The Safest and Most Effective Cleaners for Aluminium Window Frames
The best cleaner for aluminium window frames is a simple solution of mild dish soap and warm water. A pH-neutral detergent diluted in water safely removes dirt, grime, and light buildup without risking damage to the frame’s protective finish. It works on powder-coated, anodised, and raw aluminium alike.
The Short Answer for Quick Cleaners
If you just need to know what to use to clean aluminium windows and get on with your weekend, here it is: a few drops of mild dish soap in a bucket of warm water, applied with a soft microfibre cloth. Rinse with clean water, dry with a separate cloth, and you’re done. This approach is safe for virtually every aluminium frame on the market.
But if your frames have stubborn stains, chalky white oxidation, or years of neglected buildup, a basic soap wash might not cut it. That’s where choosing the right product — and avoiding the wrong one — becomes critical.
Why Aluminium Needs Special Attention
Aluminium naturally forms a thin oxide layer that shields the metal from corrosion. It’s self-healing to a degree, but it’s also chemically reactive. Strong alkaline products like oven cleaners or caustic multi-purpose sprays dissolve this protective layer, causing irreversible pitting. Highly acidic solutions can etch the surface just as aggressively. Even brief contact with the wrong chemical leaves permanent marks.
This is why safe cleaning products for aluminium frames sit within a neutral pH range of roughly 6 to 9. Anything outside that window demands caution and spot-testing.
Never use alkaline or highly acidic cleaners on aluminium window frames without testing on a small, hidden area first. Products containing sodium hydroxide, ammonia, or hydrofluoric acid should be kept away entirely.
How to clean aluminium window frames without damage also depends on factors beyond chemistry. Your frame’s finish type, the specific stain you’re dealing with, and whether you live in a coastal, urban, or rural environment all shape the ideal cleaning approach. A home near the beach in Queensland faces salt-spray corrosion that an inland Melbourne property never will.
The sections ahead break down each of these variables — starting with how to identify what finish your frames actually have.
Identify Your Frame Finish Before You Start Cleaning
Most homeowners grab a cloth and start scrubbing without a second thought. The problem? A cleaning method that’s perfectly safe for one type of aluminium finish can permanently damage another. Knowing what finish your aluminium windows have isn’t just trivia — it directly determines which products you can use, how much pressure you can apply, and what chemicals to avoid entirely.
Australian homes typically feature one of four aluminium finishes. Each responds differently to cleaners, abrasives, and environmental exposure. A quick visual and tactile check is all it takes to identify yours.
How to Tell If Your Frames Are Powder-Coated
Powder coating is by far the most common finish on modern Australian aluminium windows. If your home was built or renovated in the last 20 to 30 years, there’s a strong chance your frames are powder-coated.
Run your finger along the frame. Powder-coated aluminium feels smooth and uniform — almost like a plastic skin bonded to the metal. You won’t see any metallic grain or texture beneath the colour. The finish appears consistent from every angle, without the subtle colour shifts you’d notice on anodised surfaces.
Colour is another giveaway. Powder coating comes in virtually any shade — white, black, charcoal, cream, even bold reds or blues. If your frames are a solid, opaque colour with no visible metallic character underneath, they’re almost certainly powder-coated. The coating typically ranges from 60 to 80 microns thick, creating a durable film that resists chipping and fading under normal conditions.
For cleaning, powder-coated frames tolerate gentle scrubbing with a soft cloth or non-abrasive sponge. They handle mild soap solutions well. However, solvents, thinners, and abrasive pads will cut through the coating and expose raw aluminium beneath — leading to accelerated oxidation in that spot.
Anodised vs Raw Aluminium Identification
Anodised aluminium has a distinctive metallic sheen with subtle colour depth. Unlike powder coating, which sits on top of the metal, anodising is an electrochemical process that becomes part of the aluminium itself — it doesn’t peel or flake because it’s integrated with the substrate. The surface feels slightly harder and more textured than powder coating, with a satin-like quality under your fingertips.
Anodised frames typically appear in silver, bronze, champagne, or dark grey tones. They have a translucent quality — you can sense the metal beneath the finish rather than seeing a flat, opaque colour. Older Australian homes from the 1970s through 1990s often feature anodised frames, particularly in natural silver or bronze.
Raw or mill-finish aluminium is rare on residential windows but occasionally appears on older budget installations or industrial buildings. It starts as a bright silver but oxidises over time to a dull, chalky white. If your frames look patchy, powdery, or unevenly grey-white, you may be dealing with uncoated aluminium that has weathered without protection.
Brushed aluminium shows visible directional lines — fine parallel scratches from the mechanical finishing process. It has a satin appearance and is more common on commercial or decorative applications than standard residential windows.
Why Finish Type Changes Your Cleaning Approach
The difference between anodised and powder-coated aluminium isn’t just cosmetic — it fundamentally changes what’s safe to use. Powder-coated surfaces can handle slightly more physical scrubbing because the coating is thick and resilient, but solvents dissolve the polymer layer. Anodised surfaces need pH-neutral solutions only; acidic pollutants and harsh chemicals can compromise the oxide layer, and scratches show more readily because the finish is thinner and translucent.
Raw aluminium is the most vulnerable — without any protective finish, it reacts quickly with both alkaline and acidic products and oxidises faster in humid or coastal conditions.
| Finish Type | Visual Appearance | Touch Test | Safe Cleaners | Avoid |
|---|---|---|---|---|
| Powder-Coated | Uniform, opaque colour; no metallic grain visible | Smooth, plastic-like feel | Mild soap and water, non-abrasive cream cleansers | Solvents, thinners, abrasive pads, steel wool |
| Anodised | Metallic sheen with subtle colour depth; silver, bronze, or grey tones | Slightly harder, satin texture | pH-neutral soap and water only; mild detergent | Acidic cleaners, abrasive products, alkaline sprays |
| Mill Finish (Raw) | Bright silver when new; chalky white or patchy grey when weathered | Slightly rough, may feel powdery if oxidised | Mild soap; fine automotive polish for oxidation | Strong acids, strong alkalis, prolonged moisture contact |
| Brushed | Visible directional lines; satin metallic appearance | Fine linear texture under fingertips | Gentle soap and water; wipe in direction of grain | Circular scrubbing, abrasive pads, harsh chemicals |
If you’re still unsure about your finish, check a hidden area — the inside edge of the frame or behind a flyscreen. Powder coating often shows a slight texture difference at edges where the coating is thinner, while anodised surfaces remain consistent throughout.
With your finish identified, you can confidently choose the right cleaning solution and method. The concentration of that solution — and exactly how to mix it — matters more than most people realise.
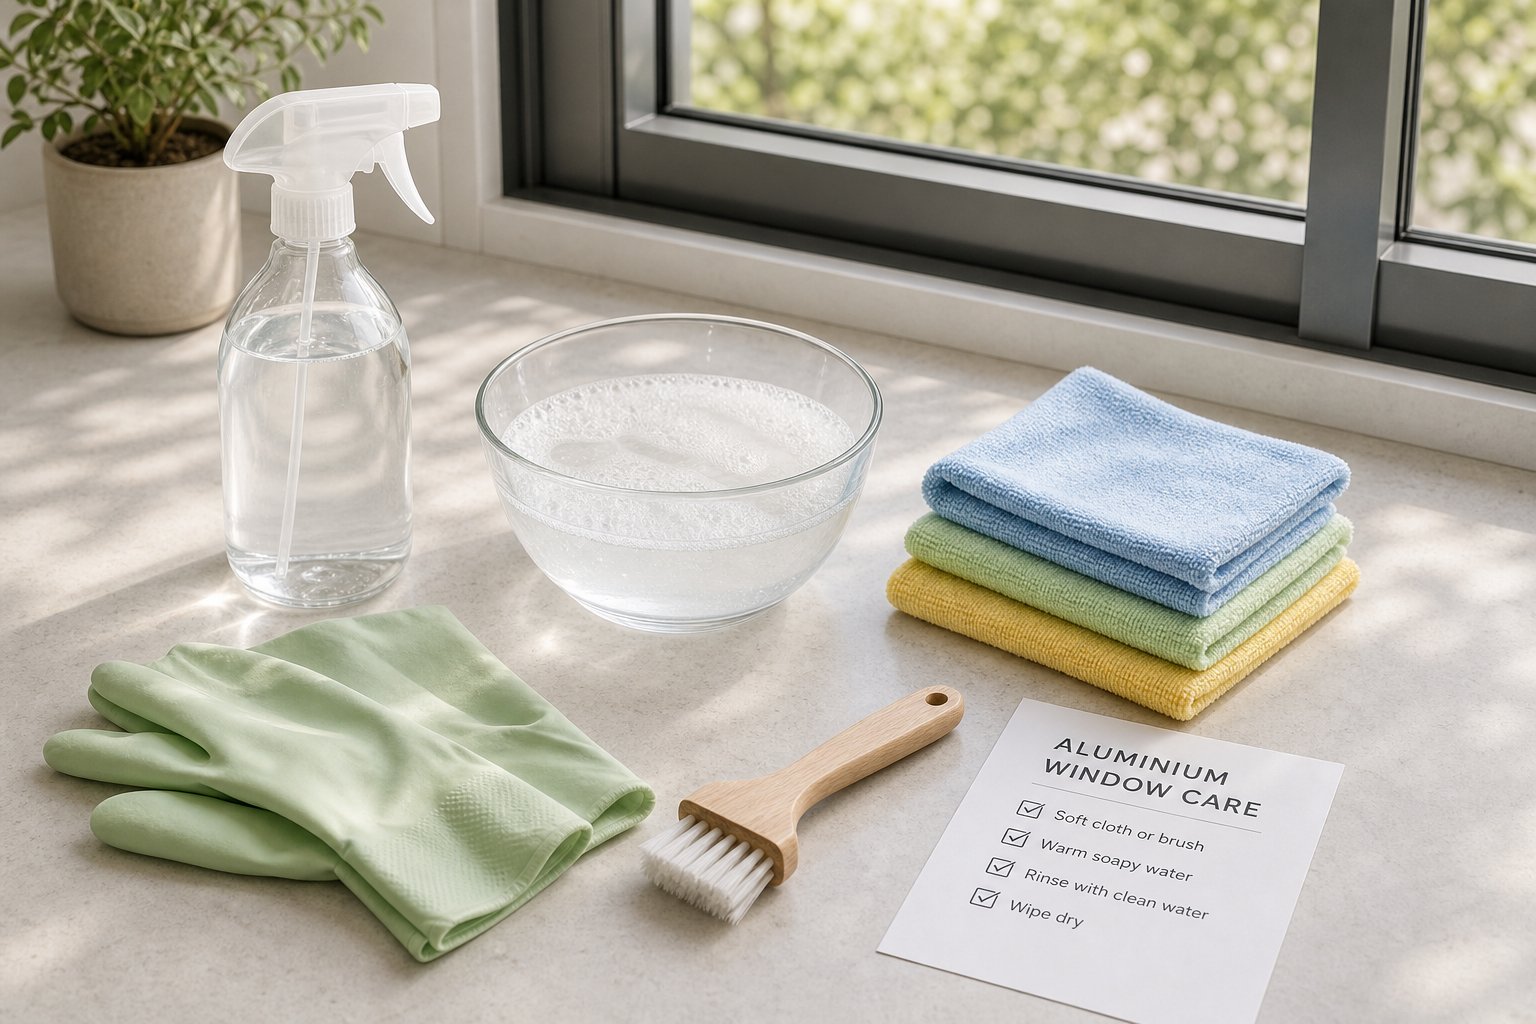
Household Cleaners and DIY Solutions with Exact Ratios
Getting the dilution right separates a safe, effective clean from a frustrating waste of time — or worse, a damaged finish. Most advice online says “use soapy water” without specifying how much soap to use on aluminium frames, leaving you guessing. Here are precise recipes you can replicate every time.
Dish Soap Solution with Correct Concentration
The best homemade aluminium window frame cleaner recipe is also the simplest. Add approximately one teaspoon (5 mL) of pH-neutral dish soap to one litre of warm water — not hot, not cold. Warm water around 30 to 40 degrees Celsius dissolves grime more effectively without stressing seals or coatings.
Apply the solution with a soft microfibre cloth or non-abrasive sponge, working in gentle straight strokes rather than circular scrubbing. Rinse the cloth frequently to avoid dragging trapped grit across the surface. More soap isn’t better here — excess detergent leaves a filmy residue that attracts dust faster and can streak in direct sunlight.
This concentration handles everyday dirt, fingerprints, dust buildup, and light grime on all finish types. For most Australian homes cleaned on a regular schedule, it’s the only solution you’ll ever need.
White Vinegar Solution for Light Oxidation
When soap alone won’t shift that hazy, slightly chalky buildup, a vinegar solution for cleaning aluminium frames is the next step. Mix equal parts white vinegar and water — a 1:1 ratio — in a spray bottle or bowl. This creates a mildly acidic solution (around pH 3 to 4 when diluted) that dissolves light mineral deposits and early-stage oxidation.
Spray or apply the mixture to the affected area and let it dwell for 5 to 10 minutes. This contact time allows the acetic acid to break down the buildup without aggressive scrubbing. After the dwell period, wipe with a damp microfibre cloth and rinse thoroughly with clean water.
A critical note for anyone cleaning aluminium window frames with vinegar: do not leave the solution sitting on powder-coated surfaces beyond 10 minutes. Extended acid contact can dull the coating’s sheen over time. On anodised frames, keep dwell time to the shorter end — closer to 5 minutes — and always rinse completely. Vinegar combined with warm water is effective for light oxidation, but it’s not a substitute for mechanical methods on heavily corroded surfaces.
Commercial Aluminium Cleaners Worth Considering
Household solutions handle routine maintenance and mild staining. But if you’re dealing with heavy oxidation, years of neglect, or persistent salt buildup in coastal areas like those along the NSW or Queensland coastline, a dedicated commercial product may be necessary.
Look for aluminium-specific cleaners labelled as pH-neutral or mildly acidic (pH 4 to 8). Products marketed as “aluminium brighteners” are typically stronger and designed for raw or mill-finish metal — avoid these on powder-coated or anodised frames unless the label explicitly confirms compatibility. A 5% solution of a commercial degreaser can also work well for oily contamination on either painted or anodised finishes, provided you wipe it off while still damp and never let it dry on the surface.
Here’s how to think about your options, ranked from mildest to strongest — start at the top and only escalate when the previous method hasn’t worked:
- Plain water rinse — removes loose dust and surface dirt; always your first pass.
- Dish soap solution (1 teaspoon per litre) — handles everyday grime and light buildup on all finishes.
- White vinegar mix (1:1 with water) — dissolves light oxidation and mineral deposits; limit dwell time on coated surfaces.
- Non-abrasive cream cleanser — provides gentle polishing action for stubborn marks on powder-coated frames; avoid on anodised finishes.
- Dedicated aluminium cleaner — formulated for heavy oxidation or coastal salt residue; follow manufacturer instructions precisely.
Whichever product you reach for, a few safety precautions apply across the board. Wear rubber gloves when using vinegar solutions or any commercial product — even mild acids irritate skin with repeated exposure. If you’re using spray cleaners indoors, open windows for ventilation to avoid inhaling aerosolised chemicals. And when cleaning overhead frames or high windows from a ladder, wear eye protection — drips of cleaning solution falling into your eyes is a surprisingly common and entirely avoidable problem.
These solutions address general cleaning and light oxidation effectively. But what happens when you’re facing something more specific — hard water scale, mould growth, or paint splatter that won’t budge with any of the above?
Tackling Stubborn Stains by Problem Type
Stubborn stains rarely respond to a one-size-fits-all approach. The white crust along the bottom rail of your frame might be mineral scale, oxidation, or dried silicone overspray — and each demands a completely different treatment. Misidentifying the problem means wasting effort on a method that won’t work, or worse, using something that makes the stain permanent.
Before reaching for any product, take 30 seconds to diagnose what you’re actually looking at. Run a fingernail across the mark. If it flakes off as a dry powder, you’re likely dealing with oxidation or mineral deposits. If it smears or feels slightly greasy, it could be mould or silicone residue. If it’s hard, raised, and doesn’t budge under your nail, you’re probably facing paint splatter or heavy calcium scale. This simple test saves time and protects your frames from unnecessary chemical exposure.
Removing Hard Water Deposits and Mineral Buildup
Hard water stains on aluminium windows appear as white, chalky patches — particularly along the bottom edge of frames where water pools and evaporates. In areas with high mineral content in the water supply (common across much of South Australia, parts of regional Victoria, and Western Australia), these deposits build up quickly and bond tightly to the surface.
Start with a 1:1 white vinegar and water solution. Spray it directly onto the deposits and let it sit for 5 to 10 minutes. The mild acidity dissolves calcium and magnesium carbonates without attacking the aluminium beneath. Wipe with a soft cloth, rinse, and inspect.
For heavier deposits that resist vinegar alone, make a paste from cream of tartar (potassium bitartrate) mixed with a few drops of water. Apply the paste to the affected area, let it dwell for 10 to 15 minutes, then gently work it with a damp microfibre cloth. Cream of tartar is mildly acidic but non-abrasive, making it safe for powder-coated and anodised finishes alike. Rinse thoroughly afterward — any residue left behind can attract fresh dirt.
If you live in a hard water area and want to prevent recurrence, use distilled water for your final rinse after every clean. It sounds fussy, but it eliminates the mineral-laden droplets that cause the problem in the first place.
Treating Oxidation and Chalky White Residue
That white chalky residue on aluminium frames is often confused with hard water staining, but it’s a different beast entirely. Oxidation is the aluminium itself reacting with oxygen and moisture — the metal’s surface is literally converting into aluminium oxide powder. It feels gritty rather than smooth, and it appears across the entire frame surface rather than just where water collects.
The critical distinction is between surface oxidation and deep pitting. Surface oxidation presents as a uniform dull haze or light powdery film. It’s cosmetic and fully treatable at home. Deep pitting — where the surface shows visible craters, rough erosion, or material loss — indicates structural degradation that requires professional assessment.
To remove oxidation from aluminium window frames at the surface level, follow this process:
- Wash the frame with soap and water first to remove loose dirt and debris.
- Dry the surface completely with a clean microfibre cloth.
- Apply a small amount of fine automotive cutting compound or metal polish to a soft cloth. Use this on raw or mill-finish aluminium only — never on powder-coated or anodised surfaces.
- Work the polish in straight lines (not circles) using light, even pressure. The compound contains micro-fine abrasives that remove the oxidised layer without gouging the metal beneath.
- Buff with a clean, dry cloth until the surface regains its sheen.
- Apply a protective wax or aluminium sealant immediately to prevent re-oxidation.
For powder-coated frames showing oxidation, the coating itself has likely failed in that area. Polishing won’t help — the exposed aluminium beneath needs to be sealed with a touch-up paint or taken to a professional for recoating. On anodised frames, soft chemical cleaners such as citric or oxalic acid can lift surface haze without destroying the finish, but heavy pitting means the anodised layer has been breached and cannot be restored without industrial equipment.
Dealing with Mould, Paint Splatter, and Silicone Residue
Removing mould from aluminium window frames is straightforward once you know the limits. Mould thrives in damp, poorly ventilated areas — the bottom tracks and corners of bathroom or laundry windows are prime territory in humid Australian climates.
A diluted bleach solution (one part household bleach to ten parts water) kills mould effectively on raw aluminium and powder-coated surfaces. Apply with a cloth, let it sit for two to three minutes, then scrub gently and rinse thoroughly. However, bleach should never be used on anodised aluminium — it can discolour and compromise the finish. For anodised frames, stick to a dedicated mould remover labelled as safe for coated metals, or use undiluted white vinegar as a milder alternative that still kills most mould species.
Paint splatter from renovation work is a common headache. Resist the urge to scrape with a metal blade — you’ll gouge the frame’s finish instantly. Instead, use a plastic scraper or an old credit card held at a shallow angle to lift dried paint. For stubborn spots, apply a solvent-free paint remover designed for delicate surfaces, let it soften the paint for the recommended time, then peel or wipe away. Mineral turpentine and acetone will dissolve paint quickly but also attack powder coating, so avoid them entirely on coated frames.
Silicone residue — left behind from window installation or bathroom sealing — is notoriously sticky and resistant to general cleaners. A dedicated silicone remover (available at most hardware stores) is the only reliable option. Apply it sparingly to the residue, allow the specified dwell time, and wipe clean. Keep the product away from rubber weatherseals, as silicone removers can degrade rubber compounds.
| Stain Type | First Try | Escalation | When to Call a Professional |
|---|---|---|---|
| Hard water deposits | 1:1 white vinegar and water (5-10 min dwell) | Cream of tartar paste (10-15 min dwell) | Deposits have etched into the coating or caused visible pitting beneath |
| Surface oxidation | Soap wash followed by fine automotive polish (raw aluminium only) | Oxalic acid-based aluminium cleaner for heavier chalking | Deep pitting visible, material loss, or structural weakness in the frame |
| Mould | Diluted bleach 1:10 (powder-coated/raw) or white vinegar (anodised) | Commercial mould remover rated for coated metals | Mould returns repeatedly despite treatment — indicates a ventilation or drainage issue |
| Paint splatter | Plastic scraper at shallow angle | Solvent-free paint remover with dwell time | Paint has bonded to damaged or bare aluminium and won’t lift without risking the frame |
| Silicone residue | Dedicated silicone remover with controlled application | Repeat application with longer dwell time | Silicone has penetrated a crack or joint and is trapping moisture behind it |
One pattern runs through every stain type above: the longer you leave it, the harder it becomes to remove and the more likely it is to cause permanent damage. Oxidation that starts as a light haze progresses to irreversible pitting. Mould that begins on the surface works its way into seals and drainage channels. Addressing problems early keeps them in the “first try” column rather than the professional restoration category.
Speaking of drainage channels — the areas where grime accumulates fastest aren’t the visible frame faces at all. They’re the hidden tracks, weep holes, and rubber seals that most people never think to clean.
Cleaning the Full Frame System Including Tracks and Seals
Most people clean the visible face of their aluminium frames and call it done. The flat surfaces look great, but the parts that actually affect how your windows perform — the tracks, drainage slots, rubber seals, and tight corner joints — remain packed with grime. These hidden zones collect dead insects, dust, leaf debris, and moisture far faster than the exposed frame faces. Left unattended, they don’t just look neglected. They cause real functional problems: windows that stick, drainage that fails, and corrosion that starts from the inside out.
A complete frame clean means getting into every channel and crevice where buildup hides. It takes a few extra minutes per window, but it’s the difference between frames that operate smoothly for decades and frames that seize up or corrode prematurely.
Clearing Tracks and Drainage Slots
Window tracks are grime magnets. Every time you open or close a sliding or awning window, the rollers push debris along the channel, compacting it into a hard-packed layer that eventually interferes with smooth operation. In Australian homes — particularly those with flyscreens that don’t fully seal the track from outside air — dust, sand, pollen, and insect remains accumulate surprisingly fast.
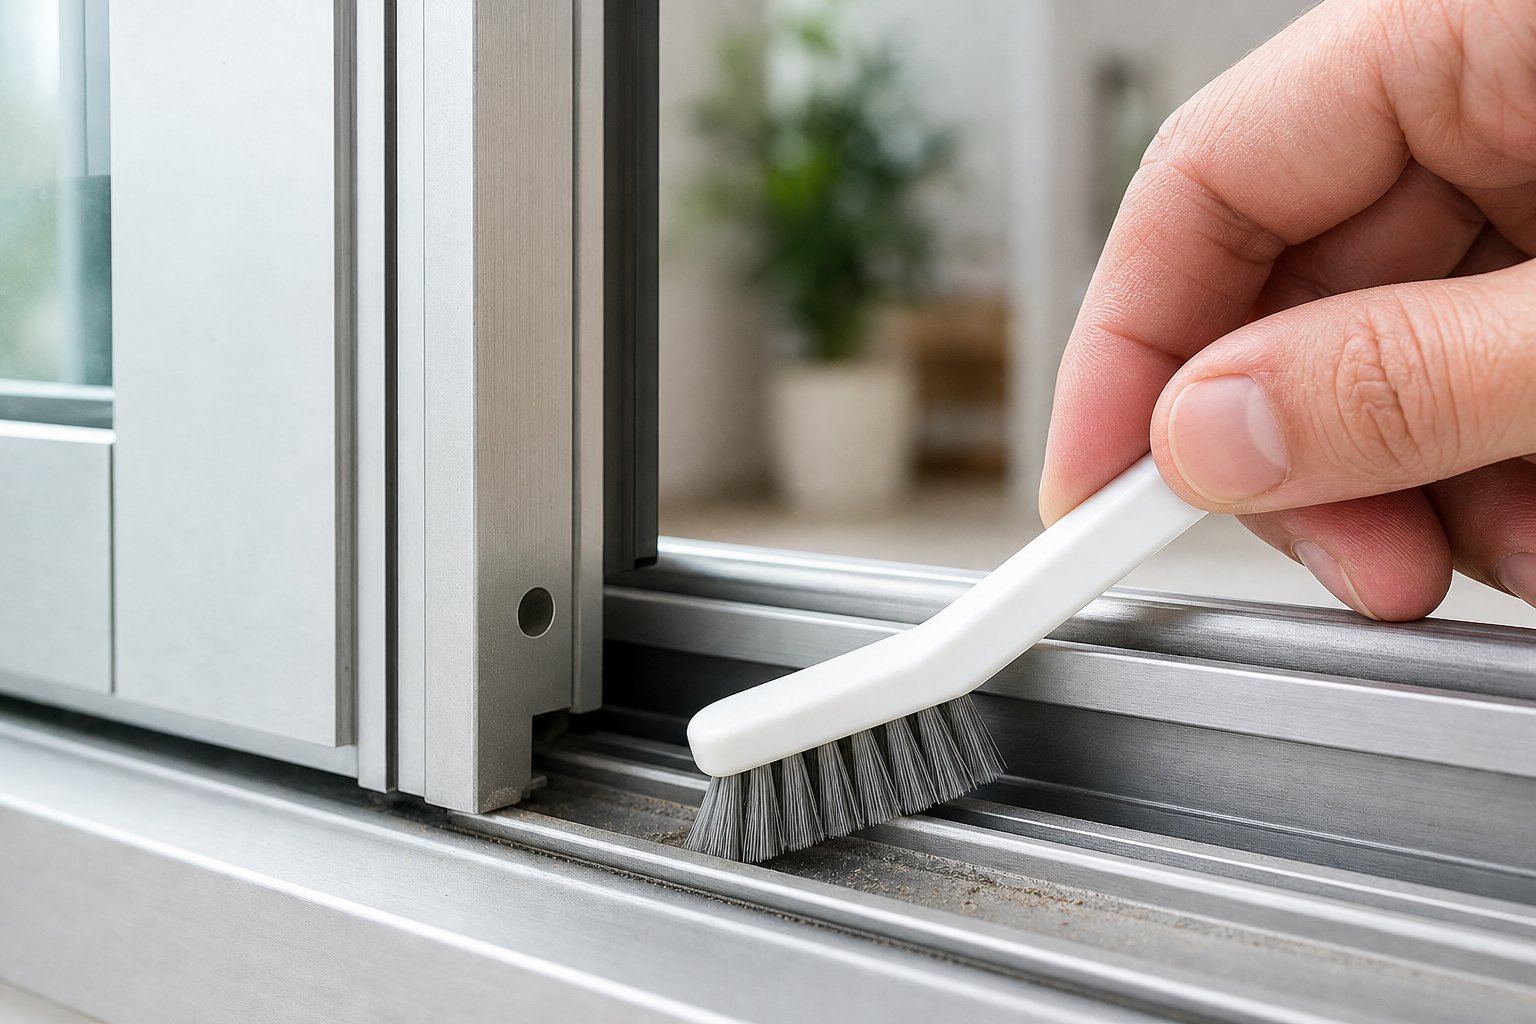
Start by dry-brushing the track with a stiff nylon brush or an old toothbrush. Work along the full length of the channel, dislodging compacted dirt from the corners and edges. A detail brush with flexible plastic bristles works particularly well here because it conforms to the track profile and reaches into the narrow grooves that wider brushes skip over. Vacuum or sweep out the loosened debris before introducing any liquid — adding water to dry grit just creates mud that’s harder to remove.
Once the loose material is cleared, wipe the track with a cloth dampened in your mild soap solution. For stubborn, caked-on residue, let the soapy water sit for a minute or two to soften the buildup before scrubbing again.
Drainage slots — those small rectangular or circular openings along the bottom rail of the frame — deserve special attention. Their job is to channel rainwater and condensation out of the frame system before it pools inside. When they’re blocked, water sits against the aluminium with nowhere to go. This standing water accelerates oxidation and, in coastal areas, concentrates salt deposits directly against the metal.
To clean window frame drainage holes, use a squeeze bottle filled with warm water and direct a firm stream into each slot. You’ll often see discoloured water flush out the exterior side, confirming the hole was partially blocked. If water doesn’t flow through, gently probe the opening with a cotton bud or thin wooden skewer to dislodge the obstruction — usually compacted dust or paint overspray from the original installation. Blocked drainage holes are one of the most common causes of water damage in aluminium window systems, yet they take less than a minute per window to clear.
Cleaning Rubber Seals and Weatherstripping
The rubber seals around your aluminium frames serve a critical purpose: they keep water, wind, and dust out of your home while allowing the sash to open and close smoothly. Over time, these seals collect a film of grime, lose their flexibility, and can even develop mould in humid climates — particularly in bathrooms, laundries, and north-facing windows that trap morning condensation.
Cleaning rubber seals on aluminium windows requires a gentler approach than the frames themselves. Wipe them down with a soft cloth dampened in plain warm water and a tiny amount of mild dish soap. That’s it. No vinegar, no bleach, no multi-purpose sprays. Acidic solutions degrade rubber compounds over time, causing them to crack, harden, and lose their sealing ability. Solvents are even worse — they strip the plasticisers that keep rubber supple, accelerating deterioration dramatically.
After cleaning, dry the seals with a soft cloth and inspect them for cracking, flattening, or permanent deformation. Healthy seals should feel slightly springy when pressed. If they’ve gone hard or show surface cracking, they’re nearing the end of their service life.
To maintain flexibility and extend seal life, apply a silicone-based rubber conditioner sparingly after cleaning. A thin coat along the contact surfaces keeps the rubber from drying out between cleans and helps maintain a proper seal against the frame. Water-based silicone conditioners are ideal because they won’t attract dust or leave a greasy residue — petroleum-based products do both and actually shorten rubber lifespan with repeated use. Apply every three to six months, or more frequently in hot, dry climates where UV exposure accelerates rubber degradation.
Reaching Corners and Joints
The tightest spots on any aluminium frame — where horizontal and vertical members meet, where the sash sits against the frame, and where hardware is mounted — are the hardest to reach and the easiest to ignore. These corners and joints trap fine dust, cobwebs, and moisture that a standard cloth simply can’t access.
Cotton buds are the best way to clean window frame corners effectively. Their small, soft tips fit into the 90-degree joints where frame members meet, lifting out compacted grime without scratching the finish. Foam-tipped swabs (the kind used for electronics cleaning) work even better for anodised surfaces because they won’t leave cotton fibres behind.
For dry dust in hard-to-reach joints — particularly around hinge mechanisms and locking hardware — a can of compressed air blows debris out quickly without introducing moisture. Hold the can upright and use short bursts to avoid the propellant liquid that escapes when cans are tilted. This is especially useful for awning and casement windows where the hinge area collects fine grit that eventually causes stiff operation.
If you’re dealing with a sliding door track that’s heavily soiled, a handheld steam cleaner offers a chemical-free option that melts compacted grime out of crevices far faster than manual scrubbing. The steam loosens baked-on dirt without abrasives or solvents, and the narrow nozzle attachments reach into track profiles that brushes struggle with. Just keep steam away from rubber seals — the heat can temporarily soften them and potentially affect their shape.
Having the right tools gathered before you start makes the whole process faster and less frustrating. Here’s what you need for a thorough frame system clean:
- Microfibre cloths (at least two — one for washing, one for drying)
- Stiff nylon brush or old toothbrush for tracks
- Cotton buds or foam-tipped swabs for corners and joints
- Squeeze bottle filled with warm water for flushing drainage holes
- Silicone-based rubber conditioner for weatherseals
- Plastic scraper for stubborn track buildup
- Compressed air canister for dry dust in hardware areas
- Small vacuum or dustpan for collecting loosened debris
A full track-and-seal clean adds roughly five minutes per window to your routine — a small investment that keeps drainage flowing, seals intact, and hardware operating freely. The payoff isn’t just cosmetic. Functional drainage and healthy seals are your frame’s first line of defence against the chemical and environmental forces that cause real damage over time.
What NOT to Use on Aluminium and the Chemistry Behind It
Knowing which products that damage aluminium window frames — and understanding exactly how they cause harm — protects you from making an irreversible mistake in five seconds of careless cleaning. The damage isn’t always obvious immediately. Sometimes it shows up days later as dull patches, white spots, or rough texture that no amount of polishing will fix.
Aluminium’s vulnerability comes down to its protective oxide layer. This microscopically thin film of aluminium oxide forms naturally when the metal contacts air, and it’s remarkably effective at preventing further corrosion — as long as it remains intact. The chemicals that corrode aluminium windows all share one trait: they dissolve, penetrate, or strip this oxide barrier, leaving the raw metal exposed to rapid degradation.
Why Alkaline Cleaners Dissolve Aluminium
Strong alkaline products are the single biggest chemical threat to aluminium frames. Oven cleaners, caustic soda (sodium hydroxide), drain unblockers, and some heavy-duty multi-purpose sprays all sit at pH 11 to 14 — well above the safe range for aluminium.
The chemistry is straightforward. Hydroxide ions in alkaline solutions attack the aluminium oxide film at the surface, dissolving it into soluble aluminate ions. Once the protective layer is gone, the hydroxide ions react directly with the bare aluminium metal beneath, producing aluminium hydroxide and hydrogen gas. You might even notice tiny bubbles forming on the surface during this reaction — that’s the metal actively dissolving.
Research on 6063 aluminium alloy — the same grade commonly used in Australian window frames — demonstrates that corrosion in sodium hydroxide is significantly more severe than in acidic media of comparable strength. Even a relatively dilute 0.05 M sodium hydroxide solution produced a corrosion rate of 4.40 mm per year at 30 degrees Celsius, and that rate climbed sharply with both concentration and temperature. Brief contact with a strong alkaline cleaner on a warm day can leave permanent pitting within minutes.
Common household products containing sodium hydroxide include oven cleaners, heavy-duty degreasers, some bathroom sprays marketed for soap scum, and certain “industrial strength” multi-purpose cleaners. The danger is that these products rarely advertise their alkalinity on the front label — you need to check the ingredients list or safety data sheet.
Abrasive Products That Scratch Protective Coatings
Chemical attack isn’t the only risk. Physical abrasion destroys aluminium frames through a different mechanism — by mechanically removing the protective finish and exposing raw metal to the environment.
Steel wool, wire brushes, and scouring pads cut straight through powder coating. The coating is durable under normal use, but it’s a polymer film typically 60 to 80 microns thick. A few passes with steel wool strips it entirely, leaving bare aluminium that begins oxidising within hours — especially in humid coastal conditions along the Australian coastline.
Anodised finishes are harder than powder coating but thinner, and they show scratches more readily because the finish is translucent. Even “soft scrub” cream cleansers containing fine abrasive particles can create micro-scratches on anodised surfaces. These scratches scatter light differently, producing visible haze marks that worsen with each clean. Over time, the accumulated micro-damage compromises the anodised layer’s integrity, allowing moisture and pollutants to reach the aluminium beneath.
Abrasive powders — including some marketed as “aluminium cleaners” for cookware — are far too aggressive for window frames. Cookware-grade abrasives assume you’re working on thick, uncoated aluminium that can tolerate material removal. Window frame finishes cannot.
Acidic Products and Their Limits
Acids present a more nuanced picture. Does vinegar damage aluminium frames? In proper dilution and with limited contact time, no — diluted white vinegar (around pH 3 to 4) is safe for brief use on most finishes. The mild acetic acid dissolves mineral deposits without significantly attacking the oxide layer, provided you rinse it off within 10 minutes.
Concentrated acids are another story entirely. Muriatic acid (hydrochloric acid), phosphoric acid-based rust removers, and concentrated citric acid solutions all etch aluminium aggressively. Studies confirm that corrosion rates in 1.0 M phosphoric acid reached 4.20 mm per year — destructive enough to visibly damage a frame surface in a single prolonged application. The reaction dissolves the oxide film and forms soluble aluminium phosphate complexes, effectively eating into the metal.
The practical safe zone for aluminium sits between roughly pH 4 and pH 9. Within this range, the oxide layer remains stable and self-repairing. Outside it — in either direction — the film dissolves faster than it can regenerate, and corrosion accelerates with every degree of temperature increase.
Can you use bleach on aluminium windows? Diluted household bleach (sodium hypochlorite) sits around pH 11 to 13, placing it firmly in the alkaline danger zone. On powder-coated or raw aluminium, a brief application for mould removal is tolerable if rinsed quickly. On anodised surfaces, avoid it entirely — the alkalinity discolours and degrades the finish. Never mix bleach with acidic cleaners like vinegar, as this produces toxic chlorine gas regardless of what surface you’re cleaning.
Always check product labels for sodium hydroxide, ammonia, or hydrofluoric acid before using any cleaner on aluminium window frames. If any of these ingredients are listed — even in small concentrations — keep the product away from your frames entirely. The damage they cause is irreversible and often invisible until the finish has already failed.
Understanding these chemical boundaries turns frame maintenance from guesswork into informed decision-making. But chemistry is only half the equation — how often you clean, and when, depends heavily on what your local environment is throwing at your frames between maintenance sessions.

How Often to Clean Aluminium Window Frames Based on Your Climate
Your local environment dictates how quickly contaminants accumulate on aluminium frames — and how aggressively those contaminants attack the protective finish between cleans. A home in beachside Noosa faces entirely different pressures than a terrace in inner-city Melbourne or a farmhouse in rural NSW. Treating them all the same means either over-cleaning where it’s unnecessary or under-cleaning where it matters most.
An effective aluminium window maintenance schedule isn’t one-size-fits-all. It’s shaped by salt exposure, pollution levels, humidity, and even the mineral content of your local water supply.
Coastal and High-Salt Environments
Salt spray is relentless. Airborne sodium chloride lands on your frames, absorbs moisture from the air, and begins attacking the oxide layer and any coating imperfections long before you notice visible buildup. Properties within 500 metres of the ocean experience severe salt exposure, while homes up to 5 kilometres inland still face mild but cumulative damage — particularly those on elevated sites or facing prevailing onshore winds.
Cleaning aluminium windows in coastal areas demands a more aggressive schedule than anywhere else. Rinse frames with fresh water from a garden hose every two to four weeks. This simple step washes away salt crystals before they concentrate and corrode. A full clean with mild soap solution should happen monthly, paying particular attention to tracks and drainage holes where salt-laden moisture pools.
After coastal storms with strong onshore winds, rinse your frames within 24 hours regardless of your regular schedule. Storm-driven salt spray is far more concentrated than everyday sea breeze deposits and causes accelerated damage if left sitting on the surface.
Urban and Industrial Areas
City homes near busy roads, rail corridors, or industrial zones accumulate a different kind of contamination. Fine particulate matter from vehicle exhaust, brake dust, and industrial emissions settles on frames as a dark, sooty film. It looks cosmetic, but it’s more damaging than it appears — this layer traps moisture against the frame surface, creating a micro-environment where corrosion progresses even when the weather is dry.
For homes in urban Sydney, Melbourne, Brisbane, or Perth, a full clean every two to three months keeps pollution deposits from bonding permanently to the finish. A quick rinse with plain water monthly helps in between. Properties directly adjacent to major roads or within a few hundred metres of industrial activity may need to increase frequency to every six to eight weeks, especially during dry spells when airborne particulates aren’t being washed away by rain.
Acid rain residue — more accurately described as slightly acidic precipitation caused by dissolved pollutants — is another urban concern. While Australian rainfall is generally less acidic than heavily industrialised regions overseas, it still deposits enough contaminants over time to dull powder-coated finishes if never cleaned.
Seasonal Timing and Weather Considerations
How often you clean matters, but so does when you clean. The best time of year to clean window frames in most of Australia falls in spring (September to November) and autumn (March to May). Temperatures are moderate, UV intensity is lower, and you’re either removing winter grime before summer or clearing summer dust before the wet season.
Avoid cleaning in direct sunlight. Sunlight causes cleaning solutions to evaporate faster than you can wipe them, leaving dried soap lines, streaks, and blotchy residue — even with good technique. Overcast days with temperatures above 10 degrees Celsius are ideal. The solution stays wet long enough to dissolve grime, and the cooler glass temperature prevents thermal shock from cold rinse water.
Wind matters too. Cleaning on a gusty day means airborne dust and debris land on wet surfaces before you can dry them, undoing your work immediately. Choose calm or lightly breezy conditions for the best results.
One final variable that most guides overlook: water hardness. If your area has hard water (common in Adelaide, parts of regional Victoria, and much of Western Australia), the tap water you rinse with leaves its own mineral deposits behind as it dries. Use distilled or demineralised water for your final rinse to prevent those white spots from forming. It adds a small cost but eliminates the frustrating cycle of cleaning frames only to create new mineral stains in the process.
| Environment | Rinse Frequency | Full Clean Frequency | Key Concern |
|---|---|---|---|
| Coastal (within 5 km of ocean) | Every 2-4 weeks with fresh water | Monthly | Salt crystal accumulation accelerates pitting and oxide layer breakdown |
| Urban / high-traffic | Monthly | Every 2-3 months | Soot and particulate deposits trap moisture against the frame surface |
| Industrial proximity | Every 2-3 weeks | Every 6-8 weeks | Chemical fallout and acidic residue attack coatings faster than standard pollution |
| Rural / inland | As needed (after dust storms or heavy rain) | Every 4-6 months | Dust and organic debris (pollen, bird droppings) cause staining if left long-term |
| Tropical (QLD, NT) | Monthly | Every 2-3 months | High humidity promotes mould growth on seals and in tracks year-round |
Sticking to a schedule that matches your environment keeps maintenance manageable rather than letting it become a major restoration project. Regular light cleans take minutes; neglected frames eventually demand hours of intensive treatment — or professional intervention. With the right frequency established, the next step is putting it all together into a single, efficient cleaning workflow from start to finish.
Step-by-Step Aluminium Window Cleaning Guide from Start to Finish
All the knowledge about finishes, solutions, and problem stains comes together in a single workflow you can follow from the first dry brush to the final protective coat. Whether you’re doing a quick routine maintenance wash or a deep clean on neglected frames, this process keeps things efficient and prevents you from accidentally causing damage by skipping a critical step.
A standard window takes roughly 10 to 15 minutes for a routine clean. If you’re treating stains, clearing blocked drainage, or applying protective wax, budget 30 minutes or more per window. Either way, preparation makes the difference between a smooth job and a frustrating one.
Preparation and Safety Setup
Gather everything before you start. Walking back and forth for forgotten tools wastes time and lets cleaning solution dry on the frame — exactly what causes streaks and residue buildup. Lay out your microfibre cloths, nylon brush, squeeze bottle, cotton buds, and chosen cleaning solution within arm’s reach.
Protect surrounding surfaces. Drop an old towel along the interior window sill to catch drips. If you’re cleaning exterior frames from ground level, move pot plants and outdoor furniture clear of the splash zone. For upper-storey windows accessed from a ladder, ensure stable footing and wear eye protection — soapy water dripping from overhead frames is a guaranteed irritant.
Check the weather. Overcast conditions above 10 degrees Celsius are ideal. Direct sunlight on the frame causes your cleaning solution to evaporate before you can rinse it, leaving dried soap residue that’s harder to remove than the original grime. Wind carries fresh dust onto wet surfaces, so pick a calm day when possible.
Finally, confirm your frame’s finish type. Run a finger along the surface and recall the identification cues from earlier — powder-coated feels smooth and plastic-like, anodised has a satin metallic texture, raw aluminium may feel slightly rough or powdery. This 10-second check determines which products and pressure levels are safe for your specific frames.
The Complete Cleaning Workflow
Follow these steps in order. Each one builds on the previous, and skipping ahead — particularly jumping to wet cleaning before removing loose debris — risks grinding grit into the finish.
- Dry brush the entire frame. Use a soft nylon brush or old toothbrush to sweep loose dust, cobwebs, and debris from all surfaces, tracks, and corners. Work from top to bottom so dislodged material falls away from already-cleaned areas.
- Vacuum or sweep out tracks. Clear the loosened debris from sliding tracks and sill channels before introducing any liquid. Adding water to dry grit creates an abrasive paste that scratches as you wipe.
- Rinse with plain water. Use a garden hose on a gentle spray setting or a damp cloth to wet the entire frame. This removes the remaining surface dust and primes the frame for your cleaning solution. Never use a pressure washer — the force strips protective coatings.
- Apply cleaning solution section by section. Dip a soft microfibre cloth into your soap solution (one teaspoon of mild dish soap per litre of warm water) and wipe one frame member at a time — top rail first, then sides, then bottom rail. Working in sections prevents the solution from drying on untouched areas while you’re busy elsewhere.
- Agitate gently with a soft cloth. For areas with visible buildup, apply light pressure in straight strokes along the frame’s length. Avoid circular scrubbing on anodised or brushed finishes. Use a soft-bristled brush dipped in the solution for textured areas, hardware surrounds, and track grooves.
- Flush drainage holes. Direct a firm stream of warm water from a squeeze bottle into each weep hole along the bottom rail. Confirm water exits on the exterior side. If flow is restricted, gently clear the opening with a cotton bud.
- Rinse thoroughly. Go over the entire frame with clean water — a hose on gentle spray or a cloth wrung out in fresh water. Remove every trace of soap. Any residue left behind attracts dirt faster and can dull the finish over time, particularly on powder-coated surfaces.
- Dry with a clean microfibre cloth. Wipe all surfaces completely dry to prevent water spots. This step is especially important in hard water areas where mineral-laden droplets leave white marks as they evaporate. Use a separate dry cloth from the one you washed with.
- Clean rubber seals. Wipe weatherstrips with a cloth dampened in plain water and a tiny amount of soap. Dry them, then apply a thin coat of silicone-based conditioner to maintain flexibility.
- Treat any remaining stains. If specific marks remain after the general wash — hard water deposits, oxidation spots, or mould — address them now using the targeted methods for each stain type. The general clean removes surface dirt that was masking the true extent of the problem, giving you a clear view of what still needs attention.
Post-Cleaning Inspection and Protection
A freshly cleaned frame reveals things that grime was hiding. Take a minute to inspect the entire window system before packing up your supplies.
Look for chips or scratches in powder coating — these expose bare aluminium that will oxidise quickly if left unsealed. Small chips can be touched up with colour-matched paint pens available from most hardware stores. Larger areas of coating failure indicate it’s time for professional assessment.
Check for early oxidation spots — faint white or grey patches that weren’t visible under the dirt layer. Catching these early means a simple polish or wax application now, rather than a major restoration effort six months down the track.
Inspect seal condition while the rubber is clean and visible. Look for cracking, hardening, or sections pulling away from the frame. Seals that have lost their springiness won’t improve with conditioning — they need replacement before they allow water ingress.
As a final step, apply a protective barrier. Automotive-grade carnauba wax or a dedicated aluminium frame protectant creates a hydrophobic layer that repels water, reduces dirt adhesion, and shields the finish from UV and salt exposure between cleans. Apply a thin, even coat with a soft cloth, let it haze for a few minutes, then buff to a subtle sheen. This single step can extend the interval between full cleans by weeks, reducing your overall maintenance effort significantly.
The aluminium window frame cleaning checklist is simple in concept: prepare, clean systematically from top to bottom, rinse completely, dry everything, inspect, and protect. Doing it consistently — on a schedule matched to your environment — is what separates frames that last decades from frames that deteriorate within years. And for homeowners looking to reduce that ongoing effort permanently, the choice of frame system and finish quality plays a larger role than most people realise.
Long-Term Strategies to Keep Aluminium Frames Cleaner for Longer
Cleaning your aluminium window frames properly is one thing. Reducing how often you need to do it — and how hard you need to work each time — is where the real long-term payoff lives. The right protective treatments create a barrier between your frames and the environment, repelling contaminants before they bond to the surface. And for homeowners tired of battling persistent oxidation or stubborn coastal buildup, the quality of the frame system itself often matters more than any cleaning product you apply after the fact.
Protective Coatings and Wax Applications
A freshly cleaned aluminium frame is at its most vulnerable. You’ve just removed the layer of grime that was — ironically — acting as a partial shield against new contamination. Applying a protective coating immediately after cleaning locks in that clean state and makes future maintenance dramatically easier.
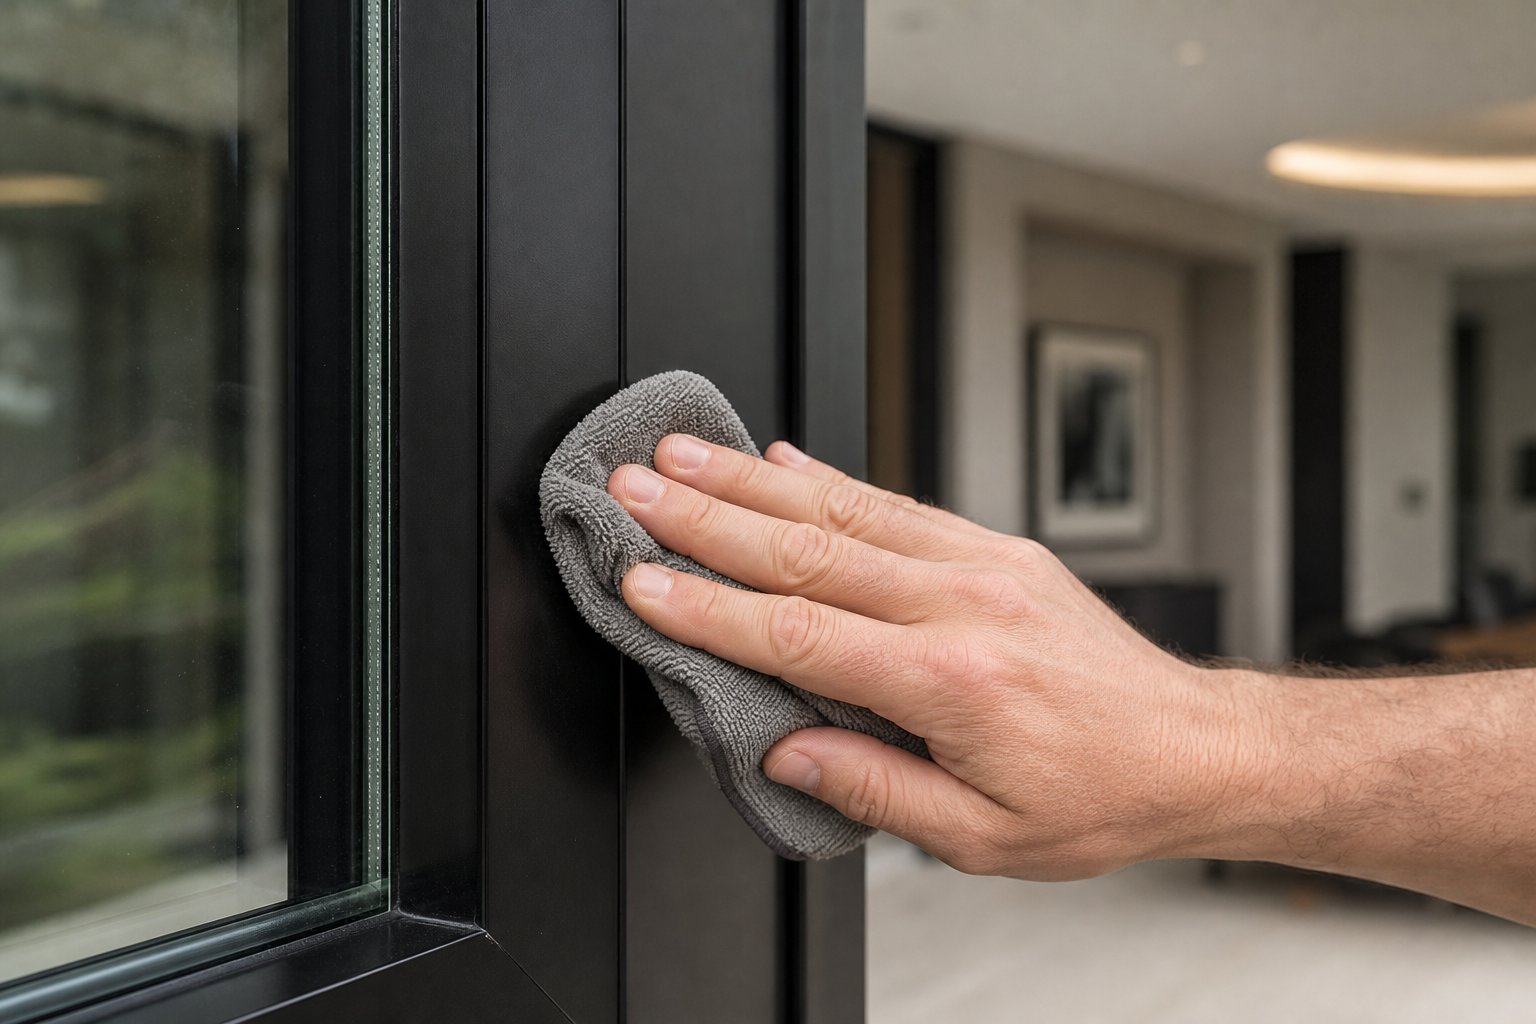
Automotive-grade carnauba wax is the best wax for aluminium window frames in most situations. It creates a hydrophobic barrier that causes water to bead and roll off rather than sitting on the surface and depositing minerals as it evaporates. Dirt and pollution particles struggle to adhere to a waxed surface, so your frames stay visibly cleaner between maintenance sessions. Apply a thin, even layer with a soft microfibre cloth, allow it to haze for two to three minutes, then buff gently to a subtle sheen.
Reapply every three to six months depending on your exposure level. Coastal properties and frames facing prevailing weather need the shorter interval. Sheltered inland frames can stretch closer to six months before the wax layer degrades noticeably. You’ll know it’s time to reapply when water stops beading and starts sheeting across the surface instead.
For homeowners wanting something more durable than traditional wax, synthetic polymer sealants offer longer-lasting protection — often eight to twelve months per application. These products bond chemically to the surface rather than simply sitting on top, providing superior resistance to UV degradation and salt exposure. They’re particularly worthwhile for frames in harsh coastal or industrial environments where carnauba wax breaks down faster.
Dedicated aluminium protectant sprays are another option. These typically combine a mild cleaning agent with a protective polymer that remains on the surface after wiping. They’re convenient for quick touch-ups between full cleans but don’t offer the same depth of protection as a proper wax or sealant application.
Whichever product you choose, the principle is the same: a protected frame repels contaminants rather than absorbing them, cutting your cleaning frequency and effort substantially over time.
- Apply protective wax or sealant immediately after every full clean — never onto dirty frames
- Use carnauba wax for general protection (reapply every 3-6 months)
- Step up to synthetic polymer sealants in coastal or industrial zones for 8-12 months of coverage
- Avoid silicone-based protectants on powder-coated surfaces — they can attract dust and cause yellowing over time
- Always apply in shade and on a cool surface to ensure even coverage without streaking
- Maintain rubber seals separately with silicone conditioner — wax products aren’t suitable for rubber
- Keep drainage holes clear after wax application — ensure product hasn’t blocked weep slots
Choosing Low-Maintenance Aluminium Window Systems
Here’s a reality that no amount of cleaning technique can overcome: the quality of your frame’s original finish determines how much maintenance it will demand for its entire lifespan. A premium powder-coated aluminium frame with a properly applied, thick coating resists UV, salt, pollution, and moisture far longer than a budget frame with a thin or poorly cured finish. The difference compounds over years — one frame still looks sharp with quarterly washes while the other needs intensive restoration work just to remain presentable.
Modern powder-coated aluminium frames represent a significant leap over older anodised or raw aluminium systems. High-quality powder coating — applied at 60 to 80 microns thickness and cured at precise temperatures — creates a finish that resists chalking, fading, and chemical attack for decades rather than years. The coating acts as a complete barrier between the aluminium substrate and the environment, meaning the metal itself never contacts corrosive elements under normal conditions.
For homeowners considering replacement windows or planning a new build, selecting a system engineered for Australian conditions makes a measurable difference to ongoing maintenance. Aluminium window systems with durable powder-coated finishes, weather-resistant hardware, and quality construction designed for coastal and urban Australian environments reduce the long-term cleaning burden considerably. Frames built to handle salt air, intense UV, and temperature extremes from the outset simply don’t deteriorate the way older or lower-grade systems do — meaning less scrubbing, less oxidation treatment, and fewer restoration headaches over the life of the home.
When evaluating low maintenance aluminium window frames for an Australian property, look for these indicators of lasting quality:
- Powder coating thickness of 60 microns or greater, with certification to Australian standards
- Thermally broken profiles that reduce condensation buildup on interior frame surfaces
- Marine-grade hardware and fasteners rated for coastal exposure
- Properly designed drainage systems with accessible weep holes that resist blockage
- Quality rubber seals and weatherstripping rated for UV and temperature cycling
- Colour options with proven fade resistance — darker colours in particular need high-quality pigments to resist UV chalking
The upfront investment in a quality aluminium window system pays back through years of reduced maintenance effort and cost. A frame that needs nothing more than a soap-and-water wash every few months is worth considerably more over a 30-year lifespan than one demanding intensive chemical treatments, recoating, or early replacement.
When Replacement Makes More Sense Than Restoration
There’s a point where continued cleaning and restoration yields diminishing returns. If your frames have crossed certain thresholds of deterioration, no cleaning product or protective wax will bring them back to acceptable condition — and the ongoing effort becomes a losing battle against progressive decay.
Knowing when to replace aluminium window frames saves you from pouring time and money into a system that’s past its functional lifespan. Consider replacement when you observe:
- Deep pitting across multiple frame members — surface oxidation is treatable, but once the metal shows visible craters and material loss, structural integrity is compromised. No polish or coating can rebuild lost aluminium.
- Widespread powder coating failure — isolated chips are repairable with touch-up paint. But when coating is peeling, bubbling, or chalking across large areas, the adhesion has failed systemically. Recoating an old frame rarely matches the durability of factory-applied powder coating on a new extrusion.
- Failed or irreplaceable seals — if weatherstripping has hardened, cracked, and pulled away from the frame, and replacement seals for your specific frame profile are no longer manufactured, the window can’t perform its basic weatherproofing function regardless of how clean the aluminium looks.
- Visible frame distortion or warping — aluminium doesn’t warp easily, so when it does, the cause is usually severe corrosion weakening the profile walls or structural stress from building movement. Neither is fixable through maintenance.
- Restoration costs approaching 70-80% of replacement — when restoration costs approach replacement prices, new frames become the smarter long-term investment because they come with warranties, modern thermal performance, and decades of low-maintenance service ahead of them.
Modern aluminium windows with advanced powder-coated finishes offer 30 years or more of performance with minimal upkeep — a stark contrast to older systems that demand increasing attention as they age. For properties where frames have reached end-of-life, replacement isn’t just about aesthetics. It’s about eliminating an ongoing maintenance burden and gaining energy efficiency, security, and weather performance that deteriorated frames simply can’t provide regardless of how diligently you clean them.
The bottom line across everything covered in this guide comes down to a simple principle: protect the finish, respect the chemistry, and match your effort to your environment. Aluminium window frames are inherently durable — they just need the right care at the right intervals to prove it. Start with mild soap and water, escalate only when necessary, shield the surface with wax or sealant after every clean, and know when a frame has earned its retirement. That approach keeps your windows performing and looking their best for the long haul.
Frequently Asked Questions About Cleaning Aluminium Window Frames
1. What is the best homemade cleaner for aluminium window frames?
The most effective homemade cleaner is one teaspoon of pH-neutral dish soap mixed into one litre of warm water (30-40 degrees Celsius). Apply with a soft microfibre cloth using straight strokes, rinse with clean water, and dry immediately. This concentration safely handles everyday dirt on powder-coated, anodised, and raw aluminium finishes without risking damage to the protective oxide layer. For light oxidation or mineral deposits, a 1:1 white vinegar and water solution works as a mild step-up, though dwell time should be limited to 5-10 minutes on coated surfaces.
2. Can you use vinegar to clean aluminium window frames?
Yes, diluted white vinegar is safe for aluminium frames when used correctly. Mix equal parts vinegar and water, apply to the affected area, and allow 5-10 minutes of dwell time before wiping and rinsing thoroughly. This mildly acidic solution dissolves light mineral deposits and early oxidation effectively. However, never leave vinegar on powder-coated surfaces beyond 10 minutes, and limit contact to 5 minutes on anodised finishes. Concentrated vinegar or prolonged exposure can dull coatings over time. Always rinse completely with fresh water after treatment.
3. What products should you never use on aluminium windows?
Avoid any product containing sodium hydroxide, ammonia, or hydrofluoric acid — these dissolve aluminium’s protective oxide layer and cause irreversible pitting within minutes. Specific products to keep away include oven cleaners, caustic soda, drain unblockers, and heavy-duty alkaline degreasers. Physically abrasive items like steel wool, wire brushes, and scouring pads mechanically strip protective coatings. Concentrated acids such as muriatic acid and phosphoric rust removers also etch the surface. The safe pH range for aluminium cleaning sits between 4 and 9 — anything outside this window risks permanent damage.
4. How often should you clean aluminium window frames in Australia?
Cleaning frequency depends on your environment. Coastal properties within 5 kilometres of the ocean need a fresh water rinse every 2-4 weeks and a full soap clean monthly due to salt spray corrosion. Urban homes near busy roads require a full clean every 2-3 months to prevent soot and particulate buildup from trapping moisture against frames. Rural and inland properties can stretch to every 4-6 months under normal conditions. After coastal storms or dust events, rinse frames within 24 hours regardless of schedule. Tropical regions like Queensland and the NT need attention every 2-3 months due to year-round humidity promoting mould growth.
5. How do you remove white oxidation from aluminium window frames?
Surface oxidation on raw or mill-finish aluminium responds well to fine automotive cutting compound applied with a soft cloth in straight strokes. Wash and dry the frame first, then work the polish using light, even pressure — never in circles. Buff with a clean cloth and immediately apply protective wax to prevent re-oxidation. For powder-coated frames showing oxidation, the coating has failed in that area and needs touch-up paint or professional recoating rather than polishing. If you see deep pitting or material loss rather than a uniform chalky haze, the damage is structural and requires professional assessment. Modern aluminium windows with quality powder-coated finishes resist this type of deterioration far more effectively than older uncoated systems.
More Window & Door Guides