Diagnose Your Aluminium Door Problem Before You Adjust
A misaligned aluminium door rarely fails all at once. It starts with a subtle scrape, a latch that needs an extra shove, or a draught creeping through a gap that wasn’t there six months ago. Before you reach for a hex key, pinpointing the exact symptom tells you which door adjustment to make and which steps you can skip entirely.
Whether you’re figuring out how to adjust a front door on a residential property or dealing with a high-traffic commercial entrance, the underlying symptoms are the same. The difference lies in hinge hardware and access, but the diagnostic logic stays consistent.
Common Symptoms That Signal Hinge Misalignment
Aluminium doors develop four telltale signs when hinges shift out of position:
- Door dragging on the floor or threshold — The door has dropped vertically, usually because one or more hinges have settled under the panel’s weight over time.
- Uneven gaps around the frame — A wider gap at the top than the bottom (or one side versus the other) points to a combination of vertical and lateral drift.
- Door won’t latch properly — The bolt or roller misses the strike plate, meaning the door has shifted horizontally so the latch no longer lines up.
- Rubbing or catching at the top or bottom corner — This typically signals that the door is sitting at a slight angle, often caused by uneven lateral positioning across the hinges or insufficient compression depth.
Spotting these early prevents the aluminium frame from wearing grooves or cracking at stress points, which turns a simple adjustment into a costly repair.
Matching Your Problem to the Right Adjustment Type
Each symptom maps to a specific axis of hinge adjustment. Use this quick-reference list to jump straight to the step you need:
- Dragging on the floor → Vertical (height) adjustment — see Step 2
- Uneven side gaps or won’t latch → Lateral (horizontal) adjustment — see Step 3
- Draughts, weak seal, or excessive closing force → Compression (depth) adjustment — see Step 4
- Rubbing at a corner → Usually a combination of vertical and lateral adjustment — start with Step 2, then refine with Step 3
If you’re unsure how to adjust front door hinges when multiple symptoms overlap, work through the axes in order: height first, lateral second, compression last. Correcting height often resolves half the lateral misalignment on its own.
Of course, making the right adjustment depends on knowing what type of hinge you’re working with and having the correct tools on hand.
Step 1 Identify Your Hinge Type and Gather the Right Tools
Grabbing the wrong size Allen key or mistaking a flag hinge for a butt hinge can turn a ten-minute fix into an afternoon of frustration. A few minutes spent identifying your hardware and laying out the correct tools needed for door hinge adjustment saves real time once you start turning screws.
Essential Tools for Aluminium Hinge Work
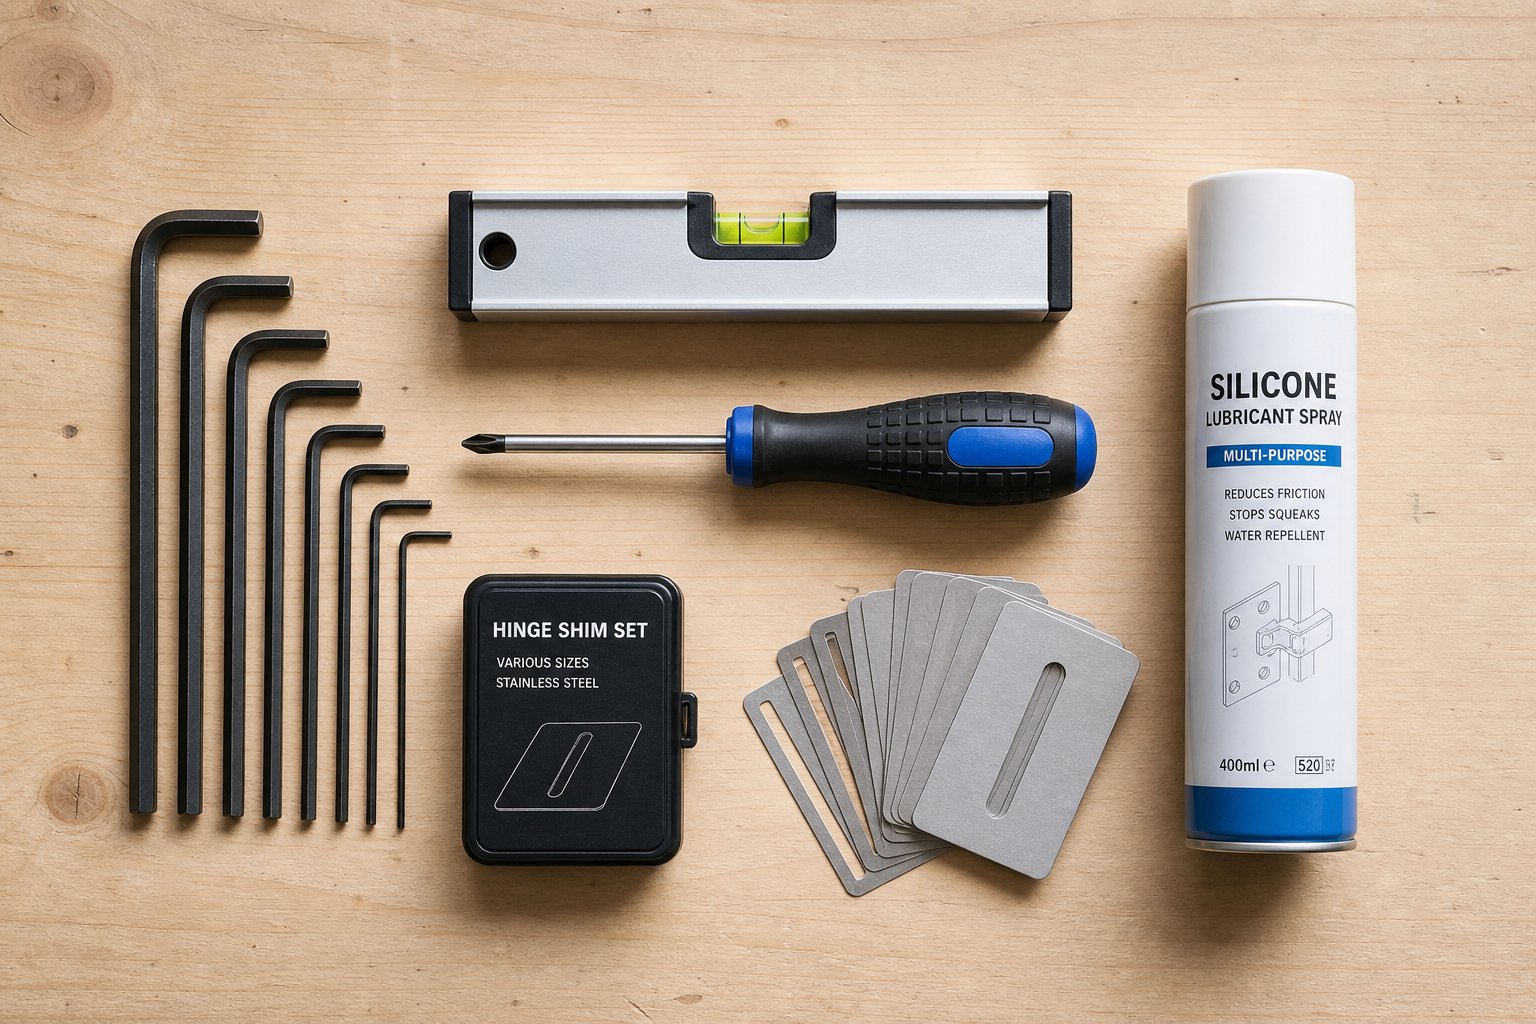
Most aluminium hinge adjustments require only a handful of tools, but having the right sizes matters more than having a full workshop. Here’s what to gather before you start:
- Metric Allen keys (hex keys) — Sizes 2.5 mm, 3 mm, 4 mm, and 5 mm cover the vast majority of concealed and commercial hinges sold in Australia. Keep a full metric set handy since manufacturers vary.
- Phillips and flat-head screwdrivers — Needed for butt hinge screws and some older flag hinge fixings. A No. 2 Phillips handles most residential hardware.
- Spirit level (600 mm minimum) — Essential for checking vertical plumb and lateral alignment after each adjustment. A short torpedo level won’t span enough of the door edge to give an accurate reading.
- Shims — Thin cardboard, plastic packers, or stainless steel shims for repositioning butt hinges that lack built-in adjustment screws.
- Penetrating lubricant — A silicone-based spray loosens seized adjustment screws without attracting dust the way petroleum-based products do.
- Torque-limiting screwdriver — Useful for delicate concealed hinge adjustments where over-tightening can strip the soft aluminium housing.
Lay everything out within arm’s reach. You’ll be making small incremental turns and checking the door repeatedly, so switching between tools should feel effortless.
Identifying Your Aluminium Hinge Type
You don’t need to remove the door to figure out what you’re working with. Open the door to about 90 degrees and look at the hinge side of the frame. The shape, mounting style, and visible hardware tell you almost everything.
Butt hinges show two rectangular leaves joined by a visible pin and knuckle barrel along the door edge. They’re the most common type on standard residential aluminium doors across Australia.
Continuous (piano) hinges run the full height of the door — you’ll see a single long metal strip rather than individual hinge bodies. These appear frequently on commercial aluminium shopfronts and high-traffic entries.
Pivot hinges sit at the top and bottom of the door rather than along the side. Look for a small plate at the floor and a matching fitting recessed into the head of the frame. Large, heavy entrance doors often use these.
Flag hinges have an L-shaped profile that slots into the door’s aluminium extrusion. They’re common on older aluminium doors and some budget residential installations. The hinge leaf wraps around the frame profile like a flag on a pole.
Concealed hinges are invisible when the door is closed. Open the door and look for a compact metal body recessed into the frame rebate, usually with two or three visible hex screws on the face. These are the most adjustable type and increasingly standard on modern residential and commercial aluminium doors.
With aluminium door hinge types explained, the table below pairs each type with its typical setting and the adjustment method you’ll use in the following steps:
| Hinge Type | Common Application | Adjustment Method |
|---|---|---|
| Butt hinge | Residential swing doors | Shimming behind hinge leaf; repositioning mortise |
| Continuous (piano) hinge | Commercial entries, shopfronts | Frame-side repositioning; elongated screw slots |
| Pivot hinge | Heavy entrance doors (residential and commercial) | Adjustable pivot shoe at floor; top pivot set screw |
| Flag hinge | Older residential aluminium doors | Limited — usually requires repositioning or replacement |
| Concealed hinge | Modern residential and commercial doors | Three-axis adjustment screws (vertical, lateral, compression) |
If you’re planning a commercial door hinge adjustment, expect concealed or continuous hinges with more built-in adjustability. Residential doors vary more widely, so confirming the type first prevents you from searching for adjustment screws that simply don’t exist on a basic butt hinge.
Knowing your hinge type also tells you how much correction is possible in place versus when you’ll need to physically reposition the hardware — a distinction that becomes critical when you start adjusting height in the next step.
Step 2 Raise or Lower the Door to Fix Dragging and Gaps
Vertical adjustment is the single most common fix for an aluminium door that scrapes the threshold or leaves a wedge-shaped gap at the top of the frame. The goal is straightforward: raise or lower the entire door panel until the gaps above and below sit even, and the bottom edge clears the floor cleanly. How you get there depends on whether your hinges have built-in adjustment screws or rely on manual shimming.
A critical principle applies regardless of hinge type: distribute the correction across all hinges rather than forcing one to carry the full load. Adjusting only the top hinge to fix door dragging on floor, for example, puts lateral stress on the lower hinge and can twist the door out of square within weeks.
Adjusting Concealed Hinges for Height
Concealed hinges on modern aluminium doors typically offer a dedicated vertical adjustment screw — usually the topmost hex screw visible on the hinge body when the door is open. This screw raises or lowers the door relative to the mounting plate fixed in the frame.
- Open the door to roughly 90 degrees so you have clear access to all hinge bodies along the frame edge.
- Identify the vertical adjustment screw on each hinge. It’s generally the screw closest to the top of the hinge housing. If you’re unsure, check the manufacturer’s markings — many European-style concealed hinges stamp a small arrow or “H” near the correct screw.
- Using the appropriate metric Allen key (commonly 4 mm), turn the screw clockwise to raise the door or counter-clockwise to lower it. One full turn typically moves the door between 0.5 mm and 1 mm, depending on the hinge model.
- Adjust each hinge by the same number of turns. If you have three hinges, give each one a half-turn, then close the door and check the gap with your spirit level held against the lock side.
- Repeat in small increments until the top gap is uniform and the bottom edge clears the threshold by 2–3 mm. Avoid over-correcting — if the top gap tightens while the bottom opens up, you’ve gone too far.
- Once satisfied, gently snug any lock screws that secure the adjustment in place. Not all concealed hinges have these, but where they exist, skipping this step lets the door drift back over time.
If you need to raise an aluminium door on its hinges by more than about 3 mm total, the concealed hinge’s adjustment range may max out. At that point, you’ll need to reposition the mounting plate itself — effectively resetting the baseline before fine-tuning with the screw again.
Shimming Butt Hinges to Correct Vertical Position
Standard butt hinges don’t have adjustment screws. To change the door’s vertical position, you add or remove material behind the hinge leaf where it meets the frame. This shifts the pivot point and tilts the door up or down.
- Open the door fully and support its weight with a wedge or block under the bottom edge. This prevents the door from sagging and stripping screws while you work.
- Loosen (don’t fully remove) the screws on the frame-side leaf of the top hinge. Two or three turns is enough to create a gap between the hinge leaf and the mortise.
- Slide a shim — thin cardboard, a plastic packer, or a stainless steel shim cut to the exact size of the hinge leaf — behind the loosened plate. Adding a shim here pushes the top of the door away from the hinge side and effectively raises the latch side.
- Re-tighten the screws firmly, ensuring the hinge leaf sits flat against the shim without rocking.
- Remove your support wedge and close the door. Check the top and bottom gaps. If the door still drags, repeat the process on the middle hinge with a slightly thinner shim to balance the correction.
To balance an off centre front door where the panel has dropped unevenly, you may need to shim the top hinge while slightly deepening the mortise on the bottom hinge. This paired approach keeps the door square rather than introducing a new angle.
For commercial aluminium doors hung on pivot hardware, vertical height adjustment works differently. The pivot shoe — a spring-loaded fitting recessed into the floor — usually has a hex bolt on its face plate. Turning this bolt raises or lowers the entire door by extending or retracting the pivot pin. Commercial door height adjustments on pivot systems can move the panel 5–8 mm, which is considerably more range than most concealed hinges offer. Just remember to check the top pivot arm as well; raising the door at the floor without adjusting the top fitting can bind the upper mechanism.
With the door sitting at the correct height and clearing the threshold evenly, any remaining misalignment is almost certainly lateral — the door sitting too far toward one side of the frame, throwing off the latch engagement.
Step 3 Shift the Door Laterally to Fix Latching Problems
A door that won’t latch is one of the most frustrating alignment failures. You push it closed, hear the click fall short, and the bolt slides against the face of the strike plate instead of dropping into the pocket. The fix is an aluminium door lateral hinge adjustment — shifting the entire panel left or right within the frame until the latch lines up cleanly and the side gaps sit even.
Lateral drift also shows up as a gap that’s noticeably wider on one side than the other. If you’ve already corrected the height and the door still won’t engage the strike, the panel is sitting too far toward or away from the hinge jamb. Here’s how to fix a door that won’t latch by correcting that horizontal position.
Lateral Adjustment on Three-Way Concealed Hinges
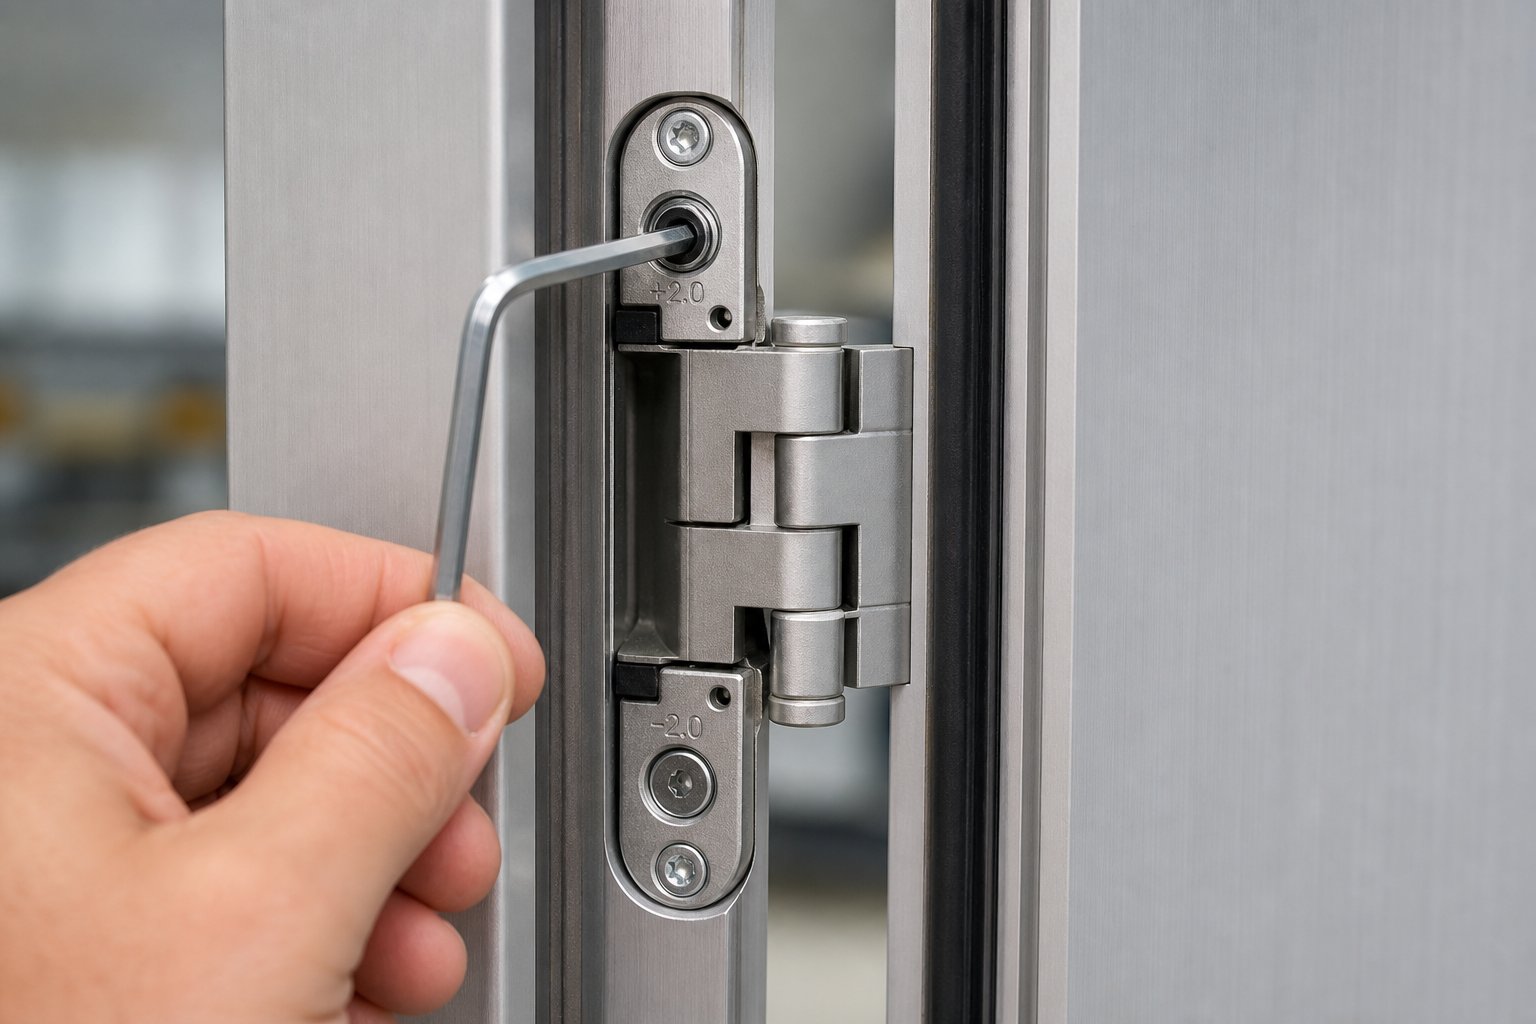
Three-way adjustable concealed hinges make this correction simple. The lateral adjustment screw is typically the middle or rear-facing hex screw on the hinge body — distinct from the vertical screw at the top and the compression screw at the front. Some manufacturers label it with an “L” or a horizontal arrow.
- Open the door to 90 degrees and locate the lateral adjustment screw on each hinge. If a small lock screw sits beside it, loosen that first with a quarter-turn counter-clockwise.
- Using your Allen key (usually 4 mm or 5 mm), turn the lateral screw clockwise to draw the door toward the hinge side, or counter-clockwise to push it toward the lock side. Each quarter-turn shifts the panel roughly 0.5 mm.
- Adjust all hinges by the same increment. This is critical — turning only the top hinge laterally while leaving the bottom untouched forces the door into a diagonal, creating a new rubbing point at the opposite corner.
- Close the door and check the side gaps visually. Hold your spirit level vertically against the lock-side edge to confirm the door sits plumb rather than leaning.
- Once the gaps look even, test the latch. If the bolt still misses, make another quarter-turn on all hinges and recheck.
- When the latch engages cleanly, re-tighten the lock screws on each hinge to secure the new position.
Check latch engagement after every incremental adjustment rather than making multiple turns at once. A single quarter-turn too many can shift the door past the strike plate in the opposite direction, doubling your work.
For anyone learning how to adjust a commercial door with concealed hardware, the process is identical — commercial metal door adjustment simply involves heavier panels and potentially more hinges (four or five per leaf on tall doors), so consistency across all hinge points matters even more.
Correcting Side Gaps on Standard Butt Hinges
Butt hinges lack a lateral adjustment screw, so you correct horizontal position by altering the depth of the hinge mortise in the frame. Deepening the mortise pulls the door toward the hinge jamb; packing it out pushes the door toward the lock side.
To move the door toward the lock side (away from the hinge jamb):
- Remove the screws from the frame-side hinge leaf and lift the leaf out of the mortise.
- Place a thin cardboard or plastic shim into the mortise, cut to match the leaf’s footprint.
- Reattach the hinge leaf over the shim and tighten the screws. The added material pushes the knuckle outward, shifting the door’s lock edge away from the hinge side.
To move the door toward the hinge jamb, you’ll need to deepen the mortise slightly with a sharp chisel — removing 0.5–1 mm of material so the hinge leaf sits further into the frame. Work carefully here, because aluminium frames are softer than timber and a slip can gouge the profile.
Whichever method you use, apply the same correction to every hinge on the door. Adjusting only one creates an angular offset that shows up as a tight corner at one end and a wide gap at the other. After each change, close the door, run your spirit level along the lock stile, and confirm the panel hangs plumb before moving on.
With the door latching reliably and the side gaps balanced, the final axis to address is compression — how tightly the door presses against the frame’s weatherseal when closed.
Step 4 Adjust Compression Depth for a Proper Seal
Height and lateral position get the door sitting square in the frame, but neither determines how firmly the panel presses against the weatherseal when closed. That’s the job of compression — sometimes called depth adjustment — and it’s the axis most people overlook until they notice a draught whistling through a supposedly closed door.
Aluminium door compression hinge adjustment moves the entire panel forward (closer to the frame’s seal) or backward (away from it). Get it wrong in one direction and you’ll fight the door every time you close it, forcing the latch against excessive resistance. Get it wrong in the other direction and you end up trying to figure out how to fix a drafty aluminium door seal that never quite makes contact. Water ingress during heavy rain is another telltale sign — if moisture appears along the bottom or sides of a closed door, insufficient compression is almost always the culprit.
Using the Compression Screw on Concealed Hinges
On most European-style three-way concealed hinges, the compression screw faces forward — toward you when the door is open at 90 degrees. It’s typically the lowest or front-most hex screw on the hinge body, separate from the vertical screw at the top and the lateral screw in the middle or rear.
- Open the door and identify the compression adjustment screw on each hinge. Some manufacturers mark it with a “D” or a small arrow pointing toward the frame.
- If a lock screw is present, loosen it by a quarter-turn before making any adjustment.
- Turn the compression screw clockwise to bring the door tighter against the frame, or counter-clockwise to push it further away. A quarter-turn shifts the panel roughly 0.25–0.5 mm depending on the hinge model.
- Adjust all hinges by the same increment to keep the door parallel to the frame. Uneven compression across the height of the door creates a twist that accelerates seal wear at one end.
- Close the door gently and check how it feels. The latch should engage without slamming or requiring extra force. If you have to lean into the door to get it to click shut, you’ve brought it too tight.
- Re-tighten any lock screws once you’re satisfied with the position.
For commercial glass door adjustment on shopfronts and entrance systems using continuous (piano) hinges, compression isn’t controlled at the hinge itself. Instead, the frame’s stop bead or the strike-side rebate is repositioned — typically by loosening the screws that hold the glazing bead or stop in place, shifting it forward or back, and re-securing. This is a less common DIY task and usually handled during professional installation or servicing.
Testing Seal Contact With the Paper-Strip Method
Your eyes can’t reliably judge whether a weatherseal is making consistent contact around the full perimeter. The paper-strip test gives you a tactile answer in seconds.
- Cut a strip of standard copy paper roughly 50 mm wide and 200 mm long.
- Open the door and place the strip across the seal at the top of the frame, letting it hang over both sides.
- Close the door fully so the seal traps the paper.
- Grip the exposed end and pull gently. You should feel moderate, even resistance — the paper slides out with effort but doesn’t tear. If it falls out freely, compression is too loose at that point. If it tears or won’t budge at all, the door is too tight against the frame.
- Repeat at the bottom and both sides, testing at least four points around the perimeter.
Consistent resistance at every test point means the seal is making uniform contact. If the top pulls freely while the bottom grips hard, you’ve got uneven compression — go back and fine-tune individual hinges until the feel matches all the way around.
Compression is the subtlest of the three axes, but it has an outsized effect on energy efficiency, acoustic insulation, and weather resistance. Once it’s dialled in, the door should close with a satisfying, cushioned click rather than a rattle or a fight. That leaves one more category of hinge hardware that plays by different rules entirely: spring-loaded hinges, where adjustment controls not just position but the force and speed of the door’s swing.
Step 5 Handle Spring-Loaded Hinges and Closer Coordination
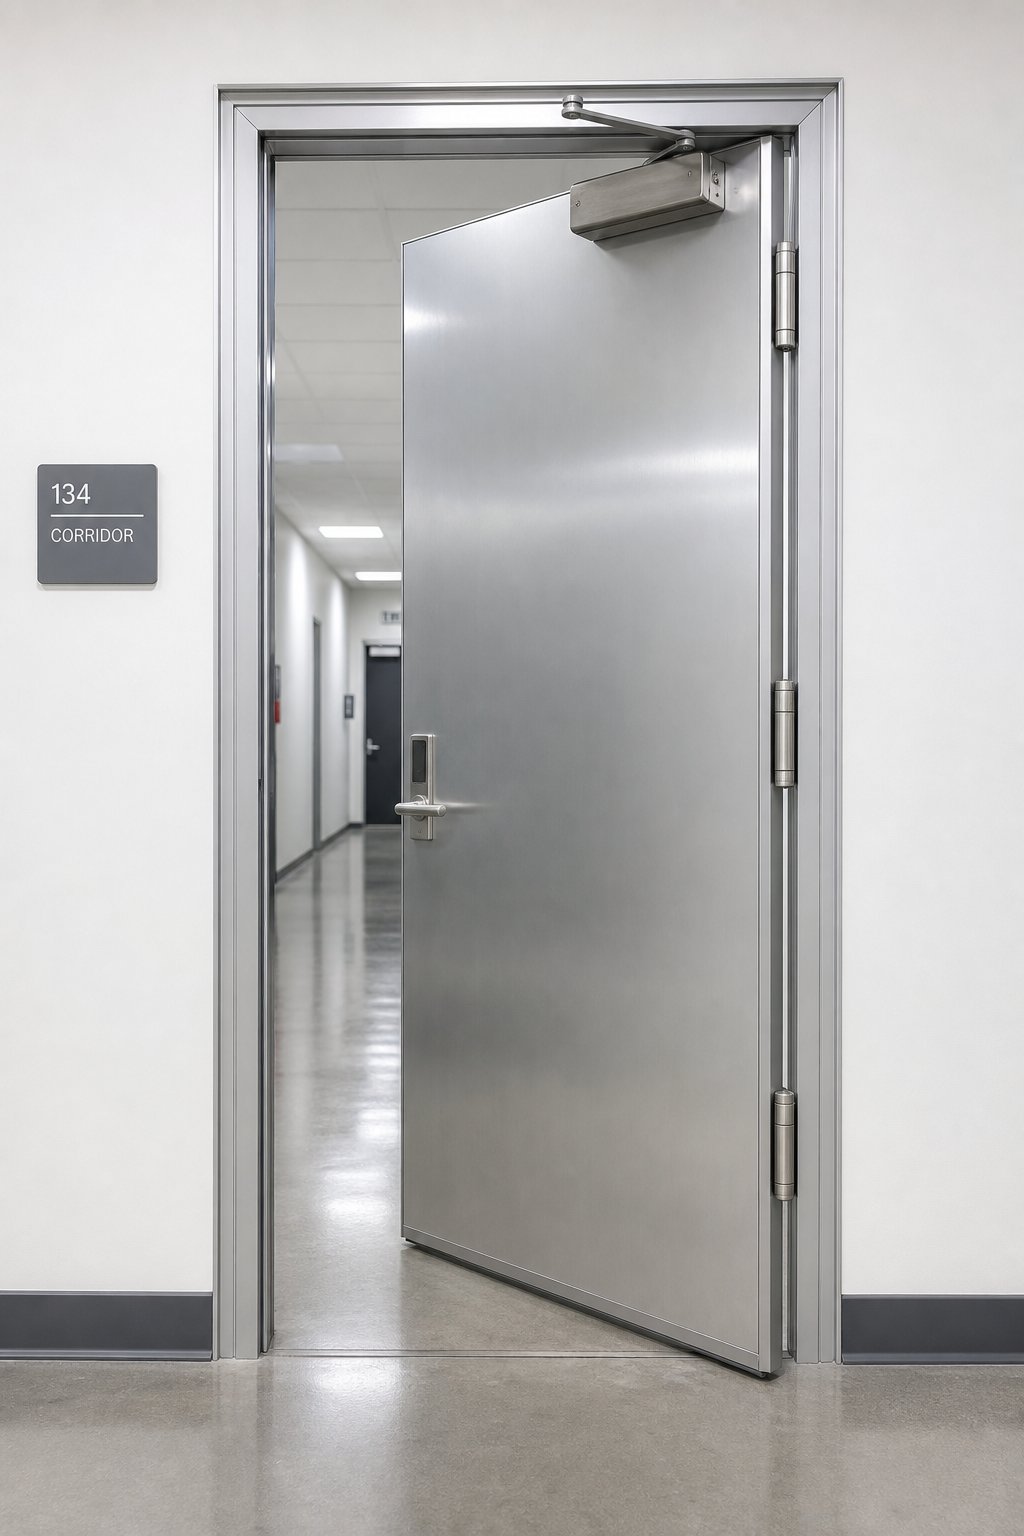
Spring-loaded hinges don’t just hold the door in place — they actively push it closed. Unlike the concealed and butt hinges covered in the previous steps, spring hinges combine the function of a hinge and a door closer into a single piece of hardware. That dual role means adjusting them isn’t about position alone. You’re also controlling swing speed and closing force, which changes the feel of the door for everyone who walks through it.
These hinges appear frequently on fire-rated stairwell doors, apartment common entries, and commercial aluminium doors where a separate overhead closer would be impractical or visually unwanted. The internal torsion spring applies constant rotational force throughout the swing arc, pulling the door back to the frame after each opening. When that tension drifts — too weak and the door creeps to a stop without latching, too strong and it slams hard enough to rattle the frame — knowing how to adjust a commercial door closer built into the hinge itself becomes essential.
Safely Adjusting Spring Tension on Aluminium Hinges
Spring hinges store significant energy in their internal coil. A tensioned hinge can exert 50–150 inch-pounds of rotational force — enough to spin a hex key violently out of your hand or slam the door with finger-crushing speed. Never attempt to remove a spring hinge without first fully releasing the tension. Wear safety glasses, maintain a firm grip on your adjustment tool at all times, and keep the door closed and latched during the adjustment process.
With that warning front of mind, here’s the procedure for adjusting a commercial door closer of the spring-hinge variety:
- Close and latch the door. This prevents unexpected movement during adjustment and keeps the spring at its resting compression point.
- Locate the hex adjustment hole. It’s typically found in the barrel of the hinge knuckle — either at the top or bottom end, depending on the handing of the door. Remove any decorative cap covering the socket.
- Insert the correct hex key fully. Most spring hinges on aluminium doors take a 3 mm or 4 mm metric Allen key. Partial engagement risks stripping the socket, which makes future adjustment impossible without replacing the hinge entirely.
- Rotate to adjust tension. If the adjustment end faces up, turn clockwise to increase closing force. If it faces down, turn counter-clockwise. Work in quarter-turn increments — each full rotation changes closing force by roughly 15–20 per cent, so small moves make a noticeable difference.
- Test after every quarter-turn. Remove the key, open the door to 90 degrees, and release. The door should travel from fully open to within about 75 mm of the frame in four to six seconds, then accelerate through the final latch engagement. If it slams, back off a quarter-turn. If it stalls short of latching, add another quarter-turn.
- Secure the tension with the cross pin. Once you’ve reached the right closing speed, rotate the key slowly until the pin hole in the centre stud aligns with the hole in the hinge knuckle. Insert the cross pin to lock the spring at its new setting, then carefully release pressure on the hex key.
- Snip the cross pin at the breakaway head. This locks the adjustment permanently. Be aware that once snipped, no further fine-tuning is possible without replacing the pin — so confirm you’re happy with the door’s behaviour before cutting.
For doors with multiple spring hinges (common on heavier commercial aluminium panels), adjust each hinge by equal increments. Unbalanced tension across hinges creates a twisting force that accelerates bearing wear and can distort the aluminium frame over time. A good rule of thumb: set all hinges to minimum tension first, then increase each one by the same quarter-turn until the door latches reliably.
Balancing Spring Hinges With Overhead Door Closers
Some commercial aluminium doors use spring hinges and a separate overhead closer simultaneously — particularly on fire-rated openings where redundancy is required or where the spring hinge alone can’t generate enough force to overcome weatherseal resistance and positive air pressure from HVAC systems.
When both systems are present, they need to work together rather than fight each other. Two closing mechanisms set to maximum tension don’t produce a better-closing door — they produce a door that’s nearly impossible to open and slams with enough force to damage the frame and hardware.
The balancing approach works like this:
- Set the overhead closer as the primary control. Adjust its sweep speed and latch speed valves to achieve the desired closing profile — smooth travel through the main arc, then a firm pull through the final few degrees to engage the latch.
- Dial the spring hinge tension down to a supporting role. The spring should provide just enough force to assist the closer, not duplicate it. In practice, this means setting spring tension to the minimum level that still returns the door from about 30 degrees to closed without the overhead closer’s help.
- Test under real conditions. Open the door fully and release. Watch for jerky movement or speed changes mid-swing, which indicate the two mechanisms are fighting. Smooth, consistent deceleration from open to closed means they’re balanced.
If you’re adjusting a commercial door closer overhead unit alongside spring hinges, remember that the closer’s backcheck valve also affects the equation. Backcheck slows the door when swung open aggressively — but if the spring hinge tension is set too high, the door fights the backcheck on the way out, stressing both mechanisms.
Getting this balance right often takes two or three rounds of incremental tweaking between the closer and the hinges. Patience here pays off in hardware longevity and a door that feels effortless to use rather than unpredictable.
Spring tension and closer coordination solve operational issues — the door’s behaviour as it swings. But none of these adjustments matter much if the hinge hardware itself is worn beyond its useful life, or if the aluminium frame can no longer hold screws securely. Recognising that threshold is the next critical skill.
Step 6 Know When to Replace Aluminium Door Hinges Instead of Adjusting
Adjustment screws can only compensate for so much. There’s a point where no amount of turning, shimming, or re-tensioning will restore a hinge to reliable operation — and continuing to force adjustments on failing hardware risks permanent damage to the aluminium frame itself. Knowing when to replace aluminium door hinges rather than chase another half-turn saves both time and money in the long run.
Signs That Adjustment Will Not Fix Your Problem
If you’ve worked through the vertical, lateral, and compression steps above and the door still won’t hold its position, the issue likely isn’t alignment — it’s worn or damaged hardware. Run through this checklist:
- Worn or loose hinge pins — Grab the door at the lock edge and lift. If you feel vertical play or hear a clunk even though all screws are tight, the pin and knuckle barrel have worn beyond tolerance. No adjustment screw compensates for a sloppy pivot point.
- Stripped screw holes in the aluminium frame — Screws that spin freely without gripping mean the threads in the frame have given way. You can tighten them all day and the hinge will still shift under load.
- Visibly bent or cracked hinge leaves — Cracks indicate metal fatigue, and a bent leaf changes the geometry so fundamentally that adjustment screws can’t bring the door back to square. Structural damage like cracks or dents compromises the hinge’s load-bearing capacity and warrants immediate replacement.
- Hinges that have exceeded their rated cycle life — Most residential aluminium door hinges are rated for 20,000 to 60,000 open-close cycles. A busy household front door might see 10–15 cycles per day, reaching 50,000 cycles within a decade. Commercial entries accumulate that figure in a fraction of the time. Once a hinge passes its rated lifespan, internal wear accelerates even if nothing looks visibly wrong.
- Persistent sagging that returns within weeks of adjustment — If you fix a sagging aluminum screen door or entry panel and it drops again within a month, the hinge bearings or mounting points have degraded past the point of reliable correction.
- Corrosion on the knuckle or pin — Particularly common in coastal Australian environments where salt air attacks exposed metal. Corroded pins bind, create uneven friction, and eventually seize entirely.
Any single item on that list is reason enough to consider replacement. Two or more together make it a certainty.
Repair Options for Stripped Aluminium Frames
Aluminium is softer than steel, which makes it easier to machine but also more vulnerable to thread failure. Stripped screw holes are arguably the most common reason adjustments stop holding on aluminium doors — the hinge itself might be fine, but the frame can no longer grip the fasteners. Understanding how to fix stripped screw holes in aluminium door frames gives you a decision point: repair the frame and reuse the hinge, or replace the entire assembly.
Three repair methods work in practice:
- Helicoil (thread insert) — A coiled stainless steel insert is threaded into a re-drilled and tapped hole, restoring the original thread size with significantly greater pull-out strength than the parent aluminium. This is the most durable repair and the preferred method for commercial aluminium doors where the hinge carries substantial weight.
- Larger-diameter screws — Stepping up one screw gauge (e.g., from a No. 8 to a No. 10) bites into fresh material around the damaged hole. It’s a quick fix, but only works once — you can’t keep going larger without weakening the surrounding extrusion wall.
- Epoxy-filled re-drilling — Fill the stripped hole with a two-part structural epoxy, let it cure fully (typically 24 hours), then re-drill and tap a new thread into the hardened plug. This works well for lighter residential doors but may not withstand the repeated stress of high-traffic commercial entries.
Each method buys time, but none addresses the root cause if the hinge itself is worn or undersized for the door’s weight. A repaired screw hole paired with a failing hinge just delays the next round of problems by a few months.
When a Full Hinged Door System Upgrade Makes Sense
Sometimes the smartest path isn’t patching individual components — it’s stepping up to a door system where the frame, hinges, and hardware are engineered as a matched unit from the start. This is especially true during aluminium storefront door installation or when renovating an older residential entry where the original hardware was budget-grade.
A purpose-built hinged door system eliminates the mismatch problems that cause premature hinge failure: undersized hinges paired with heavy glazed panels, soft fixings in thin-walled extrusions, or generic hardware that lacks three-axis adjustability. When the frame profile, hinge specification, and door weight are calculated together during the design phase, the result is a system that holds its alignment for years rather than months.
MEICHEN’s MC100 Hinged Door system takes this integrated approach — commercial-grade aluminium hinges are selected during the project specification phase to match the door’s weight, dimensions, and expected traffic load. Whether the application is a residential front entry, an apartment common door, a townhouse courtyard access, or a high-cycle commercial, education, or healthcare opening, the hardware is matched to performance requirements before production begins. That project-specific selection means the hinges arrive with adequate load rating, full three-axis adjustability, and mounting provisions designed for the frame’s wall thickness — eliminating the stripped-hole and undersized-hinge problems that plague generic installations.
For readers who’ve been chasing adjustments every few months or dealing with recurring frame damage, a system-level upgrade often costs less over a five-year window than repeated hinge replacements and frame repairs on ageing hardware.
Replacement solves existing failures, but the real goal is reducing how often you need to intervene at all. That comes down to maintenance habits and understanding how aluminium responds to seasonal temperature shifts across Australian climates.
Step 7 Maintain Your Hinges to Prevent Future Misalignment
Aluminium doesn’t rot, warp, or absorb moisture the way timber does — but it does move. Every aluminium door frame in Australia expands slightly in summer heat and contracts in winter cold, and that cyclical movement gradually shifts hinge alignment if left unchecked. A solid aluminium door hinge maintenance schedule turns reactive fixes into a five-minute seasonal habit that keeps your door operating smoothly year-round.
Seasonal Adjustment Needs for Aluminium Doors
Aluminium has a thermal expansion coefficient of approximately 23 × 10⁻⁶ per degree Celsius — roughly twice that of steel. In practical terms, a 2,100 mm tall aluminium door frame exposed to a 40°C temperature swing between a cold Melbourne winter morning and a peak summer afternoon can expand by nearly 2 mm in height. That’s enough to tighten gaps, increase seal compression, and make a previously well-adjusted door feel stiff or hard to latch.
The pattern is predictable. During summer, the frame expands and gaps shrink. The door may feel tighter against the seal, the latch might need a firmer push, and in extreme cases the panel can bind against the head of the frame. In winter, the frame contracts, gaps widen slightly, and you might notice a draught returning along the top or lock side where the seal no longer makes full contact.
For most residential doors, this seasonal shift stays within the tolerance range of quality hardware and never requires intervention. But doors on north- or west-facing walls that cop direct afternoon sun — particularly those with dark-coloured frames — experience more pronounced movement. A quick compression check at the start of summer and again in early winter catches any drift before it becomes a problem. One or two quarter-turns on the compression screw is usually all it takes to restore proper seal contact as the seasons change.
Commercial aluminium doors in climate-controlled buildings experience less thermal cycling because the interior temperature stays relatively constant. However, external commercial entries — shopfronts, school entrances, hospital ambulance bays — face the same expansion forces as residential doors, compounded by far higher daily cycle counts that accelerate wear on adjustment mechanisms.
Preventive Maintenance Schedule by Door Type
The difference between a door that needs commercial door adjustment every few months and one that holds its alignment for years often comes down to a simple maintenance routine. Residential and commercial doors share the same tasks but differ in frequency because of usage intensity.
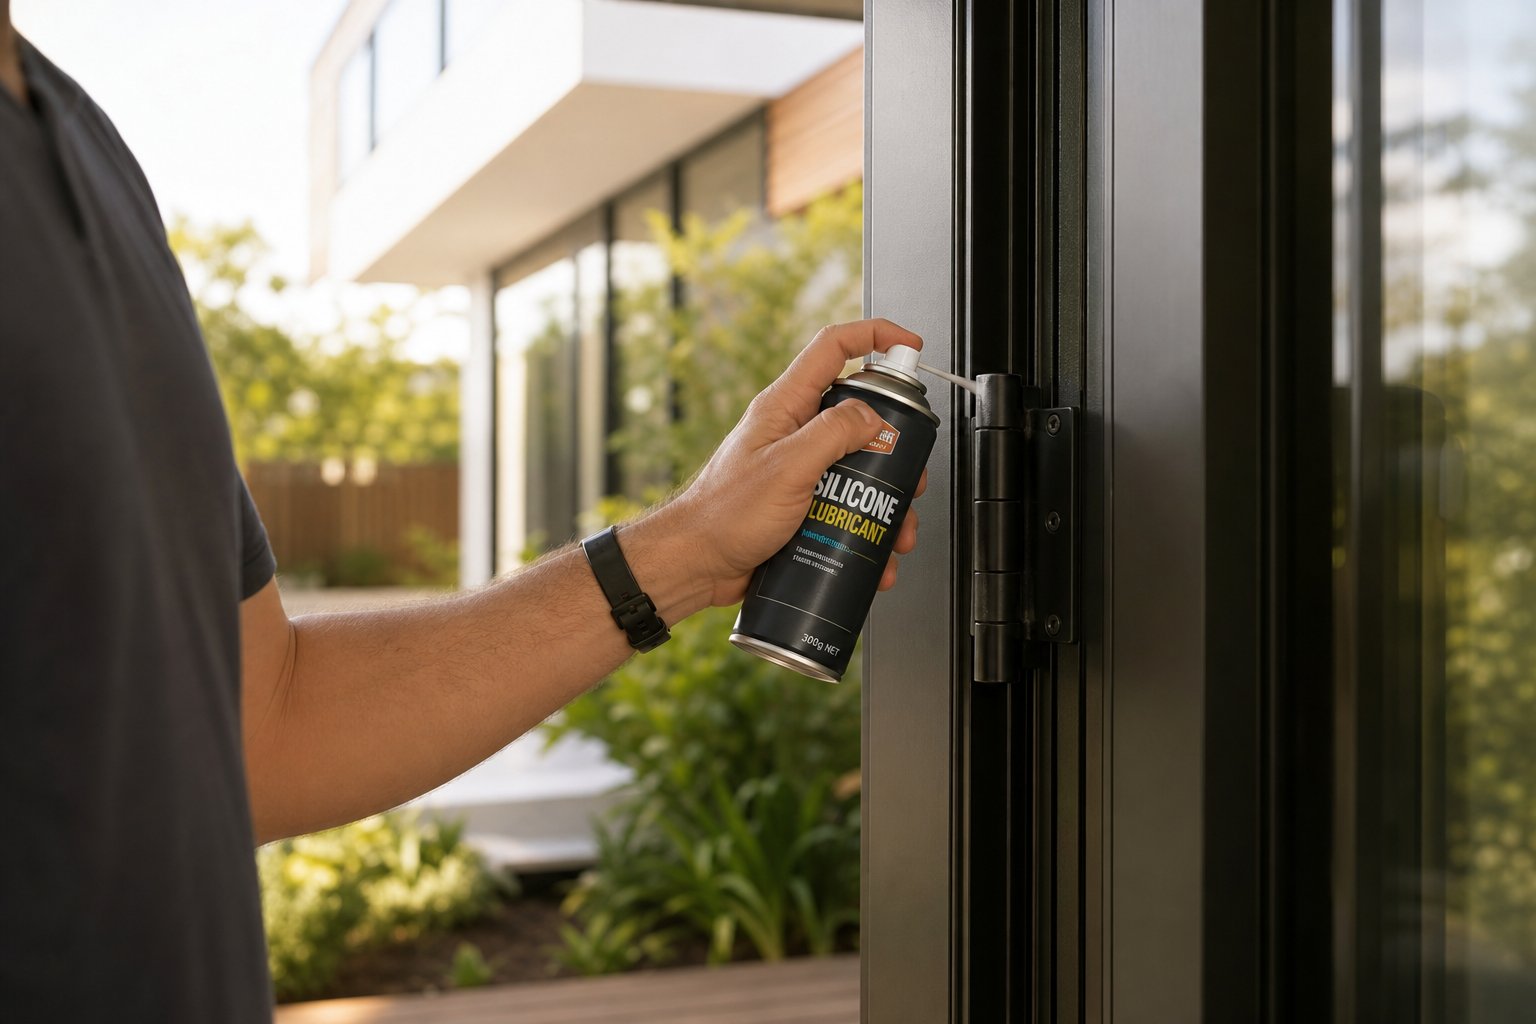
Here’s how to lubricate aluminium door hinges and maintain them properly: use a silicone-based lubricant or lithium grease on hinge pins, knuckle barrels, and adjustment screw threads. Avoid petroleum-based sprays like WD-40 for ongoing lubrication — they evaporate quickly and leave a residue that attracts dust and grit, which accelerates wear on moving parts. Silicone spray stays slippery without collecting debris, making it the better long-term choice for aluminium hinge hardware.
The table below breaks down each maintenance task with recommended intervals for residential versus commercial applications:
| Maintenance Task | Residential Frequency | Commercial Frequency | Purpose |
|---|---|---|---|
| Lubricate hinge pins and adjustment screws | Every 6 months | Every 3 months | Prevents binding, corrosion, and ensures smooth adjustment screw operation |
| Check and tighten all hinge screws | Annually | Quarterly | Catches loosening before it causes misalignment or frame damage |
| Full three-axis alignment check (vertical, lateral, compression) | Annually | Every 6 months | Identifies drift early and prevents compounding misalignment |
| Inspect hinge pins and knuckles for wear | Annually | Every 6 months | Detects play or corrosion before it progresses to replacement territory |
| Clean debris from hinge bodies and pivot points | Every 6 months | Monthly | Prevents grit from grinding into bearings and adjustment mechanisms |
| Paper-strip seal compression test | Seasonally (summer and winter) | Quarterly | Confirms weatherseal contact hasn’t changed with thermal movement |
| Inspect frame screw holes for thread integrity | Every 2 years | Annually | Catches stripped or weakening threads before hinge shifts under load |
For residential doors, an annual check is genuinely sufficient if the door was properly installed and the hardware matches the panel weight. Set a calendar reminder at the start of autumn — the mild weather makes it comfortable to work with the door open, and you’ll catch any summer expansion effects before winter contraction widens gaps further.
Commercial doors in high-traffic environments — schools, medical centres, retail entries — benefit from quarterly attention. A door that cycles 80 to 100 times per day accumulates the equivalent of a residential door’s annual wear in just a few months. Routine inspection every three to six months catches loose fixings and bearing wear before they cascade into frame damage or safety issues.
Coastal properties anywhere from the Gold Coast to the Mornington Peninsula face an additional factor: salt-air corrosion. Even marine-grade aluminium hardware benefits from a wipe-down with fresh water and a light silicone coat every three months to prevent surface oxidation from reaching hinge pins and adjustment threads.
Quality matters at the system level too. Aluminium hinged door systems built with precision-machined components and properly engineered frame tolerances hold their alignment significantly longer than generic hardware retrofitted to standard extrusions. MEICHEN’s MC100 Hinged Door, designed for residential, apartment, townhouse, commercial, education, and healthcare projects, is a good example — tighter manufacturing tolerances and project-specific hardware selection during the specification phase mean the hinges start closer to perfect alignment and drift less over time. When the frame engineering accounts for thermal movement and the hinge load rating matches the actual door weight from day one, the maintenance schedule becomes a quick confirmation rather than a correction session.
Whichever system you’re working with, the principle stays the same: fifteen minutes of preventive care twice a year costs nothing and prevents the kind of compounding misalignment that eventually damages frames, wears seals, and turns a simple adjustment into a replacement job.
Frequently Asked Questions About Adjusting Aluminium Door Hinges
1. How do I know which direction to turn the adjustment screw on my aluminium door hinge?
For most European-style concealed hinges, turning the vertical screw clockwise raises the door and counter-clockwise lowers it. Lateral screws move the door toward the hinge side when turned clockwise and toward the lock side when turned counter-clockwise. Compression screws pull the door tighter to the frame clockwise. Always work in quarter-turn increments and test the door after each adjustment to avoid overcorrecting. If your hinge lacks markings, check the manufacturer’s documentation for your specific model.
2. Can I adjust aluminium door hinges without removing the door?
Yes, in most cases. Concealed hinges with three-axis adjustment screws are designed to be fine-tuned with the door hanging in place — simply open it to 90 degrees for access. Butt hinges require shimming, which means loosening screws but not fully removing the door, provided you support the panel’s weight with a wedge underneath. The only scenario requiring full door removal is when you need to deepen a hinge mortise or replace the hinge entirely.
3. How often should I adjust or maintain my aluminium door hinges?
Residential aluminium doors typically need a full alignment check once per year, with lubrication every six months using silicone-based spray. Commercial doors in high-traffic settings benefit from quarterly screw tightness checks and six-monthly alignment inspections. Seasonal compression adjustments may be needed in areas with large temperature swings, as aluminium expands in summer heat and contracts in winter cold. Quality hinged door systems like MEICHEN’s MC100, engineered with tighter manufacturing tolerances, generally require less frequent intervention.
4. Why does my aluminium door keep dropping after I adjust it?
Recurring sagging usually indicates a problem beyond simple misalignment. Common causes include stripped screw holes in the aluminium frame that can no longer grip fasteners securely, worn hinge pins creating vertical play in the knuckle barrel, or hinges that are undersized for the door’s weight. Check for play by lifting the door at the lock edge with all screws tight. If you feel movement, the hardware needs repair or replacement rather than further adjustment. Frame repairs such as helicoil thread inserts can restore screw grip in stripped aluminium.
5. What is the paper-strip test for checking aluminium door seal compression?
The paper-strip test measures whether your door’s weatherseal makes consistent contact around the full perimeter. Close the door on a 50 mm wide strip of copy paper placed across the seal, then pull gently. You should feel moderate, even resistance — the paper slides out with effort but does not tear or fall freely. Test at least four points: top, bottom, and both sides. Inconsistent resistance indicates uneven compression that needs correcting via the depth adjustment screw on your concealed hinges, bringing the door closer to or further from the frame at specific hinge points.
More Window & Door Guides