How to Identify Aluminium Window Frame Problems Before You Start
Grabbing a screwdriver and diving straight into a repair feels productive, but fixing aluminium window frames without a clear diagnosis often leads to wasted effort or repeat failures. The sticking casement in your bathroom and the leaking slider in the living room might share a symptom yet demand completely different solutions. A few minutes spent identifying the actual problem saves hours of guesswork.
Signs Your Aluminium Window Frame Needs Attention
Most frame issues announce themselves well before they become serious. Knowing how to repair a window frame starts with recognising what your windows are telling you. Watch for these common symptoms:
- Drafts or cold spots near the window perimeter, even when fully closed
- Difficulty opening or closing — sticking, grinding, or requiring excessive force
- Visible white or grey powdery residue on the frame surface (oxidation)
- Water leaking through the frame during rain or pooling on the sill
- Rattling glass panes, especially in windy conditions
- Condensation forming between double-glazed panes
- Gaps visible between the frame and the wall or between the sash and frame
Any single symptom points toward a specific category of failure — seal degradation, mechanical wear, corrosion, or structural misalignment. Multiple symptoms appearing together often indicate the problem has progressed beyond its initial stage.
Which Window Type Do You Have?
Your repair approach depends partly on the style of window involved. Sliding windows fail differently from casement windows, and each type has its own weak points. Horizontal and vertical sliders rely on tracks and rollers that wear over time. Casement windows use hinges and crank mechanisms prone to stiffening. Awning windows share similar hinge hardware but face additional water ingress risks due to their opening angle. Fixed windows have no moving parts, so their issues typically centre on seal failure or glass damage rather than mechanical wear.
Identifying both the symptom and the window type narrows your aluminium window repair down to a specific, actionable fix. The sections ahead address each scenario in detail — from track and roller restoration to corrosion treatment, seal replacement, and reglazing — so you can move forward with the right repair for your situation.
Common Causes of Aluminium Window Frame Damage
Symptoms tell you something is wrong. Causes tell you how to fix it properly. A broken sliding window that jumps its track might seem like a roller problem, but if the real culprit is foundation movement warping the frame, replacing rollers alone guarantees the issue returns within months. Every lasting repair begins with understanding why the damage occurred in the first place.
The cause determines the cure. Treating a symptom without addressing its root leads to repeat failures, wasted materials, and growing frustration. Identify the underlying trigger first, then choose your repair method accordingly.
Environmental Factors That Damage Aluminium Frames
Aluminium naturally forms a thin oxide layer that protects it from the elements. In mild, dry conditions, this passive layer holds up well for decades. Harsh environments, however, overwhelm that natural defence and accelerate deterioration.
Salt air and coastal exposure are the most aggressive environmental threats to old aluminium window frames across Australia. Properties along the coastline — from Sydney’s eastern suburbs to Perth’s beachside corridors — face constant salt-laden moisture that attacks protective coatings and penetrates to the bare metal beneath. Without adequate protective finishes like powder coating or anodising, salt accumulates on frame surfaces and causes pitting that weakens the structure over time. Homes within 1 km of the ocean are particularly vulnerable, though salt spray can travel much further in windy conditions.
Humidity and persistent moisture compound the problem. In tropical regions like Far North Queensland or the Northern Territory, high humidity year-round keeps frame surfaces damp for extended periods. This sustained moisture contact breaks down seals and accelerates oxidation, especially in areas where drainage holes become blocked and water sits against the frame.
UV radiation does not damage the aluminium itself, but it devastates the rubber seals and gaskets that keep your windows weathertight. Australia’s intense sun exposure causes rubber compounds to harden, crack, and shrink over time. UV degradation accelerates breakdown particularly on north and west-facing windows that receive prolonged direct sunlight. A seal that might last 15 to 20 years on a shaded south-facing wall could fail in as few as 8 to 10 years on an exposed northern elevation.
Mechanical Wear and Aging Components
Even in a perfectly mild climate, aluminium window frames degrade through simple use. Every time you slide a panel open, engage a lock, or crank a casement handle, moving parts experience friction and stress.
Roller and track wear is the most common mechanical failure. Sliding window rollers are typically nylon or stainless steel wheels that carry the full weight of the sash panel. Over thousands of open-close cycles, these rollers flatten, crack, or seize. Debris accumulating in the track — dirt, sand, insect matter, paint flakes — grinds against both the rollers and the aluminium track surface, accelerating wear on both components simultaneously.
Repeated thermal cycling stresses frames in a subtler way. Aluminium expands and contracts with temperature changes. Over years of daily heating and cooling, this movement fatigues corner joints and loosens fasteners. Old aluminium windows installed decades ago may show corner separation or slight frame distortion purely from this cumulative thermal stress.
Foundation settling and structural movement create frame misalignment that no amount of lubrication or roller adjustment can resolve. As a home’s foundations shift — common in Australian homes built on reactive clay soils — window frames become racked out of square, causing sashes to bind, gaps to appear unevenly, and locking mechanisms to miss their strike plates. If you notice diagonal cracking in the wall near your window corners or uneven gaps around the frame, the problem likely originates below the floor rather than within the window itself.
Improper original installation is a cause that often goes unrecognised for years. Frames installed without adequate shimming, with insufficient clearance for thermal expansion, or with poor flashing details develop problems that mimic age-related wear but appear far earlier than expected. A window that sticks or leaks within its first five years almost certainly has an installation deficiency rather than a material failure.
With the root cause identified, you can select the right repair approach and gather the correct tools and materials — which is exactly where we head next.
Tools and Materials You Need for Each Repair Type
Gathering everything before you start prevents those frustrating mid-job trips to the hardware store. The good news: most aluminium window repairs rely on basic household tools you likely already own. A few specialised items — replacement rollers, specific seal profiles, or corrosion treatment products — round out the kit depending on your particular job.
Essential Tools for Every Aluminium Frame Repair
Regardless of the specific task, keep these basics within reach:
- Phillips and flat-head screwdrivers (or a multi-bit driver)
- Tape measure
- Pliers (needle-nose and standard)
- Utility knife with fresh blades
- Vacuum cleaner with crevice attachment
- Clean rags and a spray bottle
- Safety glasses and work gloves — essential when handling glass or using chemical cleaners
These cover the fundamentals of how to repair home windows frame hardware, clean tracks, and access internal components. Beyond this core set, each repair type calls for a few additional items.
Materials Organised by Repair Type
The table below breaks down exactly what you need for each common job. Use it as a shopping list before you begin any window slider repair or frame restoration work.
| Repair Type | Tools Needed | Materials Needed |
|---|---|---|
| Track cleaning and lubrication | Stiff nylon brush, vacuum with crevice nozzle, old toothbrush | Silicone-based lubricant spray (not WD-40), mild detergent, clean cloths |
| Roller replacement | Phillips screwdriver, flat-head screwdriver, pliers | Replacement rollers (matched to existing type and size), adjustment screws if worn |
| Seal and gasket work | Utility knife, putty knife, spline roller | Replacement rubber gasket or weatherstrip (correct profile), silicone sealant, rubbing alcohol for surface prep |
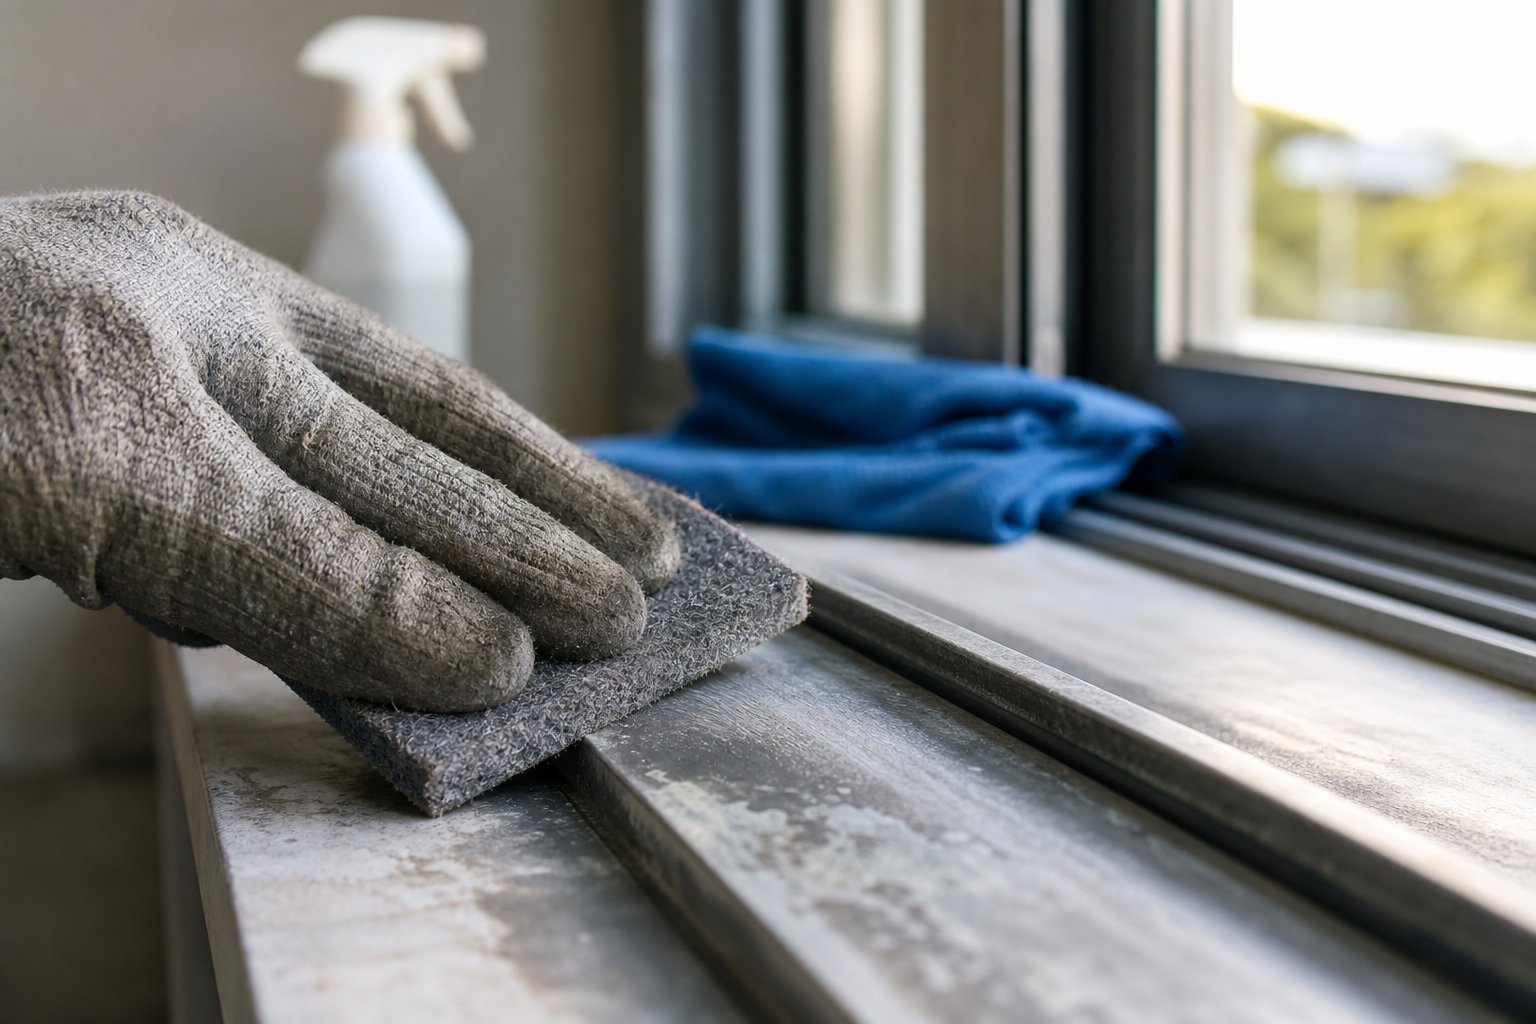
| Corrosion treatment | Fine abrasive pad (Scotch-Brite or similar), soft-bristle brush, microfibre cloths | Phosphoric acid-based cleaner or aluminium-specific oxidation remover, protective wax or clear coat, masking tape |
| Glass replacement | Glazing suction cups, putty knife, glass cutter (if trimming needed), caulking gun | Replacement glass pane (correct thickness), rubber glazing bead or glazing tape, silicone sealant |
| Frame realignment | Spirit level, rubber mallet, pry bar, shims | Packers or plastic shims, long screws for re-anchoring, sealant for any disturbed flashing |
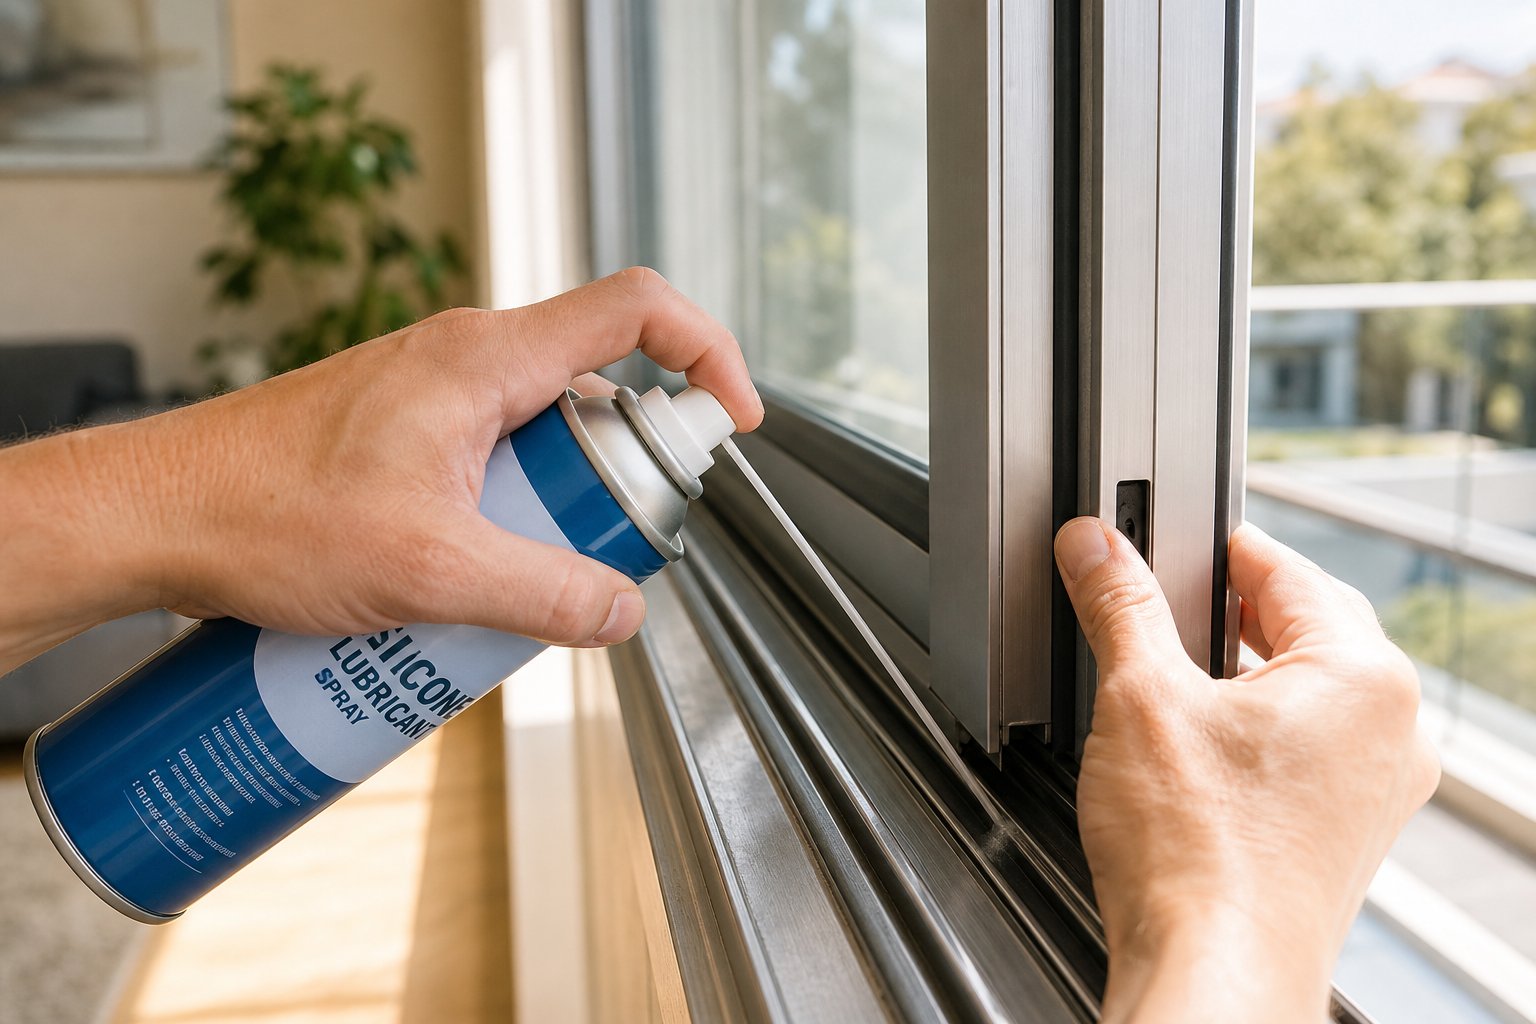
A quick note on lubricants: always choose a silicone-based product for aluminium window tracks and rollers. Petroleum-based sprays attract dust and gum up over time, creating the very problem you are trying to solve. Silicone stays slick without collecting debris.
With your tools laid out and materials on hand, you are ready to tackle the repair itself. Sliding window tracks and rollers account for the majority of aluminium frame complaints — so that is where we start.
Fixing Sliding Window Tracks and Rollers Step by Step
A sliding window stuck halfway open on a humid morning is one of the most common complaints Australian homeowners face with ageing aluminium frames. Whether it is a horizontal slider in the kitchen or a vertical sliding window in a bedroom, the underlying mechanics are similar: a panel rides on rollers along a track, and when either component fails, the whole system binds up. The good news is that sliding window repair rarely requires professional help. Most fixes take under an hour with the tools you have already gathered.
Cleaning and Restoring Clogged Window Tracks
Dirt, sand, cobwebs, and paint flakes accumulate in the aluminium sliding window track over months of normal use. In coastal areas or homes near busy roads, this buildup happens faster. A clogged track forces rollers to grind rather than glide, and the extra resistance makes the window feel jammed even when the rollers themselves are fine.
- Open the window fully and vacuum the entire track length using a crevice attachment. Pay attention to the corners where debris compacts.
- Scrub remaining grime with a stiff nylon brush dipped in warm water and mild detergent. An old toothbrush works well for the narrow channel edges.
- Wipe the track dry with a clean cloth. Inspect for dents or raised burrs in the aluminium — these can snag rollers and mimic a debris problem.
- Gently flatten any minor dents or burrs with a flat-head screwdriver or a small file, taking care not to widen the track channel.
- Apply a thin bead of silicone-based lubricant along the full track length. Slide the window back and forth several times to distribute it evenly, then wipe away excess with a rag.
This basic window track repair resolves the majority of sticking issues. If the window still resists after a thorough clean and lubrication, the rollers are the next place to look.
Replacing Worn Rollers and Adjusting Alignment
Rollers carry the full weight of the glass panel. Over years of use, nylon wheels crack, steel bearings seize, and the entire housing can flatten. Common signs of roller failure include grinding or scraping noises, a panel that feels uneven as it moves, or a window that no longer closes flush against the frame.
To repair sliding windows with worn rollers, follow this sequence:
- Open the sliding panel halfway. Lift it upward into the head track to clear the bottom rail, then tilt the base outward and lower the panel free. Place it on a padded surface — a towel on the floor works well.
- Locate the rollers on the underside of the panel. They sit in housings at each end of the bottom rail, typically secured by one or two Phillips-head screws.
- Remove the screws and slide the old roller assemblies out. If they resist, use a putty knife to gently lever them free.
- Take the old rollers to your hardware supplier to match the size, wheel diameter, and housing profile. Australian window profiles vary between manufacturers, so a physical match is more reliable than guessing from measurements alone.
- Insert the new rollers into the housing slots and secure with screws. Ensure the wheels spin freely before reinstalling the panel.
- Most replacement rollers include a height adjustment screw accessible from the face of the bottom rail. Use this to fine-tune the panel height so it sits level and engages the lock smoothly.
For vertical sliding window repair, the process is similar but the rollers (or spring balances) sit in the side channels rather than the bottom rail. Vertical sliders that drop or refuse to stay open usually need their balance mechanisms replaced rather than traditional rollers.
Reinstalling a Sliding Panel That Has Come Off Track
A panel that has jumped its track — common after a hard slam or when rollers collapse — looks dramatic but is straightforward to fix from inside the house.
- Grip the panel firmly on both sides. Lift it straight up as far as the head track allows.
- While holding it raised, swing the bottom edge inward to align the rollers with the bottom track channel.
- Lower the panel gently until the rollers seat into the track. You should feel them click or settle into the channel.
- Slide the panel back and forth to confirm it tracks smoothly. If it binds, lift and reseat — the rollers may not have dropped fully into the groove.
- Check the roller height adjustment. A panel that repeatedly jumps the track often has rollers set too low, leaving insufficient engagement with the rail.
If you need to fix a sliding window that keeps derailing despite correct roller height, inspect the track itself for bowing or warping. A bent track section can deflect the panel out of its channel under load. Minor bends can be straightened with a rubber mallet and a block of wood; severe distortion usually means the track section needs replacing.
Tracks and rollers handle the mechanical side of sliding window performance, but they are only part of the picture. Corrosion eating into the frame surface and degraded rubber seals letting moisture through represent a different category of failure — one that demands chemical treatment rather than mechanical adjustment.
Repairing Corrosion and Replacing Worn Seals
White powdery patches creeping across the frame. Tiny craters pitting the surface near the bottom rail. Rubber gaskets that have gone hard and brittle, pulling away from the channel. These are the signs that your aluminium window frame repair needs to go beyond mechanical fixes and into surface restoration and weatherproofing territory. Corrosion and seal failure often develop together — moisture sneaks past degraded seals, sits against the frame, and accelerates oxidation in a self-reinforcing cycle.
Treating Surface Oxidation and Pitting on Aluminium Frames
Aluminium does not rust like steel, but it does corrode. The white or grey powdery residue you see on old metal window frames is aluminium oxide — a porous layer that, left unchecked, allows moisture to penetrate deeper and cause pitting. Aluminium oxide is porous, meaning further corrosion can form beneath it over time, especially in moist or coastal environments.
Before treating, assess the severity. Light surface oxidation appears as a dull haze or fine white powder that wipes off partially with a damp cloth. Moderate oxidation shows a thicker chalky layer with slight roughness. Pitting — small craters visible to the naked eye — indicates advanced corrosion that has eaten into the metal itself.
For light to moderate oxidation, follow this process:
- Clean the frame thoroughly with warm water and mild detergent to remove dirt, salt deposits, and loose debris. Dry completely.
- Apply a phosphoric acid-based aluminium cleaner to the affected areas. These products convert the oxide without damaging the base metal. Follow the manufacturer’s dwell time — typically 3 to 5 minutes.
- Scrub gently with a fine abrasive pad (such as a grey Scotch-Brite pad) using even, linear strokes along the frame length. Avoid steel wool — it deposits iron particles that cause galvanic corrosion, making the problem far worse.
- Rinse thoroughly with clean water and dry with a microfibre cloth. Inspect the surface. Repeat steps 2 and 3 on stubborn areas if needed.
- Once the surface is clean and dry, apply a protective wax coating or a clear aluminium sealer. This creates a barrier against future moisture contact and slows re-oxidation significantly.
For frames with deep pitting, the process is the same but expectations differ. You can halt further deterioration and improve appearance, but pitting craters cannot be fully reversed without professional refinishing. Where pitting has abraded through the anodised or powder-coated finish, painting with an aluminium-compatible primer and topcoat is often the most practical long-term solution for residential windows frame repair.
Frames exposed to coastal salt air in areas like the Gold Coast, Wollongong, or Fremantle benefit from repeating this treatment annually. Inland properties in drier climates can typically stretch to every two or three years.
Replacing Rubber Seals and Gaskets for Better Weatherproofing
Corrosion treatment restores the frame surface, but it cannot fix the drafts and leaks caused by failed rubber seals. These gaskets — pressed into channels around the sash perimeter and glazing edges — are your window’s primary defence against water and air infiltration. UV exposure, thermal cycling, and simple age cause them to harden, shrink, and crack. As a general rule, weatherstripping should be replaced every 5 to 10 years, though harsh Australian sun on north-facing elevations can shorten that lifespan considerably.
Several seal types serve different functions within an aluminium frame:
- Wedge gaskets (glazing beads) — hold the glass pane within the frame. They press into a channel and grip the glass edge. Failure causes rattling and water ingress around the pane.
- Compression seals (bubble or bulb profiles) — sit between the sash and frame, compressing when the window closes to create an airtight barrier. Hardened or flattened compression seals are the primary cause of drafts.
- Fin seals (pile weatherstrip) — brush-like strips used in sliding window tracks to block air movement between panels. They wear down from repeated sliding contact.
- Foam tape (closed-cell sponge) — used as secondary sealing in fixed panels or as gap fillers where frame profiles meet the wall. Degrades faster than rubber but is inexpensive and simple to replace.
To replace a worn seal, start by pulling a small section of the existing gasket from its channel and measuring its cross-section dimensions — width, height, and the shape of the base that locks into the groove. Take this sample to a glazing supplier or specialist seal retailer. Australian aluminium window profiles vary between manufacturers and eras, so a physical match is essential. A seal that is even 1 mm too narrow will not grip the channel properly and will work itself loose within weeks.
Installation is straightforward. Clean the channel with rubbing alcohol to remove old residue, then press the new seal firmly into the groove starting at one corner and working continuously around the perimeter. A spline roller helps seat the gasket base fully into the channel without stretching the rubber. Avoid pulling the seal taut as you install it — slight slack prevents it from contracting out of the corners as temperatures change.
With corrosion halted and fresh seals in place, your frame is weathertight and protected. But what happens when the problem is not the frame or the seal — it is the glass itself? Cracked or broken panes within aluminium frames require their own careful approach.
How to Replace Window Glass in an Aluminium Frame
A cracked pane or shattered glass does not necessarily mean the entire window needs replacing. If your aluminium frame is structurally sound and free of severe corrosion, swapping the glass alone restores full function at a fraction of the cost. The process differs slightly between fixed panels and operable sashes, and between single-glazed and double-glazed units, but the core principles remain the same.
Safely Removing Broken Glass From Aluminium Frames
Broken glass demands respect. Even hairline cracks can release shards without warning, so proper protection is non-negotiable before you begin.
- Put on heavy-duty work gloves and safety goggles. Lay a drop cloth or old towel beneath the window to catch falling fragments.
- If the pane is cracked but still intact, apply masking tape in a cross-hatch pattern across the glass face. This holds pieces together during removal and reduces the chance of shards scattering.
- For operable sashes (sliding or casement panels), remove the sash from the frame first. Sliding panels lift up into the head track and tilt out at the base. Casement sashes typically detach by removing hinge pins or unscrewing the hinge leaves. Lay the sash flat on a padded surface.
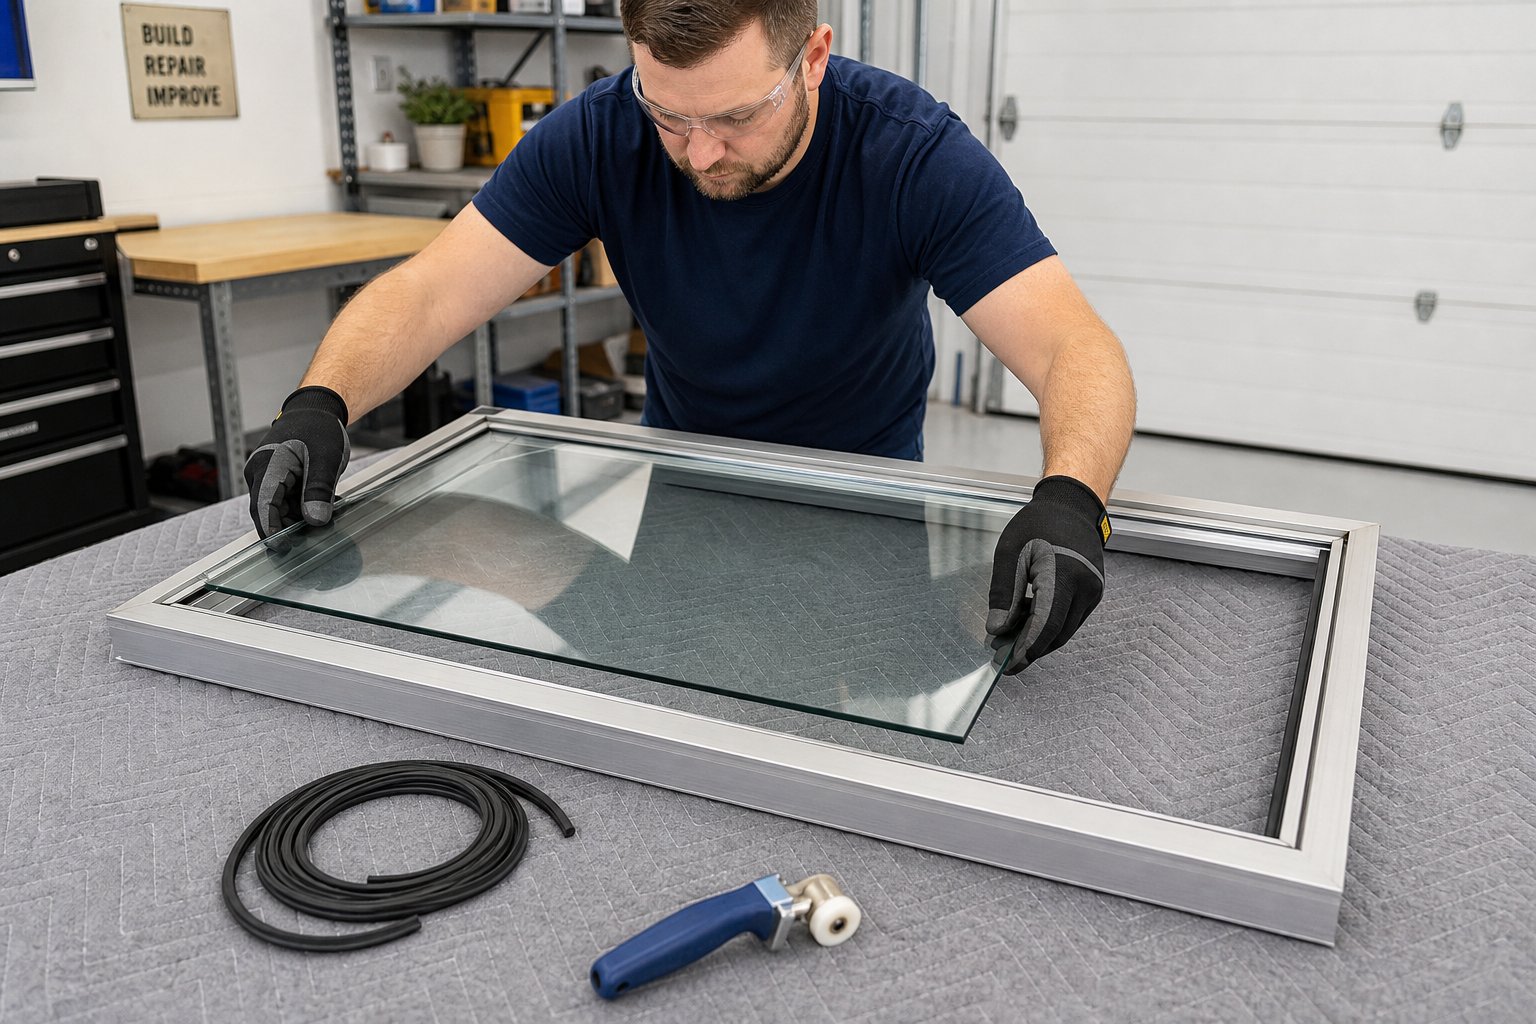
- Locate the rubber glazing bead — the flexible strip pressed into a channel around the glass perimeter. Use a putty knife or flat-head screwdriver to pry one corner free, then pull the bead out by hand along its full length. Work carefully; if the bead is still pliable, you can reuse it.
- With the glazing bead removed, the glass lifts out of the frame. For broken panes, rock each piece gently inward and remove section by section. Use suction cups on larger intact pieces for a controlled grip.
- Dispose of broken glass safely — wrap fragments in thick newspaper or cardboard before placing them in a sturdy bin.
Once the glass is out, clean the frame channel thoroughly. Scrape away old sealant residue with a putty knife, then wipe the groove with a cloth dampened in rubbing alcohol. A clean channel is essential for the new pane to seat properly and seal against moisture.
Measuring and Installing Replacement Glass Panes
Accurate measurement is the difference between a snug fit and a rattling pane. To replace window glass in an aluminium frame successfully, measure the internal rebate dimensions — not the old glass itself, which may have been cut slightly undersized.
- Measure the height and width of the frame opening at three points each (top, middle, bottom for width; left, centre, right for height). Take the smallest measurement in each direction.
- Subtract 3 mm from both the height and width. This clearance allows for thermal expansion and prevents the glass from binding against the aluminium as temperatures shift.
- Note the required glass thickness. Single-glazed aluminium windows in Australia typically use 4 mm or 5 mm float glass. If you are upgrading to toughened or laminated safety glass — required under NCC provisions for windows in wet areas, near doors, or below 800 mm from floor level — specify this when ordering.
- For double-glazed (IGU) replacements, record the overall unit thickness and the spacer width between panes. These units are factory-sealed and must be ordered to exact specifications — you cannot assemble them on site.
- Order your replacement glass from a local glazier. Bring your measurements and, if possible, a photo of the frame profile so they can confirm compatibility.
With the new pane in hand, installation follows a logical sequence. If you are learning how to replace glass in an aluminium window frame for the first time, take it slowly — rushing this stage risks cracking the new pane or creating an uneven seal.
- Run a thin bead of neutral-cure silicone sealant along the bottom of the frame channel. This cushions the glass and prevents water from pooling beneath it. Avoid acidic silicone — it corrodes aluminium over time.
- Set the glass into the frame, bottom edge first, then tilt it upright into position. Ensure even clearance on all sides. For larger panes, use suction cups and have a second person assist.
- Press the rubber glazing bead back into its channel around the full perimeter, starting at the bottom, then the top, then both sides. A spline roller helps seat it firmly without stretching the rubber.
- Apply a finishing bead of silicone sealant along the outer edge where the glazing bead meets the frame. Smooth it with a damp finger for a clean line.
- Allow the sealant to cure for at least 24 hours before operating the window or exposing it to water.
For fixed panes that cannot be removed from the wall, the same process applies in situ — you simply work from inside and outside rather than laying the frame flat. Use a stable step ladder and never lean against the frame while the glass is out.
Knowing how to replace window glass in an aluminium frame covers most single-glazed scenarios confidently. Double-glazed insulated glass units (IGUs), however, add complexity. These sealed units are heavier, more fragile during handling, and require precise thickness matching to fit the existing frame rebate. Large IGU panes — anything over roughly 1.5 m² — become difficult to manoeuvre safely without professional equipment. Similarly, windows on upper storeys or in hard-to-reach positions introduce fall risks that outweigh any cost savings from a DIY approach.
A successful reglazing job restores your window’s integrity, but it also raises a broader question. If you are replacing glass in frames that already show significant corrosion, failed seals, and worn hardware, at what point does continued repair stop making financial sense compared to a full frame replacement?
Deciding Whether to Repair or Replace Your Aluminium Frames
Spending $150 on new rollers for a sliding window that also has corroded tracks, failed seals, and single-glazed panels starts to feel like patching a sinking boat. At some point, cumulative repair costs overtake the price of a complete aluminium window frame replacement — and the new unit delivers better thermal performance, smoother operation, and decades of low-maintenance service. The challenge is knowing exactly where that tipping point sits for your situation.
When Repair Makes Sense and When It Does Not
Repair remains the smart choice when the frame itself is structurally sound and the issue is isolated. A casement window with a stiff hinge, an awning window leaking from a single degraded gasket, or a slider that just needs fresh rollers — these are targeted fixes that cost relatively little and restore full function. If your frames are powder-coated, free of pitting, and the corners remain tight and square, there is plenty of life left in them.
Repair stops making sense when problems stack up. A frame showing moderate-to-severe pitting, corner joint separation, and hardened seals throughout is telling you it has reached the end of its practical service life. Older profiles manufactured in the 1970s and 1980s often lack thermal breaks entirely, meaning even a perfectly repaired frame still conducts heat and cold straight through the aluminium. You can replace every seal and roller, but you cannot retrofit thermal break technology into a continuous aluminium extrusion.
Parts availability adds another layer. Discontinued profiles from older manufacturers make sourcing matching rollers, gaskets, and hardware increasingly difficult. If you cannot find the correct replacement components to fit aluminium windows of a particular era, improvised substitutes rarely perform as well or last as long.
Factors That Tip the Decision Toward Replacement
Several criteria help clarify the repair-or-replace decision across all window types — sliding, casement, awning, and fixed alike. The table below compares the two paths across the factors that matter most to Australian homeowners.
| Criteria | Repair | Replace |
|---|---|---|
| Typical cost per window (AUD) | $80 – $400 | $600 – $1,800+ |
| Expected lifespan extension | 3 – 8 years depending on frame condition | 25 – 40 years with modern thermally broken frames |
| Energy efficiency improvement | Minimal — seals reduce drafts but frame conductivity unchanged | Significant — thermally broken profiles with double glazing dramatically cut heat transfer |
| Disruption level | Low — most repairs completed in under an hour per window | Moderate — removal, installation, and resealing typically take half a day per opening |
| Compliance with current standards | No change to existing performance rating | New windows can meet current NCC and WERS requirements |
Cost alone does not tell the full story. A $300 repair on a frame that needs another $300 fix the following year quickly approaches the price of a new window that will not need attention for decades. Aluminium windows typically last 15 to 30 years, so frames approaching or exceeding that age range with multiple symptoms are generally better candidates for replacement than ongoing patchwork.
Thermal performance deserves particular weight in the Australian climate. Old single-glazed aluminium frames without thermal breaks offer almost no insulation — heat pours through them in summer and escapes in winter, driving up energy bills year-round. Modern thermally broken aluminium systems with double glazing deliver a step-change in comfort that no amount of seal replacement can replicate.
If you decide to replace aluminium windows rather than continue repairing them, the process involves more than picking a product off a shelf. Frame openings need accurate measurement, profiles must suit your climate zone and any BAL or cyclone ratings applicable to your area, and the new units need to integrate with existing wall flashings. Working with a project-capable aluminium window partner who handles system recommendations, material calculations, and manufacturing coordination simplifies what can otherwise become a complex renovation task. For homeowners exploring how to replace sliding windows or upgrade casement and awning units, MEICHEN’s services page outlines the support available — from custom sizing and profile selection through to delivery planning.
Whether you repair or replace, the frames you keep deserve ongoing care. A simple preventive maintenance routine extends the life of both repaired originals and brand-new installations — reducing the chance you will face this same decision again prematurely.
Preventive Maintenance to Keep Aluminium Frames in Top Shape
Repairs fix what has already gone wrong. Maintenance stops problems from developing in the first place. A structured routine adds years to your aluminium frames — whether they are freshly repaired originals or brand-new thermally broken installations. Well-maintained aluminium windows can deliver 40 to 50 years of reliable service, compared to as few as 15 years when neglected. The effort involved is minimal: a few minutes each month and a slightly deeper check each season.
Seasonal Maintenance Checklist for Aluminium Frames
Not every task needs doing every week. Spacing your maintenance by frequency keeps the workload manageable while catching issues before they escalate. Use this schedule as a baseline for sliding aluminium windows, casement, awning, and fixed panels alike.
Monthly
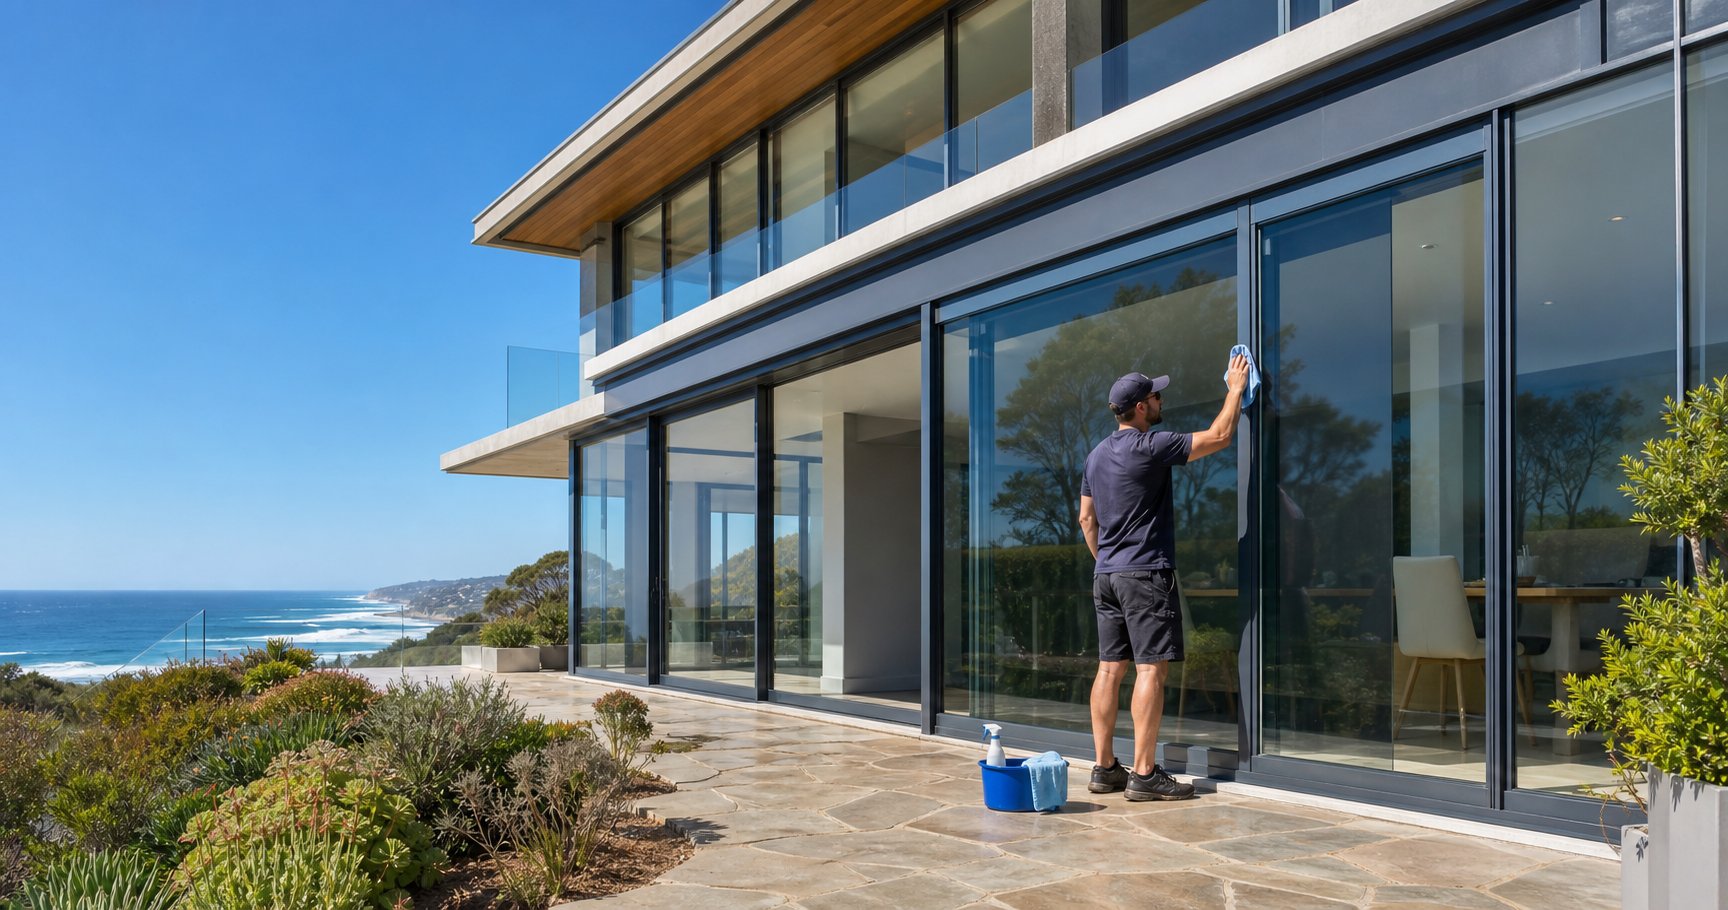
- Wipe frame surfaces with a soft cloth and mild pH-neutral detergent mixed in warm water. This removes salt, dust, and pollutant deposits before they trigger oxidation.
- Vacuum window tracks with a crevice attachment to clear grit, sand, and insect debris that cause roller wear on sliding aluminum windows.
- Rinse drainage weep holes at the sill with a quick spray of water to confirm they flow freely. A blocked weep hole is the single fastest path to frame flooding and hidden corrosion.
Quarterly
- Operate every window fully — open, close, lock. Note any new stiffness, grinding, or incomplete latch engagement that signals early hardware wear.
- Inspect perimeter sealant beads for cracking, peeling, or separation from the wall or frame. Small gaps caught early are simple to reseal; ignored gaps invite water behind the frame.
- Check double-glazed units for condensation between panes. Fogging confirms a failed edge seal and means the IGU needs replacement — no maintenance step can reverse it.
- Look at gasket corners where rubber meets rubber. Corner joints are the first point of seal failure and the earliest indicator that full gasket replacement is approaching.
Annually
- Lubricate all moving hardware — hinges, friction stays, locking mechanisms, and sliding aluminum window tracks — with a silicone-based dry lubricant. Clean components with a dry cloth first; applying lubricant over grime creates an abrasive paste that accelerates wear.
- Inspect frame surfaces for early oxidation (white chalking or dullness). Treat any spots immediately with a fine abrasive pad and protective wax before pitting develops.
- Test rubber seals by pressing them with a fingertip. Healthy seals spring back; hardened seals that hold the indent or show surface cracking need replacing before the next wet season.
- Tighten any loose screws on handles, hinges, and lock strike plates. Thermal cycling loosens fasteners gradually over the year.
- Reapply a protective silicone coating or quality aluminium wax to exposed frame surfaces, particularly on north and west-facing elevations that cop the most UV and weather.
Extra Care for Coastal and High-Humidity Environments
Homes within a few kilometres of the ocean or in tropical regions like Far North Queensland face accelerated degradation from salt-laden air and persistent moisture. The baseline schedule above is not enough for these environments — frequency needs to increase.
For coastal properties, shift monthly cleaning to fortnightly during summer and storm season when salt spray intensifies. Industry data shows hardware lifespan in corrosion-prone environments drops to the lower end of its expected range without this enhanced attention. Quarterly hardware inspections become monthly visual checks — corrosion on hinges and locking points can progress rapidly once the protective finish is breached.
High-humidity areas demand extra vigilance around drainage. Weep holes in these climates should be cleared monthly rather than just checked, as mould and algae growth can block them faster than dry-climate dust accumulation. After heavy rain events or king tides, do a quick walk-around inspection of all window frames at ground level — water staining or damp patches on interior sills reveal drainage failures that need immediate attention.
Powder-coated frames hold up better than standard anodised finishes in salt air, but they still benefit from regular fresh-water rinsing. A garden hose run over external frame surfaces once a fortnight washes away salt crystals before they concentrate and attack the coating.
During routine maintenance, you may discover components that need replacing — a roller that has worn flat, a gasket profile no longer available at the local hardware store, or a frame section where corrosion has progressed beyond what surface treatment can address. For readers sourcing replacement parts, profiles, or planning a broader upgrade suited to their specific climate zone, a supplier with project support capabilities can identify correct components and recommend systems matched to your environment. MEICHEN’s services page is a useful starting point for sourcing profiles or coordinating future window projects where custom sizing or specialist specifications are involved.
Consistent maintenance is the cheapest investment you can make in your home’s comfort and energy efficiency. A few minutes each month, a slightly deeper check each quarter, and one thorough annual inspection keep your aluminium frames operating smoothly for decades — and keep you well clear of the repair-or-replace decision for as long as possible.
Frequently Asked Questions About Fixing Aluminium Window Frames
1. How do I fix an aluminium sliding window that is stuck or hard to open?
Start by vacuuming the track with a crevice attachment to remove compacted dirt, sand, and debris. Scrub remaining grime with a nylon brush and mild detergent, then dry thoroughly. Inspect the track for dents or burrs and flatten them gently with a flat-head screwdriver. Apply silicone-based lubricant along the full track length and slide the panel back and forth to distribute it. If the window still sticks after cleaning, the rollers likely need replacing — look for cracked nylon wheels, seized bearings, or flattened housings on the underside of the panel.
2. Can you repair corroded aluminium window frames or do they need replacing?
Light to moderate surface oxidation (white powdery residue or chalky buildup) can be treated at home using a phosphoric acid-based aluminium cleaner and a fine abrasive pad like grey Scotch-Brite. After cleaning, apply a protective wax or clear aluminium sealer to prevent re-oxidation. Deep pitting that has eaten craters into the metal can be halted but not fully reversed without professional refinishing. If corrosion is widespread, corners have separated, or the frame is structurally compromised, replacement becomes the more cost-effective long-term option. A project-capable supplier like MEICHEN can help with custom sizing and system recommendations through their services page.
3. How often should I maintain my aluminium window frames?
For standard inland environments, clean frame surfaces and vacuum tracks monthly, perform a full hardware and seal inspection quarterly, and complete a thorough lubrication and protective coating application annually. Coastal properties within a few kilometres of the ocean should increase cleaning to fortnightly during summer and storm season, with monthly hardware inspections rather than quarterly. Weep holes in high-humidity areas need monthly clearing rather than just visual checks. Well-maintained aluminium windows can last 40 to 50 years, compared to as few as 15 years when neglected.
4. How do I replace glass in an aluminium window frame myself?
Remove the sash from the frame, then pry out the rubber glazing bead using a putty knife. Lift the broken glass out carefully while wearing heavy gloves and safety goggles. Clean the frame channel of old sealant residue. Measure the internal rebate at three points for both height and width, take the smallest measurement, and subtract 3 mm from each dimension for thermal expansion clearance. Apply neutral-cure silicone along the bottom channel, set the new pane in place, reinstall the glazing bead with a spline roller, and seal the outer edge. Allow 24 hours for curing before operating the window.
5. When should I replace aluminium window frames instead of repairing them?
Replacement makes more sense when multiple issues stack up simultaneously — moderate-to-severe pitting, corner joint separation, hardened seals throughout, and worn hardware. Frames older than 20 to 30 years without thermal breaks offer poor insulation regardless of repair quality, and discontinued profiles make sourcing correct replacement parts increasingly difficult. If cumulative repair costs approach $400 to $600 per window and the frame still underperforms thermally, investing in modern thermally broken aluminium with double glazing delivers better comfort, energy savings, and a 25 to 40 year lifespan.
More Window & Door Guides