Why Powder-Coated Aluminium Frames Need a Different Cleaning Approach
Most people grab whatever spray bottle is under the sink and go to town on their window frames. That works fine on bare metal or glass, but powder-coated aluminium plays by different rules. The finish sitting on your frames isn’t paint in the traditional sense. It’s a baked-on resin layer, electrostatically applied and cured at high temperatures to form a tough protective shell over the aluminium beneath. Treat it like raw metal and you risk cracking, dulling, or stripping the very barrier that keeps your frames looking sharp and corrosion-free.
Understanding how to clean powder coated aluminium window frames properly isn’t just about aesthetics. It’s protective maintenance that directly affects how long your frames last before needing professional recoating or replacement.
Why Powder-Coated Frames Need Special Care
Powder coating is air permeable. Over time, atmospheric pollutants settle on the surface, and if left unchecked, they can etch into the finish and accelerate colour fade. Harsh chemicals compound the problem. Bleach, ammonia, and alkaline degreasers attack the resin binder, while abrasive pads create micro-scratches that trap dirt and moisture against the aluminium substrate. Once that protective layer is compromised, oxidisation creeps in underneath and the coating begins to lift.
What Makes Powder Coating Different From Other Finishes
Unlike anodising, which grows an oxide layer into the aluminium itself, powder coating sits on top of the metal as a separate thermoset film, typically 50 to 150 microns thick. It resists impact and UV exposure well, but it’s softer than an anodised surface and far more sensitive to chemical attack. That distinction matters because cleaning products safe for anodised aluminium can damage powder coat, and vice versa.
Gentle pH-neutral cleaning preserves the coating’s integrity and colour for decades. Aggressive products might deliver a short-term shine, but they shorten the life of the finish with every application.
The best way to maintain powder coated window frames is a consistent, gentle routine using the right tools and solutions. The steps ahead cover everything from gathering supplies and inspecting for damage through to deep cleaning, mould removal, and long-term protection, so you can keep your frames performing without accidentally ruining them in the process.

Step 1 – Gather the Right Tools and Prepare Your Cleaning Solution
Getting the cleaning solution ratio for powder coated surfaces wrong is where most damage starts. Too concentrated and you’re chemically attacking the resin binder. Too abrasive and you’re grinding micro-scratches into the finish. The good news is that the correct setup is simple and inexpensive, and you probably already own most of what you need.
Essential Tools and Supplies Checklist
Soft materials are the non-negotiable here. Anything that could scratch automotive clear coat will scratch powder coating, so think car-wash gentle. Gather the following before you start:
- Two or three soft microfibre cloths (one for washing, one for rinsing, one for drying)
- A non-abrasive sponge without a scouring side
- A soft-bristle brush (natural bristle or soft nylon) for drainage tracks and corners
- A clean bucket
- A garden hose with a gentle spray nozzle, or a spray bottle for upper-storey frames
- A chamois or lint-free drying cloth to prevent water spots
Avoid anything marketed as “heavy duty” or “industrial strength.” If the sponge has a green or dark scouring pad bonded to one side, cut it off or use a different sponge entirely.
Safe Cleaning Solutions and Dilution Ratios
The best soap for cleaning powder coated window frames is a standard pH-neutral dish detergent, the kind you’d use for hand-washing dishes. The critical detail most guides skip is the dilution ratio. You need far less soap than you think:
Recommended mix: 1 teaspoon (5 mL) of pH-neutral dish soap per 1 litre of lukewarm water at 20–30°C.
That’s it. The water should feel barely warm to the touch. Temperatures above 25°C can soften some coatings slightly during cleaning, so staying in the lower range is safer, particularly on dark-coloured frames that absorb heat in direct sun. For automotive wash solutions designed for clear coats, follow the manufacturer’s dilution instructions, as these are formulated to be gentle on resin-based finishes and work well on powder coat too.
If you’re wondering what cleaning products are safe for powder coated aluminium beyond dish soap, pH-neutral detergents specifically labelled for painted or coated surfaces are your safest bet. Always check the pH value on the label. You want something sitting at or very close to pH 7.
Products That Will Damage Powder Coating
This is where people unknowingly destroy their frames. Products to avoid on powder coated aluminium include anything strongly acidic, strongly alkaline, or physically abrasive. Harsh chemicals such as bleach, ammonia, strong acids, alkaline detergents, and solvents like ketones or halogenated hydrocarbons can permanently damage the finish. Aggressive solvents including turpentine, white spirits, and citrus-based cleaners should also be kept well away from your frames.
| Product Type | Safe for Powder Coat | Risk Level |
|---|---|---|
| pH-neutral dish soap (diluted) | Yes | None |
| Automotive clear-coat wash | Yes | None |
| Isopropyl alcohol (spot use, rinsed immediately) | Yes (limited use) | Low |
| Bleach / sodium hypochlorite | No | High – attacks resin binder |
| Ammonia-based cleaners | No | High – dulls and discolours finish |
| Alkaline degreasers | No | High – strips coating over time |
| Acidic bathroom/tile cleaners | No | High – etches surface |
| Steel wool or abrasive pads | No | High – scratches permanently |
| Citrus-based solvents | No | Medium-High – softens resin |
| Sunscreen residue | No (avoid contact) | Medium – can stain and degrade finish |
A useful rule of thumb: if you wouldn’t use it on your car’s paintwork, don’t use it on your powder-coated frames. Both finishes rely on a resin-based protective layer, and both respond poorly to chemical shortcuts.
With your bucket mixed and your soft cloths ready, the next step is knowing what you’re actually looking at on those frames, because not every mark is simple dirt, and scrubbing the wrong spot can make things considerably worse.
Step 2 – Inspect Your Frames and Identify Dirt vs Damage
A dark smudge on your frame might be nothing more than accumulated dust. Or it might be mould rooted into a micro-crack in the coating. A white haze could be mineral deposits from hard water, or it could be the powder coat itself breaking down. The distinction matters because scrubbing a damaged area with even a soft cloth pushes moisture and contaminants deeper into the breach, exposing bare aluminium to the elements and accelerating corrosion beneath the intact film surface. Take two minutes to inspect aluminium window frames before cleaning, and you’ll avoid turning a minor issue into an expensive repair.
How to Spot Surface Dirt vs Coating Damage
Surface dirt sits on top of the finish. It wipes away easily with a damp cloth and doesn’t leave a mark behind. Coating damage, on the other hand, is part of the finish itself failing. Here’s how to tell if powder coating is damaged on window frames: look for raised edges where the coating is lifting away from the metal, small chips revealing a different colour or bare aluminium underneath, or fine cracks running across the surface. These defects often start at edges and corners where the original powder film is thinnest. If you spot any of these, that area needs gentle treatment only — no pressure, no scrubbing.
Run through this quick inspection sequence before you pick up a cloth:
- Visual scan for chips and peeling — Check edges, corners, and any areas exposed to direct weather. Look for raised flakes or spots where the colour appears different from the surrounding finish.
- Finger-wipe test for chalking — Run a dry finger firmly across a flat section of the frame. If a fine powdery residue transfers onto your skin, the coating is chalking.
- Check drainage channels for trapped moisture — Standing water in tracks and weep holes accelerates both mould growth and substrate corrosion. Clear any blockages you find.
- Inspect rubber seals for mould growth — Black or green spots along gaskets and weatherstrips indicate mould that may have spread onto the adjacent frame surface.
Signs of Oxidation and Chalking on Older Frames
Chalking is one of the most misunderstood issues homeowners encounter. That powder coated aluminium chalking white residue isn’t dirt — it’s the resin binder in the coating breaking down, typically from prolonged UV exposure. The binders degrade under ultraviolet radiation, releasing pigment particles as a fine powder on the surface. South and west-facing frames cop the worst of it in Australia, and you’ll often notice patchy fading on sun-exposed sections while shaded areas of the same frame still look fresh.
Light chalking on older frames is normal and doesn’t necessarily mean the coating has failed. You can still clean these frames safely using the gentle methods covered in the next steps. Heavy chalking — where the colour has noticeably faded and the residue is thick — suggests the coating is nearing end of life and may benefit from a protective wax treatment or professional assessment rather than aggressive cleaning.
When to Stop Cleaning and Seek Professional Help
Certain signs of corrosion on aluminium window frames tell you the problem has moved beyond what cleaning can address. White powdery deposits appearing beneath bubbling or flaking coating indicate the aluminium substrate itself is oxidising. Pitting — small craters in the metal surface — means material has already been lost. If you notice the frame flexing under light pressure, or if corrosion covers more than a small isolated spot, stop cleaning that area immediately. Scrubbing corroded sections only removes more of the protective layer and speeds up the damage.
For isolated chips smaller than a few millimetres, a touch-up paint pen can seal the exposed metal until you arrange a proper repair. Anything more widespread warrants a professional inspection to determine whether recoating or replacement makes better long-term sense.
With your frames inspected and any damage noted, you’re ready to move into the actual cleaning process — starting with the routine wash that keeps frames in good shape between deeper treatments.
Step 3 – Perform a Routine Light Clean
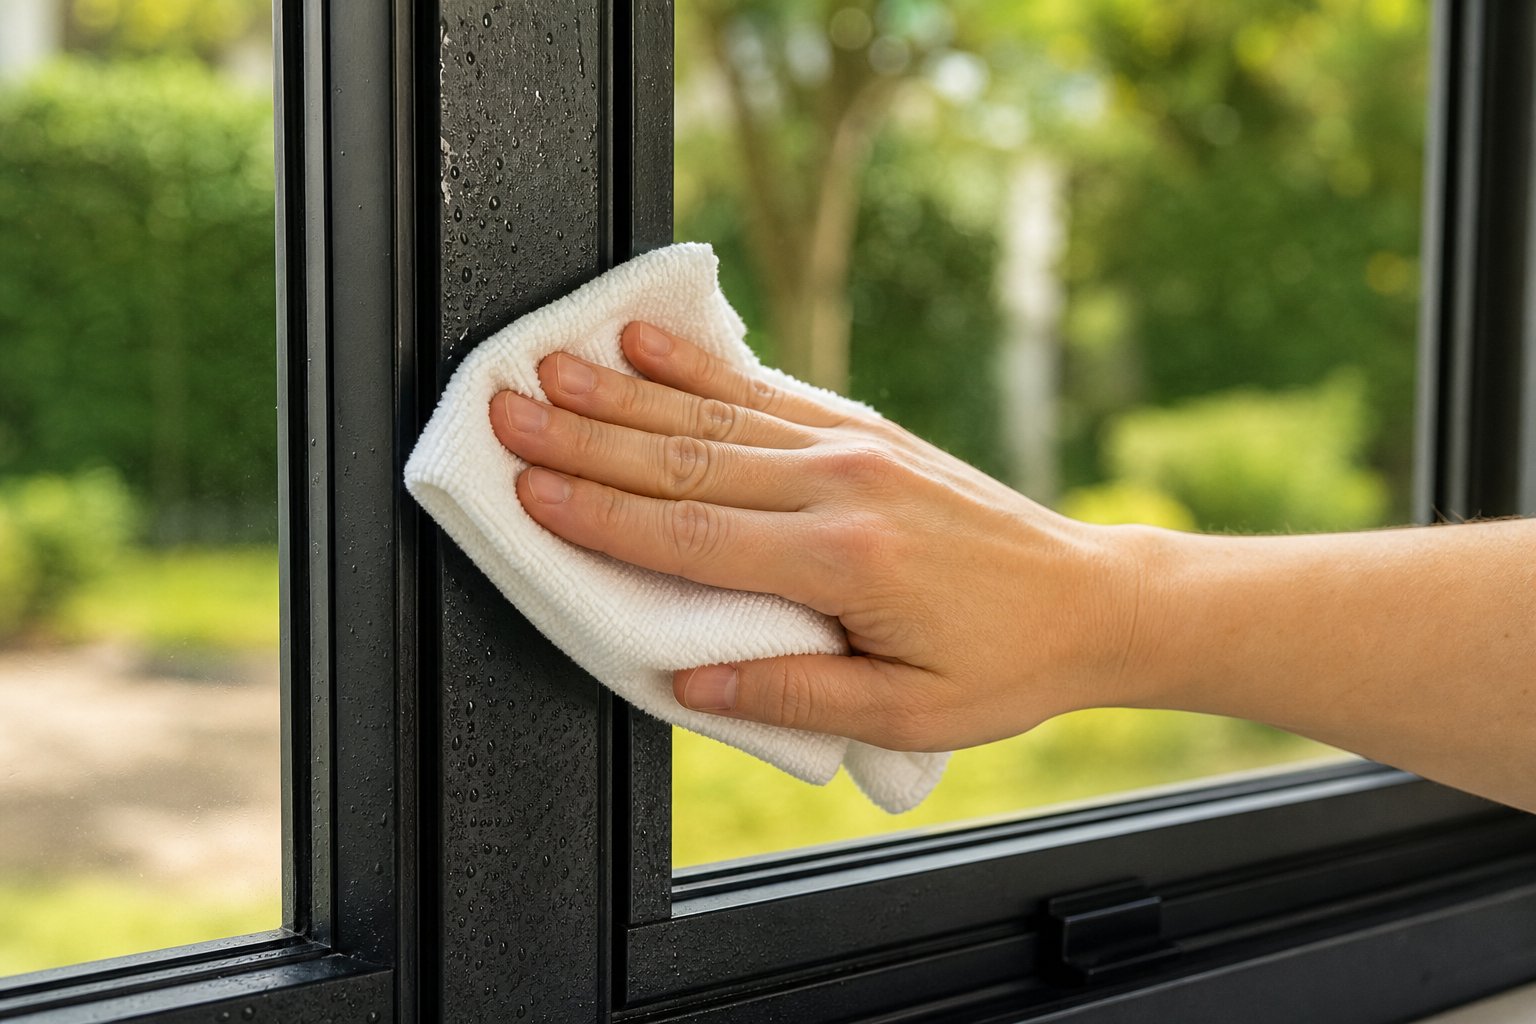
Routine cleaning steps for aluminium window frames don’t need to be complicated. A light wash every one to three months keeps surface grime from bonding to the finish and prevents the kind of buildup that eventually requires aggressive scrubbing. The key is sequence. Get the order wrong and you’ll drag grit across the surface, leaving fine scratches that trap dirt and dull the finish over time.
Always pre-rinse your frames with plain water before any cloth touches the surface. This floats away sand, dust, and abrasive particles that would otherwise act like sandpaper under your cleaning cloth.
The Correct Washing Sequence From Top to Bottom
Gravity is your friend here. Working downward means dirty water doesn’t run over sections you’ve already cleaned. Follow these steps in order:
- Pre-rinse with plain water — Use a garden hose on a gentle spray setting or a spray bottle to wet the entire frame. Focus on corners and horizontal ledges where grit accumulates. Let the water carry loose particles away before you touch anything.
- Apply the soap solution with a soft cloth — Dip your microfibre cloth into the diluted mix (1 teaspoon of pH-neutral soap per litre of lukewarm water) and wring it so it’s damp, not dripping. Wipe in gentle circular motions, starting at the top of the frame and working down each side.
- Clean tracks and corners with a soft brush — Use your soft-bristle brush to work soap into drainage channels and tight corners where the cloth can’t reach. Keep the pressure light.
- Rinse thoroughly with clean water — Go over the entire frame again with fresh water, ensuring no soap residue remains. Soap left to dry on powder coating can leave a filmy haze that attracts dirt faster than a clean surface would.
- Dry with a chamois or lint-free cloth — Wipe down all surfaces immediately after rinsing. This is how you prevent water spots on powder coated window frames, especially in areas with hard water where mineral deposits form as droplets evaporate.
The whole process takes roughly ten minutes per window. If you’re cleaning multiple frames, rinse and dry each one before moving to the next rather than soaping them all at once. Soap drying on the surface in warm weather is one of the most common causes of streaking.
Techniques That Prevent Scratching and Water Spots
Knowing how to wash powder coated aluminium windows without scratching comes down to two principles: remove grit before contact, and keep your cloth clean. Rinse or swap your microfibre cloth frequently during the wash. A cloth loaded with particles from the first frame will scratch the second one. Circular motions distribute pressure evenly and avoid the linear scratches that catch light and become visible at certain angles.
For drying, work in straight overlapping strokes rather than buffing back and forth. A quality chamois absorbs water on the first pass without needing repeated pressure. If you notice water beading unevenly — some areas sheeting off while others hold droplets — that’s a sign the coating in those spots may be chalking or losing its surface tension, worth noting for your next inspection.
Common Mistakes That Dull the Finish Over Time
The single most damaging habit is reaching for a pressure washer. Can you use a pressure washer on powder coated aluminium? The short answer is no. Standard consumer units operate at 2,000 to 4,000 PSI — far beyond what any coated surface can safely handle. Even at lower settings, the concentrated jet can force water behind rubber seals and into the frame cavity, leading to hidden moisture damage and eventual corrosion from the inside out. High-pressure washers can force water into seals and joints, causing potential damage to both frames and operating mechanisms. Stick to a gentle hose spray or hand-rinsing.
Other common mistakes include cleaning in direct midday sun (the solution evaporates too fast, leaving residue), using the same bucket of water for an entire house (you’re just redistributing grit by the third window), and skipping the drying step because the frames “will air dry.” They will — but they’ll air dry with mineral spots baked on by the sun.
A consistent light clean every few weeks prevents most problems. But frames that have gone six months or longer without attention, or those dealing with stubborn stains like bird droppings and tree sap, need a different level of treatment altogether.
Step 4 – Deep Clean Neglected or Heavily Soiled Frames
Frames that haven’t been touched in six months or more develop a different kind of grime. Surface dust compresses into a bonded film. Bird droppings bake on under UV exposure and become acidic enough to etch the coating. Tree sap polymerises into a sticky resin that resists a simple wipe-down. Construction dust — particularly from render, concrete, or brick cutting — contains calcium and silica particles that embed into the finish. A standard light clean won’t shift any of this, and scrubbing harder with the same mild solution just risks scratching the surface without actually lifting the deposit.
Deep cleaning neglected aluminium window frames requires a shift in strategy: instead of mechanical force, you use dwell time. Let the solution do the work.
How to Tackle Stubborn Stains Without Abrasives
The soak-and-soften approach is your safest path to removing bonded contaminants. Apply your cleaning solution generously to the affected area and let it sit for two to three minutes before touching it with a cloth. This dwell period allows the surfactants in the soap to penetrate beneath the deposit and break its bond with the coating surface. After soaking, wipe gently with a soft microfibre cloth. Most deposits will lift away without pressure.
For spots that resist the initial soak, increase your soap concentration slightly — up to 2 teaspoons (10 mL) per litre of lukewarm water — and switch to a non-abrasive nylon brush. Work in small circular motions with minimal downward pressure. The nylon bristles are soft enough to avoid scratching the powder coat but firm enough to dislodge stubborn residue that a flat cloth can’t grip.
Different contaminants respond to slightly different treatments:
- Bird droppings — Soak with the standard soap solution for 3 minutes to rehydrate the deposit. Once softened, wipe away gently. Never scrape dried droppings with a fingernail or blade, as the uric acid in bird waste is corrosive enough to mark the finish if dragged across it. To remove bird droppings from powder coated windows safely, patience and moisture are your only tools.
- Tree sap — Apply a slightly warmer soap solution (closer to 30°C) and let it dwell for 3–5 minutes. Warmth helps soften polymerised sap. For particularly stubborn spots, a small amount of isopropyl alcohol on a microfibre cloth can dissolve the sap — dab rather than rub, and rinse the area with clean water immediately after. To clean tree sap off powder coated aluminium frames, avoid citrus-based solvents, which soften the resin binder in the coating itself.
- Construction residue — Cement splatter and render dust are alkaline and can etch powder coat if left in place. Soak thoroughly with your soap solution, let it dwell, then use the nylon brush to gently lift particles. Never use a scraper or razor blade. If residue remains after two soak-and-wipe cycles, consult a professional rather than escalating to harsher methods.
- Hard water mineral deposits — These appear as white or chalky spots where water has repeatedly dried on the surface, particularly common in areas with bore water or high calcium content in the mains supply.
Safe Approach for Hard Water and Mineral Deposits
Mineral scale bonds tightly to powder-coated surfaces and won’t budge with soap alone. The solution is a brief application of diluted white vinegar — but timing is critical. To remove hard water stains from powder coated aluminium, mix a 50/50 solution of white vinegar and water in a spray bottle. Spray it directly onto the mineral deposit, wait no longer than 60 seconds, then wipe away with a damp cloth and rinse the entire area thoroughly with clean water.
That 60-second limit isn’t arbitrary. White vinegar sits at roughly pH 2.5, and even diluted to 50% it remains acidic enough to begin attacking the resin binder if left in prolonged contact. This is the maximum acidity that’s safe for powder coat under controlled, brief exposure. Never leave vinegar solution to air-dry on the surface, and never use it undiluted. If the mineral deposit doesn’t clear after one application, repeat the process rather than extending the dwell time.
Cleaning Drainage Tracks and Hidden Channels
While you’re deep cleaning the visible frame surfaces, take the opportunity to clear out the drainage tracks and weep holes at the base of each window. These channels are designed to direct condensation and rainwater away from the frame cavity, but they collect debris remarkably fast — dead insects, leaf litter, fine dust, and even mould. A blocked drainage channel traps moisture against the aluminium, creating the perfect conditions for corrosion to develop beneath the coating where you can’t see it.
Use your soft-bristle brush or a cotton bud to clear each weep hole. Flush the tracks with clean water from a spray bottle and confirm that water flows freely out the drainage points. If a channel is heavily clogged, a plastic toothpick or the blunt end of a bamboo skewer can dislodge compacted debris without scratching the powder-coated track surface.
Deep cleaning addresses the visible contamination, but one specific problem — mould — requires its own targeted approach because the products most people reach for will do more harm than the mould itself.
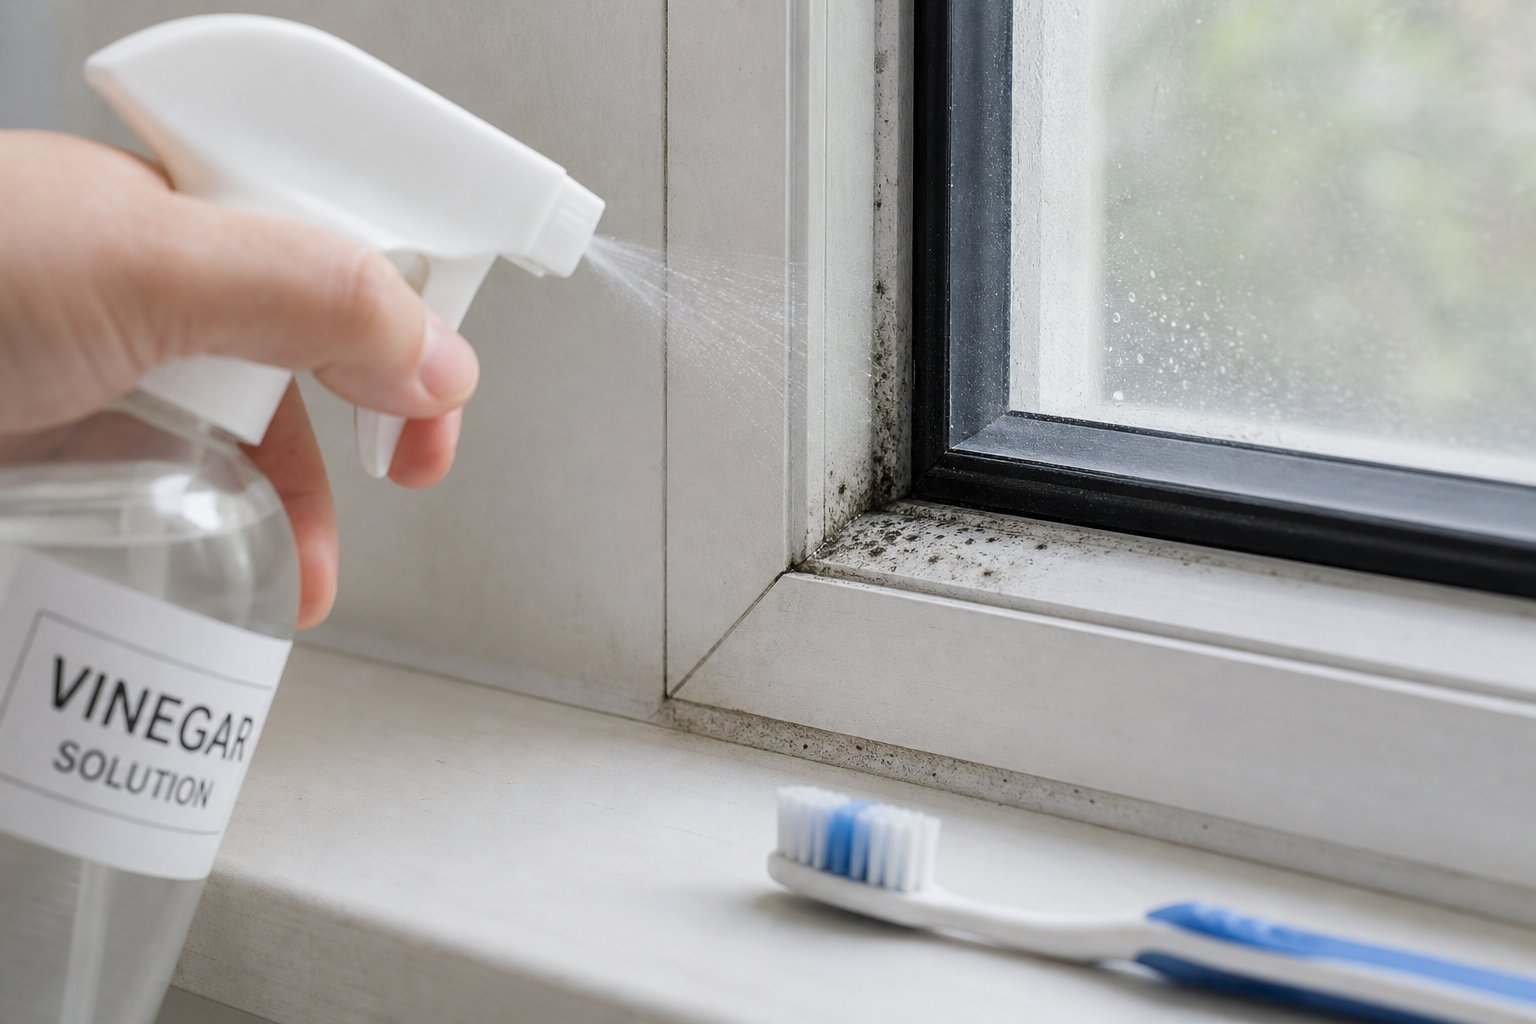
Step 5 – Remove Mould Safely From Powder-Coated Surfaces
Mould thrives wherever moisture lingers, and aluminium window frames offer plenty of opportunity — drainage tracks, rubber gaskets, shaded bottom rails, and corners where condensation collects overnight. The instinct is to reach for a dedicated mould remover from the cleaning aisle. The problem is that most of those products will strip your powder coating faster than the mould ever could.
Why Standard Mould Removers Damage Powder Coating
The active ingredient in the majority of household mould removers is sodium hypochlorite — the same compound found in bleach. Others rely on strong acids like hydrochloric or phosphoric acid to dissolve organic growth. Both attack the thermoset resin binder that holds the powder coat together. Will bleach damage powder coated aluminium? Absolutely. Sodium hypochlorite breaks down the polymer chains in the resin, causing the finish to become chalky, discoloured, and brittle. Repeated exposure leads to cracking and peeling, exposing the aluminium substrate to moisture and salt — exactly the conditions the coating was designed to prevent.
Strong acids, alkalis, and solvents all compromise the integrity of powder-coated finishes. Even a single application of a chlorine-based mould spray can leave a visible bleached patch on darker-coloured frames. The damage is cumulative and irreversible — you can’t polish it back.
A Powder-Coat-Safe Mould Treatment Method
A safe mould cleaner for powder coated surfaces doesn’t need to be harsh to be effective. Mould is a surface organism on non-porous coatings, meaning it sits on top of the finish rather than rooting into it. A mild acid combined with gentle mechanical action is enough to kill and remove it without touching the resin layer beneath.
Here’s how to remove mould from powder coated aluminium window frames using a vinegar-based solution:
- Mix the solution — Combine 1 part white vinegar with 4 parts water in a spray bottle. This brings the acidity to a level that kills mould spores without threatening the coating.
- Spray the affected area — Apply generously to all visible mould, including along rubber seals and into drainage track edges.
- Let it dwell for 5 minutes — The acetic acid needs time to penetrate the mould structure and kill the root system on the surface.
- Scrub gently with a soft brush — Use a soft-bristle nylon brush or an old soft toothbrush. Work in small circular motions without heavy pressure.
- Rinse thoroughly with clean water — Remove all vinegar residue. Don’t let it sit beyond the 5-minute dwell period.
- Dry the area completely — Wipe down with a clean cloth. Residual moisture invites the mould straight back.
For persistent mould that survives the vinegar treatment, sodium percarbonate (oxygen-based bleach) offers a stronger alternative without the risks of chlorine. When dissolved in warm water, it releases oxygen that lifts and kills mould spores. Mix approximately 15 g (1 tablespoon) per litre of warm water, apply to the mouldy area, let it work for 10 minutes, then scrub lightly and rinse. Unlike chlorine bleach, sodium percarbonate breaks down into water, oxygen, and soda ash — none of which attack the powder coat binder.
| Method | Powder Coat Safety | Effectiveness | Notes |
|---|---|---|---|
| Chlorine bleach (sodium hypochlorite) | Unsafe — degrades resin binder | High | Causes discolouration, chalking, and peeling over time |
| Acidic mould removers (hydrochloric/phosphoric acid) | Unsafe — etches finish | High | Can cause irreversible surface damage in seconds |
| White vinegar solution (1:4 with water) | Safe — mild acidity, brief contact | Moderate | Effective for light to moderate mould; rinse within 5 minutes |
| Sodium percarbonate (oxygen bleach) | Safe — pH-neutral breakdown products | High | Best option for stubborn mould; no toxic residue |
| pH-neutral soap only | Safe | Low | Removes surface mould but doesn’t kill spores |
Preventing Mould From Returning
Killing existing mould is only half the job. If the conditions that encouraged growth remain unchanged, it’ll return within weeks. To prevent mould on aluminium window frames long-term, focus on eliminating the moisture that feeds it:
- Keep drainage channels clear — Blocked weep holes trap water against the frame. Check and clear them during every routine clean.
- Reduce moisture traps — Trim back vegetation that sits against frames and restricts airflow. Overhanging plants create shade and hold humidity right where mould wants it.
- Improve ventilation — In bathrooms and kitchens, run exhaust fans during and after moisture-generating activities. Condensation on interior frame surfaces is a direct mould invitation.
- Address condensation at the source — If your frames consistently fog up on the inside, the issue is indoor humidity rather than the frames themselves. A dehumidifier or improved ventilation strategy will do more than any cleaning routine.
Australian coastal and subtropical climates — particularly in Queensland, northern NSW, and the Top End — create year-round conditions that favour mould growth on exterior frames. In these regions, a monthly visual check of seals and drainage points catches problems early, before mould establishes a visible colony that requires treatment.
Mould management is reactive by nature. A smarter long-term strategy is building a cleaning schedule around your specific environment, so contaminants never get the chance to take hold in the first place.
Step 6 – Set a Cleaning Schedule Based on Your Environment
Your location dictates how fast contaminants accumulate on your frames — and how much damage they can do between cleans. A home in suburban Melbourne faces a completely different threat profile than a beachfront property on the Sunshine Coast or a rural homestead west of Dubbo. The best maintenance frequency for powder coated aluminium isn’t a single number. It depends on what’s landing on your frames every day.
| Environment | Cleaning Frequency | Primary Contaminants | Key Focus Areas |
|---|---|---|---|
| Coastal (within 1 km of shoreline) | Every 4–6 weeks | Salt spray, sand, marine moisture | Salt residue removal, weep hole clearance, pitting prevention |
| Coastal (1–5 km from shoreline) | Every 6–8 weeks | Airborne salt, humidity, wind-driven sand | Salt film on horizontal surfaces, seal condition |
| Urban / Suburban | Every 2–3 months | Pollution film, brake dust, acid rain deposits | Dark residue on sills, drainage tracks, discolouration |
| Industrial areas | Every 6–8 weeks | Chemical fallout, soot, oil-based particulates | Bonded film on all surfaces, accelerated chalking |
| Rural / Semi-rural | Every 3–4 months | Pollen, dust, insect residue, bird droppings | Organic buildup in corners, staining from droppings |
Coastal Homes and Salt Spray Exposure
Salt is the single greatest threat to aluminium longevity. Chloride ions in airborne salt spray overwhelm the natural oxide layer on any exposed aluminium and cause visible pitting within weeks if the protective coating is compromised. Powder coating provides an excellent barrier, but only while it remains intact. Salt deposits left sitting on the surface gradually degrade the resin binder, creating micro-entry points for moisture to reach the substrate beneath.
How often to clean aluminium window frames near the coast depends on your exact distance from the water. Properties within a kilometre of the shoreline — common across Sydney’s eastern suburbs, the Gold Coast, Perth’s coastal strip, and anywhere along the Great Ocean Road — need a full clean every four to six weeks. Significant airborne chloride deposits have been measured more than 80 kilometres inland from the coast, so even homes a few streets back aren’t immune.
Between full cleans, a quick fresh-water rinse every week or two makes a substantial difference. This doesn’t need to be a full wash — simply hosing down the frames with clean water for 30 seconds per window displaces accumulated salt before it has time to attack the finish. Think of it as salt damage prevention for aluminium window frames at its most basic: dilute and remove the chloride before it does its work.
Pay particular attention to horizontal surfaces, drainage tracks, and any concave sections that hold moisture. Fabricated aluminium that holds moisture and prevents drainage creates prolonged exposure to salinised solutions that accelerate corrosion. Blocked weep holes in coastal environments aren’t just a mould risk — they’re a structural one.
Urban Properties and Pollution Buildup
City and suburban homes face a slower but persistent assault. Vehicle exhaust, industrial emissions, brake dust, and acid rain leave a fine greasy film on frame surfaces that bonds more tightly over time. You’ll notice it as a dark residue on lighter-coloured frames, particularly on sills and the bottom rail where particles settle.
A cleaning schedule for powder coated windows in urban areas should target every two to three months. Properties near major roads, train lines, or industrial zones may need to push closer to the six-to-eight-week mark, especially in high atmospheric pollution environments. The pollution film itself isn’t immediately corrosive like salt, but it traps moisture against the coating and creates an acidic micro-environment as rain dissolves the particulates. Left unchecked for months, this etches the surface and accelerates colour fade.
Focus your urban cleans on horizontal surfaces where fallout accumulates, and check for any discolouration developing on south-facing frames that receive less direct sun and stay damp longer after rain.
Rural Settings and Seasonal Pollen
Rural and semi-rural properties generally have the lightest contamination load, making a three-to-four-month cycle sufficient for most of the year. The main culprits are pollen (particularly during spring), agricultural dust, insect residue, and bird droppings from species that perch on frames and sills.
The exception is during harvest season or nearby land clearing, when airborne dust levels spike dramatically. Fine soil particles carried on the wind act like a mild abrasive if you wipe them across the coating without pre-rinsing. During dusty periods, a quick hose-down every couple of weeks — the same approach coastal homeowners use for salt — prevents grit from bonding to the surface.
Pollen is mildly acidic and can stain lighter-coloured powder coatings if left in contact for extended periods. A routine clean at the end of the spring pollen season catches this before it becomes a permanent mark. Bird droppings, as covered in the deep-cleaning section, should be removed as soon as you notice them regardless of your scheduled cleaning cycle — their uric acid content makes them a spot-damage risk at any time of year.
Sticking to a schedule matched to your environment keeps contaminants from ever reaching the point where aggressive intervention is needed. But cleaning alone doesn’t add protection — it only removes threats. The next step is actively reinforcing the coating’s defences so it holds up longer between cleans and resists UV degradation over the years ahead.
Step 7 – Protect and Extend Your Powder Coat Finish
Cleaning removes what’s attacking the coating. Protection adds a layer that absorbs the punishment before it ever reaches the finish itself. Think of it like sunscreen for your frames — a sacrificial barrier that takes the UV hit, repels moisture, and buys the powder coat underneath more years of service.
Applying Protective Wax to Extend Coating Life
The best wax for powder coated window frames is an automotive-grade liquid wax — the same type you’d use on a car’s clear coat. Look for a non-abrasive, silicone-free formula with UV inhibitors. Compound-type waxes contain cutting agents that will dull the finish, so avoid anything labelled “cut and polish” or “rubbing compound.” A pure carnauba or synthetic polymer sealant is what you want.
Application is straightforward:
- Clean and dry the frames completely using the routine method covered earlier.
- Apply a thin, even layer of liquid wax to the frame surface using a soft microfibre cloth.
- Allow it to haze for the time specified on the product (usually 5–10 minutes).
- Buff off gently with a clean, dry microfibre cloth.
One or two applications per year is sufficient for most environments. Coastal properties benefit from waxing every six months, timed after a thorough clean at the start and middle of the year. The wax layer acts as a sacrificial UV and moisture barrier — it degrades instead of the powder coat, and you simply reapply it at the next service. This is one of the simplest ways to protect powder coated aluminium from UV damage without any specialist equipment.
A thin layer of high-grade non-abrasive wax maintains gloss and provides ongoing protection, particularly for surfaces exposed to direct sunlight and weather.
Addressing Early Chalking Before It Worsens
If your finger-wipe test reveals light chalking — that fine powdery residue transferring onto your skin — the coating isn’t necessarily finished. Early-stage chalking means the outermost layer of resin has degraded under UV exposure, releasing pigment particles. The bulk of the coating beneath may still be perfectly sound.
To address it, use a non-abrasive polish designed for painted or clear-coated automotive surfaces. These products contain micro-fine fillers that smooth the degraded surface layer and restore some of the original sheen without cutting into the intact coating below. Apply with a soft cloth in gentle circular motions, then buff off and follow immediately with a wax application to seal and protect the refreshed surface.
This treatment won’t reverse heavy chalking or restore severely faded colour, but it can buy several more years of service life on frames showing the first signs of UV wear. How long does powder coating last on aluminium windows? With consistent cleaning and periodic wax protection, a quality powder coat finish holds up for 15 to 25 years before recoating becomes necessary. Modern aluminium windows with marine-grade powder coating regularly exceed 30 years of total frame life when properly maintained.
How Quality Frames and Coatings Make Maintenance Easier
Not all powder coatings are created equal. Budget coating processes use thinner film builds, fewer pre-treatment stages, and lower-grade resins that break down faster under Australian UV intensity. Premium systems apply multi-stage chemical pre-treatments to the aluminium substrate before coating, ensuring superior adhesion and corrosion resistance from day one. The result is a finish that responds better to cleaning, resists chalking longer, and holds its colour through years of sun exposure.
This is where your choice of window system matters as much as your maintenance routine. Well-engineered powder-coated aluminium windows built with durable finishes and diverse colour options reduce long-term maintenance effort considerably. Frames that start with a superior coating process tolerate more cleaning cycles, shed contaminants more readily, and extend the life of the powder coated aluminium finish well beyond what cheaper alternatives can manage. When you’re planning a build or renovation, factoring in coating quality alongside thermal performance and glazing options pays dividends in reduced upkeep for decades to come.
Protection and quality framing handle the long game. But there comes a point — particularly with older installations — where no amount of wax or careful cleaning can reverse what time and exposure have done to the finish.
Step 8 – Know When to Call a Professional or Upgrade
Sometimes the damage goes deeper than what a microfibre cloth and vinegar solution can fix. Frames that have endured 15 or 20 years of Australian sun, salt, and storm cycles eventually reach a tipping point where cleaning becomes cosmetic at best and counterproductive at worst. Recognising that threshold early saves you from pouring effort into a finish that’s already failed — and helps you make a clear-headed decision about whether professional powder coat repair for aluminium windows or full replacement delivers better value.
Signs Your Frames Need Professional Attention
A few isolated chips or light surface chalking don’t necessarily mean the coating is done. Those are maintenance issues you can manage with touch-up pens and protective wax. But certain signs of powder coating failure on window frames indicate the protective system has broken down beyond what DIY methods can restore:
- Widespread peeling or flaking — When the coating lifts away from the substrate in sheets or large flakes across multiple sections of the frame, the adhesion between resin and metal has failed. Cleaning these areas only accelerates the delamination.
- Deep pitting or white powdery corrosion beneath the finish — Pitting means aluminium has already been lost. White powdery deposits forming under bubbling coating indicate active oxidation of the substrate, and no surface treatment will reverse material loss.
- Persistent staining unresponsive to safe cleaning methods — If you’ve followed the deep-cleaning process twice and stains remain, the discolouration has likely penetrated the resin layer itself. Further scrubbing risks thinning the coating without improving appearance.
- Significant colour fade or heavy chalking across entire frames — When the finger-wipe test produces thick residue and the original colour is barely recognisable, the UV degradation has consumed most of the resin binder. Wax can’t protect what’s already broken down.
- Frames older than 15–20 years with visible deterioration on multiple surfaces — Age alone isn’t the issue, but age combined with visible decline across most of the frame surface tells you the coating has reached end of life.
- Rubber seals cracked, hardened, or pulling away from the frame — Failed seals allow moisture behind the coating, accelerating hidden corrosion that cleaning can never address.
If you’re seeing three or more of these signs across your window frames, it’s time to stop cleaning and start evaluating your options.
Re-Coating vs Replacing Your Window Frames
The decision between recoating vs replacing aluminium windows comes down to structural condition, total cost, and how many more years you need from the frames.
Professional re-coating involves stripping the old finish, treating the aluminium substrate, and applying a fresh powder coat layer. It’s a viable option when the frames themselves are structurally sound — no warping, no deep corrosion, no compromised joints. Restoration can often be completed for 30–50% of the cost of full replacement, making it financially attractive for frames in good structural shape that simply need a cosmetic and protective refresh.
For small chips and scratches — anything under a few millimetres — a colour-matched touch-up paint pen seals the exposed aluminium and prevents moisture ingress until your next scheduled maintenance. These are available from most powder coating suppliers in standard RAL and Colorbond colours. Clean the chip with isopropyl alcohol, apply a thin layer, and allow 24 hours to cure before exposing to weather.
However, re-coating has limits. The process requires removing the frames from the building, transporting them to a coating facility, and reinstalling them — which adds labour costs and leaves your openings exposed during the turnaround. If the frames need re-coating every 8–10 years due to harsh coastal or industrial exposure, the cumulative cost of repeated restorations can approach or exceed the price of new windows within two cycles.
When to replace powder coated aluminium window frames rather than recoat becomes clearer when you consider these scenarios:
- The aluminium substrate shows deep pitting or structural corrosion that compromises frame integrity
- Frames are warped, bent, or no longer seal properly against weatherstrips
- The window hardware (hinges, locks, rollers) is obsolete and replacement parts are unavailable
- Current frames don’t meet modern energy efficiency or safety standards under the National Construction Code (NCC)
- Restoration costs approach 70–80% of new window pricing — at that point, you’re paying nearly full price for a system with an older structural life behind it
- You’re planning a major renovation where new windows add resale value and allow upgraded glazing performance
In Australia, a standard aluminium window replacement ranges from $500 to $1,500 per unit for supply and install, with custom or high-performance systems exceeding $2,000. Multiply that across an entire home and the figures become significant — but so does the return in thermal performance, security, noise reduction, and decades of maintenance-free service from a fresh coating system.
Choosing Durable Frames for Easier Future Maintenance
If your assessment points toward replacement, the quality of the new system determines how much maintenance you’ll face over the next 20-plus years. Not all aluminium windows are equal in this regard. Cheaper systems with thin powder coat film builds and minimal pre-treatment degrade faster under Australian conditions, putting you back in the same position sooner.
When evaluating new frames, look for:
- Multi-stage chemical pre-treatment of the aluminium before coating (chromate or chrome-free conversion coatings that improve adhesion and corrosion resistance)
- Powder coat film thickness of 60–120 microns for exterior-exposed surfaces
- Compliance with AS 3715 for metal finishing or equivalent quality certification
- Thermally broken profiles if energy performance matters for your climate zone
- Colour options backed by UV-stable resins rated for Australian solar exposure
For homeowners whose frames are beyond cleaning and restoration, upgrading to modern powder-coated aluminium windows with custom colour options, advanced glazing choices, and project support for residential, apartment, and commercial applications provides a genuine fresh start. Frames engineered for low-maintenance longevity — with superior coating processes and proper drainage design — hold up to cleaning cycles and environmental exposure far better than budget alternatives, reducing the frequency and effort of every maintenance task covered in this guide.
Whether you recoat or replace, the underlying principle remains the same: invest in quality protection now, maintain it with the gentle methods outlined in the steps above, and your powder-coated aluminium frames will reward you with decades of service before the question arises again.
Frequently Asked Questions About Cleaning Powder-Coated Aluminium Window Frames
1. What is the best cleaning solution for powder coated aluminium window frames?
The safest and most effective cleaning solution is 1 teaspoon (5 mL) of pH-neutral dish soap mixed into 1 litre of lukewarm water between 20 and 30 degrees Celsius. Automotive clear-coat wash products also work well because they are formulated for resin-based finishes. Avoid bleach, ammonia, alkaline degreasers, acidic bathroom cleaners, and citrus-based solvents, as these attack the resin binder in the powder coat and cause permanent damage including discolouration, chalking, and peeling.
2. How often should you clean powder coated aluminium windows?
Cleaning frequency depends on your environment. Coastal properties within 1 kilometre of the shoreline need a full clean every 4 to 6 weeks due to salt spray exposure, with fresh-water rinses in between. Urban and suburban homes should clean every 2 to 3 months to remove pollution film and acid rain deposits. Rural properties can stretch to every 3 to 4 months unless pollen or dust levels are high. Properties near industrial zones should follow a 6 to 8 week schedule. Between full cleans, a quick hose-down with fresh water helps prevent contaminant buildup.
3. Will bleach or pressure washers damage powder coated aluminium?
Yes, both cause significant damage. Bleach contains sodium hypochlorite, which breaks down the polymer chains in the powder coat resin binder, leading to chalking, discolouration, brittleness, and eventual peeling. Even a single application can leave visible bleached patches on darker frames. Pressure washers operate at 2,000 to 4,000 PSI, which is far too intense for coated surfaces. The concentrated jet can force water behind rubber seals and into the frame cavity, causing hidden moisture damage and corrosion from the inside out. Use a gentle garden hose spray instead.
4. How do you remove mould from powder coated window frames safely?
Mix 1 part white vinegar with 4 parts water in a spray bottle. Spray the mouldy area generously, let it dwell for 5 minutes, then scrub gently with a soft-bristle nylon brush or old toothbrush. Rinse thoroughly with clean water and dry completely. For stubborn mould that survives vinegar treatment, use sodium percarbonate (oxygen-based bleach) at 1 tablespoon per litre of warm water. Apply for 10 minutes, scrub lightly, and rinse. Unlike chlorine bleach, sodium percarbonate breaks down into water, oxygen, and soda ash, which are all safe for powder-coated finishes.
5. How long does powder coating last on aluminium windows and when should you replace them?
With consistent cleaning and periodic wax protection, quality powder coat finishes last 15 to 25 years before recoating is needed. Marine-grade coatings on premium aluminium windows can exceed 30 years of total frame life. Signs that frames need professional attention or replacement include widespread peeling or flaking, deep pitting or white corrosion beneath the finish, heavy chalking with significant colour fade, and cracked or hardened rubber seals. If restoration costs approach 70 to 80 percent of new window pricing, upgrading to modern powder-coated aluminium windows with superior coating processes often provides better long-term value.
More Window & Door Guides