Step 1 – Assess Your Frame Type and Damage Level
That chalky residue on your old aluminium window frames is telling you something specific. Grab a cloth and rub a small section. Does the white powder transfer easily? Does the surface feel gritty, smooth, or pitted? The answers determine which revival method will actually work, because treating anodised aluminium the same way you’d treat a powder-coated frame is a fast track to making things worse.
Identify Your Frame Type Before You Start
Australian homes typically feature one of three aluminium frame finishes, and each responds differently to cleaning, polishing, and recoating. Here’s how to tell them apart:
Anodised aluminium window frames have a hard, metallic appearance where the underlying grain or brushed texture remains visible through the finish. The surface feels smooth and integrated with the metal itself rather than sitting on top like a separate layer. Anodising is a conversion process that thickens the natural oxide layer, so it won’t peel in sheets the way paint does. If you see dulling or fading without flaking, you’re likely looking at an anodised finish.
Powder-coated aluminium windows carry a thicker, more uniform coating that softens fine details around edges and corners. The finish often appears as a solid, opaque colour layer. When damaged, powder coat tends to chip or crack as a distinct shell, sometimes revealing bare metal underneath. Most aluminium frame windows installed in Australian homes from the 1990s onward use powder-coated finishes.
Mill finish (bare aluminium) has a raw, natural silver appearance with visible die lines, minor surface marks, and less uniformity than either anodised or coated frames. It oxidises more readily because there’s no protective treatment beyond the thin natural oxide layer that forms on exposure to air.
Assess Damage Severity: From Surface Haze to Deep Pitting
Misidentifying the severity of deterioration leads to wasted effort or, worse, permanent damage to frames that only needed gentle treatment. Use this three-level classification to match your frames to the correct restoration approach:
- Level 1 – Light chalking and fading: A white haze or dull appearance that transfers onto a cloth when rubbed. Colour looks washed out but the surface remains smooth to the touch. No visible pitting or coating failure.
- Level 2 – Visible oxidation and white powdery residue: Heavier white or grey deposits that don’t wipe away easily. Surface feels rough in patches. Staining or discolouration is evident, particularly around joints and water run-off areas.
- Level 3 – Pitting, flaking coating, and structural corrosion: Small craters or pockmarks visible on the surface. Coating is lifting, bubbling, or peeling away from the metal. Corrosion has progressed beyond the surface layer, and frames may feel structurally compromised at thin sections.
Each level demands a fundamentally different approach. Level 1 responds well to mild cleaning and polishing. Level 2 requires abrasive compounds or chemical treatment. Level 3 often needs professional intervention or recoating to achieve a lasting result. Skipping this assessment step is the single most common reason DIY frame restoration fails or causes additional harm.
The type of finish and the depth of damage together form your restoration roadmap. They dictate which products are safe to use, how aggressively you can work the surface, and whether polishing alone will suffice or repainting becomes necessary.
Step 2 – Understand Why Your Frames Deteriorated
Knowing what went wrong matters just as much as knowing how to fix it. The damage pattern on your oxidized windows didn’t appear randomly. It’s the result of a specific chemical process driven by your local environment, and understanding that process helps you choose the right revival method rather than guessing.
How Aluminium Oxide Forms and Why It Spreads
Fresh aluminium reacts with oxygen almost instantly, forming an ultra-thin protective film of aluminium oxide (Al₂O₃). This passive layer is remarkably thin — typically just 5 to 10 nanometres on untreated surfaces — yet it acts as a self-healing shield. Scratch it lightly, and it reforms within moments as long as oxygen is present.
The problem starts when environmental stressors overwhelm this natural defence. Chloride ions from salt air, acidic pollutants, or prolonged moisture exposure penetrate the oxide film at weak points — grain boundaries, micro-scratches, or areas where coatings have thinned. Once breached, the exposed aluminium beneath reacts aggressively with moisture and oxygen, producing the white powdery residue you recognise as aluminium window corrosion. That chalky buildup isn’t just cosmetic. It signals active degradation spreading outward from each breach point.
The oxide layer remains stable in near-neutral pH conditions (roughly pH 5 to 9), but strong acids, alkalis, or aggressive ions destabilise it rapidly. This is why certain cleaning products accelerate the very window corrosion you’re trying to fix.
How Climate and Location Accelerate Frame Damage
Your geographic location largely dictates which type of deterioration your frames develop. A home in coastal Queensland faces entirely different stressors than one in suburban Melbourne or an industrial area of Western Sydney. Each environment leaves a distinct signature on an oxidized window frame.
Chloride from ocean spray has been detected more than 80 kilometres from the shoreline, meaning coastal corrosion risk extends well beyond beachfront properties. Industrial pollutants like sulphur oxides and nitrogen oxides combine with dew or fog to create acidic films on exposed metal surfaces, while high UV exposure degrades protective coatings from the outside in.
| Environment Type | Typical Damage Pattern | Revival Priority |
|---|---|---|
| Coastal (within 5 km of ocean) | Rapid pitting, white salt deposits, coating undercut | High — act within weeks of first signs |
| High UV (north-facing, tropical regions) | Coating chalking, colour fade, surface brittleness | Moderate — seasonal attention |
| Industrial or urban | Dull film, localised staining, acidic etching near joints | Moderate — semi-annual cleaning |
| Humid or poorly ventilated | Persistent moisture staining, crevice corrosion in tracks | Moderate-high — improve drainage first |
Matching your environment to the correct damage pattern tells you whether you’re dealing with chemical attack, UV breakdown, or moisture-driven corrosion. That distinction shapes every product choice and technique in the steps ahead — starting with assembling the right tools and materials for your specific situation.
Step 3 – Gather Your Tools and Materials
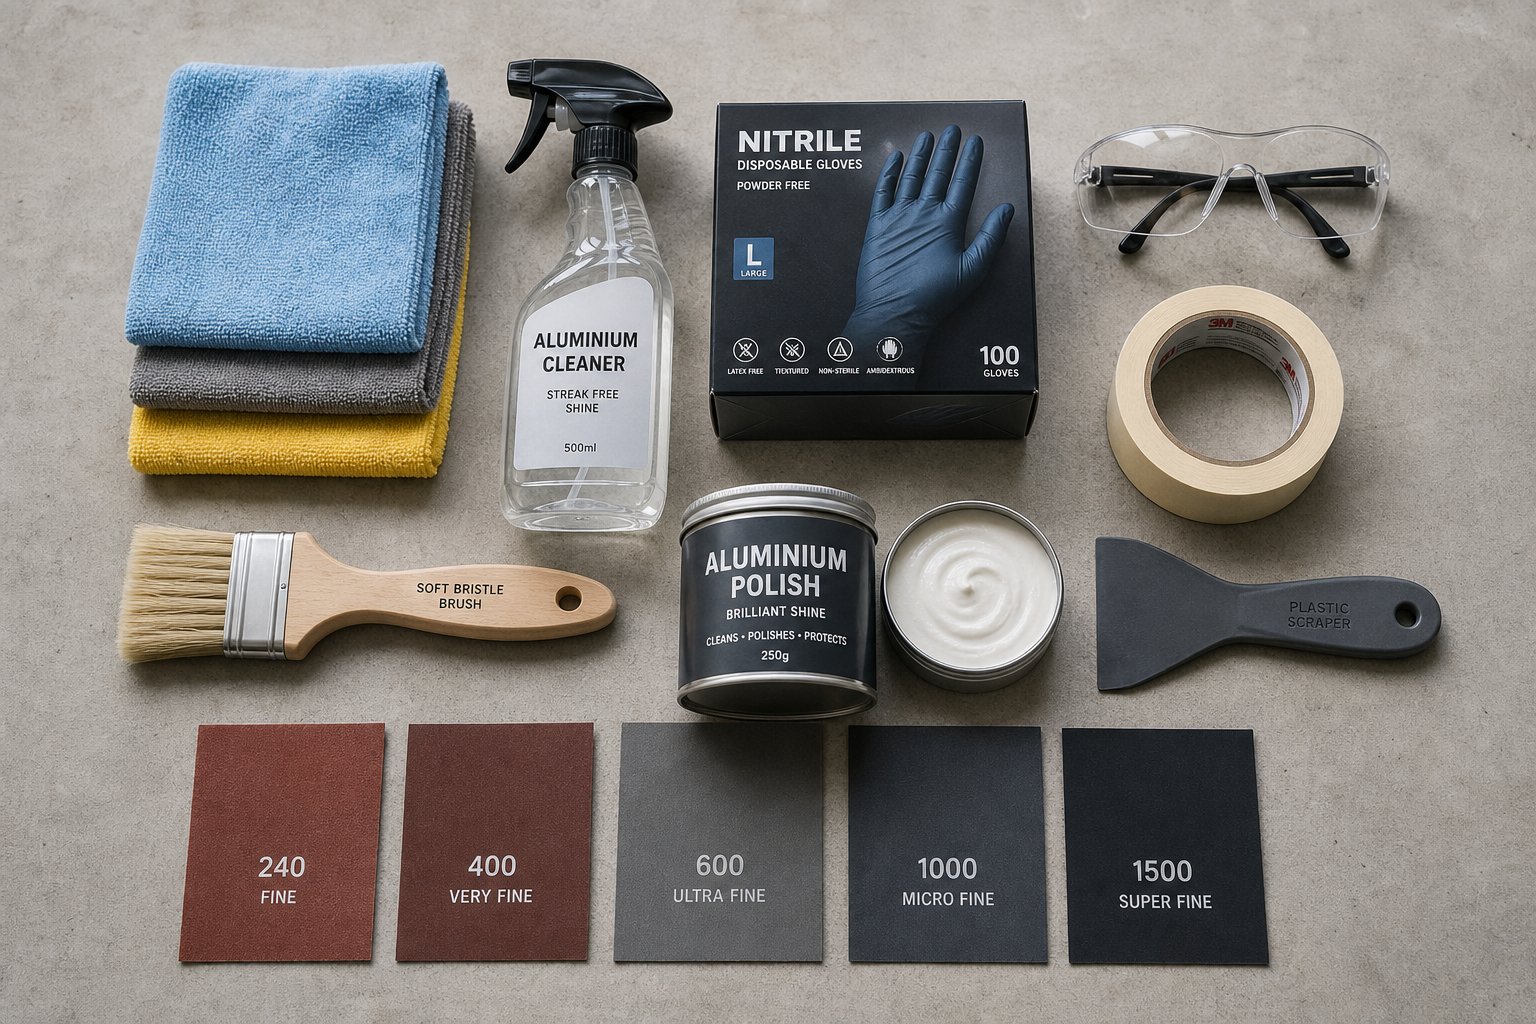
A half-finished restoration stalled by a missing product is frustrating and risky. Leaving partially treated aluminium exposed overnight invites fresh oxidation into surfaces you’ve just stripped bare. The solution is simple: assemble everything before you touch a single frame. The list below covers a standard five-window project and accounts for the frame type and damage level you identified earlier.
Essential Cleaning and Preparation Supplies
Regardless of whether you’re restoring aluminium on a coastal Queenslander or a suburban brick veneer in Melbourne, the cleaning phase requires the same core kit. Quantities here assume five average-sized windows (roughly 1200 mm x 1500 mm each).
- Non-abrasive aluminium window frame cleaner — 1 litre minimum. Look for pH-neutral formulations (pH 6–8) that won’t attack anodised layers or strip powder coat. Avoid anything labelled “heavy duty” or containing sodium hydroxide.
- Microfibre cloths — 8 to 10 cloths. Dedicate separate cloths to cleaning, rinsing, and polishing stages. A 300 GSM weight provides good dirt pickup without scratching.
- Plastic scrapers — 2 scrapers (one narrow, one wide). These remove caked-on grime and old sealant residue without gouging the aluminium surface the way metal blades do.
- Soft-bristle brush — 1 brush with nylon or natural bristles for dislodging dry debris from corners, tracks, and drainage slots before wet cleaning begins.
- Painter’s masking tape — 2 rolls of quality low-tack tape (such as 3M Blue or equivalent). Use it to protect glass, rubber seals, and adjacent wall surfaces from cleaners, abrasives, and primer overspray.
- Drop cloths or plastic sheeting — enough to cover the sill area and roughly 600 mm of wall below each window. Chemical drips and polish residue stain rendered surfaces permanently.
- Bucket and garden hose — for mixing cleaning solutions and rinsing. Avoid pressure washers; the concentrated jet damages aluminium finishes and forces water behind seals.
- Nitrile gloves and safety glasses — 2 pairs of each. Even mild cleaning products irritate skin over a full day’s work, and splashback during rinsing catches you off guard.
Polishing and Restoration Products to Look For
Restoring aluminium to a consistent sheen requires more than a generic metal polish from the automotive aisle. The products you choose need specific properties matched to exterior window frames rather than car trim or cookware.
When selecting a metal polish, pay attention to three characteristics:
- Cut level — Polishes range from fine (finishing) to coarse (cutting). Light chalking (Level 1 damage) needs a fine-cut polish only. Moderate oxidation (Level 2) calls for a medium-cut compound followed by a fine finishing polish. Using a coarse compound on lightly damaged frames removes more material than necessary and can leave visible swirl marks.
- Aluminium-safe formulation — Products designed for aluminium avoid ammonia, bleach, and strong alkaline agents that attack the oxide layer. Check labels for explicit compatibility with non-ferrous metals. Automotive wheel polishes often contain aggressive acids unsuitable for window frames.
- Protective residue — Some polishes leave behind a thin wax or polymer layer that slows re-oxidation. This is a bonus for exterior frames but not a substitute for a dedicated sealant applied afterward.
For protective coatings applied after polishing, look for these properties:
- UV inhibitors — Essential for north-facing frames and anywhere with high solar exposure. UV-stable polymer coatings prevent the rapid chalking cycle that undoes your restoration work within months.
- Hydrophobic properties — A coating that causes water to bead and sheet off reduces moisture dwell time on the frame surface, which is the primary driver of ongoing corrosion.
- Reapplication frequency — Wax-based sealants typically last 3 to 4 months in Australian conditions. Polymer sealants extend that to 6 to 12 months. Ceramic-style coatings can push beyond 12 months but cost significantly more upfront.
Budget roughly $40 to $80 AUD for a quality aluminium polish and a separate protective sealant. Spending less usually means buying a product formulated for indoor use or one that lacks UV stability — both poor choices for exterior window frames exposed to Australian sun.
Optional Paint and Coating Supplies
If your damage assessment revealed Level 3 deterioration — flaking coating, deep pitting, or colour that polishing simply cannot restore — repainting becomes the practical path forward. These supplies are only necessary for frames heading into a full recoat.
- Self-etching primer — The non-negotiable foundation for paint for aluminum window frames. Self-etching formulations contain mild phosphoric acid that dissolves the oxide layer and creates a chemical bond simultaneously. Standard primers designed for steel or timber will peel from aluminium within months. A two-part epoxy primer offers even stronger adhesion for coastal or high-exposure locations.
- Exterior acrylic or urethane-modified paint — Choose a 100% acrylic latex or urethane-modified enamel rated for exterior metal. These flex with thermal expansion (aluminium moves considerably between a 5°C winter morning and a 40°C summer afternoon) without cracking. Two coats deliver proper colour depth and UV protection.
- Fine-grit sandpaper (180–220 grit) — For scuffing the surface to create mechanical adhesion before priming. Anything coarser than 120 grit leaves scratch marks visible through the topcoat.
- Tack cloth or isopropyl alcohol wipes — Removes every particle of sanding dust before primer application. Even minor contamination causes adhesion failure.
- Application tools — A small HVLP spray gun produces the smoothest finish on narrow frame profiles. For DIY without spray equipment, use a high-density foam mini roller combined with a quality angled brush for tight corners. Standard bristle brushes leave visible stroke marks on aluminium’s smooth surface.
The total outlay for paint for aluminum windows — primer, topcoat, sandpaper, and application tools — typically runs $80 to $150 AUD for a five-window project when using quality products from a paint specialist rather than bargain-bin options. That investment buys 8 to 12 years of protection when applied correctly, which brings us to the technique that makes or breaks the entire process: how you clean those frames without introducing new damage.
Step 4 – Deep Clean Without Causing Further Damage
Cleaning sounds straightforward, but the wrong technique on old aluminium windows turns a cosmetic problem into a structural one. A pressure washer strips powder coat. An abrasive pad scores anodised surfaces. Even the wrong soap pH dissolves protective layers you’re trying to preserve. The goal here is removing grime and loose oxidation without creating fresh damage that complicates every step that follows.
Remove Loose Debris and Surface Grime Safely
Sequence matters more than scrubbing force. Wiping a dusty frame with a wet cloth drags grit across the surface like sandpaper, leaving micro-scratches that trap moisture and accelerate future corrosion. Follow this order instead:
Start with a dry soft-bristle brush or vacuum with a crevice nozzle to sweep away loose dirt, cobwebs, and debris from the frame face, corners, and glazing beads. Work top to bottom so dislodged material falls away from cleaned areas. Only after dry debris is gone should any liquid touch the surface.
Apply your cleaning solution to one frame section at a time — a single vertical or horizontal member — rather than wetting the entire window at once. Working in sections prevents the solution from drying mid-clean, which leaves streaky residue that bonds to the surface and requires re-cleaning. Rinse each section thoroughly with a gentle hose stream before moving to the next.
Avoid pressure washers entirely. The concentrated jet forces water behind rubber seals and into drainage channels, and at close range it damages powder-coated finishes and can compromise seal integrity. A standard garden hose with a spray nozzle provides more than enough rinsing pressure for aluminium frames.
Cleaning Techniques for Each Frame Type
So how do you clean aluminium window frames without making things worse? The answer depends entirely on which finish you identified in Step 1. Each type has a different chemical tolerance, and using the wrong product is one of the most common causes of irreversible damage during DIY restoration.
Anodised aluminium windows require pH-neutral cleaners exclusively. The anodised layer is chemically bonded to the metal, and alkaline products (anything above pH 9) dissolve it progressively with each wash. No amount of polishing rebuilds what alkaline cleaners strip away. Stick to dedicated aluminium-safe cleaners or plain mild dish soap diluted in lukewarm water.
Powder-coated frames tolerate mild detergent solutions well but react poorly to solvents like turpentine, acetone, or methylated spirits. These soften and cloud the coating surface. Warm water with a few drops of pH-neutral dish soap handles most grime. For stubborn marks, isopropyl alcohol applied sparingly to a cloth works without attacking the coating — but test an inconspicuous spot first.
Mill finish (bare aluminium) can handle slightly more aggressive cleaning since there’s no applied coating to protect. A diluted white vinegar solution (one part vinegar to four parts water) helps cut through heavier oxidation buildup. However, don’t leave acidic solutions sitting on the surface for more than a few minutes before rinsing, as prolonged contact etches the metal unevenly.
Regardless of frame type, follow this cleaning sequence:
- Mix your chosen cleaning solution at the correct dilution — stronger is not better.
- Dip a microfibre cloth or soft sponge into the solution and wring until damp, not dripping.
- Wipe one frame section using light, consistent pressure. Work in straight lines rather than circular motions to avoid swirl patterns.
- Rinse the section immediately with clean water from a hose or a separate bucket of fresh water.
- Dry with a clean microfibre cloth to prevent water spots, particularly on anodised surfaces where mineral deposits show readily.
- Inspect the cleaned section before moving on. If grime remains, repeat with fresh solution rather than increasing pressure or switching to a harsher product.
While you have the cleaning supplies out, tackle the window tracks and hardware simultaneously. These areas trap moisture, dead insects, and grit that accelerate corrosion on adjacent frame surfaces. Vacuum loose debris from tracks, then use a soft brush or old toothbrush to dislodge compacted dirt from corners and around rollers. Clear the weep holes — those small drainage slots at the bottom of the frame — with a cotton bud or thin plastic pick. Blocked weep holes cause water to pool inside the track, creating a persistent moisture source that corrodes the frame from the inside out.
Wipe hardware (handles, locks, hinges) with the same mild solution and check rubber seals for cracking or compression. Damaged seals allow water ingress that undermines your entire revival effort regardless of how well you treat the visible frame surfaces. A light application of silicone spray on moving parts keeps mechanisms smooth without attracting the dust buildup that oil-based lubricants cause.
With frames properly cleaned and free of contaminants, the surface is ready for the real work — removing the oxidation layer that no amount of soap and water can shift.
Step 5 – Remove Oxidation and Surface Corrosion
Soap lifted the grime. What remains — that stubborn white haze, the rough powdery buildup, or the cratered pitting — is oxidation bonded to the metal itself. Removing it requires a chemical or mechanical approach matched precisely to the damage level you assessed earlier. Get this step wrong on oxidised aluminium window frames and you’ll either waste hours on a method too gentle to make a difference, or strip away protective layers that can never be rebuilt at home.
Treating Light Surface Oxidation and Chalking
Level 1 damage responds well to mild acid treatment. The chalky film is a thin layer of aluminium oxide that dissolves readily when its chemical bonds are disrupted by a low-pH solution — no heavy abrasion needed.
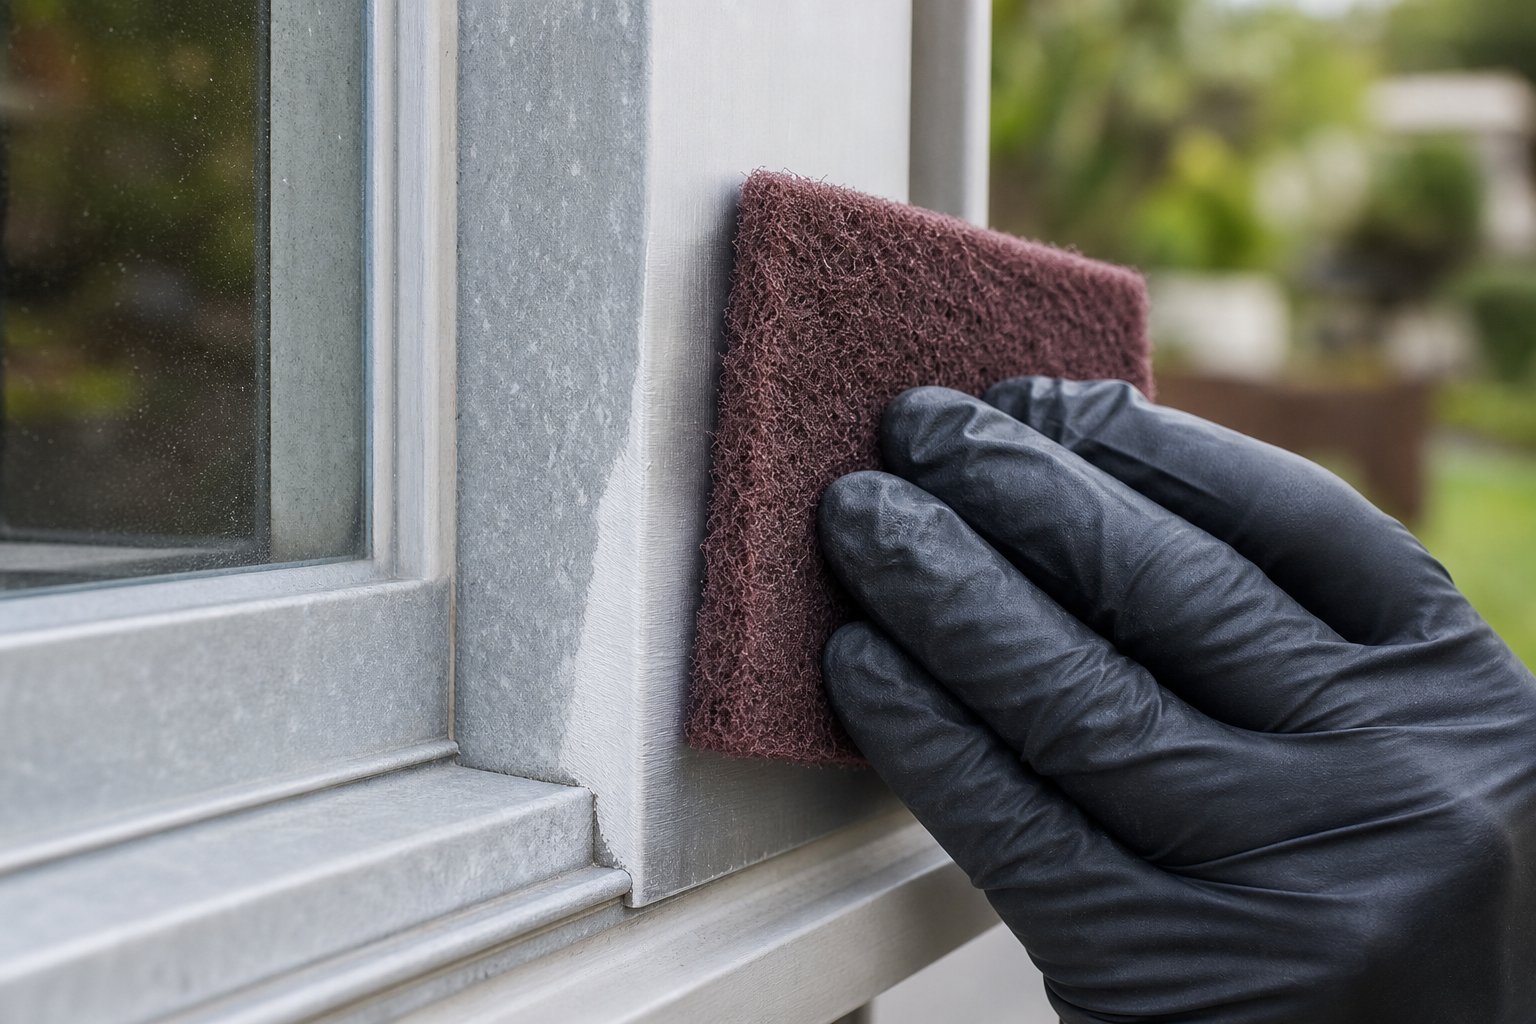
Mix a solution of one part white vinegar to one part water in a spray bottle. Apply generously to a single frame section and allow it to dwell for 5 to 8 minutes. You’ll notice the surface begin to look slightly wet or glossy as the acid reacts with the oxide layer. After the dwell period, agitate gently with a non-scratch pad (such as a Scotch-Brite white or blue pad) using light, straight strokes along the length of the frame member. Avoid circular scrubbing — it creates uneven patches visible once the frame dries.
Rinse thoroughly with clean water immediately after agitation. This neutralises the acid reaction and flushes dissolved oxide from the surface. Dry with a fresh microfibre cloth and inspect. If chalking persists in patches, repeat the process once more with a slightly longer dwell time of up to 10 minutes. Two passes typically clear Level 1 oxidation completely.
For frames with anodised finishes, keep the vinegar solution diluted (no stronger than 1:2 vinegar to water) and limit dwell time to 3 to 5 minutes. The anodised layer sits within the same pH vulnerability range as the oxidation you’re removing, so prolonged acid contact thins it irreversibly.
Addressing Moderate Oxidation and Staining
Level 2 damage — visible white powdery deposits, roughened texture, and staining — won’t budge with vinegar alone. The oxide layer is thicker and more firmly bonded, requiring fine abrasive compounds to physically cut through it. This is where aluminium window repair shifts from simple cleaning into genuine surface restoration.
Start with a medium-cut aluminium polishing compound applied to a non-woven abrasive pad (grey Scotch-Brite or equivalent). Work in straight, overlapping strokes following the grain direction of the frame. On extruded aluminium, the grain runs along the length of each member — you’ll feel it as faint parallel lines under your fingertips. Working against the grain creates cross-hatched scratches that catch light and look worse than the original oxidation.
Apply moderate, consistent pressure. Let the compound do the cutting rather than forcing the pad into the surface. After completing one section, wipe away residue with a clean cloth and assess progress. If heavy oxidation remains, make a second pass with the same compound before stepping down to a finer grade.
Progress through grits sequentially:
- Medium-cut compound with grey non-woven pad — removes the bulk of oxidation and staining.
- Fine-cut compound with white non-woven pad — refines the surface and removes scratches left by the first stage.
- Finishing polish with a clean microfibre cloth — brings up a consistent sheen and removes haze from the compounding stages.
Each stage should remove the marks left by the previous one. If you can still see scratches from the medium compound after the fine stage, you haven’t spent enough time on the intermediate step. Rushing through grits leaves a surface that looks polished at arm’s length but reveals swirl marks in direct sunlight.
On old metal window frames with bare mill finish, you can work slightly more aggressively since there’s no coating to preserve. On powder-coated frames, however, compound only the areas where coating has already failed and bare metal is exposed — compounding intact powder coat destroys it.
Handling Severe Pitting and Corrosion
Level 3 damage crosses into territory where surface polishing alone cannot produce a satisfactory result. Deep pitting means the corrosion has eaten into the aluminium substrate itself, creating craters that no amount of compounding will level without removing an unacceptable amount of base metal.
For frames with extensive pitting, a dedicated aluminium oxidation remover — typically a phosphoric or citric acid-based product — dissolves heavy oxide buildup and corrosion products from within the pits. Apply according to the manufacturer’s directions, observing recommended dwell times precisely. These products are significantly more aggressive than household vinegar, and exceeding dwell times etches healthy metal surrounding the pits.
Safety precautions for chemical oxidation removers are non-negotiable:
- Wear chemical-resistant nitrile gloves and safety glasses at minimum.
- Work in a well-ventilated area — outdoors is ideal for window frame work.
- Keep a bucket of clean water within arm’s reach for immediate rinsing if product contacts skin.
- Mask adjacent glass, seals, and wall surfaces. Acid-based removers etch glass and degrade rubber seals on contact.
- Never allow the product to dry on the surface — this concentrates the acid and causes localised damage.
After chemical treatment, rinse extensively and assess what remains. Shallow pitting (under 0.5 mm deep) often improves enough to accept a primer and paint system that fills and conceals the texture. Deeper pitting requires a different conversation entirely.
If you can catch a fingernail in the pits, surface treatment alone won’t restore a smooth finish. At that depth, the corrosion has removed enough base metal that polishing simply widens the craters. These frames need either a high-build primer system to fill the texture before repainting, or professional assessment to determine whether the aluminium window frame repair is still economically viable compared to replacement.
One critical warning for anodised frames at any damage level: aggressive oxidation removal destroys the anodised layer permanently. Anodising is an electrochemical process performed in a factory bath — it cannot be replicated at home. Every pass with an abrasive compound or acid remover thins what remains of that hard, protective surface. If your anodised aluminium window frames have reached Level 3 deterioration, the realistic options narrow to recoating with paint (accepting the loss of the original anodised appearance) or full replacement. Attempting to polish through severe damage on anodised surfaces leaves you with bare, unprotected aluminium that re-oxidises faster than the original frame ever did.
Successful oxidation removal — at any level — leaves the aluminium surface clean, smooth (or as smooth as pitting allows), and chemically neutral. That bare, reactive surface is now ready for the next critical phase: polishing to restore visual consistency and applying protection before the metal begins forming a new oxide layer.
Step 6 – Polish and Restore the Surface Finish
Oxidation removal leaves the aluminium clean but visually flat — a matte, slightly hazy surface that looks better than before yet far from finished. Polishing is what transforms that prepared surface into something with genuine lustre. The technique varies significantly depending on whether you’re working with bare mill finish aluminium or faded anodised aluminium window frames, and getting it wrong at this stage undoes the careful work you’ve already invested.
Polish Mill Finish and Bare Aluminium Frames
Bare aluminium responds beautifully to a multi-stage polishing process. The principle is identical to sanding — you progress from coarser to finer compounds, with each stage removing the marks left by the previous one. According to polishing specialists at Empire Abrasives, the key sequence moves from a cutting compound (like brown tripoli) that removes fine scratches, through to a colouring compound (white rouge) that brings out a deep, reflective sheen.
For window frames specifically, follow this sequence:
- Apply a small amount of medium-cut aluminium compound to a clean microfibre applicator pad or soft buffing cloth.
- Work in straight, overlapping strokes along the length of each frame member — always following the extrusion grain direction.
- Use moderate pressure and keep the pad moving. Dwelling in one spot generates heat through friction, which can warp thin frame sections or burn compound residue into the surface.
- Wipe away residue with a clean cloth and inspect. The surface should appear noticeably brighter with no visible scratches from the oxidation removal stage.
- Switch to a fine finishing polish on a fresh cloth. Apply with lighter pressure using the same straight-line technique.
- Buff the entire section with a dry, clean microfibre cloth using quick, light strokes to bring up the final sheen.
Heat buildup is the most common mistake during polishing. Power tools like angle grinders with buffing wheels work brilliantly on thick aluminium plate, but window frame profiles are thin-walled extrusions. Excessive speed or pressure concentrates heat in a small area, potentially distorting the frame or discolouring the metal. Hand polishing with quality compounds delivers a consistent result on window frames without that risk. If you do use a cordless drill with a buffing attachment, keep the speed below 1500 RPM and never hold it stationary against the surface.
Expect the polishing process to take 15 to 25 minutes per window frame, depending on size and how thoroughly you completed the oxidation removal step. A well-prepared surface polishes quickly. One that still carries residual haze or fine scratches fights you at every pass — a sign you need to step back to a coarser compound before continuing.
Restore Faded Anodized Surfaces
Anodized aluminum frame windows present a fundamentally different challenge. The anodised layer is not a coating sitting on top of the metal — it’s an electrochemically grown oxide that becomes part of the aluminium itself. As Metal Finishings Ltd explains, restoring anodising requires stripping the existing layer and re-anodising in a controlled bath, which is not a DIY-feasible process. You cannot rebuild what polishing removes.
What you can achieve on faded anodised frames is limited but still worthwhile. A fine finishing polish applied gently with a soft cloth removes surface grime and light haze trapped within the porous oxide structure, improving clarity and colour depth. Think of it as cleaning the anodised layer rather than cutting through it. Use only the lightest-grade polish available, apply minimal pressure, and stop the moment you see dark residue on your cloth — that’s the anodised layer itself being removed.
For anodised frames where fading, chalking, or patchy discolouration has progressed beyond what gentle polishing can address, the realistic options narrow to two paths: painting over the existing surface, or professional re-anodising (which requires frame removal and specialist equipment).
So, is painting anodized aluminum window frames a viable option? Yes — but only with proper preparation. The anodised surface is hard, smooth, and chemically stable, which are excellent qualities for corrosion resistance but terrible for paint adhesion. Practical guidance on painting anodised aluminium confirms that long-term success depends on surface condition and prep quality rather than the paint itself. The critical steps include thorough degreasing, controlled scuffing with 320 to 400 grit sandpaper to create mechanical tooth across the entire surface, and application of a self-etching primer specifically approved for non-ferrous metals. Skip any one of these, and the topcoat peels within months — particularly at edges and corners where thermal movement concentrates stress.
For homeowners weighing up how to repaint aluminium window frames with anodised finishes, understand that you’re committing to a paint maintenance cycle going forward. The original anodised appearance cannot be recovered once painted over. That said, repainting aluminium windows with a quality acrylic system over proper primer delivers 8 to 12 years of protection and opens up colour options that anodising never offered.
Regardless of frame type, polishing alone provides no lasting protection. The moment you achieve that satisfying gleam, the aluminium surface is already reacting with atmospheric oxygen, beginning the slow march back toward oxidation. A freshly polished frame left unprotected in Australian conditions will show visible dulling within weeks and measurable chalking within a few months. Every polished surface needs a sealant or coating applied promptly — which is exactly what the next step addresses.
Step 7 – Repaint or Recoat for a Factory-Fresh Look
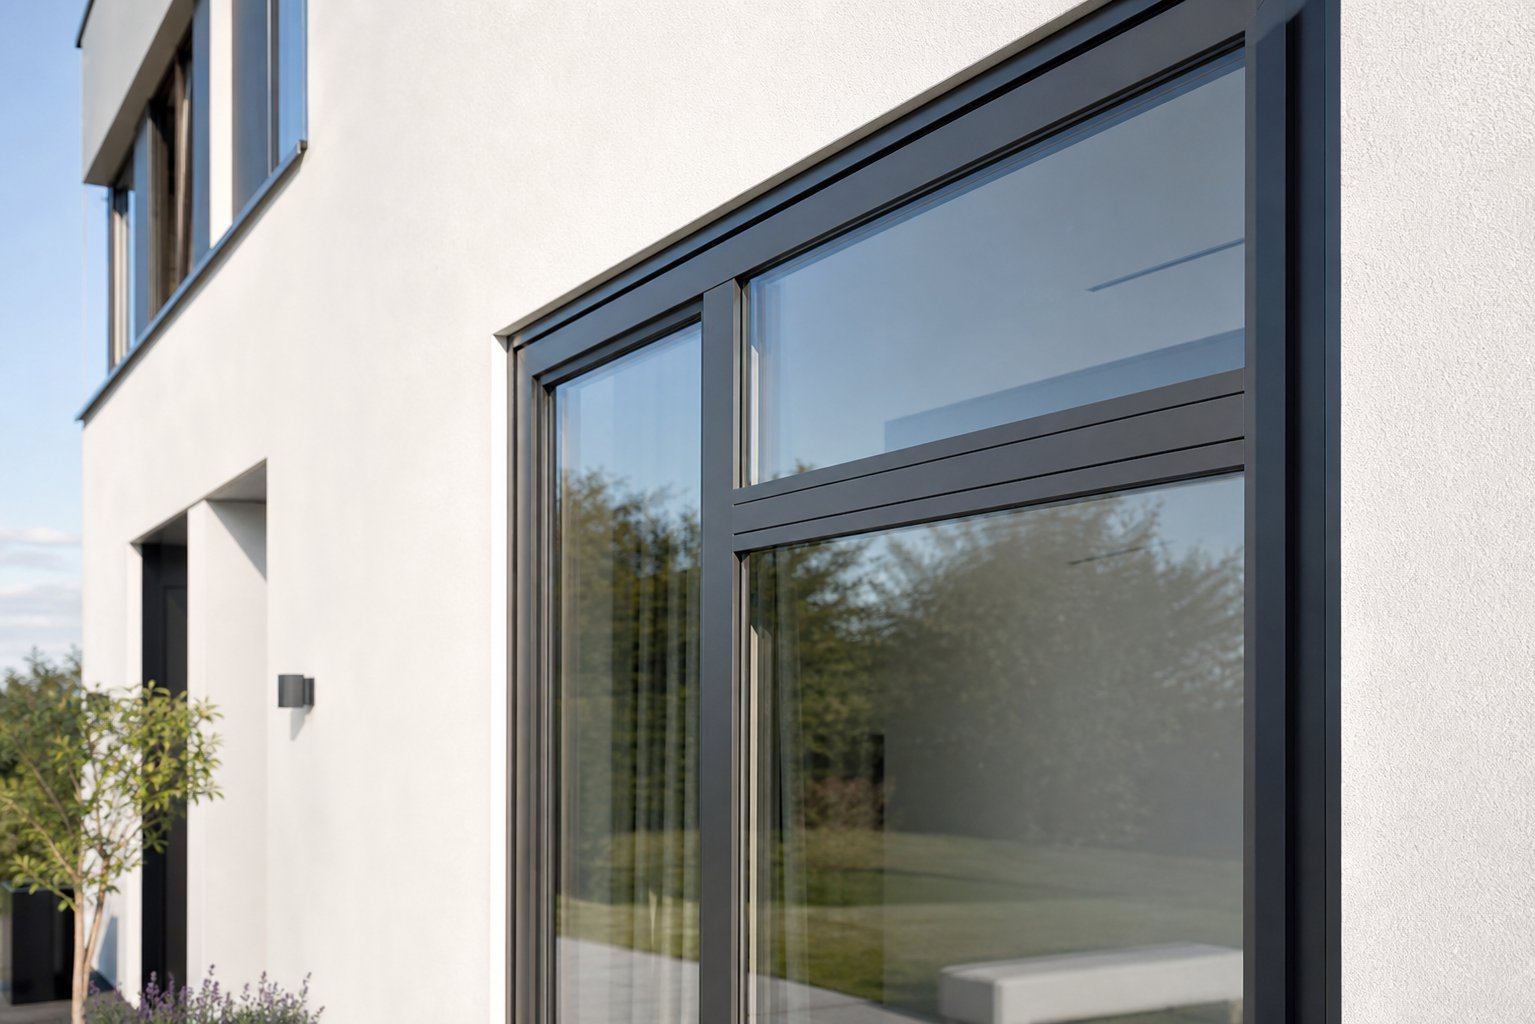
Sealant protects polished aluminium that still looks good. But for frames where oxidation has eaten through the original finish, where colour has faded beyond recovery, or where pitting leaves an uneven texture that no polish can smooth — repainting is the path that actually delivers results. Can you paint aluminium windows successfully as a DIY project? Absolutely, provided you respect the preparation demands that aluminium imposes. Skip a step and you’ll watch your topcoat peel away in sheets within a single season.
Prepare Aluminium Surfaces for Paint Adhesion
Preparation accounts for roughly 80% of a successful aluminium paint job. The metal’s smooth, non-porous surface and its instant oxide formation make it hostile to coatings that haven’t been given a proper foundation. Here’s the sequence that prevents premature failure:
Degrease thoroughly. Aluminium frames accumulate invisible silicone traces, body oils from handling, and airborne grease that block chemical bonding. Use a dedicated degreaser or tri-sodium phosphate (TSP) solution, then rinse completely with clean water. Any residue left behind creates a weak point where paint lifts first.
Create a mechanical key. Lightly scuff the entire surface with 180 to 220 grit sandpaper or a fine non-woven abrasive pad. You’re not grinding the metal down — you’re creating microscopic scratches that give primer something to grip. Stay away from anything coarser than 120 grit; those deep marks telegraph through the finished topcoat. Wipe away all sanding dust with a tack cloth or isopropyl alcohol.
Apply self-etching primer. This is the non-negotiable step. Self-etching primers contain mild phosphoric acid that dissolves the oxide layer and deposits a bonding coat simultaneously — performing chemical and mechanical adhesion in a single application. Standard primers designed for timber or ferrous metals simply cannot bond to aluminium’s non-porous surface. For coastal locations or high-exposure frames, a two-part epoxy primer offers even stronger adhesion and superior moisture resistance, though it requires precise mixing and has a limited working time once combined.
Apply primer in thin, even passes rather than one heavy coat. Heavy application causes runs and extends cure time unnecessarily. Allow the manufacturer’s recommended recoat window — typically 30 minutes to 2 hours for self-etching, up to 24 hours for epoxy — before applying topcoats. Miss that window and you’ll need to lightly sand the primer before the next coat will adhere properly.
Why does skipping primer guarantee failure? Aluminium reforms its oxide layer within moments of exposure to air. Paint applied directly over this invisible barrier sits on a surface that’s chemically slippery. Thermal cycling — the constant expansion and contraction as frames heat and cool through Australian summers — stresses that weak bond until adhesion fails completely, usually within three to six months.
Choose the Right Paint System for Longevity
Knowing how to paint aluminium window frames correctly means choosing a topcoat that handles the specific demands of exterior metal: UV bombardment, thermal movement, and moisture exposure. Two main paint types suit the job, each with distinct trade-offs.
100% acrylic latex paint is the preferred choice for most residential aluminium frame work. It’s water-based, low in volatile organic compounds, dries relatively quickly (touch-dry in 1 to 2 hours), and — critically — remains flexible after curing. That flexibility allows it to expand and contract with the aluminium underneath without cracking. Quality exterior acrylics also contain UV stabilisers that resist the chalking and fading cycle. Expect 8 to 12 years of service life in moderate Australian climates when applied over proper primer.
Enamel paint (oil-based or solvent-based) produces a harder, glossier finish that resists scratching and staining better than acrylic. However, that hardness becomes a liability on aluminium. As comparative analysis between enamel and acrylic paints confirms, enamel’s rigidity means it cannot flex with thermal movement as readily, making it more prone to cracking on metal substrates exposed to wide temperature swings. It also requires solvent cleanup and longer cure times — up to several days for full hardness. Reserve enamel for sheltered frames with minimal sun exposure where its superior scratch resistance outweighs the flexibility disadvantage.
For application method, spraying with an HVLP (high volume, low pressure) system delivers the smoothest, most uniform finish on narrow frame profiles. Brush marks and roller texture show prominently on aluminium’s flat surfaces, particularly in direct light. If you’re learning how to paint an aluminum window frame without spray equipment, use a high-density foam mini roller for flat sections and a quality angled brush for corners and rebates. Choose paint with good self-levelling properties to minimise visible application marks.
Apply two topcoats minimum. The first coat should be thin and even — building colour without runs. Allow full drying (check the manufacturer’s recoat time, which varies from 4 to 24 hours depending on humidity and product) before applying the second coat for final colour depth and sheen. Full cure to maximum hardness takes 7 to 14 days, during which you should avoid cleaning or stressing the frames.
When Professional Powder Coating Makes Sense
For frames with extensive damage across multiple windows, or where you want a finish indistinguishable from new, powder coating aluminium windows delivers results that brush or spray painting simply cannot match. The process applies a dry polymer powder electrostatically, then cures it in an oven at around 200°C, fusing the coating into a seamless, incredibly hard shell.
The catch: powder coating windows requires removing the frames from the building entirely and transporting them to a specialist facility. The frames are stripped of all hardware, seals, and existing coatings, then blasted clean before the powder is applied. This makes it impractical for a single window but increasingly cost-effective when treating an entire home’s worth of frames in one batch.
Can you paint aluminium window frames and achieve powder-coat durability? Not quite. Even the best brush-applied system lasts 8 to 12 years in moderate conditions. A quality powder-coated finish — applied to architectural standards — holds up for 15 to 25 years with minimal maintenance, resisting scratches, UV degradation, and chemical exposure far beyond what liquid paint achieves.
| Factor | DIY Brush/Roller Paint | Professional Spray Paint | Professional Powder Coating |
|---|---|---|---|
| Durability | 5–10 years | 8–12 years | 15–25 years |
| Approximate Cost (per window, AUD) | $15–$30 (materials only) | $80–$150 (labour + materials) | $150–$350 (removal, coating, refit) |
| Finish Quality | Good — visible brush/roller texture possible | Very good — smooth, even coverage | Excellent — factory-grade, seamless |
| Colour Range | Wide (any exterior acrylic) | Wide (any exterior acrylic or enamel) | Extensive (RAL and custom colours) |
| Scratch Resistance | Moderate | Moderate-high | Very high |
| Frame Removal Required | No | No | Yes |
| DIY Feasible | Yes | Possible with equipment | No — specialist facility required |
The decision often comes down to how many frames need treatment and their current condition. A single window with moderate fading? DIY paint makes perfect economic sense. An entire home with frames showing Level 3 damage across the board? Powder coating aluminum windows delivers a longer-lasting result at a lower cost per year of service life, even though the upfront investment is higher. It also eliminates the need for recoating cycles every decade.
Whichever method you choose, the freshly coated surface is only as durable as the maintenance that follows. Paint and powder coat alike degrade faster without regular care — and the protective routine that locks in your results starts immediately after the final coat cures.
Step 8 – Protect Your Work and Plan Ongoing Maintenance
A freshly polished or painted frame looks brilliant on day one. Without protection, that brilliance fades fast. Bare aluminium begins forming a new oxide layer within hours of exposure to air, and even quality topcoats degrade under relentless UV and moisture. The revival work you’ve invested in Steps 5 through 7 only holds if you seal it properly and maintain it on a schedule.
Apply Protective Sealant After Every Revival
Sealant is the barrier between your restored surface and the environment that damaged it in the first place. Three main categories suit aluminium window frames, each with different longevity and cost profiles:
- Wax-based sealants — Easy to apply, affordable, and effective at repelling water. They create a sacrificial layer that wears away over 3 to 4 months in typical Australian conditions. Best suited to sheltered frames or as a quick interim measure between more durable applications.
- Polymer sealants — Synthetic formulations that bond more firmly to the metal surface and resist UV breakdown better than wax. Expect 6 to 12 months of protection depending on sun exposure and rainfall. A solid middle-ground option for most residential frames.
- Ceramic coatings — The longest-lasting option, forming a semi-permanent glass-like layer with excellent hydrophobic and UV-resistant properties. Quality ceramic coatings can protect for 12 to 24 months but cost significantly more and require careful surface preparation for proper bonding.
Apply your chosen sealant within 24 hours of completing polishing or after paint has fully cured (typically 7 to 14 days). Waiting longer allows oxidation to begin forming beneath the sealant, trapping the problem rather than preventing it. For an old aluminum window that’s just been revived, this step is the difference between a result that lasts and one that disappoints within weeks.
Seasonal Maintenance Schedule That Prevents Future Damage
Consistent quarterly attention catches problems early and keeps aluminium window repairs minor rather than major. Industry maintenance data confirms that structured care can extend aluminium frame service life from a base of 30 years to 50 years or more — a significant return on minimal effort.
| Season | Key Tasks | Why It Matters |
|---|---|---|
| Summer (Dec–Feb) | Inspect sealant for UV degradation; reapply wax or polymer coating if water no longer beads; check for new chalking on sun-facing frames | Peak UV exposure accelerates coating breakdown fastest during these months |
| Autumn (Mar–May) | Full frame wash with pH-neutral cleaner; clear weep holes and tracks of leaf debris; lubricate hardware before cooler weather stiffens mechanisms | Organic debris traps moisture against frames through winter, driving crevice corrosion |
| Winter (Jun–Aug) | Check seals and gaskets for cracking; inspect for condensation patterns indicating thermal bridge issues; verify drainage is functioning | Prolonged moisture contact and reduced evaporation make winter the highest-risk period for corrosion progression |
| Spring (Sep–Nov) | Deep clean all frames; assess whether sealant needs full reapplication; inspect painted surfaces for cracking or adhesion loss before summer heat | Prepares frames for the high-UV, high-temperature season ahead and catches winter damage early |
Each quarterly session takes 15 to 30 minutes per window — a modest time investment that compounds into years of extended frame life.
The Lifecycle Cost Advantage of Regular Upkeep
Replacing aluminium windows across a typical Australian home runs anywhere from $5,000 to $15,000 AUD depending on size, style, and access complexity. Annual maintenance supplies — cleaners, sealants, lubricants — cost under $100. Even factoring in occasional aluminium window repairs like gasket replacement or hardware servicing, the maintenance path costs a fraction of premature replacement driven by neglect.
A life cycle study published in Resources, Conservation and Recycling Advances found that maintaining rather than replacing windows minimised both lifecycle climate impact and costs across a 60-year study period. The financial logic is clear: regular upkeep stretches the useful life of your existing aluminum window framing far beyond what neglected frames achieve.
That said, there’s a ceiling to what maintenance can accomplish on aging frames. Frames that have already cycled through multiple revivals with diminishing returns, or those with compromised thermal performance and outdated hardware, eventually reach a point where ongoing repair costs approach diminishing value. Modern aluminium window systems — like MEICHEN’s aluminium windows with factory-applied powder-coated finishes and weather-performance engineering — are designed to dramatically reduce that long-term maintenance burden from day one. Their durable coatings, quality hardware, and precision sealing mean the intensive revival cycles this guide describes become largely unnecessary for decades. For frames nearing end-of-life despite your best maintenance efforts, upgrading to a purpose-engineered system is often the smarter long-term investment than another round of restoration.
Protection and maintenance lock in your results. But what happens when the results themselves fall short, or when problems emerge despite your best efforts? Knowing how to troubleshoot — and when to stop — saves both time and money.

Step 9 – Troubleshoot Problems and Know When to Replace
Sometimes you follow every step correctly and the frames still look tired. Other times, a single misstep during the process creates damage worse than what you started with. Knowing how to diagnose a poor outcome — and recognising when repairing aluminium window frames stops making financial sense — prevents you from throwing good money after bad.
Common Mistakes That Ruin Aluminium Frames During Revival
Most DIY restoration failures trace back to a handful of avoidable errors. Each one seems minor in the moment but compounds into visible, sometimes irreversible damage:
- Using steel wool or wire brushes — Steel particles embed in the softer aluminium surface and create galvanic corrosion spots. Within weeks, rust-coloured staining appears around every embedded fragment, spreading outward through moisture contact.
- Applying alkaline cleaners to anodised surfaces — Products containing sodium hydroxide or ammonia dissolve the anodised layer progressively. The damage isn’t always obvious immediately but reveals itself as patchy, uneven dulling that no amount of polishing corrects.
- Skipping primer before painting — The single most common reason paint peels from aluminium. Without a self-etching primer creating a chemical bond, topcoats sit on the slippery oxide layer and fail within months — particularly at edges and corners where thermal stress concentrates.
- Using automotive cutting compounds too aggressively — Compounds designed for thick steel car panels remove material far too quickly on thin-walled window extrusions. Over-compounding thins the frame wall, removes protective layers permanently, and can even distort the profile.
- Neglecting to mask glass and seals — Abrasive compounds scratch glass permanently. Chemical removers degrade rubber gaskets. Primer overspray on glass requires razor blades to remove, risking scratches. Five minutes of masking tape saves hours of corrective work.
- Working in direct sun or on hot frames — Cleaning solutions and polishing compounds dry too quickly on heated surfaces, leaving residue that bonds to the metal and creates uneven patches.
Troubleshooting When Your Results Fall Short
If you’ve completed the cleaning and polishing process but the frames still look dull or damaged, the issue likely runs deeper than surface oxidation. Several scenarios point to problems that surface treatment alone cannot resolve:
Cleaning and polishing produce no visible improvement. This typically indicates coating failure rather than surface oxidation. The powder coat or anodised layer has degraded from within, and no amount of surface work restores what’s broken at a structural level. The frame needs stripping and recoating — not more polishing.
Fresh paint peels within weeks. Preparation failure is almost always the cause. Either the surface wasn’t degreased adequately, the mechanical key was insufficient, or primer was skipped or incompatible. For anyone wondering how to repaint aluminium window frames successfully after a failed first attempt, the answer is stripping back to bare metal and starting the preparation sequence from scratch. Painting over peeling paint simply traps the problem beneath another layer destined to fail.
Corrosion returns rapidly after treatment. When oxidation reappears within weeks despite sealant application, structural pitting is likely trapping moisture beneath the surface. These micro-reservoirs of water drive corrosion from within, and no topical sealant can prevent what’s happening underneath. The pitting needs to be addressed with high-build primer systems, or the frame has reached the limits of what DIY restoration can achieve.
Colour remains uneven after repainting. Patchy colour absorption usually means the surface preparation varied across the frame — some areas were properly scuffed and primed while others weren’t. Can you paint aluminium window frames over an inconsistent base and expect uniform results? Not reliably. Strip the affected sections, re-prepare uniformly, and recoat.
When Replacement Becomes the Smarter Investment
There’s no shame in reaching the conclusion that a frame is beyond economical revival. Aluminium lasts decades, but it doesn’t last forever — particularly when original coatings were low quality, environmental exposure has been severe, or maintenance was deferred for too long. Consider replacement the practical choice when:
- Extensive pitting spans multiple frames — Treating one or two isolated pits is manageable. When every frame across the home shows widespread cratering, the cumulative cost of how to repaint aluminium windows properly (stripping, filling, priming, coating) approaches or exceeds replacement cost.
- Structural integrity is compromised — Frames that flex under hand pressure, show visible thinning at corners, or have corroded through at any point are no longer performing their structural role. No coating fixes a frame that’s lost base metal.
- Thermal performance has failed — Older aluminium frames without thermal breaks conduct heat aggressively. If you’re reviving frames that also drive high energy bills through poor insulation, restoration addresses appearance but not the underlying performance deficit.
- Repeated revival cycles deliver diminishing returns — When you’re recoating every two to three years and each cycle produces a slightly worse result than the last, you’ve entered a declining curve where ongoing investment yields less value each time.
For frames that have genuinely reached end-of-life, modern aluminium window systems represent an upgrade rather than a concession. MEICHEN’s aluminium windows address the very problems that led to deterioration in the first place — their factory-applied powder-coated finishes resist the UV degradation and chalking cycle that drives most revival projects, while colour customisation options mean you’re not locked into the limited palette of decades past. Weather performance ratings, thermally broken profiles, and precision-engineered sealing systems eliminate the condensation, corrosion, and energy loss issues that plague older frames. Whether the application is residential, apartment, or commercial, these systems are engineered so the intensive restoration process outlined in this guide becomes largely unnecessary for their service life.
Replacement isn’t failure — it’s recognising that the cost of perpetual maintenance has exceeded the value of the asset being maintained. A modern system with durable finishes and quality engineering resets the clock entirely, giving you decades of low-maintenance performance rather than an annual cycle of cleaning, polishing, and recoating frames that are fighting a losing battle against time and environment.
Frequently Asked Questions About Reviving Aluminium Window Frames
1. Can you paint aluminium window frames without them peeling?
Yes, but only with correct preparation. The key is applying a self-etching primer that chemically bonds to the aluminium surface before any topcoat. Without this step, paint sits on the slippery oxide layer and peels within months. You also need to degrease thoroughly and scuff the surface with 180-220 grit sandpaper to create mechanical adhesion. Using a quality exterior acrylic topcoat over self-etching primer typically delivers 8 to 12 years of protection in Australian conditions.
2. How do you remove white oxidation from aluminium window frames?
The removal method depends on severity. Light chalking responds well to a 1:1 white vinegar and water solution left to dwell for 5-8 minutes, then agitated with a non-scratch pad. Moderate oxidation requires fine abrasive compounds worked in straight strokes along the grain direction, progressing from medium-cut to fine-cut polish. Severe pitting needs phosphoric or citric acid-based oxidation removers with strict safety precautions. Always rinse thoroughly after treatment and apply protective sealant within 24 hours to prevent re-oxidation.
3. What is the best cleaner for aluminium window frames?
A pH-neutral cleaner (pH 6-8) specifically formulated for non-ferrous metals works best across all aluminium frame types. For anodised frames, pH-neutral is essential since alkaline products dissolve the anodised layer permanently. Powder-coated frames tolerate mild dish soap in warm water. Bare mill finish aluminium can handle diluted white vinegar for heavier buildup. Avoid anything labelled heavy duty or containing sodium hydroxide, ammonia, or strong solvents, as these cause irreversible damage to protective finishes.
4. Is it worth restoring old aluminium window frames or should I replace them?
Revival makes financial sense when damage is limited to surface oxidation, fading, or localised coating failure across a few frames. The materials cost under $150 AUD for a five-window project. However, replacement becomes the smarter investment when frames show extensive pitting across multiple windows, structural thinning, compromised thermal performance, or when repeated revival cycles deliver diminishing returns. Modern aluminium windows with factory-applied powder-coated finishes and thermally broken profiles offer 15-25 years of low-maintenance performance, eliminating recurring restoration cycles.
5. How often should aluminium window frames be maintained after restoration?
A quarterly maintenance schedule keeps revived frames in good condition long-term. Summer requires sealant inspection and reapplication if water no longer beads on the surface. Autumn calls for a full wash and clearing debris from tracks and weep holes. Winter focuses on checking seals and drainage function. Spring is for deep cleaning and assessing whether sealant or paint needs attention before high-UV months. Each session takes 15-30 minutes per window. Wax sealants need reapplication every 3-4 months, polymer sealants every 6-12 months, and ceramic coatings last 12-24 months.
More Window & Door Guides