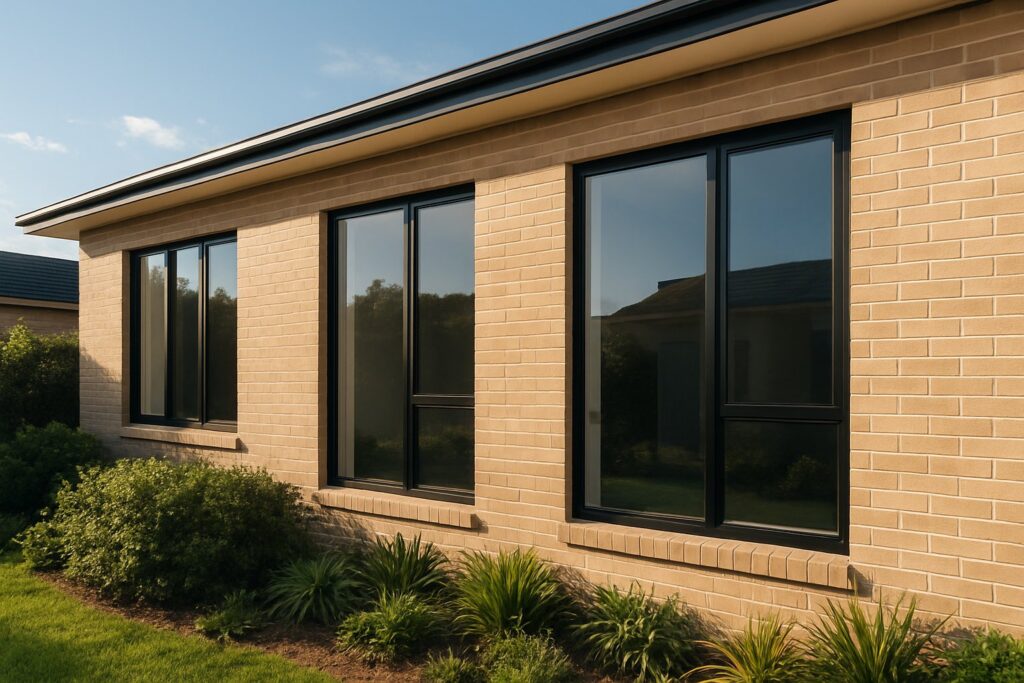
Yes You Can Paint Powder Coated Aluminium Windows
Can you paint powder coated aluminium windows? Straight up — yes, you can. Painting over powder coated window frames is entirely possible, and thousands of Australian homeowners do it every year to refresh faded finishes or shift to a new colour scheme. But the gap between a job that lasts and one that peels within months comes down to how seriously you treat the process before any paint hits the surface.
The Short Answer and What It Means for Your Project
Powder coating is a factory-applied thermoset finish cured at extreme heat. It bonds to the aluminium at a molecular level, creating a surface that actively resists new coatings. That resistance is what makes it so durable — and exactly why slapping paint straight over it fails. With the right preparation, primer system, and topcoat selection, though, you can achieve a solid, long-wearing result that transforms your window frames without the cost of full replacement.
Proper surface preparation accounts for roughly 80% of a successful outcome when painting over powder coated aluminium. Skip it, and no paint on earth will save the job.
Setting Realistic Expectations Before You Start
Here is what honesty looks like: a painted-over powder coat finish will not match the durability of the original factory application. Factory powder coating endures decades of Australian UV exposure, coastal salt air, and temperature swings. A well-executed repaint, by contrast, delivers solid performance for several years before requiring maintenance or a fresh topcoat. That is not a reason to avoid the project — it is a reason to go in with clear eyes.
This guide walks you through the full decision journey. Is it possible to paint powder coated aluminium? Confirmed. Should you? That depends on your situation. How do you do it properly? That requires specific knowledge of abrasion, primer chemistry, and paint compatibility. And if painting is not the right call, what are the smarter alternatives? Every answer sits ahead.
Why Powder Coat Resists Paint and What That Means
That factory-applied finish on your aluminium windows is not just paint in a different form. It is a fundamentally different type of coating — one engineered specifically to reject anything that tries to sit on top of it. Understanding why paint won’t stick to powder coated aluminium starts with understanding what powder coating actually is at a molecular level.
How Powder Coating Creates a Paint-Resistant Surface
Powder coating is a thermoset polymer — typically polyester-based for architectural applications like window frames. During manufacturing, a dry powder is electrostatically charged and sprayed onto the aluminium profile. The charged particles cling uniformly to the grounded metal surface. Then the whole assembly enters a curing oven at temperatures around 180-200°C.
This is where the chemistry gets interesting. At those temperatures, the polymer chains undergo cross-linking — a permanent chemical reaction that bonds the molecular chains into a dense, interconnected network. Unlike thermoplastic coatings that can be remelted, thermoset powder coatings lock into their final structure irreversibly. The result is a surface with extremely low porosity, high chemical resistance, and a smooth profile that gives liquid paint virtually nothing to grip.
Think of it this way: raw timber has open grain and texture that soaks up paint. Powder coating is the opposite — a sealed, glass-smooth polymer shell wrapped around the aluminium. This is exactly why it protects so well against Australia’s harsh UV, salt spray, and temperature extremes. And it is exactly why paint peeling off a powder coated surface is so common when people skip preparation.
Mechanical vs Chemical Adhesion on Cured Coatings
Paint bonds to surfaces through two primary mechanisms, and powder coating defeats both of them in its factory-cured state.
Mechanical adhesion relies on physical interlocking. Paint molecules flow into microscopic valleys, pores, and irregularities on a surface, then harden in place — locked on like roots gripping rocky soil. A cured powder coat finish has almost no surface irregularities. Its cross-linked polymer surface is too smooth and non-porous for paint to key into. Without those micro-abrasions, there is no mechanical grip.
Chemical adhesion depends on surface energy compatibility between the substrate and the applied coating. For a liquid paint to wet a surface properly and form a lasting bond, the surface energy of the substrate needs to exceed the surface tension of the paint. Powder coating’s cured thermoset surface has relatively low surface energy — the paint molecules would rather stick to each other than spread across the coating. This is why untreated powder coat causes paint to bead, crawl, or simply refuse to bond.
These principles apply regardless of the substrate metal underneath. Whether you are painting over powder coated steel on a fence or powder coated aluminium on a window frame, the challenge is identical — the barrier is the cured polymer layer, not the metal beneath it. How powder coat prevents paint bonding comes down to its sealed molecular structure defeating both bonding pathways simultaneously.
This dual resistance is precisely why preparation is non-negotiable. You need to artificially create the conditions for adhesion that the powder coat was designed to prevent — roughening the surface for mechanical grip and using chemically compatible primers that can bridge the energy gap. Get that wrong, and sheets of paint will lift away within weeks, especially under the thermal cycling that Australian window frames endure daily.
DIY Painting vs Professional Options Decision Matrix
Knowing that adhesion is achievable does not answer the real question most people face: who should actually do the work? The gap between DIY painting aluminium windows vs professional application is not just about skill — it is about matching the right approach to your specific situation, budget, and tolerance for ongoing maintenance.
Three Paths Forward and How to Choose
You have three realistic options when the cost of repainting powder coated windows lands on your radar. Each carries distinct trade-offs in upfront spend, durability, and effort.
| Criteria | DIY Painting | Professional Painter | Re-Powder-Coating |
|---|---|---|---|
| Cost Range | Low | Medium | High |
| Durability Expectation | 3–5 years before maintenance | 5–8 years with quality products | 15–20+ years (factory equivalent) |
| Skill Level Required | Moderate to high | Handled by contractor | Handled by specialist |
| Time Investment | High (prep-intensive) | Moderate (your time is minimal) | High (windows removed off-site) |
| Best Suited For | 1–3 windows, tight budget, capable DIYer | Multiple windows, quality finish, limited personal time | Severely degraded coating, long-term solution, whole-house projects |
DIY makes sense when you are refreshing a single window or a couple of frames on a budget — provided you are genuinely willing to invest time in proper preparation. Hiring a professional painter for aluminium window frames becomes the stronger choice once the job scales beyond a few openings, or when you lack confidence in surface prep techniques. Re-powder-coating windows vs painting over them favours situations where the existing finish is chalking badly, flaking to bare metal, or where you need a result that will not require attention for well over a decade.
Homeowner vs Property Manager Considerations
A homeowner wanting to shift a single bedroom window from beige to charcoal faces a completely different calculation than a property manager maintaining a portfolio of rental units across Sydney or Melbourne. For the homeowner, a weekend DIY project with quality materials can deliver a satisfying result at minimal cost. The stakes are personal — if the finish needs a touch-up in four years, that is manageable.
Property managers operate under different pressures. Consistency across multiple openings matters. Tenant turnover means windows need to look presentable without constant intervention. In that scenario, engaging a professional painter — or investing in re-powder-coating for the entire property — typically delivers better value per year of service life. The upfront spend is higher, but the maintenance cycle stretches significantly, reducing call-backs and keeping presentation standards consistent across units.
Condition of the existing coating also drives the decision. If the current powder coat is still intact but just the wrong colour, painting over it (DIY or professional) is perfectly reasonable. If the coating is visibly degraded — chalking, peeling, or exposing raw aluminium — painting over a compromised substrate only delays the inevitable. That is where re-powder-coating or replacement earns its higher price tag through genuine longevity.
Surface Preparation That Makes or Breaks Results
Regardless of whether you tackle the job yourself or brief a professional, the surface prep steps for painting aluminium windows are identical — and non-negotiable. Every layer of paint you apply is only as durable as what sits beneath it. Cut corners here and the finish will peel, guaranteed. Do it properly and you create conditions where paint genuinely bonds to a surface designed to reject it.
Here is the complete preparation sequence, in the order it must happen:
- Initial cleaning — Remove all dirt, cobwebs, mould, and loose debris from the window frames using a soft brush and clean water. Let the surface dry completely before proceeding.
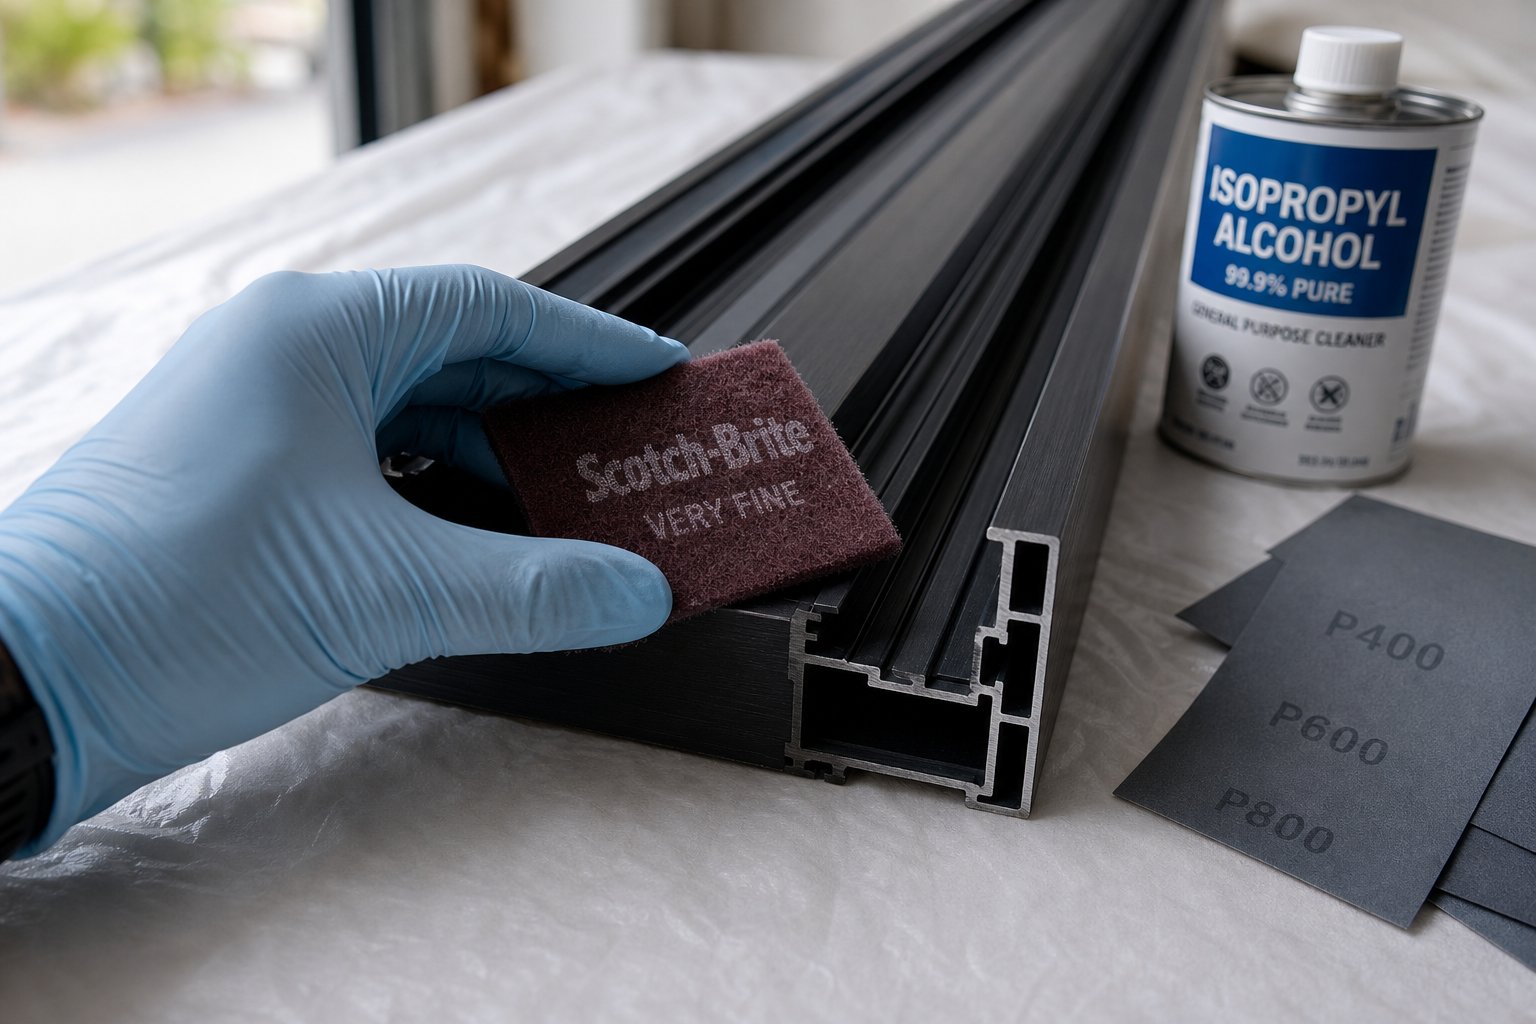
- Degreasing — Wipe down all surfaces with isopropyl alcohol or a dedicated silicone and wax remover. This strips invisible films of grease, sunscreen transfer, insect spray residue, and silicone contamination that household cleaners leave behind.
- Abrasion — Sand the entire powder coated surface using 320–400 grit sandpaper or scotch-brite pads to create a uniform matte texture. Every millimetre must be scuffed — no shiny patches can remain.
- Dust removal — Vacuum or use a tack cloth to remove all sanding dust from profiles, corners, and rebates. Residual dust trapped beneath primer causes adhesion failure just as effectively as a glossy surface.
- Final solvent wipe — One last pass with isopropyl alcohol on a lint-free cloth. This removes any oils from your hands deposited during sanding and gives the primer an absolutely clean substrate to bond with.
- Masking — Tape off glass, rubber seals, hardware, and any adjacent brickwork or render before priming. Extend masking to protect sills and surrounding surfaces from overspray or drips.
Abrasion Methods That Protect the Substrate
The best grit sandpaper for powder coated surfaces sits in the 320–400 range. This is deliberate. Anything coarser — say 80 or 120 grit — risks cutting straight through the powder coat layer and exposing raw aluminium beneath. That creates a patchwork of different substrates requiring different primer chemistries and invites uneven adhesion across the frame.
Sanding powder coated aluminium windows before painting is not about removing the coating. It is about disrupting its surface just enough to create micro-abrasions — tiny valleys that give the primer something to mechanically lock into. Scotch-brite pads (the maroon or grey variety) work especially well on curved profiles and corners where flat sandpaper cannot maintain consistent contact. The goal is a uniformly dull, matte appearance across the entire area you intend to paint.
Apply light, even pressure and work methodically. Aggressive sanding creates low spots that telegraph through the final finish. If you accidentally break through to bare metal in a small area, that spot will need an aluminium-specific etch primer before the main primer coat — adding complexity you want to avoid.
Cleaning Protocols and Common Mistakes
How to prepare powder coated aluminium for painting hinges on degreasing aluminium window frames before paint as much as it does on sanding. Invisible contamination is the silent killer of paint adhesion. The problem with everyday household cleaners — dishwashing liquid, spray-and-wipe products, window cleaner — is that many contain surfactants, fragrances, or silicone additives that leave a residual film. That film sits between your primer and the powder coat, acting as a release agent.
Isopropyl alcohol (IPA) at 90%+ concentration is the safest general-purpose degreaser for this job. It evaporates cleanly without residue. For frames near kitchens or barbecue areas where grease contamination is heavier, a dedicated wax and silicone remover provides a more aggressive cut. Acetone also works but evaporates almost instantly — useful in hot Australian conditions where slower solvents can flash off before properly dissolving contaminants.
A critical sequencing note: always degrease before sanding. If you sand a contaminated surface, you grind contaminants into the micro-abrasions you just created — exactly where you need pristine adhesion. Then degrease again after sanding to remove oils from handling. Two passes, different purposes, both essential.
Partial Painting for Targeted Refreshes
Not every project demands painting entire window frames. Plenty of Australian homes have powder coated aluminium windows where only the exterior-facing surfaces have faded under relentless UV, while interior profiles remain perfectly serviceable. Partial painting is a valid strategy — and a far less daunting one.
Common partial painting scenarios include:
- Painting only exterior-facing frame surfaces exposed to sun damage, leaving interior returns untouched
- Refreshing fixed frames while skipping operable sashes that see less UV exposure
- Targeting north and west-facing elevations where fading is most severe, leaving protected southern elevations alone
- Recoating only the bottom rail of awning windows where water pooling has degraded the finish
The same preparation rules apply to partial work — you still need full abrasion, degreasing, and priming on every square centimetre you intend to coat. The key difference is masking. You must create a clean, sharp paint line where the new coating meets the existing powder coat. Use fine-line automotive masking tape along these transitions to prevent a ragged, obvious boundary between old and new finishes.
Feathering the sanded edge — gradually reducing abrasion intensity toward the boundary — helps the primer bond blend seamlessly into the retained powder coat. This prevents a visible ridge where two coating systems meet, keeping the result looking intentional rather than patchy.
Choosing the Right Primer and Paint System
A perfectly prepared surface still fails if you put the wrong primer on it. Primer selection is where most DIY repaints come unstuck — people invest hours in careful sanding and degreasing, then grab whatever tin is on the shelf at the hardware store. The best primer for painting over powder coated aluminium is not the same product you would use on bare metal or timber. It needs to be chemically equipped to bond with a cured thermoset polymer, and it needs to play nicely with whatever topcoat goes over it.
Primer Types Explained for Powder Coated Surfaces
Not all primers do the same job. Each type uses a different mechanism to create adhesion, and each suits particular substrates and project scenarios. Here is what is actually available and when to reach for each one:
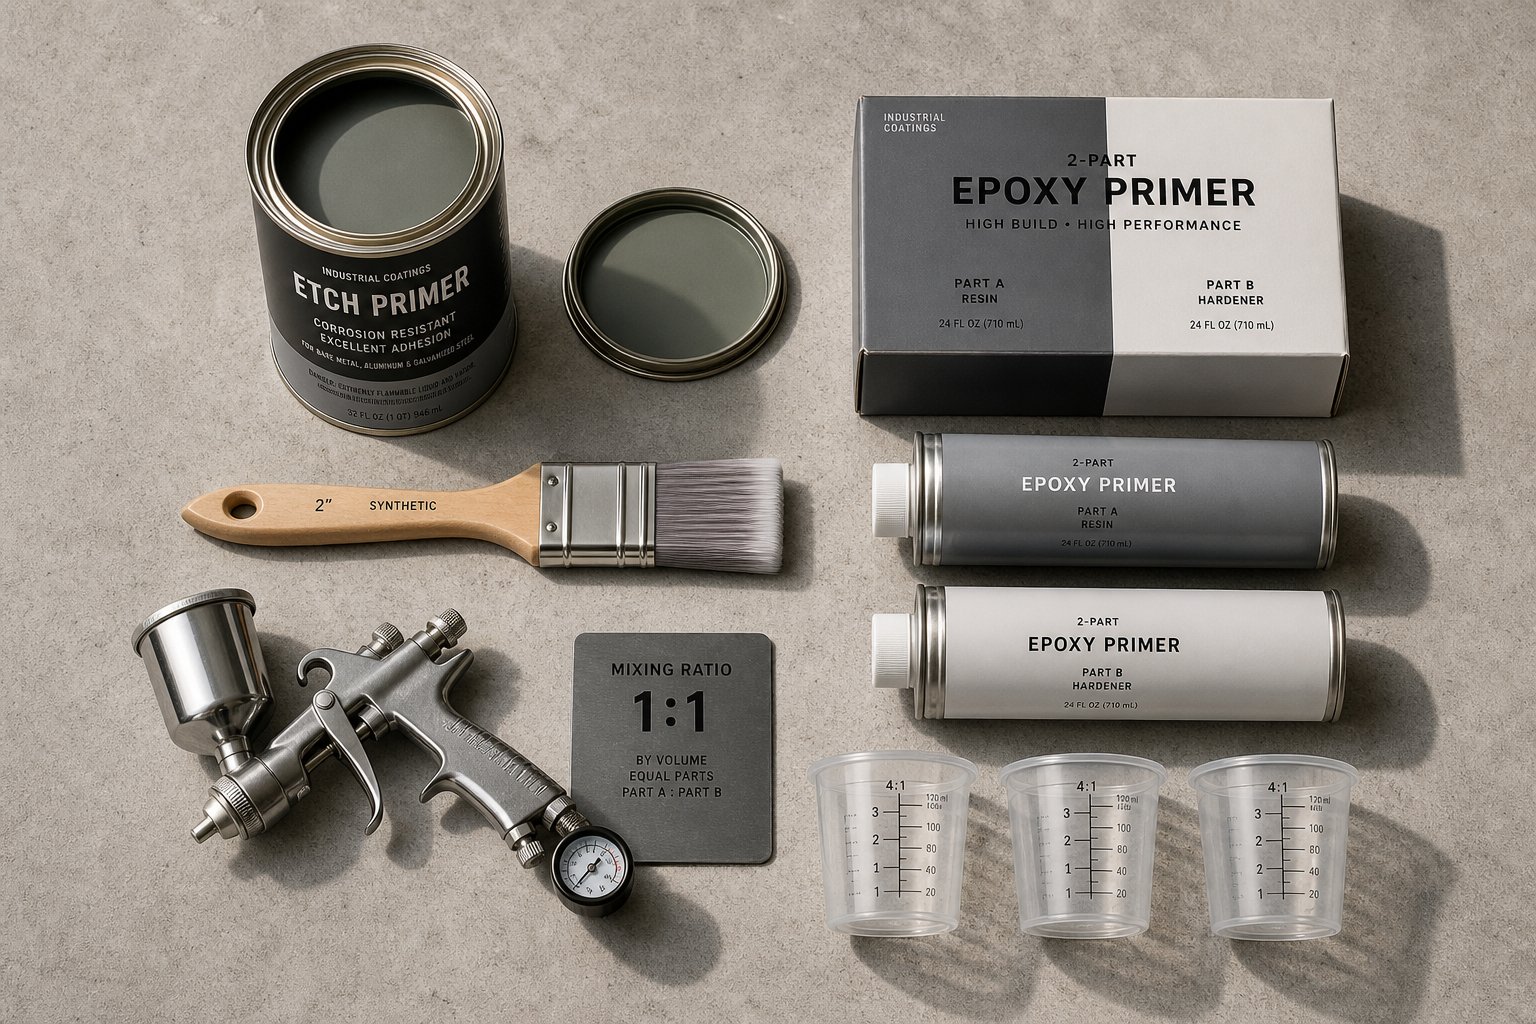
- Etch primers — Contain phosphoric acid that chemically bites into metal and coating surfaces, creating both a chemical bond and micro-etching in a single step. An etch primer for powder coated window frames works by reacting with the scuffed surface to form a thin phosphate layer that subsequent coats lock onto. Best for: well-prepared powder coated surfaces where maximum adhesion is critical, and projects where you want a single-component product without the complexity of two-part mixing.
- Self-etching primers — Combine the etching action and priming function into one product. A self-etching primer on aluminium windows eliminates one step from the process, making it popular for DIY projects. These contain acid compounds that lightly etch while simultaneously depositing a priming layer. Best for: smaller jobs, spot repairs, and situations where a streamlined process matters more than ultimate durability.
- Two-part (2K) epoxy primers — The professional standard for powder coated substrates. These use a resin and hardener that react chemically when mixed, creating an extremely dense, tenacious bond to the roughened powder coat profile. 2K epoxy primers deliver superior adhesion and anti-corrosive properties, but they are UV-sensitive and must always be topcoated — left exposed, they chalk and degrade quickly. Best for: full window repaints, professional-grade results, high-exposure facades, and any situation demanding maximum longevity.
- Adhesion promoters — Thin bonding agents applied as a tie coat before a standard primer. These modify the surface energy of the powder coat, allowing conventional primers to wet and grip a surface they otherwise could not. Best for: projects where you want to use a specific topcoat system that requires its own branded primer — the adhesion promoter bridges the gap between the powder coat and that system.
Australian suppliers like Haymes Industrial Coatings offer dedicated products across these categories, including their Metal Etch Primer (a 1K epoxy-modified etch primer) and their 339 2K Epoxy Primer — both formulated specifically for use on powder coated and metal surfaces. Matching the primer to your substrate type is the single most important material decision in the entire project.
Why Paint System Compatibility Matters
Primers and topcoats are not interchangeable building blocks you can mix freely. They form a system — and that system only works when the chemistry of each layer is compatible with the layers above and below it. Paint system compatibility for powder coated surfaces is where many otherwise well-prepared jobs fall apart weeks or months after application.
The core issue is solvent and resin interaction between layers. A solvent-based topcoat applied over certain water-based primers can attack the underlying layer, causing wrinkling or lifting. Conversely, a water-based acrylic topcoat over a solvent-heavy primer may fail to achieve proper inter-coat adhesion because the surface energies do not match. These failures often look fine on day one — the paint appears smooth and well-bonded — then cracking, bubbling, or delamination emerges weeks later as the layers cure at different rates and create internal stress.
Practical rules to avoid compatibility failures:
- Stay within one manufacturer’s system wherever possible. Brands formulate primers and topcoats to work together — proprietary additives in one product may only bond correctly with that brand’s companion products.
- Check the Technical Data Sheet (TDS) for every product. It lists compatible topcoats, recoat windows, and surface requirements. This is not optional reading.
- When using a 2K epoxy primer, pair it with a 2K polyurethane or acrylic urethane topcoat for maximum durability. These two-part systems cure through chemical reaction rather than simple evaporation, creating robust inter-layer bonds.
- Avoid applying single-pack water-based house paint directly over solvent-based industrial primers without confirming compatibility on the TDS. This mismatch is the most common DIY failure mode.
- Respect recoat windows. Apply your topcoat within the timeframe specified by the primer manufacturer. Wait too long and the primer surface may become too hard for the topcoat to bond properly — requiring another light scuff with 320-grit before proceeding.
One more distinction worth understanding: products designed for bare aluminium are not the same as those formulated for powder coated surfaces. Bare aluminium primers need to contend with rapid oxidation — they contain chemistry that bites into fresh metal oxide. Powder coat primers need to bond with a cured polymer layer, which is a completely different substrate. Using a bare-metal primer on intact powder coating will not deliver the same adhesion, even if the product technically mentions aluminium on the label. Similarly, primers designed for anodised aluminium target the porous oxide layer unique to that finish — they do not perform identically on a sealed thermoset powder coat.
Choosing your primer and topcoat as a matched pair, verified against manufacturer data, is the difference between a finish that endures years of Australian sun and one that lifts at the first temperature swing.
Powder Coated vs Anodised vs Bare Aluminium Finishes
That distinction between primer types designed for different aluminium surfaces deserves a closer look — because misidentifying your window’s finish is one of the fastest ways to waste an entire weekend. People searching for advice on painting anodised aluminium window frames frequently end up reading powder coat guides, and vice versa. The preparation approach for each is genuinely different, and applying the wrong method means poor adhesion from the start.
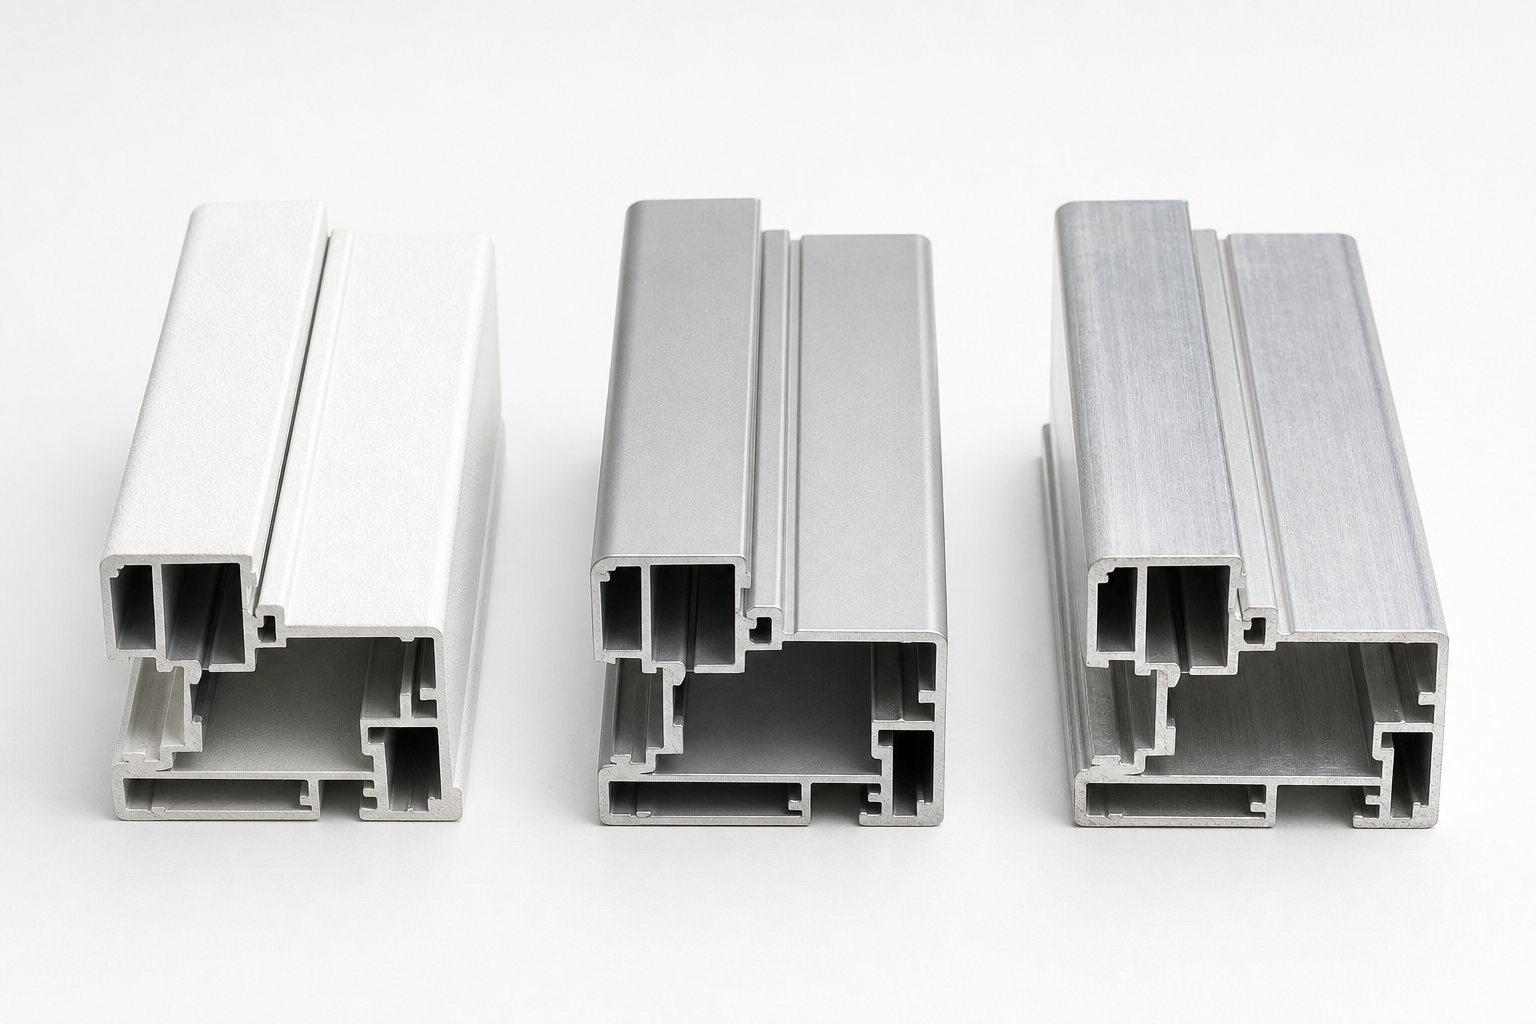
So how to tell if aluminium windows are powder coated versus anodised? Powder coated frames have a slightly textured, opaque finish that sits on top of the metal — you can sometimes see tiny orange-peel texture under strong light. Anodised aluminium retains a metallic sheen because the oxide layer is transparent and integral to the metal itself, not a separate coating applied over it. Bare aluminium, meanwhile, looks raw and silvery, often with visible machining marks or a dull grey patina where natural oxidation has formed.
Powder Coated Aluminium Preparation Requirements
As covered in the previous sections, powder coat is a sealed thermoset polymer with low porosity and low surface energy. Paint has nothing natural to grip. The entire preparation strategy revolves around artificially creating mechanical adhesion through abrasion (320–400 grit) and then using a chemically compatible primer — etch primer or 2K epoxy — that can bridge the energy gap between the cured polymer and your topcoat.
Anodised Aluminium and How It Differs
Anodising is not a coating in the conventional sense. It is an electrochemical process that thickens the natural aluminium oxide layer into a hard, porous structure integrated directly into the metal. That porosity is the critical difference between powder coated and anodised aluminium when it comes to painting. The microscopic pores in an anodised surface actually accept paint more readily than sealed powder coat does — they provide natural mechanical keying points without requiring aggressive sanding.
Painting anodised aluminium window frames still demands proper cleaning and light abrasion, but the surface is inherently more paint-friendly. A quality etch primer or even a well-applied acrylic primer bonds effectively to the porous oxide layer. The challenge with anodised surfaces is different: you need to ensure the pores are free of wax sealers or contaminants that may have been applied during original manufacturing. A thorough solvent wipe handles this.
Bare Aluminium and Oxidation Challenges
Bare aluminium presents the opposite problem. Exposed metal begins forming a thin, unstable oxide layer within minutes of contact with air. This natural oxide is inconsistent and loosely bonded — not the controlled, hardened oxide that anodising produces. If you prime over this patchy oxide without treatment, adhesion remains unreliable.
Painting bare aluminium vs powder coated windows requires a fundamentally different primer chemistry. Bare metal needs an etch primer containing phosphoric acid that reacts directly with the aluminium oxide, converting it into a stable zinc or iron phosphate layer. This chemical conversion creates a bonding surface that standard primers can grip. Skip this step and the paint system has no stable foundation — it sits on top of an oxide layer that continues to grow and shift beneath it.
| Criteria | Powder Coated | Anodised | Bare Aluminium |
|---|---|---|---|
| Surface Characteristics | Sealed thermoset polymer, low porosity, opaque finish | Porous aluminium oxide layer, transparent, metallic appearance | Raw metal with thin, unstable natural oxide |
| Recommended Abrasion | 320–400 grit or scotch-brite pads | 400 grit or fine scotch-brite, light pressure | 180–320 grit to remove loose oxide, then degrease |
| Primer Type Needed | 2K epoxy primer or etch primer for thermoset surfaces | Etch primer or quality acrylic primer | Phosphoric acid etch primer (metal-reactive) |
| Adhesion Difficulty | High — sealed surface resists bonding | Moderate — porous structure aids mechanical grip | Moderate to high — unstable oxide undermines adhesion |
| Expected Paint Longevity | 5–8 years with proper system | 7–10 years with proper system | 5–8 years (oxide instability limits lifespan) |
The takeaway is straightforward: identify your finish type before buying any materials. The difference between powder coated and anodised aluminium is not cosmetic trivia — it dictates which products you need, how aggressively you sand, and what kind of adhesion you can realistically expect. Get the identification right, and the rest of the process follows logically. Get it wrong, and you are fighting chemistry you cannot win against.
Longevity Expectations and Troubleshooting Paint Failures
Knowing which finish type you have and which primer to use gets you to application day. But what happens in year two, year five, or year eight? How long does paint last on powder coated aluminium is one of those questions where the honest answer depends on variables people rarely think about before they start.
How Long Painted Powder Coat Actually Lasts
Factory-applied powder coating on aluminium windows is engineered to last 15 to 20 years in outdoor conditions with minimal maintenance. That is the benchmark you are painting over — and your repaint will not match it. A well-executed paint system using a compatible primer and quality topcoat typically delivers solid performance for 5 to 8 years before noticeable degradation begins. With professional-grade 2K systems and meticulous preparation, you might push toward the upper end. With single-pack DIY products, expect closer to the lower end — some industry sources suggest 5 to 10 years as the realistic maintenance window.
Several Australian-specific factors shorten that lifespan. North and west-facing frames cop relentless UV, which breaks down paint binders faster than protected southern elevations. Coastal salt air accelerates chalking. And the daily thermal cycling across much of Australia — scorching afternoons followed by cool evenings — stresses the bond between paint and powder coat through constant expansion and contraction. Frames in shaded, sheltered positions on temperate southern coastlines will outlast identical paint systems baking on a north-facing wall in Brisbane or Perth.
The practical implication: plan for a maintenance recoat. Unlike factory powder coating that you apply once and forget, a painted-over finish enters you into an ongoing maintenance cycle. Budget for a light sand-back and fresh topcoat every five to eight years if you want the frames to stay looking sharp.
Troubleshooting Peeling Bubbling and Flaking
Paint failures are not random — they are diagnostic. Each failure mode points directly to a specific mistake in the preparation or application process. If you are trying to fix paint peeling off aluminium window frames, identifying the root cause tells you exactly what went wrong and whether the section needs full stripping or can be spot-repaired.
- Peeling (sheets of paint lifting cleanly from the surface) — Almost always caused by inadequate surface preparation. The paint had no mechanical grip because the powder coat was not scuffed properly, or invisible contamination sat between the primer and substrate. Fix: strip the affected area back to the powder coat, re-sand with 320–400 grit, degrease thoroughly, and re-prime before recoating.
- Bubbling (raised blisters beneath the paint film) — Two common causes. First, moisture trapped beneath the coating — painting on a humid day or over a surface that was not fully dry allows water vapour to expand under sun exposure, pushing the paint upward. Second, solvent entrapment from incompatible products — applying a topcoat before the primer has properly flashed off traps volatile solvents that later gas out as bubbles. Fix: puncture and sand back blistered areas, identify the moisture source or product mismatch, allow full cure time, and recoat under dry conditions.
- Flaking (small chips and fragments breaking away) — Typically indicates the coating was applied too thick in a single pass, creating internal stress as it cures, or the wrong primer chemistry was used. Overly thick coats cure unevenly — the outer surface hardens while the inner layer remains soft, creating shear forces that crack and chip the film. Fix: remove flaking material, feather the edges with fine sandpaper, apply thinner coats (two to three light passes rather than one heavy one), and ensure primer-topcoat compatibility.
- Chalking (powdery residue on the surface when rubbed) — UV degradation of the paint binder. Not a preparation failure, just the natural end of the paint’s service life. Common on northern-exposure frames after several years. Fix: wash off chalk residue, lightly sand, and apply a fresh topcoat — full strip-back is not usually necessary if the underlying adhesion is still sound.
Most failures become visible within the first twelve months if caused by preparation errors. If your paint job survives the first full summer without issues, the adhesion is likely sound and future degradation will be gradual UV wear rather than catastrophic delamination.
Colour Matching and Warranty Considerations
RAL colour matching for aluminium windows matters when you are painting only some frames on a facade and need them to blend with untouched neighbours. Aluminium window manufacturers use standardised RAL colour codes — a European colour system with over 200 defined shades — to specify their powder coat finishes. Common architectural RAL colours include 9016 (Traffic White), 7016 (Anthracite Grey), 9005 (Jet Black), and 7035 (Light Grey).
If you know your window manufacturer and the original colour specification, matching becomes straightforward — take the RAL code to any paint supplier and they can mix an exact formula. Without that information, colour-matching gets trickier. Powder coat finishes fade with UV exposure over time, so even a perfect RAL match to the original specification may look slightly different beside a sun-bleached frame that has been in place for a decade. In practice, painting all frames on a single elevation produces a more uniform result than spot-painting individual windows scattered across a facade.
Warranty is the consideration most people overlook entirely. Does painting powder coated windows void warranty? In many cases, yes. Manufacturers typically warranty their powder coat finish against defects like peeling, excessive fading, or chalking for a defined period. Painting over the finish modifies the product in a way that voids that coverage — the manufacturer can no longer assess whether a failure originated in their coating or in the paint system applied on top. Check your window warranty documentation before touching a brush to the frame. If the powder coat is still within its warranty period and showing premature degradation, you may be entitled to a manufacturer remedy rather than needing to repaint at your own cost.
For Australian homes, this warranty question intersects with consumer law. If a powder coat finish fails prematurely in a way that suggests a manufacturing defect, Australian Consumer Law guarantees may apply regardless of the manufacturer’s stated warranty terms. Painting over a defective finish before documenting the issue and raising a claim could undermine your position. Document any existing degradation with photos and contact the manufacturer or installer before proceeding with a repaint — you might save yourself the entire project.
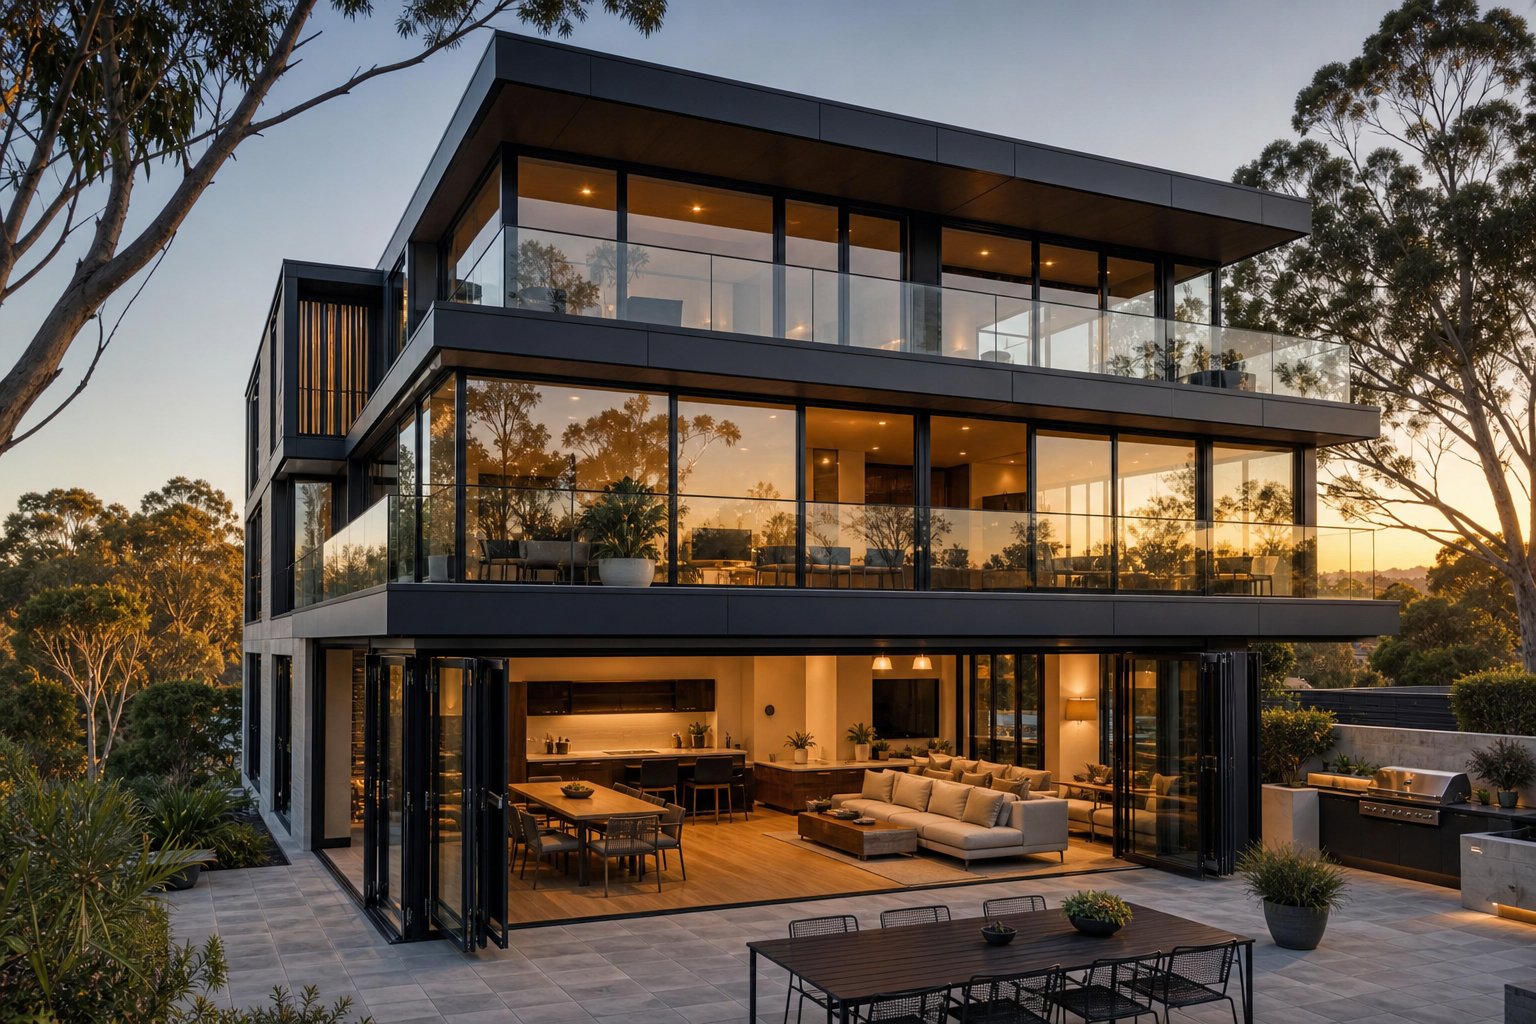
When Replacing Windows Makes More Sense Than Repainting
Warranty claims, ongoing maintenance recoats, colour-matching headaches — at a certain point, the cumulative effort of keeping a painted finish presentable exceeds the cost of solving the problem permanently. Replacing powder coated aluminium windows vs repainting is not always a clear-cut decision, but there are specific situations where replacement or factory re-powder-coating delivers genuinely better value over time.
When Factory Powder Coating Beats DIY Painting
Painting makes sense when the existing coating is still structurally sound and you just want a colour change or minor refresh. It stops making sense when:
- The existing powder coat is severely degraded — chalking to bare aluminium, flaking in large patches, or showing signs of substrate corrosion beneath. Painting over a compromised base layer means your new finish inherits all the instability underneath it.
- Multiple windows need attention simultaneously — repainting eight or ten frames across a house is a substantial time and material investment that delivers 5–8 years of service life. Factory re-coating or replacement delivers 15–20+ years from the same effort window.
- Long-term durability matters more than short-term savings — rental properties, homes you plan to hold for decades, or facades where consistent appearance is non-negotiable all favour a permanent solution over a cyclical one.
- You want access to factory powder coated aluminium window colour options — modern manufacturers offer extensive palettes, including custom RAL colours, textured finishes, and metallic tones that are difficult or impossible to replicate with brush or spray-applied paint. Colours like Monument Matt, Surfmist, and Woodland Grey are standard offerings from Australian suppliers, with custom powder coat colours for aluminium window frames available on request through powder coat systems like Dulux and AkzoNobel.
Factory powder coating meets Australian Standard AS 3715 for architectural aluminium finishes — a durability benchmark that no field-applied paint system can match. The controlled environment of electrostatic application and oven curing produces a finish thickness and consistency that manual painting simply cannot replicate on installed frames.
What to Look for in Replacement Aluminium Windows
For readers who decide when to replace aluminium windows instead of painting, knowing what separates a quality replacement from a basic one helps justify the investment. Focus on three areas:
Colour range and finish quality. Look for suppliers offering a full spectrum from standard architectural colours through to custom specifications. The ability to choose custom powder coat colours for aluminium window frames — matched to your existing facade or a new design direction — means you get exactly the result you want without compromise. Textura and low-gloss finishes reduce visible fingerprints and dust accumulation, particularly on darker tones.
Powder coat certifications. Quality powder coating is not just about colour choice. Ask whether the finish meets AS 3715 and whether the coating supplier (Dulux Powder Coatings or AkzoNobel Interpon, for example) backs the finish with a written performance warranty. These warranties typically cover colour stability, gloss retention, and resistance to chalking, cracking, and peeling for defined periods — something a DIY repaint can never offer.
System performance beyond finish. Replacement is also an opportunity to upgrade the window system itself — thermally broken frames for better energy performance, improved hardware for ease of operation, compliance with current NCC requirements, and glazing upgrades like double glazing or low-E glass. A new window rated under the Window Energy Rating Scheme (WERS) delivers thermal performance improvements that repainting alone obviously cannot touch.
For Australian homeowners and project teams exploring purpose-built aluminium window systems with factory powder coating, providers like MEICHEN offer specification flexibility across window types, custom colour options, and project-ready integration for both residential and commercial builds. Exploring these factory-finished alternatives may deliver better long-term value than committing to repeated repainting cycles — particularly for whole-house projects or new construction where getting the colour and finish right from day one eliminates the maintenance question entirely.
The honest conclusion to the entire painting question comes down to this: yes, you can paint powder coated aluminium windows successfully. The process works when done properly. But for projects where degradation is advanced, where scale makes ongoing maintenance impractical, or where you simply want a finish that lasts decades without intervention, replacement with factory-coated frames is the path that eliminates regret from the equation altogether.
Frequently Asked Questions About Painting Powder Coated Aluminium Windows
1. What happens if you paint over powder coated aluminium without sanding?
Without sanding, paint has no mechanical grip on the sealed thermoset polymer surface. The powder coat’s low porosity and smooth finish mean liquid paint cannot interlock with the substrate. Within weeks or months — especially under Australian thermal cycling — the paint will sheet off in large flakes or peel away cleanly. Sanding with 320-400 grit creates micro-abrasions that give primer something to key into, which is the foundation of the entire paint system’s durability.
2. How do you tell if aluminium windows are powder coated or anodised?
Powder coated frames have an opaque, slightly textured finish that sits on top of the metal — under strong light you may notice a subtle orange-peel texture. Anodised aluminium retains a metallic sheen because its protective oxide layer is transparent and integral to the metal itself, not a separate coating. Bare aluminium looks silvery or dull grey with visible machining marks. This identification matters because each finish type requires different primer chemistry, abrasion levels, and preparation approaches for successful painting.
3. What is the best primer for painting over powder coated aluminium windows?
Two-part (2K) epoxy primer is the professional standard for powder coated surfaces. It uses a resin-hardener reaction to create an extremely tenacious bond to scuffed powder coat profiles. For DIY projects, a quality etch primer containing phosphoric acid also performs well by chemically biting into the prepared surface. The critical rule is ensuring your primer and topcoat form a compatible system — stay within one manufacturer’s range and always check the Technical Data Sheet for confirmed topcoat pairings.
4. Does painting powder coated windows void the manufacturer’s warranty?
In most cases, yes. Manufacturers warranty their powder coat finish against premature defects like peeling, excessive fading, or chalking. Applying paint over the finish modifies the product and prevents assessment of whether failures originated in the factory coating or the applied paint system. Before painting, check your warranty documentation. If the existing powder coat is showing premature degradation while still under warranty, you may be entitled to a manufacturer remedy under Australian Consumer Law — document any issues with photos before proceeding.
5. How long does paint last on powder coated aluminium window frames in Australia?
A well-executed paint system with compatible primer and quality topcoat typically lasts 5 to 8 years before noticeable degradation. Professional-grade 2K systems with meticulous preparation may push toward the upper end. Australian conditions accelerate wear — north and west-facing frames cop intense UV that breaks down binders faster, coastal salt air speeds chalking, and daily thermal cycling stresses the bond between layers. Plan for a maintenance recoat with light sanding and a fresh topcoat within that timeframe to keep frames looking sharp.
More Window & Door Guides