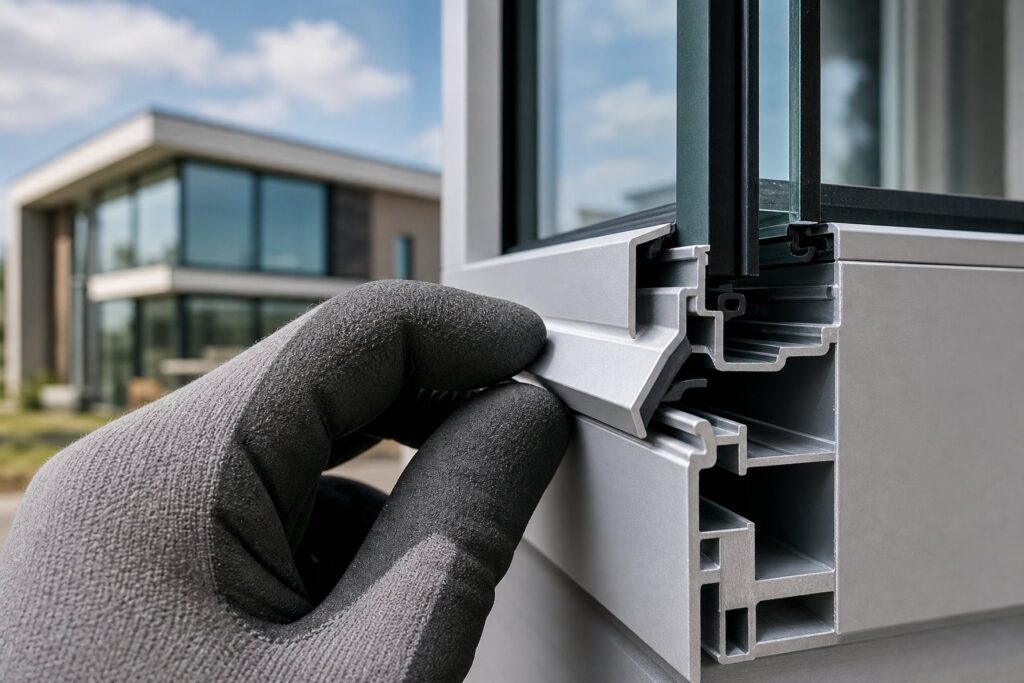
Why Aluminium Window Tracks Need a Different Cleaning Approach
Most guides on how to clean window tracks treat every material the same. Spray something acidic, scrub hard, wipe it down. That approach works fine on vinyl or timber — but aluminium plays by different chemical rules, and ignoring them can leave you with permanently dulled, pitted, or discoloured tracks.
Why Aluminium Tracks Are Different from Vinyl or Timber
The moment aluminium is exposed to air, it forms an ultra-thin oxide layer (aluminium oxide) that acts as a natural shield against corrosion. This self-protecting film is only a few nanometres thick, yet it is the reason your window tracks resist rust the way steel never could. Vinyl is chemically inert and timber is porous — neither reacts to cleaning products the way aluminium does.
Here is where things get tricky. Aluminium is highly sensitive to pH extremes. Strong alkaline cleaners (pH above 8.5) etch the surface and strip that protective oxide layer. Acidic solutions like undiluted vinegar attack anodised finishes. Even a cleaner that seems gentle at room temperature can become aggressive on aluminium when temperatures rise above 60°C.
There is another factor unique to aluminium: thermal conductivity. Aluminium conducts heat roughly 1,000 times faster than timber, which means the metal surface of your window tracks cools rapidly overnight, drawing moisture from the air. That condensation settles into the track channels, trapping dirt in window sill crevices and creating the damp conditions mould needs to thrive. Vinyl tracks stay closer to ambient temperature and rarely produce this effect.
Common Damage from Using the Wrong Cleaning Approach
Highly alkaline solutions can aggressively attack aluminium surfaces. Even brief exposure causes etching, discolouration, and a dull whitish appearance that permanently damages the metal’s finish and protective properties.
Generic cleaning window tracks advice often recommends bleach for mould or bicarb-and-vinegar combinations for stubborn grime. On aluminium, chlorine bleach causes pitting, while vinegar dissolves anodised coatings. Steel wool — a common suggestion for dirty window tracks — leaves micro-scratches that harbour more dirt in window sill channels than you started with.
The best way to clean window tracks made from aluminium starts with understanding your specific finish type and choosing chemistry that works with the metal rather than against it. The step-by-step process ahead covers exactly that — from identifying whether your tracks are anodised, powder-coated, or raw aluminium, through to safe scrubbing techniques, mould treatment, and long-term maintenance tailored to Australian climate conditions.
Step 1 – Identify Your Aluminium Track Finish Before You Start
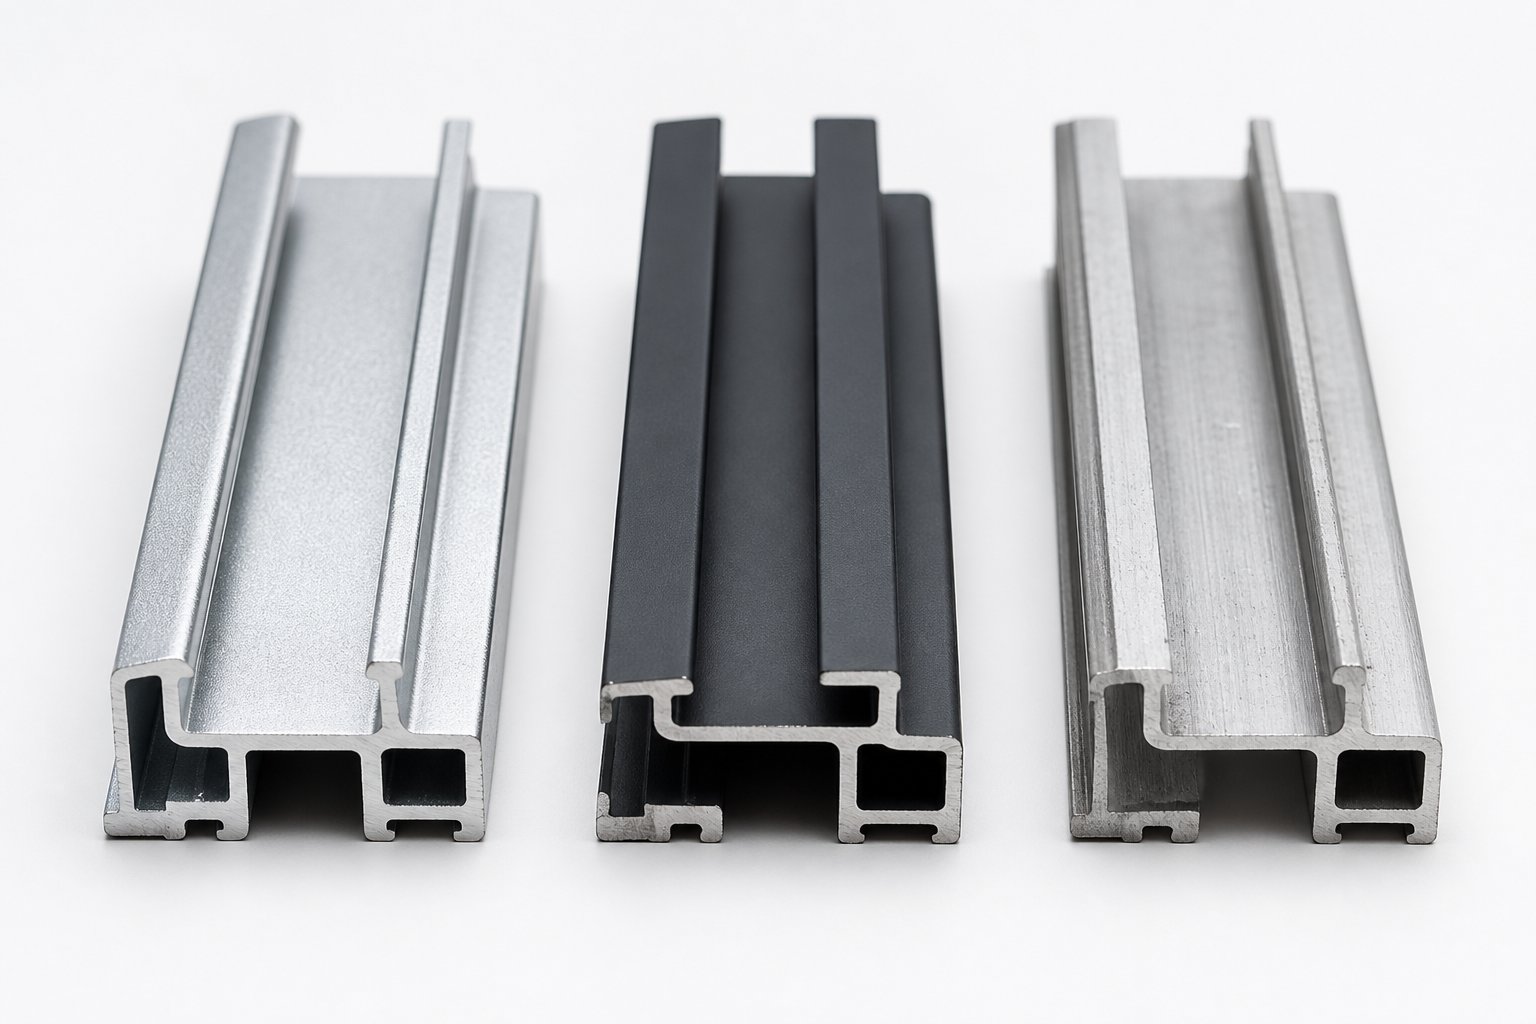
Picking up a sponge and a random window frame cleaner without knowing your finish type is the fastest way to cause irreversible damage. Aluminium window tracks in Australian homes come in three distinct finishes, and each one reacts differently to cleaning agents. A few seconds of inspection now saves you from etching, scratching, or pitting later.
How to Tell If Your Tracks Are Anodised or Powder-Coated
Run your finger along the track surface and look closely at the colour and texture. Each finish has reliable visual and tactile cues:
- Anodised aluminium has a metallic sheen with a slightly cool, hard feel. The colour appears to come from within the metal rather than sitting on top. You will often see silver, bronze, or charcoal tones with a subtle grain visible underneath. The anodic oxide layer is integral to the metal surface — it cannot be peeled or chipped off.
- Powder-coated aluminium feels slightly textured, almost like fine eggshell. The colour sits as a distinct layer on top of the metal. If you find a chip or scratch on the frame elsewhere, you will see bare aluminium underneath the coloured coating. White, cream, and dark grey are common powder-coat colours on Australian window systems.
- Raw (mill-finish) aluminium looks like bare metal — a dull silver-grey with no applied colour. It may show light surface oxidation as a chalky white residue, especially in coastal areas. This finish is less common on modern windows but appears on older installations and some commercial frames.
If you are wondering how to clean window frames without causing harm, this identification step is non-negotiable. The wrong product on the wrong finish creates damage that no amount of polishing will reverse.
Which Cleaning Solutions Are Safe for Each Finish
How do you clean aluminum window frames safely? The answer depends entirely on what you identified above. Anodised surfaces remain vulnerable to both acid and alkaline cleaners — only pH-neutral solutions (pH 6 to 8) are safe. Powder-coated tracks tolerate mild detergents well but scratch easily under abrasive pads. Raw aluminium handles gentle abrasives like baking soda paste but pits rapidly when exposed to caustic or highly alkaline solutions.
| Finish Type | Visual Appearance | Safe Cleaners | Cleaners to Avoid |
|---|---|---|---|
| Anodised | Metallic sheen, colour appears within the metal, hard and smooth | pH-neutral dish soap (pH 6–8), water, soft cloth | Vinegar, citrus-based cleaners, alkaline degreasers, abrasive pads |
| Powder-Coated | Coloured layer on surface, slight eggshell texture, chips reveal bare metal | Mild dish soap, dilute hydrogen peroxide (3%), soft sponge | Steel wool, scouring pads, solvent-based cleaners, acetone |
| Raw Aluminium | Bare silver-grey metal, may show chalky white oxidation | Baking soda paste, mild detergent, nylon scrub pad | Bleach, caustic soda, ammonia-based cleaners, muriatic acid |
Understanding how to clean aluminium window frames starts with matching your method to your material. With your finish identified and the right cleaning agents selected, you are ready to gather the specific tools that suit your track geometry — because even the correct solution applied with the wrong brush can leave marks in those narrow channels.
Step 2 – Gather the Right Tools and Safe Cleaning Solutions
Track geometry dictates tool selection more than most people realise. Aluminium sliding window tracks feature narrow channels, raised guide rails, and tight corners where standard cloths simply cannot reach. Grabbing whatever is under the kitchen sink leads to either ineffective cleaning or accidental surface damage. A few minutes spent assembling the right window track cleaning tools makes the actual job faster and far safer for your finish.
Essential Brushes and Tools for Track Geometry
The channels in most aluminium tracks measure between 10 mm and 20 mm wide — too narrow for a standard scrubbing brush, too deep for a flat cloth to reach the bottom corners. You need tools shaped to match those dimensions.
A dedicated window sill cleaning brush with stiff nylon bristles fits snugly into the channel and dislodges compacted grime without scratching. For tighter corners and around roller housings, an old toothbrush provides the precision you need. Wider flat brushes are useful for the track floor itself, but they skip the edges where dirt accumulates most.
Older window systems often have complex track profiles with multiple ridges and recesses that trap debris stubbornly. Modern two-track aluminium sliding window designs — like the MEICHEN MA100 Sliding Window — feature smoother, more streamlined track profiles that simplify cleaning access considerably. If your tracks have deep grooves or irregular geometry, choose a narrower brush for cleaning window tracks and work section by section.
Here is a complete checklist organised by task:
- Debris removal: vacuum cleaner with crevice attachment, stiff nylon detail brush, old toothbrush, wooden skewer or plastic pick for compacted corners
- Scrubbing: narrow window track cleaning tool (nylon bristle), soft-bristled brush for powder-coated surfaces, microfibre cloths (at least two — one damp, one dry)
- Mould treatment: spray bottle, small mixing bowl, disposable gloves, cotton buds for spot application in tight areas
- Lubrication and reassembly: silicone-based spray lubricant (not petroleum-based), clean lint-free cloth for excess wipe-down
Safe Cleaning Solutions by Finish Type
Your finish identification from Step 1 determines which window track cleaner solutions belong in your kit:
- General cleaning (all finishes): warm water with a few drops of mild dish soap — pH-neutral formulas work across anodised, powder-coated, and raw aluminium without risk
- Mould on powder-coated tracks: hydrogen peroxide at 3% concentration in a spray bottle. It kills mould spores without bleaching or etching the coating
- Oxidation stains on raw aluminium: baking soda paste (three parts baking soda to one part water) applied with a soft nylon pad. The mild alkalinity lifts chalky deposits gently
- Anodised tracks with stubborn grime: pH-neutral commercial cleaner specifically labelled safe for anodised aluminium, or plain soapy water with extra dwell time
Equally important is knowing what to leave in the cupboard. Steel wool and wire brushes gouge aluminium permanently — even a single pass creates micro-scratches that trap future dirt. Chlorine bleach causes pitting and white discolouration on all aluminium finishes. Scouring pads marketed as “gentle” still risk damaging powder-coated surfaces. And combining vinegar with baking soda might look satisfying, but the fizzing reaction neutralises both ingredients, leaving you with salty water that cleans nothing.
Understanding your window system’s track design helps you choose the right brush width and cleaning approach. A narrow window sill cleaning brush paired with the correct solution for your finish type is all you need to tackle even heavily neglected sliding window tracks without leaving a mark. With your toolkit assembled, the real work begins — clearing out loose debris and opening up those critical drainage holes before any liquid touches the surface.
Step 3 – Remove Loose Debris and Clear Drainage Holes
Liquid cleaners applied to dirty window tracks full of loose grit do more harm than good — the grit becomes an abrasive slurry that scratches the aluminium as you scrub. Dry-cleaning first removes that risk entirely and gives you a clear view of what you are actually dealing with underneath.
Vacuum and Brush Out Compacted Debris
So how do you clean window tracks without creating new scratches? Start dry. If your sliding panel blocks full access to the track length, remove it first. Most aluminium sliders lift out by opening the panel fully, gripping both sides, lifting upward into the head track, then tilting the bottom edge toward you and lowering it free. Set the panel on a soft surface away from foot traffic — this is also a good time to inspect the rollers, which we cover in a later step.
With the track fully exposed, follow this sequence:
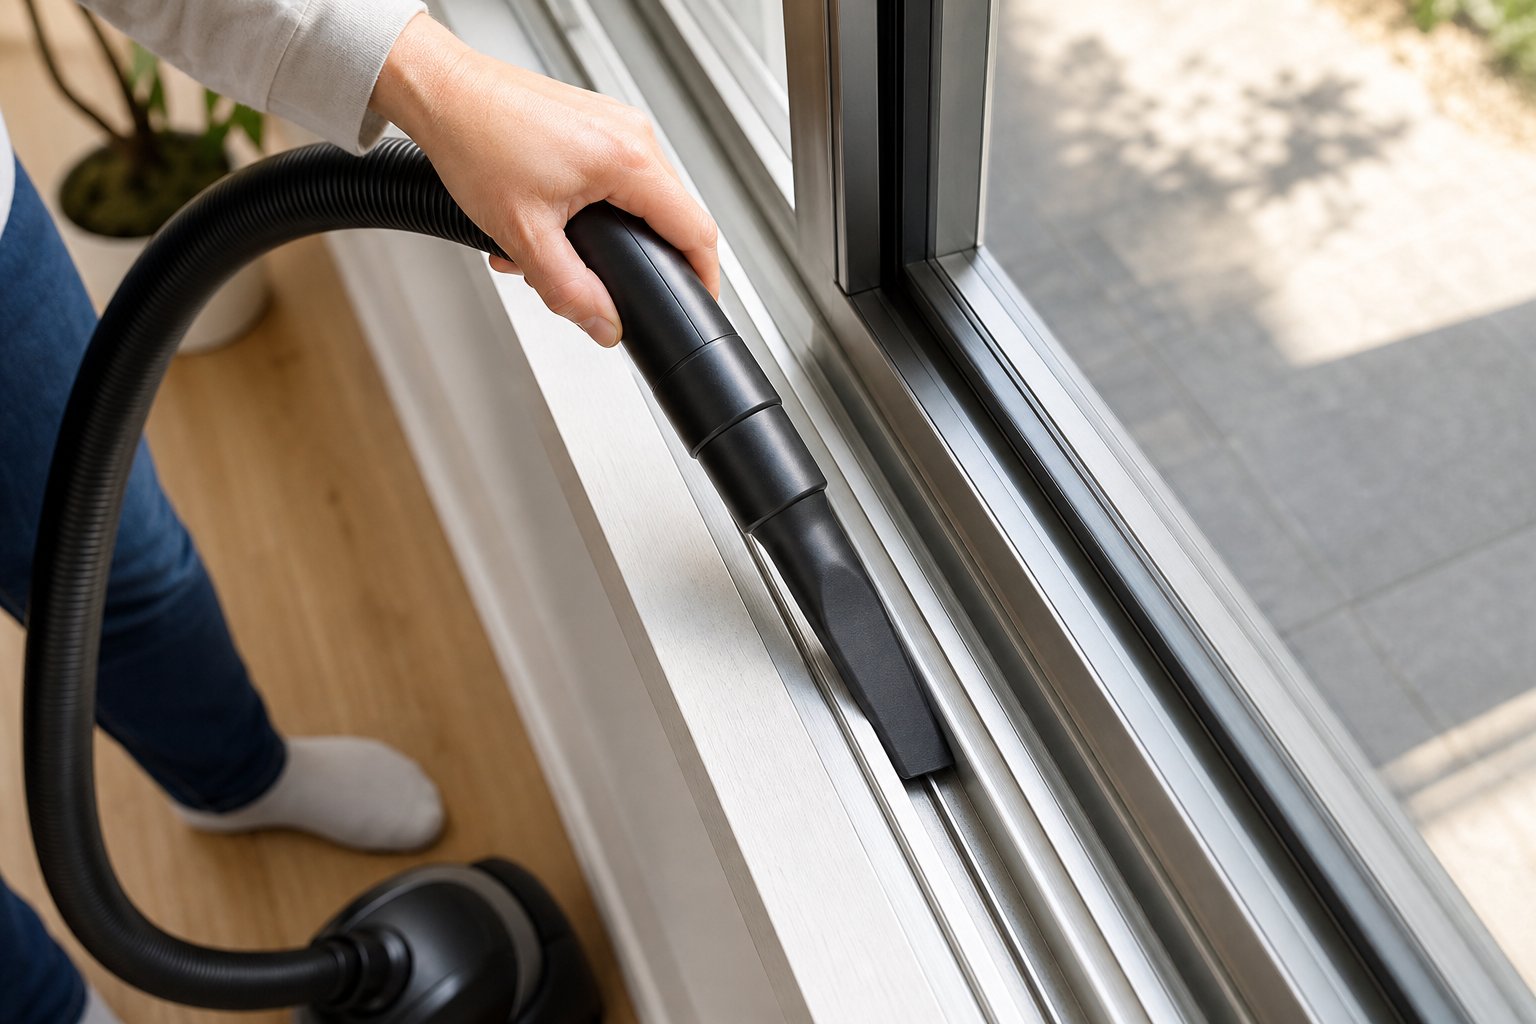
- Run a vacuum with a crevice attachment along the entire track length, working from one end to the other. Focus on corners and the base of guide rails where compacted dirt settles.
- Use a stiff nylon detail brush to dislodge anything the vacuum missed — insect debris, pet hair, dried leaf matter, and fine dust that clings to residual moisture.
- For stubborn compacted patches, scrape gently with a wooden skewer or plastic pick. Avoid metal tools that can gouge the track surface.
- Vacuum a second time to collect everything you have loosened.
This dry pass alone transforms neglected tracks. Pet owners and anyone near trees will likely find a surprising volume of material packed into those narrow channels.
Clear Weep Holes to Prevent Water Damage
Every aluminium sliding window has small drainage slots — called weep holes — at the base of the outer track. These allow rainwater and condensation to escape rather than pooling against the metal. Clogged weep holes trap water inside the frame, accelerating corrosion and potentially damaging wall framing, sheathing, and insulation behind the window.
Locate the weep holes on the exterior bottom edge of the frame — they appear as small rectangular slots or round openings. Push a pipe cleaner or straw brush gently into each hole to clear debris, pulling material outward rather than pushing it deeper. If you cannot see drainage happening, pour a small amount of water into the track and check whether it exits through the weep holes outside. No flow means the channel is still blocked and needs another pass.
This window gap clean step is easy to overlook, yet it is one of the most important things you can do to protect aluminium tracks from long-term damage. Pooled water sitting against aluminium — especially where dissimilar metals meet at screw points — creates the exact conditions for galvanic corrosion.
With loose debris cleared and drainage restored, the tracks are ready for wet cleaning. The method you use next depends on the finish type you identified earlier — and getting it right means the difference between a track that looks renewed and one that ends up etched.
Step 4 – Deep Clean the Tracks Using the Right Method for Your Finish
Your tracks are clear of loose debris and the weep holes are flowing freely. This is where the real window track cleaning begins — applying the right wet method for your specific finish so grime lifts away without etching, scratching, or dulling the aluminium beneath.
The Scrub-and-Wipe Technique for Each Finish
Regardless of finish type, the core technique stays the same: apply your cleaning solution, allow a short dwell time, scrub with a detail brush, then wipe clean with a damp microfibre cloth. What changes is the solution itself and how aggressively you can work the surface.
Always scrub in the direction of the track channel, never across it. Cross-grain scrubbing pushes contaminants into the channel walls and creates visible scratch patterns that trap future dirt.
Powder-coated tracks: Mix a few drops of mild dish soap into warm water — not hot, as excessive heat can soften powder coatings over time. Dip a soft-bristled brush into the solution and apply it generously along the track channel. Let it sit for two to three minutes so the soap can break down greasy film and grime. Then brush clean window rails by working your detail brush along the channel length in smooth, even strokes. Wipe the loosened residue with a damp microfibre cloth, rinsing the cloth frequently.
Anodised tracks: Use only a pH-neutral cleaner diluted in water — no vinegar, no citrus, no alkaline degreasers. The anodic oxide layer is tough but chemically sensitive, and even mildly acidic solutions degrade it over repeated exposure. Apply the solution with a soft cloth or foam sponge, let it dwell for two minutes, then use a nylon-bristled brush to work along the track direction. Wipe and dry immediately to prevent water spots from forming on the hard oxide surface.
Raw aluminium: For oxidation stains — that chalky white buildup common on older mill-finish tracks — mix a paste of three parts baking soda to one part water. Spread the paste along the stained areas with a soft nylon pad and allow three minutes of dwell time. The mild alkalinity dissolves surface oxidation without attacking the base metal. Scrub gently along the channel, then wipe thoroughly with a clean damp cloth. Rinse the track a second time to ensure no residue remains, as dried baking soda leaves a powdery film.
Before committing any solution to the full track length, test it on a small hidden section first — the back corner of the inner track or beneath where the roller housing sits. Wait five minutes and check for discolouration, dulling, or any change in surface texture. This spot-test habit is especially important on anodised finishes, where damage may not appear immediately but worsens with each application.
Handling Stubborn Buildup Without Abrasives
Some grime refuses to budge on the first pass — particularly the dark, sticky residue that forms when dust mixes with old lubricant or condensation over months of neglect. The temptation is to reach for something more aggressive, but abrasive pads and scouring powders create micro-scratches that make future window rail cleaning harder, not easier.
Instead, extend the dwell time. Reapply your cleaning solution and let it work for five to seven minutes rather than two. For truly stubborn patches on powder-coated or raw aluminium tracks, lay a cloth soaked in your cleaning solution directly over the buildup and leave it for ten minutes. The extended contact softens hardened grime so your brush can lift it without extra pressure.
Some homeowners ask whether they can steam clean window tracks as an alternative to chemical solutions. A handheld steam cleaner works well on powder-coated surfaces — the heat and moisture loosen grime effectively without any chemical risk. However, avoid directing concentrated steam at anodised tracks for extended periods, as rapid thermal cycling can stress the oxide layer. If you do steam clean window tracks, keep the nozzle moving and follow up with a dry cloth immediately.
For isolated spots that still resist after extended dwell and repeated brushing, a plastic scraper held at a low angle can shave off hardened deposits without gouging the metal. Work slowly, keep the blade nearly flat against the track floor, and follow up with another soap-and-wipe pass to clean tracks of any remaining loosened material.
Once the tracks are visibly clean and smooth to the touch, the next concern is what may be growing in those damp channels — because mould and corrosion require a different treatment approach entirely.
Step 5 – Treat Mould and Corrosion on Aluminium Tracks
Clean tracks can still harbour two problems that soap and water alone will not solve: mould growth and galvanic corrosion. Both thrive in the same damp conditions, and both require targeted treatment that respects the aluminium surface beneath.
Remove Mould Safely Without Damaging the Aluminium
Aluminium’s high thermal conductivity is the root cause here. Because the metal conducts heat so efficiently, track surfaces cool rapidly overnight — particularly during winter — creating a thermal bridge that draws moisture from indoor air. That condensation settles into track channels and stays there, giving mould exactly what it needs: persistent dampness, organic dust as a food source, and sheltered darkness. If you have ever wondered how to clean mould off window sills and tracks that keep growing back, this condensation cycle is the reason.
Safe mould removal depends on your finish type:
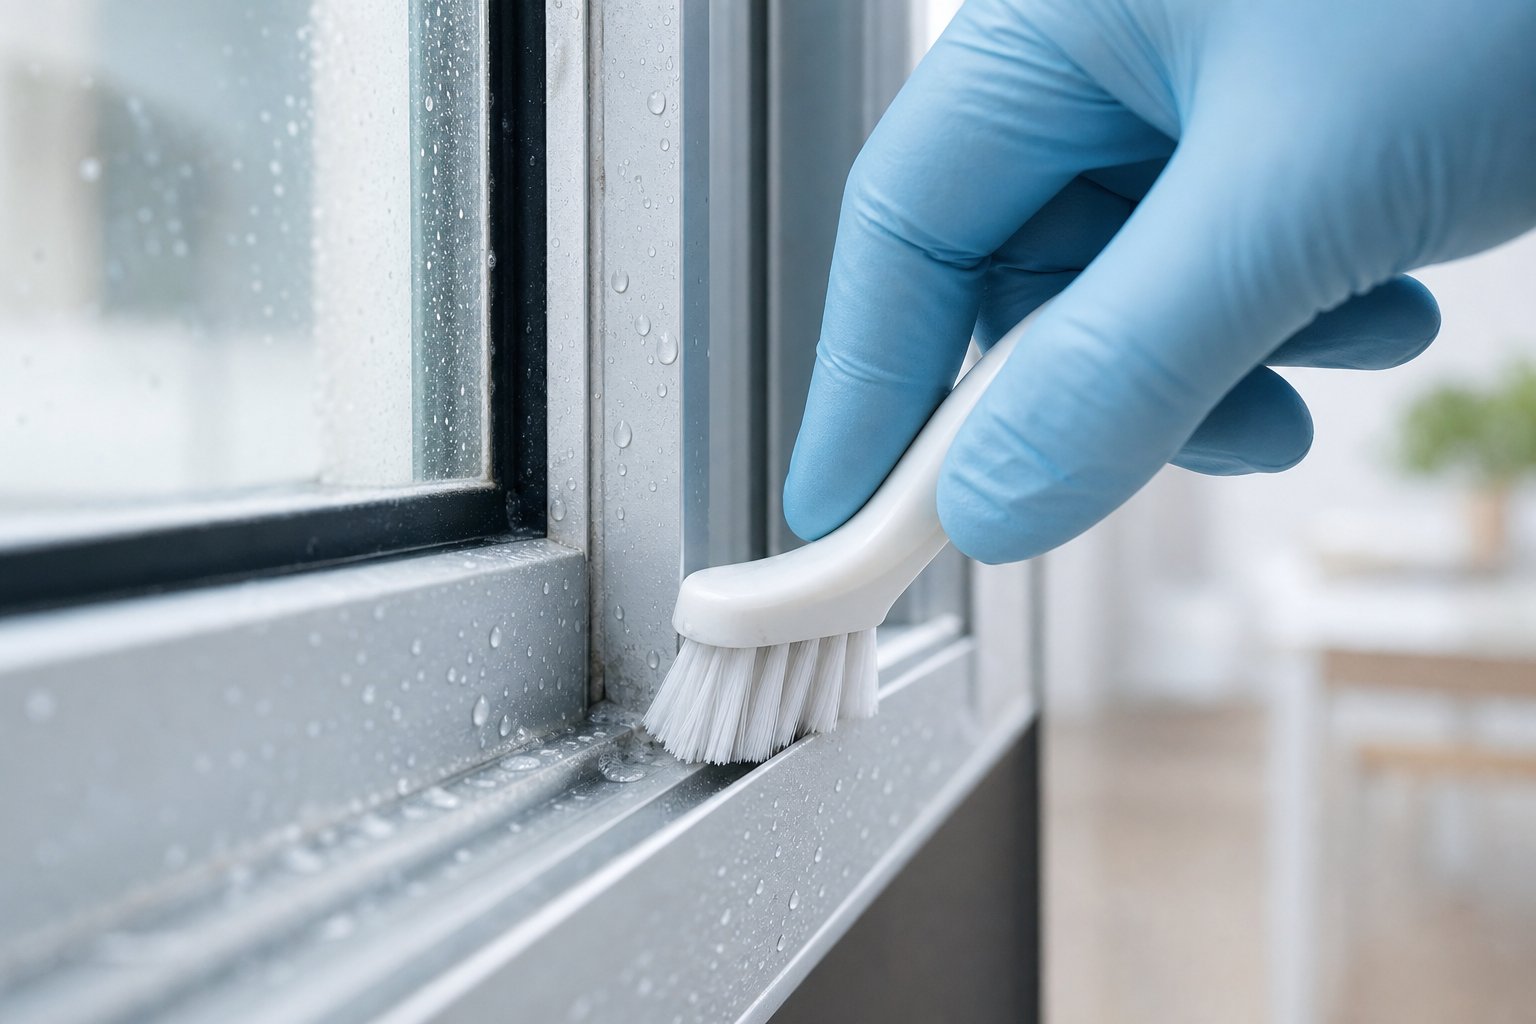
- Powder-coated tracks: Spray undiluted 3% hydrogen peroxide directly onto the mould. Allow ten minutes of contact time — the peroxide oxidises mould cell walls and penetrates shallow root systems without affecting the coating. Scrub gently with a soft nylon brush along the track direction, then wipe clean with a damp microfibre cloth. Hydrogen peroxide is effective against roughly 85% of common household mould species and breaks down into harmless water and oxygen.
- Raw aluminium tracks: Mix a paste of three parts baking soda to one part water and apply it over the affected area. The alkaline environment (around pH 9) disrupts mould growth while remaining gentle on uncoated metal. Leave the paste for fifteen minutes, scrub with a nylon pad, and rinse thoroughly.
- Anodised tracks: Use a pH-neutral commercial mould remover specifically labelled safe for anodised surfaces. Avoid anything acidic — even diluted vinegar degrades the anodic oxide layer over repeated applications.
Whatever your finish, never use chlorine bleach for cleaning black mold on window sills or tracks made from aluminium. Bleach causes pitting, white discolouration, and accelerated surface degradation on all aluminium finishes. Its high water content can also feed mould roots in porous deposits rather than eliminating them. If you are dealing with how to clean moldy window sills around aluminium frames, hydrogen peroxide or baking soda are always the safer choice.
For persistent cleaning mildew from window sills and track corners, repeat the hydrogen peroxide treatment weekly for three consecutive weeks. This catches spores that survive the initial application and germinate in the following days.
Spot and Treat Galvanic Corrosion at Metal Junctions
Aluminium window tracks rarely exist in isolation — they are assembled with steel screws, brass rollers, stainless steel pins, and other dissimilar metals. Wherever two different metals meet in the presence of moisture, a galvanic cell forms. The aluminium acts as the sacrificial anode, corroding preferentially to protect the more noble metal. This electrochemical process accelerates in coastal environments where salt-laden moisture increases electrolyte conductivity dramatically.
Knowing what to look for helps you catch corrosion early — before it creates pitting deep enough to trap dirt permanently. Here are the signs that distinguish active galvanic corrosion from normal surface oxidation:
- Galvanic corrosion: thick white or grey powdery deposits concentrated around screw heads, roller pins, or bracket contact points. The aluminium directly adjacent to the dissimilar metal appears pitted, rough, or eaten away. Deposits feel crusty and flake off to reveal damaged metal beneath.
- Normal oxidation: a thin, even, slightly chalky film spread uniformly across exposed raw aluminium surfaces. The metal underneath remains smooth and intact. This natural oxide layer is protective — do not scrub it away aggressively on raw finishes.
- Early-stage corrosion: a faint white haze or “frosting” forming specifically where aluminium contacts a steel screw or brass component, even if the rest of the track looks fine.
- Advanced corrosion: visible material loss, deep pitting around fastener holes, and loosened screws that no longer grip properly because the surrounding aluminium has degraded.
To treat early-stage galvanic corrosion, gently remove the powdery deposits with a fine nylon pad — never steel wool, which introduces iron particles that worsen the problem. Clean the area with a damp cloth, dry it completely, then apply an aluminium-safe corrosion inhibitor. These products typically contain lanolin or specialised wax compounds that displace moisture and coat the metal junction, interrupting the electrolyte bridge that drives the galvanic reaction.
Corroded or pitted tracks are not just a cosmetic issue. The rough, uneven surface created by pitting harbours more bacteria, mould spores, and even pest debris than smooth, well-maintained aluminium. Each pit becomes a micro-reservoir that resists cleaning and accelerates further degradation. Addressing corrosion early — and keeping those weep holes clear so moisture does not pool at metal junctions — is the most effective long-term defence.
With mould eliminated and corrosion treated, the tracks are ready for the final steps: drying, lubrication, and reassembly that keeps everything sliding smoothly for months to come.
Step 6 – Lubricate the Tracks and Reassemble Your Window
Freshly cleaned aluminium tracks left damp are vulnerable to flash corrosion — a rapid surface oxidation that can undo your work within hours. Drying and lubricating properly protects the finish and ensures your sliding panel glides the way it should.
Use a dry microfibre cloth to wipe every surface of the track channel, paying attention to corners and the base of guide rails where moisture hides. In humid climates — particularly along the Queensland coast or in Sydney’s western suburbs during summer — allow the tracks to air-dry for ten to fifteen minutes after wiping before applying any lubricant. Trapped moisture beneath a lubricant film creates the perfect environment for corrosion to develop unseen.
Apply Silicone Lubricant to Track Channels
Knowing how to lubricate window tracks correctly matters as much as the cleaning itself. A silicone-based spray lubricant is the right choice for aluminium — it dries to a thin, non-greasy film that repels dust and moisture rather than attracting them. Petroleum-based products like WD-40 leave an oily residue that collects airborne grit within days, turning your clean tracks into a sticky mess that accelerates wear on the window runners.
Apply a light, even coat of silicone spray along the full length of each track channel. Less is more here — a thin film provides smooth operation without creating buildup. Use a clean lint-free cloth to spread the lubricant evenly and wipe away any excess. If you have weatherstripping or rubber seals along the frame, a light pass of silicone over those surfaces keeps them supple and prevents cracking. For anyone wondering what to clean window seals with during this step, the same mild soapy water from your earlier cleaning works well — just wipe them down before applying the silicone coat.
Inspect Rollers and Reassemble the Window
Before reinstalling the sliding panel, check the condition of the window runners at the bottom edge. Worn, flat-spotted, or corroded rollers cause grinding that damages freshly cleaned tracks within weeks. Spin each roller with your finger — it should turn freely without catching or crunching. Look for visible flat spots, cracked housings, or white corrosion deposits around the axle pins.
If the rollers spin smoothly but the panel previously dragged or sat unevenly, the roller height adjustment screws likely need a tweak. These small Phillips or hex screws sit near each bottom corner of the panel. Turning clockwise typically raises that side; counterclockwise lowers it. Work in quarter-turn increments and test after each adjustment — over-raising pushes the panel into the head track and creates new resistance.
With rollers inspected and adjusted, reassemble in this order:
- Lift the sliding panel at a slight angle and insert the top edge into the upper head track.
- Swing the bottom edge inward and lower the panel so the rollers seat onto the lubricated track.
- Slide the panel back and forth ten to fifteen times to distribute the silicone evenly across the track surface and roller wheels.
- Reinstall the flyscreen panel using the same lift-and-seat method.
- Close the window fully and check that the latch engages cleanly and the seals compress evenly against the frame — no visible gaps or daylight around the edges.
If you notice uneven seal compression or the latch does not catch, adjust the roller height screws in small increments until the panel sits square. Knowing what to clean window seals with and how to maintain them during reassembly keeps the entire system performing as a unit — clean tracks, smooth rollers, and properly compressed seals working together.
Testing is the final confirmation. The panel should glide with two-finger pressure, produce no grinding or scraping sounds, and latch securely on the first attempt. If it still feels heavy or uneven, the issue likely sits with the rollers themselves rather than the tracks — replacement rollers are inexpensive and straightforward to fit on most Australian aluminium sliding window systems.
How often you need to repeat this full process depends heavily on where you live — and that is where a climate-based maintenance schedule becomes genuinely useful.
Step 7 – Set a Maintenance Schedule Based on Your Climate
Australian conditions vary dramatically from one postcode to the next. A home in Cairns faces entirely different track contamination than one in Canberra or coastal Perth. Applying a single generic schedule — “clean twice a year” — either leaves coastal tracks corroding between cleans or wastes effort in dry inland areas where quarterly attention is plenty. The best way to clean window sills and tracks long-term is to match your frequency to the specific threats your environment throws at the aluminium.
Cleaning Frequency by Climate and Location
Salt, humidity, pollution, and pollen each degrade aluminium tracks at different rates. Coastal environments accelerate corrosion through chloride-rich air, while urban pollution deposits an acidic film that etches unprotected surfaces over time. The table below maps each environment to a realistic cleaning cycle and its primary concern:
| Environment Type | Recommended Frequency | Primary Concern |
|---|---|---|
| Coastal (within 1 km of ocean) | Every 4–6 weeks | Salt spray causing pitting and galvanic corrosion |
| Humid subtropical (e.g. Brisbane, northern NSW) | Monthly | Condensation-driven mould growth in track channels |
| Urban/industrial (e.g. inner Sydney, Melbourne) | Every 6–8 weeks | Pollution film and fine particulate buildup |
| Dry inland or rural (e.g. western NSW, SA) | Quarterly (every 12 weeks) | Dust accumulation and occasional insect debris |
During high-pollen seasons — typically September through November across most of southern Australia — add an interim wipe-down regardless of your location. Pollen mixes with moisture overnight and forms a sticky residue that hardens quickly in track channels if left more than a week or two.
Quick Maintenance Clean vs Seasonal Deep Clean
Not every session needs to be the full multi-step process. Knowing how to keep window tracks clean between deep cleans saves time and prevents the heavy buildup that eventually causes track damage and costly roller replacements.
A quick maintenance clean takes roughly five minutes per window:
- Run a dry detail brush along the track channels to sweep loose dust and debris toward one end
- Vacuum the collected material with a crevice attachment
- Wipe the track floor with a lightly damp microfibre cloth
- Check weep holes are clear — poke through with a pipe cleaner if needed
A seasonal deep clean is the full process covered in Steps 3 through 6 — dry debris removal, wet cleaning matched to your finish type, mould and corrosion treatment, drying, lubrication, and roller inspection. Schedule this two to four times per year depending on your environment row in the table above.
Consistent light maintenance is what keeps frame and sill cleaning manageable. Homeowners who clean window sills and tracks on a regular quick-clean cycle rarely face the compacted black grime that requires aggressive scrubbing — the kind of buildup that risks scratching powder coatings or wearing through anodised layers. Five minutes of prevention is always cheaper than a full restoration or, worse, a window replacement.
That said, there comes a point where no amount of cleaning restores a track to proper function. Recognising when your aluminium tracks have crossed that threshold — and knowing what to look for in a replacement — saves you from throwing effort at a problem that only new hardware can solve.

When Cleaning Is Not Enough and Replacement Makes Sense
Regular maintenance extends the life of aluminium window tracks significantly — but it cannot reverse structural damage. There is a point where even the most diligent cleaning routine, the right window seal cleaner, and fresh silicone lubricant cannot restore smooth, secure operation. Recognising that threshold early saves you from spending money on window track cleaning services for tracks that are fundamentally compromised.
Signs Your Aluminium Tracks Are Beyond Cleaning
A single symptom in isolation might be fixable. When several appear together, replacement becomes the practical path forward. Watch for these warning signs:
- Persistent grinding despite lubrication — if the panel still drags, scrapes, or vibrates after fresh silicone and roller adjustment, the track surface itself is likely pitted or warped beyond what any window rail cleaner can address.
- Visible pitting that traps dirt regardless of cleaning effort — deep corrosion pits act as permanent reservoirs for grime, moisture, and mould spores. No amount of scrubbing restores a smooth surface once the metal has lost material.
- Cracked, perished, or missing seals — rubber weatherstrips that have hardened, split, or pulled away from the frame allow water ingress and air leakage. While you can use a window rubber cleaner to maintain healthy seals, cracked ones need replacement. If the frame itself no longer holds the seal channel properly, the entire unit is compromised.
- Rollers adjusted to their limit — when the height adjustment screws are fully extended and the panel still sits unevenly or drags, the track profile has deformed enough that no roller position compensates.
- White powdery deposits that return within days of cleaning — rapid recurrence of galvanic corrosion deposits around screw points or roller housings indicates active electrochemical degradation that cleaning alone cannot stop.
- Gaps visible when the window is closed — misalignment from warped or corroded tracks creates security vulnerabilities and kills energy efficiency. Even the best window sealant cleaner cannot compensate for a frame that no longer sits square.
Heavily corroded tracks compromise more than smooth operation. Gaps from misalignment let conditioned air escape — driving up energy costs — and provide entry points for water, insects, and potential intruders. If your tracks show multiple signs from the list above, the cost of repeated repairs and window track cleaning services will eventually exceed the cost of a new unit.
What to Look for in a Replacement Sliding Window
If you have determined your tracks are beyond restoration, choosing the right replacement system prevents the same problems from recurring. Prioritise these features:
Smooth, streamlined track profiles. Modern aluminium sliding windows are engineered with simpler channel geometry that resists debris accumulation and makes routine cleaning straightforward. Complex multi-ridge profiles trap dirt — look for designs that minimise crevices.
Quality sealing performance. Effective weatherstripping and tight frame tolerances prevent the water ingress and condensation that cause mould and corrosion in the first place. Knowing how to clean window seals matters, but starting with high-quality seals that resist perishing under Australian UV exposure matters more.
Hardware designed for longevity. Rollers, latches, and fasteners should be corrosion-resistant and replaceable. Stainless steel components at metal junctions reduce galvanic corrosion risk significantly.
The MEICHEN MA100 Sliding Window is one example of a modern two-track aluminium system designed with these priorities in mind — smooth track profiles for easy maintenance access, strong sealing performance, integrated screen configurations, and quality hardware that addresses the exact issues (grinding, poor seals, debris accumulation) that typically prompt replacement. For homeowners whose existing tracks have reached the end of their serviceable life, systems like this represent what current aluminium window engineering can deliver.
Replacement is never the first recommendation. The cleaning and maintenance process in this guide keeps most aluminium tracks performing well for years. But when the metal itself has degraded — when pitting is deep, corrosion is active, and no window sealant cleaner or lubricant restores proper function — a new system is the only path back to smooth, secure, energy-efficient operation.
Frequently Asked Questions About Cleaning Aluminium Window Tracks
1. What is the best homemade solution for cleaning aluminium window tracks?
The safest homemade solution depends on your track finish. For powder-coated aluminium, warm water with a few drops of pH-neutral dish soap works effectively for general grime. For raw aluminium with oxidation stains, a paste of three parts baking soda to one part water gently lifts chalky deposits without damaging the metal. Anodised tracks require only pH-neutral soapy water — avoid vinegar or citrus-based mixtures, as their acidity degrades the protective anodic oxide layer over repeated use. Always test any solution on a hidden section of track first and allow five minutes before checking for discolouration.
2. Can I use vinegar to clean aluminium window tracks?
Vinegar is not recommended for aluminium window tracks, particularly anodised finishes. The acetic acid in vinegar attacks the anodic oxide layer that protects the metal, causing progressive dulling and surface degradation with each application. Even on powder-coated or raw aluminium, vinegar offers no advantage over safer alternatives like mild dish soap or baking soda paste. If you need extra cleaning power for stubborn buildup, extend the dwell time of your pH-neutral solution rather than switching to an acidic product.
3. How often should I clean my aluminium window tracks in Australia?
Cleaning frequency should match your local environment. Coastal homes within one kilometre of the ocean need track cleaning every four to six weeks due to salt spray accelerating corrosion. Humid subtropical areas like Brisbane benefit from monthly cleaning with mould checks. Urban environments require attention every six to eight weeks because of pollution film buildup. Dry inland or rural locations can manage with quarterly deep cleans. Between full cleans, a five-minute maintenance pass with a dry brush and damp cloth prevents heavy accumulation regardless of location.
4. Why do my aluminium window tracks keep getting mouldy?
Aluminium’s high thermal conductivity is the primary cause. The metal cools rapidly overnight, creating a thermal bridge that draws moisture from indoor air. This condensation settles into track channels and remains trapped, providing the persistent dampness mould needs to grow. Organic dust in the channels serves as a food source, while the sheltered darkness of the track profile completes the ideal growing environment. To break the cycle, treat existing mould with 3% hydrogen peroxide on powder-coated tracks or baking soda paste on raw aluminium, then maintain clear weep holes so moisture drains rather than pooling.
5. When should I replace aluminium window tracks instead of cleaning them?
Replacement becomes the practical choice when multiple warning signs appear together: persistent grinding despite fresh lubrication and roller adjustment, visible pitting deep enough to trap dirt permanently, cracked or missing weatherseals allowing water ingress, roller height screws adjusted to their limit without resolving drag, and white corrosion deposits that return within days of cleaning. These symptoms indicate structural degradation that no cleaning routine can reverse. Modern two-track aluminium sliding window systems like the MEICHEN MA100 are designed with smoother track profiles, quality sealing, and corrosion-resistant hardware that address these exact failure points.
More Window & Door Guides