What an External Aluminium Window Sill Actually Does
Most people glance at the outside window sill without giving it a second thought. It looks like a simple ledge beneath the glass. In reality, that narrow strip of metal is doing serious structural and protective work every time it rains, and getting it wrong invites problems that are expensive to fix once they take hold inside the wall cavity.
What Is an External Window Sill and Why Does It Matter
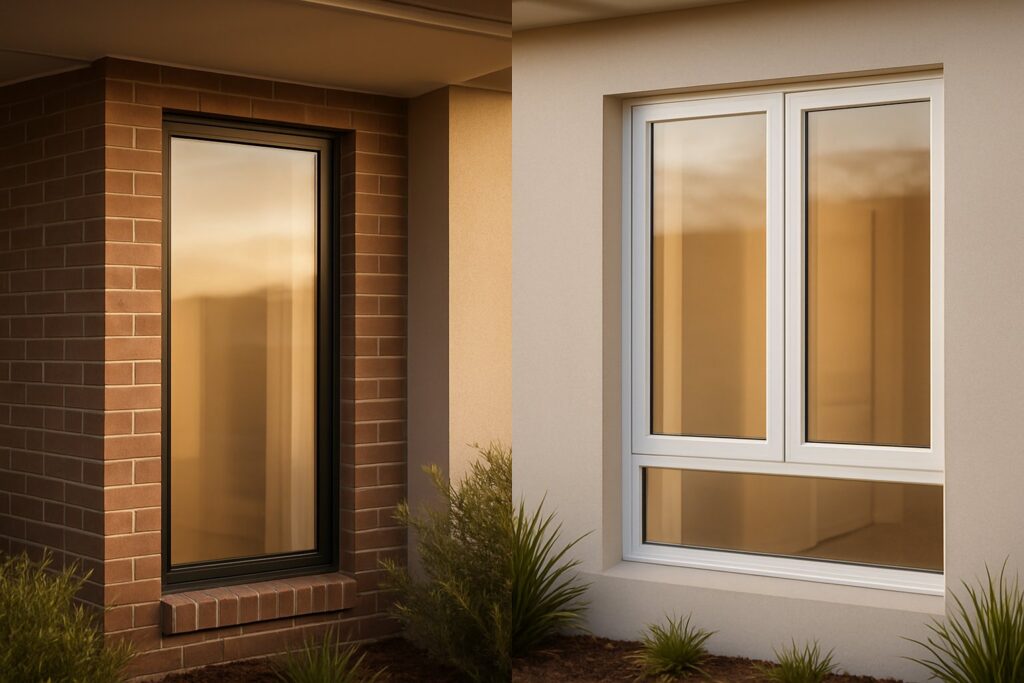
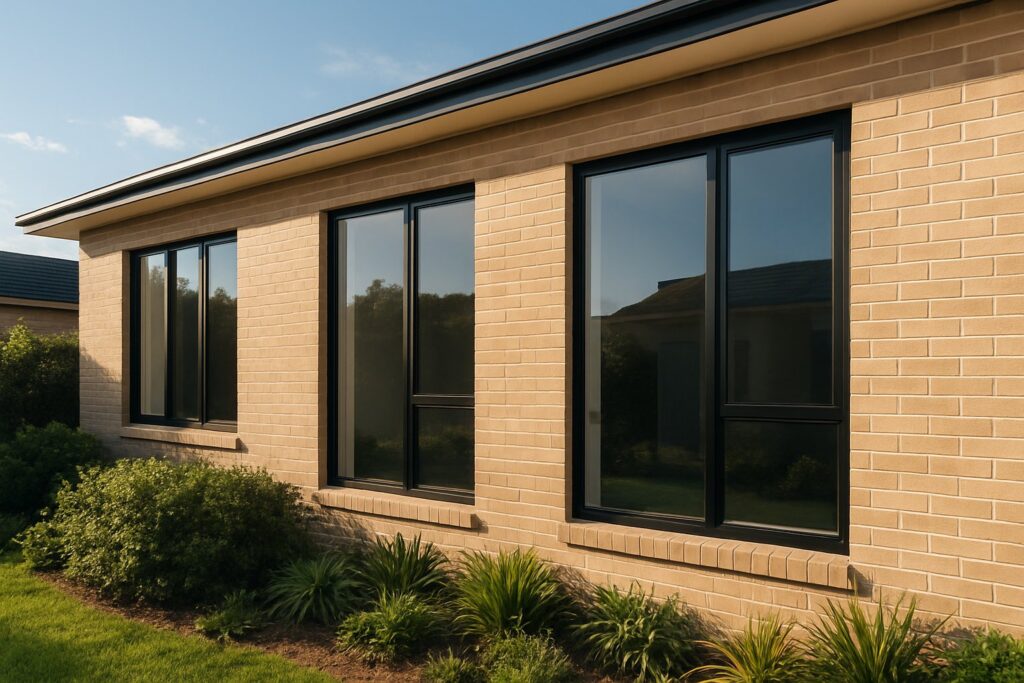
An external aluminium window sill is a profiled aluminium component fitted to the outside base of a window opening. Its primary role is to intercept rainwater running down the glass and frame, then direct it away from the wall face via a sloped surface and drip edge, preventing moisture from penetrating the sub-sill structure and facade below.
So what is a window sill doing that the frame alone cannot handle? The frame seals the glazed unit into the opening, but it does not manage water once it leaves the glass surface. The exterior window sill bridges that gap. It sits at a slight angle, typically between 5 and 15 degrees, so water cannot pool. A formed drip groove on the underside stops runoff from tracking back toward the brickwork or render. Beyond drainage, the sill shields the mortar bed, cavity closer, and insulation layer sitting directly beneath the window from UV exposure and driving rain.
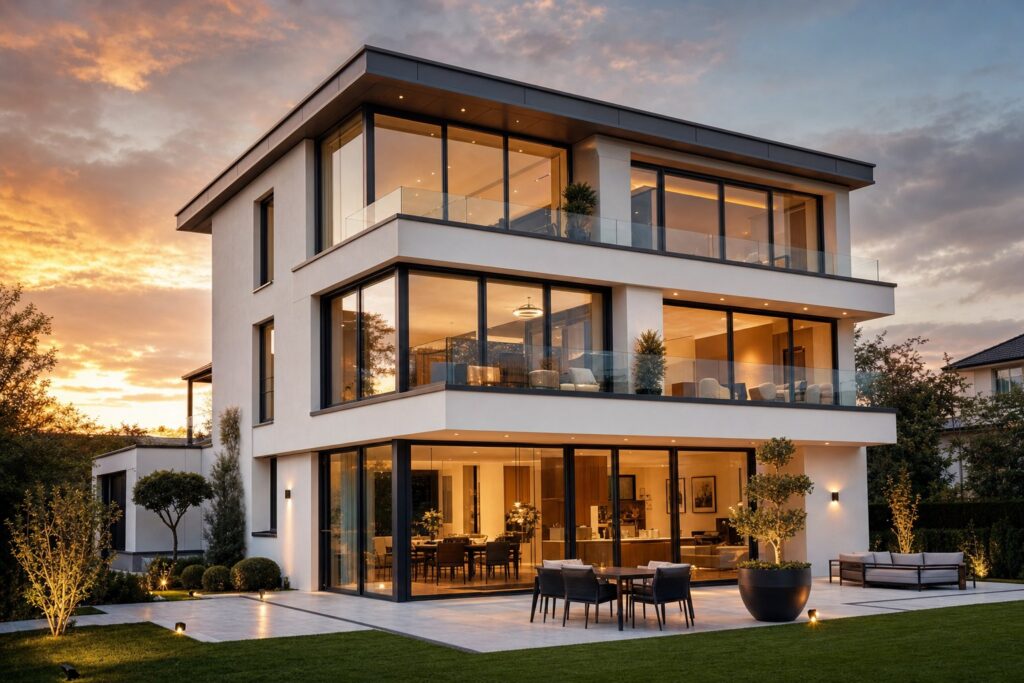
Internal sills serve a different purpose entirely. They sit flat inside the room as a finished board or shelf. External sills, by contrast, must slope outward, resist weather, and endure decades of thermal cycling without warping or corroding. Aluminium handles all three demands. It is lightweight, dimensionally stable, corrosion-resistant when powder-coated, and slim enough to complement modern facade lines. These qualities explain why aluminium has overtaken timber and pressed steel as the go-to exterior window sill material across Australian residential and commercial builds.
Sill vs Cill vs Ledge and Other Terminology Explained
Search for this component online and you will encounter a confusing mix of terms. In the UK trade, “cill” is the traditional spelling still used on many specification sheets and supplier catalogues. In Australia and North America, “sill” dominates. Both refer to the same element. Whether you type window sill or window cill into a search bar, you are looking for the same profiled component at the base of the opening.
The word “ledge” appears in everyday language too. People often call the outside projection an exterior window ledge, especially when describing the flat portion where birds like to perch. Technically, the ledge is just the visible nose of the sill. The full sill profile extends back under the window frame, tucking behind the bottom rail to form a weathertight junction. Understanding these terms matters when ordering or specifying, because suppliers list products under different names depending on region. The function, however, stays the same: manage water, protect the wall, and give the reveal a clean finish.
With that function clear, the next question becomes which material delivers the best balance of longevity, weight, and aesthetics for Australian conditions.
How Aluminium Compares to Other Sill Materials
Choosing window sill materials is rarely a straightforward decision. Budget, climate exposure, building style, and long-term maintenance all pull in different directions. Aluminium dominates modern Australian builds for good reason, but it is not the only option on the table. A clear side-by-side comparison helps you see exactly where each material excels and where it falls short.
Aluminium vs PVC vs Stone vs Timber at a Glance
No single article typically lays out all the major types of exterior window sills in one place with honest trade-offs. The table below addresses that gap, covering the six most commonly specified materials for external sill applications in Australia.
| Material | Typical Lifespan | Weight | Maintenance Level | UV Resistance | Cost Bracket (AUD, supply only per lineal metre) |
|---|---|---|---|---|---|
| Aluminium (powder-coated) | 40-60+ years | Light | Very low | High (quality coating) | $30-$80 |
| PVC / uPVC | 20-30 years | Light | Low | Moderate (yellows over time) | $15-$40 |
| Natural stone (granite, bluestone) | 80-100+ years | Very heavy | Low-moderate | Very high | $90-$250+ |
| Timber (hardwood) | 15-30 years (climate dependent) | Medium | High | Low (requires coating) | $40-$90 |
| Zinc | 40-60 years | Medium-light | Very low | High | $60-$120 |
| Composite | 25-40 years | Medium | Low | Moderate-high | $35-$70 |
A few details deserve extra context. PVC sills are the cheapest upfront, but intense Australian UV degrades them faster than in milder climates, leading to brittleness and discolouration within two decades. Exterior wood window sills look beautiful on period homes, yet they demand repainting or oiling every two to three years and are vulnerable to rot if moisture sits against end grain. A composite window sill blends timber fibres or polymers into a board that resists rot better than solid timber, though it still cannot match aluminium for slim profile depth or thermal stability at exposed sites.
When Aluminium Is the Strongest Choice
Certain project scenarios tilt the decision heavily toward aluminium. Coastal builds within salt-spray zones need a sill that will not pit, swell, or delaminate. Powder-coated aluminium, especially with a marine-grade polyester coating, handles salt air without the accelerated corrosion that eats zinc or exposed steel. High-rise facades and multi-storey apartment blocks favour aluminium for its low weight per lineal metre, reducing load on thin masonry or lightweight cladding systems.
Colour-matched modern designs benefit too. Aluminium sills can be powder-coated to any RAL colour, allowing precise matching with aluminium window frames, cladding panels, or fascia details. Try achieving that kind of colour consistency with stone or timber. The range of types of window sills available in extruded aluminium also means architects can specify slim 1.5 mm profiles that virtually disappear into the facade line, something bulky stone or chunky PVC cannot replicate.
When Another Material May Suit Better
Honesty matters here. Heritage restoration projects governed by council heritage overlay controls often require stone or timber sills to match the original building character. Replacing a Victorian-era sandstone sill with aluminium may not receive development approval, regardless of performance advantages. In these cases, natural stone or faithfully detailed hardwood remains the right call.
Ultra-budget renovations where the sill faces minimal weather exposure, perhaps a sheltered ground-floor window under a deep verandah, might justify a PVC sill purely on cost grounds. The lower UV load in a shaded position reduces the yellowing problem that plagues uPVC in full sun.
For everything else, aluminium strikes the strongest balance across the criteria that matter most in Australian conditions: lifespan, weight, thermal cycling tolerance, and minimal upkeep. The real performance difference, though, comes down to profile design, which determines how effectively the sill manages water and integrates with the window frame above it.

Types of External Aluminium Sill Profiles
Profile design is where the engineering lives. Two sills made from the same aluminium alloy can perform vastly differently depending on how they were formed and what cross-sectional shape they carry. Most suppliers list profile options without explaining why one shape suits a particular application better than another, or why the manufacturing method behind the profile matters just as much as the material itself.
Extruded vs Pressed Aluminium Profiles
Aluminium sills reach their final shape through one of two main processes: extrusion or press-braking (sometimes called roll-forming). The difference is not cosmetic. It affects structural integrity, dimensional consistency, and how long the sill holds up under decades of thermal movement.
Extrusion works by forcing heated aluminium billets through a shaped die under enormous pressure. The result is a continuous length of material with a uniform cross-section, consistent wall thickness, and integrated features like drip grooves, upstand legs, and drainage channels all formed in a single pass. Because the metal flows through the die as one piece, there are no joints, welds, or weak points within the profile. Extruded aluminium produces a stronger, more durable component compared to thinner sheet alternatives, largely because more material is used in its fabrication and the grain structure aligns along the length of the profile.
Pressed or brake-formed sills start as flat aluminium sheet, typically 0.7 mm to 1.2 mm thick. The sheet is cut to size and bent into shape on a press brake or passed through rollers. This method is cheaper and faster for simple shapes, but it has limitations. Bends create stress concentrations that can fatigue over time. Wall thickness is uniform only because the sheet started that way, not because the profile was engineered for load paths. Complex features like integrated drip edges or thermal breaks require additional folding operations, each one adding a potential failure line.
For Australian conditions, where sills endure extreme UV, wide temperature swings, and in coastal areas salt-laden air, extruded profiles offer a measurably longer service life. They resist deflection under thermal expansion better because their cross-section can be designed with internal ribbing or hollow chambers that add stiffness without extra weight. If budget allows, extruded profiles are the stronger specification for any exposed application.
Common Profile Shapes and Their Applications
Regardless of manufacturing method, external aluminium sills come in several standard profile shapes. Each suits a different window type, wall construction, or aesthetic preference.
- Flat sill – A minimal, low-profile shape with a slight built-in fall. Commonly specified for flat sill window applications in modern minimalist facades, particularly on rendered or panelled walls where a slim shadow line is preferred.
- Sloped/angled sill – Features a pronounced drainage slope of 10 to 15 degrees built into the profile itself. Ideal for exposed elevations and high-rainfall regions where positive water shedding is critical. Often paired with brick veneer or masonry construction.
- Bullnose (decorative nosing) – A rounded front edge that softens the visual line of the sill. Popular on residential builds where a more traditional or transitional aesthetic is desired. The curved nose still incorporates a drip groove underneath to prevent water tracking back to the wall.
- Stepped sill – Incorporates a rear upstand step that tucks behind the window frame, creating a mechanical barrier against wind-driven rain. This profile is common in commercial glazing and curtain wall systems where the sill must integrate with pressure-equalised drainage cavities.
- Watertable sill – A wider, more substantial profile that doubles as a horizontal feature band on the facade. Traditionally used to define the transition between floor levels or different cladding materials, a watertable sill projects further from the wall face and carries a deeper drip edge.
Standard nose projections on residential sills typically range from 25 mm to 40 mm beyond the wall face. This overhang ensures water drips clear rather than running down the render or brickwork below. The drip groove, a small channel machined or formed into the underside of the nose, breaks the surface tension that would otherwise draw water back along the soffit of the sill toward the wall.
Understanding Sub-Sill and Sill Pan Components
A visible sill is only one layer of defence. Beneath it, best-practice detailing calls for a window subsill or sill pan that acts as a secondary drainage plane. This hidden component catches any moisture that bypasses the primary sill, whether from condensation running down inside the frame, a failed corner seal, or wind-driven rain forced past the frame-to-sill junction.
An aluminium sill pan is essentially a shallow tray formed from sheet aluminium or a purpose-made extrusion, fitted into the rough opening before the window frame is installed. Its back edge turns up to form a dam, and its front edge either laps over the external sill or drains outward through weep slots. Building science research emphasises that all windows eventually allow some moisture past their frames, making sub-sill pan flashing a critical detail for long-term wall durability.
In Australian residential construction, sub-sills are increasingly specified alongside the primary external sill as a system. The combination means that even if sealant fails at the frame junction years down the track, water still has a managed exit path rather than accumulating inside the wall cavity. When specifying your sill profile, always check whether the supplier offers a compatible sub-sill or pan component designed to work with that particular extrusion shape. Mismatched profiles create gaps that defeat the purpose of the secondary drainage layer entirely.
With profile type and sub-sill integration sorted, the next consideration is getting the physical dimensions right, because even a perfectly shaped sill fails if it is ordered too short, too shallow, or without the correct end cap allowances.
How to Measure for the Right External Window Sill Size
Ordering an external window sill that arrives at the wrong length or depth is a frustratingly common problem, and it almost always traces back to one overlooked step during measurement. The sill itself is not a complex component, but the interaction between reveal width, end cap type, insulation depth, and drainage fall means you cannot simply tape-measure the opening and call it done. Getting the exterior window sill detail right at the measurement stage saves time, avoids costly reorders, and ensures a weathertight result once installed.
Measuring Width Including End Cap Allowances
Width is the first dimension most people reach for, and it is also where the most frequent mistakes occur. The base measurement is simple: measure horizontally from one side of the reveal to the other, at the point where the sill will sit. Take this measurement at both the front and back of the opening, and use the larger figure if there is a discrepancy. Older masonry openings are rarely perfectly square.
Here is where end caps for window sills change the equation. End caps are the small return pieces fitted to each exposed end of the sill, and their style dictates how much extra length you need to add, or in some cases subtract, from the reveal measurement.
- Plaster return end caps sit flush with the internal reveal face. The sill is ordered to match the reveal width exactly, with each end cap adding roughly 15-25 mm that tucks into the plaster or render line.
- Brick return end caps extend slightly into the brickwork at each side. Add 20-30 mm per end to accommodate the return section that beds into a raked mortar joint.
- Sloping end caps angle downward to match the sill’s drainage fall and are visible from the side. The sill body is typically ordered to the reveal width, with the angled cap adding its own finished projection at each end.
Always confirm the end cap style before placing your order. The wrong assumption here means either a visible gap at the reveal junction or a sill that is physically too long to fit the opening.
Determining Depth and Projection From the Wall Face
Depth, sometimes called projection, is measured from the front face of the window frame outward to the external face of the wall, then extended further to account for overhang. Place your tape at the bottom rail of the frame and measure straight out to the rendered, brick, or cladded face below. That gives you the base depth.
Add a minimum of 30-40 mm beyond the wall face for the nose overhang. This projection ensures rainwater drips clear of the facade rather than running down the wall surface. For taller buildings or heavily exposed elevations, some specifiers push to 50 mm overhang for extra protection.
One factor that catches people out is insulation thickness. If external wall insulation or a thicker cavity closer has been installed since the window was originally fitted, the effective wall face sits further out than it used to. Measure to the finished face, not the masonry behind it. Missing this detail results in a sill that barely projects past the insulation layer and fails to throw water clear.
Accounting for Slope and Drainage Fall
A flat external aluminium sill is a ponding sill, and ponding leads to staining, algae growth, and eventually moisture ingress at the back edge. Every sill needs a forward slope so water runs off under gravity rather than sitting until it evaporates.
The recommended minimum drainage fall for an external window sill is 5 degrees from the horizontal, with 10 to 15 degrees considered best practice for exposed or high-rainfall locations.
Some profiles have this slope built into the extrusion itself. Others rely on the sub-frame or mortar bed beneath the sill being set at the correct angle. Before ordering, verify which approach your chosen profile uses. If the slope is not built in, you will need to confirm that the sub-sill surface can be prepared at the required angle, either by shaping the mortar bed or fitting angled packing brackets.
Bringing all of this together, here is the complete measurement sequence in order:
- Measure the reveal width at the sill line, front and back, and record the larger figure.
- Select your end cap style and add or confirm the corresponding length allowance per end.
- Measure depth from the frame face to the finished external wall face.
- Add 30-50 mm for nose overhang beyond the wall.
- Check whether external insulation or a cavity closer increases the effective wall depth.
- Confirm whether your chosen profile has built-in slope or requires the sub-frame to provide the drainage angle.
- Verify the sub-frame or mortar bed can achieve at least 5 degrees of forward fall.
Double-check every measurement at least twice. A 10 mm error on paper becomes a poorly fitting sill on site, and most suppliers will not accept returns on custom-cut lengths. With accurate dimensions in hand, attention shifts to the surface finish that will protect your sill against UV, salt, and years of weather exposure.
Powder-Coating Finishes and Colour Options
The aluminium underneath your sill may last half a century, but its surface finish determines whether it still looks good after five years or fifteen. Coating choice affects far more than colour. It controls UV fade resistance, salt tolerance, scratch repairability, and how well your window sill trim exterior blends with the rest of the facade over time. Yet most suppliers list colour swatches without explaining why one coating system outperforms another in real-world conditions.
Powder-Coating vs Anodising for External Sills
Two primary finishing methods dominate the aluminium sill market, and each brings distinct advantages.
Powder coating applies a dry polyester or fluoropolymer powder electrostatically to the aluminium surface, then cures it in an oven at around 200 degrees Celsius. The result is a tough, uniform film typically 60 to 80 microns thick. This process opens up a virtually unlimited colour palette, from bright whites to textured metallics, and minor surface damage can be repaired with colour-matched liquid touch-up coatings. For most Australian residential builds, powder coating is the standard specification for metal window trim exterior components.
Anodising takes a different approach entirely. It is an electrochemical process that thickens aluminium’s natural oxide layer rather than applying an external film. The finish becomes part of the metal itself, so it cannot peel or flake. Anodised surfaces offer excellent UV stability and a distinctive metallic lustre that powder coating cannot replicate. The trade-off is a narrower colour range, limited mostly to silver, bronze, champagne, and dark charcoal tones. Anodised finishes also scratch more visibly and are harder to repair on site.
For external sills specifically, powder coating wins on versatility and repairability. Anodising suits high-end architectural projects where a natural metallic aesthetic is the priority and the sill will not be subject to regular physical contact.
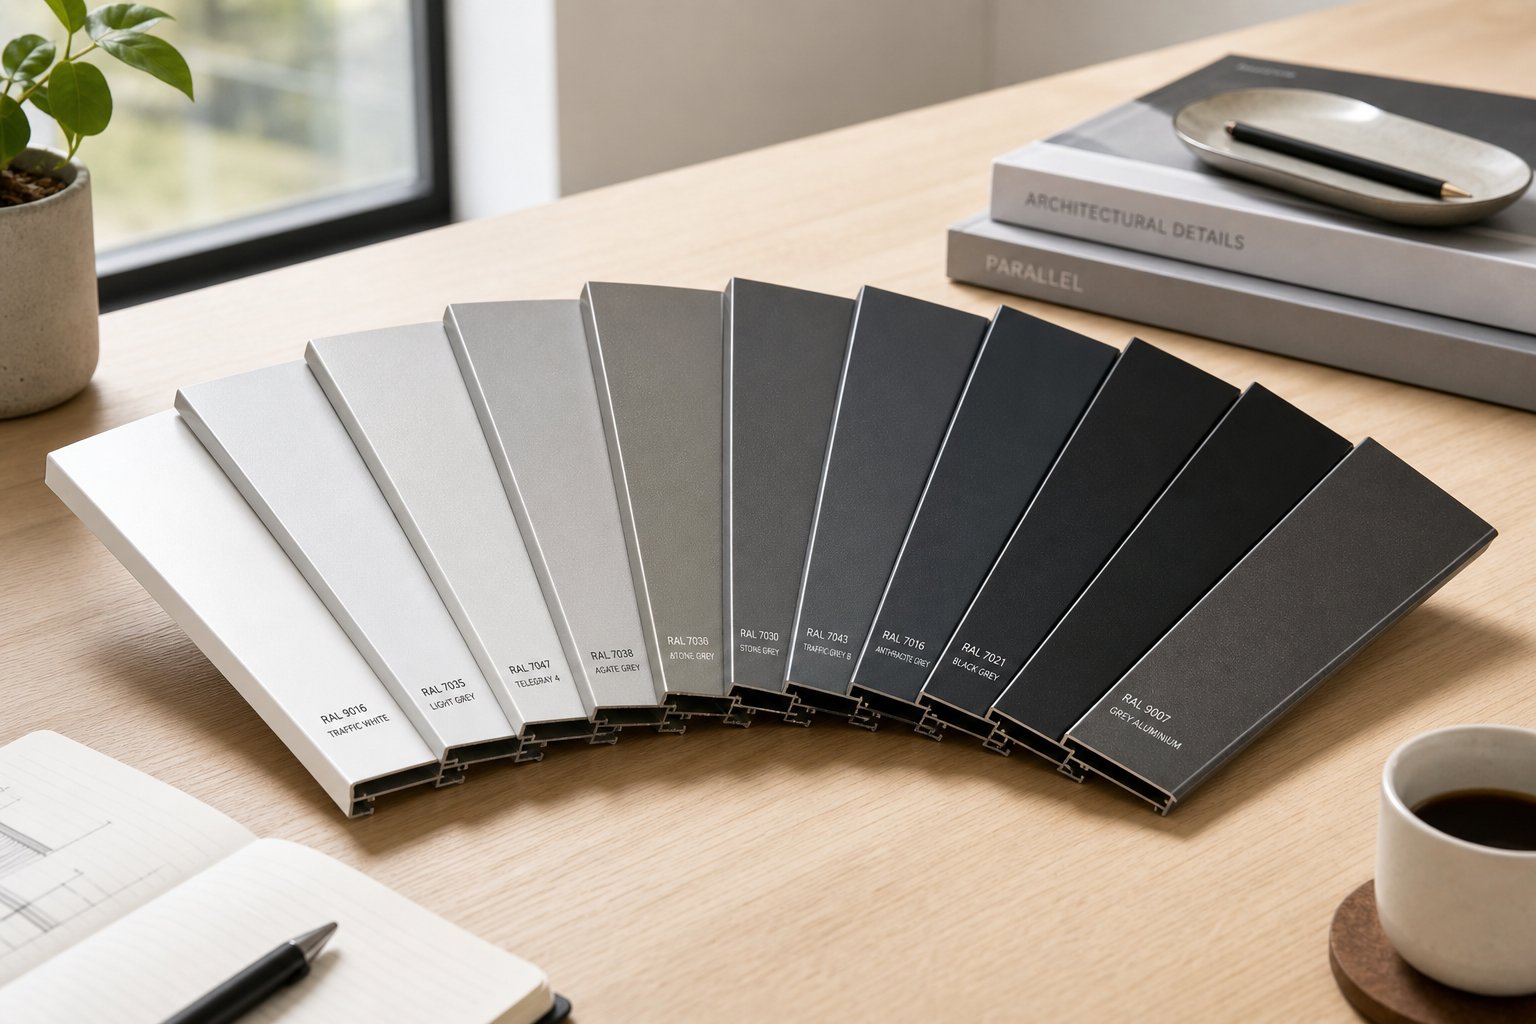
RAL Colour Selection and UV Longevity
Most Australian sill suppliers coat to the RAL colour system, giving you access to hundreds of standardised shades. Not all colours age equally, though. Darker tones absorb more UV radiation and heat, which accelerates a phenomenon called chalking, where the coating surface develops a fine powdery residue over years of sun exposure. Lighter colours reflect more energy and typically hold their gloss longer in high-UV environments like most of Australia.
Coating thickness plays a direct role in fade resistance. A quality architectural-grade powder coat applied at 60 to 80 microns and cured correctly will resist colour shift far longer than a budget 40-micron coating. For coastal or heavily exposed sites, specifying a super-durable polyester powder rated to the equivalent of 3,000-plus hours of accelerated weathering testing provides measurably better longevity. Marine-grade coatings add an enhanced pre-treatment layer, typically a chromate or non-chromate conversion coating, that prevents filiform corrosion from creeping beneath the finish in salt-laden air.
Standard gloss levels range from matte (20-30% gloss) through satin (40-60%) to full gloss (80%+). Satin finishes hide minor surface imperfections better and show less dirt accumulation than high-gloss options, making them a practical choice for window sill molding exterior applications that are difficult to reach for regular cleaning.
Matching Sill Finish to Your Window Frames
Colour drift between sill and frame is one of the most visible yet easily preventable issues on a finished facade. It happens when the sill and window frame are powder-coated by different applicators, in different batches, or to slightly different specifications. Even two components nominally coated in the same RAL number can appear noticeably different if gloss level, coating thickness, or curing temperature varies between them.
The simplest prevention is specifying sill and frame finishes together from the same coating line, or at minimum the same powder supplier and batch. If that is not possible, request a colour tolerance check against a physical sample rather than relying on digital swatches.
The most popular RAL colour categories used on Australian residential builds include:
- Whites – RAL 9016 (Traffic White), RAL 9010 (Pure White), RAL 9003 (Signal White)
- Greys – RAL 7035 (Light Grey), RAL 7044 (Silk Grey), RAL 7038 (Agate Grey)
- Anthracites – RAL 7016 (Anthracite Grey), RAL 7021 (Black Grey), RAL 7024 (Graphite Grey)
- Metallics – Metallic silver, titanium, and bronze-effect textured finishes outside the standard RAL chart
Anthracite grey in particular has surged in popularity for contemporary Australian homes, though it sits in the darker range where UV chalking is most noticeable. Pairing RAL 7016 sills with a super-durable polyester rather than a standard polyester adds years of clean appearance before any chalking becomes visible.
With finish and colour locked in, the next concern is how that coated surface holds up against the specific climate your project faces, because a sill on a shaded Melbourne terrace and one on a north-facing Gold Coast balcony experience very different weathering forces.
Weather Resistance Across Different Climates
A sill on a sheltered suburban wall in Hobart leads a quiet life. The same profile bolted to a beachfront facade in Noosa cops salt-laden wind, intense UV, and cyclonic rain. Aluminium handles both, but only when coating specification, fixing method, and drainage geometry align with the specific exposure. Suppliers market “weather resistance” as a blanket claim. The reality is more nuanced.
Performance in Coastal and High-Salt Environments
Unfinished aluminium reacts aggressively with airborne chloride. Significant salt deposits have been recorded more than 80 kilometres from the shoreline, meaning coastal corrosion risk extends well beyond beachside properties. Within weeks of exposure, chloride ions overwhelm aluminium’s natural oxide layer, producing visible pitting that eventually compromises structural integrity.
A high-performance powder coat or Class I anodise finish eliminates this vulnerability. For projects within direct salt-spray zones, specifying a 70% PVDF resin-based coating, tested to over 4,000 hours of accelerated salt-spray exposure, provides proven protection. At a minimum, any exterior window seal between the sill and frame junction must use marine-grade silicone rated for saline environments. Standard acrylic sealants break down faster in salt air, leaving a gap that funnels moisture into the wall cavity.
Fabrication details matter too. Cut ends, drilled fixing holes, and folded edges are all vulnerable points where salt can attack raw aluminium beneath the coating. Ensure cut ends are sealed or capped, and that weep slots remain clear so salinised water does not pool on the sill surface.
UV Exposure, Heat Cycling and Thermal Expansion
Australian UV levels are among the harshest globally, and aluminium sills in full northern exposure absorb considerable heat. The aluminium itself will not degrade under UV, but the coating can chalk if under-specified, and the metal expands linearly with temperature.
Aluminium’s coefficient of thermal expansion is 0.000023 per degree Celsius. In practical terms, a 1,500 mm sill subjected to a 40-degree Celsius surface temperature swing, common on a dark-coloured west-facing elevation, will expand by approximately 1.4 mm. That movement is small but cumulative at joints and fixings. If screws are driven too tight or slots are not provided, the sill buckles or lifts at the ends.
Correct fixing design accommodates this movement. Oval screw slots rather than round holes allow the sill to slide slightly as it heats and cools. Window seals or sills junctions should use flexible sealant, not rigid adhesive, so the bond stretches without cracking. Darker colours amplify the effect because they absorb more radiant heat, raising surface temperature well above ambient air temperature.
Water Management and Drip Edge Design
Every exterior sill is fundamentally a water-management device. The outside window seal between sill and frame keeps moisture from entering above, while the sill’s slope and drip groove prevent it from tracking back underneath.
A minimum forward fall of 5 degrees is required to ensure gravity moves water off the sill faster than surface tension can draw it back toward the wall. In high-exposure locations or heavy-rainfall regions like tropical Queensland, 10 to 15 degrees provides a stronger safety margin against wind-driven rain reversal.
Surface tension causes rainwater to flow around surfaces and back toward the building unless the tension is physically broken. That is the role of the drip groove, a small kerf cut or formed into the underside of the sill nose. Without it, water clings to the soffit and runs back onto the wall face below, staining render and eventually saturating masonry. The principle has been understood for centuries in stone construction, yet it is still overlooked on modern installations where the installer assumes the slope alone is sufficient.
Proper integration between the sill’s back upstand and the window frame flashing completes the system. The upstand tucks behind the frame’s bottom rail, directing any water that makes it past the frame outward rather than inward. Combined with a compatible sub-sill pan beneath, this layered approach gives water no path into the wall, regardless of wind direction or rainfall intensity.
Climate performance, however, only holds if the sill is installed correctly in the first place. The gap between theory and practice is where most failures originate.
Installation Steps and Mistakes to Avoid
A perfectly specified sill sitting in a box means nothing if installation introduces the very water paths it was designed to prevent. Whether you are fitting a new build or learning how to replace a window sill exterior on an older home, the method matters as much as the material. Most failures traced back to the sill junction originate from rushed preparation, misplaced sealant, or fixings that inadvertently punch through the drainage plane.
Preparing the Sub-Sill and Setting the Correct Slope
Before the sill touches the opening, the substrate beneath it needs to be clean, structurally sound, and shaped to the correct fall. Two approaches achieve this.
A mortar bed is the traditional method for masonry construction. Mix a stiff cement mortar, not runny, and trowel it across the full bearing area. Shape the mortar to a minimum 5-degree forward slope, checking with a spirit level or angle finder. The sill slides into the wet bed from front to back until its rear upstand contacts the window frame or stop bead. Any air pockets beneath the sill create unsupported spans that flex under foot traffic or thermal load, so full-contact coverage is essential.
Mechanical bracket systems suit lightweight wall constructions, steel-framed builds, or situations where you need to replace an outside window sill without disturbing the render below. L-shaped aluminium brackets fix to the substrate at the required angle, and the sill clips or screws onto them. This approach also simplifies metal window sill flashing integration, because the bracket sits above the waterproof membrane rather than embedding into a mortar joint that might crack over time.
Whichever method you use, confirm that the back edge upstand sits tight behind the window frame’s bottom rail. That upstand, typically 15 to 25 mm high, acts as a mechanical dam preventing wind-driven rain from being pushed over the sill’s rear edge and into the wall cavity.
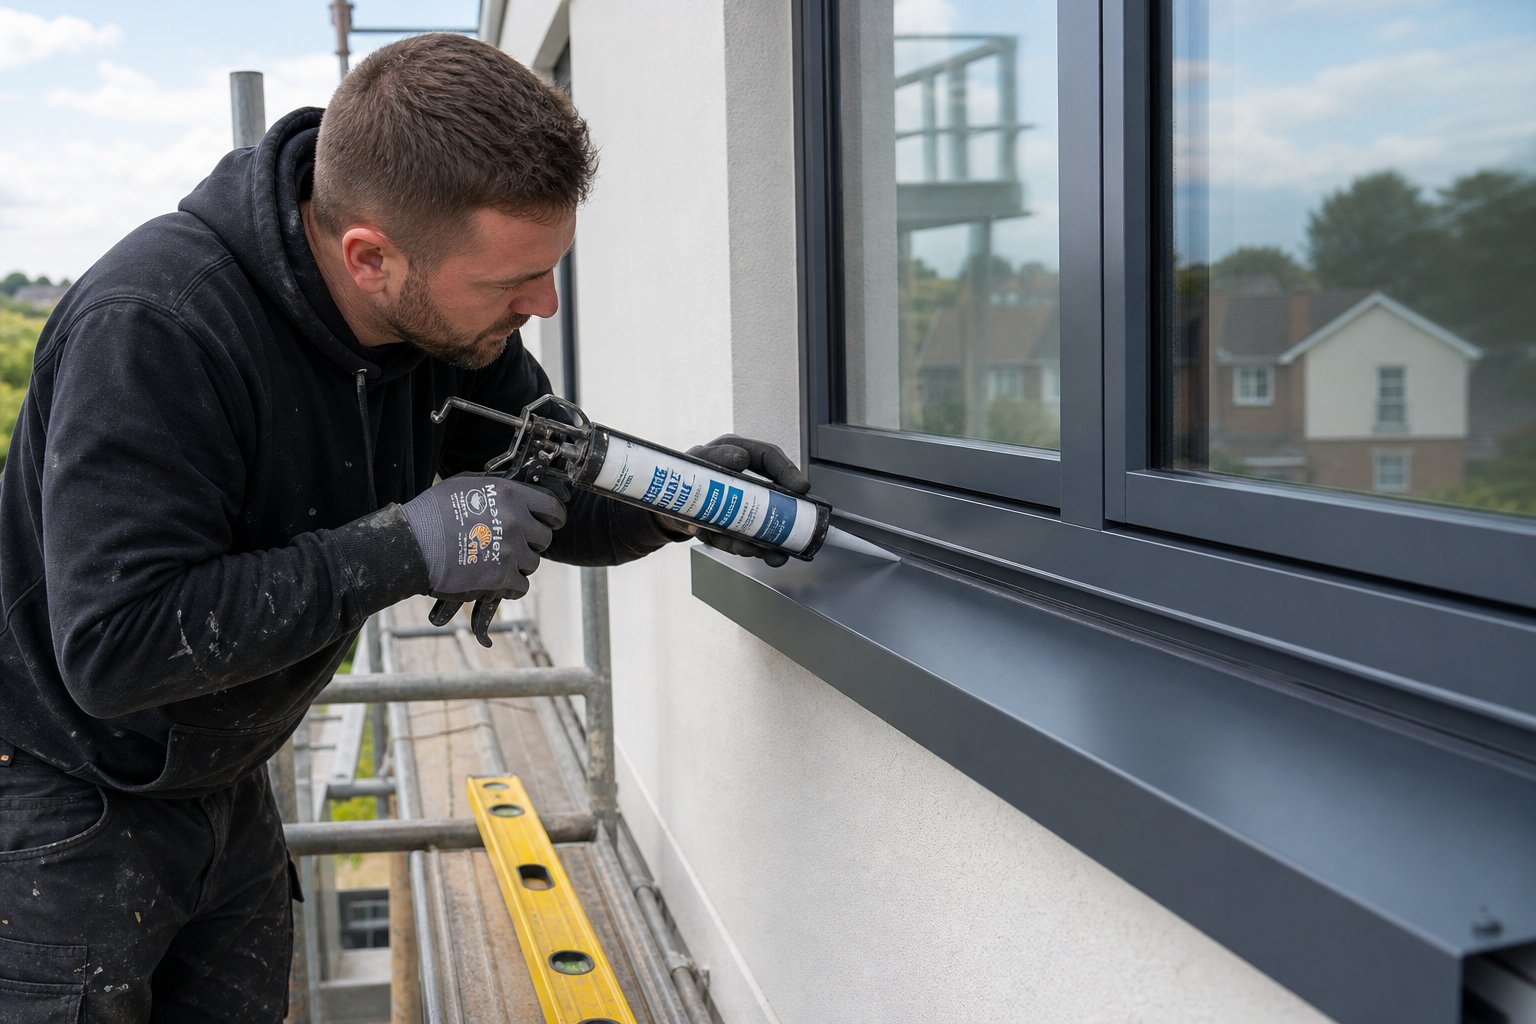
Sealing, Fixing and Preventing Water Ingress
Sealant placement is where most DIY installations go wrong. The instinct is to seal everything generously, but over-sealing traps moisture rather than excluding it.
Apply a bead of neutral-cure silicone along the junction between the sill’s rear upstand and the window frame. This is the primary weather seal. Use a marine-grade silicone in coastal zones. At the sill ends, seal between the end cap and the reveal face to prevent water wicking sideways into the masonry.
Do not seal the front drip edge or the underside of the sill nose. These surfaces must remain open so any moisture that reaches the sill can drain forward and drip clear. Sealing them creates a reservoir with no exit. Research into aluminium windowsill anchorage confirms that penetrations through the horizontal portion of a sill pan are a leading cause of long-term water infiltration, because sealant over screw heads eventually debonds, leaving fastener holes exposed to standing water.
For fixings, use stainless steel screws into masonry plugs, or aluminium rivets where you are fastening aluminium to aluminium. This matters. Mixing metals, such as steel screws into an aluminium sill sitting on a zinc flashing, creates a galvanic cell that accelerates corrosion at the contact point. If dissimilar metals must meet, isolate them with a nylon washer or EPDM gasket.
Thermal bridging also deserves attention during installation. An aluminium sill conducts heat readily. Where it passes through or touches the cavity closer or insulation layer, apply a thermal break strip or closed-cell foam tape between the sill and the structure. This prevents the sill from becoming a cold bridge that draws condensation on the interior side of the wall during winter.
Common Installation Mistakes and How to Avoid Them
Knowing what goes wrong on other projects is the fastest way to prevent repeating those errors on yours. These are the failures tradespeople encounter most often when they are called back to diagnose leaking or damaged sills:
- Insufficient slope – A sill set level or with less than 5 degrees of fall ponds water against the back upstand. Over time, pooled water forces past the rear seal and into the wall. Always verify slope with a level before the mortar sets or the brackets are locked off.
- Missing end cap sealant – Unsealed end caps allow water to travel sideways along the sill profile and soak directly into brickwork or render at the reveal. A small bead of silicone at each end cap joint is all it takes.
- Incorrect fixings causing electrolytic corrosion – Galvanised or zinc-plated screws in direct contact with aluminium create a galvanic reaction in the presence of moisture. Within a few years the aluminium corrodes around the fastener. Stainless steel or matched aluminium fixings eliminate this risk.
- Blocked drainage channels – Mortar squeeze-out, render overspill, or paint can block the drip groove on the sill’s underside or fill the weep slots in a sub-sill pan. Once blocked, water has no exit path and backs up into the wall. Check all drainage features are clear before the job is signed off.
- Thermal bridging at the frame junction – Omitting a thermal break between the sill and the structural wall allows heat to bypass the insulation envelope. In air-conditioned buildings, this creates a visible condensation line on the interior wall beneath the window. A strip of closed-cell foam or a proprietary thermal break tape solves it cheaply.
- Fasteners through the horizontal sill pan – Screwing down through the flat section of a sub-sill or pan flashing exposes that penetration to any water collecting on the pan surface. Industry analysis shows that even sealant-encapsulated fastener heads eventually allow leakage as the sealant ages. Fix through vertical legs instead, keeping horizontal drainage surfaces unbroken.
If you are learning how to wrap windows in aluminium cladding or undertaking a full replacement, treat these six points as your pre-handover checklist. A ten-minute inspection at completion catches problems that would otherwise reveal themselves months later as stained plaster or damp framing inside the wall.
Correct installation locks in performance for decades. After that, the sill asks very little of you, but a basic maintenance routine ensures the coating, seals, and drainage channels keep doing their job year after year.
Maintenance and Long-Term Care for Aluminium Sills
Aluminium sills earn their reputation as low-maintenance, not no-maintenance. The distinction matters. A powder-coated surface left entirely to the elements will still outlast timber or PVC by decades, but a small amount of periodic care keeps the finish looking sharp and the seals intact for the full service life of the product. Surprisingly few guides address what that care actually involves, so here is a practical breakdown.
Routine Cleaning for Lasting Appearance
Dirt, pollen, bird droppings, and atmospheric pollution settle on any horizontal surface. On a coated aluminium sill, these deposits are mostly cosmetic at first, but left long enough they become acidic or abrasive enough to dull the powder coat. Industry guidance for powder-coated products recommends cleaning at three-monthly intervals as standard practice, with six months being the absolute longest gap. Coastal or industrial locations warrant the shorter cycle due to salt and particulate accumulation.
The cleaning method is straightforward. Use a dilute solution of mild liquid detergent in warm (not hot) water, applied with a soft-bristle brush or non-abrasive cloth. Work along the length of the sill, paying attention to the drip groove on the underside where grime builds up out of sight. Rinse thoroughly with clean water afterward. Areas sheltered from rain, such as sills beneath deep eaves, collect more surface residue because they never receive a natural rinse, so give those extra attention.
What you avoid is equally important. Abrasive pads, scouring powders, and steel wool physically damage the coating film. Highly alkaline cleaners, acetone, methyl ethyl ketone (MEK), and petrol-based solvents attack the powder coat chemically, causing premature gloss loss and colour change. If you need to remove a stubborn mark like paint overspray, methylated spirits applied briefly with a soft cloth is the safest solvent option. Always test on a small hidden section first.
Inspecting Seals and Joints Over Time
The sill itself ages gracefully, but the sealant joints around it do not last forever. Silicone sealants in protected joints can remain effective for up to 20 years, though exposure to UV and thermal cycling in Australian conditions often shortens that to 10 to 15 years. Polyurethane sealants have a shorter expected life of 5 to 10 years. Either way, periodic inspection catches degradation before water finds a way in.
Look for these warning signs at the rear upstand junction and end cap junctions:
- Cracking or alligatoring on the sealant surface, where the bead develops a network of fine cracks resembling dried mud
- Separation from the substrate, where the sealant pulls away from either the aluminium or the masonry, leaving a visible gap
- Hardening, where the bead has lost all flexibility and feels brittle when pressed with a fingernail
- Discolouration or tackiness, indicating chemical breakdown of the sealant polymer
Any of these signs means the sealant is no longer performing its function. Remove the old bead completely, clean both surfaces with methylated spirits, and reapply a fresh bead of neutral-cure silicone. Do not skim new sealant over the top of a failing joint. The new layer will not bond properly to degraded material, and the problem simply hides until water finds its way through.
When to Consider Sill Covers or Replacement
Aluminium sills rarely need outright replacement. More commonly, it is the coating that reaches end of life rather than the metal. After 25 to 30 years of full exposure, even a quality powder coat may show chalking, localised colour fade, or micro-scratches from decades of cleaning. At this stage you have two options.
An exterior aluminum window sill cover is a retrofit profile that fits over the existing sill without removing it. These external sill covers work well when the underlying aluminium is structurally sound but cosmetically tired. The cover provides a fresh coated surface, maintains the drainage slope, and avoids disturbing the sealant junctions around the frame. It is a cost-effective refurbishment option when browsing window sills for sale as replacements seems premature given the structural condition of the original.
Full replacement makes more sense when the sill has suffered physical damage, such as impact dents deep enough to crack the coating through to bare metal, or when electrolytic corrosion around old fixings has weakened the profile. It is also justified if the original sill was a pressed sheet product that has begun to bow or deform under thermal cycling, and you want to upgrade to an extruded profile with better long-term stiffness. Window sill covers exterior applications cannot correct an underlying slope deficiency either. If the original sill was installed without adequate fall, a cover simply inherits the same ponding problem. In that case, removing the old sill and resetting the substrate at the correct angle is the only real fix.
For minor scratches and chips on an otherwise sound sill, a colour-matched dab stick or aerosol touch-up paint restores the protective film locally. Domestic refurbishment can also include polishing with a quality automotive cream polish to restore gloss on lightly weathered surfaces, though this suits mild degradation rather than heavy chalking. Avoid polishes containing cutting compounds unless the surface is severely worn.
Pulling all of this together into a practical schedule, here is a seasonal maintenance checklist:
- Every 3 months (quarterly) – Wash the sill surface and drip groove with mild detergent and rinse with fresh water. Clear any debris from weep slots or drainage channels.
- Every 6 months (twice yearly) – Visually inspect sealant joints at the rear upstand and end caps for cracking, separation, or hardening. Check the drip groove is unobstructed.
- Annually – Inspect fixings for corrosion or looseness. Look for any coating damage, bubbling, or chalking on the sill face. In coastal areas, check cut ends and screw points for early signs of filiform corrosion beneath the coating edge.
- Every 5 years – Assess overall coating condition. Apply automotive-grade cream polish to restore gloss on mildly weathered surfaces. Replace any sealant joints showing signs of degradation. Touch up scratches or chips with colour-matched repair paint.
In coastal or industrial environments, shift each interval shorter by one step. What is annual in a suburban setting becomes six-monthly near the coast. The effort is minimal either way, a few minutes with a cloth and a quick visual check, but it extends the gap between today and the day you need to think about window sills for sale as replacements by a considerable margin.
Maintenance keeps a sill performing in isolation. The broader question is how your sill integrates with the window system sitting above it, because a mismatch between sill specification and frame material creates compatibility issues that no amount of cleaning can resolve.
Matching Your Sill to the Right Window System
An exterior aluminum window sill does not exist in isolation. It sits beneath a frame, contacts a glazing unit, and bridges the gap between window system and wall construction. Get the pairing wrong and you end up with tolerance mismatches, visible colour drift between components, or warranty grey zones where neither the sill supplier nor the window manufacturer accepts responsibility for a leak at the junction.
Compatibility With Different Window Frame Materials
The frame material above your sill dictates how the two components physically connect, expand relative to each other, and age together over decades.
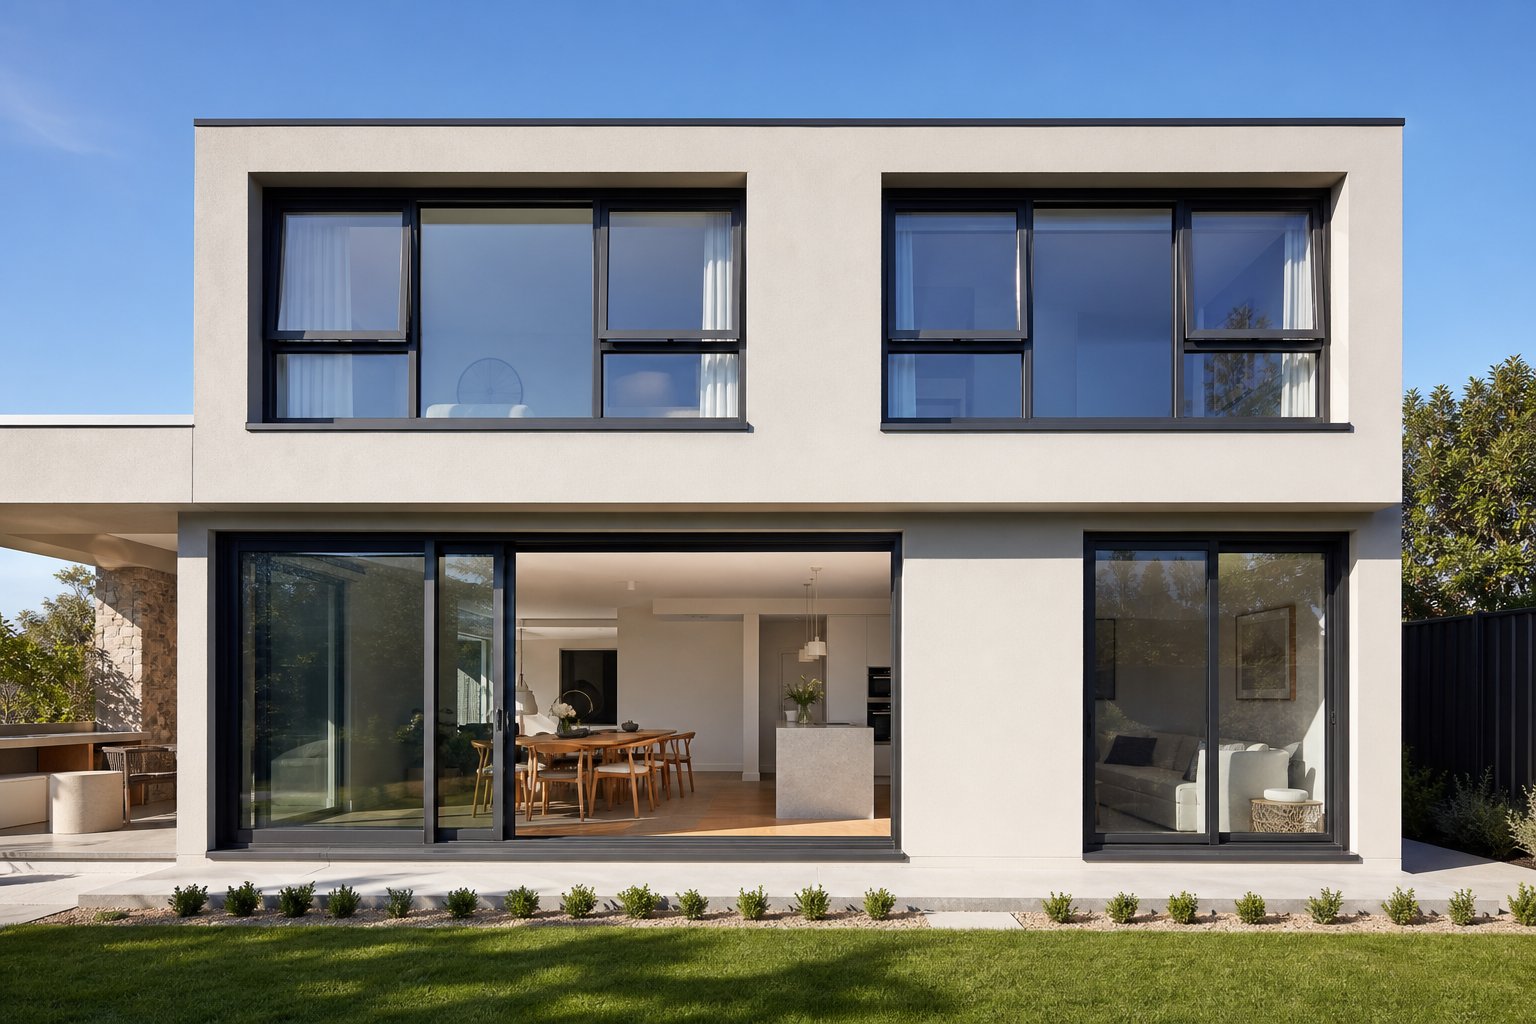
Aluminium frames with aluminium sills offer the simplest integration. Both components share the same coefficient of thermal expansion, so they move in unison as temperatures shift through Australian summer extremes. Coating systems are identical, meaning colour matching is straightforward when both are powder-coated in the same batch. Fixing details are simpler too, since there is no risk of galvanic corrosion between like metals. For these reasons, aluminium-to-aluminium pairings simplify specification on commercial facades and contemporary residential builds alike.
uPVC frames paired with an aluminium outdoor window sill introduce a differential movement challenge. PVC expands at roughly three times the rate of aluminium. A flexible sealant joint between frame and sill accommodates this movement, but if the installer uses a rigid adhesive, the joint cracks within a season or two. Colour coordination also requires more care, because PVC frames are co-extruded with a foil finish rather than powder-coated, and the sheen and texture differ from a coated metal window sill even when the RAL number nominally matches.
Timber frames bring moisture management to the forefront. Timber swells and shrinks with humidity changes, so the sill-to-frame seal must remain elastic year-round. The back upstand of the aluminium sill should tuck behind the timber bottom rail with a compressible foam tape or silicone bead that flexes without debonding. Timber also demands that any flashing beneath the sill laps correctly over the frame’s weather bar to prevent moisture wicking into end grain, a detail that is less critical on aluminium or PVC frames where the material itself is impervious to moisture absorption.
Specifying Sills as Part of a Complete Window System
Sourcing your exterior window sills and window frames from the same manufacturer eliminates most of the compatibility headaches described above. A single supplier designs the sill profile to mate precisely with their frame’s bottom rail geometry. Tolerances are controlled at the factory rather than improvised on site. Finish consistency is guaranteed because both components pass through the same coating line.
Warranty coverage tightens as well. When sill and frame come from different suppliers, a leak at the junction often falls into a gap between two warranties, with each party pointing at the other’s product. A system-level specification removes that ambiguity. The window manufacturer warrants the entire assembly, including the window exterior sill, as one tested unit.
For Australian residential and commercial projects, suppliers offering integrated window and sill specification streamline the build process considerably. MEICHEN’s aluminium window range, for example, allows project teams to specify frames, glazing, hardware, and sills as a coordinated system, ensuring matched finishes and engineered tolerances across every component. This kind of system-level approach reduces site rework, simplifies procurement, and keeps accountability with a single point of contact from design through to installation.
Whether you are a homeowner coordinating a renovation or an architect detailing a multi-storey facade, the principle holds: treat the exterior aluminum window sill as part of the window system rather than an afterthought bolted on by a different trade. The result is tighter weatherproofing, cleaner aesthetics, and a warranty that actually covers the critical junction where sill meets frame.
Frequently Asked Questions About External Aluminium Window Sills
1. What is the difference between a window sill and a window cill?
There is no functional difference. ‘Cill’ is the traditional British trade spelling still found on UK specification sheets, while ‘sill’ is the standard term in Australia and North America. Both refer to the profiled component at the base of a window opening that directs rainwater away from the wall. When ordering from suppliers, check which spelling they use in their catalogue so you find the correct product listing, but the component itself is identical regardless of spelling.
2. How long does an external aluminium window sill last?
A quality powder-coated aluminium sill typically lasts 40 to 60 years or more when properly installed and maintained. The aluminium substrate itself is virtually indefinite in terms of structural life. The powder coating is usually the first element to show age, with chalking or minor fade appearing after 25 to 30 years in high-UV Australian conditions. Specifying a super-durable polyester coating and following a basic quarterly cleaning routine extends the aesthetic lifespan considerably. Marine-grade coatings are recommended for properties within salt-spray zones to prevent filiform corrosion.
3. What slope should an external window sill have?
The minimum recommended drainage fall is 5 degrees from the horizontal. For exposed elevations or high-rainfall regions such as tropical Queensland, 10 to 15 degrees provides a stronger safety margin against wind-driven rain reversal. Some extruded profiles have this slope built into the cross-section, while others rely on the mortar bed or mounting brackets beneath the sill being set at the correct angle. Always verify slope with a spirit level before fixings are locked off, as a level sill will pond water against the back upstand and eventually allow moisture into the wall cavity.
4. Can you fit an aluminium sill over an existing window sill?
Yes, exterior aluminium sill covers are designed specifically for this purpose. They retrofit over a structurally sound but cosmetically tired sill without requiring full removal. The cover provides a fresh powder-coated surface and maintains the drainage slope. However, sill covers cannot correct an underlying slope deficiency. If the original sill was installed without adequate forward fall, a cover inherits the same ponding problem, and full replacement with correct substrate preparation is the better solution.
5. Should I use powder coating or anodising for an external aluminium sill?
For most Australian residential projects, powder coating is the stronger choice. It offers a virtually unlimited colour palette, can be matched precisely to window frames, and minor surface damage is repairable with colour-matched touch-up paint. Anodising produces a distinctive metallic lustre that powder coating cannot replicate and the finish becomes part of the metal itself so it cannot peel, but the colour range is limited to silvers, bronzes, and charcoals. Anodised finishes also scratch more visibly and are harder to repair on site. Choose anodising for high-end architectural projects where a natural metallic aesthetic is the priority.
More Window & Door Guides