What Are Aluminium Window Trims and Why They Matter
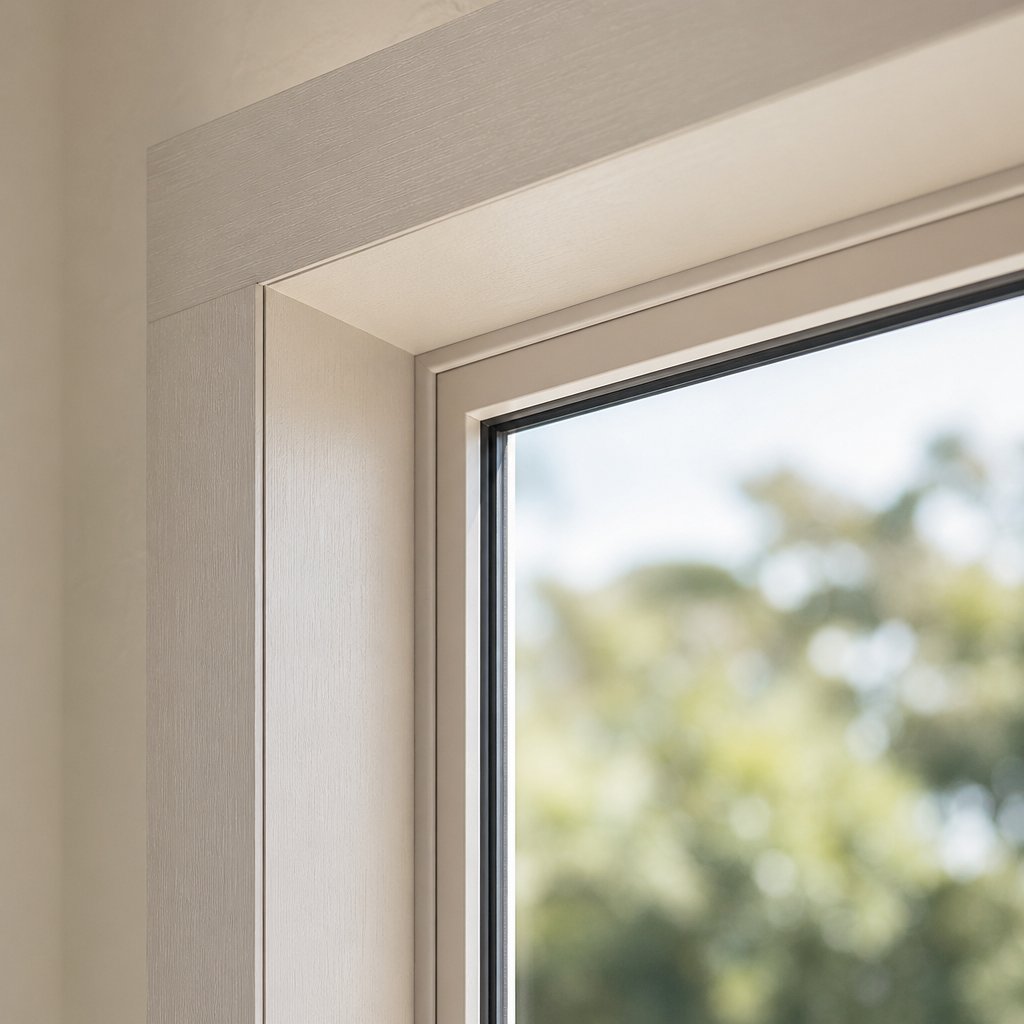
Every window opening creates a gap. Between the frame and the surrounding wall sits a junction that needs protection from weather, a clean visual line, and a barrier against thermal bridging. That is exactly where aluminium window trims earn their place on a build.
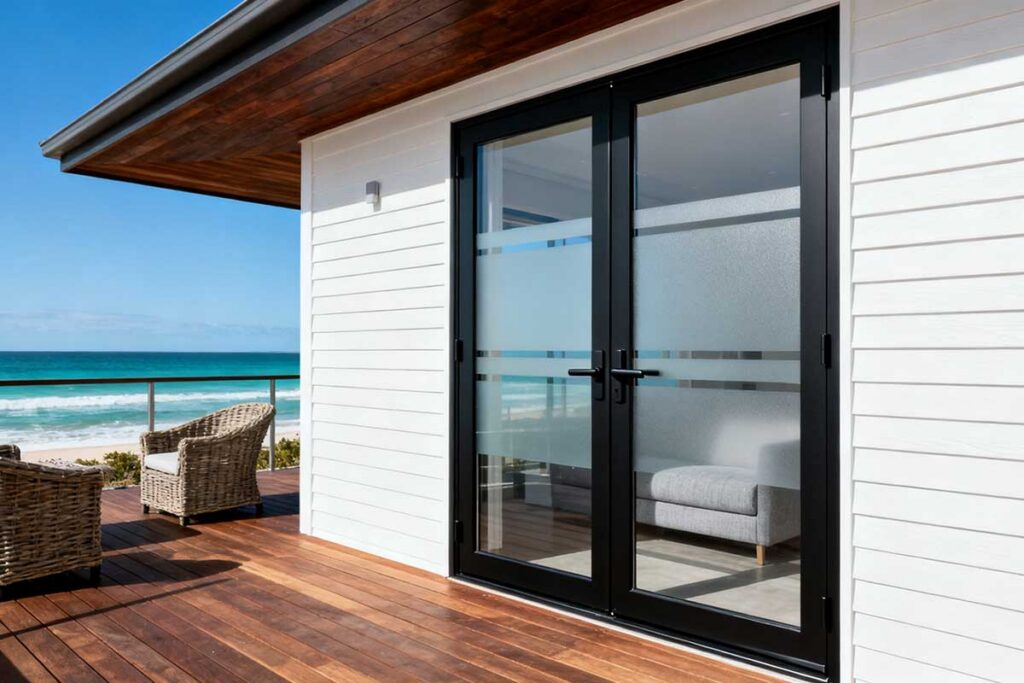
Aluminium window trims are pre-formed metal finishing pieces installed around window openings to seal the junction between the window frame and the adjacent wall material. They serve three core functions: weather protection, thermal bridging reduction, and a clean aesthetic finish that requires minimal ongoing maintenance.
What Aluminium Window Trims Actually Do
At their simplest, these trims act as a shield. Rain, wind-driven moisture, and UV exposure all target the vulnerable transition point where a window frame meets rendered masonry, weatherboard, or cladding. An aluminium window trim covers that gap with a corrosion-resistant, dimensionally stable material that won’t rot, warp, or crack under Australian conditions.
Beyond weather sealing, trims reduce thermal bridging by creating a controlled overlap that limits direct heat transfer at the frame-to-wall junction. They also deliver a sharp, consistent sight line around each opening, which is why architects specify them on everything from single-storey renovations through to multi-level commercial facades. As Alumac Industries notes, these trims can be tailored in custom sizes and powder-coated finishes to suit any architectural style.
Applications range widely. Residential projects use them to refresh ageing timber frames through window wrapping, where an aluminum window wrap covers deteriorating woodwork without full frame replacement. Commercial builds rely on them for uniform detailing across dozens or hundreds of openings. Renovation projects often combine them with new cladding systems to modernise an entire facade in one pass.
Key Terminology Across Regions
Terminology shifts depending on where you are. In Australia and the UK, the standard spelling is aluminium window trim. Across the US and Canada, you will see aluminum window trim or window aluminum trim used interchangeably. The product itself is identical, just the spelling differs.
The function also carries different names. What Australians call window capping is often referred to as window wrapping or cladding in North America. A builder in Sydney ordering aluminium trim is buying the same category of product as a contractor in Toronto requesting capping. Throughout this article, we use Australian English conventions, but the technical guidance applies regardless of which regional term you are familiar with.
With the terminology sorted, the real question becomes which profile shape suits your specific window detail, and that choice is where most builders trip up.
Aluminium Trim Profiles Explained with Practical Applications
Picking the wrong profile shape is the single fastest way to create a water entry point or an ugly shadow line around a window. Each extruded aluminium channel has a specific cross-section designed for a particular junction condition. Use it in the right spot and the detail disappears into the facade. Use it in the wrong spot and you are chasing leaks within a year.
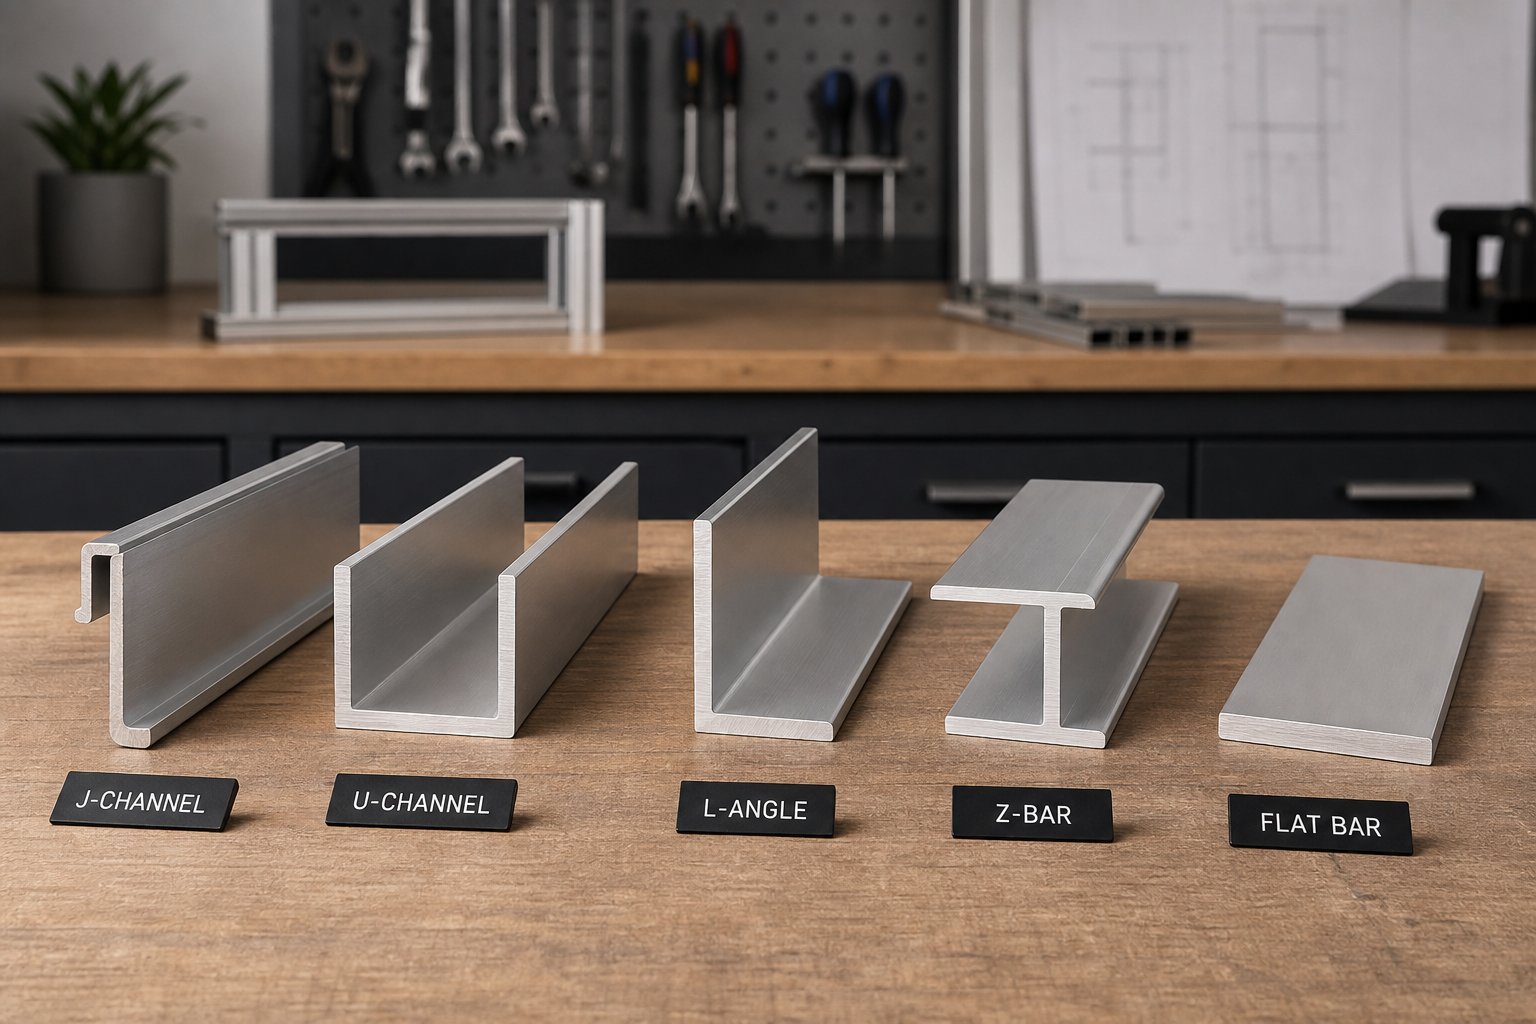
J-Channels and U-Channels for Edge Termination
A J channel window trim features a single return leg that creates a pocket for receiving panel edges. Think of it as a slot that captures the cut end of cladding or weatherboard where it terminates against the window frame. The J-shape channels water away from the junction while concealing raw material edges. In Australian residential builds, J-channels are commonly specified at head and jamb positions where fibre cement or aluminium cladding panels meet the window reveal.
U-channels, by contrast, wrap both sides of a raw edge. Their symmetrical profile makes them ideal for capping exposed panel ends, particularly along sill lines where a cut sheet edge would otherwise be visible. An aluminium trim channel in a U-shape also works well as a glazing bead holder in older commercial frames being retrofitted with new sealed units. Wall thicknesses for both profiles typically range from 0.8 mm to 1.6 mm in residential applications, with heavier gauges reserved for commercial facades exposed to higher wind loads.
L-Angles, Z-Bars and Flat Stock Profiles
L-angle profiles form a simple 90-degree corner. They serve as drip edges above window heads, as aluminum corner trim protecting external reveal corners, and as transition pieces where two different wall planes meet at a window opening. Their versatility makes them the most frequently ordered profile in the Australian market.
Z channel aluminium profiles step between two planes that sit at different depths. Where a window frame is recessed behind the cladding line, a Z-bar bridges that offset cleanly. This is especially useful on brick veneer homes where the window sits behind the outer leaf and the trim needs to transition from the frame face to the brick surface.
Flat stock window trim is the simplest option: a plain rectangular bar face-fixed over the frame-to-wall junction. It works best on flush-framed installations where the window and wall sit on the same plane, providing a neat aluminum edge trim molding without complex bends.
Matching Profiles to Your Window Type
The right profile depends on three factors: how far the frame is set back from the wall face, what cladding material surrounds the opening, and whether the trim needs to manage water runoff or simply provide a visual finish. The table below maps each profile to its strongest application.
| Profile Name | Typical Use | Best Application | Common Dimensions |
|---|---|---|---|
| J-Channel | Receiving cladding panel edges at window jambs and heads | Fibre cement and weatherboard cladding terminations | 10 mm – 20 mm pocket depth, 0.8 mm – 1.2 mm gauge |
| U-Channel | Capping raw panel edges and glazing bead retention | Sill trims, exposed sheet edges, retrofit glazing | 10 mm – 25 mm internal width, 1.0 mm – 1.6 mm gauge |
| L-Angle | Corner protection, drip edges, plane transitions | Head drip flashing, external reveal corners | 20 mm x 20 mm up to 50 mm x 50 mm, 1.0 mm – 1.6 mm gauge |
| Z-Channel | Bridging offset planes between frame and cladding | Recessed windows in brick veneer or cavity wall builds | 10 mm – 30 mm step depth, 1.0 mm – 1.2 mm gauge |
| Flat Bar | Face-fixed cover strip over frame-to-wall junctions | Flush-framed windows on rendered or flat panel walls | 25 mm – 75 mm width, 1.0 mm – 3.0 mm thickness |
Getting the profile right is only half the equation. The material you choose for that profile, whether aluminium, vinyl, timber, or composite, determines how long the detail holds up under Australian sun, salt air, and driving rain.
Aluminium vs Vinyl, Wood and Composite Trim Materials
Material choice shapes everything that happens after installation day. A perfectly measured, correctly profiled trim still fails if the material cannot handle the environment it lives in. Aluminium is the dominant choice in Australian exterior trim work, but it is not the only option on the table. Vinyl, timber, composite, and fibre cement all compete for the same junctions around window openings, each with genuine strengths and real limitations.
Aluminium vs Vinyl and uPVC Trims
Vinyl window trim, sometimes called plastic window trim or uPVC trim, wins on upfront cost. It is lightweight, easy to cut with basic hand tools, and available in a limited range of factory colours. For budget-conscious projects or rental properties where longevity is less critical, vinyl trim for windows offers a serviceable solution at a fraction of the aluminium price point.
The trade-off shows up over time. Vinyl expands and contracts significantly with temperature swings, which is a real concern across most Australian climate zones. Prolonged UV exposure causes discolouration and brittleness, and once a vinyl window molding warps, it stays warped. You cannot repaint it easily, and colour options are restricted to what the manufacturer offers. Trim for vinyl windows also lacks the structural rigidity needed for longer spans without visible deflection.
Aluminium, by contrast, holds its shape across decades of thermal cycling. Powder-coated finishes resist UV degradation far longer than vinyl pigments, and the material can be refinished if damaged. Where vinyl might last 15 to 20 years before showing its age, aluminium trims routinely exceed 30 years with nothing more than periodic cleaning.
Aluminium vs Timber and Composite Options
Timber trim delivers a warmth and texture that no metal or plastic can replicate. For heritage restorations or Queenslander-style homes where character matters, wood window trim exterior applications remain the traditional choice. Hardwoods like cedar or spotted gum look stunning when freshly oiled or painted.
Maintenance is the catch. Decoro’s material comparison highlights that wood is vulnerable to moisture, warping, cracking, and termite damage, requiring regular sealing or painting to prevent deterioration. In coastal or humid subtropical regions of Australia, untreated timber can begin rotting within a few years. That ongoing upkeep adds labour cost that erodes timber’s initial price advantage over aluminium.
Composite trims blend wood fibres with polymers to reduce moisture sensitivity. They resist rot better than solid timber and hold paint well, but they still lack the corrosion resistance and dimensional stability of aluminium in harsh environments. Fibre cement trim boards offer excellent fire resistance and insect immunity, making them popular in bushfire-prone areas. However, they are heavier, harder to cut without specialised equipment, and more brittle at thin cross-sections than aluminium profiles.
Long-Term Cost and Maintenance Comparison
The real cost of any trim material is not what you pay at the supplier. It is the total spend across the life of the building, including repainting, replacement, and repair labour. Aluminium carries a higher purchase price than vinyl or engineered wood, but its maintenance demands are minimal: a wash-down once or twice a year and occasional sealant inspection at junctions.
Sustainability also factors into the equation. Alutec Facades notes that recycling aluminium requires only 5% of the energy needed to produce it from raw materials, and the material can be recycled indefinitely without losing quality. Vinyl is technically recyclable but rarely recycled in practice, while timber is renewable but resource-intensive to harvest and process sustainably at scale.
| Material | Lifespan | Maintenance Level | Relative Cost | Best Suited For |
|---|---|---|---|---|
| Aluminium (powder-coated) | 30 – 50+ years | Low (periodic cleaning) | Medium-High | All climates, coastal, commercial, long-term residential |
| Vinyl / uPVC | 15 – 20 years | Low initially, no refinishing option | Low | Budget builds, rentals, sheltered locations |
| Timber (hardwood) | 20 – 40 years (maintained) | High (regular sealing, painting, termite checks) | Medium-High | Heritage homes, character builds, sheltered elevations |
| Composite | 25 – 35 years | Medium (periodic painting) | Medium | Moderate climates, residential renovations |
| Fibre Cement | 25 – 40 years | Medium (repainting every 7 – 10 years) | Low-Medium | Bushfire zones, fire-rated applications, flat profiles |
No single material is perfect for every scenario. But for Australian conditions, where UV intensity, salt air, and temperature extremes test every surface relentlessly, aluminium delivers the strongest balance of longevity, low maintenance, and aesthetic flexibility. The next consideration is getting the dimensions right, because even the best material underperforms when the trim is the wrong size for the opening.
How to Measure and Select the Right Trim Dimensions
A trim that is 3 mm too narrow leaves an exposed gap. One that is 5 mm too wide creates an awkward overlap that traps moisture behind the profile. Accurate measurement is what separates a weathertight window frame trim detail from one that invites problems within its first winter.
Measuring Window Reveals and Frame Gaps
Three dimensions drive every trim selection decision: the reveal depth (how far the frame sits back from the wall face), the frame width visible from outside, and the gap between the frame edge and the surrounding wall material. Each measurement needs to be taken at multiple points because walls are rarely perfectly plumb and window openings are seldom perfectly square.
- Measure the reveal depth at the head, sill, and both jambs. Place your tape from the outer wall face to the front edge of the aluminium window frame. Record all four readings and note the deepest measurement.
- Measure the frame width at the same four positions. This tells you how much of the frame face is available for the trim to overlap or sit against.
- Measure the wall-to-frame gap at the head, sill, and both jambs. This is the space between the edge of the frame and the start of the render, cladding, or brickwork. Take readings at the corners and midpoints of each side, as gaps often vary by several millimetres across a single opening.
- Check for square by measuring diagonals corner to corner. If the two diagonal measurements differ by more than 3 mm, the opening is out of square and your trim cuts will need to compensate.
- Use the smallest reveal depth and the largest gap measurement as your critical dimensions. The trim must cover the widest gap while fitting within the shallowest reveal.
For flat trim for windows on flush-framed installations, you only need the gap measurement and enough overlap onto both the frame and wall to create a solid fixing base. Profiled aluminium edge moulding requires the additional reveal depth reading because the profile wraps into the recess.
Choosing the Right Gauge Thickness and Width
Gauge thickness determines how rigid the finished trim feels and how well it resists denting during installation and service life. Residential aluminium window trims typically range from 0.55 mm for light-duty flat window trim applications up to 1.2 mm for wider profiles that span larger gaps without visible deflection. As a sheet metal gauge reference from BuyMetal illustrates, even small differences in thickness significantly affect rigidity and workability.
For most Australian homes, 0.7 mm to 1.0 mm covers the majority of applications. Thinner stock suits narrow aluminum edge trim pieces under 40 mm wide, while anything spanning 50 mm or more benefits from at least 0.8 mm to prevent oil-canning (the visible waviness that appears when thin sheet is fixed under slight tension).
Alloy selection matters too. The 6063-T5 grade is the standard for extruded aluminium window frames and matching trims. It offers excellent corrosion resistance, takes powder coating well, and is easily formed into complex profiles. For sheet-based aluminum edge molding that gets brake-pressed rather than extruded, 5005-series alloys provide good formability and a consistent anodised finish.
Accounting for Thermal Movement
Aluminium expands roughly twice as much as steel for the same temperature change. DC Iron’s fabrication guide confirms that this movement becomes significant in longer runs of metalwork exposed to direct sunlight. For window trims, the practical impact is straightforward: a 3-metre length of aluminium trim can expand by approximately 2 mm across a 60-degree Celsius temperature swing, which is entirely realistic on a dark-coloured, north-facing facade in an Australian summer.
Short trims around standard window openings (under 1.5 metres per piece) rarely cause issues. Longer runs along ribbon windows or commercial strip glazing need expansion gaps at joints, typically 2 mm to 3 mm filled with a flexible sealant rather than butted hard together. Slotted screw holes at fixing points allow the trim to slide slightly without buckling.
Lighter colours absorb less solar radiation and experience smaller temperature extremes, which reduces expansion stress. If your project involves long horizontal runs of window frame trim on an exposed elevation, choosing a lighter powder coat colour is a practical way to minimise thermal movement without adding complexity to the fixing detail.
With dimensions confirmed and material thickness selected, the next challenge is turning those measurements into a finished installation, whether you are working on a new build or retrofitting trims over an existing frame.
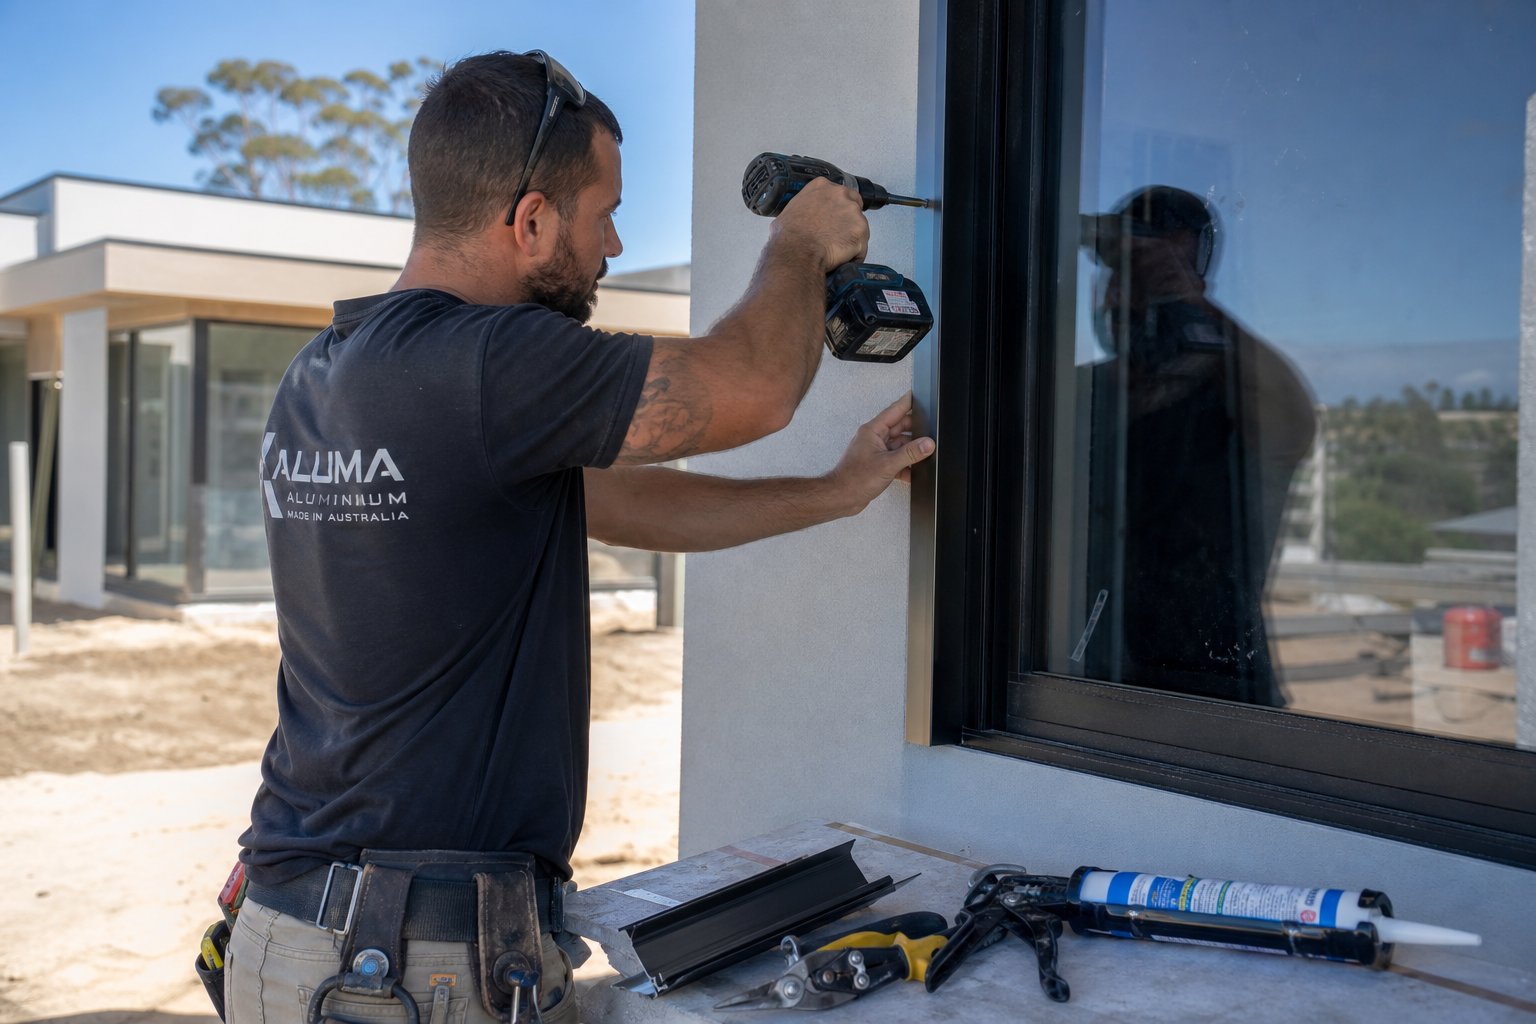
Installation Steps for New Builds and Retrofit Projects
Knowing how to trim exterior windows properly is the difference between a detail that lasts decades and one that traps moisture behind the profile within its first wet season. The process varies significantly depending on whether you are fitting exterior window trim during construction or retrofitting over an existing frame, so each scenario deserves its own sequence.
Installing Trims on New-Build Window Openings
On a new build, metal window trim installs as part of the cladding stage, not after it. Timing matters because the trim needs to integrate with the weather-resistant barrier and head flashing before the surrounding wall finish locks everything in place. Lowe’s new-construction window guide emphasises that taping windows with flash tape is a critical step in preventing leaks and ensuring proper weatherproofing.
- Confirm the building wrap is lapped correctly around the window opening, with the head flap left untaped so it can later fold over the head trim.
- Install the sill flashing first, ensuring it slopes outward with a minimum 5-degree fall to shed water away from the frame.
- Position the sill trim piece over the flashing, allowing a 2 mm expansion gap at each end where it meets the jamb trims.
- Fix the jamb trims next, overlapping the sill trim ends so water running down the jambs drains onto the sill rather than behind it.
- Install the head trim last, tucking it under the building wrap flap. Fold the wrap down over the top edge of the trim and seal with flashing tape.
- Apply a continuous bead of compatible sealant along the back edge of each trim piece where it contacts the frame, leaving the bottom edge of the sill trim unsealed to allow any trapped moisture to weep out.
This sequence follows the shingle principle: every upper piece overlaps the one below it, directing water outward at every junction. Skipping this order or sealing the sill trim completely is one of the most common mistakes on site.
Retrofit Installation Over Existing Frames
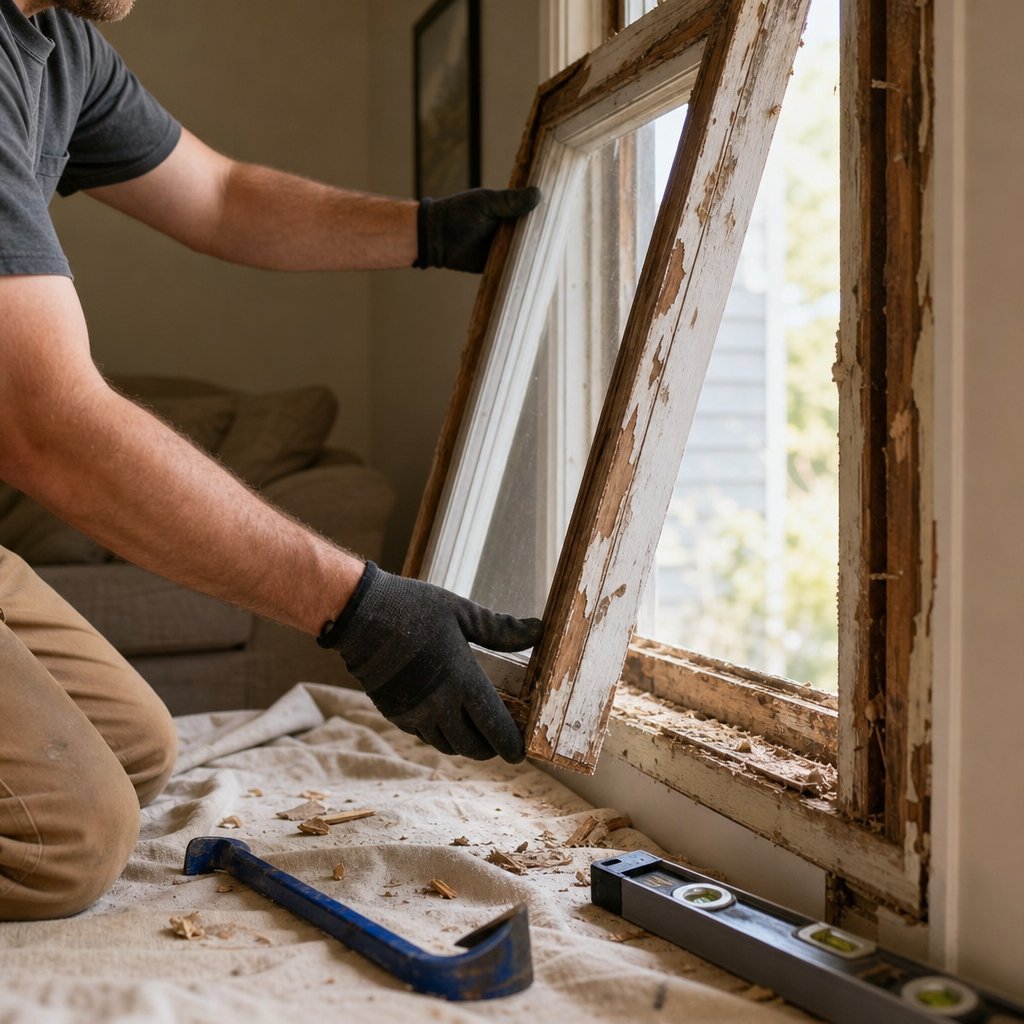
Retrofit work introduces variables that new builds avoid. Existing outside window trim may be deteriorated timber, cracked vinyl, or painted fibre cement that has started delaminating. The substrate underneath could be uneven, damp, or partially rotted. How do you trim a window that already has years of weathering behind it? Start by stripping back to a sound surface.
- Remove existing trim carefully using a flat pry bar and utility knife to cut through old sealant lines. Avoid damaging the window frame or surrounding render.
- Inspect the revealed substrate. Probe timber reveals with a screwdriver to check for soft spots. Scrape loose paint and fill any voids deeper than 2 mm with an exterior-grade filler.
- Sand high spots and pack low areas with shims or packing strips so the new trim sits flat without rocking. Uneven surfaces cause the aluminium to oil-can once fixed.
- Apply a primer coat to any exposed raw timber to prevent moisture wicking into the wood behind the new trim.
- Dry-fit all trim pieces before committing to fasteners. Alsco Metals recommends test-fitting cut trim around the window to allow time for adjustments before final installation.
- Fix the trim following the same sill-jamb-head sequence used in new builds, applying sealant to the back face as you go.
On rendered masonry homes, common across much of suburban Australia, the render edge around the opening often chips during old trim removal. A bead of flexible sealant behind the new trim around windows exterior conceals minor render damage without requiring a full patch and repaint.
Cutting, Joining and Fastening Techniques
Clean cuts and secure fixings define the finished quality of any window trim exterior installation. The method depends on the gauge and profile of the material.
For light-gauge flat stock (under 1.0 mm), aviation snips give the most control. Use left-cutting snips for right-hand curves and right-cutting snips for left-hand curves. Straight snips handle linear cuts. For heavier extruded profiles, knowing how to cut extruded aluminum safely means reaching for a mitre saw fitted with a non-ferrous blade (typically 80 to 100 teeth with a negative rake angle). This produces burr-free cuts at precise angles without deforming the profile.
- Essential tools: aviation snips (left, right, straight), mitre saw with non-ferrous blade, metal file or deburring tool, pop rivet gun, cordless drill with 2 mm and 3 mm bits, caulking gun, tape measure, speed square, and a brake press or hand seamer for bending flat coil.
Fastening options break into three categories. Stainless steel screws (8-gauge wafer head) suit most residential applications where the trim fixes into timber or steel framing. Pop rivets work for joining two aluminium pieces together, such as lapping a corner joint. Structural adhesive tape systems, increasingly popular in commercial work, bond the trim to smooth substrates without visible fixings, though they require clean, dry surfaces and adequate curing time before the joint bears wind load.
Wherever screws penetrate the trim face, pre-drill to prevent dimpling. Countersink slightly and touch up with colour-matched paint pen if the screw heads will be visible. At corner joints, overlap the head trim over the jamb ends and seal the internal junction with butyl tape to prevent capillary water tracking into the joint.
Proper installation technique handles the mechanical side of the equation. What determines whether that trim actually performs over the long term is how well it copes with the specific climate conditions on your site.

Climate Performance from Coastal Salt to Extreme Heat
Australia throws just about every climate challenge at a building envelope. A home in Cairns faces relentless humidity and cyclone-driven salt spray. A property in western Sydney bakes under UV that degrades most surface coatings within a decade. A build in Hobart endures freeze-thaw cycles that crack rigid materials. Aluminium window cladding handles all of these conditions, but only when the alloy, finish, and installation detail are matched to the specific environment.
Coastal and High-Humidity Performance
Salt-laden air is the primary enemy of any metal exterior window trim in coastal zones. Within 500 metres of the shoreline, airborne chlorides accelerate surface corrosion on unprotected metals. Aluminium resists this better than steel because it forms a self-renewing oxide layer when exposed to moisture. Still, that passive protection has limits. aPlank’s climate performance guide notes that marine-grade alloys in the 5000 series offer superior chloride resistance, while high-quality powder coatings or anodised finishes act as an additional barrier against salt and moisture penetration.
For aluminum capping on windows in coastal Australian homes, the combination matters: a marine-grade alloy base with a minimum 60-micron powder coat finish rated to AAMA 2604 or higher. Fasteners need equal attention. Stainless steel fixings prevent galvanic corrosion where dissimilar metals meet in the presence of salt moisture. Quarterly cleaning to remove salt deposits keeps the protective coating intact and extends service life significantly.
In humid subtropical regions like south-east Queensland, the concern shifts from salt to persistent moisture. Condensation forms behind trims that are sealed too tightly, creating conditions for mould growth on the substrate. Ventilated cavity details and unsealed weep edges at sill positions allow trapped moisture to escape rather than accumulate.
UV Resistance and Colour Stability
Australia’s UV index regularly exceeds levels that would be considered extreme in Europe or North America. That intensity breaks down organic coatings, fades pigments, and embrittles plastics. Aluminium itself is unaffected by UV, but the finish applied to it determines how the trim looks after five, ten, or twenty years of direct sun exposure.
Powder coating outperforms both anodising and wet-applied paint for long-term colour retention. Fairway Aluminum Solutions confirms that powder-coated finishes resist chipping, fading, and peeling even under prolonged UV exposure, maintaining colour and gloss for decades. Anodised finishes offer excellent hardness but limited colour range, typically restricted to silvers, bronzes, and blacks.
Colour choice has a practical consequence beyond aesthetics. Black aluminum trim absorbs substantially more solar radiation than lighter shades, driving surface temperatures higher and increasing thermal expansion stress. On north-facing and west-facing elevations in Australian conditions, darker aluminum trim capping experiences greater thermal cycling than identical profiles in lighter colours on the same building. This does not rule out dark finishes, but it does mean expansion allowances need to increase accordingly.
Thermal Cycling and Expansion Management
Regions with large diurnal temperature swings, such as inland NSW or central Queensland, subject aluminum metal trim to repeated expansion and contraction cycles. Wagner Companies notes that aluminium resists warping, cracking, and brittleness across extreme temperature ranges, unlike vinyl or timber alternatives that degrade under the same conditions.
The practical response is straightforward: allow for movement rather than fighting it. Slotted fixing holes, flexible sealant at butt joints, and a 2 mm to 3 mm gap at trim intersections accommodate expansion without buckling or distortion. In cooler climates with freeze-thaw cycling, these same gaps prevent ice from wedging behind the profile and levering it away from the substrate.
- Coastal zones (within 1 km of shoreline): Specify marine-grade alloy or minimum 60-micron powder coat. Use stainless steel fasteners. Clean quarterly to remove salt residue.
- Humid subtropical regions: Ensure weep drainage at sill trims. Avoid fully sealing back edges. Allow ventilation behind aluminum capping for windows to prevent condensation trapping.
- Arid and high-UV inland areas: Prioritise AAMA 2604/2605-rated powder coatings. Consider lighter colours on exposed elevations to reduce thermal stress on longer trim runs.
- Cold climates with freeze-thaw cycling: Maintain expansion gaps at all joints. Use flexible sealants rated for sub-zero temperatures. Avoid rigid butt joints that can buckle when the trim contracts.
- Cyclone-prone regions (northern QLD, NT): Increase fastener frequency and use heavier gauge profiles to resist wind uplift. Confirm compliance with NCC wind load requirements for the specific site.
Climate dictates the specification, but the trim does not exist in isolation. Its performance depends equally on how it connects to the flashing, cladding, and sealant systems surrounding it, and those junctions are where most weather failures actually originate.
How Trims Connect to Flashing, Cladding and Sealants
A trim profile bolted to a wall with no thought for what sits behind it or beside it is just decoration. The real function of exterior trim on windows only kicks in when every adjacent component, flashing, weather barrier, cladding, sealant, and insulation, works as a coordinated system. Get one junction wrong and water finds its way in. Research published by IIBEC confirms that inadequate sill flashing details are among the most challenging aspects of aluminium window system design, with undetected water intrusion often causing substantial damage to wall components and interior finishes before anyone notices.
Integrating Trims with Flashing and Weather Barriers
Flashing and aluminium window trims are partners, not substitutes. Head flashing sits above the window opening, tucked beneath the weather-resistant barrier (WRB) so that water running down the wall face is deflected outward before it reaches the frame. The head trim then installs over or in front of the flashing, providing the visible finish while the flashing does the heavy waterproofing work hidden behind it.
At the sill, the relationship inverts. The sill flashing drapes over the rough opening’s bottom edge, slopes outward with a minimum 5-degree fall, and incorporates end dams at each side to prevent water escaping laterally into the wall cavity. The sill trim sits on top of this flashing, and critically, its bottom edge must remain unsealed so trapped moisture can weep to the exterior. Bayshore Exteriors notes that up to 80% of window leaks trace back to improper or missing flashing, not to the trim or frame itself.
The WRB, typically a synthetic building wrap in Australian timber-framed construction, must lap correctly around the opening. Side wraps fold into the reveal, the sill wrap folds down over the framing, and the head wrap stays untaped until the head flashing and trim are in place, then folds down over both. This shingling sequence ensures every layer directs water outward and downward. Window caps exterior to the WRB plane cannot compensate for a barrier that was cut short or taped in the wrong order underneath.
Trim Detailing for Different Cladding Types
Each cladding system creates a different junction condition at the window opening, and the trim detail needs to respond accordingly. A rendered masonry wall presents a rigid, relatively flat surface where a face-fixed flat bar or L-angle typically works well. A weatherboard home introduces horizontal shadow lines and varying depths that demand J-channel or Z-bar profiles to manage the transition cleanly. Metal trim around windows on a metal-clad building requires careful attention to metal siding trim details, since lapping two aluminium surfaces without a thermal break or sealant between them invites galvanic staining and capillary water tracking.
Brick veneer, common across much of suburban Australia, adds another layer of complexity. The window frame typically sits behind the outer brick leaf, creating a recessed reveal. The exterior window casing in this scenario needs to bridge from the frame face to the brick edge, often using a Z-channel or a combination of L-angle and flat stock. Getting the profile depth right prevents water pooling on horizontal surfaces, and a drip edge at the head keeps runoff from streaming down the face of the brickwork.
The table below maps common Australian wall systems to their most suitable trim profiles and key junction considerations.
| Wall System | Recommended Trim Profiles | Key Junction Detail | Common Risk |
|---|---|---|---|
| Rendered Masonry | Flat bar, L-angle | Sealant bead between trim and render face; head drip edge | Render cracking at trim edge if no flexible sealant used |
| Brick Veneer | Z-channel, L-angle + flat stock | Bridge from recessed frame to brick face; weep holes kept clear below sill | Water pooling on sill if profile depth is insufficient |
| Weatherboard (timber or fibre cement) | J-channel, U-channel | Board ends received into channel; building wrap lapped behind trim | Boards swelling and binding in channel if gap allowance is too tight |
| Metal Cladding / Panels | Z-bar, custom brake-formed trim | Thermal break between dissimilar metals; pop-rivet or concealed fix | Galvanic corrosion or capillary water tracking at metal-to-metal lap |
For trim for metal siding installations, isolating the aluminium trim from steel cladding with a neoprene or EPDM separator strip prevents galvanic reaction, especially in coastal areas where salt moisture accelerates the process. An exterior window wrap detail that neglects this separator can develop streaky corrosion staining within a single wet season.
Sealant Selection and Application at Trim Junctions
Sealant is the last line of defence at every trim junction, but not all sealants play well with aluminium. Some silicone formulations release acetic acid during curing, which attacks aluminium surfaces. Others lack the elasticity needed to accommodate thermal movement without cracking away from the joint. Choosing the right sealant and applying it in the correct locations determines whether the window siding trim detail stays watertight through years of cycling.
- Neutral-cure silicone: Safe for aluminium contact. Excellent UV resistance and flexibility. Ideal for perimeter seals between trim and cladding or render.
- Polyurethane sealant: Paintable and highly adhesive. Good for concealed joints where the sealant will be covered by a trim overlap. Less UV-stable when exposed.
- MS polymer (modified silicone): Combines the adhesion of polyurethane with the UV resistance of silicone. Compatible with aluminium, powder-coated surfaces, masonry, and timber. Increasingly specified in Australian commercial projects.
- Butyl tape: Pre-formed adhesive strip applied between overlapping trim pieces at corner joints and laps. Prevents capillary water tracking without the mess of wet sealant in tight joints.
- Acrylic latex: Budget option suitable for interior trim only. Not recommended for exterior aluminium applications due to poor long-term adhesion and limited flexibility.
Wherever sealant is applied, the joint design matters as much as the product. A proper sealant joint has a backer rod or bond-breaker tape at the back to prevent three-sided adhesion, which restricts the sealant’s ability to stretch. The joint width should be at least twice the expected movement range, so a trim run that moves 2 mm needs a sealant joint no narrower than 4 mm.
Insulation continuity around the opening deserves a final mention. Gaps in the thermal envelope at window junctions create cold bridges that drive condensation and energy loss. The trim itself does not insulate, but it must not compress or displace the insulation layer at the reveal. Where rigid foam insulation wraps into the window opening, the trim fixing method should avoid crushing the foam, and any penetrating fasteners should be thermally broken or minimised in number to reduce conducted heat paths.
Every component at a window junction, from the flashing hidden beneath the frame to the sealant bead visible at the trim edge, plays a defined role. Neglecting any single element compromises the whole assembly. The question that follows for most project owners is whether to tackle these layered details personally or hand them to someone with the experience to get each junction right the first time.
DIY vs Professional Installation and When to Call an Expert
That layered junction detail from the previous section looks straightforward on paper. In practice, the gap between understanding the theory and executing it cleanly on a ladder with a caulking gun in one hand and a rivet tool in the other is where projects either succeed or spiral into callbacks. Not every trim job demands a professional, but not every trim job belongs in DIY territory either.
When DIY Installation Makes Sense
Simple, accessible work with forgiving tolerances is fair game for a confident homeowner. Face-fixed flat bar trims on ground-floor windows, where the substrate is sound rendered masonry and the profile is a single straight length with no complex flashing integration, sit comfortably within DIY capability. The same applies to replacing a single damaged section of aluminum window casing where the surrounding detail is already intact and just needs a like-for-like swap.
A few conditions need to be true before you commit. You should be comfortable operating aviation snips or a mitre saw with a non-ferrous blade. The windows must be accessible without scaffolding or elevated work platforms. The existing flashing and weather barrier should be in good condition, meaning you are adding a cosmetic and protective layer rather than rebuilding the waterproofing system from scratch. If you are working with a basic window casing kit or pre-cut exterior window trim kits that come with matched corners and fasteners, the process becomes even more manageable since the measuring and fabrication decisions have already been made for you.
Budget is a legitimate motivator. Labour typically accounts for 40% to 60% of a trim installation quote in the Australian market. On a straightforward single-storey home with six to eight standard openings, doing the work yourself can save a meaningful amount. Just weigh that saving against the risk of moisture damage from a poorly sealed junction that might not reveal itself for years.
Projects That Need Professional Fitting
Complexity, height, and compliance obligations are the three triggers that push a project beyond DIY. Multi-storey installations require scaffolding, working-at-height safety protocols, and often council notification. Complex flashing integration, particularly on brick veneer or cavity wall construction where the aluminium window frame sits recessed behind the outer leaf, demands experience reading junction details and adapting on site when the reveal dimensions do not match the drawings.
Commercial projects carry additional weight. Building codes under the National Construction Code (NCC) require that trim for doors and windows on commercial buildings meets specific performance criteria for weather resistance and fire separation. Non-compliant installations can void building insurance, trigger rectification orders from certifiers, and delay occupancy certificates. Industry research confirms that improper installation can void manufacturer warranties and lead to costly repairs that far exceed the original labour savings.
Warranty is a factor on residential work too. Many aluminium window frame manufacturers tie their product warranty to professional installation. If a seal fails and water enters the wall cavity, the manufacturer’s first question will be who installed the trim and whether they followed the specified method. A DIY install with no documentation leaves you carrying the full cost of any rectification.
| Project Type | Complexity | Risk Level | Recommendation |
|---|---|---|---|
| Ground-floor flat bar trim on rendered walls | Low | Low | DIY suitable for confident homeowners |
| Single-storey full perimeter trim with J-channel cladding integration | Medium | Medium | DIY possible with trade experience; professional preferred |
| Multi-storey residential with scaffold access | High | High | Professional installation required |
| Brick veneer with recessed reveals and Z-bar profiles | High | Medium-High | Professional recommended due to flashing complexity |
| Commercial or compliance-critical builds | High | High | Professional installation mandatory for NCC compliance |
| Retrofit over deteriorated substrates | Medium-High | Medium | Professional recommended; substrate assessment needed first |
Working with Specialist Aluminium Window Suppliers
Sourcing window trim kits, aluminum window parts, and profiles separately from different suppliers creates a coordination burden that professionals and DIYers alike underestimate. Profiles from one manufacturer may not match the reveal depths or fixing centres of aluminum window frames from another. Colour matching across different powder coat batches introduces visible inconsistency. And when something does not fit on site, there is no single point of accountability.
This is where specialist aluminium window manufacturers change the equation. Companies like MEICHEN provide integrated trim-and-frame systems engineered to work together from the outset. The trim profiles are designed to match specific frame geometries, the powder coat finishes come from the same batch as the window frames, and the installation methodology accounts for how every component interfaces. For Australian residential and commercial builds, this integrated approach reduces on-site problem-solving, eliminates mismatched aluminum window parts, and ensures weathertight performance because the system was tested as a complete assembly rather than cobbled together from separate catalogues.
When evaluating any professional installer, look for demonstrated experience with aluminium systems specifically, not just general carpentry or cladding credentials. Ask whether they hold relevant trade licences, carry adequate insurance, and can provide references from similar projects. A qualified installer working with a complete aluminium window system from a specialist supplier delivers the fastest path from measurement to finished detail, with warranty coverage that actually holds up if something goes wrong.
Whether you handle the work yourself or bring in a professional, the final piece of the puzzle is choosing the right trim system for your specific project and understanding what keeps it performing year after year once it is installed.

Selecting the Right Trim System for Your Next Project
Every decision covered in this article, profile shape, material, gauge, climate response, flashing integration, and installation method, feeds into one practical outcome: choosing trims and windows that work together as a single, reliable system. Getting that selection right upfront saves rework, prevents water damage, and delivers a facade that still looks sharp after decades of Australian weather.
Key Selection Criteria at a Glance
Rather than revisiting each topic in full, this checklist distils the critical choices into a single reference you can take to your supplier, installer, or site meeting.
- Profile type matched to junction condition: J-channel for cladding terminations, L-angle for corners and drip edges, Z-bar for recessed reveals, U-channel for raw edge capping, flat bar for flush-framed openings.
- Gauge and alloy matched to climate: 0.7 mm to 1.0 mm suits most residential work. Specify 6063-T5 for extruded profiles or 5005-series for brake-formed aluminum trim molding. Coastal projects need marine-grade alloys or a minimum 60-micron powder coat.
- Finish matched to aesthetic and performance goals: Powder coating for maximum colour range and UV stability. Anodising for a harder, more industrial look. Lighter shades on sun-exposed elevations to reduce thermal stress.
- System compatibility matched to window frame brand: Confirm that the trim profiles suit your frame’s reveal depth, fixing centres, and finish batch. Mismatched aluminum trims and moldings from separate suppliers create colour inconsistency and dimensional conflicts.
- Expansion allowance built into the fixing detail: Slotted screw holes, 2 mm to 3 mm gaps at butt joints, and flexible sealant rather than rigid connections on any run exceeding 1.5 metres.
- Sealant compatibility confirmed: Neutral-cure silicone or MS polymer for exterior junctions. No acetic-cure products against aluminium surfaces.
- Flashing integration planned before trim installation begins: Head, sill, and jamb flashing must be in place and correctly lapped with the weather barrier before any exterior window molding goes on.
Benefits of Integrated Aluminium Window Systems
Sourcing metal trim, frames, hardware, and glazing from separate vendors might seem cost-effective on a line-item comparison. In practice, it multiplies coordination effort and introduces compatibility risk. A window molding from one catalogue may not sit flush against a frame profile from another. Powder coat colours that appear identical on sample chips can look noticeably different under natural light when they come from separate coating lines.
The more reliable path, especially for projects with multiple openings or tight programme deadlines, is to source a complete aluminium joinery package where every component is engineered and finished as a unified system. Suppliers like MEICHEN design their aluminium window systems so that trims, frames, seals, and hardware integrate without the on-site improvisation that plagues mix-and-match approaches. For Australian residential and commercial builds, this means fewer callbacks, consistent aesthetics across every opening, and warranty coverage that applies to the full assembly rather than individual parts.
Ongoing Maintenance for Lasting Performance
Aluminium window trims are genuinely low maintenance, but low does not mean zero. A handful of simple habits keep the system performing at its best over the long term.
Periodic cleaning is the foundation. A soft cloth with warm water and a mild, pH-neutral detergent removes accumulated grime and salt residue. JM Aluminium’s care guide recommends avoiding abrasive cleaners or scouring pads, as these can scratch through the powder coat and expose the aluminium beneath. In coastal locations, quarterly cleaning prevents salt from breaking down the finish. Inland and sheltered sites can generally get by with a twice-yearly wash.
Sealant joints deserve an annual visual check, ideally at the start of autumn before the wet season. Look for cracking, peeling, or separation where the sealant meets the trim edge or wall surface. Replacing a failing sealant bead takes minutes and costs almost nothing. Ignoring it lets moisture track behind the profile, where it can cause substrate damage that is expensive to repair.
If the powder coating gets chipped by impact or scratched during maintenance work on adjacent surfaces, address it promptly. Small areas can be touched up with a colour-matched paint pen or aerosol. Larger sections of damage may need professional spot recoating to restore the protective barrier before corrosion takes hold. This kind of targeted repair is straightforward and far cheaper than replacing entire lengths of aluminum trim.
Treated well, a properly specified and correctly installed aluminium trim system will outlast the building components around it. The investment is not just in material and labour on installation day. It is in the decades of weather protection, visual consistency, and trouble-free performance that follow. For those ready to explore complete aluminium window systems where trims, frames, and glazing are designed to work as one, that integrated approach remains the most dependable route to a result you will not need to revisit.
Frequently Asked Questions About Aluminium Window Trims
1. What is the difference between aluminium window trims and window capping?
They refer to the same product category. In Australia and the UK, the term aluminium window trim is standard, while window capping or window wrapping is more common in North America. Both describe pre-formed aluminium finishing pieces installed around window openings to seal the junction between the frame and wall material, providing weather protection, thermal bridging reduction, and a clean visual finish. The choice of terminology depends on your region, but the function, materials, and installation methods are identical regardless of what you call them.
2. How long do aluminium window trims last compared to vinyl or timber?
Powder-coated aluminium window trims typically last 30 to 50 years or more with minimal maintenance, primarily periodic cleaning and sealant inspection. Vinyl trims last around 15 to 20 years before UV degradation causes discolouration and brittleness, and they cannot be refinished. Timber trims can last 20 to 40 years but require regular sealing, painting, and termite checks to reach that lifespan. In Australian conditions with high UV exposure and coastal salt air, aluminium consistently delivers the strongest long-term value despite a higher upfront cost.
3. Can I install aluminium window trims myself or do I need a professional?
DIY installation is suitable for simple projects such as face-fixed flat bar trims on accessible ground-floor windows with sound substrates. You need basic tools like aviation snips, a drill, and a caulking gun. However, multi-storey work, complex flashing integration on brick veneer or cavity walls, and commercial builds requiring NCC compliance should be handled by professionals. Many aluminium window manufacturers also tie their product warranty to professional installation, so a DIY approach may void coverage if issues arise later.
4. Which aluminium trim profile should I use for my window type?
Profile selection depends on three factors: how far the frame is recessed from the wall face, the surrounding cladding material, and whether the trim needs to manage water runoff. J-channels suit fibre cement and weatherboard cladding terminations. L-angles work for corner protection and drip edges. Z-channels bridge recessed windows in brick veneer construction. U-channels cap raw panel edges at sill lines. Flat bars are best for flush-framed windows on rendered walls. Specialist suppliers like MEICHEN offer integrated trim-and-frame systems where profiles are pre-matched to specific window geometries.
5. How do I maintain aluminium window trims in coastal areas?
In coastal locations within one kilometre of the shoreline, clean trims quarterly using warm water and a mild pH-neutral detergent with a soft cloth. Avoid abrasive cleaners that can scratch through the powder coat. Specify marine-grade alloys or a minimum 60-micron powder coat finish for new installations, and always use stainless steel fasteners to prevent galvanic corrosion. Inspect sealant joints annually before the wet season, replacing any cracked or separated beads promptly. Address powder coat chips immediately with colour-matched touch-up paint to prevent corrosion from taking hold beneath the finish.
More Window & Door Guides