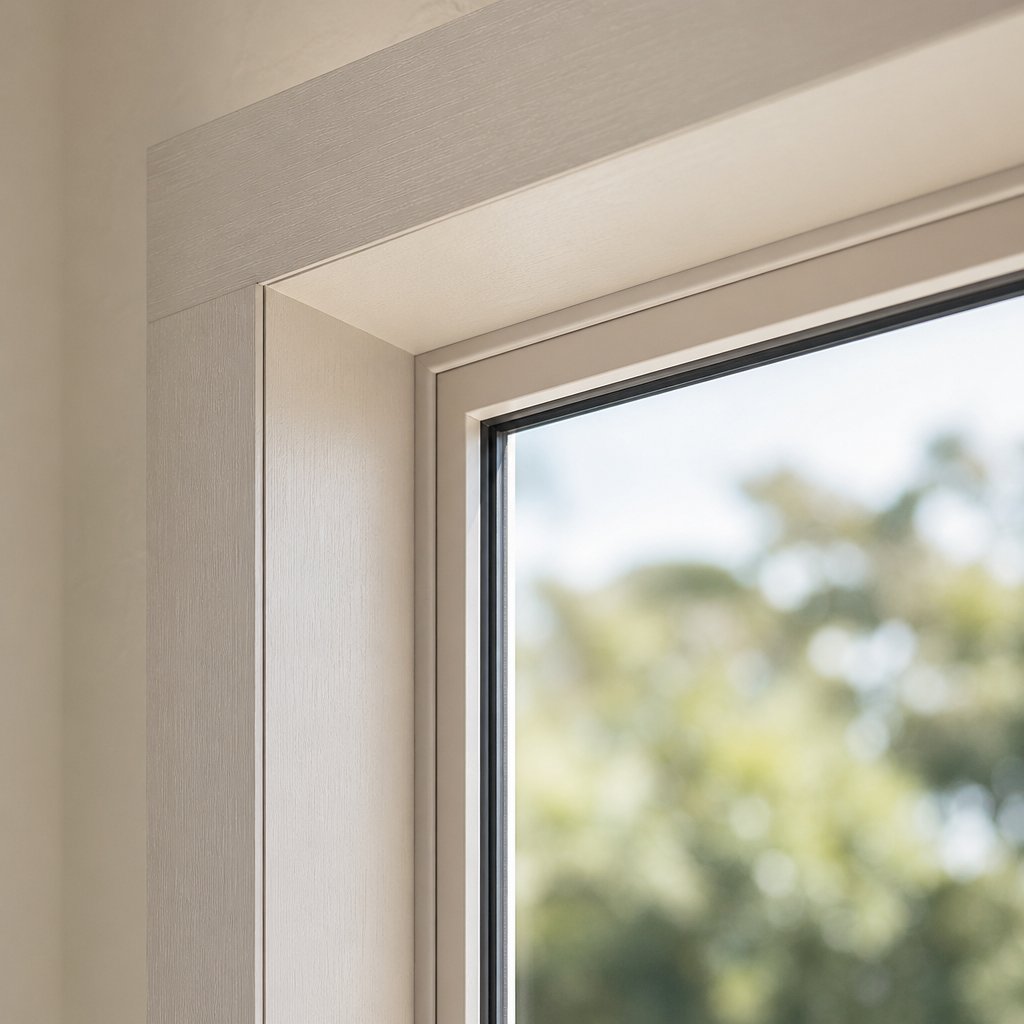
Why Drilling Into Aluminium Window Frames Requires Care
Timber is forgiving. PVC flexes and accepts most fasteners without complaint. Aluminium? It punishes sloppy technique. If you’ve ever asked whether it is safe to drill into aluminium windows, the short answer is yes — but only if you respect the material’s quirks.
Why Aluminium Frames Need Special Drilling Technique
Aluminium is softer than steel yet harder than timber, which puts it in an awkward middle ground. A standard drill bit spinning too fast will generate enough heat to weld chips directly onto the flute, scoring the hole and leaving a ragged mess. The material also tends to grab the bit as it breaks through, pulling the tool forward and potentially cracking thin-walled sections. Most residential aluminium window profiles sit between 1.2 mm and 1.6 mm thick — barely more than heavy-gauge sheet metal — so there’s almost no margin for aggressive pressure or oversized holes.
These properties mean you can’t simply reach for the same masonry bit you used on the brick reveal or the brad-point bit from your timber project. Learning how to drill aluminium window frame without damage comes down to choosing the right bit geometry, controlling speed, and managing the stringy swarf that aluminium produces.
Common Reasons You Might Need to Drill
Can you drill into aluminium window frames for everyday home upgrades? Absolutely. Here are the most frequent scenarios that send homeowners and tradespeople reaching for the drill:
- Drilling into aluminium window frame for blinds — roller blinds, venetians, and plantation shutters often require bracket holes directly on the frame head
- Installing window locks or security restrictors for child safety compliance
- Mounting security cameras, sensor contacts, or alarm hardware
- Routing cables for smart-home devices or powered ventilation fans
- Fitting trickle vents or aftermarket ventilation accessories
Each of these tasks shares the same challenge: putting a clean, correctly sized hole through a thin aluminium wall without cracking the profile, damaging the powder-coat finish, or compromising the frame’s weather seal.
This guide walks through the full process — from identifying your frame type and selecting the correct bit, through pilot hole sizing and peck-drilling technique, to sealing and weatherproofing the finished hole. The difference between a professional result and a ruined frame often comes down to details that take seconds to get right but are expensive to fix after the fact.
Identifying Your Aluminium Frame Type and Wall Thickness
That thin-walled profile sitting in your window opening isn’t a generic slab of metal. Its alloy grade and wall thickness dictate everything about how it responds to a drill bit — the speed you can run, the pressure you apply, and whether the exit side will punch clean or blow out in a jagged tear. Skipping this step is like cutting timber without checking for knots: you might get lucky, but the odds aren’t in your favour.
Residential vs Commercial Aluminium Profiles
Almost all aluminium window frames in Australia are extruded from 6063-T5 alloy — the industry standard for architectural profiles. It balances strength, corrosion resistance, and surface finish quality, which is why manufacturers favour it for both powder-coated and anodised frames. You may occasionally encounter 6061 alloy in high-wind or large-span commercial installations where extra tensile strength is needed, but for the vast majority of Australian homes, you’re working with 6063-T5.
The real variable that affects your drilling approach is wall thickness, and it splits neatly along residential versus commercial lines:
- Residential aluminium window profile thickness: Typically 1.2 mm to 1.6 mm. Standard homes, townhouses, and low-rise apartments across Australia generally use profiles at the 1.2 mm baseline, stepping up to 1.4–1.6 mm for larger openings or wind-exposed sites.
- Commercial and high-rise profiles: 2.0 mm and above. Office towers, shopfronts, and buildings in cyclone-rated regions (northern Queensland, NT) often specify thicker walls for structural rigidity and compliance with AS 2047 wind-load requirements.
Why does this matter when you pick up a drill? A 1.2 mm wall behaves almost like sheet metal — the bit breaks through in a fraction of a second, giving you zero reaction time if pressure is too high. A 2.0 mm or thicker profile offers more resistance and forgiveness, behaving closer to solid bar stock. The thinner the wall, the more critical your speed control, bit sharpness, and backing support become.
| Characteristic | Residential Profile | Commercial Profile |
|---|---|---|
| Wall thickness range | 1.2–1.6 mm | 2.0–3.0 mm |
| Typical alloy grade | 6063-T5 | 6063-T5 or 6061-T6 |
| Tensile strength | ~150 MPa | 150–260 MPa |
| Drill breakthrough speed | Very fast — requires light pressure | Moderate — more controlled |
| Backing support needed? | Recommended for holes >6 mm | Generally not required |
| Risk of exit-side blowout | High if pressure is excessive | Low with standard technique |
How to Check Wall Thickness Before You Drill
Knowing how to tell aluminium frame thickness doesn’t require specialist equipment. A few quick checks will give you the information you need:
Examine the frame edge. Open the window sash and look at the exposed profile cross-section where the sash meets the frame. On most designs, you can see the wall thickness directly at the edge of the extrusion. A standard ruler held against the cut edge gives a rough reading; a digital caliper gives precision to 0.01 mm.
Look for manufacturer markings. Many Australian aluminium window manufacturers stamp or etch identification codes into the frame rebate — the channel hidden behind the sash or glazing bead. These codes often reference the profile series, which links back to a specific wall thickness in the manufacturer’s catalogue. If you spot a code like “100 series” or “52 mm frame,” a quick search of the brand’s technical data sheet will confirm the aluminium window frame wall thickness for drilling.
Use a digital caliper on an accessible section. If the frame has a drainage slot or weep hole at the sill, you can slip a caliper jaw into the opening and measure the wall directly. Alternatively, remove a screw from existing hardware — the hole it leaves exposes the profile wall, and you can measure with the caliper across that edge.
Check the original documentation. Building plans, window schedules, or invoices from the original installation often list the profile system and wall thickness. For newer homes, this information may also appear in the NatHERS or WERS energy rating documentation submitted during construction.
Once you have a thickness reading, you can make informed decisions about drill speed, feed pressure, and whether to place a scrap timber block behind the frame as a backing support. Thin-wall residential profiles (1.2–1.4 mm) benefit from that backing block because it prevents the aluminium from deflecting inward as the bit punches through — a deflection that causes dimpling, burr formation, and cracked powder coat on the exit side.
With your frame type confirmed and wall thickness measured, the next decision is which drill bit geometry and material will cut cleanly through that specific profile without grabbing, overheating, or tearing the finish.
Essential Tools and Drill Bits for Aluminium Frames
Bit selection makes or breaks the job. A masonry bit will skate across the surface, a brad-point tip will catch and tear the thin wall, and a blunt general-purpose twist bit will generate enough friction to weld aluminium chips onto its flutes within seconds. The best drill bit for aluminium window frames is one designed specifically for non-ferrous metals — and paired with the right supporting gear, it turns a risky task into a controlled one.
Choosing the Right Drill Bit for Aluminium
The go-to drill bit type for aluminium frames is an HSS (high-speed steel) jobber bit with a 118° or 135° split-point tip. The split-point geometry is critical: it bites immediately on contact rather than skating across the powder-coated surface, eliminating the wandering that damages finishes. For residential profiles in the 1.2–1.6 mm range, a standard HSS drill bit for aluminium frames handles the job cleanly and affordably.
If you’re working with thicker commercial profiles or harder 6061-T6 alloy, cobalt-enhanced bits (M35 grade, containing 5% cobalt) step up the performance. They resist heat buildup better and maintain a sharper cutting edge over more holes — worthwhile if you’re fitting hardware across multiple frames in one session. Solid carbide bits are overkill for window frame work and too brittle for handheld drilling, so save those for machine shop applications.
Wondering what speed to drill aluminium window frame profiles? A variable-speed drill set between 1,000 and 3,000 RPM suits holes up to 6 mm. Smaller bits (2–3 mm pilots) run at the higher end of that range; larger final holes (5–6 mm) perform better at the lower end. The key is moderate, consistent speed — never full throttle. Excessive RPM generates heat faster than the thin wall can dissipate it, and aluminium’s gummy nature causes chip welding to the flute when temperatures spike.
Lubrication and Cooling for Clean Cuts
Here’s the detail most guides skip entirely: lubrication. Aluminium’s tendency to smear and bond to cutting edges under heat makes a lubricant for drilling aluminium windows non-negotiable for clean results. A small dab of cutting fluid, WD-40, or light machine oil applied directly to the drill tip and the marked spot on the frame creates a barrier that reduces friction, carries heat away from the cutting zone, and prevents those long stringy chips from welding onto the bit’s flutes.
Apply lubricant before you start drilling and again if you pause to clear swarf. On vertical surfaces — which window frames almost always are — a paste-style cutting compound stays in place better than thin oils that run off immediately. Even a basic application extends bit life significantly and leaves a noticeably cleaner hole with less burring on the exit side.
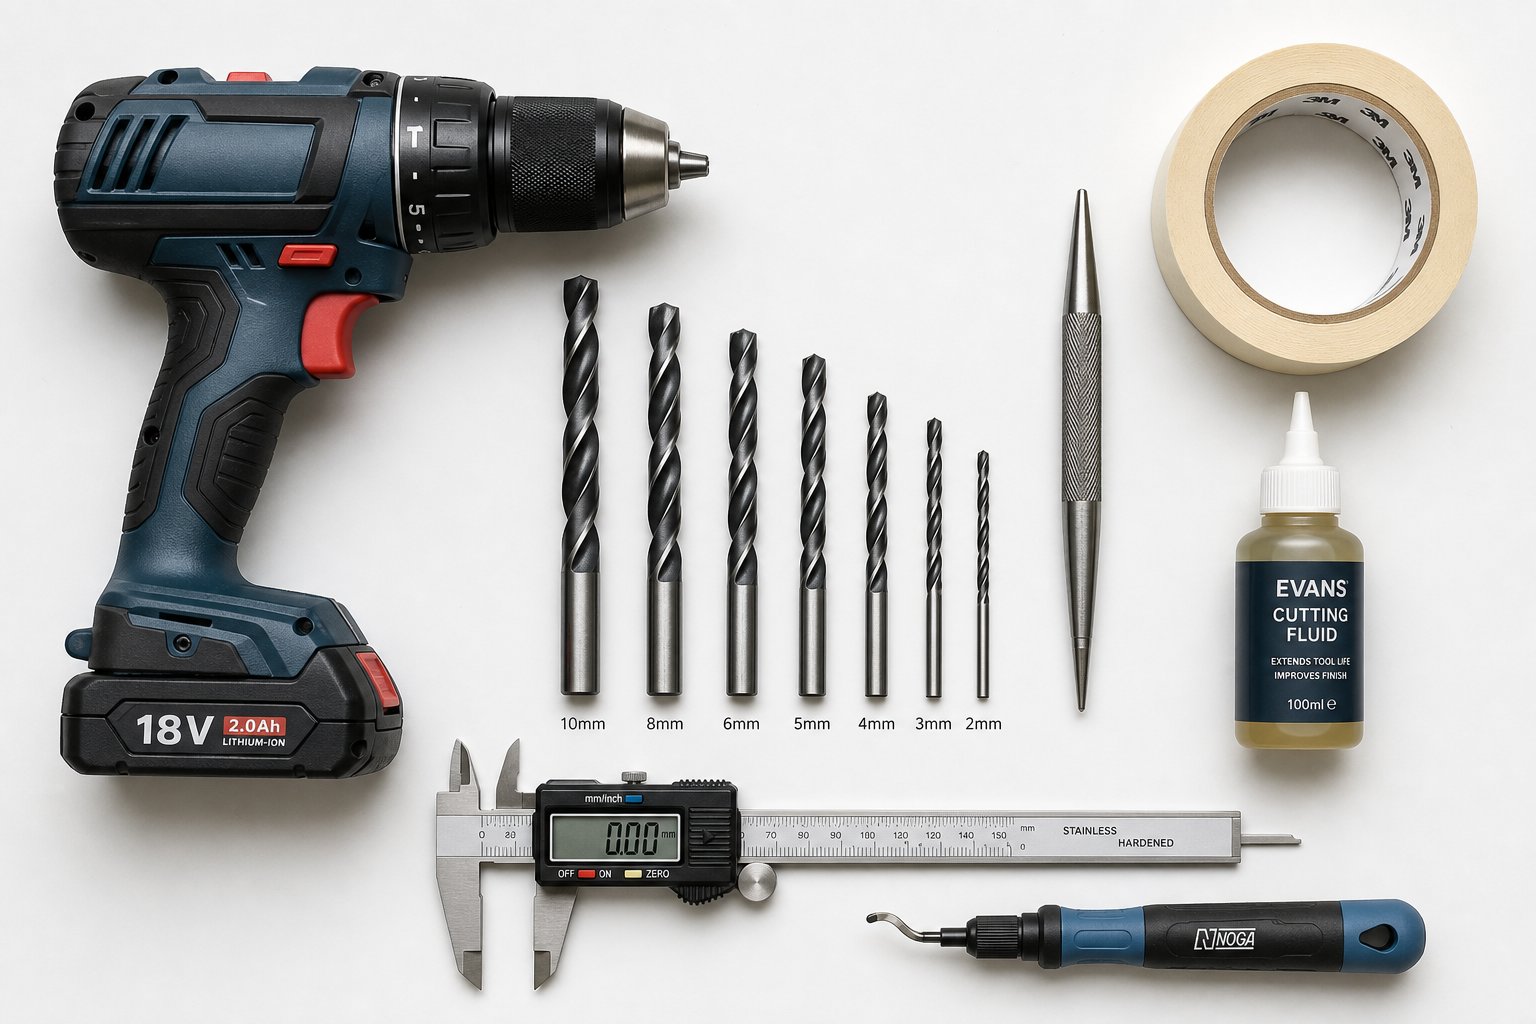
Round out your toolkit with these supporting items before you mark your first hole:
- Centre punch — creates a starter dimple that locks the bit in position and prevents skating
- Masking tape — applied over the drill zone to protect the powder-coat finish and provide a visible marking surface
- Digital caliper — confirms hole size and measures wall thickness for pilot hole calculations
- Variable-speed cordless drill — gives RPM control without the cord drag that causes hand wobble on vertical surfaces
- Magnetic drill guide or clamp — holds the bit perpendicular to the frame surface, preventing angled holes in thin walls
- Cutting fluid or WD-40 — essential lubrication to prevent heat welding and chip adhesion
- Small brush or compressed air — clears aluminium swarf between peck-drilling passes
With the right bit spinning at controlled speed, proper lubrication on the surface, and a centre-punched starting point, you’ve eliminated the three most common causes of botched holes in aluminium frames. What remains is matching your pilot hole diameter precisely to your chosen fastener — a calculation that depends on the screw gauge and the frame’s wall thickness working together.
Pilot Hole Sizing and Screw Selection for Aluminium
Getting the pilot hole size for aluminium window frame profiles wrong creates a cascade of problems. Too small, and the self-tapping screw splits the thin wall or strips its own thread on entry. Too large, and the fastener spins freely with no grip. The sweet spot sits in a narrow band that depends on screw gauge, thread type, and the wall thickness you measured earlier.
Pilot Hole Diameter vs Screw Core Size
The mistake most people make is sizing the pilot hole to the screw’s outer thread diameter. That’s the wrong measurement. You need to match the hole to the screw’s core diameter — the solid shaft between the thread roots — and then go slightly larger. For self tapping screws for aluminium window frames, the pilot hole should be approximately 0.1 mm to 0.2 mm wider than the core diameter. This allows the thread to cut into the aluminium wall and form a secure grip without forcing the material outward to the point of cracking.
On thin residential profiles (1.2–1.6 mm), that extra clearance matters even more. The wall simply doesn’t have enough material to absorb the displacement of an undersized hole, and the result is a raised ring of deformed aluminium around the screw entry — or worse, a hairline split running along the extrusion line.
The following table shows recommended pilot hole diameters for common screw gauges used in window hardware installation, based on TR Fastenings’ engineering data for aluminium sheet materials in the 1.5–3.5 mm thickness range:
| Screw Size (Metric) | Thread Pitch | Core Diameter (approx.) | Pilot Hole for Aluminium | Typical Use |
|---|---|---|---|---|
| M3 | 0.5 mm | 2.39 mm | 2.7 mm | Blind brackets, sensor mounts |
| M3.5 | 0.6 mm | 2.76 mm | 3.1 mm | Friction stays, restrictors |
| M4 | 0.7 mm | 3.14 mm | 3.6 mm | Window locks, handle bolts |
| M5 | 0.8 mm | 4.02 mm | 4.5 mm | Heavy-duty security hardware |
| M6 | 1.0 mm | 4.77 mm | 5.4 mm | Commercial fittings, large brackets |
Notice the pattern: the pilot hole is always larger than the core but smaller than the outer thread. That gap is where the thread forms its grip in the aluminium. For residential frames at the thinner end (1.2 mm), lean toward the larger pilot hole value to reduce splitting risk. For thicker commercial profiles, you can afford to stay closer to the core diameter for a tighter thread engagement.
Preventing Galvanic Corrosion With Correct Fasteners
Drilling a perfect hole means nothing if the screw you drive into it slowly destroys the frame from the inside out. Choosing the best screws for aluminium window frames isn’t just about thread grip — it’s about electrochemical compatibility over the life of the installation.
When dissimilar metals sit in direct contact and moisture is present, galvanic corrosion begins. Aluminium is highly reactive (anodic), meaning it sacrifices itself to protect less reactive metals nearby. A plain carbon steel screw in an aluminium frame will cause the surrounding aluminium to corrode, producing white oxide powder, pitting, and eventually a weakened hole that can no longer hold the fastener. In coastal Australian environments, this reaction can visibly damage a frame within months.
The solution is straightforward: use austenitic stainless steel fasteners (grade 304 or 316) for all aluminium frame applications. Stainless steel sits close to aluminium on the galvanic series, which means the electrical potential difference between them is small — too small to drive aggressive corrosion under normal conditions. Grade 316 is the better choice for homes within five kilometres of the coast, where salt spray accelerates any electrochemical reaction.
Avoid these fastener materials in direct contact with aluminium:
- Plain carbon steel — highly cathodic relative to aluminium; causes rapid galvanic corrosion of the frame
- Brass — contains copper, which is one of the most aggressive metals when paired with aluminium
- Zinc-plated steel — the zinc coating offers temporary protection, but once it wears through (and it will), the exposed steel attacks the aluminium
Sometimes dissimilar metals can’t be avoided — perhaps the hardware you’re fitting comes with its own carbon steel fasteners and no stainless alternative exists. In that case, nylon isolation washers or shoulder bushings placed between the screw head and the aluminium surface break the electrical path that drives galvanic corrosion. The nylon acts as a non-conductive barrier, preventing metal-to-metal contact while still allowing the fastener to clamp securely. A dab of lanolin-based anti-corrosion paste inside the hole adds a secondary moisture barrier for belt-and-braces protection in exposed locations.
With the correct pilot hole drilled and a corrosion-safe fastener selected, the remaining variable is execution — how you physically drive the bit through the frame wall without wandering, overheating, or tearing the finish on the exit side.
Step-by-Step Drilling Process for Aluminium Frames
Theory only gets you so far. At some point the bit meets the frame, and technique determines whether you end up with a clean, precise hole or a chewed-up mess surrounded by scratched powder coat. Here’s how to drill into aluminium window frame profiles step by step — from surface prep through to a finished, burr-free hole ready for its fastener.
Marking and Preparing the Frame Surface
Preparation takes less than two minutes but eliminates the most common causes of cosmetic damage and misplaced holes. The goal is a clearly marked, protected surface with a physical dimple that locks the bit exactly where you want it.
- Clean the frame surface. Wipe the drill zone with a lint-free cloth and isopropyl alcohol or a mild degreaser. Dust, grime, or oily residue causes masking tape to lift mid-drill and lets the bit skate sideways on first contact.
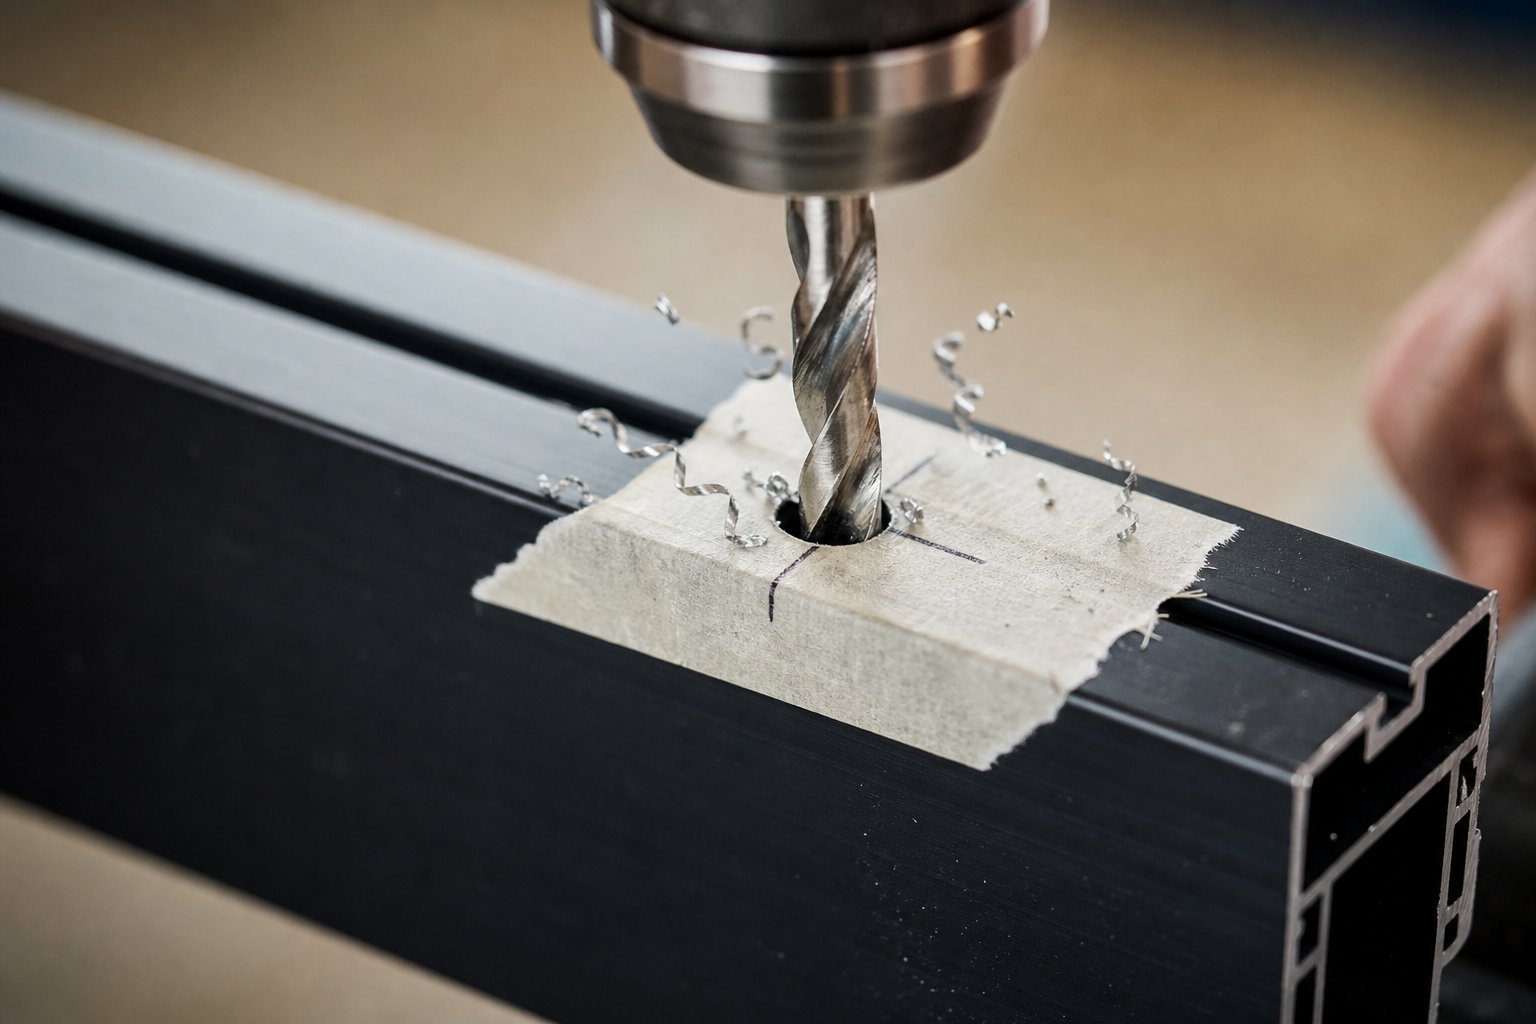
- Apply masking tape over the drill area. Use a quality painter’s tape — not cheap packing tape — pressed firmly across the zone where the hole will go. The tape serves two purposes: it protects the powder-coat or anodised finish from scratches caused by the drill chuck or flying swarf, and it gives you a visible surface to mark with a pencil or fine marker.
- Mark the hole position precisely. Measure twice. Use the hardware template if one came with your blinds, lock, or bracket. Mark a clear crosshair on the tape so you can centre-punch with confidence.
- Centre-punch the mark. Place a sharp centre punch on the crosshair and give it a single firm tap with a small hammer. The resulting dimple is your insurance policy to prevent drill bit wandering on aluminium frame surfaces. Without it, the split-point tip has nothing to register against and will skate across the hard anodised or powder-coated layer before biting in — leaving a visible scratch trail.
- Secure the work area. If the frame section flexes when you press against it (common on thin residential profiles), place a scrap timber block behind the frame inside the reveal to act as a backing support. On awning or casement sashes that can be removed, clamping the sash to a stable bench gives even better control.
Peck-Drilling Technique for Clean Holes
Aluminium doesn’t produce neat little chips like steel. It throws off long, stringy swarf that wraps around the drill flutes, clogs the hole, and scores the surrounding finish if left unchecked. The peck drilling technique for aluminium solves this by breaking the cut into short, controlled passes with chip-clearing pauses between each one.
- Start with a small pilot bit at low RPM. Load a 2 mm or 2.5 mm HSS pilot bit. Set your drill to around 2,000–2,500 RPM. Apply a drop of cutting fluid or WD-40 to the dimple. Position the bit in the centre-punch mark, squeeze the trigger gently, and let the bit feed in under light, steady pressure — never force it.
- Peck-drill in short passes. Advance the bit 2–3 mm into the material, then retract fully to clear chips from the flutes. On a 1.4 mm residential wall, you’ll break through in a single peck. On thicker commercial profiles, expect two or three passes. Clearing swarf when drilling aluminium is non-negotiable: those stringy ribbons will wrap the bit, heat up, and gouge the inside of the hole if you try to power through in one continuous push.
- Step up to the final hole size. Once the pilot hole is through, switch to your final-diameter bit (matched to the pilot hole size from the previous chapter’s table). Re-apply lubricant, seat the larger bit into the pilot hole, and drill through at a slightly lower RPM — around 1,000–1,500 for bits above 4 mm. The pilot hole guides the larger bit dead-centre, eliminating wander and reducing the cutting load on the bigger diameter.
Between passes, brush away aluminium chips with a small bristle brush or a blast of compressed air directed away from your face. Never blow swarf toward the window glass — those tiny metal slivers scratch glazing permanently.
Deburring and Finishing the Hole
A drilled hole in aluminium always leaves a raised burr on the exit side, and often a smaller one on the entry. Skipping this step means the fastener won’t seat flush, the washer won’t seal properly, and the sharp edge will cut through any sealant you apply later.
- Deburr both sides of the hole. Use a countersink bit (a 90° fluted countersink works well) turned by hand or at very low RPM — just two or three light rotations to shave the raised lip flush. Alternatively, a handheld deburring tool with a swivel blade trims the burr in seconds without removing excess material. Knowing how to deburr aluminium window frame hole edges properly is the difference between a weathertight seal and a slow leak.
- Remove the masking tape and inspect. Peel the tape away carefully. Check that the hole is round, centred on your mark, and free of cracks or powder-coat flaking around the perimeter. If you spot minor finish chips, they’ll be addressed during the sealing stage.
- Dry-fit the fastener. Thread your stainless steel screw or bolt into the hole by hand to confirm it engages cleanly. It should turn in with moderate resistance — not spinning freely (hole too large) and not requiring excessive torque that deforms the surrounding aluminium (hole too small). If the fit is right, back the screw out. The hole is now ready for sealant and final installation.
The entire sequence — from taping to dry-fit — takes under five minutes per hole once you’ve done it a couple of times. Rushing any single step, particularly the centre-punch or the peck-drilling pass, is where most DIY attempts go sideways. A clean hole with smooth edges and no finish damage sets you up for the final critical stage: sealing that penetration against moisture before driving the fastener home for good.
Sealing and Weatherproofing After Drilling
A perfectly drilled, deburred hole is only half the job. Left unsealed, that small opening becomes a direct pathway for wind-driven rain, condensation, and salt-laden air to reach the frame’s internal cavity — and from there, into the wall structure behind it. Every penetration through an aluminium facade is a potential water entry point, and facade specialists consistently identify penetrations as the most common source of water ingress in aluminium cladding and window systems. The same principle applies at a smaller scale when you drill a single screw hole for a blind bracket or window lock.
Moisture sitting inside an unsealed hole triggers oxidation of the raw aluminium exposed by drilling. Over months, white aluminium oxide builds up around the fastener, weakening the grip and staining the surrounding finish. In coastal areas of Australia — anywhere within five kilometres of the shoreline — salt accelerates this process dramatically. Knowing how to seal drill hole in aluminium window frame penetrations properly is what separates a lasting installation from one that deteriorates within a year or two.
Sealing Drill Holes to Prevent Water Ingress
The sealant you choose matters as much as the drill bit you used. Grab the wrong tube off the shelf and you’ll actively corrode the frame you just carefully drilled. The critical distinction is between acetic-cure (acetoxy) silicone and neutral-cure silicone — and for aluminium, only one is safe.
Acetic-cure silicone releases acetic acid as it cures. That’s the vinegar smell you notice when squeezing out a bead of cheap bathroom sealant. On glass or glazed tiles, it’s fine. On aluminium, that acid attacks the metal surface, causing white staining and corrosion over time — exactly the damage you’re trying to prevent. It’s one of the most common mistakes in window and door installation across Australia.
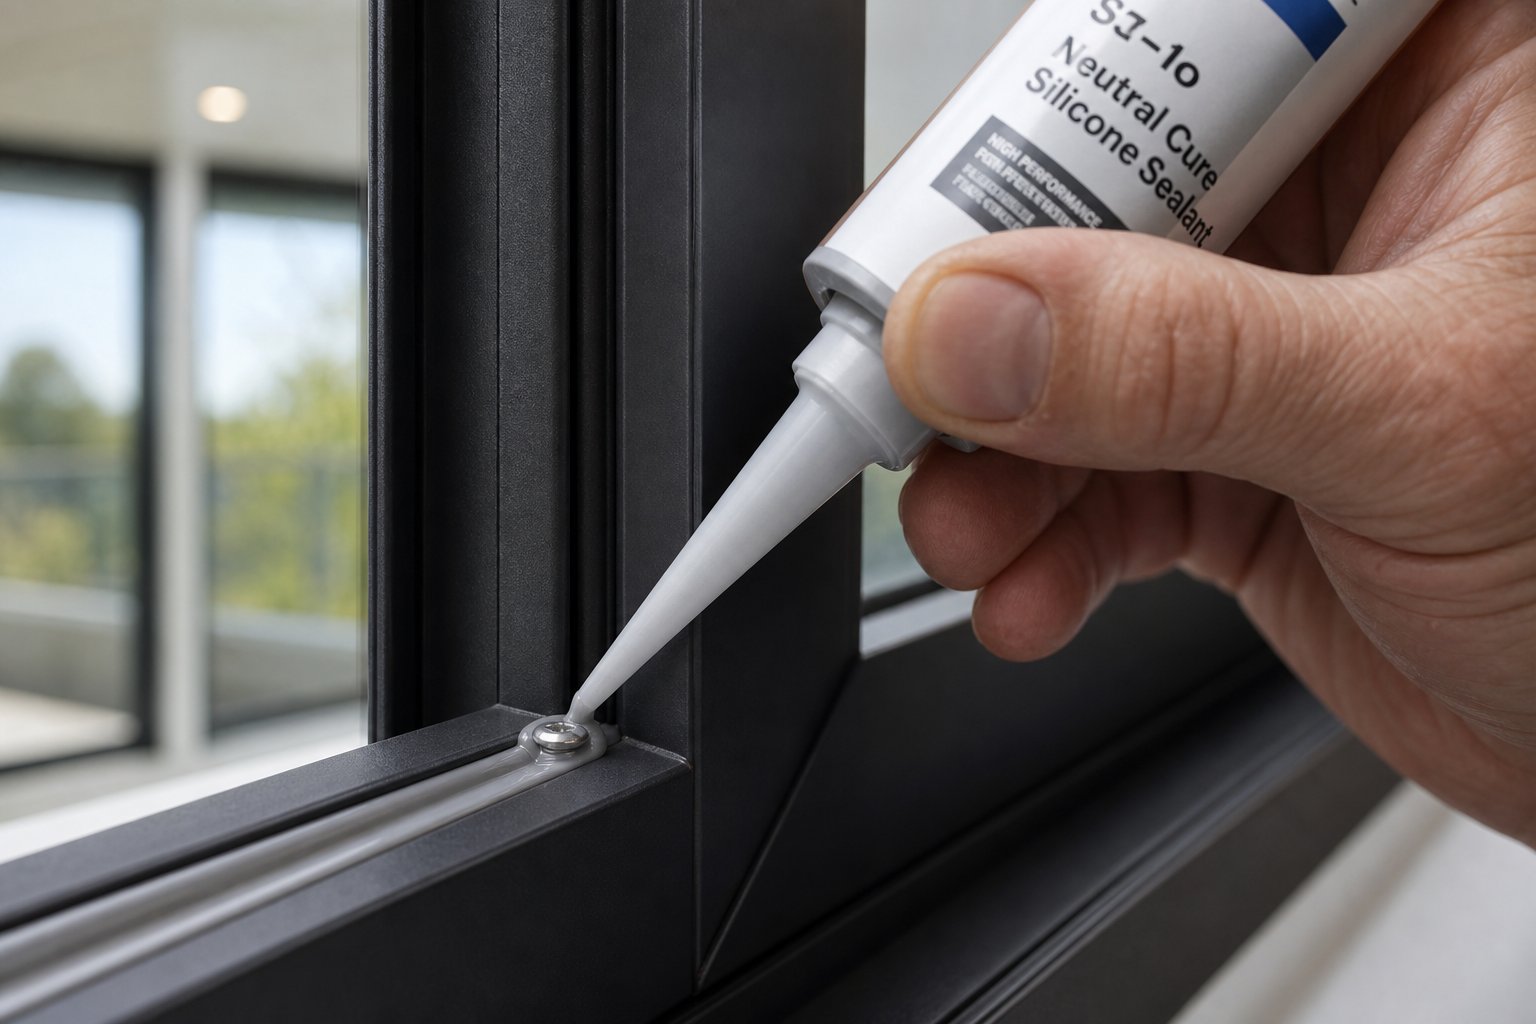
Neutral cure silicone for aluminium frames uses an alkoxy or oxime cross-linking agent instead, releasing a non-corrosive byproduct (typically ethanol) during curing. It bonds well to powder-coated and anodised surfaces, offers excellent UV and weather resistance for outdoor exposure, and won’t degrade the aluminium underneath. The trade-off is a slightly longer cure time — up to 72 hours for full cure versus 24 hours for acetic types — but that patience pays off in a seal that lasts decades rather than failing within a few seasons.
Here are the best sealant for aluminium window frames options, ranked by suitability:
- Neutral-cure silicone — first choice for most screw-hole sealing; non-corrosive to aluminium, excellent UV stability, flexible enough to absorb thermal movement, and available in colours matched to common frame finishes (white, black, grey, bronze)
- Polyurethane sealant — strong adhesion and paintable once cured; good for larger penetrations or where the seal needs to be colour-matched with touch-up paint afterward; slightly less flexible than silicone over extreme temperature cycles
- MS polymer sealant — hybrid option combining silicone flexibility with polyurethane adhesion; paintable, non-corrosive, and low-odour; higher cost but excellent all-round performance on aluminium
The application method is straightforward but often done in the wrong order. Before driving the final fastener, apply a small bead of neutral-cure silicone inside the drilled hole using a fine nozzle or a toothpick for small screw holes. Then apply a ring of sealant around the screw shank or under the screw head and washer. Drive the fastener home, and the sealant compresses into every gap between the screw threads and the aluminium wall. Wipe away any squeeze-out with a damp cloth before it skins over. This method seals from the inside out — far more effective than trying to caulk around the screw head after installation.
One detail worth noting: check that your sealant is compatible with the specific coating system on your frame. Most neutral-cure silicones work with standard powder coat, but some aggressive formulations can discolour certain anodised finishes. The sealant’s technical data sheet will list compatible substrates — take thirty seconds to confirm before applying.
Beyond the hole itself, consider the frame’s drainage system. Aluminium window profiles include weep holes and pressure-equalisation channels designed to drain any moisture that enters the frame cavity. If your drilled hole sits near or below these drainage paths, sealant squeeze-out or debris can block them. After installation, verify that weep holes at the sill remain clear and unobstructed. Similarly, if your frame uses a thermally broken profile — where a polyamide strip separates the interior and exterior aluminium sections — avoid drilling through the thermal break zone. Penetrating that strip compromises the frame’s insulation performance and can create a condensation bridge that leads to interior moisture problems.
Warranty Considerations Before You Drill
Here’s the question most people ask too late: does drilling void aluminium window warranty coverage? The honest answer is — it depends on the manufacturer, but in many cases, yes.
Most aluminium window warranties in Australia cover three areas: frame manufacturing defects (typically 5–10 years), finish integrity such as powder-coat fading or peeling (10–15 years), and installation workmanship (1–2 years). The exclusions section is where drilling becomes relevant. Warranty documents commonly exclude damage caused by “modifications after installation,” and drilling a hole squarely qualifies as a modification. Some manufacturers are more specific, stating that any unauthorised penetration of the frame profile voids the structural and weatherproofing warranty for that unit.
Before you pick up the drill, take these steps:
- Locate your original window warranty documentation — check the purchase invoice, building handover pack, or contact the installer
- Read the exclusions section for language around “modifications,” “penetrations,” or “unauthorised alterations”
- Contact the manufacturer or installer directly if the wording is ambiguous — get a written response confirming whether a specific drilling task (e.g., two 4 mm holes for a blind bracket) will affect coverage
- Document the installation with dated photos showing sealant application and correct fastener selection — this evidence helps if a future warranty claim arises on an unrelated issue
For homes still within the installation warranty period, it’s worth asking whether the original installer can fit the hardware for you. Their workmanship warranty typically covers any penetrations they make, keeping your coverage intact.
There’s also a broader consideration for anyone planning multiple accessories or hardware upgrades. Quality aluminium window systems from manufacturers like MEICHEN are engineered with pre-punched mounting points and integrated hardware channels built into the profile during fabrication. These provisions allow blinds, locks, sensors, and ventilation accessories to be fitted without any post-installation drilling — preserving both the frame’s weather seal and full warranty coverage. If you’re weighing up a window replacement or specifying windows for a new build, choosing a system with these built-in accessory provisions eliminates the sealing and warranty concerns entirely.
Regardless of warranty status, proper sealing protects your frame and your home’s building envelope. A well-sealed penetration with the correct sealant, corrosion-safe fastener, and intact drainage channels will perform reliably for the life of the window. But even with perfect technique, mistakes happen — a hole ends up 3 mm off-centre, the bit wanders on a tricky angle, or the powder coat chips further than expected. Knowing how to correct those errors without making them worse is the final piece of the puzzle.
Fixing Mistakes and Repairing Damaged Aluminium Frames
A misplaced hole doesn’t mean the frame is ruined. It means you need a repair strategy before the problem compounds — because an untreated wrong hole invites moisture, weakens the profile wall, and looks unprofessional once hardware is mounted slightly off-position. Whether you’re dealing with a wandered pilot hole, a stripped thread, or chipped powder coat, each issue has a proven fix that restores both function and appearance.
Fixing a Misplaced or Oversized Hole
The most common scenario: the bit drifted 2–3 mm from your mark, or you drilled the hole before realising the bracket template was upside down. Knowing how to fix wrong hole in aluminium window frame profiles depends on whether the misplaced hole will be hidden by hardware or left exposed.
For holes that will sit behind a bracket or cover plate, the simplest approach is to fill hole in aluminium window frame penetrations with a metal-reinforced epoxy filler rated for aluminium. Clean the hole with isopropyl alcohol, roughen the inner edges with a small round file to give the epoxy a mechanical key, then press the filler firmly into the opening — slightly overfilling to allow for sanding. Once cured (typically 6–24 hours depending on the product), sand flush with 320-grit paper. The filled hole won’t hold a screw again, but it seals the penetration and disappears under the mounted hardware.
For structural situations where the misplaced hole sits in a load-bearing zone — say, a window lock strike plate — a more robust fix involves riveting a small aluminium backing plate behind the frame wall. Cut a piece of matching-gauge aluminium sheet roughly 20 mm larger than the hole in each direction, bond it to the interior face with structural adhesive, and drill your corrected hole through both layers. The backing plate reinforces the weakened section and gives the new fastener a thicker material to grip.
Stripped screw holes present a different challenge. If the thread has lost its bite, you have two options to repair stripped screw hole aluminium frame damage without replacing the entire profile:
- Step up one screw gauge — if the original fastener was M4, re-drill the pilot hole to suit an M5 screw. The larger thread cuts fresh material and restores full grip. Only works if the hardware accepts the bigger fastener.
- Install a rivet nut (nutsert) — a threaded insert that expands behind the frame wall when set with a rivet nut tool. It creates a permanent machine-thread anchor in the thin aluminium, allowing you to reuse the original screw size with a bolt rather than a self-tapper. Ideal for hardware that gets removed and refitted periodically, like security screens.
Repairing Finish Damage on Aluminium Frames
Even careful drilling can chip the powder coat or anodised layer around the hole perimeter — especially if the masking tape lifted during the cut or the exit burr pulled finish material away. Left exposed, bare aluminium oxidises and the damage spreads outward over time.
To touch up powder coat aluminium window frame surfaces, start with proper surface preparation. Lightly sand the chipped area with 320-grit paper to feather the edges where intact coating meets bare metal, then clean with isopropyl alcohol. Apply a colour-matched touch-up paint formulated for powder-coated substrates — most Australian aluminium window manufacturers offer RAL-matched touch-up pens or small aerosol cans through their dealer network. Apply in thin coats, allowing six hours between each, until the repair sits level with the surrounding finish. Two to three coats typically achieve adequate coverage and corrosion protection.
For anodised frames, the repair is trickier because anodising is an electrochemical process that can’t be replicated with a brush. The practical field fix is a clear lacquer or anodised-look touch-up paint that approximates the original sheen. It won’t be invisible under close inspection, but it seals the exposed metal and prevents oxidation from spreading.
Here’s a quick-reference checklist of common drilling mistakes and their corresponding fixes:
- Hole 2–3 mm off-centre — fill with aluminium-rated epoxy, re-drill in the correct position
- Hole too large for the fastener — install a rivet nut insert to create a fresh threaded anchor
- Stripped screw thread — step up one gauge or fit a nutsert for machine-thread engagement
- Powder coat chipped around hole — sand, clean, and apply manufacturer-matched touch-up paint in thin coats
- Crack running from hole along extrusion line — stop immediately; bond an aluminium backing plate behind the crack and seal both sides with neutral-cure silicone
- Bit wandered and scored the frame surface — polish the scratch with fine automotive cutting compound, then seal with clear lacquer
Most of these repairs take under thirty minutes and cost less than $20 in materials. The key is acting quickly — bare aluminium left exposed to coastal air or trapped moisture deteriorates faster than you’d expect, turning a minor cosmetic issue into a structural one. With the damage addressed and sealed, the frame is back to full weathertight performance and ready for its intended hardware.

Summary and Smarter Alternatives to Drilling
Every successful hole in an aluminium frame comes down to five non-negotiable principles working together. Miss one, and the result ranges from cosmetic damage to a compromised weather seal that costs far more to fix than the original hardware installation.
Key Takeaways for Safe Aluminium Frame Drilling
The single most important principle: never let the drill bit overheat. Aluminium welds itself to a hot flute in seconds, and once that happens, the bit tears rather than cuts — destroying the hole, the finish, and often the surrounding frame wall in a single pass.
Keep these five points front of mind:
- Bit selection — HSS split-point or cobalt jobber bits only. No masonry, no brad-point.
- Peck-drilling — advance 2–3 mm, retract, clear swarf, repeat. Never power through in one pass.
- Pilot hole sizing — match to the screw’s core diameter plus 0.1–0.2 mm, not the thread diameter.
- Corrosion-safe fasteners — stainless steel grade 304 or 316. Isolate dissimilar metals with nylon washers.
- Seal every penetration — neutral-cure silicone applied inside the hole before driving the fastener, not caulked around the outside afterward.
When to Choose Pre-Engineered Mounting Solutions
Drilling is a valid approach for existing frames where no alternative exists. But if you’re planning a new build, a renovation, or replacing ageing windows, it’s worth asking whether post-installation drilling is even necessary.
Modern aluminium window systems with integrated hardware channels and pre-drilled mounting points accept blinds, locks, sensors, and ventilation accessories straight out of the factory — no aftermarket holes, no sealant workarounds, no warranty grey areas. The accessory provisions are engineered into the profile during extrusion, so the frame’s structural integrity and weather seal remain completely intact.
An alternative to drilling aluminium window frame profiles makes particular sense when you need multiple accessories across many openings, or when the frames sit in exposed coastal or high-wind zones where every sealed penetration is a potential failure point over time.
For readers considering a window upgrade, MEICHEN’s aluminium window systems offer custom options with pre-punched accessory points and integrated hardware channels designed for Australian residential and commercial builds — eliminating the need for post-installation drilling while preserving full warranty coverage and frame performance. It’s a cleaner path from the start.
FAQs About Drilling Into Aluminium Window Frames
1. Can you drill into aluminium window frames without cracking them?
Yes, you can drill into aluminium window frames safely if you use the correct technique. The key is using an HSS split-point drill bit at moderate RPM (1,000-3,000), applying a centre punch dimple first to prevent wandering, and using peck-drilling passes of 2-3 mm with swarf clearing between each pass. Residential frames are typically only 1.2-1.6 mm thick, so light pressure is essential to avoid cracking or blowout on the exit side. A scrap timber backing block placed behind the frame helps prevent deflection on thin-walled profiles.
2. What is the best drill bit for aluminium window frames?
HSS (high-speed steel) jobber bits with a 118-degree or 135-degree split-point tip are the best choice for aluminium window frames. The split-point geometry bites immediately without skating across the powder-coated surface. For thicker commercial profiles or harder 6061-T6 alloy, cobalt-enhanced M35 bits offer better heat resistance. Avoid masonry bits (they skate across the surface), brad-point bits (they catch and tear thin walls), and solid carbide bits (too brittle for handheld drilling). Always apply cutting fluid or WD-40 to the bit tip before drilling to prevent aluminium from welding onto the flutes.
3. What size pilot hole do I need for screws in aluminium window frames?
The pilot hole should match the screw’s core diameter (the shaft between thread roots) plus 0.1-0.2 mm — not the outer thread diameter. For example, an M4 screw with a 3.14 mm core diameter needs a 3.6 mm pilot hole in aluminium. This allows self-tapping threads to grip without splitting the thin wall. For residential frames at the thinner end (1.2 mm), lean toward the larger pilot hole value to reduce splitting risk. Always use stainless steel screws (grade 304 or 316) to prevent galvanic corrosion between the fastener and the aluminium frame.
4. Does drilling into aluminium windows void the warranty?
In many cases, yes. Most Australian aluminium window warranties exclude damage from post-installation modifications, and drilling qualifies as a modification. Warranty documents typically cover frame defects (5-10 years) and finish integrity (10-15 years), but exclusions often reference unauthorised penetrations. Before drilling, check your warranty documentation, contact the manufacturer for written confirmation, and document your work with dated photos. Alternatively, modern aluminium window systems like those from MEICHEN feature pre-punched mounting points and integrated hardware channels that allow accessory fitting without drilling, preserving full warranty coverage.
5. How do I seal a drill hole in an aluminium window frame to prevent leaks?
Use neutral-cure silicone — never acetic-cure (vinegar-smelling) silicone, which releases acid that corrodes aluminium over time. Apply a bead of sealant inside the drilled hole before driving the fastener, plus a ring under the screw head or washer. As you tighten the screw, sealant compresses into every gap between threads and the aluminium wall, sealing from the inside out. Polyurethane sealant and MS polymer are also suitable alternatives. After installation, verify that nearby weep holes remain unblocked so the frame’s drainage system continues functioning properly.
More Window & Door Guides