What Is a Window Jamb and Why Should You Care
When you look at a window from inside your home, the sides and top of the opening form a clean, finished border around the glass. Those pieces have a name, and getting familiar with them can save you real money and frustration on your next project.
The Simple Definition of a Window Jamb
A window jamb is the vertical and horizontal frame member that forms the sides and top of a window opening, supporting the sash and anchoring the entire window unit to the rough opening in the wall.
Picture a doorway turned on its side. The two upright pieces on the left and right are the side jambs, and the horizontal piece across the top is the head jamb. Together, they create the structural channel that holds the window sash, keeps it square, and allows it to open and close smoothly. The sill at the bottom works alongside the window jambs to complete the rectangle, but it is technically its own component.
Here is the distinction that trips most people up: the jamb is a structural element, not decorative trim. Casing and trim are the visible moldings nailed over the jamb to cover gaps and add style. The jamb itself sits behind that finish work, doing the heavy lifting of alignment, support, and sealing. Remove the trim and you will see the jamb underneath, bridging the window unit to the framed wall.
Why Window Jambs Matter More Than You Think
A damaged or poorly fitted jamb affects everything downstream. Drafts creep in around the edges. Sashes stick or rattle. Moisture finds its way into the wall cavity. If you are planning a renovation, ordering a replacement, or building from scratch, understanding jamb depth, material, and condition determines whether the finished result performs well or becomes a recurring headache.
This is also where components like a window jamb extension come into play. When wall thickness exceeds the depth of the jamb, an extension bridges that gap so the interior finish sits flush. Many manufacturers offer a window jamb kit that bundles the extension pieces, stops, and hardware needed for a clean installation.
In the sections ahead, we will break down the full anatomy of a jamb, compare materials side by side, walk through accurate measuring techniques, cover maintenance and repair, and lay out a step-by-step replacement guide. The goal is straightforward: give you enough practical knowledge to make confident decisions at every stage of your window project.
Window Jamb Anatomy and the Terms People Confuse
Knowing what is a window jamb is only the starting point. The real confusion kicks in when terms like frame, casing, trim, and liner start getting used interchangeably. They shouldn’t be, because each one refers to a different part with a different job. Let’s sort them out once and for all.
Head Jamb, Side Jambs and Sill Explained
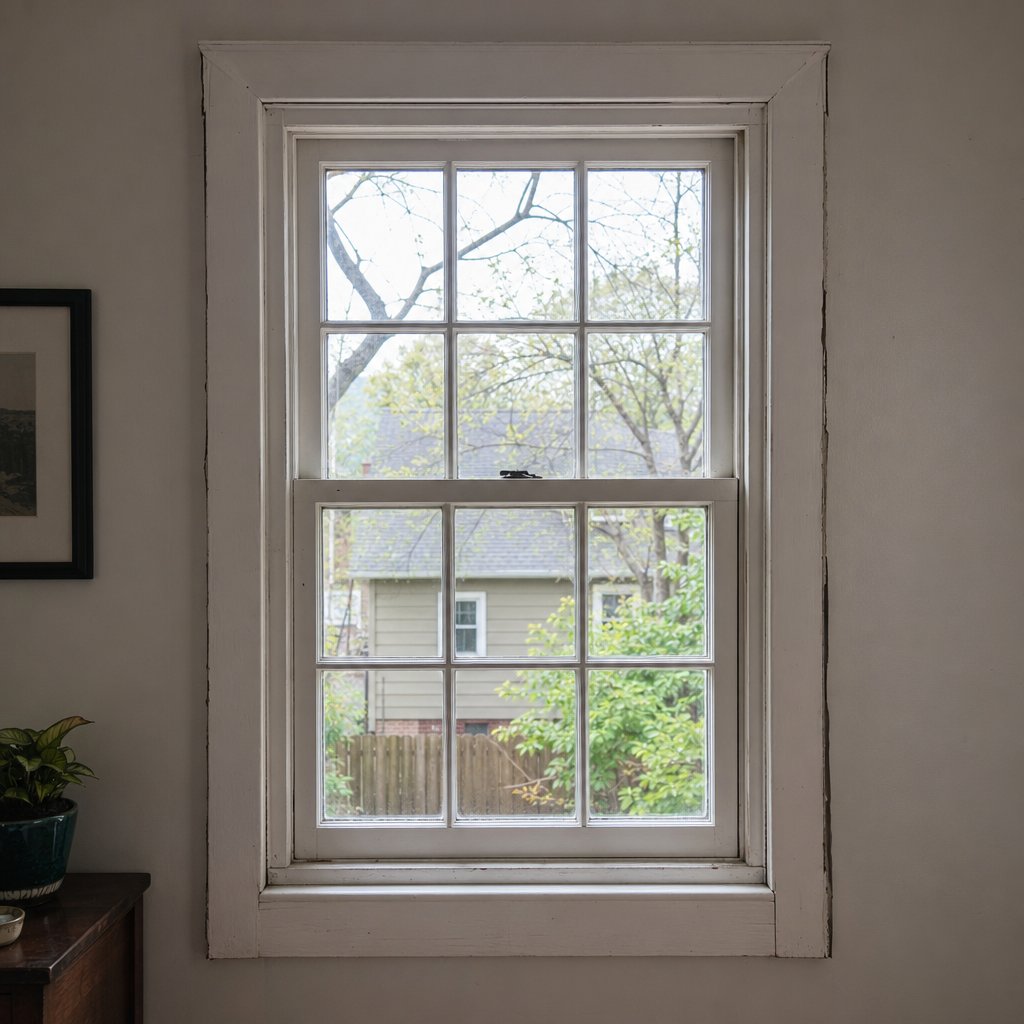
Every window opening is defined by a few core structural pieces that work as a team. The head jamb runs horizontally across the top. The two side jambs stand vertically on the left and right. And the sill sits at the bottom, angled slightly to shed water away from the interior. Together, these four members form the rectangular pocket that holds the sash and connects the window unit to the rough framing of your wall.
Surrounding and interacting with those primary pieces, you’ll find several smaller components that affect how the window operates, seals, and looks. Knowing the correct window jamb size for your wall thickness starts with understanding how all of these parts relate to one another, so here is a quick-reference glossary.
Inline Glossary of Related Window Parts
- Head jamb — the horizontal top member of the jamb assembly.
- Side jambs — the two vertical members forming the left and right sides of the window opening.
- Sill — the bottom horizontal piece, sloped for drainage on the exterior side.
- Jamb liner — a track or channel installed inside the side jambs that guides the sash up and down; common in double-hung windows and often spring-loaded to hold the sash in position.
- Stop — a narrow strip attached to the jamb that prevents the sash from swinging inward or outward beyond its intended path.
- Parting bead — a thin vertical strip set into a groove in the side jamb that separates the upper and lower sashes in a double-hung window, allowing each to slide independently.
- Casing — the decorative molding applied over the gap between the jamb and the surrounding wall, visible from the interior or exterior.
- Trim — a broader term for any finished molding around the window, including casing, stool, and apron pieces.
- Window extension jamb — an additional piece that increases jamb depth to match thicker walls, essential during renovations or energy-efficiency upgrades with added insulation. A vinyl window jamb extension is a popular choice for moisture-prone areas because it resists rot and requires minimal upkeep.
Window Jamb vs Frame vs Casing vs Trim
These four terms get swapped around constantly, yet each describes something distinct. The jamb is part of the frame, the casing covers the joint between the frame and the wall, and trim is the umbrella category for all decorative finish pieces. Mixing them up when ordering parts or talking to a contractor can lead to wrong materials showing up on site. The comparison below makes the differences concrete.
| Component | Location | Function | Visible After Installation |
|---|---|---|---|
| Window Jamb | Sides and top of the window opening, between the rough framing and the sash | Provides structural support, anchors the window unit, and houses hardware tracks | Partially — visible at the window jamb size depth if no extension or casing is applied; otherwise mostly concealed |
| Window Frame | Entire perimeter of the window unit (head, jambs, and sill combined) | Forms the complete structural shell that holds the sash and glass assembly | Partially — exterior face often visible; interior face covered by casing and trim |
| Window Casing | Applied over the joint where the jamb meets the interior or exterior wall surface | Conceals construction gaps, adds a finished appearance, and helps block drafts | Yes — fully visible as the molding border around the window |
| Window Trim | Any decorative molding around the window, including casing, stool, and apron | Provides aesthetic finish and additional weather protection | Yes — all trim elements are designed to be seen |
A simple way to remember it: the frame is the whole structure, the jamb is the sides-and-top portion of that structure, the casing is the molding that hides the seam, and trim is the catch-all for every visible finishing piece. Getting these distinctions right matters most when you are measuring for replacements or specifying parts, because each component has its own dimensions, materials, and installation requirements.
With the terminology sorted, the next logical question is what these parts should be made of. Material choice shapes everything from longevity and moisture resistance to how much maintenance you will deal with over the life of the window.
Window Jamb Materials and How to Pick the Right One
Material is the single biggest factor that determines how long a jamb lasts, how much upkeep it demands, and whether it can handle the conditions you throw at it. Ask yourself what is window jamb failure usually traced back to, and the answer almost always involves the wrong material in the wrong environment. A wood jamb in a steamy bathroom, a bare MDF profile on an exterior wall — these are the choices that create problems two or three years down the road.
Six materials dominate the market. Each has genuine strengths and honest trade-offs, so the goal here is to match the material to your specific situation rather than chase a single “best” option.
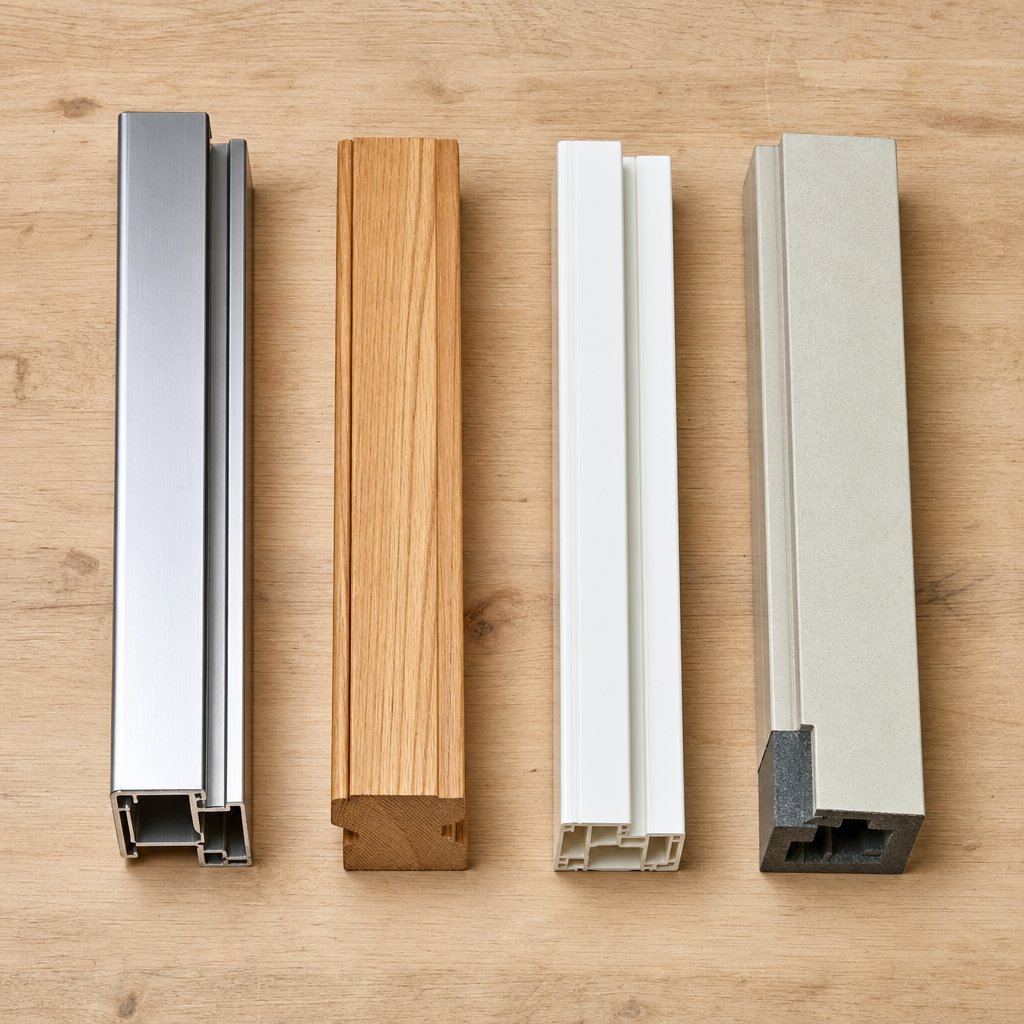
Wood, Vinyl, Aluminium and Composite Compared
| Material | Durability | Moisture Resistance | Best Use Case | Maintenance Level |
|---|---|---|---|---|
| Aluminium | Very high — resists warping, cracking, and corrosion | Excellent; will not rot or swell | Modern builds, coastal climates, storm-prone and high-humidity areas | Low — occasional wipe-down; no painting or sealing required |
| Wood | High when properly maintained | Poor to moderate without regular sealing | Historic restorations, dry climates, interior-facing jambs where aesthetics are a priority | High — periodic sanding, painting, and sealing to prevent rot |
| Vinyl (PVC) | Moderate to high | Excellent; impervious to moisture | Budget renovations, humid rooms like bathrooms and kitchens | Very low — clean with soap and water |
| Composite | High — engineered to resist rot and insects | Very good | Mixed climates, energy-efficiency upgrades, homeowners wanting a wood look without the upkeep | Low — minimal sealing or painting needed |
| PVC (rigid cellular) | Moderate to high | Excellent | Jamb extensions for vinyl windows, wet-area installations, replacement projects | Very low |
| MDF | Low to moderate — vulnerable to swelling if exposed to moisture | Poor | Interior-only applications in dry, climate-controlled spaces | Moderate — must be sealed and kept dry; not suitable for exterior or high-humidity use |
Which Jamb Material Suits Your Situation
Imagine you are renovating a bathroom where steam and splashing are daily realities. Wood and MDF are off the table immediately. Vinyl or PVC handles that moisture without flinching, and the cost stays low. For a window jamb extension detail in a wet zone, rigid cellular PVC is a reliable pick because it machines cleanly and never absorbs water.
Coastal homes face a different challenge: salt air, driving rain, and intense UV exposure. Aluminium frames are extremely strong and resistant to corrosion, making them a standout for these conditions. The material does not swell, crack, or need repainting, and modern thermal-break technology addresses the older concern about heat conductivity. Suppliers like MEICHEN engineer their aluminium window systems with precision-fitted jamb profiles designed to meet Australian standards, which makes them a practical option for homeowners and builders who want longevity without the maintenance burden.
Restoring a heritage home? Wood is often the only historically appropriate choice. It offers a warmth and character that no synthetic can fully replicate, and it provides excellent natural insulation. Just budget for ongoing upkeep — sanding, priming, and repainting every few years to keep rot at bay, especially on exterior-facing surfaces.
Composite sits in a comfortable middle ground. It mimics the look and workability of wood while resisting moisture and insects. If you want a window jamb liner track that stays dimensionally stable through seasonal humidity swings, composite or aluminium will outperform raw wood over time.
For tight budgets, vinyl delivers the most value per dollar. It is the least expensive option, carries some of the longest warranties in the industry, and performs well across a wide range of climates. The trade-off is a more limited aesthetic range and less structural rigidity in very large openings.
The right material depends on where the window lives, what the climate throws at it, and how much time you are willing to spend on maintenance. Get that match right, and the jamb quietly does its job for decades. Get it wrong, and you will be revisiting the problem far sooner than you planned — which is exactly why accurate measurement matters just as much as material selection.
How to Measure Window Jamb Depth and Size Accurately
Choosing the right material only matters if the piece you order actually fits. A jamb that is too shallow leaves exposed drywall edges and trim that refuses to sit flat. One that is too deep forces you to trim material on site, adding labor and inviting sloppy finish work. The fix is simple: measure before you order, and measure correctly.
So what is the jamb of a window in terms of the dimension you actually need? It is the distance from the interior finished wall surface straight through to the exterior finished surface or sheathing. That single measurement, called jamb depth, tells you which stock size to buy or whether you need a jamb extension window solution to bridge the difference.
Step-by-Step Jamb Depth Measurement
You only need a tape measure, a pencil, and a notepad. If the window still has casing or trim attached, carefully pry off a small section on one side so you can access the full wall thickness. Then follow this process:
- Stand inside the room and locate the interior edge of the drywall or plaster where it meets the window frame.
- Extend your tape measure from that interior edge straight through the wall to the exterior sheathing, brick mould, or siding surface on the other side.
- Record the measurement to the nearest 1/16 of an inch.
- Repeat at the top of the opening (near the head jamb), the middle, and the bottom (near the sill).
- Compare all three readings. Walls are rarely perfectly uniform, especially in older homes where settling, layered finishes, or uneven framing create variation.
Always measure in at least three spots and use the largest measurement. Ordering to the largest dimension ensures the jamb covers the full wall thickness at every point, and any minor excess is easily concealed by casing.
This approach aligns with standard replacement window measurement practices, which stress taking multiple readings and recording to the nearest 1/16 inch for accuracy. Skipping this step is one of the most common reasons homeowners end up with ill-fitting windows and costly reorders.
Standard Jamb Sizes and What They Mean
Most residential windows ship with one of two standard jamb depths, each paired to a common wall construction:
| Jamb Depth | Typical Wall Assembly | Common Application |
|---|---|---|
| 4-9/16 inch | 2×4 studs with 1/2-inch drywall on each side | Most interior walls, standard single-story homes, lighter exterior builds |
| 6-9/16 inch | 2×6 studs with drywall, or masonry with interior furring | Energy-efficient exterior walls, deeper insulation cavities, cold-climate construction |
A 4-9/16 inch jamb fits a 2×4 wall while a 6-9/16 inch jamb fits deeper 2×6 or masonry walls, so measuring your actual wall build-up is the only reliable way to choose the right depth. Intermediate sizes like 5-1/2 inches also exist for walls with stucco, thicker drywall, or layered exterior finishes. The window jamb detail that matters most here is matching the depth to the full wall thickness, not just the stud dimension.
Measuring Jambs in Older and Non-Standard Homes
Older and historic homes are where standard sizes stop being standard. Plaster over lath, multiple generations of drywall, tile, paneling, or stone cladding can push wall thickness well beyond the typical 4-9/16 or 6-9/16 range. You might measure 4-3/4 inches at one opening and 5-1/4 inches at the next, even in the same house.
When your reading falls between standard sizes, you have two practical options. The first is ordering a custom-width jamb from a manufacturer who mills to your exact specification. The second, and often more cost-effective route, is choosing the nearest standard size and pairing it with an extension piece to make up the difference. This is a common scenario in renovation work, and it is exactly what is the window jamb extension designed to solve.
One more thing to watch for: if you plan to add insulation, re-side, or apply new interior finishes after the window goes in, factor those future layers into your measurement. A jamb that fits perfectly today can end up too shallow once an extra half-inch of rigid foam or a new layer of drywall goes on. Measure the assembly you will have, not just the one you have right now.
With accurate dimensions in hand, the next question is whether your existing jambs are still worth keeping or whether the signs of wear have crossed the line into replacement territory.
Signs Your Window Jamb Needs Attention
Accurate measurements tell you what size to order. But what if the jamb already in the wall is the real problem? A failing jamb rarely announces itself with a single dramatic event. Instead, it sends a series of smaller signals that are easy to dismiss individually but paint a clear picture when you know what to look for.
Warning Signs Your Window Jamb Is Failing
Walk up to any window in your home and run through this checklist. If you spot even two or three of these symptoms at the same opening, the jamb deserves a closer look.
- Drafts near the window edges — you feel moving air along the sides or top of the window even when it is fully closed and locked. This often means the jamb has shifted, warped, or shrunk away from the sash, breaking the seal that weatherstripping depends on.
- Visible wood decay or soft spots — press a fingernail or a screwdriver tip into the jamb surface. If it sinks in easily, rot has already taken hold beneath the paint. Stains, mushy wood, mold, or flaking paint around the frame are clear signs of water intrusion that will only spread over time.
- Difficulty opening or closing the window — sashes that stick, jam, or require real force to move suggest the jamb is no longer plumb or has swollen from moisture absorption. This can result from swelling, poor installation, or broken frames, and it creates a safety concern if the window cannot be opened quickly in an emergency.
- Peeling or bubbling paint at the jamb — paint lifts when moisture gets trapped underneath. If the bubbling keeps returning after you repaint, water is reaching the jamb from behind, usually through a failed exterior seal or condensation within the wall cavity.
- Condensation forming between the jamb and glass — fog or water droplets in this zone indicate that the seal between the sash and jamb has broken down, allowing warm interior air to meet a cold surface and condense.
- Gaps between the jamb and the wall — visible daylight or a noticeable crack where the jamb meets the surrounding drywall or plaster means the jamb has pulled away from the rough opening. Settling, thermal cycling, or inadequate shimming during the original installation are common causes.
How Jamb Damage Affects the Entire Window
A jamb does not fail in isolation. Think of it as the backbone of the window assembly — when it shifts, everything connected to it shifts too.
Weatherstripping is the first casualty. Those seals are designed to compress against a flat, stable surface. A warped or rotted jamb creates uneven contact, and even brand-new weatherstripping cannot compensate for a surface that is no longer straight. As weatherstripping experts note, if your window frames are warped or the wood is beginning to rot, new foam or V-strips will not solve the underlying issue because air moves through the structural gaps of the window itself.
Sash operation degrades next. The jamb liner tracks that guide a double-hung sash up and down rely on consistent channel width. Even a small bow in the side jamb creates friction on one side and a gap on the other, leading to sashes that stick halfway or refuse to stay open. Window jamb extensions and liners cannot perform properly when the surface they attach to is compromised.
Energy performance takes the final hit. Gaps and seal failures let conditioned air escape and outside air infiltrate, driving up heating and cooling costs. New energy-efficient windows can save $200 to $600 per year on energy bills, which puts the cost of ignoring a deteriorating jamb into perspective.
Repair or Replace — A Decision Framework
Not every symptom demands a full tear-out. Minor paint peeling on an otherwise solid jamb is a weekend fix. Structural rot that has spread into the rough framing is not. The table below maps common symptoms to a recommended course of action so you can make a confident call.
| Symptom | Severity | Recommended Action | DIY Feasibility |
|---|---|---|---|
| Surface paint peeling or bubbling | Low | Scrape, prime, and repaint; identify and seal the moisture source | High — basic tools and materials |
| Minor drafts along edges | Low to moderate | Replace weatherstripping and re-caulk exterior joints | High — affordable DIY project |
| Small soft spots or localized decay (less than 10% of jamb surface) | Moderate | Dig out damaged wood, fill with epoxy consolidant, sand, and refinish | Moderate — requires patience and proper products |
| Sash sticking or binding intermittently | Moderate | Check jamb for plumb; adjust or replace jamb liners and lubricate tracks | Moderate — may need shims and a level |
| Visible gaps between jamb and wall | Moderate to high | Re-shim and insulate the gap; install vinyl window jamb extensions or casing to cover if the gap is cosmetic | Moderate — straightforward but precision matters |
| Widespread rot or decay across multiple jamb members | High | Full jamb replacement; inspect rough framing for secondary damage | Low — best handled by a professional |
| Jamb pulling away from rough opening or structural shifting | High | Full replacement with new shimming and insulation; possible rough-opening repair | Low — structural work requires experience |
| Condensation between jamb and glass combined with frame rot | High | Replace the entire window unit, not just the jamb | Low — professional installation recommended |
A useful rule of thumb: if the damage is cosmetic and confined to the surface, repair is usually worth the effort. If rot has penetrated deeper than a quarter inch, if the jamb is visibly out of plumb, or if you are dealing with multiple symptoms at the same window, replacement is the more cost-effective path. A non-warranty seal repair typically runs $300 to $500, while a full replacement window can start around $599, making the math favor replacement once repairs start stacking up.
When replacement is the answer, the question becomes whether you also need to address the depth mismatch between the new unit and your wall. That is exactly the scenario where understanding what is a window jamb extension — and when to use one — becomes essential.
Window Jamb Extensions Explained
You have the right material picked out and your measurements recorded. The new window unit arrives, you set it in the opening, and there it is — a gap between the edge of the frame and the interior wall surface. The frame is narrower than the wall is thick. This is one of the most common situations in renovation work, and it is exactly what extension jambs for windows are designed to solve.
What Is a Window Jamb Extension
A window jamb extension is a strip of material attached to the interior (or occasionally exterior) edge of the window frame to increase its depth so it sits flush with the finished wall surface. Think of it as a filler piece that bridges the gap between a standard-depth frame and a wall that is thicker than that frame was built to accommodate. Without it, you are left with an exposed ledge of drywall or plaster that no casing can neatly cover.
Most extensions attach to the interior side of the frame. Interior extension jambs create a consistent transition between the window unit and interior trim or casing, giving the finished opening a clean, built-in look. Exterior extensions are less common and typically reserved for specific door configurations where the unit needs to sit flush with the interior wall to allow full swing clearance.
Material options mirror what are window jambs themselves made from. Wood extensions suit stain-grade interiors and historic restorations. Vinyl window extension jambs handle moisture-prone rooms without any risk of rot or swelling. PVC and composite round out the lineup for homeowners who want durability with minimal upkeep. Many manufacturers also sell bundled extension kits that include pre-sized strips for the head and both sides, along with attachment hardware, which simplifies ordering and reduces on-site cutting.
When You Need Extension Jambs
Extensions are not always necessary. If your wall thickness matches the factory jamb depth, the frame sits flush and you move straight to casing. But several real-world scenarios push the wall beyond that standard depth:
- Renovations where new drywall or plaster is layered over existing wall finishes, adding thickness the original frame was never sized for.
- Energy-efficiency upgrades that introduce thicker insulation, rigid foam sheathing, or deeper stud cavities (such as moving from 2×4 to 2×6 framing).
- Re-siding projects where new exterior cladding or rain-screen assemblies increase the overall wall build-up.
- Older homes with plaster-over-lath walls, which are often thicker than modern drywall assemblies and rarely align with standard jamb depths.
- Extending window jambs during a full-frame replacement when the new unit ships with a shallower profile than the one it replaces.
In each case, the extension fills the difference so the interior finish looks intentional rather than improvised.
Extension Jamb Installation Overview
Installing extensions is a manageable project for anyone comfortable with a tape measure, a miter saw, and a level. The process breaks down into a few clear steps:
- Measure the gap between the edge of the window frame and the interior wall surface at the top, middle, and bottom of each side, plus across the head. Record the largest reading.
- Rip extension stock to the measured width. If you are using a kit, select the closest matching depth strip and trim as needed.
- Apply a bead of construction adhesive or interior wood glue along the edge of the window frame where the extension will sit.
- Press the extension into position, keeping it flush with the interior wall surface. Use a combination square to set a consistent reveal between the extension and the window frame.
- Pin the extension in place with 18-gauge brad nails or a 23-gauge pinner, spacing fasteners roughly every 12 inches.
- Check for plumb and level. Shim behind the extension if the wall surface is uneven, so the finished face stays flat and true.
- Seal any remaining gaps between the extension and the rough opening with low-expansion spray foam to improve air sealing.
- Apply casing and trim over the extension to complete the finished look.
As remodeler Mike Sloggatt demonstrates, checking the distance between the window and the wall edge in multiple spots is critical because plaster and drywall thickness can vary even within a single opening. Getting that measurement right means the extension sits tight with no rocking or gaps behind the casing.
Extensions handle the depth mismatch. But what happens when the jamb itself needs to come out entirely? That calls for a different set of tools and a more involved process — a full removal and replacement from the rough opening out.
DIY Window Jamb Replacement and Installation Guide
Replacing a full window jamb is a bigger commitment than adding an extension, but it is well within reach if you are comfortable with basic carpentry. The process follows a logical sequence: remove the old, prepare the opening, install the new, and finish clean. Rushing any single step — especially shimming and plumb checks — is where most DIY projects go sideways.
Before you pull the first nail, gather everything you need so the work flows without interruptions.
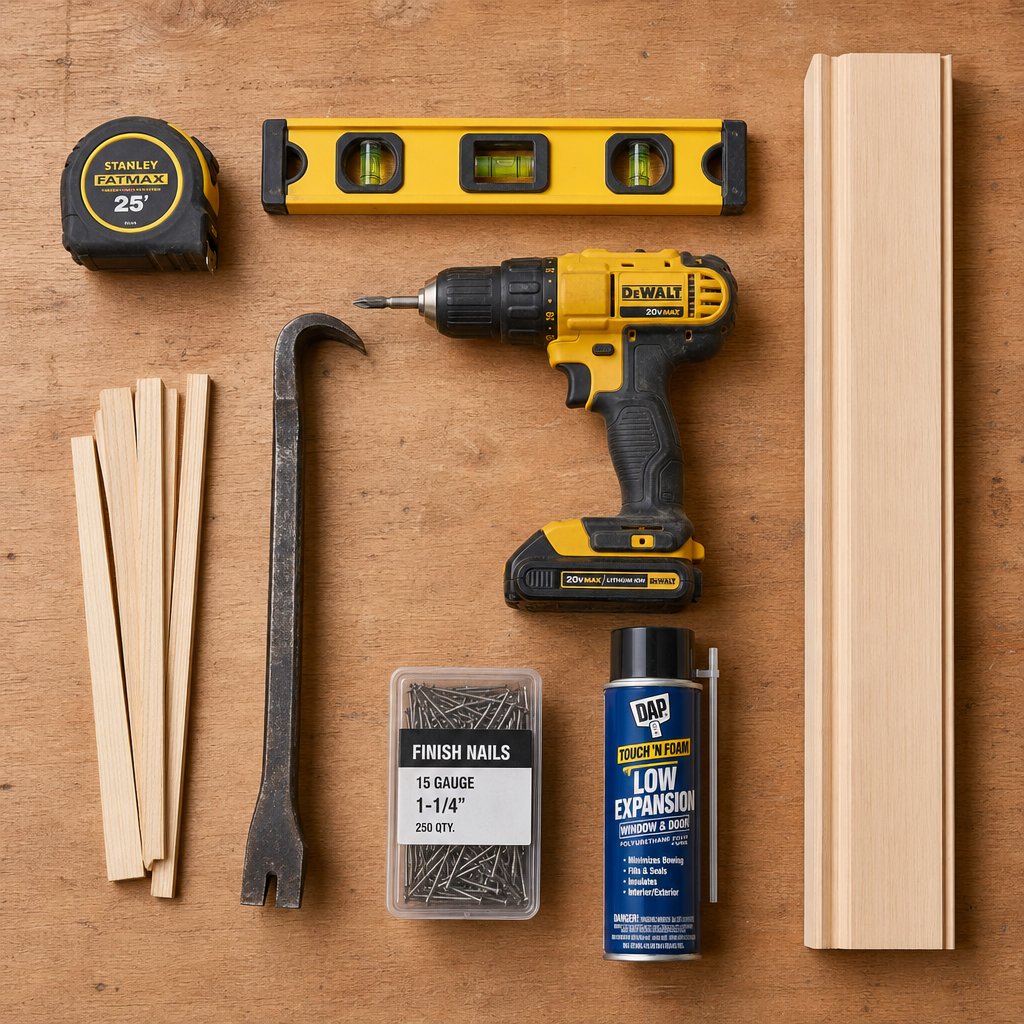
Tools and Materials You Will Need
- Tape measure and pencil
- 4-foot and torpedo levels
- Pry bar and flat bar
- Utility knife
- Hammer and nail set
- Drill/driver with assorted bits
- Miter saw or circular saw
- Oscillating multi-tool (for cutting nails and tight spots)
- Wood shims (cedar or composite)
- Low-expansion spray foam rated for windows and doors
- Construction adhesive
- New jamb stock — wood window jamb material for stain-grade work, or PVC/composite for moisture-prone locations
- Casing and trim pieces
- Exterior-grade caulk and interior latex caulk
- 2-inch and 3-inch finish nails or trim screws
- Safety glasses and work gloves
If your wall thickness exceeds the depth of the new jamb stock, keep window extension jambs on hand as well. Wondering what is a window extension jamb in this context? It is the same flush-bridging strip covered in the previous section — you may need one if the replacement jamb does not match your full wall build-up.
Removing and Replacing a Window Jamb Step by Step
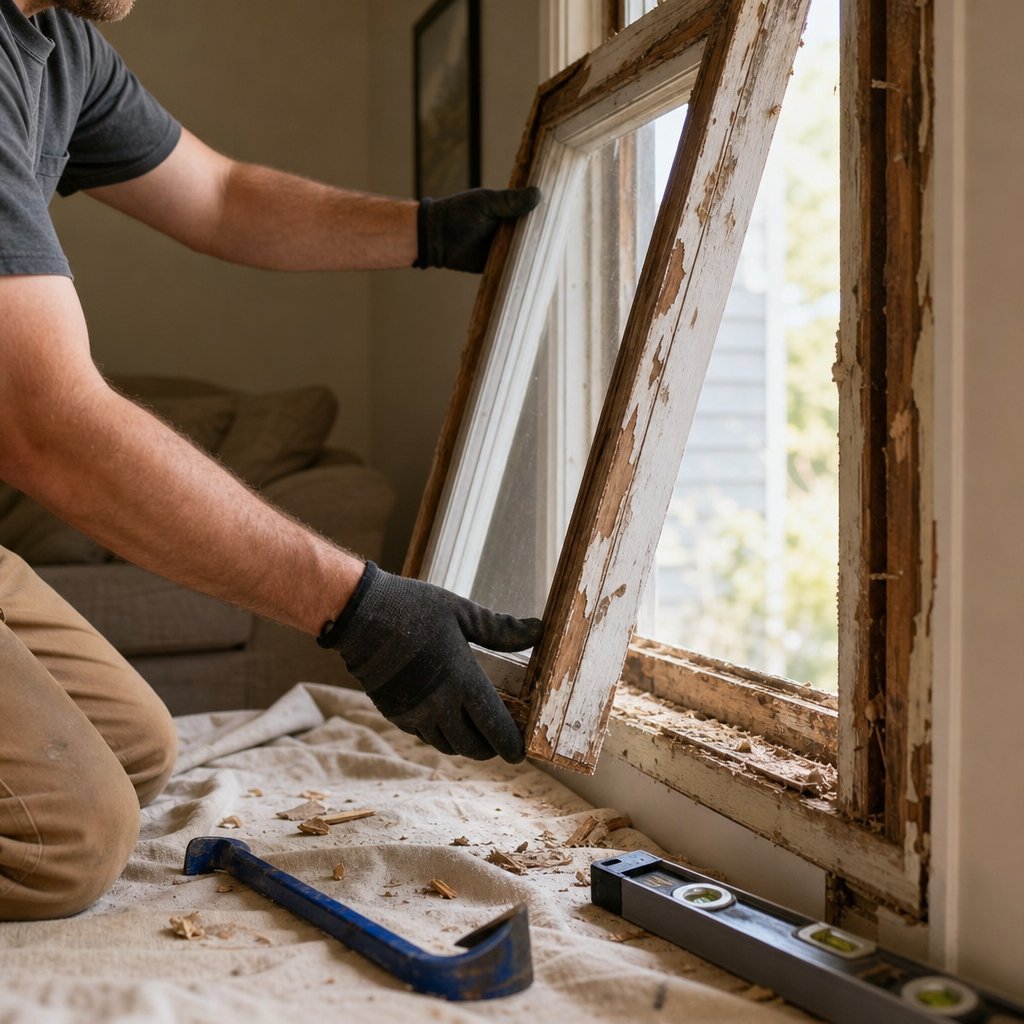
- Score the paint line where the interior casing meets the wall with a utility knife. This prevents tearing drywall or plaster when you pry the trim free. Use a flat bar behind the casing and work slowly from one end to the other, pulling nails as you go. Set the casing aside if you plan to reuse it.
- Remove the window stops and any jamb liners. On double-hung windows, release the sash cords or spring-loaded balances first, then lift the sashes out of the opening. Label each piece if you intend to reinstall them.
- Cut through any nails or screws anchoring the old jamb to the rough framing. An oscillating multi-tool with a metal-cutting blade works well here. Pry the head jamb free first, then the two side jambs, and finally the sill if it is also being replaced.
- Inspect the rough opening thoroughly. Look for rot, insect damage, or moisture staining on the jack studs, header, and rough sill. Check the rough opening for any signs of rot, damage, or moisture before proceeding — any compromised framing needs to be repaired or sistered before a new jamb goes in.
- Scrape away old caulk, foam, and debris. Vacuum the opening clean so the new jamb seats against solid, flat surfaces.
- Dry-fit the new jamb assembly into the opening. Set the sill first, then the two side jambs, and finally the head jamb. Check that the pieces sit snug without forcing them.
- Shim behind each side jamb at the top, middle, and bottom. Place shims behind the head jamb at both ends and the center. Adjust until the jamb is perfectly plumb (sides) and level (head). Use your 4-foot level on every surface.
- Secure the jamb through the shims into the rough framing with trim screws or finish nails. Drive fasteners at each shim location. Avoid over-tightening — the jamb should stay straight, not bow inward.
- Score the shims flush with the jamb face using a utility knife and snap them off cleanly.
- Apply low-expansion spray foam in the gap between the jamb and the rough opening. Fill no more than one-third of the cavity depth — the foam will expand to close the rest. Using expanding foam instead of non-expanding foam can bow wood jambs or distort the frame, so always reach for the can labeled specifically for windows and doors.
- Reinstall the sash, jamb liners, and stops. Test the window operation — it should glide smoothly without binding.
- Apply casing and trim. Nail casing to both the jamb edge and the wall framing, then caulk the interior seam and paint or stain to finish.
Check for plumb and level at every stage — after shimming, after fastening, and again after the foam cures. A jamb that reads plumb before nailing can shift under fastener pressure, and foam expansion can push things out of alignment overnight.
Common DIY Mistakes to Avoid
Three errors account for the majority of failed jamb replacements, and all of them are preventable.
The first is over-shimming. Packing too many shims behind the jamb, or driving them in too tightly, bows the frame inward. That bow creates friction against the sash and throws the jamb window detail out of square. Shims should be snug enough to hold position, not so tight that they flex the wood or composite.
The second is inadequate insulation. Leaving the gap between the jamb and rough opening empty — or filling it with fiberglass batts that compress and sag — creates a direct path for air infiltration. Low-expansion foam is the right product here, applied sparingly. Fill the gaps between the window frame and the rough opening with foam, then allow it to cure completely before moving to the next step.
The third is skipping the plumb check. It is tempting to eyeball alignment and move on, especially after hours of careful work. But a jamb that is even 1/8 inch out of plumb across its height will cause the sash to bind on one side and leave a visible gap on the other. Keep the level in your hand, not on the floor.
One more consideration for older and historic homes: original jamb construction often used thicker stock, non-standard profiles, and hand-planed surfaces that modern milled lumber will not replicate exactly. If preserving the period look matters, source jamb material from a millwork shop that can match the original dimensions and profile. Standard big-box lumber may be the right thickness but the wrong character for a 100-year-old opening.
A properly installed jamb is only half the equation. Keeping it in good shape over the years — through seasonal inspections, timely sealing, and smart moisture management — is what separates a jamb that lasts decades from one that needs attention again in five.
Window Jamb Maintenance That Extends Their Lifespan
Installation day gets all the attention. The measuring, shimming, and leveling feel like the hard part — and they are. But a jamb that is perfectly installed and then ignored for a decade will still deteriorate. Wood absorbs moisture. Caulk dries out. Paint cracks. Seasonal temperature swings stress every joint and seal in the assembly. A simple routine, spread across the four seasons, catches small problems before they become expensive ones.
Seasonal Window Jamb Maintenance Checklist
Different times of year expose different vulnerabilities. Spring reveals what winter left behind, while autumn is your last chance to button things up before cold weather arrives. The schedule below keeps each jamb window opening in good shape year-round.
| Season | Inspection Points | Actions |
|---|---|---|
| Spring | Check for moisture damage from winter condensation and ice; look for soft spots, paint blistering, or staining on wood jambs | Scrape and repaint any damaged areas; re-caulk exterior joints that have cracked or pulled away; clean tracks and sills of debris left by winter storms |
| Summer | Inspect exterior caulk and paint for UV degradation; check that sill drainage slopes are clear and functioning | Apply fresh exterior caulk where needed; touch up paint on exposed wood surfaces; verify that any window jamb extension installation remains flush and sealed at the wall transition |
| Autumn | Test weatherstripping compression along all jamb faces; check for drafts with a lit incense stick or your hand on a windy day | Replace worn or flattened weatherstripping; clean and lubricate sash tracks; close and lock all windows to confirm smooth, gap-free operation before heating season |
| Winter | Monitor for condensation forming on or near the jamb; watch for frost patterns that indicate air leaks | Wipe condensation promptly to prevent moisture from soaking into wood; use a dehumidifier or improve ventilation in high-humidity rooms; avoid stacking items against window sills that trap moisture |
Tailoring your efforts to the season keeps the workload light — a few minutes per window, a few times a year. Skip it, and you are back to the repair-or-replace decision far sooner than necessary.
Preventing Jamb Rot and Moisture Damage
Rot does not start overnight. It starts with a hairline crack in the paint, a bead of caulk that has pulled away from the corner, or a sill that has lost its drainage slope. Failed paint, cracked sealant, or open joints let rain soak into end grain, and once moisture gets in, decay fungi have everything they need to thrive. The fix is keeping water out in the first place.
- Maintain a continuous, unbroken paint or stain film on all exposed wood surfaces — touch up chips and cracks as soon as you spot them, especially on sills and lower side jambs where water collects.
- Re-caulk exterior joints between the jamb and siding at least every two to three years, or whenever you see gaps or shrinkage in the existing bead.
- Verify that sills slope away from the interior at a slight angle so water drains outward rather than pooling against the frame.
- Clear drip grooves on the underside of the sill — these small channels are designed to break the surface tension of water and prevent it from wicking back toward the wall.
- Control indoor humidity with exhaust fans in kitchens and bathrooms. Stale, humid indoor air condenses on the coolest surface, which is often the window frame, feeding moisture right into the jamb.
- Keep trickle vents and air bricks unblocked so air circulates freely around the window opening.
Climate matters here too. Coastal and tropical environments accelerate paint breakdown and increase salt and moisture exposure, which is why aluminium, vinyl, and composite jambs outlast wood in those settings with far less effort. In dry, temperate climates, a well-maintained wood jamb can go decades without serious issues.
Maintaining Jamb Liners for Smooth Operation
If you have double-hung windows, the window jamb liners — those spring-loaded tracks that let each sash slide up and down — need their own attention. A dirty or worn liner is the most common reason a sash feels heavy, sticks halfway, or refuses to stay in position.
Periodically clean the vinyl jamb liners where the sash slides and keep them dirt and grease free by washing with a gentle dish detergent. A soft cloth or sponge works well. Avoid abrasive cleaners or solvents that can degrade the vinyl surface or strip the lubricant from the spring mechanism.
After cleaning, apply a thin coat of silicone-based spray lubricant to the liner channels. Silicone stays slick without attracting dust the way oil-based products do. Run the sash up and down a few times to distribute the lubricant evenly.
If a sash still will not hold its position after cleaning and lubricating, the spring tension inside the liner has likely worn out. Replacement liners are available from most window manufacturers and snap into the existing jamb channel without removing the frame. It is a 15-minute fix per window that restores the balanced, effortless feel the sash had when it was new.
Consistent maintenance protects the investment you have already made in good materials and careful installation. It also gives you a clear baseline — when you know what normal looks like, you can spot trouble early and act before a small issue becomes a full replacement project. That kind of long-view thinking applies just as much to choosing the right jamb configuration for your next build or renovation.
Choosing the Right Window Jamb for Every Project
Every window project carries its own set of constraints — wall thickness, moisture exposure, budget, and aesthetic goals all shift depending on whether you are building from the ground up or swapping out a single unit in a 60-year-old house. The jamb configuration that works perfectly in one scenario can be completely wrong in another.
Matching Jamb Specs to Your Project Type
Rather than defaulting to whatever stock is on the shelf, match your window jamb depth, material, and extension needs to the specific job at hand. Here is how the variables line up across the most common project types:
- New construction — Standard 4-9/16 or 6-9/16 inch jambs sized to the framed wall. Aluminium or composite materials offer the best long-term value with minimal maintenance. No extensions needed when the frame is spec’d to the wall build-up from the start.
- Full renovation or remodel — Measure every opening individually, because added insulation, new drywall layers, or re-siding can push wall thickness beyond standard depths. Replacement window jambs paired with extensions are the norm here. What is a jamb extension on a window in this context? It is the strip that bridges the gap between a standard-depth frame and your newly thickened wall.
- Window-only replacement (existing frame intact) — Pocket-style replacement units fit inside the existing jamb, so the original depth stays in play. Focus on material condition rather than depth. If the old jamb is solid, a pocket insert saves time and money.
- Basements and below-grade openings — Moisture is constant. Vinyl or PVC jambs resist ground-level humidity and occasional water contact far better than wood or MDF. Verify that the sill slopes outward and that drainage is unobstructed.
- Exterior-exposed or coastal locations — Aluminium dominates here. It handles salt air, UV, and driving rain without corroding, swelling, or requiring regular repainting. Thermally broken aluminium profiles keep energy performance competitive with other materials.
- Historic or period homes — Wood jambs milled to match original profiles preserve architectural character. Expect non-standard dimensions and plan for custom millwork. Extension jambs for Andersen windows and similar heritage-style units are available in wood and primed options to maintain a period-correct appearance.
Putting It All Together for Your Next Window Project
The lifecycle of a jamb follows a predictable arc: select the right material and depth for the conditions, install it plumb and properly insulated, maintain it seasonally, and replace it when repair costs start outweighing the value of the fix. Every section of this guide feeds into that cycle. Accurate measurement prevents ordering mistakes. Material selection determines how much maintenance you will carry. Proper installation sets the baseline for decades of performance. And routine upkeep stretches that lifespan as far as the material allows.
For homeowners and builders looking at aluminium window systems with precision-engineered jamb profiles, MEICHEN’s aluminium windows collection offers energy-efficient, Australian-standard-compliant options across casement, awning, and sliding configurations — a practical starting point for anyone ready to pair durable jamb construction with a low-maintenance, long-life window system.
Window Jamb FAQs
1. What is the difference between a window jamb and a window frame?
A window frame refers to the entire structural shell surrounding the glass, including the head, sides, and sill. The window jamb is specifically the vertical side members and the horizontal top member of that frame. Think of the jamb as a subset of the frame — it forms the channel that holds the sash and anchors the unit to the rough opening, while the frame encompasses the full perimeter including the sill. When ordering parts, getting this distinction right prevents costly mix-ups.
2. How do I know if my window jamb needs to be replaced?
Several warning signs point to a failing jamb: persistent drafts along the window edges even when closed, soft spots or visible decay when you press a screwdriver into the wood, sashes that stick or bind during operation, paint that keeps peeling or bubbling after repainting, and visible gaps between the jamb and the wall. If damage is limited to surface-level cosmetic issues, repair is usually sufficient. However, when rot penetrates deeper than a quarter inch, the jamb is visibly out of plumb, or multiple symptoms appear at the same window, full replacement is the more reliable and cost-effective path.
3. What is a window jamb extension and when do I need one?
A window jamb extension is a strip of material attached to the edge of the window frame to increase its depth so it sits flush with the finished interior wall surface. You need one whenever your wall is thicker than the factory jamb depth — a common situation during renovations that add insulation or drywall layers, re-siding projects, energy-efficiency upgrades with deeper stud cavities, and in older homes with plaster-over-lath walls. Extensions come in wood, vinyl, PVC, and composite, and many manufacturers sell pre-sized kits that simplify installation.
4. What is the standard window jamb depth for residential homes?
The two most common residential jamb depths are 4-9/16 inches and 6-9/16 inches. A 4-9/16 inch jamb fits a standard 2×4 wall with half-inch drywall on each side, while a 6-9/16 inch jamb suits 2×6 walls or masonry with interior furring. Intermediate sizes like 5-1/2 inches exist for walls with stucco or thicker finishes. Always measure your actual wall thickness at three points — top, middle, and bottom — and use the largest reading when ordering, since walls are rarely perfectly uniform.
5. Which window jamb material is best for high-humidity or coastal areas?
For high-humidity rooms like bathrooms and kitchens, vinyl or PVC jambs are ideal because they are completely impervious to moisture, will not rot or swell, and require almost no maintenance. For coastal environments where salt air, UV exposure, and driving rain are constant factors, aluminium is the strongest performer — it resists corrosion, never needs repainting, and modern thermally broken profiles address older concerns about heat conductivity. Suppliers like MEICHEN offer aluminium window systems with precision-fitted jamb profiles engineered to Australian standards, making them a practical choice for durability-focused projects.
More Window & Door Guides