Step 1 – Assess Whether Your Wooden Windows Need Full Replacement
Before you learn how to replace wooden windows with aluminium, there’s a more fundamental question worth answering honestly: do your timber frames actually need replacing, or could a targeted repair buy you another decade?
Getting this wrong in either direction costs money. Replacing windows that only needed resealing wastes thousands. Pouring repair dollars into frames riddled with structural rot is equally pointless. Whether you plan to tackle this yourself or hire a professional, the assessment process is the same.
Signs Your Wooden Windows Are Beyond Repair
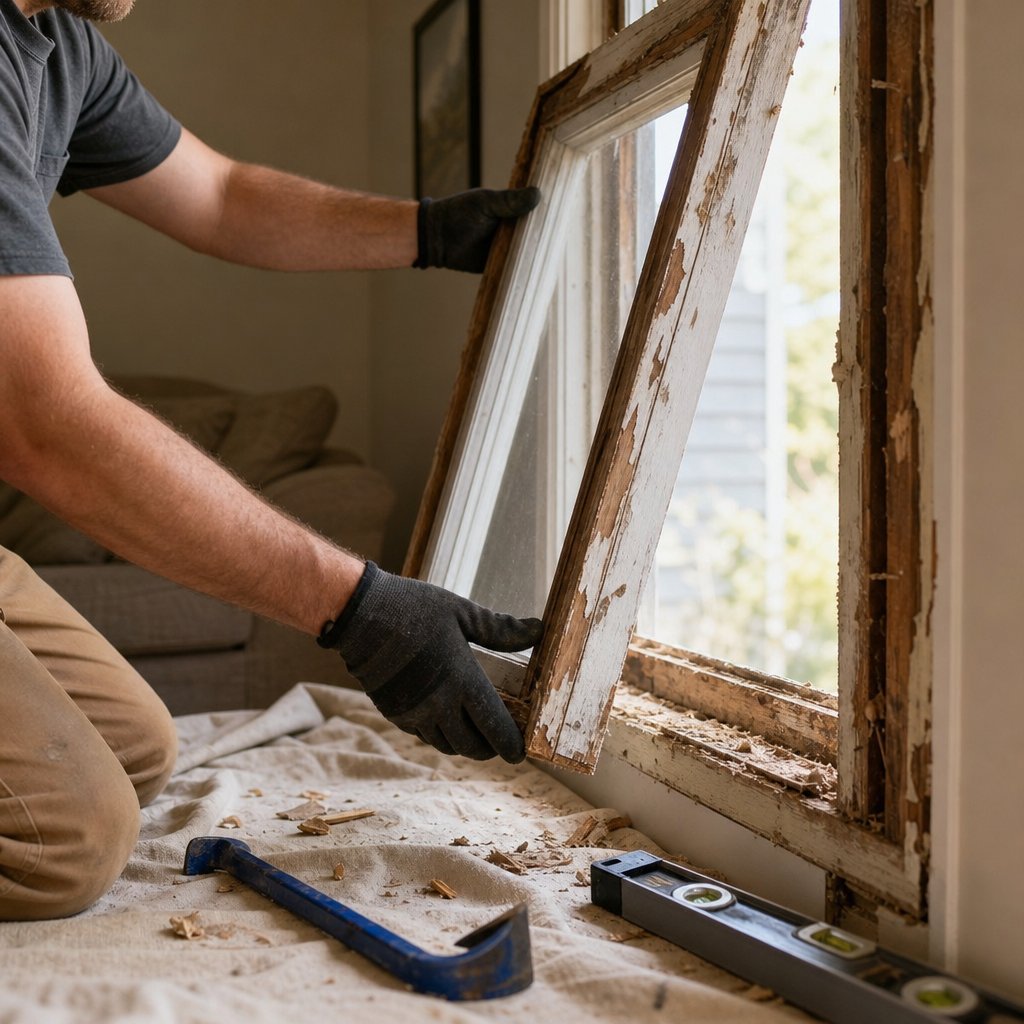
Surface-level wear — a bit of flaking paint, a stiff latch — rarely justifies full replacement. The real red flags run deeper. Look for these indicators that your timber frames have passed the point of viable repair:
- Structural rot that penetrates beyond the surface layer — probe suspect areas with a screwdriver; if it sinks in easily, the timber’s integrity is gone
- Warped or twisted frames that no longer sit square in the opening, causing persistent drafts and gaps
- Failed joints where the frame corners have separated or become spongy
- Paint failure recurring within one to two years of repainting, signalling moisture trapped inside the timber
- Single-glazed units paired with deteriorating putty and no viable path to upgrade
- Hardware mechanisms that are seized, broken, or no longer available as replacement parts
Difficulty opening or closing windows can also indicate swelling from moisture absorption — a sign that rot is progressing internally even if the exterior looks passable.
When Refurbishment Makes More Sense Than Replacement
Restoration is worth considering if the timber is still structurally sound. Minor surface decay, loose glazing, or worn weatherstrips can all be addressed without ripping out the entire frame. Professional restoration can extend a window’s life by 15 to 25 years at 40–70% less cost than full replacement. Heritage-listed properties in particular may require you to restore rather than replace, depending on local council regulations.
But if multiple signs from the list above are present — especially deep rot combined with frame distortion — repair becomes a short-term patch on a long-term problem.
Benefits of Switching to Aluminium Frames
For frames that are genuinely beyond saving, replacing wooden windows with aluminium offers a compelling upgrade. Aluminium is corrosion-resistant, dimensionally stable, and won’t attract termites or borer — common concerns for Australian homeowners. Thermally broken aluminium frames rival timber for insulation performance while requiring little more than an occasional wipe-down to maintain. The material’s strength-to-weight ratio is 43 times that of wood, allowing slimmer sightlines and larger glass areas without sacrificing structural integrity.
Can you replace wooden windows with aluminium in every situation? In most cases, yes — but the method you choose and the regulations that apply will shape how smoothly the project runs.
Step 2 – Choose Between Retrofit and Full-Frame Replacement
The method you use to replace wooden windows with aluminium matters just as much as the windows themselves. Get this decision wrong and you’ll either overspend on unnecessary demolition or trap problems behind a new frame that looked fine on installation day.
Two approaches dominate: retrofit (also called insert) installation and full-frame replacement. Each suits different situations, and the right choice depends on the condition of your existing timber reveals, your wall construction, and how much disruption you’re willing to tolerate.
What Is a Retrofit Aluminium Window Installation
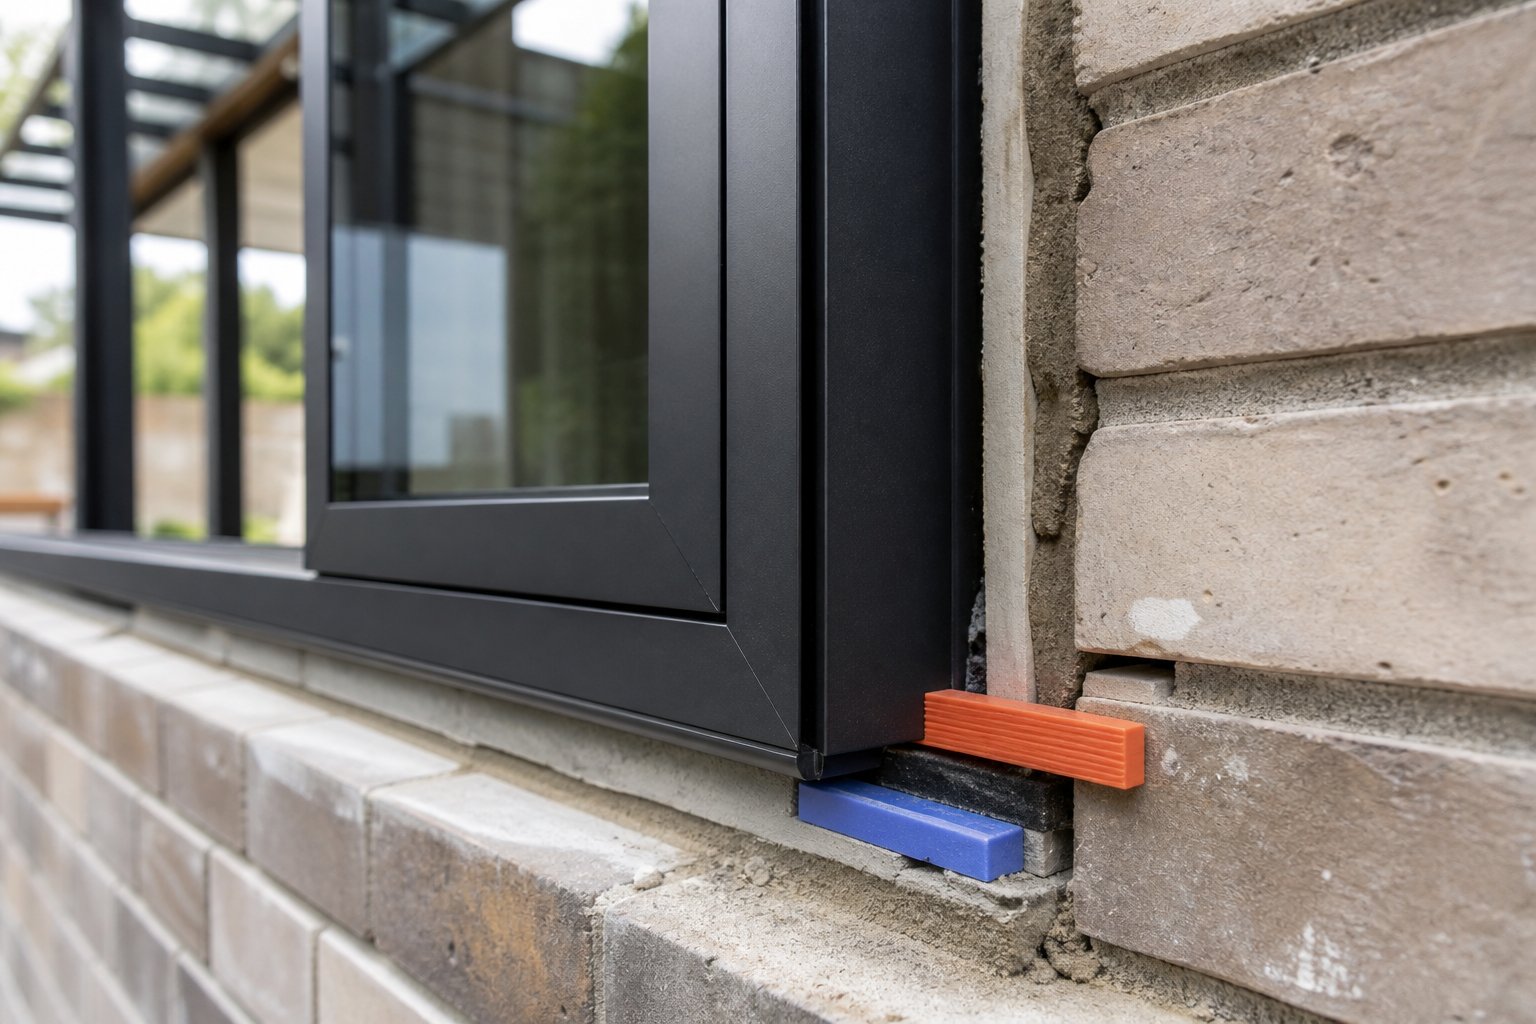
A retrofit installation keeps the existing timber reveal and sub-frame in place. The new aluminium window is custom-sized to slot inside the old frame opening, fixed directly to the surrounding timber. Your interior architraves and external cladding stay untouched.
This approach works well when the timber reveal is still structurally sound — no rot, no warping, no separation at the joints. It’s faster, less invasive, and significantly cheaper because there’s no demolition of surrounding finishes. Most retrofit installations can be completed in two to three hours per window, compared to a full day or more for full-frame work.
The trade-off? You lose some glass area. Because the new aluminium frame sits inside the existing timber frame, the visible glazing shrinks by roughly 40 to 50 mm on each side. For smaller windows, that reduction is noticeable. You’re also relying on the old timber reveal to remain stable long-term — if hidden rot develops later, you’ll face a more complex repair with the aluminium frame already in place.
When Full-Frame Replacement Is the Better Option
Full-frame replacement strips everything back to the structural opening — the raw brickwork, stud framing, or masonry reveal. The entire old timber frame, sub-sill, and any packing comes out, and the new aluminium window is fixed directly into the structural wall.
This is the method to choose when replacing wooden window frames with aluminium in situations where the timber reveal has deteriorated, where you want to maximise glass area, or where you suspect concealed damage behind the existing frame. It also gives you the flexibility to change window sizes or styles entirely — converting a fixed pane to an awning window, for example, or widening an opening.
The downsides are predictable: higher cost, longer installation time, and more disruption. Interior architraves and external trim will need reinstating. Plaster or render around the opening may need patching. For occupied homes, this means dust, noise, and temporary weatherproofing while the opening is exposed.
How Wall Construction Affects Your Choice
Australian homes come in a range of construction types, and each one influences which method is practical.
Brick veneer homes typically suit both approaches. The timber reveal sits independently of the external brick leaf, so retrofit is straightforward if the reveal is sound. Full-frame replacement requires careful removal to avoid disturbing the brick course above the opening.
Weatherboard homes often favour full-frame replacement because the timber framing and cladding are integrated. Removing just the window without disturbing surrounding boards can be tricky, and the opportunity to install proper flashing behind the new frame makes the extra effort worthwhile.
Rendered walls — whether over brick, block, or polystyrene — present the highest risk of cosmetic damage during full-frame removal. Cracking around the opening is common. If your render is in good condition and the timber reveal is solid, retrofit avoids this risk entirely.
| Factor | Retrofit Installation | Full-Frame Replacement |
|---|---|---|
| Cost | Lower — minimal labour and no finishing trades required | Higher — demolition, flashing, and reinstatement of trim and finishes |
| Disruption level | Low — typically 2-3 hours per window | High — up to a full day per window plus finishing work |
| Glass area | Slightly reduced (40-50 mm lost per side) | Maximised — frame sits at the full structural opening |
| Suitability for brick veneer | Excellent if reveal is sound | Good, but requires care around brickwork |
| Suitability for weatherboard | Possible, but limited by reveal condition | Preferred — allows proper flashing integration |
| Suitability for rendered walls | Preferred — avoids cracking render | Viable, but risk of cosmetic damage to surrounding render |
| Addresses hidden damage | No — concealed rot remains in place | Yes — full exposure of structural opening |
| Final appearance | Slightly deeper frame profile visible internally | Clean, flush finish with maximum sightlines |
A practical rule of thumb: if your timber reveals pass the same screwdriver test you used to assess the window frames themselves, retrofit is likely the smarter path. If there’s any doubt about what’s lurking behind the existing frame — or if you want the cleanest possible finish with maximum glass — full-frame replacement pays for itself in longevity and aesthetics.
Whichever method you settle on, there’s a regulatory step that needs to happen before you pick up a tape measure or place an order. Skipping it can mean ripping out freshly installed windows at your own expense.
Step 3 – Check Building Permits and Local Regulations
Regulations around window replacement catch homeowners off guard more often than you’d expect. Whether you plan to replace wooden windows with aluminium in Perth, regional Victoria, or suburban Sydney, the rules governing what you can and can’t do vary significantly by council area, property type, and heritage status. Ignoring them doesn’t just risk a fine — it can mean removing brand-new windows and starting over.
Do You Need a Building Permit for Window Replacement
In many Australian jurisdictions, a like-for-like window replacement (same size, same opening position) may not require a full development application. But changing the material from timber to aluminium, altering the window size, or modifying the opening style can trigger approval requirements under the National Construction Code and relevant state legislation. The logic is straightforward: your windows form part of the building envelope, affecting structural integrity, energy performance, weatherproofing, and emergency egress. Councils want to verify these elements remain compliant.
The following situations are most likely to require some form of council approval or certification:
- Changing window dimensions or adding new openings
- Properties located in heritage overlay zones or conservation areas
- Strata-titled apartments or townhouses governed by a body corporate
- Homes in bushfire-prone areas where BAL ratings dictate glazing specifications
- Properties in cyclone-rated regions (northern Queensland, NT, parts of WA) with specific wind-load requirements
- Any alteration visible from a street frontage in areas with neighbourhood character overlays
Heritage and Conservation Area Restrictions
Heritage overlays add another layer of complexity. If your property sits within a heritage precinct or is individually listed on a heritage register, replacing wooden windows with aluminium may require a planning permit — and approval isn’t guaranteed. Conservation guidelines often dictate frame colour, profile proportions, glazing bar configurations, and even the method of opening. Some councils will approve aluminium on rear or non-visible elevations while requiring timber-look profiles on street-facing facades. Others may reject aluminium entirely for individually significant buildings.
The key step is contacting your local council’s heritage adviser or planning department before ordering anything. They can clarify what’s permissible and whether a heritage impact statement is needed. This conversation costs nothing but can save thousands in rejected applications or enforcement orders.
Strata and Body Corporate Approval Requirements
For units, apartments, and townhouses under strata title, windows typically form part of the common property — even though they’re attached to your individual lot. That means replacing them requires body corporate approval, often through a special resolution at a general meeting. Some schemes have uniform appearance requirements that restrict frame colours or styles to maintain a consistent building facade.
Don’t assume your neighbours’ recent window upgrade sets a precedent. Each application is assessed individually, and unapproved changes can result in orders to reinstate the original windows at your cost.
Sorting out approvals before measuring and ordering protects your budget and timeline. It also shapes your specification — if regulations dictate a particular colour, profile, or glazing type, you need that information in hand before the next step.
Step 4 – Measure Openings and Order Your Aluminium Windows
With approvals confirmed and any regulatory constraints locked in, the project shifts to precision work. Measuring and ordering is where replacing wood windows with aluminium windows either goes smoothly or unravels into costly delays and remakes. A window that’s 5 mm too wide won’t fit. One that’s 10 mm too narrow leaves gaps that compromise weatherproofing. There’s no room for guesswork here.
How to Measure Window Openings for Aluminium Frames
Your measuring approach depends on the installation method you chose in Step 2. For retrofit, you’re measuring the internal dimensions of the existing timber reveal — the space the new aluminium frame will slot into. For full-frame replacement, you’re measuring the structural opening itself, exposed once the old frame is removed.
Follow this sequence for accurate results:
- Measure the width at three points — top, middle, and bottom of the opening. Record the smallest measurement.
- Measure the height at three points — left, centre, and right. Again, record the smallest figure.
- Check for square by measuring both diagonals corner to corner. If the difference between the two diagonals exceeds 3 mm, the opening is out of square and your supplier needs to know.
- Measure the reveal depth (the distance from the face of the wall to the back of the reveal) to confirm the aluminium frame profile will sit correctly without protruding or sitting too deep.
- Note any obstructions — plumbing, electrical conduit, or structural elements near the opening edges that could interfere with fixing points.
Take every measurement in millimetres. Rounding to the nearest centimetre introduces exactly the kind of error that causes problems at installation. For retrofit installations, most suppliers recommend deducting 5–10 mm from your smallest width and height measurements to allow for shimming and adjustment.
Selecting the Right Aluminium Window System
Measuring tells you the size. System selection determines everything else — thermal performance, security, appearance, and longevity.
Frame profile depth is the first consideration. Standard residential aluminium profiles typically range from 45 mm to 100 mm deep. Deeper profiles accommodate thicker glazing units and provide greater structural rigidity for larger openings. Your reveal depth measurement from the step above dictates the maximum profile you can use without modifications.
Glazing choice has the biggest impact on performance. Double-pane insulated glass with Low-E coatings is the standard for most Australian climate zones, reducing heat gain in summer and heat loss in winter. Laminated glass adds security and acoustic benefits — worth considering for street-facing windows or ground-floor openings. For homes in bushfire-prone areas, your BAL rating will dictate minimum glazing specifications regardless of preference.
Thermally broken profiles — where a polyamide barrier separates the inner and outer aluminium shells — are increasingly specified under NCC energy efficiency requirements. They prevent the frame from conducting heat and reduce condensation risk in cooler climates like Melbourne, Hobart, and the ACT.
Hardware (handles, locks, hinges, stays) and colour finish round out the specification. Powder-coated finishes offer the widest colour range and perform well in Australian UV conditions. For coastal properties, marine-grade anodising or specialised powder coatings resist salt-air corrosion.
For complex projects — multiple window sizes, unusual opening types, or high-performance requirements — professional suppliers like MEICHEN offer drawing review, custom sizing, and manufacturing coordination services that catch measurement errors before production begins. This kind of support is particularly valuable when you’re replacing wooden windows with aluminium across an entire home, where a single specification mistake can multiply across dozens of openings.
Understanding Lead Times and Delivery Planning
Aluminium windows are manufactured to order. Unlike off-the-shelf timber frames, there’s no grabbing a standard size from a warehouse. Lead times for custom aluminium windows in Australia typically range from four to eight weeks depending on complexity, factory load, and finish requirements. Non-standard colours, specialised hardware, or large-format panels can push timelines further.
The production process moves through distinct phases: engineering and shop drawing approval, material procurement, fabrication, quality control, and delivery. Delays at the approval stage — indecision on colour, late changes to sizes — cascade through every subsequent phase.
Order well before your planned installation date. Stripping out old timber frames and leaving openings exposed while waiting for delivery is a recipe for water damage, dust intrusion, and domestic frustration. A practical approach: confirm your order at least six to eight weeks ahead, then schedule frame removal only once you have a confirmed delivery date in hand.
Accurate measurements and a locked-in specification are what separate a smooth installation from a project plagued by remakes and return freight charges. The physical work of removing old frames comes next — and it carries safety risks that most guides completely overlook.

Step 5 – Gather Tools and Materials and Address Safety Risks
Replacing wooden sash windows with aluminium — or any timber frame for that matter — involves demolition, glass handling, and potentially hazardous materials. Jumping straight into removal without the right gear invites injuries, contamination, and project delays that no one budgets for.
Essential Tools for Aluminium Window Installation
The tools needed to install aluminium window frames overlap significantly with those required for removing old timber ones, but there are distinct differences depending on whether you’re doing a retrofit or full-frame replacement. Full-frame work demands more demolition equipment and finishing tools because you’re stripping back to the structural opening and reinstating trim afterwards.
| Category | Tool / Material | Retrofit | Full-Frame |
|---|---|---|---|
| Demolition | Pry bar / wrecking bar | Yes | Yes |
| Demolition | Reciprocating saw | No | Yes |
| Demolition | Hammer and cold chisel | No | Yes |
| Demolition | Utility knife (for cutting sealant lines) | Yes | Yes |
| Installation | Spirit level (1200 mm minimum) | Yes | Yes |
| Installation | Drill with masonry and timber bits | Yes | Yes |
| Installation | Packers and shims (various thicknesses) | Yes | Yes |
| Installation | Masonry anchors / timber screws | Yes | Yes |
| Installation | Measuring tape (metric, 5 m+) | Yes | Yes |
| Installation | Set square | Yes | Yes |
| Finishing | Caulking gun and exterior-grade silicone | Yes | Yes |
| Finishing | Backer rod (closed-cell foam) | Yes | Yes |
| Finishing | Expanding foam (low-expansion type) | No | Yes |
| Finishing | Plaster patching compound | No | Yes |
| Finishing | Flashing tape / self-adhesive membrane | Optional | Yes |
| Safety | Safety glasses / goggles | Yes | Yes |
| Safety | Cut-resistant gloves | Yes | Yes |
| Safety | P2 respirator mask | Yes | Yes |
| Safety | Dust sheets / plastic sheeting | Yes | Yes |
| Safety | Scaffold or stable platform (for upper-storey work) | If needed | If needed |
A few notes on this list. Low-expansion foam is critical — standard expanding foam exerts enough pressure to bow an aluminium frame out of square. The reciprocating saw makes full-frame removal dramatically faster by letting you cut through old timber in place rather than wrestling entire sections out intact. And a 1200 mm spirit level gives you a reliable reading across the full width of most residential window openings.
Safety Precautions for Removing Old Wooden Frames
Glass handling is the most immediate hazard. Old single-glazed panes are thin, brittle, and unpredictable when stressed during frame removal. Always remove glass from the frame before attempting demolition — score the putty line with a utility knife, pry the glazing beads free, and lift panes out with suction cups or gloved hands. Lay removed glass flat on a padded surface, never leaning against a wall where it can slide and shatter.
Working at height adds another layer of risk. Australian work health and safety regulations require fall protection for any work above 2 metres. For upper-storey windows, a properly erected scaffold or mobile platform is far safer than a ladder — you need both hands free to control heavy frame sections as they come loose. Never lean out of an opening to work on the external face of a frame without a secure platform beneath you.
Structural support during removal is often overlooked. Timber window frames in older homes sometimes carry a portion of the load above the opening, particularly where lintels are undersized or have deteriorated. Before pulling a frame, check that a solid lintel spans the full width of the opening above. If you’re uncertain, get a builder to inspect — removing a load-bearing frame without temporary support can crack brickwork or, in extreme cases, cause partial collapse above the opening.
Dealing With Lead Paint in Older Timber Windows
Any home built before 1970 in Australia is likely to contain lead-based paint. Homes built between 1970 and 1997 may also contain lead paint in reduced concentrations. Never sand, scrape, or demolish painted timber from this era without testing first — disturbing lead paint generates toxic dust that poses serious health risks to you, your family, and your neighbours.
Lead dust is the primary exposure pathway. As the US EPA notes, demolishing older painted structures generates dust containing lead from both interior and exterior coatings — and that dust settles on surfaces, is inhaled by workers, and gets tracked into living spaces. The same principles apply to Australian homes with pre-1970 paint layers.
Before you replace wooden windows with aluminium screen or frame removal, take these precautions:
- Test painted surfaces with a lead paint test kit (available from hardware stores) before disturbing any old timber
- If lead is confirmed, lay heavy-duty plastic sheeting beneath the work area to catch all debris and dust
- Mist painted surfaces with water before cutting or prying to suppress dust generation
- Wear a P2 respirator — standard dust masks are insufficient for lead particles
- Keep children, pregnant women, and pets away from the work zone
- Bag all removed timber and paint debris in heavy-duty plastic for disposal at a facility that accepts hazardous waste — do not burn or place in general household bins
- Wet-wipe all surfaces in the area after work is complete; do not sweep or vacuum with a standard vacuum
Lead paint safety when removing old wooden windows isn’t optional caution — it’s a legal obligation under Australian work health and safety legislation. If you’re hiring tradespeople, confirm they follow these containment and disposal protocols. A contractor who dismisses lead concerns on a pre-1970s home is a contractor worth replacing.
With the right tools staged and safety measures in place, the physical work of stripping out old timber frames can proceed methodically — starting with the interior trim and working outward to the structural opening.
Step 6 – Remove the Old Wooden Window Frames Safely
Demolition feels like the satisfying part — finally ripping out those tired timber frames. But rushing this stage causes the most avoidable damage: cracked plaster, gouged reveals, disturbed brickwork that takes hours to repair before your new aluminium frame can go in. A methodical approach, working from the inside out, keeps the structural opening clean and ready.
Removing Interior Trim Without Damaging Walls
Interior architraves and trim sit between your wall lining and the window frame, typically fixed with brad nails or finish nails driven into the timber reveal behind. Prying them off carelessly tears plasterboard paper, chips render, and splinters the trim itself — a problem if you plan to reuse it.
Start by scoring the paint line where the architrave meets the wall using a sharp utility knife. This breaks the paint seal and prevents it from peeling a strip of wall finish away with the trim. Then work a thin pry bar or stiff putty knife behind the architrave at a nail location, applying gentle outward pressure. Move along the length, releasing each nail point progressively rather than levering hard at one spot. At mitered corners, pull both pieces away simultaneously — they’re usually nailed together and separating them individually splits the joint.
Set removed trim aside carefully if you intend to reinstate it. Pull any remaining nails through the back face with pliers rather than punching them back through the front, which damages the painted surface.
Extracting the Wooden Frame From the Opening
With trim removed and glass already taken out (as covered in the safety section), the frame itself is exposed. Here’s how to remove old wooden window frames in a controlled sequence, replacing wooden window frames step by step:
- Score all external sealant lines between the frame and the wall — brickwork, render, or cladding — with a utility knife. This prevents the sealant from pulling chunks of wall finish away during extraction.
- For sash windows, remove the parting bead (the thin strip separating upper and lower sash tracks) by prying it from its groove. Then remove the staff bead on the interior side. This is how to remove a wooden sash window frame without fighting the track system.
- For casement or fixed windows, check for screws or nails fixing the frame to the reveal or structural opening. Remove any visible fixings with a screwdriver or nail puller.
- Cut through the sill using a reciprocating saw or hand saw — one cut near each end. This breaks the frame into manageable sections and relieves tension that holds the jambs in place.
- Pry the jambs (vertical sides) away from the reveal, working from the cut sill upward. A wrecking bar at the base gives good leverage. For stubborn frames, make an additional horizontal cut midway up each jamb to create smaller sections.
- Remove the head (top piece) last, once the jambs are free. It should lift or pry out with minimal resistance.
- Pull out any remaining packing, shims, or blind stops between the frame and the structural opening.
The technique varies slightly by wall type. Removing timber window frames from brick walls requires extra care around the brick course — avoid levering directly against brickwork, which can crack mortar joints or dislodge individual bricks. Use a timber offcut as a packing piece between your pry bar and the brick face. In weatherboard homes, the frame often sits behind the cladding edge, so you may need to carefully prise back a section of weatherboard to access external fixings. Rendered walls are the most fragile — any lateral force against the render surface risks cracking, so work slowly and keep leverage directed inward rather than outward.
Preparing the Structural Opening for the New Frame
Once the old frame is out, inspect the exposed opening thoroughly before doing anything else. This is where hidden problems reveal themselves.
Check the reveal timber (in timber-framed walls) or the masonry edges for rot, termite damage, or crumbling mortar. Soft or punky timber in the reveal needs cutting back to solid material and sistering in new treated pine before an aluminium frame can be fixed to it. Damaged mortar joints in brick openings should be repointed and allowed to cure.
Look up. The lintel above the opening is now visible — check for cracking, rust staining on steel lintels, or rot in timber lintels. Diagonal stepped cracks running upward from the corners of the opening, or any bowing in the masonry above, indicate lintel failure that must be addressed by a structural professional before your new window goes in. Do not proceed with installation if the lintel shows signs of distress.
Clean all debris, old sealant residue, and loose material from the opening surfaces using a stiff brush. The reveal faces need to be solid, clean, and relatively flat for the new frame to sit against properly.
One final consideration: weather. If your new aluminium windows haven’t arrived yet — or if you’re removing multiple frames across a day or two — cover each exposed opening immediately with heavy-duty plastic sheeting taped securely to the surrounding wall. Even a brief rain shower can soak wall cavities, insulation, and floor coverings. Temporary weatherproofing takes five minutes per opening and prevents damage that takes days to dry out.
With clean, sound openings ready and any structural issues resolved, the installation of your new aluminium frames can proceed with confidence — starting with positioning, levelling, and selecting the right fixing method for your wall type.
Step 7 – Install the New Aluminium Window Frame
A clean, structurally sound opening is only half the equation. How the aluminium frame goes in — the shimming, the levelling, the fixing sequence — determines whether the window operates smoothly for decades or binds and leaks within months. This is the aluminium window installation method step by step, covering both retrofit and full-frame scenarios across common Australian wall types.
Positioning and Levelling the Aluminium Frame
Grab a helper. Even lightweight aluminium frames become awkward to hold steady while simultaneously checking level and inserting shims. The positioning sequence is identical whether you’re fitting aluminium windows in a timber reveal or anchoring directly into a masonry opening — only the fixing method changes afterwards.
- For full-frame installations, apply a continuous bead of exterior-grade silicone along the sill pan or sub-sill tray before lifting the frame into place. This creates the primary moisture barrier beneath the window.
- Lift the frame into the opening and rest it on the sill. Centre it within the space, leaving an even gap on each side for shimming.
- Insert paired shims at both bottom corners and at the midpoint of the sill. Use shims in pairs — one from each direction — so the full depth of the frame is supported evenly rather than rocking on a single contact point.
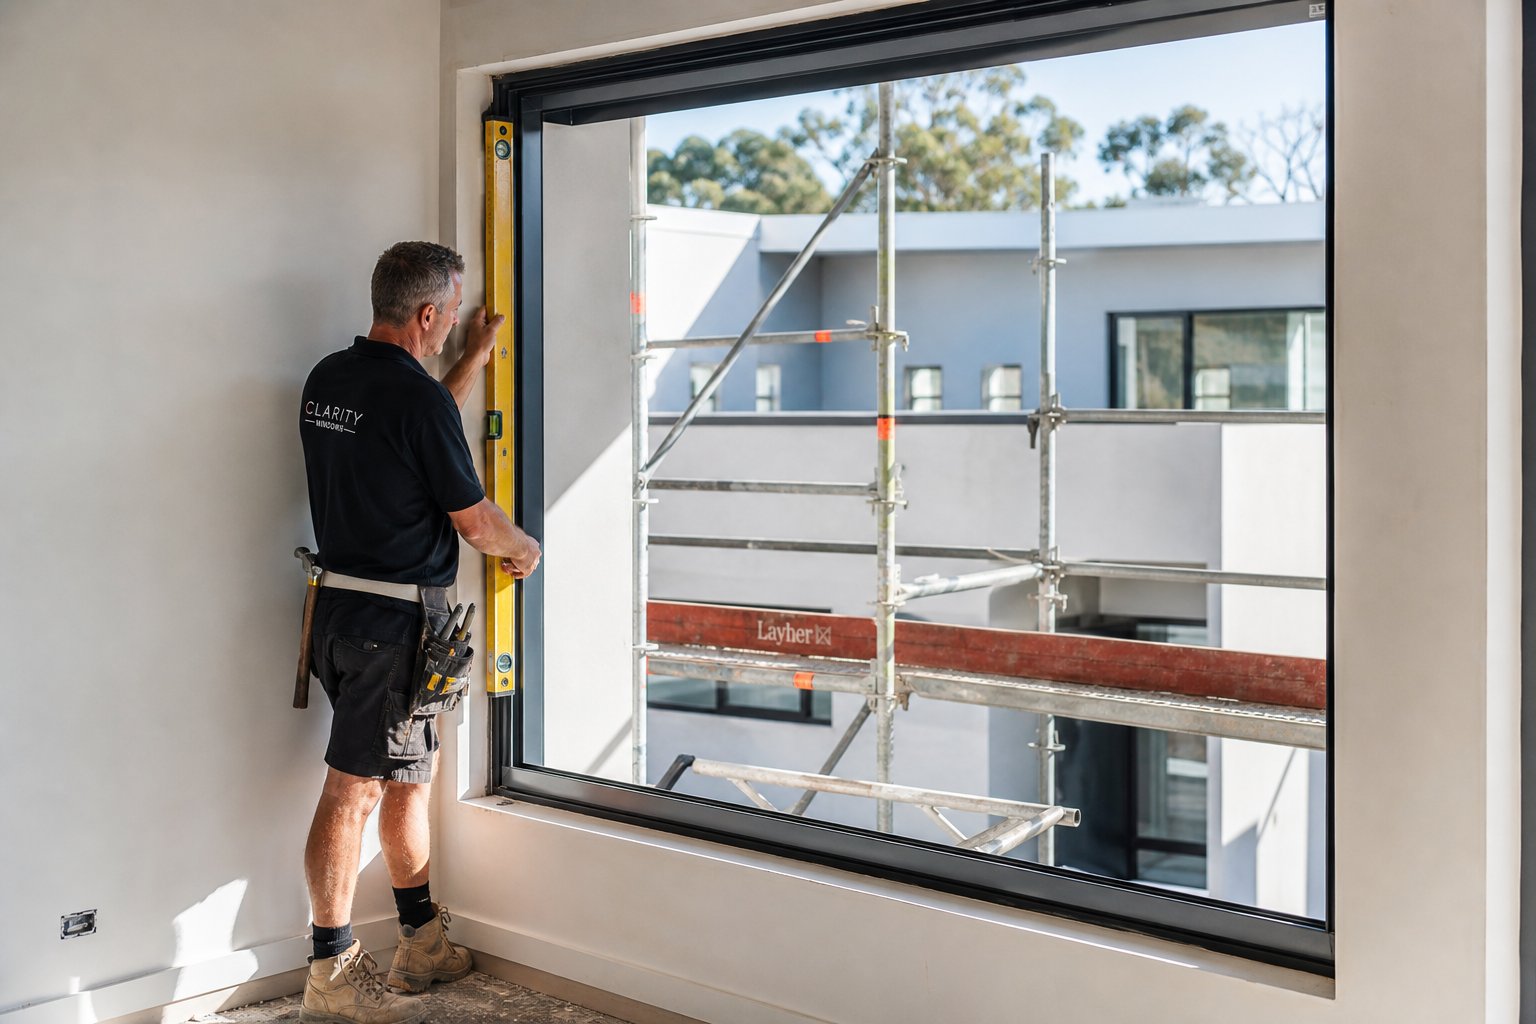
- Place a 1200 mm spirit level across the sill of the frame. Adjust bottom shims until the bubble sits dead centre.
- Hold the level vertically against each side jamb. Add shims roughly 150 mm from the top and bottom corners, plus at midpoints, until both jambs read plumb.
- Shim the head of the frame if any gap exists between the top of the window and the header or lintel above.
- Measure both diagonals of the frame (corner to corner). If they match within 2–3 mm, the frame is square.
- Open and close every operable sash, sliding panel, or awning arm. The window must move freely before a single screw goes in.
That final check is non-negotiable. A sash that binds at this stage will only get worse once fixings compress the frame into its final position. If anything sticks or a lock won’t engage, adjust your shims until operation is smooth. Skipping this test is one of the most common causes of post-installation callbacks.
Fixing Methods for Different Wall Types
With the frame shimmed, level, and operating correctly, it’s time to lock it in place. The fixing approach depends entirely on what your walls are made of — and getting this wrong either weakens the installation or damages the surrounding structure.
Brick and double-brick walls: To install an aluminium window frame in a brick wall, drill pilot holes through the pre-punched fixing points in the aluminium profile, then drive masonry anchors (sleeve anchors or dynabolts) into the brick. Avoid over-tightening — brick doesn’t flex, so excessive torque can crack the mortar joint or bow the aluminium profile inward. For brick veneer homes with a timber reveal lining the opening, you can fix through the frame into the reveal timber using galvanised screws instead, which is simpler and carries less risk of masonry damage.
Timber-framed walls: The most forgiving substrate. Drive galvanised bugle screws or dedicated window screws directly through the frame into the timber studs. No anchors needed, no pre-drilling into masonry. Space fixings every 300–450 mm and keep them at least 50 mm from frame corners to avoid splitting the stud edge.
Steel-framed walls: Use self-tapping screws rated for the steel gauge (typically 0.75–1.2 mm BMT in residential framing). These cut their own thread in a single motion. Critically, place a thermal break strip between the aluminium frame and the steel stud at every fixing point — steel conducts heat roughly 400 times faster than timber, and without this barrier you’ll get condensation on the interior frame surface in cooler months.
Regardless of wall type, place a fastener within 150 mm of each corner, then space additional fixings every 300–450 mm along jambs, head, and sill. After every two or three screws, re-check the spirit level and test sash operation again. If the frame has shifted even slightly, back the screw off and re-shim before continuing.
Once all fixings are driven, trim shims flush with the wall surface. Protruding shims interfere with foam insulation and interior trim later.
Installing Glazing and Hardware
Many aluminium windows arrive with glazing already fitted. If yours were shipped with glass removed to reduce weight during handling — common for larger units — refit the panes now. Press glazing beads firmly into their channels until they click into position, confirming the glass sits evenly with no gaps or movement.
Install handles and locks next. Most handles attach with two machine screws through the sash profile. Align the lock keeper on the frame so the latch engages with a firm click — if you need to force it, the keeper is misaligned and needs repositioning. For awning and casement windows, fit friction stays or restrictor arms according to the manufacturer’s specifications, ensuring the sash holds at any open position without drifting closed.
Run through a final operation check on every moving part:
- Sliding sashes should glide without scraping or excessive resistance — adjust rollers if the sash drags
- Casement and awning sashes should close flush against the weatherseal with even compression all the way around
- Locks should engage cleanly without forcing — a lock that requires pressure to close indicates the frame is slightly out of alignment at that point
- Handles should sit flat against the sash with no wobble or looseness
If a sash binds or doesn’t close flush, the cause is almost always a frame that’s been pulled out of square by an over-tightened fixing. Loosen the nearest screw, re-shim, and re-test. Correcting this now takes two minutes. Correcting it after sealing takes an afternoon.
With the frame secured, glazed, and hardware operating smoothly, the installation itself is structurally complete. What keeps it performing through years of weather, temperature swings, and daily use comes down to how well you seal and finish the perimeter — the focus of the next step.
Step 8 – Seal, Finish, and Inspect the Completed Installation
A perfectly levelled and fixed frame means nothing if water finds its way past the perimeter. Weatherproofing aluminium windows after installation is where long-term performance is won or lost — and it’s the step most DIY installers rush through because the hard work feels done.
Sealing and Weatherproofing Your New Windows
Proper perimeter sealing is the single biggest factor in long-term window performance. A frame that’s plumb, square, and beautifully finished will still fail if moisture penetrates the gap between the aluminium profile and the surrounding wall. Every leak trace, every mould patch, every bubbling paint job around a window traces back to inadequate sealing at installation.
Start with the gaps between the frame and the structural opening. For full-frame installations, fill cavities deeper than 10 mm with low-expansion polyurethane foam. Standard expanding foam generates too much pressure and can bow the frame — stick with products labelled specifically for window and door use. Allow the foam to cure fully before trimming flush with the frame edge.
Next, install closed-cell backer rod into the external joint between the aluminium frame and the wall face. The rod should sit roughly 6–8 mm below the surface, creating the correct depth for your sealant bead. This prevents three-sided adhesion — the sealant bonds only to the frame and the wall, allowing it to flex with thermal movement rather than tearing away from one surface.
To seal aluminium window frames to brick, use a neutral-cure silicone rated for exterior use. Acidic-cure silicones can corrode aluminium over time. Apply a continuous bead over the backer rod, tooling it smooth with a wetted finger or profiling tool. Ensure the sealant bridges both surfaces with full contact — gaps or air pockets become future leak points. Repeat on all four sides externally, paying particular attention to the sill junction where water naturally pools.
Internally, a smaller silicone bead or acrylic sealant along the frame-to-wall junction provides a finished appearance and blocks drafts. Acrylic is paintable, making it the better choice where you plan to paint architraves or reveals to match the room.
Reinstating Interior and Exterior Trim
For retrofit installations, your original architraves should fit back into position with minimal adjustment — the reveal dimensions haven’t changed. Nail them home with brad nails, fill the holes, and touch up paint.
Full-frame replacements typically require new architraves or reveal linings because the frame now sits at a different depth within the wall. Measure the gap between the aluminium frame edge and the wall lining, then cut timber or MDF reveal boards to bridge it. Fix these to the surrounding framing, then cap with architrave moulding.
Externally, repair any render damage with a suitable patching compound, feathering edges to blend with the existing surface. For brick veneer homes, repoint any mortar joints disturbed during installation. Weatherboard homes may need a section of cladding refitted or a new cover mould installed where the board meets the frame. A bead of exterior sealant at every cladding-to-frame junction completes the weather envelope.
Post-Installation Quality Checklist
Before calling the job done, run through every item below. Professional post-installation reports for window and door projects cover these same points — frame alignment, fixings, glazing integrity, drainage, and finish quality.
- All operable sashes open and close smoothly without binding or scraping
- Locks engage with a firm click — no forcing or misalignment
- Weatherseals compress evenly around the full perimeter when the window is closed (no visible daylight gaps)
- Drainage slots at the sill are clear and unobstructed by sealant or foam
- External sealant is continuous with no gaps, bubbles, or missed sections
- Internal sealant or trim sits flush with no visible gaps behind architraves
- Glass is seated firmly in glazing beads with no rattling or movement
- No condensation forming between panes (indicates a failed sealed unit — report immediately)
- Flashing and drainage provisions direct water outward, not into the wall cavity
- All fixings are tight but not over-torqued — frame profiles show no bowing or distortion
Aluminium window maintenance compared to timber is refreshingly minimal. Where wooden frames demanded sanding and repainting every three to five years, powder-coated aluminium needs only periodic cleaning with mild soapy water and a soft cloth. Lubricate hardware annually with a silicone-based spray, clear drainage slots of debris, and inspect weatherseals for compression loss every few years. Coastal properties should be washed more frequently — quarterly is ideal — to prevent salt buildup from dulling the finish or attacking fixings.
That’s the physical project complete. What remains is understanding the financial side — how to budget accurately for the full scope of work and sidestep the mistakes that turn a straightforward upgrade into an expensive lesson.
Step 9 – Budget Accurately and Avoid Common Mistakes
Every variable covered in the previous eight steps — method choice, glazing spec, wall type, access difficulty — feeds directly into your final project cost. The cost of replacing wooden windows with aluminium isn’t a single figure you can pull from a price list. It’s a calculation shaped by your specific home, your specific windows, and the decisions you’ve made along the way.
What Affects the Cost of Replacing Wooden Windows With Aluminium
Some factors carry more weight than others. A homeowner replacing three standard casements in a single-storey brick veneer home faces a fundamentally different budget from someone upgrading twelve mixed openings across a two-storey weatherboard with upper-floor access issues. The table below breaks down the primary cost drivers and their relative impact on total project price.
| Cost Variable | Impact on Total Cost | Notes |
|---|---|---|
| Number of windows | High | More units = higher material cost, though per-unit pricing often drops with volume |
| Window size and opening type | High | Large sliding doors or bi-folds cost significantly more than standard casements or awnings |
| Glazing specification | High | Double glazed is standard; laminated, tinted, or BAL-rated glass adds $80–$250+ per panel |
| Installation method (retrofit vs full-frame) | Medium–High | Full-frame adds demolition, flashing, and reinstatement labour |
| Wall construction type | Medium | Rendered and weatherboard walls require more finishing work than exposed brick |
| Access difficulty | Medium | Upper-storey windows needing scaffold add $500–$1,500+ to the project |
| Frame colour and finish | Low–Medium | Standard colours (black, white, monument) are cheaper; custom powder coat adds lead time and cost |
| Thermally broken profiles | Medium | Typically 20–40% more than standard profiles, but increasingly required under NCC energy provisions |
| Hardware upgrades | Low | Keyed locks, restrictor stays, and premium handles add modest per-unit cost |
| Lead paint management | Low–Medium | Professional containment and disposal for pre-1970s homes adds labour time |
How much to replace wooden windows with aluminium across an average three-bedroom Australian home? Expect a broad range from $8,000 to $25,000+ depending on where you land across these variables. Homes in New Zealand face similar cost structures — the cost of replacing wooden windows with aluminium in NZ is influenced by the same factors, with additional considerations around seismic bracing and local compliance requirements.
How to Compare Quotes and Avoid Hidden Charges
A low headline number means nothing if it excludes items you’ll inevitably need. When comparing quotes, check that each one covers the same scope. A transparent quote should itemise:
- Supply cost for the aluminium windows (frame, glazing, hardware)
- Installation labour — including removal and disposal of old timber frames
- Flashings, sealants, and weatherproofing materials
- Scaffold or elevated work platform hire (if applicable)
- Reinstatement of internal and external trim
- Any make-good work to surrounding finishes (render patching, repointing)
A quote that bundles everything into a single line item makes comparison impossible. Ask for a breakdown. If a supplier can’t or won’t provide one, that’s a red flag.
For larger projects involving multiple window sizes and types, suppliers offering end-to-end services reduce the risk of cost blowouts from specification errors or mid-project changes. MEICHEN’s engineering support and manufacturing coordination, for example, catches sizing discrepancies and system mismatches at the drawing stage — before they become expensive remakes on the factory floor. That kind of pre-production verification is particularly valuable when the cost of replacing wooden window frames with aluminium spans a dozen or more openings, each with different dimensions and requirements.
Common Mistakes That Lead to Costly Rework
Every mistake below has appeared in real projects — often more than once. Each one adds cost, delays, or both.
- Inaccurate measuring — A 5 mm error means a window that doesn’t fit. Remakes carry full manufacturing lead times and often a remake fee on top of the original cost.
- Skipping permit checks — Installing non-compliant windows in a heritage zone or without body corporate approval can result in removal orders. You pay twice: once to install, once to undo.
- Ignoring lead paint — Disturbing lead-based coatings without containment exposes your household to toxic dust and can trigger EPA fines if neighbours report contamination.
- Poor weatherproofing during removal — Leaving openings exposed overnight without plastic sheeting invites water into wall cavities, insulation, and flooring. Drying out a soaked wall cavity costs far more than five minutes of taping up plastic.
- Incorrect fixing methods — Using the wrong anchor type for your wall material (timber screws into brick, or masonry anchors into lightweight steel framing) creates fixings that pull out under wind load or thermal cycling.
- Inadequate sealing — Gaps in external sealant, missing backer rod, or blocked drainage slots lead to water ingress that rots surrounding framing and stains interior finishes within a year or two.
- Over-tightening fixings — Bowing the aluminium profile inward causes sashes to bind, locks to misalign, and weatherseals to lose compression — all of which require partial disassembly to correct.
Most of these mistakes share a common thread: they happen when people skip steps to save time or money upfront. The cost of replacing wooden windows with aluminium is an investment that pays back over decades in reduced maintenance, better thermal performance, and improved security. Cutting corners during installation erodes that return before you’ve even finished the project.
Budget for the job properly, follow the sequence laid out in this guide, and your aluminium windows will outperform the timber frames they replaced for 30 years or more — without asking for a single coat of paint.
Frequently Asked Questions About Replacing Wooden Windows With Aluminium
1. Can you replace wooden windows with aluminium in any type of home?
In most cases, yes. Both brick veneer, weatherboard, and rendered homes can accommodate aluminium window replacements. The installation method differs by wall type — brick veneer suits both retrofit and full-frame approaches, weatherboard homes often benefit from full-frame replacement for proper flashing integration, and rendered walls favour retrofit to avoid cracking surrounding finishes. Heritage-listed properties or strata-titled units may face restrictions on frame colour, profile style, or material choice, so checking with your local council or body corporate before proceeding is essential.
2. How much does it cost to replace wooden windows with aluminium in Australia?
For an average three-bedroom Australian home, expect a range from $8,000 to $25,000 or more depending on the number of windows, glazing specification, installation method, wall type, and access difficulty. Full-frame replacement costs more than retrofit due to additional demolition and finishing labour. Double glazing is standard, but laminated, tinted, or BAL-rated glass adds $80 to $250+ per panel. Scaffold hire for upper-storey work can add $500 to $1,500. Suppliers offering end-to-end services including engineering support and manufacturing coordination can help reduce cost blowouts from specification errors.
3. What is the difference between retrofit and full-frame aluminium window replacement?
Retrofit installation keeps the existing timber reveal intact and inserts a new aluminium frame inside it. It is faster, cheaper, and less disruptive but reduces visible glass area by roughly 40 to 50 mm per side. Full-frame replacement removes everything back to the structural opening, allowing maximum glass area and addressing any hidden damage behind the old frame. It costs more and requires reinstatement of interior and exterior trim. Choose retrofit when your timber reveal is structurally sound; choose full-frame when the reveal has deteriorated or you want the cleanest finish with maximum sightlines.
4. Do I need a building permit to replace wooden windows with aluminium?
It depends on your location, property type, and the scope of changes. A like-for-like replacement in the same opening size may not require a full development application in many Australian jurisdictions. However, changing window dimensions, altering materials in heritage overlay zones, modifying street-facing facades in character overlay areas, or replacing windows in strata-titled properties typically triggers approval requirements. Homes in bushfire-prone or cyclone-rated regions also face specific glazing and frame compliance mandates. Always check with your local council before ordering.
5. How long do aluminium windows last compared to wooden windows?
Aluminium windows typically last 30 years or more with minimal maintenance — periodic cleaning with soapy water, annual hardware lubrication, and clearing drainage slots. Wooden windows require sanding and repainting every three to five years to prevent moisture damage, rot, and paint failure. Aluminium is corrosion-resistant, dimensionally stable, and unaffected by termites or borer. Thermally broken aluminium frames rival timber for insulation performance while eliminating the ongoing maintenance cycle that makes timber frames expensive to own long-term.
More Window & Door Guides