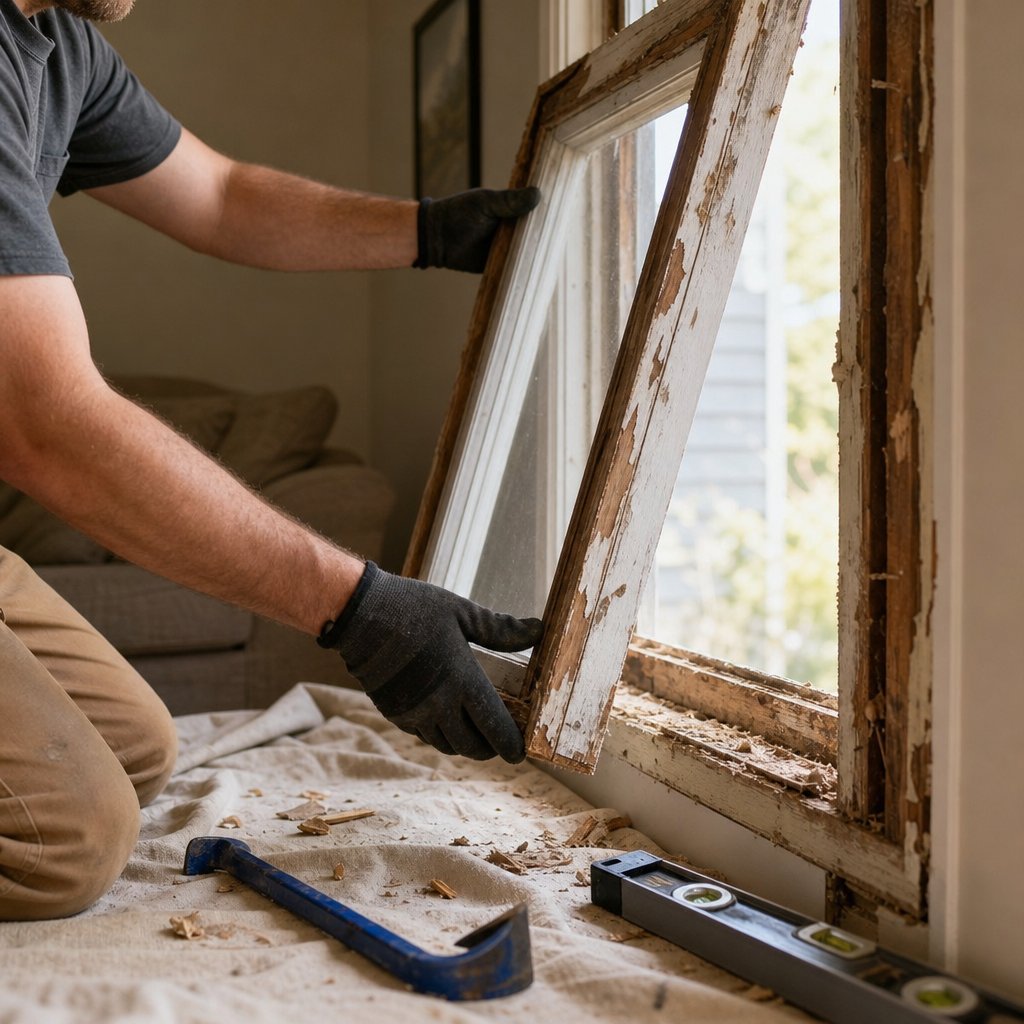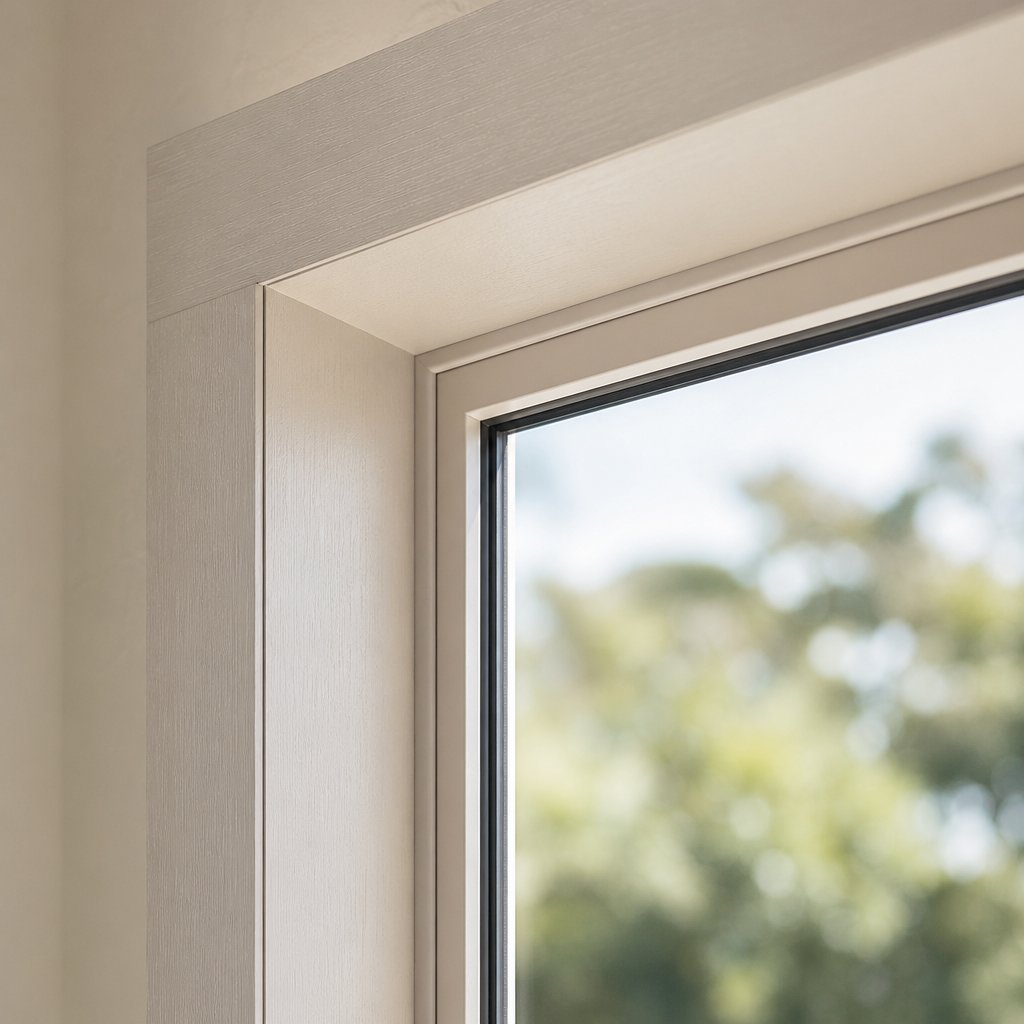
Step 1 – Assess Whether Your Old Aluminium Windows Need Replacing
Aluminium windows installed in Australian homes during the 1970s through 1990s were built to last structurally, but their thermal performance tells a different story. Most of these older frames feature continuous aluminium profiles with no thermal break, paired with single glazing that does little to resist heat transfer. The result, decades later, is condensation streaming down glass on winter mornings, drafts you can feel from across the room, and energy bills that climb every year. Before you commit to a full aluminium window replacement, though, it pays to figure out whether your windows genuinely need replacing or just need some targeted maintenance.
Signs Your Aluminium Windows Need Replacing
Not every tired-looking window demands a complete swap. But certain symptoms point clearly toward replacement rather than repair. Watch for these red flags:
- Visible corrosion or pitting — surface oxidation on old aluminium window frames weakens the profile and compromises the seal between glass and frame.
- Failed seals and fogged glass — moisture trapped between panes means the insulated glass unit has broken down internally. You cannot reseal this; the glazing needs replacing.
- Excessive drafts — hold a lit incense stick near the frame edges. If the smoke dances sideways, air is moving through gaps that weatherstripping alone may not fix.
- Difficult operation — sashes that jam, rollers that grind, or locks that no longer engage indicate worn-out hardware and potentially a warped frame.
- Condensation on the interior frame surface — a hallmark of non-thermally-broken aluminium conducting cold directly into your living space.
If you are noticing two or more of these issues simultaneously, repair becomes a short-term patch rather than a lasting fix.
Repair vs Full Replacement Decision Guide
The honest answer is that some old aluminium windows still have life left in them. Here is a quick comparison to guide your decision:
- Repair is sufficient when the frame is structurally sound, the issue is limited to worn weatherstripping or a single stiff roller, and the glass remains intact with no seal failure.
- Repair is sufficient when you only need to know how to replace window glass in an aluminium frame because a single pane has cracked but the frame and seals are otherwise fine.
- Full replacement is the better investment when the frame shows corrosion, the window lacks any thermal break, multiple seals have failed, or the window no longer meets current energy performance expectations under the NCC.
- Full replacement is the better investment when you plan to sell or renovate and want to improve your home’s WERS rating and street appeal in one step.
From a DIY difficulty perspective, resealing or swapping hardware sits around a 1–2 out of 5. A full removal and reinstallation jumps to a 3–4, depending on your wall type and storey height. Knowing where your project falls on that scale helps you plan realistically.
Understanding Your Window Type Before You Start
The process to replace aluminium windows varies depending on what you are working with. Sliding windows require you to release the head stop and lift sashes from their tracks. Casement and awning windows involve unscrewing hinges and disconnecting winding mechanisms. Fixed panes are glazed directly into the frame, so the glass must come out before the frame can be removed. Each type also differs in how the frame is fixed to the wall — sliding windows in older Australian homes often sit in a timber sub-frame, while fixed and casement units may be screwed directly into masonry reveals.
Identifying your window style upfront sets realistic expectations for the tools, time, and help you will need for the steps ahead.
Step 2 – Choose the Right Replacement Window System
Knowing your windows need replacing is only half the equation. The other half is selecting a system that suits your wall type, your room layout, and the performance standards your home needs to meet. Get this decision right and the installation itself becomes far more straightforward.
Retrofit Frames vs Full Frame Replacement
Every replacement aluminum window project starts with a fundamental choice: do you fit the new unit inside the existing sub-frame (retrofit), or strip everything back to the structural opening and start fresh (full frame)?
A retrofit approach — sometimes called an insert installation — slots a new aluminium window into the old frame that remains fixed to the wall. The surrounding plaster, cladding, and reveals stay untouched. Full frame replacement removes the entire assembly, including the old frame, back to the raw opening. This gives you a clean slate but involves more disruption.
| Retrofit (Insert) | Full Frame Replacement | |
|---|---|---|
| Best for | Sound sub-frames with no rot or corrosion; quick upgrades | Damaged frames, resizing openings, or upgrading to thermally broken profiles |
| Pros | Faster install, lower cost, minimal wall damage, preserves internal and external finishes | Maximum glass area, superior thermal performance, addresses structural issues, greater design flexibility |
| Cons | Slightly reduced glass area, relies on old sub-frame integrity, limited style changes | Higher cost, longer install time, may require patching of internal linings and external cladding |
| Typical cost implication | Lower — roughly 15–20% less than full frame | Higher — accounts for removal, making good, and new flashings |
| DIY suitability | Moderate — manageable for competent DIYers at ground level | Harder — often requires professional support due to structural interface |
If your existing timber reveals are solid and square, aluminum retrofit windows save time and money. If the sub-frame shows rot, warping, or corrosion — or you want to change the window size — full frame is the only path that makes long-term sense.
Choosing Between Sliding, Casement, and Awning Styles
The style you pick should match how the room is used, not just how the window looks from the street.
- Sliding aluminium windows — ideal where furniture, benchtops, or walkways sit directly below the opening. Sashes glide horizontally, so nothing protrudes inward or outward. They suit kitchens, living areas, and bedrooms where you want wide ventilation without sacrificing floor space. An alum sliding window also works well for servery-style openings connecting indoor and outdoor entertaining zones.
- Casement windows — hinged at the side and opening outward, casements catch side breezes and funnel them into the room. They seal tightly when closed, making them a strong performer in exposed or windy locations. Best for bedrooms, studies, and upper-storey openings where you want controlled airflow.
- Awning windows — hinged at the top, these open outward at the base. They let fresh air in while deflecting rain, which makes them a practical choice for bathrooms, laundries, and any room where you want ventilation during unpredictable weather.
- Fixed panes — no moving parts, maximum glass area, and the best thermal performance of any configuration. Use them to flood a room with light, then pair with an operable window nearby for ventilation.
Many replacement projects combine styles — a large fixed panel flanked by operable casements, for example — to balance light, airflow, and aesthetics in a single opening.
Thermal Performance and Compliance Considerations
Here is where many DIYers get caught off guard. Replacing windows is not purely a cosmetic or maintenance exercise — it can trigger compliance obligations under the National Construction Code (NCC), specifically the energy efficiency provisions in Section 13 covering external glazing.
Whether your replacement windows need to meet current energy performance standards depends on the scope of work and your local council’s interpretation of the regulations. As a general rule, like-for-like replacements in the same opening size may not trigger a full compliance assessment. However, if you are enlarging openings, adding new windows, or undertaking work as part of a broader renovation that requires a development application, your new glazing will likely need to satisfy current NCC requirements for thermal performance — including limits on total glazing area relative to floor area, and minimum U-value and Solar Heat Gain Coefficient (SHGC) thresholds appropriate to your climate zone.
Practically, this means aluminum replacement windows installed today should feature thermally broken frames and double glazing as a baseline in most Australian climate zones. The Window Energy Rating Scheme (WERS) provides star ratings that make it straightforward to compare products. Aim for windows rated under WERS so you can verify heating and cooling performance before you buy, rather than discovering a compliance gap after installation.
Checking with your local council before ordering is a small step that prevents expensive rework — and it ensures your new windows actually deliver the comfort and efficiency gains that justified the project in the first place.
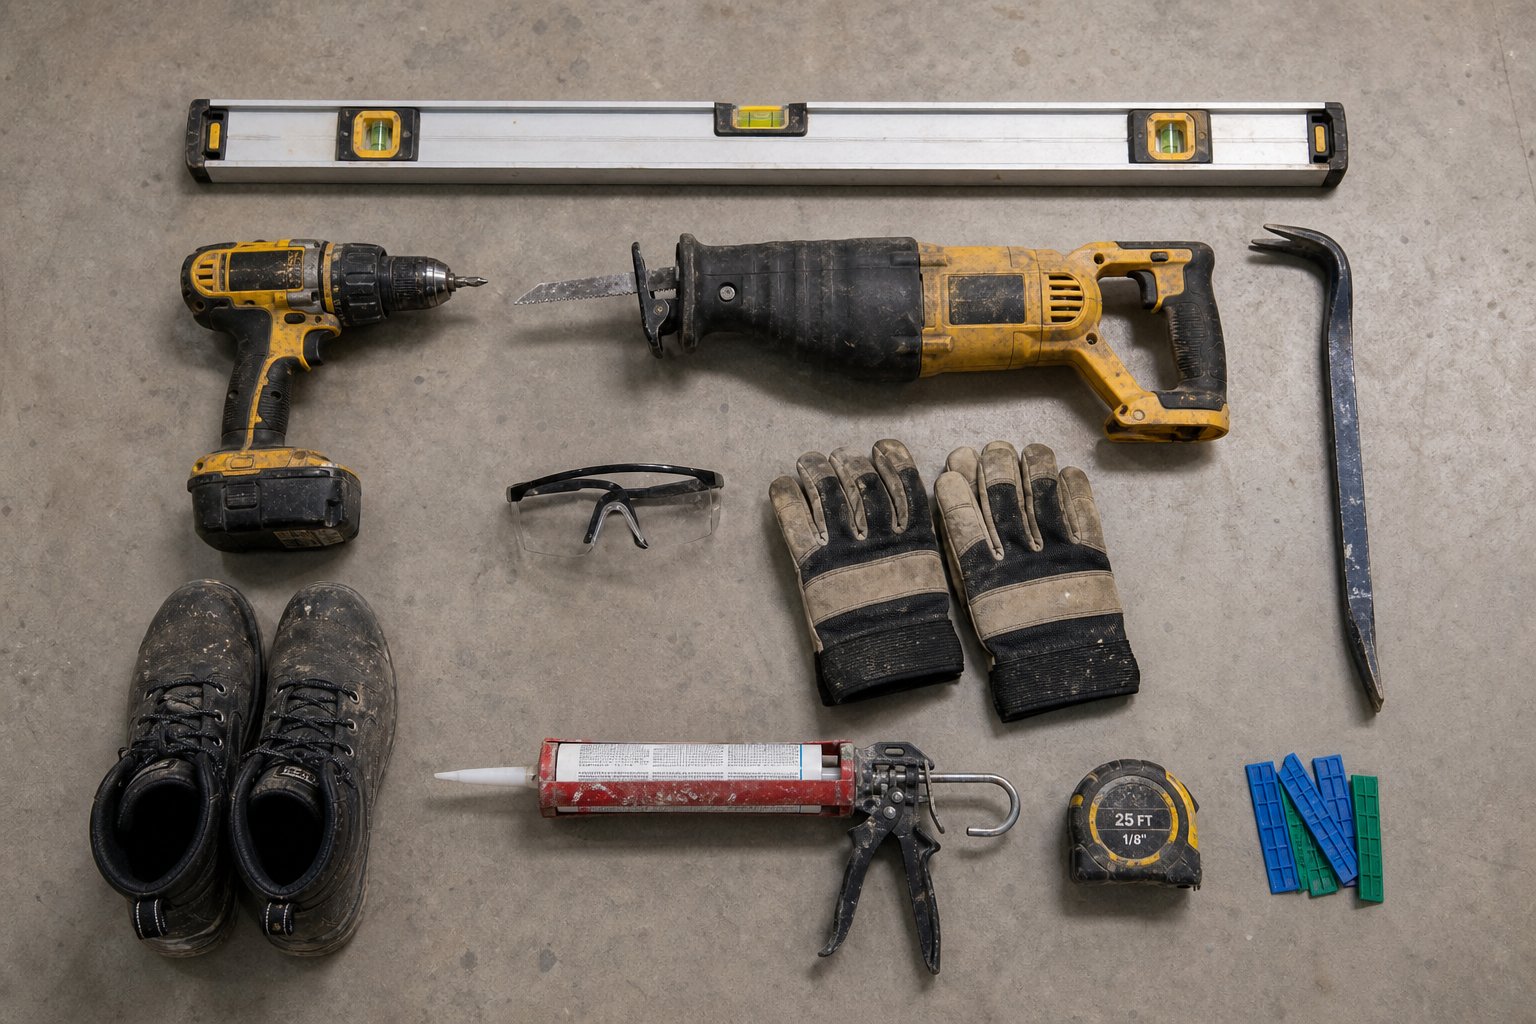
Step 3 – Gather Tools, Materials, and Safety Gear
Having the right gear laid out before you start saves trips to the hardware store mid-project — and more importantly, it keeps you from improvising with the wrong tool when you are balancing on a ladder with a loose frame in your hands. Window frame removal and installation are two distinct phases, each with its own kit. Sorting everything in advance means you can move through the job smoothly without unnecessary pauses.
Tools for Removing Old Aluminium Frames
Stripping out an old aluminium window is mostly about cutting fixings and levering sections free without damaging the surrounding wall. You will need:
- Reciprocating saw or angle grinder fitted with a metal-cutting disc — for slicing through screws, nails, or frame sections that refuse to budge
- Pry bar (flat and curved) — to lever frame members away from reveals once fixings are cut
- Utility knife — for scoring and cutting old sealant and paint lines between the frame and wall
- Hammer — to tap the pry bar into tight gaps and knock stubborn sections loose
- Screwdriver set (Phillips and flat-head) — many older frames are held by accessible screws hidden under snap-on covers
- Dust sheets or drop cloths — to protect flooring and catch debris inside the room
- Skip bin or trailer for disposal — old frames, glass, and packing material add up quickly
Tools and Materials for Installing New Windows
The installation phase demands more precision. Fitting aluminium windows properly means getting the frame dead level and securely anchored without distortion. Gather these before your new unit arrives:
- Spirit level (at least 1200 mm) — essential for checking plumb and level across the full frame width
- Tape measure — for verifying opening dimensions against the new frame size
- Drill with masonry bits and a driver bit set — for fixing into brick, concrete, or timber reveals
- Packers and shims (plastic wedge type) — to level and plumb the frame within the opening
- Low-expansion polyurethane foam — to fill the gap between frame and structure without bowing the profile
- Neutral-cure silicone sealant — for external weatherproofing (never use acidic silicone on aluminium)
- Flashing tape (self-adhesive, minimum 150 mm wide) — for sill and jamb waterproofing before the frame goes in
- Timber reveals or packers — if the existing reveal needs building up to suit the new frame depth
- Appropriate fixings for your wall type — coach screws for timber frames, dynabolts or sleeve anchors for masonry
Essential Safety Equipment
Installing aluminium windows involves cutting metal, handling heavy glass, and often working above ground level. The risks are real — lacerations from raw aluminium edges, eye injuries from grinding sparks, and falls from height account for the most common incidents on window replacement projects. Do not skip any of the following:
- Safety glasses or full-face shield (mandatory when cutting with a grinder or reciprocating saw)
- Heavy-duty cut-resistant gloves — raw aluminium edges and broken glass will slice through standard work gloves
- Steel-cap boots — dropped frames and glass panels can crush unprotected feet
- Hearing protection — angle grinders and reciprocating saws exceed safe noise levels within seconds
- P2 dust mask — cutting old frames releases fine aluminium particles and decades of accumulated dust
- Stable ladder rated to your weight, or scaffolding for upper-storey work — never lean sideways from a ladder while holding a frame
One point that gets overlooked constantly: glass handling requires suction cups rated to the panel weight, and a second person. A standard double-glazed sash in a 1200 mm x 1500 mm opening weighs upward of 30 kg. Trying to manoeuvre that alone, especially at height, is where serious injuries happen. If your project involves upper-storey windows or panels wider than 1500 mm, treat a helper as non-negotiable — not optional.
With your tools sorted and safety gear on hand, the physical work of removing the old frame becomes a controlled process rather than a scramble. That removal phase is where most of the mess and risk concentrates, so having everything within arm’s reach makes all the difference.
Step 4 – Remove the Old Aluminium Window Frame Safely
This is the step that makes most DIYers hesitate. Pulling an old frame out of a wall feels irreversible — and it is, to a degree. But with the glass removed first and a clear understanding of how your frame is fixed to the structure, the process is methodical rather than destructive. The key is working in the right sequence: glass out, fixings cut, frame levered free.
Remove the Glass Sashes First
Always strip the glass from the frame before you touch a pry bar. Trying to remove a window from the frame with the glass still in place is how panels shatter and people get hurt.
For sliding windows, the technique is straightforward. Unlatch the handle so the sash moves freely, then lift the sash upward into the top head track until the bottom clears the sill. Angle the base toward you and lift it out. Before attempting this, run your finger along the head track and check for anti-lift blocks or safety clips — these small plastic or metal pieces prevent the sash from being lifted out accidentally and must be unscrewed first. If you have been wondering how to remove a sliding window without damaging it, that head-stop release is the detail most guides skip.
For casement and awning windows, disconnect the winding mechanism or friction stay by unscrewing the arm from the sash. Support the sash weight while you remove the final hinge screws — a helper is essential for anything wider than 900 mm. Lay removed sashes flat on a drop cloth away from your work zone.
Large panes over 1200 mm in either dimension should be handled with suction cups and two people, no exceptions. Glass that size can weigh 25–35 kg and becomes dangerously unwieldy if it shifts mid-lift.
Cut and Pry Out the Old Aluminium Frame
With the glass safely out, you are left with an empty aluminium perimeter frame fixed to the wall. How to take out a window frame depends entirely on your wall construction — and this is where brick veneer and double-brick homes diverge significantly.
Brick veneer homes: In most Australian brick veneer construction, the aluminium frame is screwed through a timber reveal (also called a timber buck) that sits within the structural opening. The brick cladding butts up against the frame’s outer flange but does not carry the window’s weight. Your approach here is to:
- Score the sealant line between the frame and the external brickwork using a utility knife
- Locate the fixing screws — often hidden under snap-on covers along the jambs
- Remove accessible screws with a driver, or cut through concealed fixings with a reciprocating saw blade slid between the frame and the reveal
- Work a flat pry bar behind the frame jamb and lever it away from the timber reveal, starting at one corner and progressing along the length
- Once the jambs are free, the head and sill sections typically pull away with minimal resistance
Double-brick homes: The frame is often fixed directly into the masonry with expansion bolts or masonry screws — there is no timber sub-frame to work against. This makes removal trickier because you cannot simply lever against timber. Instead:
- Cut through the expansion bolts or masonry anchors using a reciprocating saw with a bi-metal blade
- If bolts are inaccessible, cut the aluminium frame itself into sections using an angle grinder with a metal-cutting disc (wear full face protection)
- Pry each section away from the masonry carefully — aggressive levering can crack the brick edges or dislodge mortar
- Clean any remaining bolt shanks flush with the masonry using a grinder so they do not interfere with the new frame
Patience matters here. Rushing the pry-out phase is how brickwork gets chipped and reveals get splintered. If a section refuses to budge, look for a hidden fixing rather than applying more force.
Handle Disposal and Recycling
Old aluminium frames are fully recyclable, and this is one area where your demolition waste actually has value. Most scrap metal dealers across Australia accept clean aluminium window frames and will pay by the kilogram — rates fluctuate, but even a few frames can offset a portion of your project costs. Strip any rubber gaskets, plastic clips, and glass before dropping frames at the scrap yard, as contamination reduces the price or leads to rejection.
Glass disposal requires more care. Broken or intact window glass is not accepted in household recycling bins. Contact your local council for glass drop-off points or book a bulky waste collection. Some councils classify window glass as construction waste, which means it needs to go to a licensed waste facility or into a skip bin designated for building materials.
Keeping your site clean as you go — frames stacked flat, glass stored upright in a safe location, and debris swept regularly — reduces the risk of cuts and trips during the rest of the installation. It also means you are not working around hazards when the new frame arrives and the precision work begins.
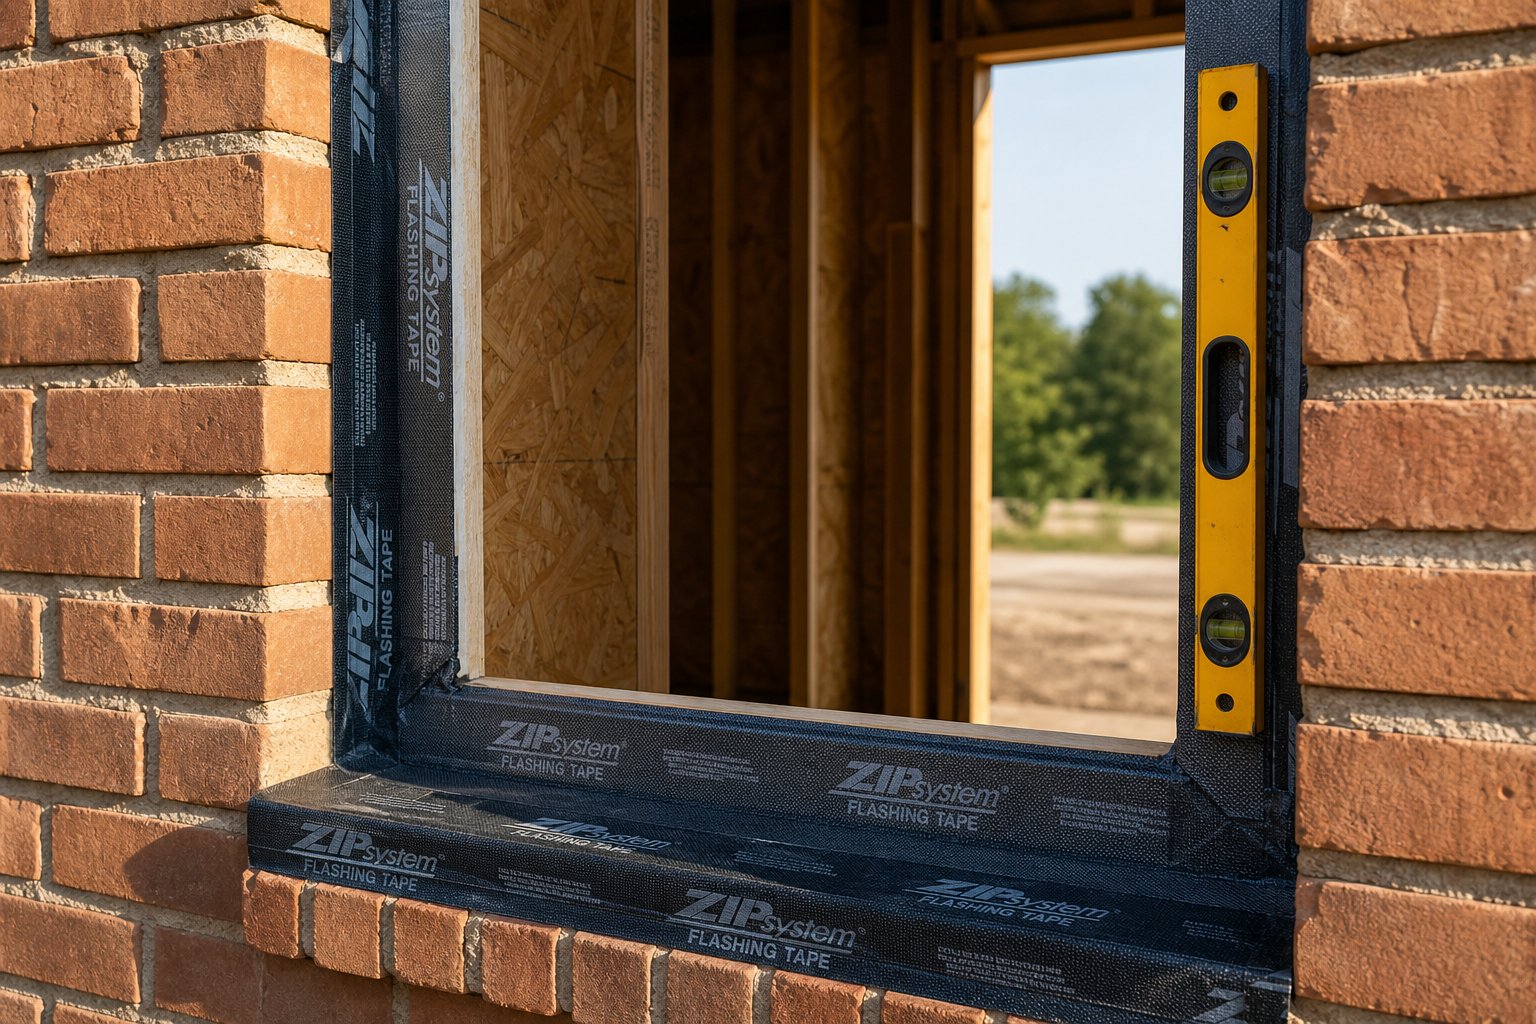
Step 5 – Prepare and Waterproof the Window Opening
A bare opening staring back at you might feel like progress, but this is actually the most consequential pause in the entire aluminium frame window replacement process. What you do — or fail to do — between removing the old frame and fitting the new one determines whether your window stays leak-free for decades or develops water damage within a few seasons. Skipping preparation is the single biggest cause of failed installations, yet it is the step most DIY guides gloss over entirely.
Inspect and Repair the Structural Opening
With the old frame gone, you have a rare opportunity to see the structural bones of the opening. Take it seriously. Grab a torch and inspect every surface before you even think about how to put in a window frame.
Timber reveals and sub-frames (brick veneer homes): Run a screwdriver or awl into the timber at the sill, jambs, and lintel. Soft, spongy timber indicates rot — common at the sill where moisture pools over years of poor drainage. Any rotted sections must be cut out and replaced with treated timber before the new frame goes in. A new aluminium window fixed into compromised timber will shift over time, breaking seals and creating air gaps that no amount of silicone can fix permanently.
Masonry openings (double-brick homes): Look for cracked or crumbling mortar joints around the lintel, jambs, and sill course. Hairline cracks in the mortar are cosmetic, but anything wider than 2–3 mm should be raked out and repointed with fresh mortar. Check the lintel itself — steel lintels in older homes can corrode and bow, while concrete lintels may show spalling. A compromised lintel is a structural issue that needs professional assessment before you proceed with replacing aluminum frame windows.
For double-brick construction specifically, peer into the cavity between the two brick skins. Clear out any mortar droppings or debris that have accumulated on the cavity ties or the damp-proof course (DPC). If the DPC is torn, displaced, or missing at the sill level, water that enters the cavity will track inward rather than draining down and out through the weep holes. Replacing or patching the DPC at this stage is far easier than trying to retrofit it after the new window is installed.
Also check for any residual fixings — old expansion bolt shanks, protruding screws, or lumps of hardened sealant — that would prevent the new frame from sitting flush. Grind these back level with the surrounding surface.
Check Measurements and Square the Opening
Your new aluminium frame replacement windows are manufactured to precise dimensions. The opening they slot into rarely is. Walls settle, timber shrinks, and masonry shifts over decades — so never assume the opening is perfectly square just because it looks right.
Measure the width in three places: across the top of the opening, across the middle, and across the bottom. Then measure the height in three places: at the left jamb, at the centre, and at the right jamb. Record the shortest measurement for both width and height — this is the maximum frame size that will physically fit into the opening without forcing.
To check for square, measure diagonally from the top-left corner to the bottom-right, then from the top-right to the bottom-left. If the two diagonal measurements are within 2–3 mm of each other, the opening is acceptably square. A larger discrepancy means the opening is racked — one corner is higher or further forward than its opposite.
Use a spirit level to confirm plumb on both jambs and level across the sill. If the sill slopes, the opening is out of level — not unusual in older homes where stumps have settled or brickwork has moved.
Here is the practical reality: packers and shims can compensate for minor irregularities, typically up to about 5 mm total across the frame width or height. Beyond that, you are asking the shims to do structural work they are not designed for. If your opening is significantly out of square or out of plumb, the reveal or masonry needs to be built up or trimmed back before the new frame goes in. Trying to force a square frame into a racked opening results in binding sashes, uneven gaps, and seals that fail prematurely.
Apply Flashing and Waterproofing
This is the step that separates a professional-quality result from a weekend bodge job. Window openings are one of the most vulnerable locations in the building envelope — and flashing installed before the frame goes in creates a drainage path that directs any water penetrating the cladding safely back outside rather than into your wall cavity or internal linings.
Start with the sill. Apply a self-adhesive flashing tape (minimum 150 mm wide) across the full width of the sill, wrapping it up the face of each jamb by at least 100 mm. The tape should extend over the outer edge of the sill so water drains outward, not back into the wall. If your sill is dead flat, create a slight back slope using a tapered timber filler or a proprietary sill wedge — this ensures water runs toward the outside rather than pooling against the frame.
Next, apply jamb flashing tape up both sides of the opening, overlapping the sill flashing by at least 50 mm. The overlap sequence matters: jamb flashing sits on top of sill flashing so that water running down the jambs is directed onto the sill membrane and out, not behind it. Think of it like roof tiles — each layer sheds water onto the one below.
At the head (top of the opening), flashing tape goes on last and overlaps the top of the jamb flashing. Some installers also fit a rigid metal drip edge or head flashing above the window that tucks behind the external cladding and directs water over the face of the frame rather than behind it.
A few critical details to get right:
- Clean the substrate thoroughly before applying tape — dust, loose render, and moisture all prevent proper adhesion
- Use a J-roller or firm hand pressure to eliminate air pockets under the tape
- In cold weather (below 10°C), some adhesive tapes lose their grab — check the manufacturer’s minimum application temperature and use a compatible primer if needed
- Never leave the sill flashing sealed at both ends with no drainage path — water that gets behind the frame must have somewhere to escape
- Ensure the flashing is compatible with the sealant you will use later — some silicones do not bond well to certain tape surfaces
Done properly, this flashing layer acts as a secondary line of defence. Even if the external sealant joint between the frame and cladding eventually cracks or ages, water that penetrates will hit the flashing membrane and drain harmlessly to the outside. It is invisible once the window is installed, but it is arguably the most important ten minutes of the entire project.
With the opening inspected, measured, and waterproofed, you have created the conditions for a clean, secure installation. The new frame can now go in knowing it is sitting on a sound structure with proper drainage behind it — which is exactly what the next step demands.
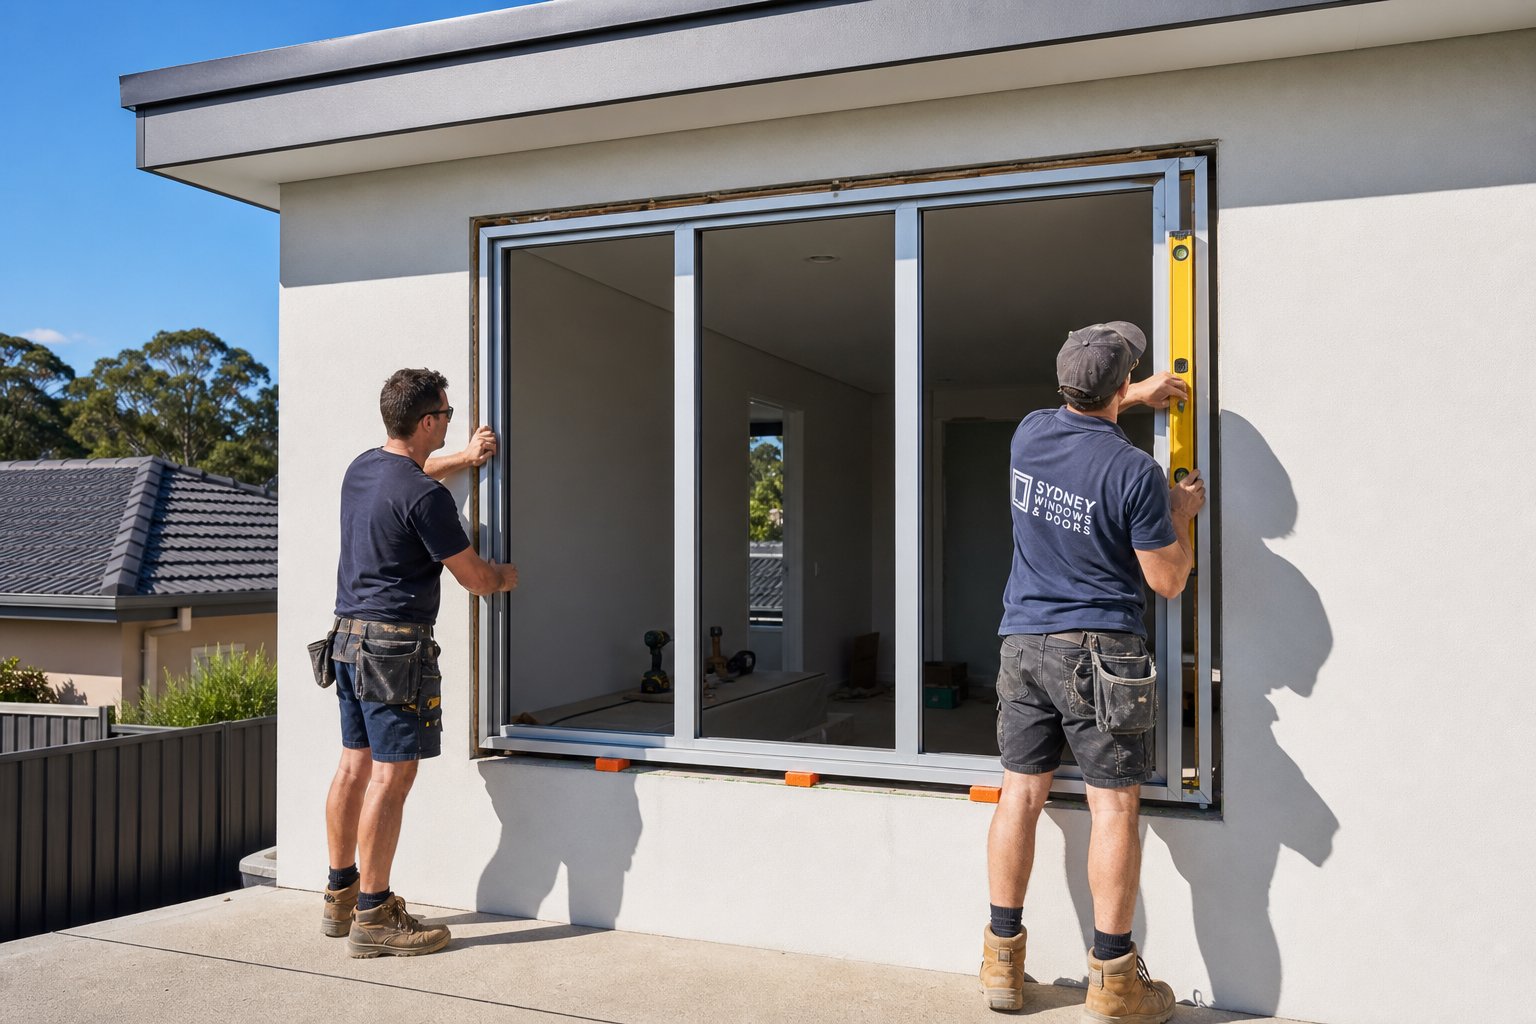
Step 6 – Install the New Aluminium Window
Your opening is clean, flashed, and ready. This is where the project shifts from demolition and preparation into precision work — and where patience pays off more than speed. Aluminium window installation follows a strict sequence: position, level, fix, then fit the glass. Reverse any of those steps and you will fight the frame for the life of the window.
Position and Level the New Frame
Grab your helper — even a lightweight aluminium frame becomes awkward to hold steady while checking level and inserting shims at the same time. The process is identical whether you are learning how to install a sliding window or fitting a casement unit; only the sash hanging differs later.
Lift the frame into the opening and rest it on packers placed at both bottom corners and at the midpoint of the sill. These packers carry the full weight of the unit, so use paired shims (one from each direction) to support the entire depth of the frame evenly. Place your spirit level across the sill and adjust the bottom shims until the bubble sits dead centre.
Next, check plumb by holding the level vertically against each side jamb. Add shims at the jambs — roughly 150 mm from the top and bottom corners, plus at any midpoints — until both sides read true. Then shim the head if any gap exists between the top of the frame and the lintel.
Here is the critical test: open and close every operable sash before driving a single screw. Sliding panels should glide without resistance. Casement and awning sashes should swing freely and compress their seals evenly when latched. If anything binds, adjust your shims until the operation feels smooth. As Deslauriers’ shimming guide stresses, a window that is hard to operate at this stage will only get worse once fixings compress the frame into its final position.
Confirm square by measuring diagonals — top-left to bottom-right, then top-right to bottom-left. If the two figures match within 2–3 mm, you are good to fix.
Fix the Frame Into the Opening
The fixing method depends on what is behind the frame. For timber reveals — the most common scenario in Australian brick veneer homes — drill pilot holes through the pre-punched fixing points in the aluminium jamb and drive galvanised coach screws into the timber. For masonry openings in double-brick construction, use expansion anchors (dynabolts) or sleeve anchors drilled directly into the brickwork.
Spacing matters. Place a fixing within 150 mm of each corner, then space additional fasteners every 300–400 mm along the jambs, head, and sill. This distributes load evenly and prevents the frame from flexing between anchor points.
The most common mistake at this stage is over-tightening. Aluminium profiles are hollow extrusions — crank a screw too hard and the jamb bows inward, pinching the sash and breaking the weatherseal’s contact. Tighten each fixing until snug, then stop. After every two or three screws, re-check level and plumb with your spirit level and test the sash operation again. If anything has shifted, back the screw off slightly and re-shim before continuing.
Once all fixings are driven, trim or snap the shims flush with the wall surface so they do not interfere with foam insulation or internal trims later.
Install Sashes and Hardware
With the frame locked in and operating correctly, it is time to fit the glass and hardware. The sequence differs slightly depending on window type, but the overall slider window installation and casement process follows this order:
- For sliding windows: lift the outer sash into the top track, angle the base inward, and lower it onto the bottom rail. Repeat for the inner sash. Adjust the roller height screws at the base of each sash until the panels glide smoothly and sit parallel with the frame — uneven rollers cause dragging and premature track wear.
- For casement and awning windows: hold the sash in position and reattach the hinges or friction stays, starting with the top hinge. Tighten progressively and check that the sash swings freely without fouling the frame at any point in its arc.
- Fit handles, locks, and keepers. Align each lock keeper so the latch engages with a firm click — if you need to force it, the keeper is misaligned or the frame has a slight bow that needs correcting.
- Install window restrictors or safety stays where required (mandatory on windows above ground floor in homes with young children under Australian building regulations).
- Test every moving part: open, close, lock, unlock. Confirm smooth operation across the full range before moving to sealing.
If you are working through how to replace sliding windows across multiple openings, repeat this sequence for each unit — do not batch-fix all frames and leave sash fitting until the end. Testing operation immediately after fixing each frame lets you catch and correct issues while the fix is still easy to adjust.
For homeowners tackling complex aluminium window installation scenarios — particularly double-brick openings, frame-joining configurations for wide spans, or multi-panel sliding systems — the reality is that precision demands increase significantly. These projects benefit from professional support that includes drawing review, system selection, and custom engineering to ensure the new window performs correctly in the specific wall type. MEICHEN’s services cover exactly this scope, providing end-to-end coordination from specification through to delivery planning. If you have reached this step and the complexity exceeds your comfort level, that is not a failure — it is a smart recognition of where specialist knowledge adds genuine value.
Knowing how to replace a sliding window or casement unit is one thing; knowing when the project has outgrown a weekend DIY job is equally important. Either way, the frame is now fixed, the sashes are operating, and the next phase — sealing and weatherproofing — locks in the performance for the long term.
Step 7 – Seal, Weatherproof, and Finish the Installation
A perfectly levelled and fixed frame means nothing if water and air find their way around it. The gap between the aluminium profile and the structural opening — typically 5–15 mm on each side — is the weak link in every window installation. Left unfilled, it becomes a highway for drafts, moisture, and even insects. Sealing this perimeter correctly is what transforms a mechanically sound installation into one that actually performs thermally and stays dry through driving rain.
Seal the Perimeter With Expanding Foam
Low-expansion polyurethane foam is the standard method for insulating and air-sealing the gap between the window frame and the rough opening. The operative word here is low-expansion. Standard or high-expansion foam generates significant outward pressure as it cures — enough to bow an aluminium jamb inward by several millimetres, binding sashes and breaking weatherseal contact. Once cured, that distortion is permanent unless you cut the foam out and start again.
Use a foam specifically rated for window and door applications. These products expand to roughly 1.5 times their dispensed volume rather than the 3–4 times expansion of general-purpose gap fillers. As GE Sealants’ installation guide emphasises, the frame must be fully fixed and the geometry locked with shims and fasteners before any foam enters the cavity — foam follows geometry, it does not set it.
Application technique matters as much as product choice. Insert the applicator nozzle into the gap and lay a shallow bead as you draw it along the joint, filling the cavity roughly halfway. Let expansion do the rest. If you overfill, the excess pushes against the frame before you can correct it. For deeper gaps or areas near operable sashes where movement sensitivity is highest, build the foam in staged lifts — a light first pass, allow it to tack off, then a second pass to fill remaining voids.
A few rules to follow:
- Keep foam on the interior side of the frame — it belongs in the air-seal zone, not the drainage plane
- Never foam across weep holes or drainage slots at the sill; these must remain completely clear
- Work within the temperature range on the product label — cold conditions slow the cure and make the foam harder to control
- After curing, trim excess foam flush with the frame and wall surface using a sharp utility knife before applying trims
Once the foam has cured (typically 4–8 hours depending on temperature and humidity), cycle every operable sash again. If anything feels tighter than it did before foaming, you have localised pressure on the frame. Cut the foam out at that point, re-shim if needed, and reapply in a thinner lift.
Apply External Silicone and Trim
The external junction between the aluminium frame and your cladding — whether brick, render, weatherboard, or fibre cement — needs a continuous sealant bead to prevent wind-driven rain from penetrating behind the frame. This is also the visible finish line of the project, so neatness counts.
Use a neutral-cure silicone sealant for this joint. This is non-negotiable for aluminium. Acidic-cure silicone (the type that smells strongly of vinegar as it sets) releases acetic acid during curing, which corrodes aluminium surfaces and breaks down the anodised or powder-coated finish over time. Neutral-cure products cure without releasing corrosive byproducts and bond well to both aluminium and masonry substrates.
To apply a clean bead:
- Mask both sides of the joint with painter’s tape, leaving a consistent gap width exposed — typically 6–10 mm
- Cut the silicone nozzle at a 45-degree angle to match the joint width
- Run a continuous bead along the full perimeter in one steady pass, maintaining even pressure on the caulking gun
- Tool the bead immediately with a silicone finishing tool or a wet finger to push sealant into the joint and create a concave profile that sheds water
- Peel the masking tape away while the silicone is still wet — waiting until it skins over will tear the edge
If your installation includes external architraves or cover moulds — common when wrapping a window with aluminium capping or when the gap between frame and cladding is too wide for sealant alone — fix these in place before running the final silicone bead. The sealant then bridges the junction between the trim and the cladding, and between the trim and the frame, creating two smaller joints rather than one oversized one. Smaller joints flex less and last longer.
For anyone learning how to wrap a window with aluminium capping, the principle is the same: all joints between dissimilar materials get sealed with neutral-cure silicone, and every horizontal surface slopes away from the glass to shed water outward.
Internal Finishing and Final Checks
Inside the room, the gap between the frame and the plasterboard or reveal is typically covered by timber or MDF architraves. If your existing architraves survived the removal process intact, refix them with brad nails or construction adhesive. If they were damaged, now is the time to fit new ones — pre-primed pine architrave from any hardware store does the job and can be painted to match your interior.
Fill any remaining gaps between the architrave and the wall with paintable acrylic sealant (not silicone — paint will not adhere to silicone). A thin bead tooled smooth with a damp finger gives a seamless finish once painted.
If you needed to replace window glass in an aluminium frame as part of this project — perhaps upgrading from single to double glazing within a retained frame section — confirm that the glazing beads are fully snapped home and the rubber gaskets sit evenly around the glass perimeter with no gaps or bunching.
Before you pack up your tools, run through this final quality checklist:
- Smooth sash operation — every sliding, casement, or awning sash opens and closes without resistance or binding
- Secure locking — all locks engage with a positive click and the sash compresses firmly against its weatherseal when latched
- Weep holes clear — check the external face of the sill for visible weep slots and confirm they are not blocked by foam, silicone, or debris
- No daylight gaps — from inside, close all sashes and look for any pinpoints of light around the frame perimeter; light means air (and eventually water) can pass through
- Clean sealant lines — external silicone should be uniform with no voids, bubbles, or missed sections; internal acrylic should be smooth and ready for paint
- Drainage test — pour a small amount of water onto the external sill track and confirm it flows out through the weep holes rather than pooling or tracking inward
That drainage test is the one check most people skip, and it is arguably the most important. A blocked weep hole turns your sill track into a reservoir during heavy rain, and water will eventually find its way past the seals and into your wall cavity or onto your floor. Clear any blockage now while access is easy.
With sealing complete and every function verified, the installation is genuinely finished — not just mechanically assembled, but weatherproofed against the conditions Australian homes actually face. What remains is an honest assessment of which parts of this process sit comfortably within DIY territory and which ones warrant calling in a specialist.

Step 8 – Know When to Call a Professional Instead
You have read through every step. You understand the sequence, the tools, and the risks. The honest question now is whether your specific project falls within comfortable DIY territory — or whether the smarter move is handing it to someone who does this daily. There is no shame in either answer. What matters is making the call before you are halfway through a removal with a cracked lintel staring back at you.
DIY Difficulty Ratings by Phase
Not every phase of an aluminium window replacement carries the same risk or skill requirement. Some steps are genuinely approachable for a handy homeowner; others demand experience that only comes from repetition across dozens of projects. Here is an honest breakdown:
| Phase | Difficulty (1–5) | Notes |
|---|---|---|
| Assessment and decision-making | 1 | Observation and research — no physical risk |
| Removal at ground level | 2 | Manageable with correct tools and a helper for glass |
| Removal at height (upper storey) | 4 | Scaffolding required; heavy glass handling above ground multiplies risk significantly |
| Opening preparation and waterproofing | 3 | Requires attention to detail; mistakes are hidden until leaks appear months later |
| Installation of a standard single window | 3 | Achievable with patience, a spirit level, and a second pair of hands |
| Installation of large or multi-panel systems | 5 | Frame-joining, structural loads, and tight tolerances — specialist territory |
| Sealing and finishing | 2 | Straightforward if you use the right products and follow the sequence |
If your project sits mostly in the 1–3 range — a single ground-floor sliding window in a brick veneer wall, for example — a competent DIYer with the right tools can deliver a solid result. Once you start stacking multiple difficulty-4 and difficulty-5 factors together, the probability of costly errors climbs fast.
Situations That Require Professional Installation
Certain scenarios push a project beyond what weekend work can safely achieve. If any of the following apply, professional installation is not just recommended — it is the practical choice:
- Upper-storey windows requiring scaffolding — working at height with heavy glass panels and power tools demands fall-protection systems and trained personnel
- Double-brick wall openings needing structural cutting — enlarging or modifying openings in load-bearing masonry requires engineering assessment and precise execution to avoid cracking or collapse
- Frame-joining for wide spans — multi-panel configurations where individual frames are structurally joined to span openings wider than a single unit can cover involve engineering calculations and specialised coupling hardware
- Windows near wet areas requiring compliance certification — bathrooms, laundries, and pool-adjacent openings may need waterproofing certification that only licensed installers can provide
- Heritage-listed properties with approval requirements — council heritage overlays often mandate that work be carried out by approved tradespeople, and non-compliant modifications can trigger enforcement action
- Cyclone-rated or bushfire-rated installations — homes in BAL-rated zones or cyclone regions require windows tested and installed to specific Australian Standards (AS 2047, AS 1170.2), with documentation to prove compliance
Getting Professional Support for Complex Replacements
Specialist aluminium window companies offer far more than just someone to hold the frame while screws go in. The real value lies in the upstream work — getting the specification right before manufacturing begins, so the product that arrives on site actually fits the opening, meets the performance requirements, and integrates with the wall system without compromise.
For homeowners in Sydney and across NSW looking to replace aluminum windows in complex scenarios, this upstream coordination is what separates a smooth project from an expensive headache. Double-brick openings, frame-joining configurations, performance-matched glazing for specific climate zones, and multi-panel aluminium sliding windows all demand engineering input that goes beyond standard off-the-shelf solutions.
MEICHEN provides exactly this scope of service — covering drawing review, system selection, custom engineering support, performance matching, manufacturing coordination, and delivery planning. Their team works with homeowners, builders, and architects specifying aluminium windows in Sydney and beyond, ensuring that every element is resolved before fabrication starts. For readers who have worked through this guide and identified that their project exceeds comfortable DIY scope, this kind of end-to-end professional support is the logical next step. It means your aluminum window replacement gets done once, done right, and built to last in Australian conditions.
Whether you tackle the work yourself or bring in a specialist, the principles remain the same: proper preparation, correct sequencing, and attention to weatherproofing detail. The difference is simply who holds the drill — and whether the project’s complexity justifies the cost of expertise over the cost of potential rework.
Frequently Asked Questions About Replacing Aluminium Windows
1. Can I replace aluminium windows myself or do I need a professional?
A competent DIYer can handle a standard ground-floor aluminium window replacement in a brick veneer wall with the right tools and a helper. The job rates around a 3 out of 5 for difficulty. However, upper-storey installations requiring scaffolding, double-brick openings needing structural cutting, frame-joining for wide spans, and multi-panel sliding systems rate 4-5 and typically require professional support. If your project involves engineering calculations, compliance certification, or working at height with heavy glass panels, specialist installers like MEICHEN offer end-to-end services from drawing review through to delivery planning that prevent costly errors.
2. How do I know if my aluminium windows need replacing or just repairing?
Repair is sufficient when the frame is structurally sound and the issue is limited to worn weatherstripping, a stiff roller, or a single cracked pane with intact seals. Full replacement becomes the better investment when you notice two or more of these signs together: visible corrosion or pitting on the frame, fogged glass indicating failed seals, excessive drafts detectable with an incense stick test, sashes that jam or grind, and condensation forming on the interior frame surface. Non-thermally-broken aluminium frames from the 1970s-1990s paired with single glazing generally warrant replacement for energy efficiency alone.
3. What is the difference between retrofit and full frame aluminium window replacement?
Retrofit (insert) installation slots a new aluminium window into the existing sub-frame that remains fixed to the wall, preserving internal and external finishes with minimal disruption. It costs roughly 15-20% less than full frame replacement but slightly reduces glass area and relies on the old sub-frame being structurally sound. Full frame replacement removes everything back to the raw structural opening, giving maximum glass area, superior thermal performance, and the ability to address structural issues or resize openings. Choose retrofit when your timber reveals are solid and square; choose full frame when the sub-frame shows rot, warping, or corrosion.
4. Do replacement aluminium windows need to meet building code requirements in Australia?
It depends on the scope of work. Like-for-like replacements in the same opening size may not trigger a full compliance assessment under the National Construction Code (NCC). However, enlarging openings, adding new windows, or replacing windows as part of a broader renovation requiring a development application will likely need to satisfy current NCC energy efficiency provisions. This typically means thermally broken frames and double glazing as a baseline in most Australian climate zones. Check with your local council before ordering, and look for windows rated under the Window Energy Rating Scheme (WERS) to verify performance.
5. How do I waterproof a window opening before installing a new aluminium frame?
Apply self-adhesive flashing tape in a specific sequence that creates a drainage path directing water outward. Start with the sill: lay 150 mm wide flashing tape across the full width, wrapping it up each jamb by at least 100 mm. Next, apply jamb flashing up both sides overlapping the sill tape by 50 mm. Finally, apply head flashing overlapping the jamb tape. The overlap sequence works like roof tiles, with each layer shedding water onto the one below. Ensure the sill slopes outward, clean the substrate before applying tape, use a roller to eliminate air pockets, and never seal both ends of the sill flashing without leaving a drainage path.
More Window & Door Guides