How to Tell Your Window Frames Need Replacing
You walk past the same window every morning and feel that familiar cold draft creeping in. You’ve re-caulked it, added weatherstripping, maybe even replaced the glass. And yet the problem keeps coming back. At some point, the issue isn’t the glass or the seal — it’s the frame itself.
Replacing window frames is a fundamentally different project from swapping out a sash or popping in a new pane. It means the structural skeleton holding everything together has failed. Here are the signs that tell you the frame, not just the window, is the real problem:
- Visible rot or decay in wood frames, especially along the sill and lower corners where moisture collects
- Persistent drafts that survive every round of weatherstripping and caulk
- Condensation trapped between panes, signaling seal failure tied to frame warping
- Windows that stick, jam, or refuse to stay open — often caused by a frame that’s shifted out of square
- Visible separation between the frame and the surrounding wall
If you’re only dealing with a cracked pane or worn hardware, a simple repair might still make sense. But when the frame itself is compromised, patching individual symptoms just delays the inevitable.
When Repair Won’t Cut It Anymore
There’s a threshold where repairs stop being cost-effective. A non-warranty seal repair alone can run $300 to $500 per window, and that doesn’t touch the underlying frame damage. Once rot starts spreading through wood, epoxy fills and paint are temporary fixes at best. You’re spending real money to keep an aging frame limping along without solving the structural or energy problems behind it. For homeowners researching diy replacement windows, recognizing this tipping point early saves both time and budget.
What Replacing the Frame Actually Involves
This isn’t a weekend caulk-and-swap job. When you learn how to install a new frame, you’re looking at removing interior and exterior trim, extracting the entire old frame from the rough opening, inspecting the structural framing for hidden rot or insect damage, and then installing a replacement window unit from scratch. Think of it as surgery rather than a bandage — you’re getting down to the bones of the wall.
Frame replacement addresses structural and energy problems that insert replacements simply cannot fix — it’s the only approach that lets you inspect, repair, and properly seal the rough opening.
Whether you’re planning a vinyl window installation on a main floor or looking to install new basement windows, understanding this scope is the first step. The real question that shapes your entire project comes next: do you need to go full-frame, or can a retrofit insert get the job done?
Full-Frame vs Insert Replacement and How to Choose
That question — full-frame or insert — shapes everything from your budget to your tools for window replacement to how many weekends the project will consume. Yet most guides gloss over the distinction or bury it in jargon. Here’s the plain version.
Full-Frame Replacement Explained
A full-frame window frame replacement strips the opening all the way back to the rough framing — head, jambs, sill, everything comes out. You’re left staring at bare studs and sheathing. From there, you inspect the structural framing, make any necessary repairs, and install a completely new window unit into the opening.
This approach is necessary when the existing frame is rotted, warped, or no longer square. Homes built before modern building codes often fall into this category because the original framing may have shifted over decades of settling. If you want to change the window’s size or style — say, replace double hung windows with wider casements — full-frame is the only path that gets you there. It’s also the right call when you need to address hidden water damage or poor insulation behind the old frame, issues that wouldn’t be visible with a less invasive method.
Retrofit and Insert Replacement Explained
Insert replacement, sometimes called pocket or retrofit replacement, takes a lighter approach. The existing frame stays in place. You remove the old sash and glass, then fit a new window unit inside the original frame. Think of it as installing replacement windows within a shell that’s already there.
When the frame is structurally sound, square, and free of rot, this method works well. It’s faster, less disruptive, and typically costs less — $100 to $400 per window compared to $180 to $1,500 for full-frame. The tradeoff? Insert replacements slightly reduce the glass area since the new unit nests inside the old frame. They also can’t fix what they can’t see. If there’s hidden damage behind that frame, an insert just covers it up.
Which Approach Fits Your Situation
Figuring out how to replace your windows the right way starts with an honest look at what you’re working with. Your wall construction type matters here too — solid masonry walls handle the process differently than timber-framed cavity walls, affecting both how to install window units and how much exterior disruption to expect.
Choose full-frame replacement if:
- The existing frame shows rot, decay, or insect damage
- The opening is visibly out of square or the frame has separated from the wall
- You want to change the window size, shape, or style
- The home was built before modern energy codes and you want a complete thermal upgrade
- You’re already planning exterior siding or trim work
Choose insert replacement if:
- The existing frame is structurally sound, square, and level
- You want a quicker project with minimal disruption to interior and exterior finishes
- Budget is a primary concern and the frame doesn’t need structural attention
- You’re upgrading vinyl replacement windows or similar units where the frame is still in good shape
- Preserving original exterior trim or historic details is a priority
The bottom line: if the frame can reliably support a new window for another 20-plus years, an insert saves time and money. If there’s any doubt about the frame’s integrity, going full-frame now prevents far more expensive problems later. Either way, knowing exactly which approach you’re committing to determines every material and tool you’ll need to gather before the first screw comes out.
Window Frame Materials Compared
Your replacement approach is locked in. The next decision — frame material — will define how the window performs for the next two to five decades. And yet, most homeowners pick a material based on price alone without weighing durability, energy performance, or how much weekend maintenance they’re signing up for.
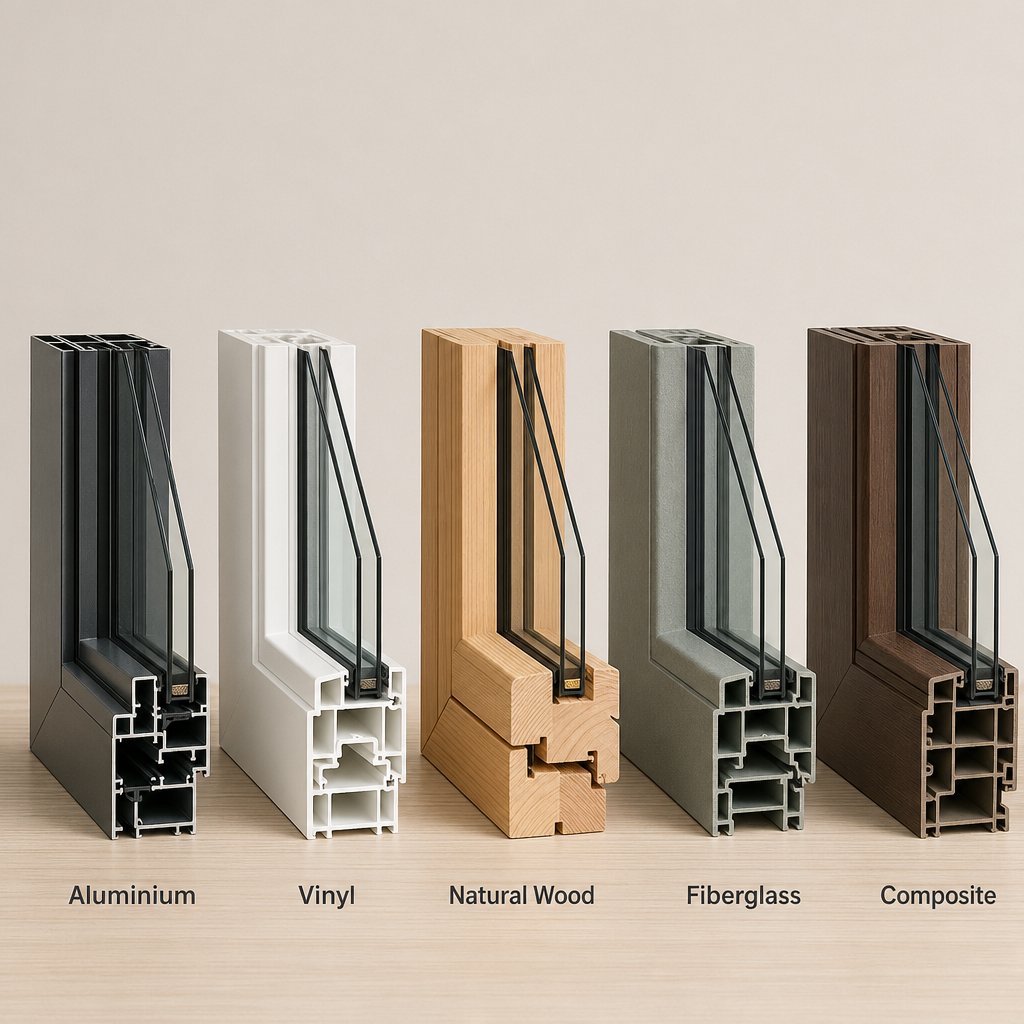
Five materials dominate the market for replacing windows: aluminium, vinyl (uPVC), wood, fiberglass, and composite. Each has genuine strengths and real limitations. Here’s how they stack up across the factors that actually matter when you’re figuring out how to replace a window that will hold up long-term.
Durability and Lifespan by Material
How long a frame lasts depends on what it’s made of and where you live. Aluminium frames form a natural oxide layer that protects against rust, giving them a typical lifespan of 20 to 25 years — and often longer with quality powder coating. Their slim profiles maximize glass area, which is a real advantage for fixed window designs and modern aesthetics. Aluminium is also nearly infinitely recyclable, with over 90% of aluminium in buildings getting recycled at end of life.
Vinyl sits in the 20-to-30-year range and resists rot and moisture well, though it can become brittle in extreme cold and may warp in sustained heat. Wood, when properly maintained, can last 30 to 60 years — hardwoods like oak push that even further. Fiberglass is the longevity champion, often exceeding 50 years thanks to minimal thermal expansion and resistance to rot, corrosion, and pests. Composite frames blend wood fibers with polymers for stability that resists warping and cracking, typically lasting 30-plus years.
Energy Efficiency and Climate Suitability
Two numbers matter here: U-factor (how well the frame resists heat transfer — lower is better) and SHGC, or Solar Heat Gain Coefficient (how much solar heat passes through — lower means less heat entering your home). You don’t need to memorize the specs, but understanding the concept helps you match the right material to your climate.
Wood and fiberglass are natural insulators. Wood’s cellular structure traps tiny air pockets that slow heat transfer, while fiberglass frames are often foam-filled for extra thermal resistance. Vinyl performs well in moderate climates thanks to multi-chamber frame designs that trap air. Composite materials offer minimal expansion and contraction, helping them maintain tight seals across temperature swings.
Aluminium was historically the weak link for thermal performance — the metal itself conducts heat readily. That’s changed. Modern aluminium frames use thermal break technology, an insulating barrier built into the frame that dramatically reduces heat transfer. Today’s thermally broken aluminium windows achieve energy ratings competitive with vinyl and approach fiberglass territory. For homeowners exploring this option, MEICHEN’s aluminium windows collection is a useful reference point — their Australian-standard-compliant systems demonstrate how current aluminium engineering delivers energy efficiency alongside the material’s inherent durability and slim sightlines.
Maintenance and Long-Term Cost
Imagine choosing a frame material and then barely thinking about it for 20 years. That’s the reality with aluminium, vinyl, and fiberglass — all three need little more than occasional cleaning. The catch with aluminium and vinyl? If a frame gets dented or cracked, spot repairs are rarely possible. You’re usually looking at how to replace a replacement window entirely rather than patching the damage.
Wood is the high-maintenance option. It demands regular sealing, staining, or painting to prevent moisture absorption and rot. Skip a cycle and you’ll be researching how to fix window frame damage far sooner than expected. Composite frames split the difference — low upkeep like vinyl, but with better structural resilience if something takes a hit.
The table below puts all five materials side by side so you can compare at a glance. Whether you’re planning a retrofit window swap or a full-frame overhaul, this should help narrow your shortlist before you start pricing units.
| Material | Durability | Energy Efficiency | Maintenance | Best Climate Fit | Relative Cost |
|---|---|---|---|---|---|
| Aluminium | 30-45 years; resists corrosion, won’t rot or warp; slim profiles maximize glass area | High with thermal breaks; competitive U-values with vinyl | Very low — occasional cleaning only | Hot, humid, and mixed climates; excellent for coastal areas with powder coating | $$ |
| Vinyl (uPVC) | 20-30 years; resists moisture and rot; can crack in extreme cold or warp in heat | Good; multi-chamber designs trap air effectively | Very low — no painting or staining needed | Moderate and cold climates; avoid extreme heat regions | $ |
| Wood | 30-60 years with maintenance; susceptible to rot, insects, and moisture without upkeep | Excellent natural insulator; best U-values among traditional materials | High — regular sealing, staining, or painting required | Cold and temperate climates; ideal for heritage and period homes | $$$ |
| Fiberglass | 50+ years; minimal thermal expansion; resists rot, corrosion, and pests | Excellent; often foam-filled for superior insulation | Very low — virtually maintenance-free | All climates, especially regions with extreme temperature swings | $$$ |
| Composite | 30+ years; resists warping, cracking, and fading in extreme conditions | Very good; minimal expansion maintains tight seals year-round | Low — occasional cleaning, no painting | All climates; strong performer in both heat and cold | $$ |
Knowing how to put in a window that performs well for decades starts with picking the right material for your climate, your maintenance tolerance, and your budget. With that decision made, the practical side of the project comes into focus — specifically, the tools and supplies you’ll need lined up before you pull the first piece of trim.
Tools and Materials You Need Before You Start
You’ve picked your frame material and your replacement approach. Before you touch a single piece of trim, though, there’s a less glamorous step that separates a smooth window install from a frustrating one: having everything you need within arm’s reach before the project begins.
Running to the hardware store mid-project with an exposed rough opening and weather rolling in? That’s a scenario you want to avoid. Here’s a complete shopping checklist so you can gather everything in one trip — whether you’re browsing at a local supplier or comparing Lowes windows replacement options online.
Essential Hand and Power Tools
Each tool on this list serves a specific purpose in the process of how to install replacement windows. Knowing why it’s there helps you avoid skipping something that seems optional but isn’t.
- Flat pry bar and cat’s paw — for removing interior and exterior trim without destroying surrounding finishes
- Reciprocating saw — for cutting through nails, old caulk, and stubborn frame sections during extraction
- Drill/driver with bit set — for driving fasteners when securing the new frame to the rough opening
- 4-foot level — for checking plumb and level during installation; a shorter torpedo level helps in tight spots
- Tape measure — for verifying rough opening dimensions at multiple points before ordering your new unit
- Utility knife — for scoring caulk lines, trimming shims, and cutting flashing tape
- Caulk gun — for applying exterior-grade sealant around the frame perimeter
- Hammer — for setting shims and tapping trim into place
- Putty knife — for scraping old caulk and sealant from the rough opening
A shop vacuum is also worth having nearby. Keeping the rough opening clean as you work makes it easier to spot damage and ensures flashing tape adheres properly — something installation professionals emphasize as a critical detail.
Materials and Supplies Checklist
Tools get the old frame out. These materials are what make the new one perform. If you’re tackling a do it yourself window replacement, missing even one of these items can compromise the seal, the weatherproofing, or the finished look.
- Flashing tape (self-adhesive, flexible) — applied to the sill, jambs, and head of the rough opening to direct water out, not in
- House wrap or building paper — for integrating the window into the wall’s weather-resistant barrier
- Low-expansion spray foam — for air sealing the gap between the frame and rough opening without bowing the jambs
- Exterior-grade caulk (silicone or polyurethane) — for sealing the frame perimeter against wind and rain
- Composite or wood shims — for leveling and plumbing the new frame within the opening
- Interior and exterior trim pieces — to finish the installation and cover the transition between frame and wall
- Exterior-grade fasteners (screws preferred over nails) — for securing the frame; screws allow easier adjustment if something shifts during installation
- Backer rod — for filling larger gaps before caulking and preventing thermal bridging at shim locations
One detail worth noting: when learning how to install a window properly, you’ll find that most manufacturer instructions specify low-expansion foam, not the standard gap-filling variety. Grabbing the wrong can is one of the most common purchasing mistakes, and it can cause real problems during installation.
Safety Gear You Shouldn’t Skip
This part of the checklist tends to get overlooked, especially by experienced DIYers who figure they’ll be fine. Don’t shortcut it. How to replace windows safely matters just as much as doing it correctly.
- Safety glasses — flying debris from prying and cutting is a given
- Heavy-duty work gloves — old frames often have exposed nails, splintered wood, and sharp metal flashing
- Dust mask or N95 respirator — essential when cutting, sanding, or disturbing old materials, especially in homes with unknown paint history
- Hearing protection — a reciprocating saw in an enclosed space gets loud fast
Here’s the item most checklists leave off: if your home was built before 1978, add a lead paint test kit to your list. About 75% of homes from that era contain some lead-based paint, and disturbing old window frames is one of the most common ways to release lead dust into your living space. A simple swab test before you start tells you whether standard precautions are enough or whether you need specialized containment and cleanup procedures.
With your tools staged, materials stacked, and safety gear ready, the actual work can begin. The sequence you follow from here — and the order in which each step happens — is where most DIY projects either come together cleanly or start going sideways.
How to Install Replacement Window Frames
Sequence matters more than speed here. Every step builds on the one before it, and skipping ahead — even by one stage — can compromise the entire installation. Whether you’re looking to replace windows in house projects room by room or tackling a single problem window, the process follows the same logic.
Removing the Old Window and Frame
Start from the inside. Use your pry bar to carefully remove interior trim and casing, working from the edges inward to minimize wall damage. Once the trim is off, score the exterior caulk line with a utility knife and remove any fasteners holding the frame to the rough opening. A reciprocating saw makes quick work of stubborn nails or screws buried under layers of paint.
With the fasteners out, the old sash and frame should come free. For large windows, have a second person help support the unit as you extract it — these are heavier than they look, and dropping one can damage the rough opening you’re about to rely on.
Here’s the step most people rush past: once the frame is out, stop and inspect. You’re looking at the rough opening for the first time, possibly in decades. Check for soft or spongy wood that signals rot. Look for insect damage, especially along the sill plate. Use your level to confirm the opening is still square and plumb. This inspection determines whether you can proceed directly to prep or need to make structural repairs first.
Preparing the Rough Opening
A clean, sound rough opening is the foundation of everything that follows. Scrape away old caulk, foam, and debris. If you find minor rot, cut back to solid wood and sister in new framing material. Anything more extensive — a compromised header, widespread decay — warrants pausing the project and consulting a professional.
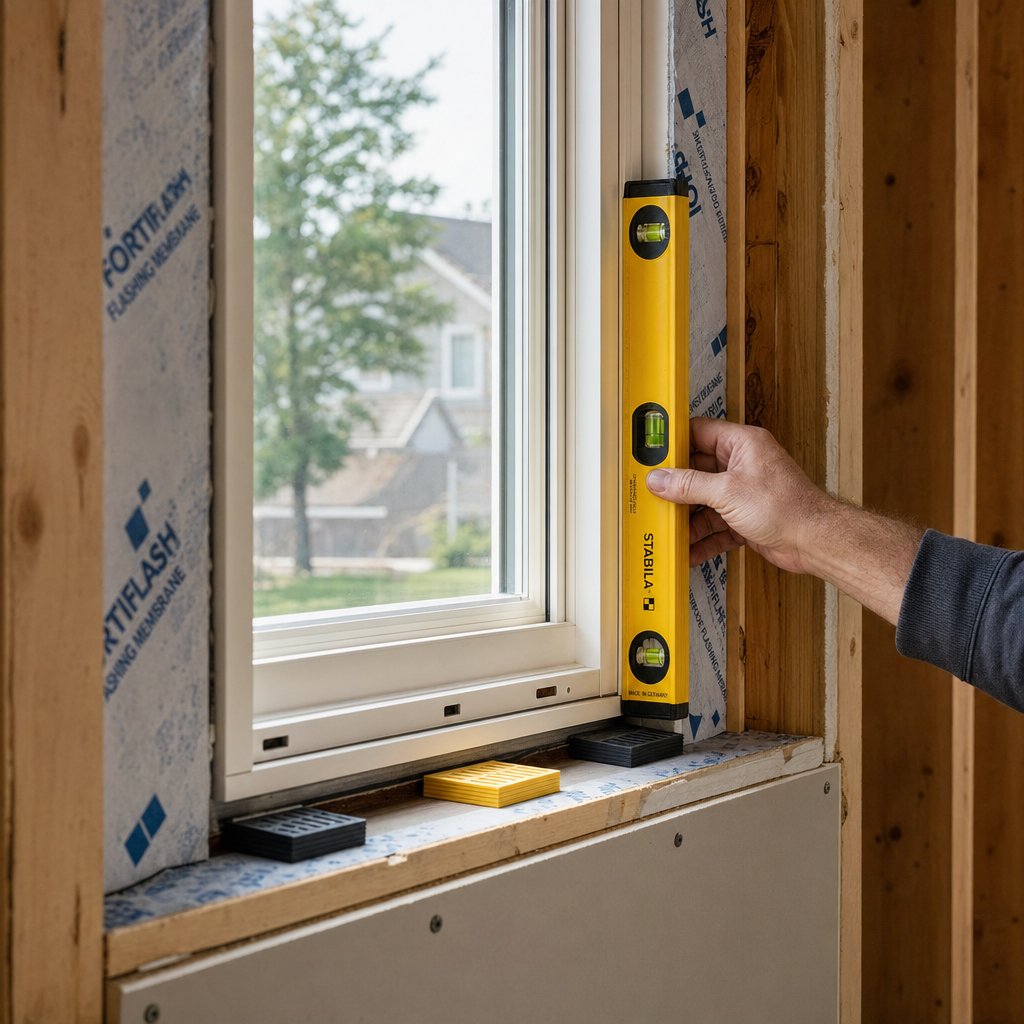
Flashing comes next, and the order you apply it is critical. Proper flashing sequence starts at the sill, then moves up the jambs, and finishes at the head. This layering ensures water always sheds downward and outward, never behind the barrier. Apply flexible flashing tape into the sill and up the jambs a minimum of six inches, pressing firmly into the corners where leaks are most likely to develop.
Before committing to fasteners, dry-fit the new window into the opening. You want roughly a quarter-inch gap on each side for shimming. If the fit is too tight or too loose, address it now — not after you’ve started sealing.
Installing and Sealing the New Frame
This is where understanding replacement windows how to install them correctly really pays off. Follow this sequence:
- Set the window into the opening from the exterior, resting it on the sill. Center it so the gaps are even on both sides.
- Check for level across the sill and plumb on both jambs. Insert composite shims at the sill and jamb locations to achieve true alignment.
- Fasten the window through the frame or nail fin into the rough opening per the manufacturer’s specifications — typically every six to eight inches. Avoid overtightening, which can distort the frame.
- Test the window’s operation before going further. Open, close, lock, and unlock it. If anything binds or sticks, adjust your shims and re-check.
- Apply low-expansion spray foam in thin passes to fill the gap between the frame and rough opening. Let each pass cure before adding more — overfilling bows the jambs and causes operational problems.
- Install exterior flashing tape over the nail fin or frame perimeter, following the same bottom-up sequence: sill first, then jambs, then head. Each layer should overlap the one below by at least two inches.
- Seal the exterior perimeter with a continuous bead of exterior-grade caulk, and install interior and exterior trim to finish the assembly.
If you’re installing windows and doors as part of a broader renovation, this same flashing and sealing logic applies to door openings — the water management principles are identical.
Final Checks and Verification
Most guides end at trim installation. That’s a mistake. Post-installation verification catches problems while they’re still easy to fix — before drywall patches and paint cover everything up.
Run through these checks:
- Operate every moving sash and lock mechanism. Movement should be smooth with no binding or excessive force.
- Hold a lit incense stick or thin piece of tissue along the frame perimeter on a windy day. Any flutter or smoke deflection reveals an air leak that needs additional sealing.
- Inspect the sill from the exterior. Water should have a clear drainage path away from the frame — not pooling against it.
- Verify that the interior foam has cured fully and hasn’t expanded enough to distort the frame. If a sash that worked fine during step four now sticks, over-expanded foam is the likely culprit.
Taking fifteen minutes for these checks can save you from discovering a leak or draft months later, when the cost to install replacement windows a second time — or hire someone to fix the first attempt — is far higher than getting it right now. The difference between a professional-quality result and a frustrating redo often comes down to the mistakes you didn’t know to watch for.
Mistakes That Ruin Window Frame Replacements
Every step in the previous section assumed things go according to plan. Reality is messier. Even homeowners who follow the process carefully can make errors that don’t reveal themselves for weeks or months — and by then, the damage is already underway. Knowing where things typically go wrong is just as valuable as knowing the correct sequence.
Measurement and Fit Errors
Here’s a mistake that derails projects before they even start: measuring the old frame instead of the rough opening. The frame you’re removing may have shifted, swelled, or compressed over the years, so its dimensions no longer reflect the actual space your new window installation needs to fit into. Measure the rough opening itself — width, height, and depth — at three points each (top, middle, bottom for width; left, center, right for height). Even a quarter-inch discrepancy can mean a unit that’s too tight to shim properly or too loose to seal.
This matters whether you’re fitting a large picture window or a small window in a bathroom. Order based on the smallest measurement in each dimension, and confirm the diagonals are equal to verify square. If they’re off by more than a quarter inch, you’ll need to address the framing before the new unit goes in.
Flashing and Waterproofing Failures
Flashing errors are the silent killers of new window installations. The damage from incorrect flashing often doesn’t show up for months — sometimes years — because water travels behind wall surfaces before it becomes visible inside the home.
The correct sequence is non-negotiable: sill first, then jambs, then head. Each layer overlaps the one below it so water always sheds downward and outward. Reverse the order or skip a layer, and you’ve created a funnel that directs water straight into the wall cavity. Jamb flashing must overlap sill flashing, and head flashing must overlap the jambs. Getting this wrong during a retrofit window replacement is especially common because homeowners assume the existing weather barrier will compensate — it won’t.
Pay attention to corners and transitions too. These are the spots where flashing tape lifts or fails to adhere, particularly if the surface wasn’t cleaned before application. A roller pressed firmly along every edge makes a real difference in long-term adhesion.
Air Sealing Mistakes
You’ll find two types of spray foam at the hardware store: standard expanding foam and low-expansion foam labeled specifically for windows and doors. Grabbing the wrong can is one of the most frequent errors, and the consequences are immediate. Standard expanding foam generates enough force to bow window jambs inward, making sashes bind or refuse to latch. The Building America Solution Center is clear on this point: only use non-expanding or low-expansion foam formulated for window and door openings.
The opposite mistake — skipping foam entirely and stuffing fiberglass insulation into the gap — is equally problematic. Fiberglass is not an air barrier. Air moves freely through the fibers, which means you’ve insulated the gap thermally but left a wide-open path for drafts and moisture. Whether you’re working on retro fit windows in an older home or a brand-new opening, the gap between frame and rough opening needs a true air seal, not just thermal fill.
Ignoring Hidden Damage
Sometimes the real problem only becomes visible after the old frame comes out. Rot in the rough opening framing, insect-damaged studs, or a header that’s sagging — these aren’t issues you can work around. Proceeding with a new window installation over compromised framing is like hanging a new door on a broken hinge. It might look fine for a while, but it won’t perform or last.
If you’re researching how to replace the glass on a window and discover the frame is damaged, the scope of your project just changed. The same applies in reverse: what starts as a frame replacement can uncover structural issues that go deeper than expected. Here are the red flags that should pause the project immediately:
- Soft, spongy, or discolored wood in the jack studs, header, or sill plate
- Visible insect tunnels or frass (sawdust-like debris) around the rough opening
- Diagonal measurements that differ by more than half an inch, indicating the opening is significantly out of square
- Staining or mold on the sheathing behind where the old frame sat
- A header that visibly sags or feels springy under pressure
- Crumbling or deteriorated sheathing that won’t hold fasteners or flashing tape
Any of these conditions means the rough opening needs structural repair before a new window goes in. Trying to shim and seal your way past compromised framing doesn’t work — the problems will resurface, often worse than before.
The rough opening is the foundation of the entire installation. If it’s compromised, nothing else matters — not the window quality, not the foam, not the flashing.
Recognizing these pitfalls is half the battle. The other half is knowing when the project has crossed the line from a confident DIY job into territory where professional help makes more financial sense — a calculation that depends on more than just the cost of labor.
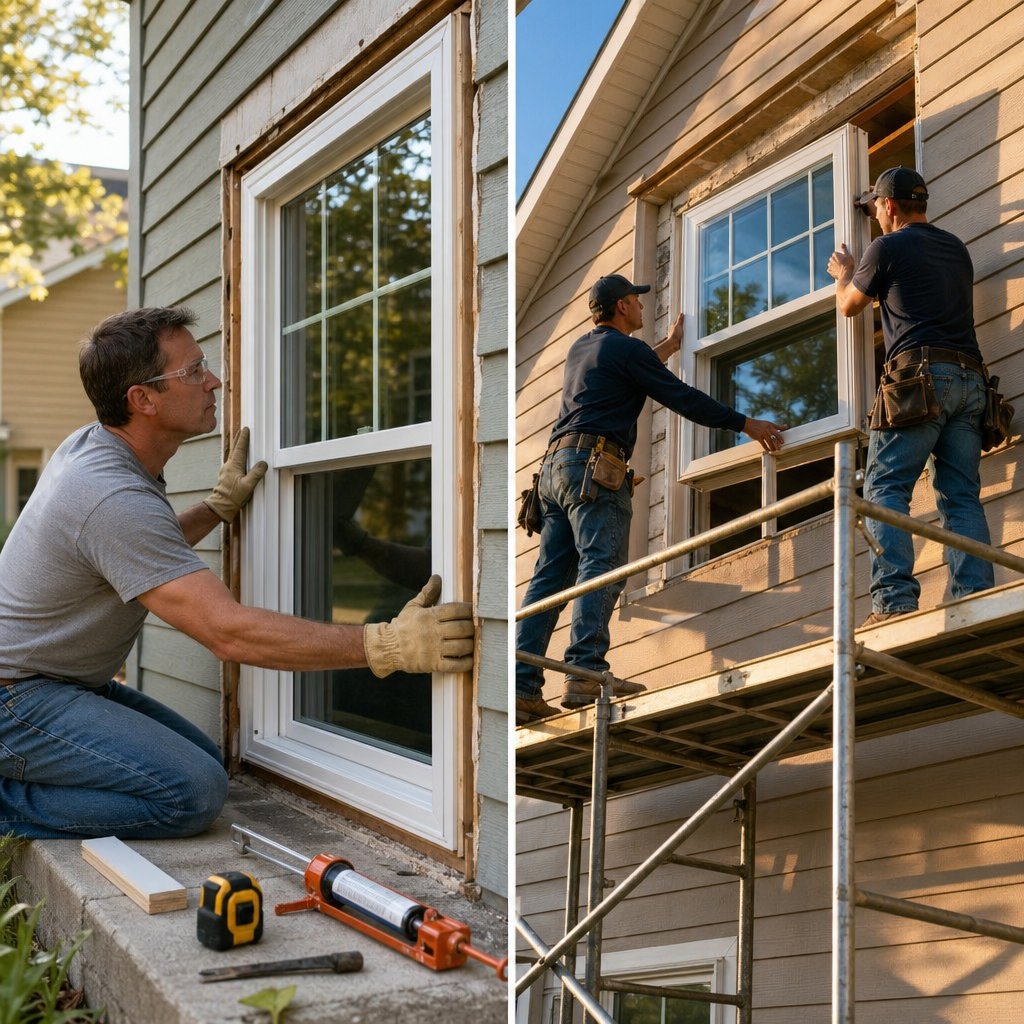
What Replacement Window Installation Really Costs
That line between “I can handle this” and “I should call someone” isn’t always obvious. The previous section showed how quickly a straightforward frame replacement can escalate when hidden damage or flashing errors enter the picture. So how do you weigh the savings of doing it yourself against the risk of a costly mistake?
What DIY Saves You and What It Costs You
Labor is the biggest single expense in any replacement window installation. Professional labor typically runs $150 to $300 per window, which means a 10-window project could add $1,500 to $3,000 to your total bill just for installation. Eliminate that line item and the math looks appealing fast.
But the savings aren’t as clean as they appear on paper. Installing a window yourself means purchasing or renting tools you may not own — reciprocating saws, levels, caulk guns, pry bars — which can add $25 to $195 depending on what’s already in your garage. Factor in your time, too. A professional crew can handle 10 to 12 windows in a single day. A homeowner juggling weekends and a full-time job? That same project could stretch across weeks or even months, leaving openings exposed to weather and your household disrupted.
Then there’s the cost of getting it wrong. A flashing mistake that sends water into your wall cavity, an over-foamed jamb that bows the frame, a measurement error that means reordering a custom unit — these aren’t hypothetical scenarios. They’re the most common reasons DIY projects end up costing more than hiring a pro would have. Whether you’re installing replacement window units in vinyl or wood, the margin for error stays the same.
When Professional Installation Is Worth It
Some situations make the DIY question easy to answer. If your project involves any of the following, professional help isn’t a luxury — it’s the practical choice:
- Multi-story windows that require ladders, scaffolding, or working at height
- Structural damage discovered in the rough opening during removal
- Pre-1978 homes where lead paint or asbestos in glazing compounds may be present
- Projects that require building permits or must meet updated energy codes
- Large-scale windows and doors installation across multiple openings simultaneously
Hiring well matters just as much as hiring at all. Not every contractor delivers the same quality, and the cheapest bid often signals corners that will be cut. When vetting professionals, focus on verifiable credentials: confirm they’re licensed, bonded, and insured. Ask for their installation warranty in writing — a product warranty from the manufacturer means nothing if the labor isn’t guaranteed separately. Request references from projects completed in the last six months, not just a portfolio of older work.
Watch for red flags, too. A contractor who won’t provide a written estimate, pressures you to sign immediately, or asks for a large deposit before any work begins is telling you something. The best professionals are transparent about pricing, timeline, and how they handle unexpected issues like hidden rot — because they’ve dealt with those surprises before.
One detail that catches many homeowners off guard: most window manufacturers include warranty clauses that void coverage if the product is incorrectly installed. A DIY installation that seems fine today could leave you fully exposed financially if a seal fails or a frame defect appears three years down the road. Whether you’re working with vinyl windows replacement or premium fiberglass, that warranty protection is only as strong as the installation behind it.
A Realistic Self-Assessment
Enthusiasm isn’t a skill. Before committing to installing a window yourself, honestly evaluate whether you have the following:
- Comfort operating power tools — reciprocating saws, drills, and caulk guns — in awkward positions and tight spaces
- Ability to work precisely with levels and shims, achieving plumb and square within tight tolerances
- Basic understanding of water management in wall assemblies — how flashing, house wrap, and drainage planes work together
- Patience to follow manufacturer installation specs exactly, even when shortcuts seem obvious
- Willingness to stop the project and call a professional if you uncover damage beyond your skill level
If you checked every box with genuine confidence, a single ground-floor window in good framing conditions is a reasonable starting point. Tackle one, verify your work, and build from there. If you hesitated on two or more, the math shifts decisively toward hiring someone who does this daily.
A poorly installed window costs more in the long run than paying a professional to do it right — in energy loss, in water damage, and in the warranty coverage you silently voided.
Whichever path you choose, one category of risk doesn’t care about your skill level: the safety hazards, permit requirements, and building code obligations that apply to every window frame replacement project regardless of who holds the drill.
Safety Hazards, Permits, and Building Code Compliance When Replacing a Window
Skill and good intentions don’t exempt you from regulations — or from the health risks hiding inside older walls. Whether you’re replacing windows in house projects yourself or overseeing a contractor, the legal and safety obligations are the same. Ignoring them doesn’t just put your health at risk; it can tank a future home sale or void your insurance coverage entirely.
Lead Paint and Asbestos in Older Homes
If your home was built before 1978, there’s roughly a 75% chance it contains lead-based paint — and the older the home, the higher the likelihood. Replacing window frames in these homes is one of the most common ways to release lead dust, because prying, cutting, and scraping old trim disturbs decades of painted surfaces.
Before you touch anything, test. Inexpensive swab kits from any hardware store give you a result in minutes. If the test comes back positive, the project changes significantly. You’ll need to mist painted surfaces with water before cutting to suppress dust, seal the work area with polyethylene sheeting, cover HVAC registers to prevent contaminated dust from circulating, and follow proper lead waste cleanup and disposal procedures. For extensive lead presence — or if children or pregnant women live in the home — hire a certified lead abatement professional. This isn’t overcaution; lead poisoning causes permanent neurological damage in children and kidney and fertility problems in adults.
Asbestos is the other hidden hazard. Older window glazing compounds and some caulking materials can contain asbestos fibers. Disturbing these materials without proper containment creates an inhalation risk that’s serious enough to warrant professional testing and, if confirmed, licensed removal.
Building Permits and Local Codes
Not every window project requires a permit, but more do than most homeowners realize. The general rule: a like-for-like swap — same size, same location, same type — often qualifies for an exemption. The moment you change the scope, permits typically kick in. Situations that commonly trigger permit requirements include:
- Changing the size or shape of the window opening
- Modifying structural elements like headers or jack studs
- Converting a window to a door or vice versa
- Installing a different window type (e.g., switching from double-hung to casement)
- Working on a property in a designated historic district
- Adding or relocating egress windows in bedrooms or basements
How do you check? Contact your local building department — most municipalities list requirements online, and a quick phone call can confirm whether your specific project needs a permit. The consequences of skipping this step are real: fines, stop-work orders, mandatory removal and reinstallation, and failed inspections that surface when you try to sell the home. Non-compliant work can also give your home insurer grounds to deny a claim if water damage or structural failure traces back to an unpermitted modification.
Energy codes matter here too. Many jurisdictions now require replacement windows to meet minimum U-factor and SHGC ratings. Even if you’re browsing Lowe’s home improvement windows or shopping through specialty suppliers, confirm that the units you’re considering meet your local energy code before ordering. A retro fit window that doesn’t comply can fail inspection just as easily as one that’s improperly installed.
Personal Protective Equipment and Worksite Safety
PPE isn’t optional — it’s the baseline. When you’re learning how to install a window unit, the safety gear list should be finalized before the tools come out:
- Safety glasses or goggles — debris from prying, cutting, and demolition is constant
- N95 respirator — critical when cutting old materials, and mandatory if lead paint or asbestos is suspected
- Heavy-duty work gloves — old frames hide exposed nails, splintered wood, and sharp metal
- Hearing protection — reciprocating saws in enclosed spaces exceed safe decibel levels quickly
- Hard-soled, closed-toe footwear — dropped frames and stray fasteners are real hazards
- Lead paint test kit — for any pre-1978 home, as discussed above
Working at height adds another layer of risk. OSHA requires fall protection for any work performed at six feet or above in construction settings, and while that standard technically applies to job sites rather than homeowner projects, the physics of falling don’t care about regulatory categories. If replacing a window means climbing a ladder or working from scaffolding on a second story, use proper fall arrest equipment or hire a professional for those specific openings.
One last practical detail: if your project spans more than a single day, secure the open rough opening against weather overnight. A sheet of plywood fastened over the exterior and sealed with tape keeps rain, wind, and pests out of your wall cavity. Leaving an opening exposed — even for one night — can introduce moisture that undermines the flashing and framing work you’ve already completed.
With the safety, legal, and compliance picture clear, the remaining decision is the one that ties everything together: choosing the right replacement window for your home’s style, climate, and long-term performance goals.
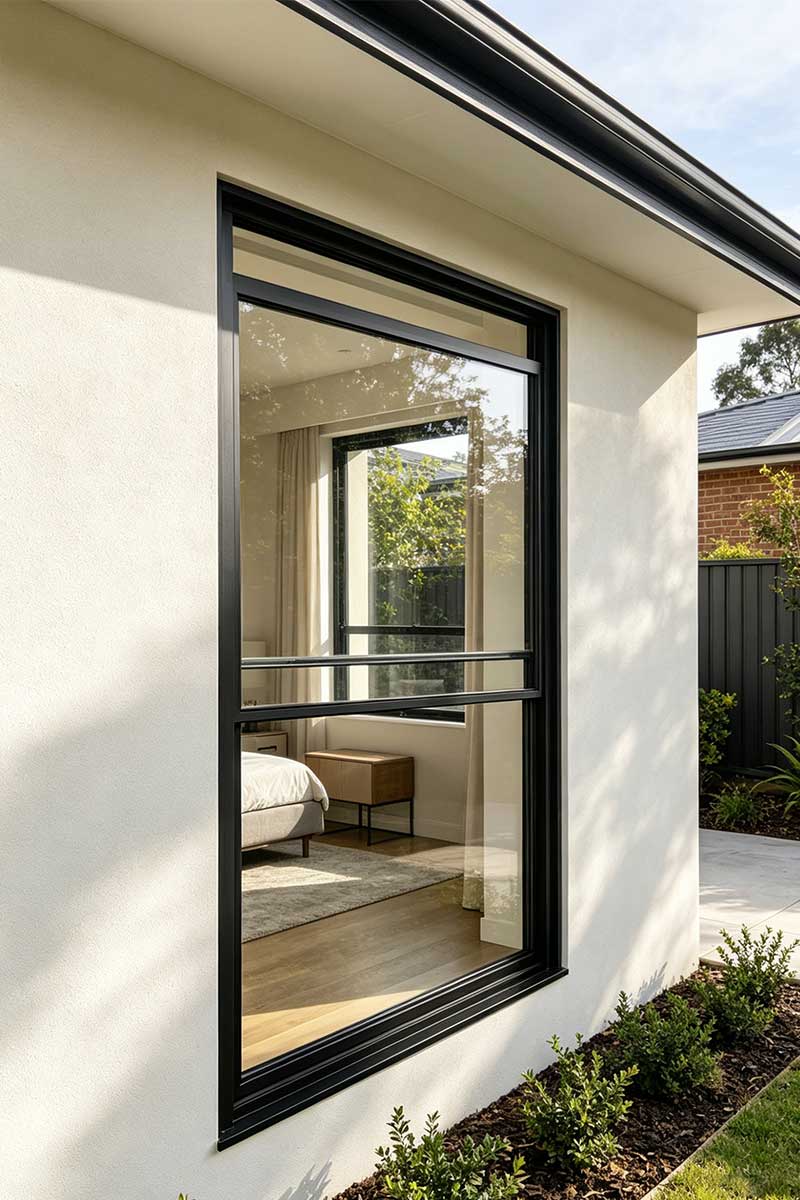
Choosing the Right Replacement Windows for Your Home
You know how to take out a window, prep the opening, flash it properly, and seal the new unit. You understand the safety risks and the permit landscape. The only piece left? Picking the actual window that goes back in — and making sure it’s the right fit for your home’s architecture, your climate, and your wallet over the next 20-plus years.
Matching Window Style to Your Home
Architectural style narrows your options faster than you’d think. If you’re replacing double hung windows in a Colonial or Craftsman home, double-hung units preserve the symmetry and period character those designs depend on — they pair naturally with decorative grilles, shutters, and traditional trim detailing. Modern and mid-century homes lean toward casement or fixed windows with minimal framing and maximum glass area. Planning to how to replace basement windows for egress compliance? Casement or sliding styles typically meet code requirements while maximizing the limited opening size. Awning windows work well in wet climates where you want ventilation even during rain — a practical choice for kitchens, bathrooms, and covered porches.
The key is proportion. Taller windows suit vertical facades; wider units complement horizontal ranch-style homes. When you install replacement windows, matching the new units to your home’s existing lines keeps the result looking intentional rather than patched together.
Energy Performance That Actually Matters
Two ratings drive real-world energy savings: U-factor and SHGC. U-factor measures how well the window resists heat loss — lower is better. SHGC measures how much solar heat passes through — lower keeps cooling costs down in warm climates, while higher values help with passive heating in cold regions.
What should you target? ENERGY STAR guidelines recommend U-factor at or below 0.27 with SHGC around 0.40 for northern cold climates, and U-factor at or below 0.40 with SHGC under 0.25 for hot southern zones. Mixed climates fall somewhere in between — U-factor around 0.30 and SHGC near 0.30 balances both heating and cooling demands. The right frame-and-glass combination tuned to your climate zone compounds savings year after year over the window’s full lifespan.
Don’t overlook visible transmittance (VT) either. A VT of 0.40 to 0.60 lets in enough natural light to reduce daytime electricity use without introducing excessive heat gain.
Where to Start Your Search
Whether you’re exploring Lowes window replacement installation options, specialty suppliers, or manufacturer-direct collections, evaluate every potential source against the same criteria. Not all products — or suppliers — are equal, and the cheapest unit rarely delivers the best long-term value.
When comparing suppliers and product lines, look for:
- Compliance with national or regional performance standards (ENERGY STAR, NFRC, or equivalent local certifications)
- Warranty coverage that includes both the product and the installation — and clearly states what voids it
- A range of configurations for different project types: full-frame, insert, and various operating styles
- Transparent energy ratings published for each product, not just marketing claims
- Availability of technical support or installation guidance for DIY buyers
For homeowners considering aluminium frames — especially in hot, humid, or coastal climates — MEICHEN’s aluminium windows collection is a practical starting point. Their product hub features multiple Australian-standard-compliant aluminium window configurations suited to different project scales, from single-room renovations to full builds. It’s a useful resource for comparing thermally broken aluminium options side by side and understanding how to install a replacement window system that balances durability with energy performance.
If you’re still weighing how to replace old windows across your entire home, start with one or two priority openings — the draftiest room, the most visible facade — and build confidence from there. Every window you’ve read about in this guide follows the same principles: sound framing, proper flashing, correct material for your climate, and an honest assessment of whether the work fits your skill level. Get those right, and the rest is just repetition.
Frequently Asked Questions About Replacing Window Frames
1. How do I know if my window frames need replacing or just repairing?
Look for these key indicators: visible rot or decay along the sill and lower corners, persistent drafts that survive repeated caulking and weatherstripping, condensation trapped between panes, windows that stick or refuse to stay open, and visible separation between the frame and the wall. If you’re spending $300 to $500 per window on non-warranty seal repairs without resolving the underlying issue, the frame itself is likely the problem. Minor cosmetic damage or worn hardware can usually be repaired, but structural compromise in the frame means replacement is the more cost-effective long-term solution.
2. What is the difference between full-frame and insert window replacement?
Full-frame replacement removes everything down to the rough opening, including the entire old frame, trim, and sill. It’s necessary when the existing frame is rotted, out of square, or structurally damaged. Insert (retrofit) replacement fits a new window unit inside the existing frame, which stays in place. Inserts work when the frame is structurally sound and square, cost less ($100 to $400 per window vs $180 to $1,500 for full-frame), and cause less disruption. However, inserts slightly reduce glass area and cannot address hidden damage behind the frame. Your wall construction type also affects which approach is practical.
3. Which window frame material is best for energy efficiency and durability?
It depends on your climate and maintenance tolerance. Fiberglass leads in longevity (50+ years) and offers excellent insulation when foam-filled. Wood is a top natural insulator but demands regular sealing and painting. Vinyl performs well in moderate climates with minimal upkeep, though it can warp in extreme heat. Modern aluminium frames with thermal break technology have closed the energy-efficiency gap significantly, achieving U-values competitive with vinyl while offering superior durability in hot, humid, and coastal environments. Collections like MEICHEN’s aluminium windows (meichenwindows.com.au/aluminium-windows/) showcase how thermally broken aluminium systems meet Australian energy standards alongside long-term corrosion resistance.
4. Can I replace window frames myself, or should I hire a professional?
A confident DIYer comfortable with power tools, levels, shims, and basic water management principles can handle a single ground-floor window in good framing conditions. However, professional installation is strongly recommended for multi-story windows, homes built before 1978 (lead paint risk), projects requiring permits or structural repairs, and situations involving multiple openings. Keep in mind that labor typically runs $150 to $300 per window, but a poorly installed window costs more long-term through energy loss, water damage, and potentially voided manufacturer warranties. Start with one window, verify your work, and scale from there.
5. Do I need a building permit to replace window frames?
A like-for-like replacement (same size, location, and type) often doesn’t require a permit. However, permits are typically triggered when you change the window size or shape, modify structural elements like headers, convert a window to a door, switch window types, work in a historic district, or add egress windows. Contact your local building department to confirm requirements for your specific project. Skipping permits can result in fines, stop-work orders, mandatory reinstallation, and complications during home resale or insurance claims. Many jurisdictions also enforce minimum U-factor and SHGC energy ratings for replacement windows.
More Window & Door Guides