What Goes Wrong With Anodised Aluminium Window Frames
Run your finger along an older aluminium window frame and it comes back chalky white. Or maybe the once-uniform bronze finish now looks blotchy and streaked after rain. These are not cosmetic quirks you can ignore. They signal that the anodised layer protecting your frames is under stress, and the wrong cleaning response will accelerate the damage rather than fix it.
Cleaning anodised aluminium window frames differs fundamentally from caring for painted, powder-coated, or raw aluminium surfaces. The products and techniques that work on one can wreck another. This guide walks you through proper assessment, safe cleaning methods, deep restoration, and the point at which professional help or replacement makes more sense than another weekend scrubbing.
Common Signs Your Anodised Frames Need Attention
Aluminium discoloration rarely appears overnight. It builds gradually, which is why many homeowners miss the early stages. Look for these visual indicators:
A powdery white residue that transfers to your fingertip when you touch the frame surface. This chalking means the outer layer of the anodised finish is breaking down. Streaky water marks that follow the path of runoff, often most visible on horizontal frame surfaces after rain dries. Small pits or rough patches, particularly near corners and joints where moisture lingers. Greenish-black mould growth in gasket channels and internal frame corners where airflow is limited.
If you have ever searched “does aluminium tarnish,” the short answer is that aluminium does not tarnish in the way silver or copper does. Instead, it forms oxide compounds that present as white powdery buildup or surface dulling — what most people describe as tarnished aluminium when they see it on their window frames.
Why Anodised Aluminium Demands a Different Cleaning Approach
Anodised aluminium is not painted aluminium. The protective layer is grown electrochemically from the metal itself rather than applied over the top. Powder-coated frames have a thick polymer skin you can scrub more aggressively. Raw aluminium can be polished back to bare metal. But anodised surfaces sit in between — hard and durable, yet chemically vulnerable in ways that catch people off guard.
Generic cleaning advice found online often recommends products that dissolve this oxide layer outright. Once damaged, corroded aluminium frames cannot self-repair. The five most common problems homeowners face with anodised frames are:
- White powdery corrosion (oxidation breakdown of the anodised layer)
- Pitting from salt, chemical exposure, or galvanic reaction
- Chalking caused by UV degradation of the finish surface
- Water staining from mineral-laden runoff drying on frame surfaces
- Mould and mildew growth in sheltered, damp areas of the frame
Each of these requires a different treatment intensity — and more importantly, certain common household cleaners will make every single one worse. The chemistry behind that vulnerability starts with understanding what the anodised layer actually is and how thin the margin for error really becomes.
Understanding the Anodised Layer on Your Window Frames
Paint sits on top of a surface. The anodised layer on your window frames is the surface — or more precisely, it is grown from the aluminium itself through a controlled electrochemical process. During anodising, the aluminium part is submerged in a sulphuric acid electrolyte bath and an electrical current is applied. Oxygen atoms bond with the aluminium at the surface, building up a dense aluminium oxide coating that is physically part of the metal rather than a separate film laid over it.
This distinction matters enormously for maintenance. Powder coating can chip and peel away from the substrate. An anodized aluminum finish cannot delaminate because there is no boundary between coating and base metal — the oxide transitions directly into the aluminium beneath. The result is a surface rated around 9 on the Mohs hardness scale (just below diamond), offering serious resistance to scratching, UV degradation, and everyday wear.
Window frames in Australia typically use one of three anodised finish types. Clear anodized aluminum retains the natural silver-grey metallic appearance and is common on modern architectural frames. Bronze anodising uses electrolytic colouring with inorganic metal salts deposited into the oxide layer’s pores, producing warm earth tones. Other coloured finishes — blacks, charcoals, and golds — rely on dyes absorbed into the porous oxide structure before the surface is sealed.
Here is the critical detail: the depth of colour is directly related to the oxide layer’s thickness. A clear anodized aluminum finish for decorative architectural use typically sits between 15 and 25 microns thick. Bronze and darker colours need the upper end of that range because the pigment must penetrate deeply enough to appear uniform. Thinner layers produce lighter, less durable colour.
How the Anodised Layer Protects Your Window Frames
Because the oxide layer is integral to the metal, it behaves differently from any applied coating. If you scratch a painted frame, the paint peels and flakes, exposing bare metal in a widening area. Scratch an anodised frame and you simply reveal the raw aluminium directly beneath that point — no flaking, no spreading, just a localised mark.
This integrated structure gives anodised aluminium three key protective properties. First, the dense oxide acts as a barrier against atmospheric corrosion, blocking moisture and pollutants from reaching the reactive aluminium beneath. Second, the hardness of aluminium oxide resists abrasion from wind-borne grit, cleaning cloths, and incidental contact. Third, the sealed pore structure provides UV stability — the finish does not yellow, chalk, or fade at the same rate as organic polymer coatings.
That said, protection only holds while the oxide layer remains chemically intact. Expose it to strong acids or alkalis — anything outside the safe pH range of roughly 4 to 9 — and the oxide dissolves. The aluminium underneath starts corroding rapidly because it has lost its shield.
Does Anodised Aluminium Rust or Corrode
People often ask “does anodised aluminium rust” because they see white powdery deposits or pitting and assume it is the same process that attacks steel. It is not. Rust is iron oxide, and aluminium contains no iron. Aluminium physically cannot rust.
What it can do is corrode — and the mechanisms look quite different from rust. Pitting corrosion occurs when chlorides (from coastal salt spray or pool chemicals) penetrate weak points in the oxide layer and attack the aluminium below, creating tiny craters. Filiform corrosion appears as thread-like tracks under the surface, often triggered where the sealed layer has been compromised. Chemical attack happens when cleaning products outside the safe pH range dissolve the oxide layer entirely. So does anodized aluminum rust? No. But it absolutely degrades when its protective barrier is breached.
The protective layer that makes anodised frames so durable is only 5 to 25 microns thick — roughly a quarter the width of a human hair at its thickest. Chemical damage to this layer is irreversible without professional re-anodising, which requires complete frame removal and factory processing.
This thinness is precisely why choosing the right cleaning products and methods matters so much. A single application of the wrong chemical can strip microns of protection that took an industrial electrochemical process to build — and no amount of polishing or buffing will bring it back. Knowing the current state of your oxide layer, then, becomes the logical first step before reaching for any cleaning product at all.
How to Assess Whether Your Frames Need Cleaning or Restoration
Grabbing a cloth and scrubbing is tempting when your frames look tired. But the right treatment depends entirely on what is actually happening to the anodised layer — and misjudging the severity leads people to either waste effort on gentle methods that cannot fix the problem, or reach for aggressive products that strip an otherwise salvageable finish. A quick diagnostic test takes thirty seconds and tells you exactly where your frames sit on the damage spectrum.
The Wet Test for Assessing Frame Damage
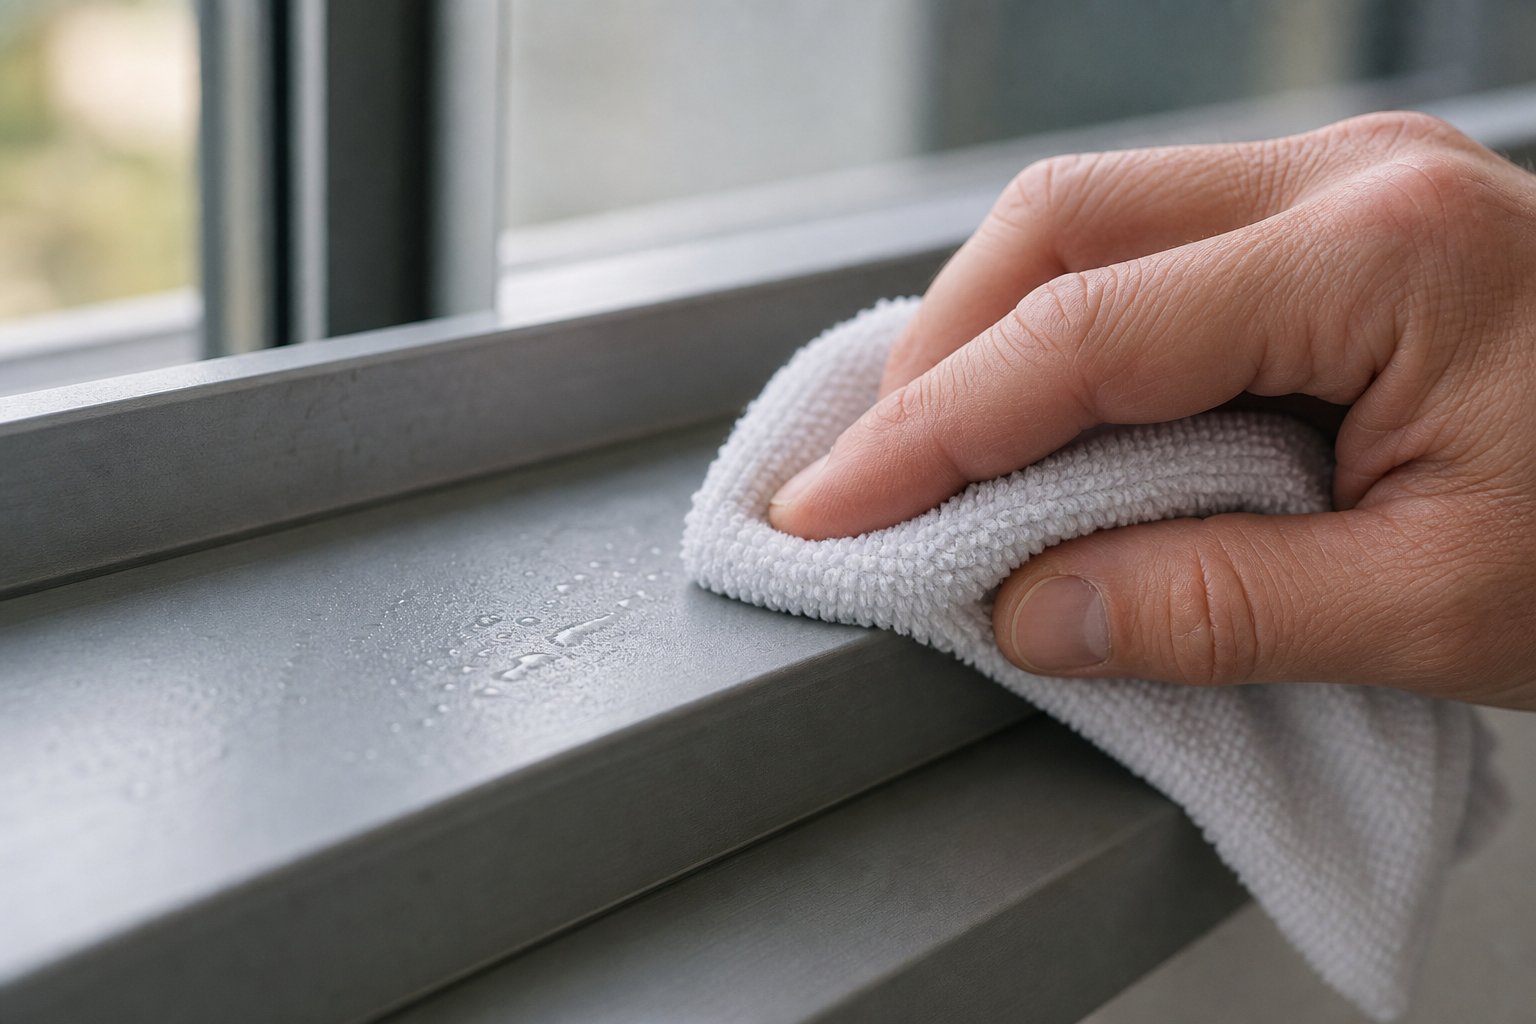
This simple method helps you determine how to clean oxidized aluminum frames without guessing — or more accurately, whether cleaning alone will even work. All you need is plain water and a clean cloth.
- Choose a section of frame that shows visible staining, chalking, or discolouration. Pick an area that represents the worst condition, not the best.
- Wet a clean microfibre cloth with plain tap water — no soap, no chemicals.
- Wipe the affected area thoroughly, saturating the surface so it stays visibly wet.
- Observe the frame while still wet. Does the staining disappear or become invisible? Or does it remain clearly visible even through the water film?
- Allow the surface to air-dry completely, then compare the dry appearance to what you saw when wet.
Interpreting the results is straightforward. If stains vanish when the surface is wet and reappear once dry, the discolouration sits on top of an intact oxide layer. Surface deposits — mineral scale, grime, mild chalking — are reflecting light differently when dry but have not penetrated the anodised finish. Routine cleaning will resolve this.
If stains remain clearly visible even while the frame is wet, the damage is within or below the oxide layer itself. This means the anodised finish has been compromised — through chemical attack, prolonged UV breakdown, or pitting corrosion. No amount of surface cleaning will remove oxidation that has become part of the damaged structure. You are looking at a deep-clean scenario at minimum, and possibly professional restoration.
One additional clue: run your dry fingertip firmly across the worst area. If it picks up a powdery white residue, the oxide layer is actively chalking. Light chalking combined with a positive wet test (stains disappear) means you still have time. Heavy chalking where the residue builds up thickly suggests the protective layer is degrading faster than surface cleaning can manage.
Matching Your Frame Condition to the Right Treatment
Use the results of your wet test alongside a visual inspection to place your frames into one of four categories. Each calls for a different response, and jumping straight to harsh methods on frames that only need a wash is just as counterproductive as gently wiping frames that need professional attention.
| Condition | Visual Symptoms | Wet Test Result | Recommended Action |
|---|---|---|---|
| Surface grime | General dullness, light dust film, water spots from recent rain | Stains disappear when wet | Routine cleaning with pH-neutral solution |
| Oxidation buildup | Chalky residue on touch, streaky mineral staining, noticeable colour fading | Most stains disappear when wet; mild residue may remain in patches | Deep clean with aluminium-safe restoration product |
| Pitting and corrosion | Visible small craters or rough texture, white powdery deposits that persist, localised dark spots | Stains and texture remain visible when wet | Professional assessment and restoration |
| Severe degradation | Widespread pitting across multiple frames, structural corrosion at joints, loose or crumbling oxide, failed seals | Damage clearly visible wet and dry; surface feels rough or gritty throughout | Professional evaluation for restoration feasibility or replacement |
Most homes with frames under fifteen years old and reasonable maintenance history will fall into the first or second category. Coastal properties, frames facing prevailing weather, or windows that have never been cleaned may land in the third. The fourth category typically applies to older buildings where frames have endured decades of neglect alongside salt exposure or industrial pollution.
If you are wondering how to remove oxidized aluminum staining from frames that fall into category two, the answer lies in stepping up your cleaning intensity — but only with products confirmed safe for anodised surfaces. Frames in categories three and four need honest evaluation because further DIY attempts risk making irreversible damage worse. Knowing which chemicals and tools to avoid becomes especially critical at this crossover point between treatable and permanently compromised.
Products and Substances That Damage Anodised Surfaces
The internet is full of well-meaning cleaning advice that will strip anodised aluminium bare. Vinegar and baking soda appear in countless DIY guides as miracle solutions for oxidised metal — and they work brilliantly on raw aluminium. On anodised surfaces, they are destructive. Understanding why specific products cause harm helps you avoid the kind of irreversible damage that turns a simple cleaning job into a costly replacement decision.
Acidic and Alkaline Cleaners That Dissolve the Oxide Layer
The anodised oxide layer remains chemically stable only within a narrow pH band of roughly 4 to 9. Step outside that range in either direction and the aluminium oxide begins dissolving at the molecular level.
On the acidic side, vinegar (acetic acid at pH 2.4), lemon juice (citric acid at pH 2), and acidic bathroom cleaners all etch the oxide layer on contact. The acid reacts with aluminium oxide to form soluble aluminium salts that simply wash away — taking your protective finish with them. Even brief exposure leaves the surface microscopically thinner, and repeated use over multiple cleaning sessions amounts to gradually removing anodising from aluminium one application at a time.
Alkaline attack is equally damaging but works through a different mechanism. Bleach (sodium hypochlorite at pH 11–13), ammonia-based glass cleaners, and alkaline degreasers dissolve the oxide layer from the opposite direction on the pH scale. As Linetec’s technical guidance confirms, chemical attack from acid or alkaline materials on anodised finishes causes irreversible damage — once the finish is visually affected, the discoloured component may need to be replaced.
The practical takeaway: any cleaner you cannot confirm sits between pH 4 and pH 9 should never touch your anodised frames. When in doubt, check the product’s safety data sheet or test with pH strips before applying.
Abrasive Tools and Scouring Products to Avoid
Physical abrasion does not dissolve the oxide layer — it grinds through it. At only 5 to 25 microns thick, the anodised finish offers surprisingly little resistance to anything designed for scrubbing.
Steel wool, even fine-grade 0000, leaves scratch patterns visible in raking light. Green scouring pads rated for pots and pans cut through anodising within a few firm passes. Magic erasers (melamine foam) act as extremely fine abrasives — gentle enough for painted walls but aggressive enough to dull and thin an anodised surface over repeated use. Scouring powders like Ajax or Jif combine chemical alkalinity with physical grit for a double assault.
Pressure washers set above 1500 PSI or held at close range create a similar effect. The concentrated water jet physically erodes the oxide layer, particularly at edges and corners where the anodising tends to be thinnest. You are effectively finding ways to strip anodised aluminium without meaning to.
Why Baking Soda Is Not Safe for Anodised Aluminium
Baking soda deserves its own callout because it appears in so many cleaning recommendations and seems harmless. It is not — at least not on anodised surfaces. Sodium bicarbonate is mildly alkaline (pH 8.3 in solution, higher in paste form) and simultaneously acts as a physical abrasive. That combination means it both chemically weakens and mechanically scratches the oxide layer in a single application.
On raw aluminium cookware, baking soda paste works well because the goal is to remove the natural oxide and polish the metal beneath. On anodised window frames, that same action amounts to how you would remove aluminium anodizing — slowly, unevenly, and irreversibly.
Keep this definitive avoid-list somewhere visible in your cleaning supplies:
- Vinegar and any acidic household cleaners
- Chlorine bleach and oxygen bleach at high concentrations
- Ammonia-based glass and surface cleaners
- Baking soda (in paste or dry powder form)
- Cream cleansers (Jif, Cif, or similar abrasive liquids)
- Steel wool of any grade
- Green or heavy-duty scouring pads
- Alkaline degreasers and oven cleaners
- Pressure washers above 1500 PSI or at close range
Every product on that list either dissolves the oxide chemically, abrades it physically, or does both simultaneously. The good news is that effective, safe alternatives exist — and they do not require expensive speciality products. A properly formulated cleaning solution paired with the right technique handles everything from routine grime to moderate oxidation buildup without putting your anodised finish at risk.
Routine Maintenance Cleaning With Proper Ratios and Methods
Knowing how to clean anodised aluminium window frames safely comes down to precise ratios and gentle technique — not guesswork. Most online guides say “use a mild detergent” and leave you wondering how mild is mild, how much to add, and what actually qualifies. Here are the exact numbers.
The Ideal Cleaning Solution Recipe
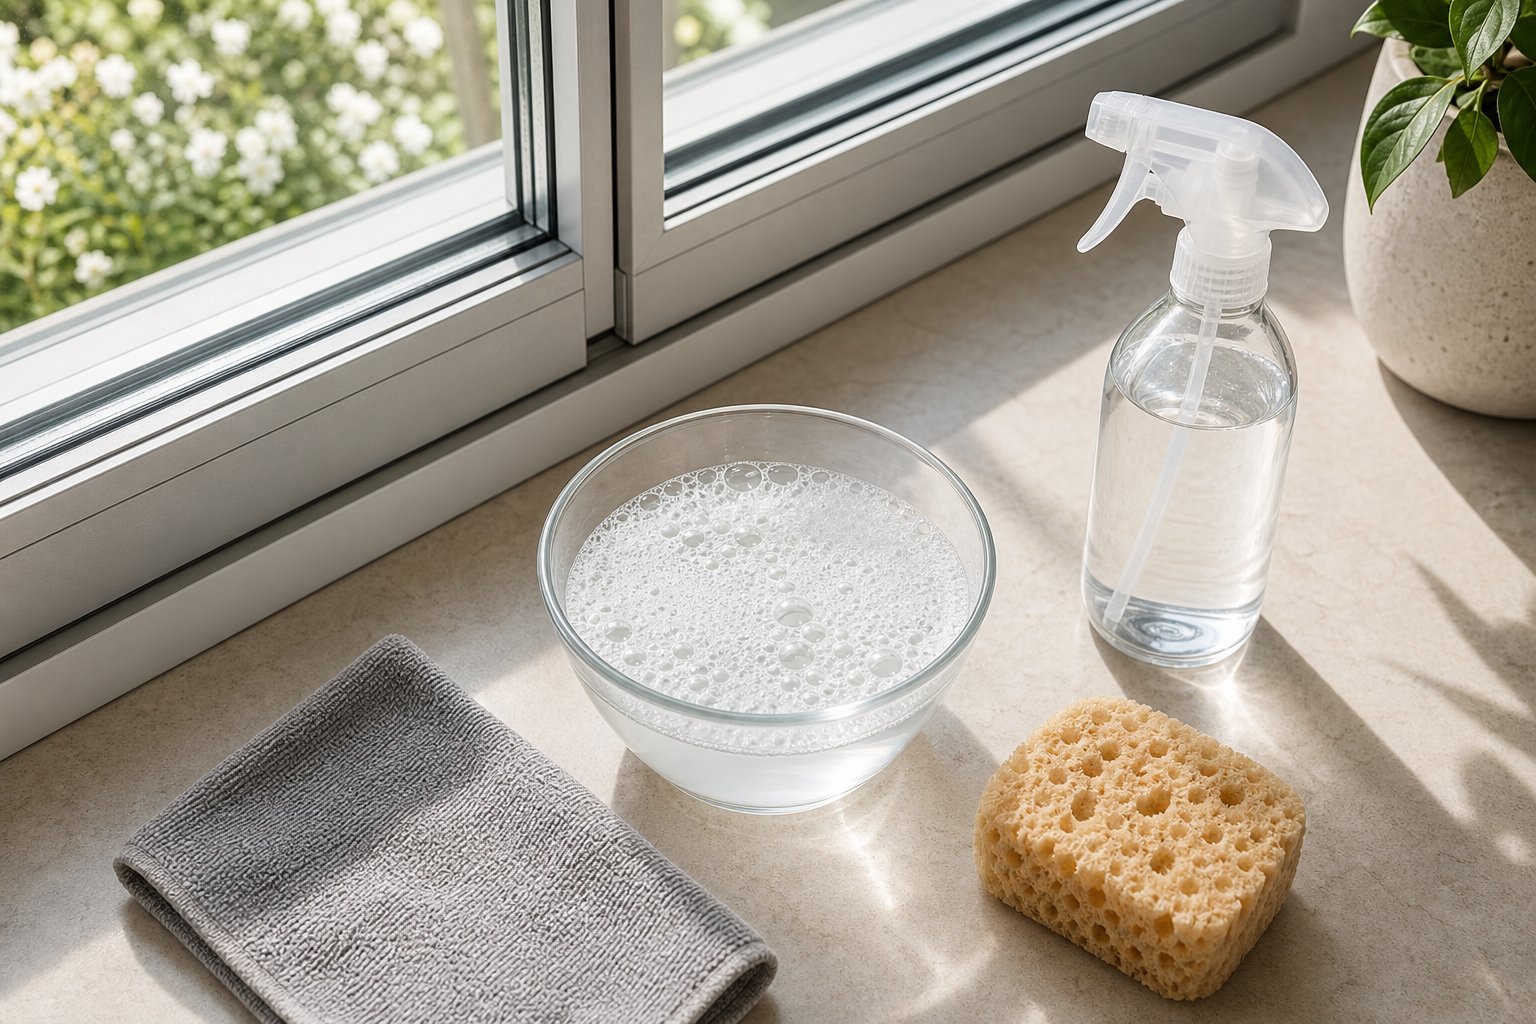
Mix 1 teaspoon (5 ml) of pH-neutral dish soap into 1 litre of warm water. Keep the water temperature below 40°C — hot water accelerates chemical activity and can cause uneven drying that leaves mineral marks behind. The soap must sit within that safe pH 4–9 window discussed earlier; most standard dishwashing liquids labelled “gentle” or “sensitive” fall between pH 6 and 8, which is ideal.
If your frames carry heavier surface grime or you prefer a purpose-built product, a dedicated anodized aluminum cleaner formulated specifically for oxide-coated metals is worth the investment. Dilute according to the manufacturer’s instructions — more concentrate does not mean more cleaning power on anodised surfaces. It just pushes you closer to a pH level that risks etching the finish. For most routine maintenance, the dish soap recipe handles the job without any speciality products at all.
Step-by-Step Routine Cleaning Method
The technique matters as much as the solution. Cleaning anodized aluminum successfully means working with the surface rather than against it. Follow this sequence each time:
- Rinse the entire frame with plain water using a garden hose on low pressure or a spray bottle. This removes loose dust, grit, and debris that would otherwise scratch the surface when you start wiping.
- Dip a soft microfibre cloth or natural sponge into your cleaning solution and apply it to the frame. Avoid cellulose sponges with abrasive scrubbing surfaces.
- Wipe in straight lines following the grain direction of the aluminium — typically lengthways along each frame member. Circular motions create swirl marks that catch light unevenly and are almost impossible to remove from anodised surfaces.
- Work one section at a time (a single frame side or rail) and move on before the solution dries on the surface. Dried soap residue leaves its own hazy film and defeats the purpose.
- Rinse each cleaned section thoroughly with fresh water. Ensure no soapy residue remains, particularly in corners and along gasket edges.
- Dry the frame with a clean, dry microfibre cloth. This final step prevents water spots — the very mineral staining you are trying to avoid.
One practical tip from industry professionals: start at the top of the frame and work downward so dirty runoff does not streak across already-cleaned sections below. This approach mirrors commercial aluminium maintenance protocols used on curtain walls and storefronts.
How Often to Clean Anodised Window Frames
Frequency depends on what your frames face daily. As a baseline, every home should clean anodised frames at least twice a year — even in sheltered, low-pollution environments. Beyond that minimum:
- Quarterly suits most suburban Australian homes with moderate dust and seasonal pollen.
- Monthly is appropriate for coastal properties exposed to salt spray, or homes near busy roads where brake dust and carbon deposits settle on surfaces.
- After major weather events — storms, dust storms, or extended humid spells — an additional rinse prevents contaminants from bonding to the oxide layer while they are still fresh and easy to remove.
The best anodized aluminum cleaner in the world cannot undo months of accumulated salt or pollution baked onto a surface by Australian summer heat. Regular, light cleaning prevents the buildup that eventually forces you into deep-clean territory. Think of it like sunscreen for your frames — consistent application protects far better than one heavy-handed effort after the damage has started.
Of course, routine maintenance only addresses frames in fair condition. When chalking persists after a proper wash, or water stains refuse to lift despite following this method correctly, the issue has progressed beyond surface grime into the oxide layer itself — and that calls for a different set of tools and products entirely.
Deep Cleaning Neglected and Heavily Stained Frames
Frames that have gone years without proper care — or endured harsh coastal seasons with only a cursory hose-down — accumulate damage that a soapy cloth simply cannot shift. Heavy chalking, embedded mineral staining, and mould colonies in gasket channels all require stepping up from routine methods. The key is escalating intensity gradually while still respecting the oxide layer beneath.
Treating Heavy Oxidation and Chalking
When your wet test confirms the oxide layer is still intact but chalking persists after a standard wash, aluminium restoration calls for a product specifically formulated for anodised surfaces. Automotive-grade aluminium polish designed for clear-coated or anodised trim is one option — but choose carefully. Most products marketed as anodized aluminum polish are made for bare metal and will cut too aggressively into a sealed oxide finish. Look for labels that explicitly state suitability for anodised or coated aluminium.
Apply the restoration product with a clean, soft microfibre cloth using straight strokes that follow the grain of the aluminium — never circular motions. Work a small section at a time (roughly 30 cm), applying light pressure only. As the Shengxin Aluminium care guide emphasises, polishing anodized aluminum demands far gentler technique than working on raw metal. Check after every few passes. If you see colour change, lightening at edges, or dark residue building on your cloth, stop immediately — you are cutting into the finish rather than cleaning its surface.
Understanding how to polish anodized aluminum in this context means accepting modest results. You will not achieve a mirror-bright shine. The realistic outcome is reduced chalkiness, improved colour depth, and a more uniform appearance — not a factory-fresh reset. That restraint is what separates successful aluminum restoration from accidental finish removal.
Removing Mould and Mildew From Frame Corners
Mould thrives in the sheltered crevices where frame meets glass, inside drainage channels, and along gasket edges where moisture lingers. Chlorine bleach might seem like the obvious weapon, but at pH 11–13 it sits well outside the safe range for anodised aluminium. The better alternative is sodium percarbonate — an oxygen-based cleaner that breaks down into hydrogen peroxide and washing soda when dissolved in water.
Mix approximately 30 grams of sodium percarbonate per litre of warm water (around 40–50°C for best activation). Apply the solution directly to mouldy areas using a soft-bristle brush or old toothbrush that can reach into tight corners. Let it sit for 10 to 15 minutes — the oxygen release does most of the heavy lifting by breaking down organic matter without attacking the aluminium oxide beneath.
Scrub gently after the dwell time, then rinse thoroughly with clean water. For severe mould in deep gasket channels, a second application may be needed. Ensure you dry the area completely afterward — leaving moisture in those same sheltered spots simply invites regrowth within weeks.
Two cautions worth noting: sodium percarbonate has mild bleaching properties, so test on an inconspicuous area first if your frames have a dark dyed anodised finish. And never mix it with vinegar (which neutralises its effectiveness) or chlorine bleach (which creates dangerous gas release).
Restoring Faded Anodised Finishes
Here is the honest reality that most cleaning guides skip: true colour restoration of anodised aluminium is not achievable through cleaning or polishing alone. The colour in bronze, charcoal, or black anodised frames exists within the oxide layer itself — deposited into the porous structure during the original factory anodising process. Once that colour fades through UV exposure or chemical degradation, no topical product can rebuild it from the outside.
What you can do is improve the appearance of faded but structurally sound finishes. A quality clear protective coating designed for anodised aluminium — such as those from Everbrite — adds a transparent film that restores depth and lustre to dull surfaces. These coatings work by creating a uniform refractive layer over the existing finish, making colours appear richer and more saturated without actually changing the oxide beneath. The surface must be completely clean, dry, and free of oxidation before coating — applying over dirt or chalk simply locks contamination under a clear film.
Restoring aluminium frames with a clear coat is a more committed step than routine cleaning. You are adding a film-forming layer that will eventually need its own maintenance or reapplication. For mildly faded frames in otherwise good condition, it can extend usable life by several years. For frames already showing widespread pitting, heavy chalking that returns within weeks, or patchy bare-metal exposure, a clear coat cannot disguise structural damage — it only delays the conversation about professional intervention or replacement.
That professional threshold is closer than many homeowners realise. Deep cleaning and protective coatings handle a middle band of deterioration effectively. But frames exist in the real world — surrounded by glass, rubber seals, hardware, and building materials that all impose their own constraints on how you clean and what products you can safely use around them.
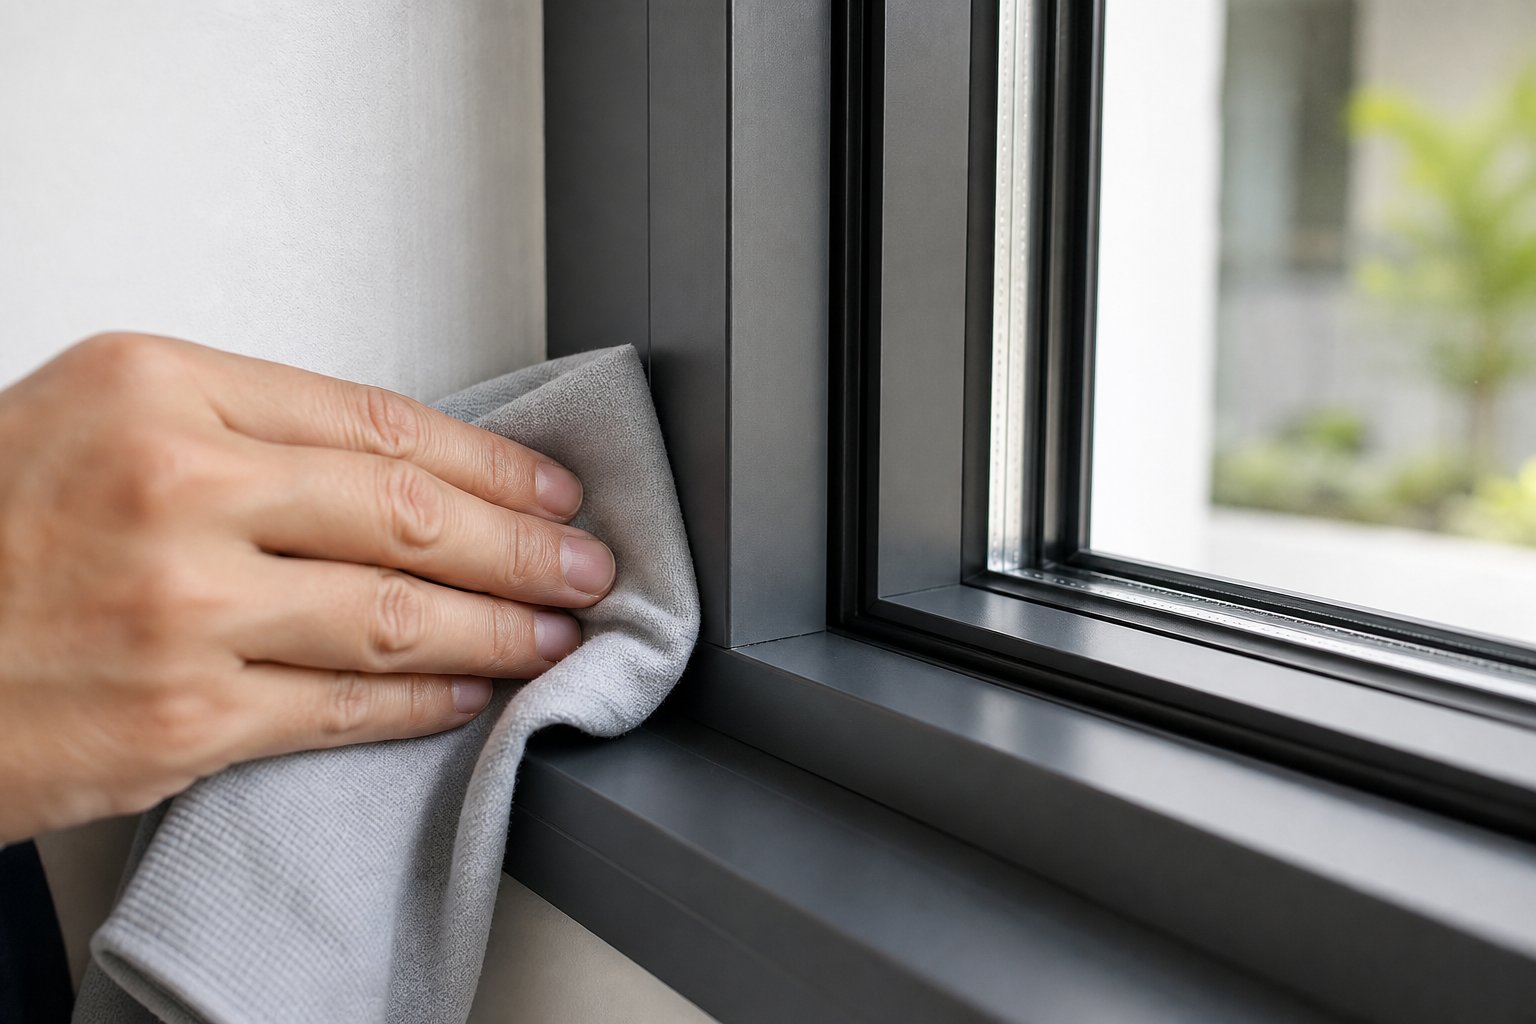
Cleaning Installed Frames Around Glass, Seals, and Hardware
Nobody removes their window frames to clean them. You are working in situ — contending with glass panes centimetres from your cloth, rubber gaskets that react badly to certain cleaners, drainage slots packed with years of grit, and hardware that seizes up if ignored. Knowing how to clean aluminium window frames effectively means treating the frame as part of a larger assembly rather than an isolated surface.
Protecting Glass and Seals During Frame Cleaning
Rubber weatherseals and gaskets are your first concern. Many aluminium window frame cleaners — even pH-neutral ones — contain surfactants or solvents that degrade EPDM and silicone seals over time, causing them to harden, crack, or shrink away from the glass. Before applying any solution to the frame, lay a damp microfibre cloth along the gasket edge as a simple barrier. This catches drips and prevents cleaning solution from pooling where rubber meets aluminium.
For the glass itself, avoid letting your frame cleaning solution sit on the pane. Residue from aluminium-specific products can leave hazy films on glass that standard window cleaner struggles to shift. Work your cloth along the frame profile rather than across it, keeping the wetted area confined to the anodized aluminium trim rather than bleeding onto adjacent surfaces. If solution does contact the glass, wipe it off with a separate damp cloth immediately — do not wait until you have finished the full frame.
The same principle applies to surrounding painted renders or timber reveals. Alkaline aluminium restoration products can soften or discolour paint if left in contact. A strip of painter’s tape along the junction of frame and wall provides cheap insurance for deep-clean sessions.
Cleaning Window Tracks and Drainage Slots
Sliding window tracks and the small drainage slots cut into the bottom rail are where most functional problems start. Debris, dead insects, and compacted grit accumulate in these channels, blocking water escape paths and eventually causing moisture to pool against the frame — exactly the condition that accelerates oxide breakdown.
Start dry. Use a stiff nylon brush or old toothbrush to loosen compacted debris from tracks and drainage holes. Follow with a vacuum fitted with a crevice nozzle to remove the loosened material before introducing any moisture. This dry-first approach prevents turning dry grit into an abrasive paste that scratches track surfaces as you scrub.
Once loose material is cleared, wipe tracks with your standard pH-neutral cleaning solution and a cloth wrapped around a flat tool — a plastic spatula or old credit card works well for reaching into narrow channels. Pay particular attention to the weep holes (small rectangular slots cut into the outer face of the bottom rail). These must remain clear for the window’s drainage system to function. A straightened paperclip gently inserted into blocked weep holes dislodges compacted dirt without damaging the opening.
Rinse tracks with a small amount of clean water and confirm it flows freely out through the drainage slots. If water pools and fails to exit, the external drainage path may be blocked or the frame may have settled out of level — both issues worth investigating before they cause internal water damage.
Maintaining Hinges and Hardware
Frame maintenance does not stop at the visible aluminium surfaces. Friction stays, handles, locking mechanisms, and rollers all require periodic attention as part of a complete cleaning routine. Hardware specialists recommend cleaning all moving parts with mild soapy water and drying thoroughly to prevent corrosion of steel components within the aluminium frame.
For friction stays (the scissor-arm hinges on awning and casement windows), wipe the slide channel clean and apply a dry silicone spray lubricant sparingly. Avoid wet lubricants or grease — these attract and hold grit that wears pivot points and can cause stays to loosen over time. Restrictor stays benefit from being fully opened periodically to prevent the mechanism seizing in the restricted position.
Lock sets and handles accumulate dust in their internal mechanisms. A light spray lubricant into the keyway and latch mechanism keeps operation smooth. For rollers on sliding windows, clear the track first (as above), then apply dry silicone spray to the roller bearings only — never oil-based lubricants that trap abrasive particles against the bearing surfaces.
Modern aluminium window systems like those from MEICHEN are engineered with maintenance accessibility in mind, featuring removable hardware, clearly defined drainage paths, and anodised finish options selected for longevity in Australian conditions. If your current frames make hardware access difficult — or you find yourself fighting corroded screws and seized hinges every time you clean — that design limitation is worth factoring into any future window upgrade decision. Systems built for easy ongoing care significantly reduce the long-term maintenance burden.
With frames, glass, seals, and hardware all addressed as a unified assembly, the remaining variable is frequency — and that depends heavily on where your home sits geographically and what contaminants your frames encounter between cleaning sessions.
How Location and Climate Affect Your Cleaning Schedule
A home in beachside Byron Bay and a terrace in inner-city Melbourne face completely different contaminants — yet both can end up with frames that look equally neglected if the cleaning schedule does not match the environment. Geography dictates what lands on your anodised surfaces, how fast it bonds, and how aggressively it attacks the oxide layer between washes.
Coastal Homes and Salt Spray Exposure
Salt is the primary enemy of anodised aluminium near the ocean. Chloride ions from airborne sea spray penetrate micro-imperfections in the sealed oxide layer and initiate pitting corrosion at those points. Significant chloride deposition has been measured more than 80 kilometres inland from the coast, meaning the threat extends well beyond beachfront properties.
If you live within a few kilometres of the shoreline, monthly rinsing with fresh water is the bare minimum — not a quarterly luxury. After storms or sustained onshore winds, an additional plain-water rinse within 48 hours prevents salt crystallising on the surface. Once salt dries and concentrates, it draws moisture from the air (hygroscopic behaviour) and keeps the frame damp at a microscopic level, accelerating the very pitting you are trying to prevent.
For coastal homeowners wondering how to get rid of aluminium oxidation that keeps returning despite regular cleaning, the answer is usually frequency rather than intensity. Gentle monthly rinses outperform aggressive quarterly scrubs because salt damage is cumulative — each day a deposit sits undisturbed deepens its chemical hold on the oxide layer.
Urban Pollution and Industrial Fallout
City frames face a less obvious but equally persistent threat. Carbon particulates from vehicle exhaust, brake dust containing metallic compounds, and industrial fallout settle on horizontal frame surfaces continuously. These deposits may not look dramatic — your frames might appear merely dull rather than visibly stained — but they embed into the porous surface of the oxide layer over months.
The challenge is that carbon and metallic particles are not water-soluble. A plain rinse will not shift them once they have bonded. Homes within 50 metres of busy roads or near industrial zones need periodic deep cleaning (every two to three months) even when frames look acceptable at a glance. Knowing how to clean tarnished aluminium in urban environments means recognising that the discolouration is not always on the surface — it can be trapped within the oxide pores, requiring a proper pH-neutral wash with light agitation rather than a simple hose-off.
Seasonal Cleaning Considerations
Each season deposits different contaminants that demand attention at specific times:
Spring pollen coats frames in a fine yellow-green layer. Left through the wet months that follow, it breaks down into organic acids that create stubborn staining — particularly on lighter clear-anodised finishes. A wipe-down at the tail end of pollen season prevents this from bonding permanently.
Autumn brings leaf litter that collects in tracks and drainage channels. Tannins leaching from decomposing leaves stain aluminium a dark brown wherever moisture and organic matter sit together. Clearing tracks before winter rains arrive is the simplest preventive step.
Winter condensation on interior frame surfaces encourages mould growth — especially in bedrooms and bathrooms with higher humidity levels. Wiping interior frames dry during cold mornings and ensuring adequate ventilation reduces the moisture that mould needs to colonise gasket edges and frame corners.
Summer heat bakes any existing deposits onto the surface. Contaminants that sat harmlessly through cooler months become chemically bonded under UV exposure and high temperatures, making them significantly harder to remove. An early-summer clean prevents this seasonal lock-in effect.
For anyone trying to figure out how to get rid of oxidation on aluminium frames that seems worse after certain seasons, the explanation is usually this compounding cycle — light deposits ignored through one season become embedded stains by the next.
| Environment | Primary Contaminants | Recommended Frequency | Key Focus Areas |
|---|---|---|---|
| Coastal | Salt spray, sand particles, marine moisture | Monthly rinse; full clean every 6–8 weeks | All exterior surfaces, weep holes, bottom rails where salt pools |
| Urban | Carbon deposits, brake dust, industrial particulates | Full clean every 2–3 months | Horizontal surfaces facing roads, tracks, and upper frame rails |
| Rural | Dust, pollen, insect residue, agricultural chemicals | Quarterly clean; additional rinse during harvest or burn-off | Tracks and drainage slots, windward-facing frames |
| High-humidity | Mould spores, condensation, organic matter | Quarterly clean; monthly interior wipe during winter | Interior frame surfaces, gasket edges, bottom corners, bathroom and laundry windows |
How to clean tarnished aluminium effectively comes back to this simple principle: match your effort to your exposure. A rural property shielded by trees and set back from the road needs far less intervention than a high-rise apartment facing a six-lane arterial or a beach house copping direct salt spray. The frames themselves are identical — what differs is everything the environment throws at them between your cleaning sessions.
Location also shapes a bigger decision. Frames that deteriorate rapidly despite diligent, climate-appropriate maintenance may have reached a point where the oxide layer can no longer withstand its environment. Persistent decline despite proper care raises the question of whether continued cleaning is cost-effective — or whether professional restoration or replacement offers a more realistic path forward.

When to Restore Professionally or Replace Your Window Frames
Persistent deterioration despite proper cleaning is the clearest signal that your frames have crossed from maintainable into a different category altogether. At some point, the oxide layer has thinned or failed so extensively that no amount of careful washing or protective coating will reverse the trajectory. The question shifts from “how do I clean this” to “is this worth saving” — and answering honestly can save you years of frustrating effort and wasted product.
Signs Your Frames Are Beyond DIY Cleaning
Several indicators tell you the damage has progressed past what home methods can address:
Widespread pitting visible to the naked eye across large sections of frame — not isolated spots near a single gasket, but cratered surfaces running the length of rails and stiles. Chalking that returns within two to three weeks of a thorough clean, indicating the oxide layer is actively breaking down faster than you can manage it. Structural corrosion at corner joints where frame members meet, visible as swelling, cracking, or white powdery buildup forcing the joint apart. Failed seals producing condensation between double-glazed panes — a sign that frame degradation has compromised the entire window unit’s integrity, not just its appearance.
If you are experiencing three or more of these symptoms simultaneously, continued DIY cleaning is not solving the underlying problem. The frame has moved from category two or three in the diagnostic table into territory where professional evaluation provides genuinely useful information rather than just an upsell.
Professional Restoration Options
How do you restore aluminum frames that have degraded beyond DIY methods? Professional services offer three broad approaches, each suited to different damage levels and budgets.
Chemical stripping and re-anodising is the most comprehensive option. The frames are removed from the building, the existing oxide layer is chemically dissolved (essentially learning how to remove anodising from aluminium at an industrial scale), and the bare aluminium is re-processed through a full anodising line. This restores the original factory finish quality but costs significantly — re-anodising costs depend on part size and quantity, and when combined with removal, transport, and reinstallation, the total often approaches 60–80% of full replacement cost for residential window frames.
Clear-coat application sits at the moderate end. A specialist applies an industrial-grade transparent coating over the existing anodised surface after thorough preparation. This can be performed in situ without removing frames, making it less disruptive. Results depend heavily on the condition of the underlying oxide — it works well on faded but structurally sound finishes, and poorly on frames with active pitting or chalking beneath.
Mechanical polishing and sealing involves carefully buffing the surface with fine compounds, then applying a protective sealant. This reduces visible oxidation and improves appearance, but removes a thin layer of the remaining oxide in the process. On frames that already have minimal oxide thickness remaining, it can accelerate future degradation rather than prevent it.
Painting anodised aluminium is also possible and sometimes the most practical restoration path for frames in fair structural condition with poor cosmetic appearance. However, it requires specific preparation that most painters overlook. The sealed oxide layer resists paint adhesion — you need to either abrade the surface lightly with fine Scotch-Brite pads to create mechanical tooth, or apply a specialist etch primer designed to bond with aluminium oxide. Standard acrylic primers will peel within months. If you are considering painting anodized aluminum frames, confirm your painter understands this preparation sequence; the adhesion failure rate on improperly prepared anodised surfaces is extremely high.
When Replacement Makes More Sense Than Restoration
The restoration-versus-replacement decision is not purely about the frame surface. It involves the entire window system — thermal performance, seal integrity, hardware function, and total lifecycle cost. An older frame with degraded anodising often has equally degraded components throughout.
Work through this checklist to determine whether replacement delivers better long-term value:
- Restoration quote exceeds 50–60% of the cost of equivalent new windows (at that threshold, new frames with modern finishes and full warranties typically offer better value)
- Frames lack thermal breaks, and heating or cooling costs are a concern (older anodised frames are typically non-thermally-broken single aluminium profiles)
- Seals have failed in multiple window units, causing fogging between panes
- Hardware is obsolete, with replacement parts no longer manufactured
- Frame profiles have structurally corroded at joints or fixing points
- Building compliance has changed since installation (current NCC energy efficiency requirements may not be achievable with original frame profiles)
- You plan to stay in the property long enough to benefit from a 20+ year lifespan on new windows rather than 5–10 years on restored ones
If three or more items on that list apply, restoration becomes a holding measure rather than a genuine solution. Professional restoration typically costs 30–50% of replacement — worthwhile when frames are structurally sound and only need cosmetic renewal, but diminishing returns set in rapidly when underlying integrity is compromised.
Modern aluminium window systems offer substantially improved anodised finish durability, thermally broken profiles that reduce heat transfer, and longer maintenance-free lifespans compared to frames manufactured even fifteen years ago. For homeowners who have determined their existing frames are beyond cost-effective restoration, MEICHEN’s aluminium windows provide a starting point for exploring replacement options with contemporary anodised and powder-coated finishes engineered specifically for Australian coastal, urban, and high-UV conditions.
Whether you choose to restore or replace, the decision is ultimately a practical one grounded in numbers — not sentiment. Frames that respond well to professional treatment deserve the investment. Frames that have structurally failed deserve retirement into something that will not demand the same cycle of escalating maintenance all over again.
FAQs About Cleaning Anodised Aluminium Window Frames
1. Can I use vinegar to clean anodised aluminium window frames?
No. Vinegar has a pH of approximately 2.4, which sits well below the safe pH range of 4 to 9 for anodised surfaces. Acetic acid reacts with the aluminium oxide layer, dissolving it at the molecular level and forming soluble aluminium salts that wash away with the protective finish. Even a single application can thin the oxide layer measurably. Use a pH-neutral dish soap solution (1 teaspoon per litre of warm water) or a dedicated anodised aluminium cleaner instead.
2. How often should I clean anodised aluminium window frames in coastal areas?
Coastal properties require a fresh-water rinse at least monthly, with a full pH-neutral wash every six to eight weeks. After storms or sustained onshore winds, rinse frames with clean water within 48 hours to prevent salt crystallising on the surface. Salt deposits are hygroscopic, meaning they draw moisture from the air and keep the oxide layer damp at a microscopic level, accelerating pitting corrosion between cleaning sessions. Frequency matters more than intensity in salt-exposed environments.
3. Does anodised aluminium rust or corrode over time?
Anodised aluminium cannot rust because it contains no iron. However, it can corrode through several mechanisms. Pitting corrosion occurs when chlorides penetrate weak points in the oxide layer. Filiform corrosion appears as thread-like tracks under the surface where the seal has been compromised. Chemical attack dissolves the oxide when exposed to cleaners outside the pH 4-9 safe range. The anodised layer itself is only 5 to 25 microns thick, so once compromised, the damage is irreversible without professional re-anodising.
4. What is the best way to remove mould from anodised aluminium window frames?
Use sodium percarbonate (oxygen-based cleaner) rather than chlorine bleach, which is too alkaline for anodised surfaces. Dissolve approximately 30 grams per litre of warm water at 40-50 degrees Celsius for best activation. Apply to mouldy areas with a soft-bristle brush, allow 10 to 15 minutes of dwell time for the oxygen release to break down organic matter, then scrub gently and rinse thoroughly. Dry the area completely afterward to prevent regrowth. Test on an inconspicuous spot first if your frames have a dark dyed anodised finish, as sodium percarbonate has mild bleaching properties.
5. When should I replace anodised aluminium window frames instead of cleaning them?
Consider replacement when restoration costs exceed 50 to 60 percent of new window prices, when frames lack thermal breaks and energy efficiency is a concern, when seals have failed causing condensation between panes, or when hardware is obsolete with no replacement parts available. Structural corrosion at corner joints and widespread pitting that returns within weeks of cleaning also indicate the oxide layer has degraded beyond cost-effective repair. Modern aluminium window systems offer improved anodised finish durability, thermally broken profiles, and longer maintenance-free lifespans suited to Australian conditions.
More Window & Door Guides