Assess Your Brick Wall Before You Start
Not all brick walls are built the same way, and the type you are working with changes everything about how to install a window in a brick wall. Get this wrong and you risk cracked mortar, structural damage, or a frame that leaks within months. Spend ten minutes identifying your situation before picking up a single tool.
Identify Your Brick Wall Type
Australian homes generally fall into one of three brick construction categories, and each one demands a different installation approach.
Solid double-brick is common in older homes built before the 1970s, particularly across suburbs in Melbourne, Adelaide, and Perth. Both leaves of brick are structural, meaning the wall carries roof and floor loads through the masonry itself. Installing or replacing windows in a brick house with solid double-brick construction is the most complex scenario because any cutting directly affects load-bearing capacity.
Brick veneer over timber frame is the most widespread construction method in Australian residential building from the 1970s onward. Here, the outer brick leaf is purely cosmetic and weather protection. The timber stud frame behind it carries structural loads. This distinction matters because the window frame typically fixes to the timber structure, and the brick acts as a facing material. The risk of structural failure is lower, but waterproofing the cavity between brick and frame becomes critical.
Cavity wall construction features two masonry leaves separated by an air gap, tied together with metal wall ties. Found in some older and commercial builds, cavity walls require specialist cavity tray detailing above any window opening to prevent moisture tracking across to the inner leaf.
New Opening vs Replacement Window
The structural implications of these two scenarios could not be more different. Replacing an existing window in a prepared brick reveal is a manageable task for confident DIYers. The lintel is already in place, the opening is formed, and the brickwork has long since settled. You are essentially removing one frame and fitting another into the same space.
Installing a window in an existing wall where no opening currently exists is a different job entirely. Cutting through brickwork means temporarily supporting everything above while you form the opening, install a correctly engineered lintel, and allow mortar to cure. This process carries genuine structural risk and typically requires a structural engineer’s involvement plus council approval under the National Construction Code (NCC).
DIY Feasibility Checklist
Before committing to a weekend project, run through these factors honestly. If more than two or three fall outside your comfort zone, professional installation is the safer path.
- Wall type: Brick veneer with timber frame is the most DIY-friendly. Solid double-brick or cavity walls add significant complexity.
- Opening status: Replacing a window in an existing reveal is achievable. Cutting a new opening is professional-level work.
- Load-bearing status: If the wall section above the window supports roof or floor loads, incorrect work risks partial collapse.
- Opening size: Larger windows on brick house facades require longer lintels with greater bearing requirements and heavier lifting.
- Lintel condition: Existing lintels that are cracked, rusted, or sagging need replacement before the new frame goes in.
- Access and height: Ground-floor, single-storey work is manageable. Anything requiring scaffolding or ladder work above 2.4 metres adds safety risk.
- Council approval: Creating a new opening or enlarging an existing one in a load-bearing wall typically requires a development application (DA) or building permit from your local council. Like-for-like replacements in existing openings usually do not, though regulations vary by state and municipality.
- Skills and tools: You need confidence with a spirit level, masonry drill, and sealant gun at minimum. Cutting new openings demands angle grinders, acrow props, and experience reading brick coursing.
Expect a straightforward like-for-like replacement to take a full day per window, including preparation and clean-up. A new opening in solid brick can stretch across several days, factoring in mortar curing times. Safety is non-negotiable here. Brick is heavy, lintels are unforgiving, and poorly supported masonry does not give warnings before it shifts.
With your wall type identified and a realistic sense of the project scope, the next critical step is getting your measurements right. Even a few millimetres of error at this stage can mean a frame that will not fit, gaps too wide to seal properly, or a return trip to the manufacturer.
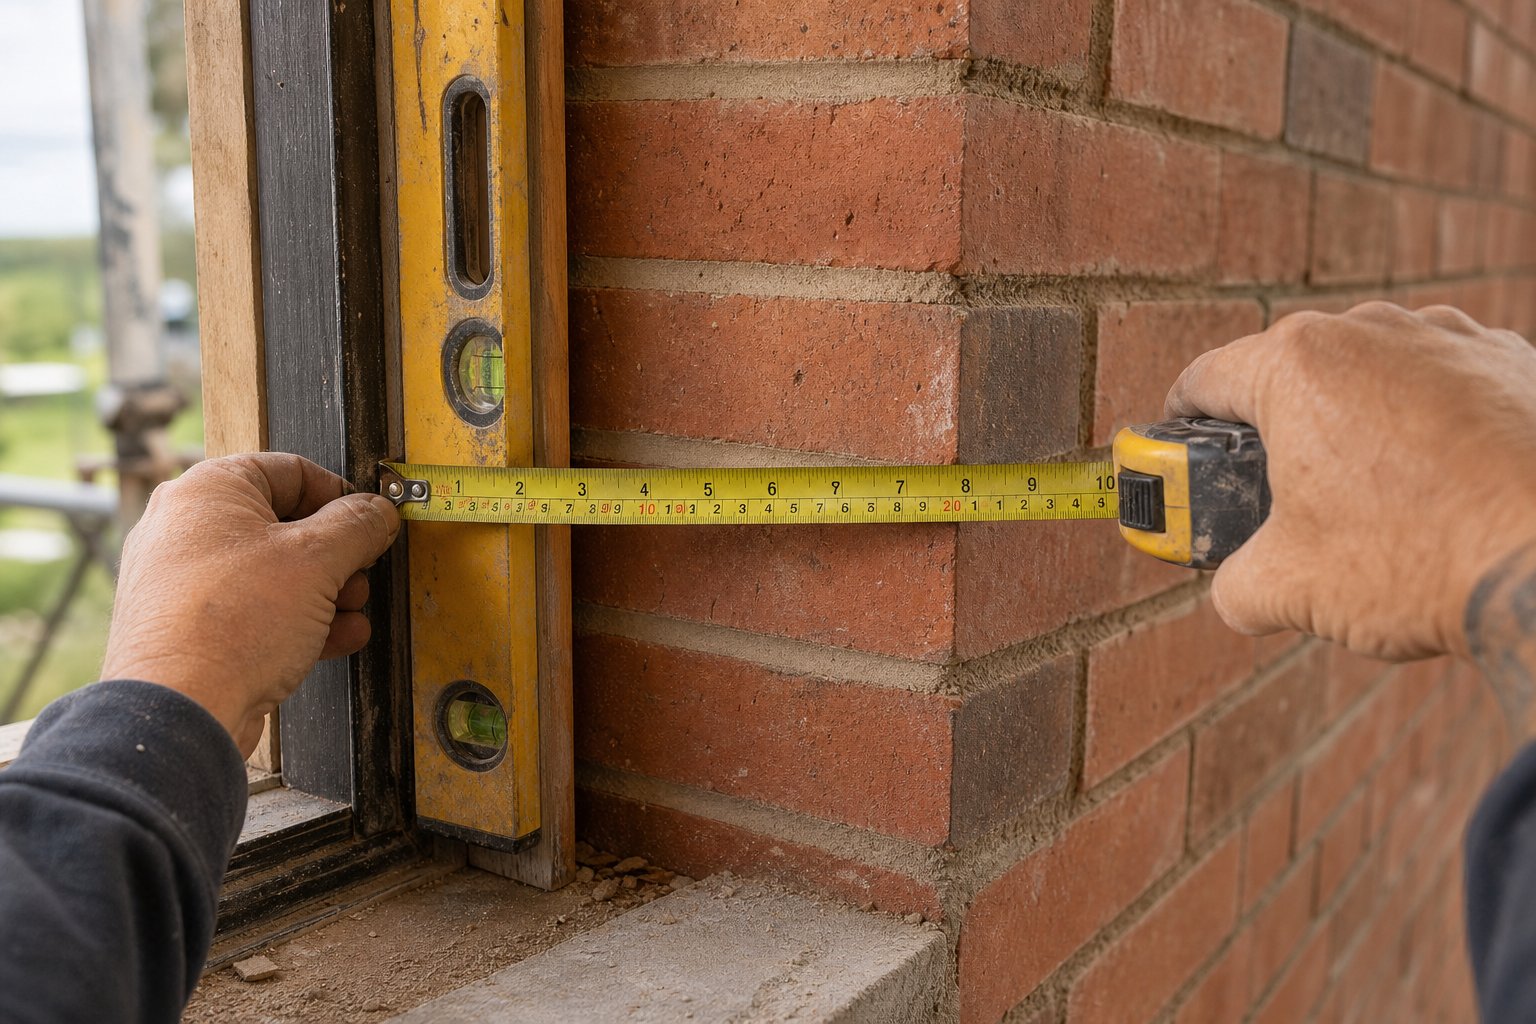
Step 1 – Measure and Size Your Aluminium Frame for the Brick Opening
Aluminium windows are manufactured to order. Unlike timber frames that can be planed down or packed out with relative ease, an aluminium frame that arrives 5mm too wide simply will not fit into your brick reveal. Equally, one that is 20mm too narrow leaves gaps that compromise weatherproofing and structural fixing. Getting your measurements right the first time is not optional — it is the foundation of a successful installation.
How to Measure a Brick Reveal Accurately
Always measure the structural opening in the brickwork itself, not the old window frame. Existing frames may have warped, settled, or been installed with non-standard gaps. The brick reveal is your only reliable reference point when you install a window in an existing wall.
Step outside and measure the opening from brick face to brick face. If your home has render over the brickwork, carefully remove a small section at the measurement points to expose the masonry edge underneath. You need the true structural dimension, not the rendered surface.
Take three width measurements: one across the top of the opening (just below the lintel), one across the middle, and one across the bottom (at the sill). Record all three in millimetres.
Take three height measurements: one on the left side, one in the centre, and one on the right side. Measure from the underside of the lintel down to the top of the sill or the brick course that forms the base of the opening.
Brick openings are rarely perfectly square, especially in older Australian homes where mortar joints have weathered unevenly or foundations have shifted slightly over decades. Variations of 5 to 10mm between measurement points are common. The smallest width and the smallest height become your working dimensions — these represent the tightest points the frame must pass through.
One detail that catches people out is brick coursing and how it affects vertical measurements. Standard Australian bricks measure 76mm high with a 10mm mortar joint, giving a coursing module of 86mm. Window openings in brick walls are almost always formed to align with course heights, so your vertical measurement should land cleanly on a multiple of 86mm (plus or minus the mortar joint). If it does not, double-check that you are measuring to the correct reference points — the underside of the lintel and the top of the sill course, not some intermediate mortar line.
The 10mm Fitting Tolerance
From your smallest width and height measurements, deduct 10mm from each dimension. This creates a nominal 5mm gap on each side and at the top of the frame, which serves several purposes:
- Allows the installer to adjust the frame for plumb and level using plastic packers
- Provides space for expanding foam insulation between frame and masonry
- Leaves room for sealant application at the correct joint depth
- Accounts for minor irregularities in the reveal surface
Some manufacturers recommend a slightly larger tolerance — up to 15mm total per dimension for wider openings or older brickwork with uneven reveals. Check the specific installation guide for your chosen aluminium window system, but 10mm is the standard starting point for most residential frames in masonry.
Understanding Aluminium Frame Sizing
When ordering aluminium windows, you will encounter three different size references. Confusing them is one of the most common causes of ordering errors, and understanding the window in brick wall detail at this level prevents costly mistakes.
Structural opening size is the brick-to-brick measurement of the hole in your wall — the raw dimension before any tolerances are applied.
Frame size (also called overall frame size or manufactured size) is the external dimension of the aluminium frame itself. This is what the manufacturer builds. It equals your structural opening minus the fitting tolerance.
Daylight size is the visible glass area — the clear opening you can actually see through once the frame is installed. It is always smaller than the frame size because the aluminium profiles overlap the glass on all sides, typically by 20 to 30mm per edge depending on the system.
When you provide measurements to a manufacturer, confirm whether they want the structural opening size (from which they will deduct tolerances) or the finished frame size (which you have already calculated). Miscommunication here is where window detail brick wall installations go wrong before the product even arrives on site.
| Brick Courses Wide | Structural Opening (mm) | Frame Size After 10mm Deduction (mm) | Approximate Daylight Width (mm) |
|---|---|---|---|
| 4 bricks | 910 | 900 | 840 – 860 |
| 5 bricks | 1140 | 1130 | 1070 – 1090 |
| 6 bricks | 1370 | 1360 | 1300 – 1320 |
| 7 bricks | 1600 | 1590 | 1530 – 1550 |
| 8 bricks | 1830 | 1820 | 1760 – 1780 |
| 9 bricks | 2060 | 2050 | 1990 – 2010 |
Note: Based on standard Australian brick module of 230mm (76mm brick + 10mm mortar joint = 86mm course height; 230mm length + 10mm perpend = 240mm horizontal module). Actual structural openings may vary by a half-brick (110mm) depending on bonding pattern. Daylight widths are approximate and vary by aluminium system profile depth.
Checking for Square
A final measurement that many people skip: the diagonals. Measure from the top-left corner of the opening to the bottom-right, then from the top-right to the bottom-left. If both diagonal measurements are identical, your opening is square. A difference of less than 3mm is generally acceptable for aluminium frame installation.
If the diagonals differ by more than 5mm, the opening is noticeably out of square. You have a few options in this case. For minor discrepancies, the fitting tolerance and sealant gap can absorb the difference — the frame sits square within the opening, and the uneven gap is filled and sealed. For larger discrepancies, the reveal may need packing with render or mortar to create a truer surface before the frame goes in. Either way, record the diagonal measurements alongside your width and height figures and pass all of them to the manufacturer or installer.
With precise measurements in hand and a clear understanding of how your aluminium frame relates to the structural opening, the focus shifts to what sits above and below that opening. The lintel carrying load over the window head, and the structural integrity of the surrounding brickwork, determine whether the installation can proceed safely or whether reinforcement comes first.
Step 2 – Verify Structural Integrity and Lintel Requirements
A brick wall window opening is only as reliable as the structure supporting it from above. Skip this step and you risk cracks radiating through mortar joints, sagging brickwork above the frame, or — in the worst case — partial collapse of the wall section. Whether you are replacing an existing window or planning how to add a window to an existing wall, structural verification comes before any physical work on the brickwork begins.
Check for Load-Bearing Requirements
Every external brick wall in an Australian home carries some degree of load. The question is not whether the wall is structural, but what sits directly above the window opening and how those loads transfer down to the foundation.
Look at the wall section above your proposed or existing window. If roof rafters, ceiling joists, or upper-storey floor framing bear onto the wall plate directly above, the lintel over that opening must carry those loads in addition to the self-weight of the brickwork. In a typical single-storey brick veneer home, the timber frame handles most structural loads, and the brick skin primarily supports its own weight. In a solid double-brick home, the masonry itself carries everything — roof loads, floor loads, and the accumulated weight of every brick course above the opening.
For replacement projects where a window already exists, the lintel is already doing its job. But that does not mean it is doing it well. Inspect the existing lintel carefully before committing to a new frame installation:
- Visible cracking in mortar joints directly above the lintel — especially stepped diagonal cracks — indicates the lintel may have deflected under load or lost bearing at the ends.
- Sagging or bowing visible along the lintel soffit (underside) suggests the beam is under-designed for the span or has deteriorated over time.
- Rust staining on brickwork below a steel lintel means corrosion has expanded the steel, potentially cracking the surrounding mortar and reducing structural capacity.
- Crumbling concrete on precast lintels, with exposed or rusted reinforcement, signals that the lintel has reached the end of its serviceable life.
If any of these signs are present, the lintel needs replacement before the new aluminium frame goes in. Installing a fresh frame beneath a failing lintel simply transfers the problem — you will end up with cracks around your brand-new window within a year or two.
For new openings where no window currently exists, there is no existing lintel to inspect. Instead, a structural engineer must calculate the loads above the proposed opening and specify the correct lintel type, size, and bearing length. This is not a step you can shortcut with guesswork. The loads vary significantly depending on whether the opening sits below a single-storey roofline, beneath a first-floor bedroom, or in a gable end wall with minimal load above.
Lintel Selection and Installation
The lintel bridges the opening and transfers all loads from above to the solid brickwork on each side. Choosing the right type depends on your wall construction, the span of the opening, and the loads it must carry.
Steel angle lintels are the most common choice for brick wall openings in Australian residential construction. A galvanised steel angle (typically 90 x 90mm or 100 x 100mm for standard window widths) sits behind the outer brick face, supporting the brickwork above while remaining largely hidden. For wider spans or heavier loads, a deeper steel section — such as a parallel flange channel (PFC) — may be specified by your engineer.
Precast concrete lintels are an economical option for moderate spans. They come in standard lengths and are reinforced internally with steel bars to handle tensile stresses across the span. Reinforced concrete lintels offer high strength and long service life, making them suitable for most residential window openings in solid or double-brick walls.
Combination lintels for cavity walls are engineered specifically for cavity construction. These typically feature a steel angle supporting the outer leaf, a separate support for the inner leaf, and an integrated cavity tray to prevent moisture bridging across the gap. They come as a single unit designed for the specific cavity width — ordering requires accurate measurement of your wall’s cavity dimension.
Regardless of type, all lintels require adequate bearing at each end. The minimum bearing length is 150mm of solid brickwork on each side of the opening. This means the lintel extends at least 150mm past the edge of the window reveal into undisturbed masonry. For wider openings (over 1800mm) or heavier loads, your engineer may specify 200mm or even 225mm bearing — some guidelines for face brickwork recommend 225mm minimum to account for the eventual toothing out of reveals below.
Temporary Propping When Removing Brickwork
If you are replacing a failed lintel or forming a new opening, the brickwork above must be temporarily supported while the permanent lintel is removed or installed. This is where the real danger lies in any brick wall window project.
The standard method uses acrow props (adjustable steel props) positioned on each side of the opening to support needle beams that pass through the wall. The needles carry the masonry weight while you work below. Key principles:
- Props must be plumb, on solid footing (concrete slab or heavy sole boards on compacted ground), and concentrically loaded for maximum safe working capacity.
- Needles should be positioned at maximum 900mm to 1200mm centres across the opening width.
- Only remove the minimum amount of masonry needed to fit the permanent lintel. Do not open the full depth of the window before the lintel is bedded and cured.
- Once the lintel is bedded on mortar, allow a minimum of 24 hours curing (longer in cold or damp conditions) before removing temporary supports.
- Never attempt propping in severe wet or windy conditions — dynamic wind loads on unsupported masonry are unpredictable.
A critical point that causes incidents on residential sites: eccentrically loaded props (such as those fitted with tongue-style bracket attachments) have drastically reduced safe working loads compared to concentrically loaded props. A standard acrow prop can safely support approximately 3,400 kg when loaded vertically through its axis, but this drops to as low as 340 kg when a cantilevered bracket attachment introduces lateral forces. For anything beyond the smallest openings in single-skin walls, proper needle beams through the wall are the safer method.
Building Permits and Code Compliance
Australian building regulations draw a clear line between work that needs formal approval and work that does not. Understanding where your project falls saves time, money, and potential legal headaches down the track.
Like-for-like replacements — removing an existing window and fitting a new aluminium frame of the same size into the same opening — typically do not require a building permit or development application. The structural opening is unchanged, the lintel remains in place, and the wall’s load path is unaffected. Most state and local council regulations classify this as exempt building work, though you should still confirm with your specific council as exemptions vary between jurisdictions.
New openings and enlargements are a different matter entirely. When adding windows to a brick house by cutting into a wall that previously had no opening, or when widening an existing opening, you are modifying the structural capacity of the wall. Under the National Construction Code (NCC) and state-level building legislation, this work requires:
- A building permit or complying development certificate (CDC) from your local council or a private certifier
- Structural engineering documentation specifying the lintel design, bearing requirements, and any temporary works methodology
- Compliance with AS 3700 (Masonry Structures) for the brickwork and AS 4100 (Steel Structures) or AS 3600 (Concrete Structures) for the lintel, depending on material
- In some states, evidence that the new opening meets BAL (Bushfire Attack Level) requirements if the property sits within a designated bushfire-prone area
Heritage-listed properties or homes within heritage conservation areas carry additional approval requirements. Modifying external walls — even replacing existing windows with a different frame material or style — may require consent from your state heritage authority or local council heritage advisor.
If you are considering how to add a window to a brick wall and the project involves a load-bearing wall, the engineering fees and permit costs are not optional extras. They are the difference between a compliant, insurable renovation and one that creates legal liability, complicates future property sales, and potentially endangers occupants.
Adding windows to a brick house without proper structural documentation is one of the most common building compliance issues identified during pre-purchase inspections. Unapproved structural work can trigger rectification orders, void home insurance, and reduce property value.
Structural integrity confirmed, lintel condition verified, and permits sorted — the project can move forward to the physical work itself. The next phase deals with carefully removing an existing frame from its brick reveal, or for those cutting fresh openings, the precise and methodical process of taking out brickwork without damaging what remains above.
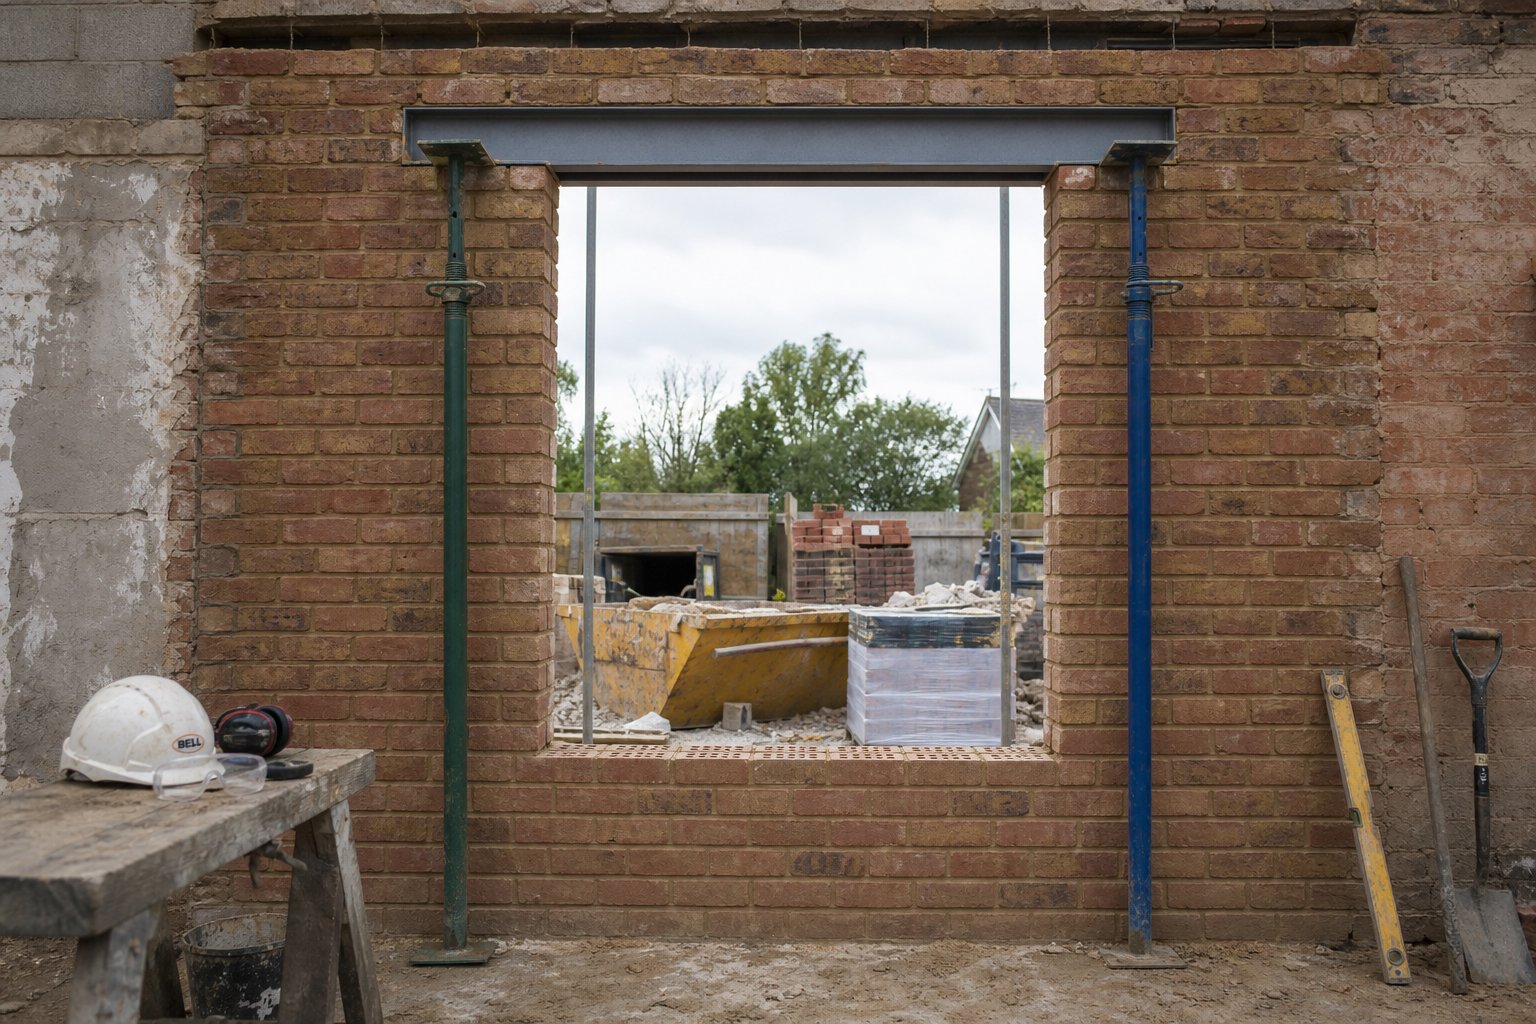
Step 3 – Remove the Old Window or Cut a New Opening Safely
This is where the project gets physical. Whether you are pulling out a tired timber frame or cutting fresh brickwork, the approach must be methodical and controlled. Rushing through removal damages reveals, cracks mortar joints, and creates problems that follow you through every subsequent step. Protective gear goes on first — safety glasses, dust mask rated P2 minimum, heavy gloves, and hearing protection if power tools are involved.
Removing an Existing Window Frame from Brick
For anyone wondering how to replace windows in a brick house, the removal phase is often less dramatic than expected. The frame is held in by a combination of sealant, fixing lugs or screws, and sometimes decades of paint bridging the gap between aluminium or timber and masonry. Work from inside out, and take it one connection at a time.
Cut the perimeter sealant. Run a sharp utility knife along the entire junction between the frame and brick reveal, both internally and externally. Old silicone or mastic will resist — score it several times rather than trying to slice through in one pass. For frames bedded in mortar rather than sealant, use a thin cold chisel to break the bond.
Remove interior trim. Pry off architraves, plaster stops, or timber reveals carefully using a flat bar with a thin blade. Older Australian homes often have hardwood architraves worth salvaging. Slide the bar behind the trim and lever gently against a scrap block to avoid denting plaster.
Locate and release fixings. Aluminium frames are typically secured with metal frame anchors (L-shaped straps screwed into the reveal) or direct masonry screws through pre-drilled holes in the frame. Find them by looking for screw heads along the frame edges, usually hidden under snap-on cover strips or behind hinged sash components. Unscrew each fixing point. If screws are corroded and refuse to budge, drill them out with a metal bit slightly smaller than the screw diameter.
Lift or lever the frame free. With all fixings released and sealant cut, the frame should lift or push out of the opening. If it resists, an old aluminium frame can be cut with a reciprocating saw or hacksaw at the mid-point of each side member, allowing it to fold inward and come away in sections. Timber frames that have swollen with moisture respond well to the same approach — saw through the jambs and collapse the frame inward.
Handle rotted timber sub-frames. Many older brick homes — particularly those built between the 1940s and 1970s — have a hardwood or treated pine sub-frame (sometimes called a buck or rough frame) built into the brick reveal, with the window frame fixed into this timber rather than directly to masonry. If this sub-frame is rotted, crumbling, or pulling away from the brick, it must come out entirely. Dig it from the reveal using a pry bar and chisel, working carefully to avoid disturbing the bricks above. The new aluminium frame will fix directly to the masonry, so the sub-frame is not replaced — just ensure the reveal behind it is sound and clean.
Clean the reveal. Once the frame is out, scrape away old mortar dags, sealant residue, and debris from all four reveal faces. A bolster chisel and stiff brush handle most of it. The goal is a clean, solid brick surface that new packers, fixings, and sealant can bond to reliably.
Cutting a New Opening in an Existing Brick Wall
Understanding how to put a window in a brick wall when no opening exists is one thing. Actually doing it safely is quite another. This is professional-level work for a reason — it demands structural engineering input, temporary works competence, and an understanding of how masonry distributes load. For most homeowners, this section is about knowing what the process involves so you can supervise your builder or assess quotes intelligently.
Never remove brickwork from a wall without first installing adequate temporary structural support above the opening. Masonry does not give visual warning before failure. A single-storey height of standard brick wall weighs over 600 kg per linear metre, and collapse happens without time to react. If you are unsure whether your temporary support arrangement is adequate, stop work and consult a structural engineer experienced in temporary works.
The process for how to put a window in an existing wall follows a strict sequence:
- Install temporary structural support. Acrow props and needle beams are positioned to carry the masonry weight above the proposed opening. Needles pass through the full wall thickness and are propped on each side, ensuring the load transfers concentrically through the props to solid footing below. Props must be plumb, pinned at the correct height, and sitting on sole boards or concrete — never on bare soil or floorboards that could compress under load.
- Mark the opening precisely. Using a spirit level and referencing brick coursing lines, mark the exact outline of the new opening on the wall face. Cut lines should follow mortar joints wherever possible — cutting through bricks is messier, creates more dust, and leaves a ragged reveal that is harder to seal against. The top of the opening aligns with the underside of the lintel bearing position.
- Cut along mortar joints. An angle grinder fitted with a diamond masonry blade cuts the perimeter mortar joints. Work in controlled passes, keeping the blade wet if possible to suppress carcinogenic silica dust. A P2 respirator is the absolute minimum protection — a powered air-purifying respirator (PAPR) is preferable for extended cutting.
- Remove bricks course by course. Starting from the top of the opening and working downward, carefully lever bricks out along the cut lines. Remove only what is needed to seat the lintel first. Do not open the full depth of the opening before the permanent support is in place — this is a common mistake that dramatically increases collapse risk.
- Install the specified lintel. Bed the lintel onto mortar at each bearing point, ensuring minimum 150mm (preferably 225mm in face brickwork) of solid masonry supports each end. Pack above the lintel tightly with mortar and slate shims to eliminate any gap between the lintel top and the brickwork it now supports.
- Allow mortar to cure. A full 24 hours minimum — longer in cold weather — before removing any temporary support. Only once the lintel is carrying load independently should you remove the remaining brickwork below to form the complete opening.
How do you replace windows in a brick house where the existing opening is the wrong size? The same principles apply. Enlarging an opening means cutting away supported brickwork, which means temporary propping, lintel re-specification, and often a building permit. Treat any enlargement as equivalent to cutting a fresh opening — the structural risks are identical.
If you are looking at how to replace a window in a brick house and your reveals are clean, your lintel is sound, and the opening dimensions match your new frame, you have cleared the hardest physical hurdle. The opening is ready for its new occupant — but before the aluminium frame goes anywhere near that reveal, there is critical waterproofing detailing to address. Moisture management above and below the window determines whether this installation stays dry for decades or develops damp problems within its first winter.
Step 4 – Waterproof with DPC and Cavity Tray Installation
Moisture is the silent killer of window installations in brick walls. A frame can be perfectly plumb, squarely fixed, and beautifully sealed — yet still develop damp patches, peeling paint, and mould within a year if the waterproofing layers above and below are missing or incorrectly detailed. These hidden components do the thankless work of diverting water that travels through the cavity and wicks through masonry, keeping it away from your interior walls and the aluminium frame itself.
Install the Cavity Tray Above the Opening
In any cavity wall construction, rainwater that penetrates the outer brick leaf runs down the inside face of that leaf and collects within the cavity. Without intervention, this water reaches the lintel above your window and pools there, eventually tracking across to the inner leaf and appearing as damp staining on internal walls around the window head.
A cavity tray solves this by acting as a waterproof gutter inside the wall. It sits directly above the lintel — some steel lintels incorporate an integral tray, but many require a separate site-formed or proprietary cavity tray installed above them. The tray catches any moisture descending the cavity and redirects it outward through weep holes in the external brickwork.
Correct installation follows specific principles that, if ignored, make the entire system ineffective:
- Slope outward: The tray must rise a minimum of 150mm from the outer leaf to the inner leaf, creating a fall that directs water toward the external face of the wall rather than allowing it to pond.
- Extend past the opening: The tray should run the full length of the lintel and include sealed stop ends at each end to prevent collected moisture from simply dropping off the tray edges into the remainder of the cavity.
- Single continuous length: Joints in a cavity tray are weak points. Where joints cannot be avoided, they need a minimum 100mm overlap, rigidly supported and sealed according to the manufacturer’s specifications.
- Keep it clean: Mortar droppings that land on the tray during bricklaying create dams that block water flow. The cavity above the tray must remain free of debris.
Weep holes provide the exit route for collected water. Position them in the outer leaf immediately above the cavity tray at maximum 900mm centres, with one at each end of the tray as a minimum. Open perpend joints (where the vertical mortar is omitted between two bricks) or proprietary weep hole vents both work — the key is that they remain unblocked and functional over the life of the building. A window in brick wall construction without adequate weep hole provision above the head is a ticking clock for moisture damage.
DPC Integration at the Sill
Water management at the window head gets most of the attention, but the sill junction is equally vulnerable. Rainwater hitting the glass runs down to the sill, and wind-driven rain can be pushed back under the sill into the wall below. At the same time, moisture within the wall needs a damp-proof course (DPC) to prevent it wicking upward into the window frame or internal plaster.
The sill DPC must integrate with the window system to create an unbroken moisture barrier. In a properly detailed installation, the DPC is dressed under the external sill — whether that sill is a precast concrete unit, a reconstituted stone cill, or a pressed aluminium section — and lapped down to connect with the main wall DPC or cavity tray below. This ensures any water that passes beneath the sill encounters the DPC and is directed outward rather than inward.
For aluminium window frames specifically, sub-sill flashing offers an additional layer of protection. This is a formed metal or flexible membrane tray that sits beneath the frame’s bottom rail, collecting any water that breaches the primary sealant line and directing it out through the frame’s built-in drainage slots. Most quality aluminium window systems designed for replacement windows with brick molding details include provisions for sub-sill drainage — check your frame manufacturer’s installation guide for the specific flashing detail required.
The sill itself must slope away from the building at a minimum fall of 10 degrees, project at least 45mm beyond the external wall face below, and incorporate a drip groove on its underside. That drip groove breaks the surface tension of water running along the sill soffit, preventing it from tracking back to the wall face and causing staining or moisture penetration at the joint below.
Reveal Preparation for Weathertightness
With cavity tray and DPC work complete, attention turns to the reveal surfaces that the aluminium frame will sit against. These brick faces form the seal interface — and sealant only performs as well as the surface it bonds to.
Start by raking out any loose, crumbling, or hollow mortar from the reveal faces. Use a plugging chisel or a narrow cold chisel to dig back until you reach solid material. Repoint any deep voids with a strong mortar mix (4:1 sand to cement for reveal faces that will receive sealant) and allow it to cure fully before proceeding. Sealant applied over friable mortar will pull away from the wall within months.
If the reveal surface is significantly uneven — common in older homes where the original bricklaying was rough inside the reveal, knowing it would be hidden by a frame — apply a thin render screed to create a flat, consistent surface. A 10mm coat of polymer-modified render, ruled flat with a straight edge, gives sealant a clean bonding plane. This step is particularly important for windows in brick walls where the reveal bricks were laid with recessed or raked joints, as those indentations create voids behind the sealant bead that compromise the seal.
Finally, brush the reveals clean of dust with a stiff bristle brush and, if the brickwork is particularly dusty or powdery, apply a coat of sealant primer recommended by your chosen sealant manufacturer. Primer is not always necessary on clean, sound brick, but on older masonry with weathered surfaces, it dramatically improves adhesion and ensures the seal remains intact through seasonal thermal movement of the aluminium frame.
These waterproofing layers are invisible once the job is finished — hidden behind brickwork, beneath sills, and under sealant beads. That invisibility is precisely why they get skipped by rushed installers and overlooked in DIY guides. Yet they are the difference between an aluminium window that stays dry for thirty years and one that develops moisture problems before its second winter. With the opening now fully weatherproofed and the reveals prepared, the frame itself is ready to go in.
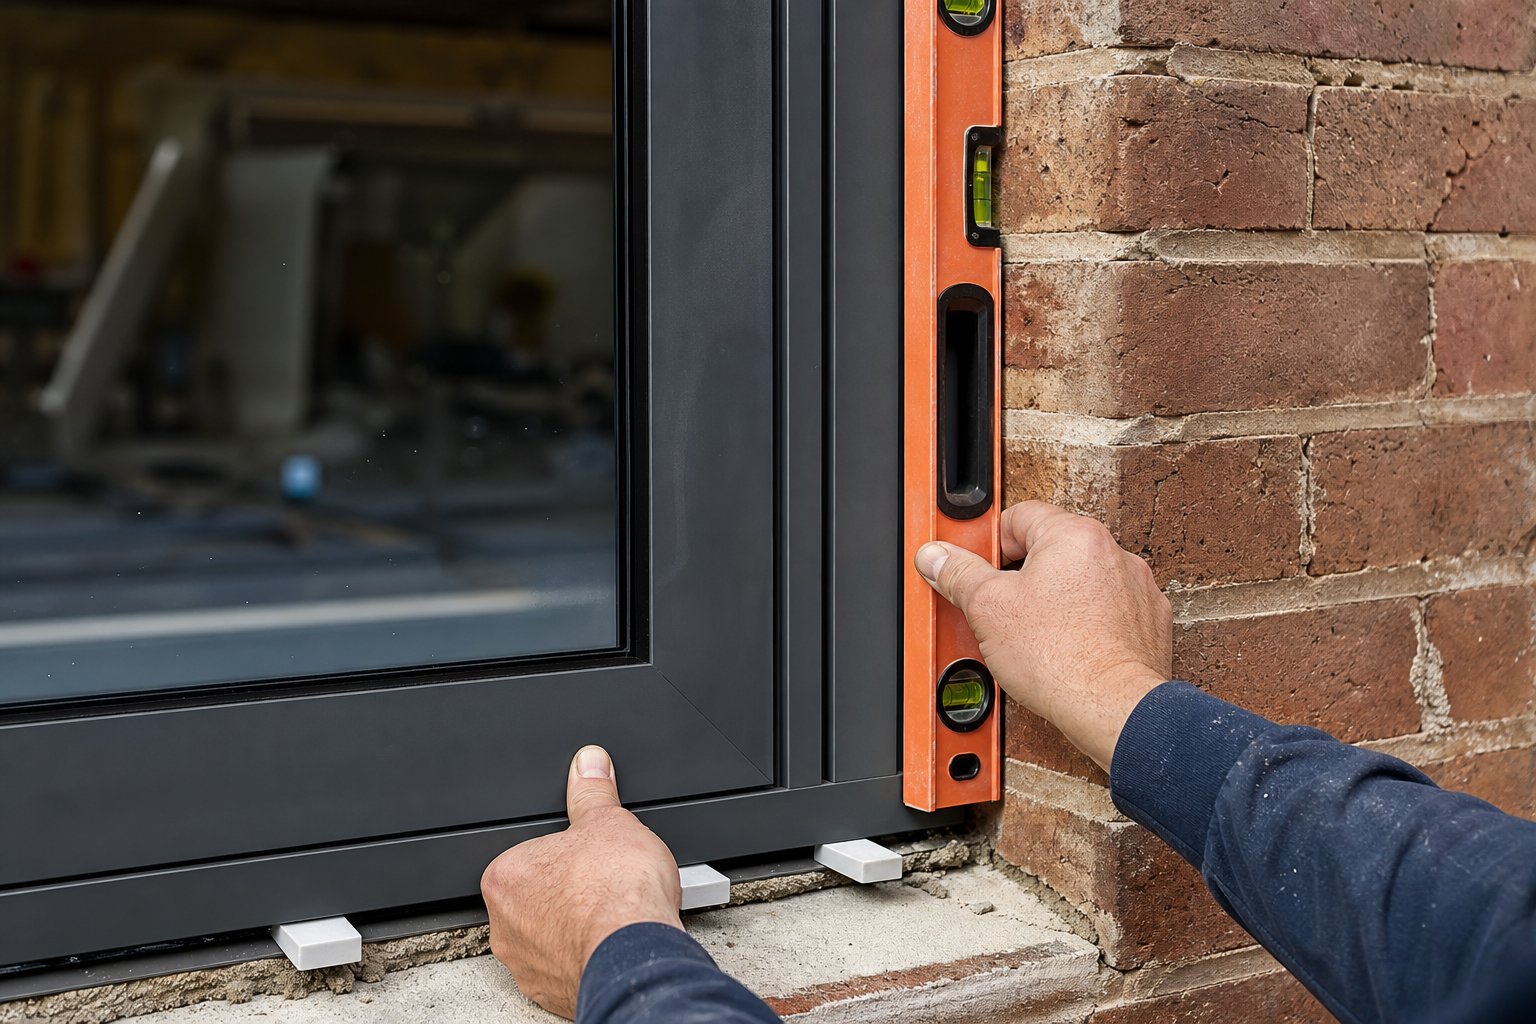
Step 5 – Secure the Aluminium Frame with Masonry Fixings
The aluminium frame is the one component in this project that offers no forgiveness. Timber can be planed, PVC flexes, but aluminium holds its shape rigidly — which means any distortion introduced during fixing shows up permanently as bowed profiles, sticky sashes, or locks that refuse to engage. Getting the frame positioned accurately and fixed without over-stressing it is where quality separates a professional-looking result from a frustrating one.
Position and Plumb the Aluminium Frame
Lift the frame into the prepared opening and rest it on plastic packers placed at each jamb position along the sill. These base packers set the height and provide a firm bearing point — never rest the frame directly on brick or mortar, as any unevenness transfers straight into the bottom rail.
With the frame sitting on its packers, insert additional packers between the frame sides and the brick reveal to centre it within the opening. The gap between frame and masonry should be even on both sides and across the top, typically 5mm to 7mm depending on your fitting tolerance from the measurement stage. This gap serves three functions: it allows final adjustment for plumb, provides space for insulating foam, and prevents the aluminium from contacting cold brickwork directly.
Check plumb on both jambs using a spirit level — a 1200mm level gives a more accurate reading than a short torpedo level. Check level across the head and sill. Then measure the diagonals of the frame within the opening. If both diagonals match within 2mm, the frame is square. Adjust packers as needed until all four checks read true. Take your time here. Every millimetre of adjustment now prevents operational problems later.
Frame setback — how far the window sits back from the external brick face — is both a performance decision and an aesthetic one. Three positions are common when installing windows in brick wall openings:
Centred within the wall is the most common modern positioning for Australian residential installations. The frame sits within the insulation zone of the cavity, creating a reveal both internally and externally. This balances weather protection with solar shading and keeps the thermal break aligned within the cavity, minimising cold bridging.
Set back into a deep external reveal positions the frame closer to the inner leaf. The deep external reveal provides excellent shading on north and west-facing walls — useful in Australian climates where summer solar gain drives cooling costs. The trade-off is that the frame must fix directly to or near the internal structure, which can increase thermal bridging unless a structural thermal break spacer is used between the masonry and the frame.
Flush with the external brick face creates a sleek, contemporary facade with minimal visible reveal externally. It maximises the internal sill depth — sometimes enough for a reading nook or desk surface. This position relies on metal installation straps to project the frame outward from the structure. Weather exposure is highest in this configuration, so sealant detailing and head flashing become more critical.
Masonry Fixing Methods for Aluminium Frames
The frame must be mechanically fixed to the brick reveal at regular intervals. Three methods are used for how to install a window in brick wall openings, and the choice depends on the frame system, wall type, and setback position.
Frame anchors (installation straps) are galvanised mild steel straps screwed to the back of the aluminium frame and then plugged or screwed into the brick reveal or blockwork behind. They allow the frame to sit anywhere within the wall depth without requiring the frame itself to align with the masonry surface. This is the preferred method when the window is positioned within the insulation zone or flush with the external face, as the straps bridge the gap between frame and structure without creating thermal bridges through the aluminium profile.
Direct masonry screws through pre-drilled frame holes work where the frame sits directly against or very close to the masonry reveal. Holes are pre-drilled through the aluminium frame profile at the factory or on site, then concrete screws drive through the frame, through any packer, and into a plastic plug seated in the brick. This method provides a very secure, rigid fix but requires the reveal to be flat and the frame to sit within a few millimetres of the masonry surface.
Through-fixing with sleeve anchors uses a bolt and expanding sleeve that passes through the frame and locks into the masonry behind. This method delivers high pull-out resistance and works well in solid brick. It is common on larger or heavier aluminium frames, such as sliding door systems, where wind loads demand stronger fixings.
Regardless of method, fixing spacing follows a consistent rule: place the first fixing 150mm from each corner of the frame on both jambs, then space subsequent fixings at a maximum of 600mm centres along the frame length. For windows wider than 1800mm, add fixings along the head rail as well. Always insert a packer between the frame and wall at each fixing point before drilling — this prevents the screw from pulling the aluminium profile inward and distorting it as you tighten.
Compatible fastener types for aluminium-to-brick connections include:
- 6.5mm concrete screws (such as Tapcon or equivalent) into pre-drilled pilot holes with plastic frame plugs — suitable for most residential installations in solid brick
- Galvanised steel frame anchors (fixing straps) — 30mm x 2.5mm minimum, fixed with 8g stainless steel screws to the frame and 8mm nylon plugs with coach screws into the masonry
- M8 or M10 sleeve anchors — for heavy-duty applications in solid masonry where high pull-out loads are expected
- Stainless steel screws where the installation is within 1km of the coast or in high-humidity environments — galvanised fixings corrode in salt-air exposure zones common across Australian coastal areas
A critical point from experienced fabricators: when using direct screw fixings, drive them through the thermally broken multi-chambered section of the profile rather than through the visible aluminium face. This keeps fixing points hidden, avoids dimpling the external finish, and maintains the integrity of the thermal break system. Over-tightening is the single most common mistake when installing replacement windows in brick house projects — aluminium does not flex back. A quarter-turn past snug is enough. Go further and the profile draws inward, creating visible bowing that no amount of sealant or trim will disguise.
Thermal Break Considerations
Aluminium conducts heat roughly 1,000 times more efficiently than timber. Without intervention, an aluminium frame acts as a direct thermal bridge between the cold external environment and your warm interior — pulling heat outward in winter and driving it inward in summer. The visible result is condensation forming on the internal face of the frame, dripping onto sills, feeding mould growth, and staining plasterwork below.
Thermally broken aluminium frames address this by splitting the profile into two halves — an external aluminium section and an internal aluminium section — connected by a low-conductivity polyamide (nylon) strip. This strip interrupts the thermal path while maintaining structural rigidity. For Australian conditions, thermally broken frames are particularly important in climate zones 6, 7, and 8 (southern Victoria, Tasmania, highland areas) where winter overnight temperatures regularly drop below 5 degrees Celsius and indoor-outdoor temperature differentials are large enough to drive significant condensation on non-broken frames.
Beyond the frame itself, the junction between the aluminium and the masonry reveal needs attention. Even a thermally broken frame loses performance if the fixing method creates a metal-to-masonry cold bridge around the perimeter. Compressible closed-cell foam tape applied to the back of the frame before it goes into the opening creates a thermal buffer between aluminium and brick. This foam — typically 3mm to 6mm thick, self-adhesive — sits between the frame’s outer face and the reveal surface, preventing direct metal-to-masonry contact at packer and fixing points.
For how to install replacement windows in a brick house where the existing frames were non-thermally-broken aluminium (common in Australian homes from the 1980s and 1990s), upgrading to thermally broken profiles during the replacement delivers a noticeable improvement in comfort and a measurable reduction in heating energy. The frame positioning discussed earlier also plays a role — centring the window within the insulation zone, with the thermal break aligned to the cavity insulation plane, maximises the benefit of the break by keeping both frame halves within their intended temperature zones.
With the frame now plumb, level, rigidly fixed, and thermally isolated from the surrounding masonry, the structural installation is complete. What remains is closing those gaps between frame and brick — not with fixings, but with foam, sealant, and trim that lock out air, water, and noise while delivering a finished appearance worthy of the precision work underneath.
Step 6 – Seal, Insulate, and Complete the Finish Work
The gap between your aluminium frame and the brick reveal is small — typically 5mm to 7mm on each side — but its role in the installation is disproportionately large. This perimeter joint must block wind-driven rain, prevent air infiltration, insulate against thermal transfer, and accommodate the constant expansion and contraction of an aluminium profile that moves roughly 1.5mm per linear metre across a 40-degree Celsius temperature swing. Get the foam and sealant wrong and even a perfectly fixed frame will leak, condense, or whistle in a crosswind.
Apply Expanding Foam and Backing Rod
Start by inserting a closed-cell polyethylene backing rod into the perimeter gap. The rod diameter should be roughly 25 to 30 percent larger than the gap width so it compresses and holds itself in position without adhesive. For a typical 6mm gap, use an 8mm backing rod. Push it in to a consistent depth of approximately 5mm from the external face of the frame — this controls where the sealant sits and prevents the sealant from bonding to the back of the joint (a condition called three-sided adhesion that causes premature cracking under movement).
Behind the backing rod, fill the remaining cavity depth with low-expansion polyurethane foam specifically formulated for window and door applications. This foam expands only 20 to 60 percent — enough to fill irregular voids without exerting pressure on the frame. It provides thermal insulation within the gap and adds a secondary air seal behind the primary sealant line.
The critical word here is low-expansion. General-purpose expanding foam grows 150 to 300 percent from its dispensed volume and exerts significant pressure during curing. Apply it around an aluminium frame and it will bow the profiles inward, jamming sashes, misaligning locks, and creating visible distortion that cannot be corrected without removing the frame entirely. For any window replacement in brick house projects, always verify the can label specifies “window and door” or “low-expansion” before you start.
Apply the foam from the bottom up, filling gaps only 40 to 50 percent on the first pass. The foam will expand to fill the rest. Allow it to cure fully — typically eight to 24 hours depending on temperature and humidity — then trim any excess flush with the frame face using a sharp utility knife before moving to sealant application.
External and Internal Sealant Application
Sealant is the final weatherproofing layer and the only part of this joint visible once the job is done. Choosing the wrong product is one of the most common causes of window replacement on brick house installations that develop leaks within a few years.
For aluminium-to-brick perimeter joints, use either a neutral-cure silicone or an MS polymer sealant. Both chemistries bond reliably to both aluminium and masonry without primer in most conditions, and both offer the elasticity needed to absorb thermal movement across the joint. Neutral-cure silicone delivers superior UV resistance and a 20 to 25 year service life on exposed exterior joints. MS polymer accepts paint — useful for interior joints and trim work where a seamless painted finish is required.
What you must avoid is acetoxy-cure silicone — the type with a strong vinegar smell during application. Acetoxy silicones are corrosive to aluminium and have limited adhesion to many masonry substrates. They are cheap and widely available at hardware stores, which is precisely why they end up on so many DIY installations where they should not be.
The correct joint profile relies on the backing rod you installed earlier. With the rod at 5mm depth and the sealant applied over it, you create a bead that bonds only to the frame face on one side and the brick reveal face on the other — two-sided adhesion. When the aluminium expands and the joint narrows, or contracts and the joint widens, the sealant stretches freely between those two bonded faces without tearing. The ideal cross-section is slightly concave (recessed), which maximises contact width with both surfaces and prevents water from pooling against the frame edge.
Apply the sealant in a single continuous pass using a professional ratchet or battery-powered gun — stop-start application creates weak points in the bead. Tool it immediately with a profiling spatula or wetted finger, pressing firmly to ensure full contact with both substrates. For joints up to 10mm wide, equal width and depth is acceptable. For anything wider, maintain a 2:1 width-to-depth ratio. Remove masking tape straight after tooling, before the sealant skins over.
Internally, the same principles apply but the product choice may differ. Where the internal joint will be painted as part of the room finish, MS polymer is the better option — it accepts all paint systems once fully cured. Neutral silicone cannot be painted, so it shows as a permanent strip of sealant colour against the wall. For a window replacement brick house project where you want an invisible interior finish, MS polymer under paint gives a far cleaner result.
Trim, Flashings, and Final Checks
External head flashing is essential where no drip detail exists above the window — common when replacing windows in brick home installations where the lintel sits flush with the outer brick face. A formed metal flashing (Colorbond or aluminium to match the frame) projects from the wall above the window head, directing rainwater away from the frame-to-brick junction. It tucks into a mortar joint or clips to the lintel face, sealed at the wall junction, and extends 10 to 15mm beyond the frame below with a kicked-out drip edge that throws water clear.
Internally, fit architraves or plaster returns to cover the gap between the frame and the wall lining. Timber architraves are the traditional finish in Australian homes — a simple flat or profiled moulding pinned and glued around the frame perimeter. For a more contemporary look, plaster returns (also called shadow-line or square-set reveals) bring the plaster directly to the frame edge with a small shadow gap, eliminating visible trim entirely. Whichever approach you take, seal the junction between trim and frame with a paintable MS polymer or acrylic caulk before finishing with paint.
Before calling the job complete, run through this final inspection sequence with every window:
- Open and close all sashes — operation should be smooth with no binding, scraping, or excessive resistance at any point in the travel.
- Engage all locks and latches — they should click positively into their keeps without needing to lift, push, or force the sash into alignment.
- Check drainage slots in the outer frame — these small slots in the bottom rail allow condensation and wind-driven water to escape. Confirm they are clear of foam, sealant, or mortar and that water drains freely outward.
- Inspect all sealant joints externally and internally — look for gaps, missed sections, or areas where the sealant has pulled away from the substrate during tooling.
- Close the window and check from outside for any visible daylight around the frame perimeter. Daylight means a gap exists in the seal that will admit wind and water.
- Run a hand slowly around the internal frame perimeter on a windy day — any noticeable draught indicates a breach in the foam or sealant line that needs attention.
These finishing steps look minor on paper, but they account for the majority of post-installation complaints. A frame that rattles, a sealant bead that cracks after six months, or a missing head flashing that allows water to track behind the frame — each one traces back to a shortcut taken in this final phase. Do it once, do it properly, and the installation earns its keep for decades without callbacks.
Even with careful technique, certain problems surface after the tools are packed away. Cracked mortar around fixings, persistent condensation on the frame, or mysterious water stains that appear weeks later — these issues have specific causes and targeted solutions that differ from the installation process itself.
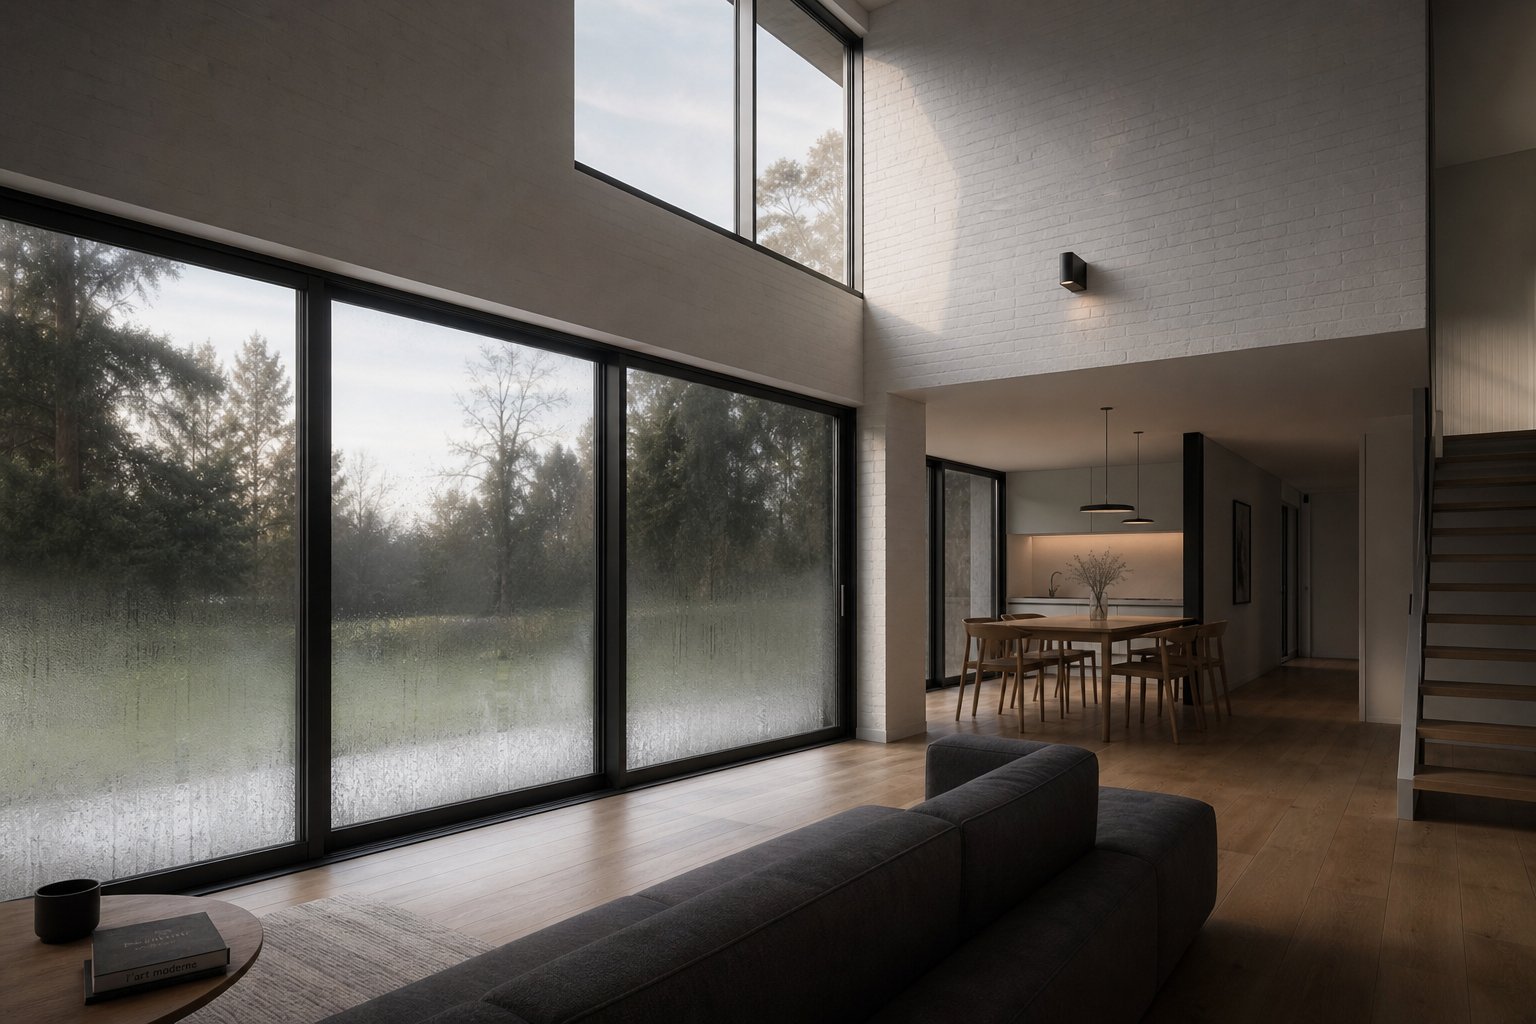
Step 7 – Troubleshoot Common Installation Problems
Some issues only reveal themselves once the job is done and the weather turns. Others happen mid-installation — a mortar joint that splits under the drill, a reveal so uneven the sealant has no flat surface to grip. Knowing why these problems occur makes the difference between a quick fix and chasing the same fault repeatedly.
Cracking Mortar During Fixing
Mortar cracks when a masonry drill bit creates stress too close to the edge of a brick or when the bit diameter is oversized for the plug being inserted. The result is a fractured mortar bed, a loose plug, and a fixing point that holds no load. In older homes where lime mortar has softened over decades, even moderate drilling force can crumble the joint entirely.
The fix starts with placement. Keep all drill holes a minimum of 50mm from the edge of any brick or block — this gives the surrounding masonry enough mass to absorb expansion forces from the plug without splitting. Match the masonry bit diameter exactly to the plug size specified by the manufacturer. A 6mm plug needs a 6mm hole, not a 6.5mm bit that someone grabbed because it was closer.
Drill mode matters too. Standard hammer-drill action works well in hard engineering brick and dense concrete, but soft lime mortar or sandstock bricks respond badly to percussive force. Switch to rotation-only mode and let the bit cut rather than punch its way through. The hole takes longer but the surrounding material stays intact. If you are replacing windows on a brick house built before the 1940s, assume lime mortar throughout and drill accordingly — these joints are often barely harder than compacted sand.
Uneven Reveals and Out-of-Square Openings
Perfectly straight reveals exist mostly in new builds. In older brick homes — particularly solid double-brick construction from the mid-twentieth century — the reveal brickwork was laid roughly because it was always hidden behind a timber sub-frame. Once that old frame comes out, you are left with bowed surfaces, recessed mortar joints, and corners that are anything but 90 degrees.
Three approaches handle this, ranging from simple to involved:
Packing shims at fixing points is the minimum intervention. Plastic packers of varying thickness between the frame and reveal absorb minor irregularities (up to 5mm) and keep the frame true while the fixings draw tight. Every fixing point needs a packer behind it — fixing through an unsupported section of frame pulls the profile into the hollow behind it.
Render screed applied to the reveal suits more pronounced unevenness. A thin coat of polymer-modified render ruled flat with a straight edge creates a consistent plane for sealant adhesion. Allow full cure time (minimum 24 hours for polymer renders, longer for lime-based products) before installing the frame against it. This approach is particularly worthwhile when installing replacement windows in brick where the old timber sub-frame masked deep voids in the masonry behind.
Adjustable cover trims on the aluminium frame handle visual irregularities without needing to modify the reveal itself. Many aluminium window systems offer clip-on architrave trims in various widths that overlap the frame-to-reveal junction. A wider trim on one side compensates for a reveal that is further from the frame at that point. The frame remains square and true; the trim absorbs the visual discrepancy.
Moisture Ingress After Installation
Water appearing around a newly installed window is demoralising, but the source is almost always traceable to one of a handful of detailing failures. The symptoms point directly to the cause:
- Damp staining at the window head, spreading horizontally: Missing or incorrectly installed cavity tray above the lintel. Water descending the cavity has no barrier and tracks across to the inner leaf. Remediation requires removing brickwork above the lintel to retrofit a cavity tray — a disruptive fix best handled by a professional bricklayer.
- Water pooling on the internal sill or dripping from the bottom frame rail: Blocked drainage slots in the aluminium frame’s outer rail. Check for mortar, foam, or sealant that has been inadvertently pushed into the drainage channels during installation. Clear them with a thin screwdriver or compressed air.
- Water running down the wall below the external sill: Insufficient sill projection or a missing drip groove. Without a drip edge projecting at least 45mm from the wall face and a groove on the sill underside, water clings to the soffit by surface tension and runs back to the brickwork below. Retrofitting a pressed-metal drip flashing under the sill resolves this without removing the frame.
- Damp patches appearing around the frame perimeter during heavy rain: Failed or incomplete sealant joints. The most common failure point is the bottom corners where vertical and horizontal sealant beads meet — if these were not applied in a continuous pass, the junction cracks under thermal movement. Cut out the failed section, re-apply backing rod, and reseal with neutral-cure silicone or MS polymer.
- Weep stains on brickwork above but no internal damp: Weep holes above the cavity tray are blocked with mortar or debris. Dirt and debris accumulation prevents collected water from draining to the exterior. Clear blockages carefully using a thin piece of wire or a compressed air nozzle, taking care not to push material further into the cavity.
If you are troubleshooting how to replace windows in brick and the previous installation leaked, inspect these details before the new frame goes in. Repeating the same waterproofing omissions with a fresh frame just resets the clock on the same problem.
Condensation on Aluminium Frames
Condensation forming on the internal face of aluminium window frames during cold mornings is not a sealant failure or a sign of water ingress — it is physics. Aluminium conducts heat efficiently, creating thermal bridges that transfer interior warmth directly to exterior surfaces. When humid indoor air contacts the cold aluminium, moisture condenses on the frame in exactly the same way it forms on a cold glass of water on a warm day.
Thermally broken frames solve this by incorporating a polyamide insulating strip between the internal and external halves of the profile. The internal aluminium stays closer to room temperature, preventing the surface from dropping below the dew point of the indoor air. But many Australian homes — particularly those built or renovated in the 1980s and 1990s — have non-thermally-broken aluminium frames where this problem is a daily occurrence through winter.
If the installed frame lacks a thermal break, remedial options are limited but not nonexistent:
Reduce indoor humidity. Run exhaust fans during cooking and showering, ensure the clothes dryer vents externally, and maintain adequate ventilation throughout the home. Lower indoor humidity means the dew point temperature drops, and the frame surface no longer reaches the condensation threshold as readily.
Improve air circulation at the window. Condensation worsens where air stagnates against cold surfaces. Keeping curtains or blinds slightly open at the base allows room air to circulate across the frame, warming it marginally and carrying moisture away before it condenses.
Apply a low-conductivity coating or tape. Specialised thermal insulation films or self-adhesive foam tapes applied to the internal frame surface create a buffer layer. These are cosmetic compromises rather than engineered solutions — they reduce condensation noticeably but do not eliminate it in severe conditions.
Plan for replacement with thermally broken profiles. For homes in southern Australian climate zones where winter condensation causes ongoing mould, timber damage, or health concerns, the long-term answer is upgrading to thermally broken aluminium frames that comply with current NCC energy efficiency requirements. This is often the practical conclusion for anyone who has worked through how to replace windows in brick and discovered the existing frames are fundamentally unsuited to the local climate.
Troubleshooting is easier when you understand root causes rather than chasing symptoms. Each problem above traces back to a specific installation decision — fixing placement, reveal preparation, waterproofing detailing, or frame specification. For projects where multiple issues compound, or where the wall type and opening complexity exceed confident DIY territory, professional involvement becomes less of a convenience and more of a necessity.
When to Hire a Professional Aluminium Window Installer
Knowing how to install replacement windows in a brick home is valuable — it helps you understand the process, assess quotes, and spot shortcuts that compromise quality. But there is a point where self-reliance becomes a liability. Some brick wall scenarios carry risks that no amount of YouTube research can adequately prepare you for, and the cost of getting it wrong far exceeds the cost of hiring someone who does this work daily.
When DIY Ends and Professional Help Begins
A confident homeowner with the right tools can handle a like-for-like replacement in a straightforward brick veneer reveal at ground level. Beyond that, the variables start stacking against you. Engage a professional when your project involves any of the following:
- Cutting a new opening in a load-bearing wall — structural engineering, temporary propping, and NCC compliance are non-negotiable, and mistakes here risk partial collapse.
- Multi-storey installations requiring scaffolding — working at height with heavy aluminium frames and power tools demands certified scaffolding, fall protection, and ideally a team rather than a solo operator.
- Heritage-listed buildings — modifications to external walls require heritage approval, and non-compliant work triggers rectification orders. Heritage consultants and specialist tradespeople familiar with heritage authority requirements should manage these projects.
- Cavity wall construction requiring specialist cavity tray work — retrofitting cavity trays above lintels involves removing and rebuilding outer brickwork courses, a task that demands bricklaying skill and waterproofing knowledge beyond most DIYers.
- Large-format commercial aluminium systems — oversized fixed-lite panels, stacking sliding doors, or curtain-wall-style glazing involve engineered framing, crane lifts, and structural glass handling that sit outside residential DIY scope entirely.
- Multiple windows in a single project — coordination of measurements, manufacturing lead times, delivery logistics, and sequential installation across an entire home benefits enormously from professional project management.
If you are unsure whether your project crosses the line, a useful rule of thumb: any situation where a measurement error means a custom frame arrives unusable, or where a structural misjudgement puts people at risk, justifies professional involvement.
What a Professional Aluminium Window Service Covers
Professional installation is not simply labour with a markup. A specialist aluminium window provider offers a coordinated process that eliminates the gaps where DIY projects typically fail — incorrect system selection, measurement errors that result in unusable frames, and waterproofing omissions that cause problems months later.
The full scope of a project-based aluminium window service typically includes:
Drawing review and system selection — matching the correct aluminium profile system to your specific brick wall scenario. A cavity wall with deep reveals needs a different frame depth and fixing approach than a flush-face installation on brick veneer. Getting this wrong is expensive because aluminium frames are manufactured to order and cannot be returned or modified on site.
Custom engineering support — for non-standard openings, oversized panels, or structural glazing applications where standard residential systems are inadequate. This includes wind load calculations, deflection limits, and compliance with AS 2047 for structural performance.
Documentation coordination — managing development applications, NCC compliance documentation, WERS ratings, and BAL assessments where required. For anyone navigating how to replace windows on a brick house while also dealing with council approvals, having a provider handle the paperwork removes a significant administrative burden.
Manufacturing to exact measurements — factory production from verified site dimensions, with quality control processes that catch errors before cutting begins.
Delivery planning and installation coordination — scheduling that accounts for mortar curing times, trades sequencing, and site access constraints.
Providers like MEICHEN offer this end-to-end approach — from drawing review and system selection through manufacturing and delivery planning — specifically for builders, developers, and architects working on aluminium window projects in brick construction. This integrated service model eliminates the risk gap that exists when homeowners or builders source frames from one supplier, measurements from another, and installation from a third party who has no input into either decision.
Choosing Between Replacement and Full-Frame Installation
One of the most consequential decisions in any brick window project is whether to do a like-for-like insert replacement or commit to a full-frame window replacement in brick house construction. The right answer depends on what you find once the old frame comes out.
Insert replacement is sufficient when: the existing reveal is sound, the lintel above is structurally adequate, the opening dimensions suit available aluminium frame sizes, and the brick reveal surfaces provide a clean, flat substrate for sealing. The new frame slides into the existing opening, fixes to the masonry, and seals against the prepared reveal. It is faster, less disruptive, and less expensive — making it the practical choice for how to install replacement windows in brick home situations where the structure is fundamentally sound.
Full-frame replacement with new lintels and reveals is worth the investment when: the existing lintel is cracked, corroded, or undersized for the span; the reveal brickwork is deteriorated beyond render repair; the opening needs resizing to accommodate modern frame proportions or comply with current egress requirements; or the sub-sill is damaged and allowing moisture ingress into the wall below. A full-frame approach resets the entire opening to current standards, with new DPC, cavity tray, lintel, and reveal detailing.
For anyone researching how to replace a window in a brick house, the deciding factor is almost always the condition of the existing structure rather than the window itself. A perfectly good opening with sound masonry and a functioning lintel rarely justifies the cost and disruption of full-frame work. Conversely, installing a premium aluminium frame into a deteriorating opening is a waste of money — the structure will undermine the new window’s performance within years.
Incorrect system selection for the brick wall type is the most common cause of failed aluminium window installations. A frame designed for timber-frame fixing installed into solid double-brick, or a standard-depth profile used in a deep cavity wall reveal, creates problems that no amount of skilled installation can overcome. Matching the aluminium system to the specific wall construction is the single most important decision in the project.
Whether you tackle the project yourself or engage a professional, the principles remain identical: assess the wall honestly, measure precisely, verify structure before cutting, waterproof thoroughly, fix without distorting, and seal for the long term. The difference a professional brings is not secret knowledge — it is the accumulated judgement that comes from seeing hundreds of brick openings and knowing which details matter most for each specific scenario. For straightforward replacements in good condition reveals, a well-prepared homeowner can achieve an excellent result. For anything more complex, the investment in professional expertise pays for itself in avoided problems, correct first-time system selection, and an installation that performs without issues for decades.
Frequently Asked Questions About Installing Aluminium Windows in Brick Walls
1. Can I install aluminium windows in a brick wall myself?
A like-for-like replacement in an existing brick veneer reveal at ground level is achievable for a confident DIYer with basic masonry skills and tools such as a spirit level, masonry drill, and sealant gun. However, cutting a new opening in a load-bearing wall, working at height, or dealing with cavity wall construction requires professional involvement due to structural risk, temporary propping requirements, and building permit obligations under the National Construction Code.
2. Do I need a building permit to replace windows in a brick house in Australia?
Like-for-like replacements where you fit a new aluminium frame into an existing opening of the same size typically do not require a building permit, as the structural opening remains unchanged. However, creating a new opening, enlarging an existing one, or modifying a load-bearing wall requires a building permit or complying development certificate, structural engineering documentation, and compliance with AS 3700 and other relevant Australian Standards. Heritage-listed properties may need additional heritage authority approval even for like-for-like changes.
3. How much gap should I leave between an aluminium frame and the brick reveal?
The standard fitting tolerance is 10mm deducted from each structural opening dimension, creating a nominal 5mm gap on each side and at the top. This gap allows adjustment for plumb and level using plastic packers, provides space for low-expansion polyurethane foam insulation, and leaves room for sealant application at the correct joint depth. Some manufacturers recommend up to 15mm total per dimension for wider openings or older brickwork with uneven reveals.
4. What causes condensation on aluminium window frames and how do I fix it?
Condensation forms because aluminium conducts heat roughly 1,000 times more efficiently than timber, creating a thermal bridge that chills the internal frame surface below the dew point of indoor air. Thermally broken frames with a polyamide insulating strip between internal and external halves prevent this. For existing non-thermally-broken frames, reduce indoor humidity with exhaust fans, improve air circulation at the window by keeping curtains slightly open at the base, or plan for future replacement with thermally broken profiles that meet current NCC energy efficiency requirements.
5. What type of sealant should I use for aluminium windows in brick?
Use neutral-cure silicone or MS polymer sealant for aluminium-to-brick perimeter joints. Both bond reliably to aluminium and masonry, offer elasticity to absorb thermal movement, and provide long service life. Never use acetoxy-cure silicone (the type with a vinegar smell) as it corrodes aluminium and has poor adhesion to masonry. For internal joints that will be painted, MS polymer is preferable since it accepts all paint systems once cured, whereas neutral silicone cannot be painted over.
More Window & Door Guides