Yes You Can Spray Paint Aluminium Window Frames
The Short Answer About Spray Painting Aluminium
Can you spray paint aluminium window frames? Absolutely. A can of etch primer, a quality topcoat, and a few hours of careful prep work can transform tired frames into something that looks factory-fresh. The catch is that aluminium behaves nothing like timber or steel. It forms an invisible oxide layer within milliseconds of contact with air, and that layer actively rejects standard paints. Skip the preparation stage, and you will be peeling ribbons of colour off your frames within weeks.
Preparation accounts for roughly 80% of a successful aluminium spray paint job. The actual spraying is the easy part.
This matters because so many homeowners grab a rattle can, give the frame a quick wipe, and wonder why the finish flakes before the first summer is over. Whether you want to paint aluminium window frames to match a modern colour scheme or simply refresh faded surfaces, understanding the science behind adhesion is what separates a lasting result from a weekend wasted.
What This Guide Covers and Who It Helps
This guide walks through everything from surface chemistry to final clear coat. If you are planning a single-window touch-up with an aerosol can, you will find step-by-step technique advice sized to that task. If you are looking to paint aluminum windows across an entire home with an HVLP spray gun, the same principles apply at scale. Along the way, we cover primer selection, weather conditions, common mistakes, expected longevity, and honest guidance on when repainting is not the right call. The goal is a finish that holds up to Australian sun, salt air, and seasonal temperature swings for years rather than months.
Why Aluminium Requires Different Treatment Than Other Metals
Steel rusts. Everyone knows that. The orange flakes crumble away, leaving pits and weakness behind. Aluminium does something entirely different, and that difference is precisely why painting metal window frames made from aluminium demands a separate playbook.
When you sand or cut steel, the exposed metal sits there waiting for primer. You have hours, sometimes days, before meaningful rust sets in. Aluminium gives you no such luxury. The moment fresh metal meets air, a chemical reaction begins that fundamentally changes the surface you are trying to paint.
How the Aluminium Oxide Layer Affects Paint Adhesion
Bare aluminium reacts with oxygen almost instantly. Within roughly 100 milliseconds of exposure, a thin ceramic film of aluminium oxide (Al₂O₃) forms across the entire surface. This layer is only 2 to 5 nanometres thick, completely invisible to the naked eye, yet it changes everything about how paint behaves on the metal.
Unlike rust, which is porous and continues eating into steel, aluminium oxide is a stable, non-porous ceramic. It actually protects the metal underneath from further corrosion. That sounds like a good thing for your window frames, and it is, structurally. But for anyone trying to paint aluminium, this protective shield becomes the enemy.
Here is why does paint stick to aluminum so poorly without proper prep. The oxide layer has several properties that work against adhesion:
- Chemically inert surface. Aluminium oxide does not react with the resins in standard paints. There is no chemical bond forming between coating and substrate.
- Extremely low porosity. The layer is non-porous, meaning paint molecules have nothing to grip onto mechanically. The bond sits entirely on the surface with no anchor points.
- Constant self-renewal. Even if you sand the oxide away, a fresh layer regenerates within seconds. You are essentially painting onto a surface that keeps replacing itself.
- Low surface energy. Contaminants from handling, atmospheric pollution, and the oxide itself reduce surface energy, preventing paint from wetting out properly across the frame.
The result is a paint film that looks fine initially but has almost no real grip. Moisture creeps underneath, temperature cycles expand and contract the metal, and eventually the whole coating lifts away in sheets. This is why so many DIY attempts at painting aluminium end in frustration within the first twelve months.
Why Standard Metal Primers Fail on Aluminium
A common mistake is reaching for a general-purpose metal primer and assuming it will work on aluminium the same way it works on a steel gate or iron railing. Those primers are formulated to interact with iron oxide, a chemically reactive, porous surface. They penetrate rust at a molecular level and form strong bonds with ferrous substrates.
Aluminium oxide is a completely different material. It is a form of corrosion that protects the metal rather than destroying it, more like a ceramic shield than a crumbling weakness. Standard primers simply sit on top of this shield without penetrating or reacting with it. The coating remains mechanically attached at best, and even a fingernail can break that bond on a poorly prepped frame.
So how do you paint aluminium successfully? You need products specifically designed to either chemically dissolve the oxide layer and bond directly to the raw metal beneath, or convert the oxide into a surface that accepts paint. Etch primers use phosphoric acid to do exactly this. They eat through the ceramic barrier and create a microscopically porous foundation that topcoats can lock into.
Every preparation step that follows in this guide, from degreasing to scuffing to priming within a tight time window, exists because of this single scientific reality. The oxide layer reforms fast, bonds nothing, and forgives no shortcuts. Understanding that one fact makes the entire process logical rather than just a list of chores to tick off.
When You Should Not Spray Paint Your Aluminium Frames
Not every aluminium frame deserves a fresh coat of paint. Sometimes the honest answer to “can you repaint aluminium window frames” is yes, technically, but you probably shouldn’t. Knowing when to walk away from a spray can saves you money, time, and the frustration of watching a weekend project fail within months.
Signs Your Frames Need Replacement Not Repainting
Paint hides surfaces. It does not heal them. If your frames have deeper problems, spraying over the top only delays an inevitable and more expensive fix. Watch for these red flags before committing to any respray project:
- Severe pitting corrosion. Aluminium window corrosion that has eaten pits deeper than 2-3 mm into the metal compromises structural integrity. Paint fills the visual gap but does nothing to restore strength. In coastal areas of Australia, salt-laden air can cause this level of damage within five to seven years on unprotected frames.
- Structural frame distortion. If a frame flexes noticeably when you press against it, or if the window no longer sits square in its opening, the section has lost too much material to serve its purpose. No coating fixes that.
- Failed thermal breaks. Thermally broken aluminium frames rely on a polyamide or polyurethane bridge between inner and outer sections. If that bridge has cracked or separated, the frame’s insulating function is gone. Repainting addresses appearance while the real problem, heat transfer and potential condensation damage, continues unchecked.
- Anodised finishes in good condition. A well-maintained anodised surface is harder, more UV-resistant, and more durable than any paint film you can apply over it. Painting anodised aluminium window frames that are still performing well actually downgrades the finish. Unless the colour genuinely bothers you or the anodising has failed and turned chalky, leave it alone.
- Widespread hardware failure. Seized rollers, corroded hinges, and stripped screw holes suggest the entire window assembly is at the end of its service life. Fresh paint on a frame whose hardware is disintegrating is purely cosmetic.
Assessing Existing Coatings and Surface Condition
Can window frames be painted over an existing coating, or does that old finish need to come off entirely? This is the decision point that trips up most DIYers. Run a simple adhesion test: press a strip of strong masking tape firmly onto the existing finish, then pull it away sharply. If flakes of old paint lift with the tape, that coating has lost its bond and must be removed before you spray anything new on top. Painting over failing paint simply gives the new coat nothing to hold onto.
Powder-coated frames that still feel smooth and firmly bonded are a different story. A light scuff with a fine abrasive pad gives your new primer a key to grip, and you can spray directly over the prepared surface. Look for bubbling, chalking, or any area where the coating lifts at the edges. These spots need stripping back to bare metal before primer goes on.
Painting anodised aluminium window frames requires extra caution. The anodised layer is so smooth and chemically stable that even etch primers struggle without thorough mechanical abrasion first. If the anodising is intact and the colour is acceptable, repainting rarely makes sense from a durability standpoint.
Being realistic about your starting point protects the hours you are about to invest in preparation. A frame in genuinely poor condition deserves replacement. A frame with sound structure and a stable existing coating, on the other hand, is an ideal candidate for the careful surface prep that comes next.
Surface Preparation Steps for a Lasting Finish
A frame worth repainting is a frame worth preparing properly. Every minute spent on surface prep pays back tenfold in durability, and rushing through this stage is the single fastest way to ruin an otherwise solid project. If you want to know how to paint aluminium window frames so the finish actually lasts under Australian sun and salt air, this is the section that matters most.
The best way to paint aluminium starts well before you pick up a spray can. It starts with clean hands, the right abrasives, and patience.
Cleaning and Degreasing Aluminium Surfaces
Aluminium frames accumulate invisible contamination over years of service. Fingerprint oils, silicone from sealants, atmospheric grime, and salt deposits all create a barrier between your primer and the metal. Standard dish soap will not cut through this buildup. You need a dedicated degreaser or mineral spirits to dissolve the organic contaminants that ordinary cleaning leaves behind.
Follow these sequential preparation steps from start to finish:
- Remove all hardware. Take off handles, locks, stays, and any removable fittings. These create recesses where paint builds up unevenly and contaminants hide.
- Wash with a non-ionic detergent to remove loose dirt, cobwebs, and surface grime. Rinse thoroughly so no soap residue remains.
- Degrease the entire frame using mineral spirits, acetone, or a commercial aluminium degreaser. Wipe in one direction with a clean cloth, then flip to a fresh section. Two passes minimum.
- Rinse and dry completely. Any moisture trapped in frame channels will blister under your paint film later.
For coastal properties, pay special attention to salt residue in frame channels and drainage slots. A diluted white vinegar solution can dissolve mineral deposits, but rinse it off within 10-15 minutes to avoid etching the metal prematurely.
Mechanical vs Chemical Surface Etching Methods
Cleaning removes contamination. Etching removes the oxide layer and creates a textured surface that primer can physically grip. This is where the process diverges depending on what you are working with.
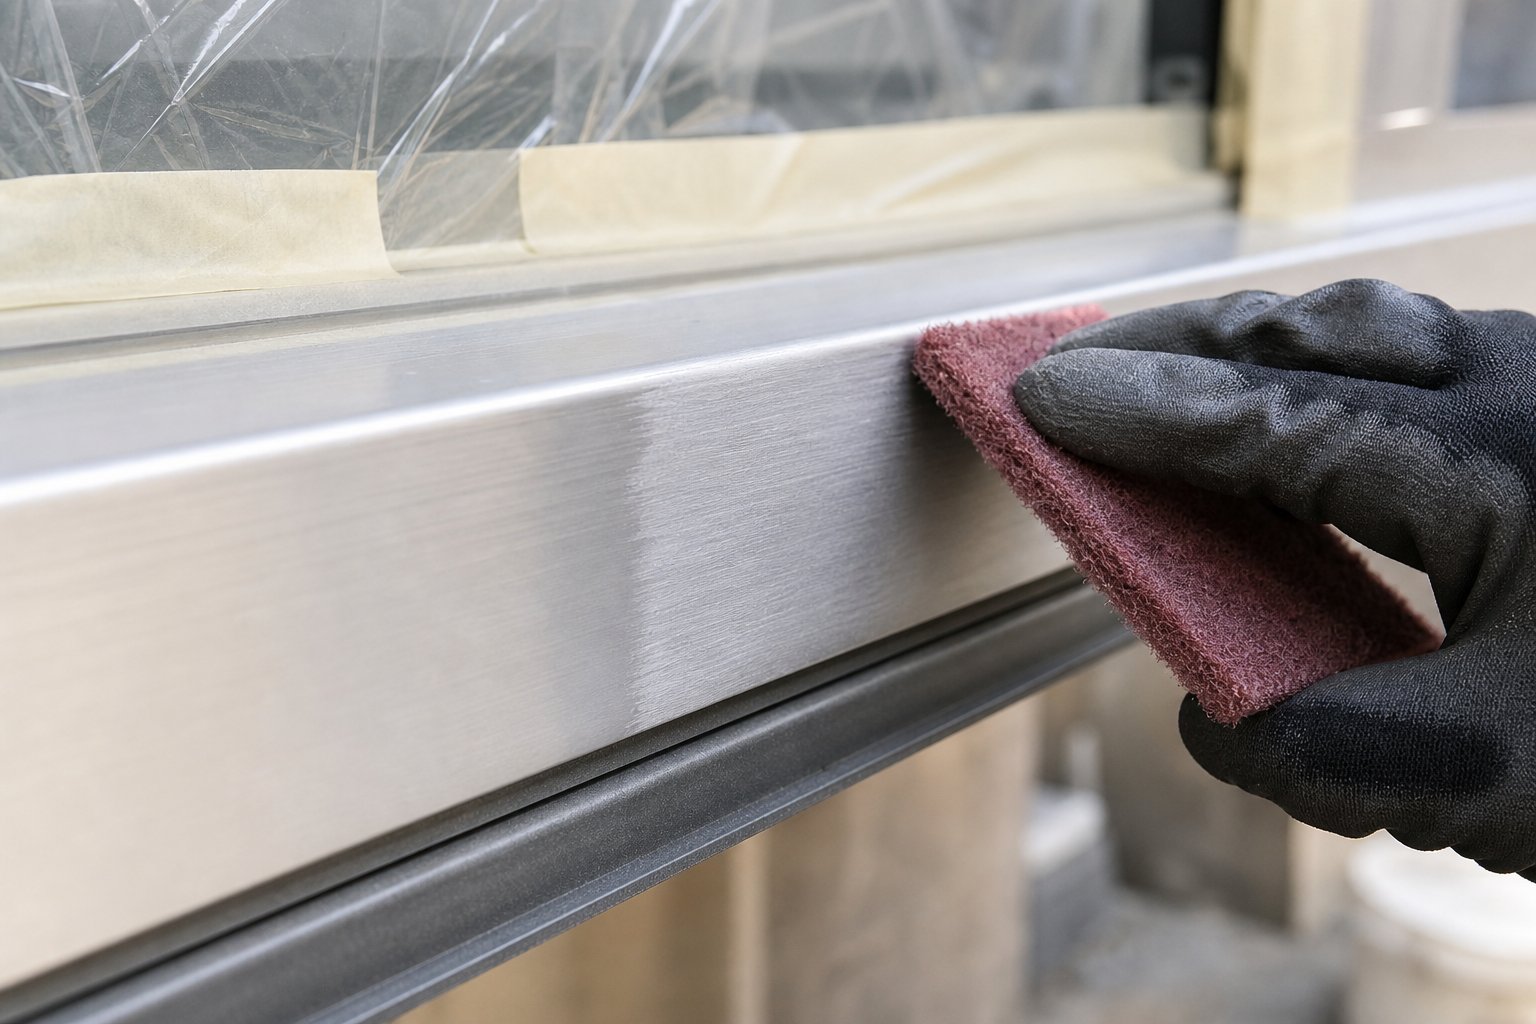
Bare aluminium needs etching within minutes of being exposed. A maroon Scotch-Brite pad (equivalent to 320-400 grit) works well for hand preparation. Sand in consistent strokes along the length of the frame profile, not in circles. The goal is a uniform matte sheen across the entire surface. Once scuffed, apply primer within 30 minutes before the oxide reforms.
Powder-coated frames in good condition do not need stripping back to bare metal. A light scuff with a grey Scotch-Brite pad (ultra-fine) breaks the gloss and creates a mechanical key for your new primer. If the existing coating is peeling or bubbling, those areas need sanding back to bare metal with 220-320 grit before feathering the edges smooth.
Anodised frames present the toughest challenge. The anodised layer is a hard ceramic, and chemical etching alone often cannot penetrate it effectively. Combine mechanical abrasion (400 grit wet sanding) with a self-etching primer for the strongest bond. Skip this dual approach and adhesion failure is almost guaranteed.
Chemical etch solutions containing phosphoric acid offer an alternative for complex frame profiles where hand sanding cannot reach every contour. These products dissolve the oxide layer chemically and leave a slightly roughened surface ready for primer. They work particularly well if you need to repaint aluminium window frames with intricate moulding details.
Masking and Protecting Surrounding Areas
Spray paint travels. Even a light breeze can carry overspray onto glass, brickwork, render, and landscaping. Thorough masking is non-negotiable for onsite work.
Use quality automotive masking tape along glass edges, pressing firmly to prevent paint creep underneath. Cover glass panes entirely with plastic sheeting or masking paper. Protect surrounding walls, sills, and any nearby surfaces with drop sheets. If you are working on upper-storey frames, mask below as well since gravity carries mist downward.
For those wondering how to paint an aluminum window frame without removing it from the wall, careful masking is what makes it possible. Professional onsite resprays rely on meticulous protection of surrounding areas to achieve clean results without the disruption of pulling frames out of openings.
That said, whether you work in-situ or remove frames entirely depends on your project scope and risk tolerance. Here is how the two approaches compare:
| Factor | In-Situ (Frames Stay Installed) | Frame Removal |
|---|---|---|
| Ease of work | Moderate. Requires careful masking and awkward angles on upper frames. | Easier spraying access, but removal and reinstallation add complexity. |
| Finish quality | Very good with proper technique. Slight risk of overspray issues. | Excellent. Full 360-degree access for even coating. |
| Cost | Lower. No removal labour, no risk of seal or render damage. | Higher. Removal, transport, and reinstallation add significant cost. |
| Risk factors | Overspray damage to glass or walls if masking fails. | Broken seals, cracked render, and water ingress during reinstallation. |
| Best suited for | Single windows, touch-ups, whole-house resprays by experienced operators. | Severe damage requiring full stripping, or frames needing hardware overhaul. |
For the majority of Australian homes with faded but structurally sound frames, in-situ preparation and spraying delivers professional results without the cost and risk of removal. How do you paint aluminum window frames efficiently across an entire facade? Work systematically from top to bottom, completing preparation on each frame fully before moving to the next. This keeps your primer window tight and prevents contamination from prep dust settling on freshly primed surfaces below.
With surfaces clean, etched, and masked, the next critical choice is which primer system bonds best to your specific aluminium substrate and spray setup.
Choosing the Right Primer and Paint System
Primer is the contract between your aluminium frame and everything that goes on top of it. Choose the wrong product and no amount of technique saves the job. Choose the right one and even a modest aerosol topcoat can hold firm for years. So what paint to use on aluminium window frames, and which primer gets you there? Three systems dominate the market, each with a distinct chemistry and a different audience.
Etch Primer vs Self-Etching Aerosol vs Epoxy Primer
All three primer types solve the same problem, the inert oxide layer, but they do it through different mechanisms and suit different project scales.
Etch primer (2K wash primer) is a two-component system containing phosphoric acid and a catalyst. When sprayed onto bare aluminium, the acid dissolves the oxide layer while simultaneously depositing a thin phosphate conversion coating. This chemical reaction creates a microscopically porous base that subsequent coats lock into at a molecular level. Etch primers build almost no film thickness, so they require a secondary build primer or topcoat applied within a tight recoat window, typically 10 to 15 minutes. They are the professional’s choice for whole-house resprays using an HVLP gun because they offer maximum adhesion on freshly prepped metal.
Self-etching aerosol primer packages a similar phosphoric acid chemistry into a single-component rattle can. The acid concentration is lower than a 2K wash primer, and the resin system is formulated to build slightly more film in one pass. For DIY homeowners tackling one or two windows, these aerosols are practical: no mixing, no pot life to worry about, and decent adhesion on scuffed aluminium. One coat usually provides enough chemical bite for a topcoat to grip, though two light coats improve coverage on bare metal.
Epoxy primer (2K) works differently. Rather than chemically etching the oxide, it relies on its resin-and-hardener chemistry to form an extremely hard, moisture-resistant film that mechanically bonds to an abraded surface. Epoxy offers superior corrosion resistance and is the non-negotiable choice for coastal Australian homes where salt spray attacks frames year-round. The trade-off is that it demands a properly roughened surface and precise mixing ratios. Many professionals use a thin etch primer coat first, then seal with epoxy for maximum durability, a combination that outperforms either system alone.
| Primer Type | Application Method | Adhesion Strength | Ease of Use | Best Suited For |
|---|---|---|---|---|
| 2K Etch Primer (Wash Primer) | HVLP spray gun | Excellent (chemical bond) | Moderate. Requires mixing, short pot life. | Professional whole-house resprays on bare aluminium |
| Self-Etching Aerosol | Rattle can | Good (mild acid etch + resin) | High. No mixing, ready to spray. | DIY single-window touch-ups and small projects |
| 2K Epoxy Primer | HVLP spray gun | Excellent (mechanical + chemical bond) | Moderate. Precise mixing, longer cure. | Coastal homes, high-exposure frames, maximum longevity |
A common mistake is grabbing a general rust-inhibiting primer designed for steel. These products rely on iron oxide chemistry and will not bond to aluminium’s ceramic oxide layer. Always confirm the label explicitly states suitability for non-ferrous or aluminium substrates before purchasing.
Topcoat Formulations for Aluminium Frames
Once the primer has done its job, your window frame paint choice determines colour, sheen, and weather resistance. Two formulations dominate for spray application on aluminium:
100% acrylic exterior paint is the most accessible option. Available in both aerosol cans and bulk tins for HVLP guns, acrylic formulations flex with aluminium’s thermal expansion without cracking. They resist UV breakdown well in Australian conditions and come in every colour imaginable. For most residential projects, a quality exterior acrylic is the best paint for aluminum window frames when balancing cost, durability, and ease of application. Many aluminum trim paint products marketed for exterior metalwork fall into this category.
Two-pack polyurethane or epoxy topcoats deliver a harder, more chemical-resistant film. These are the coatings used in factory-applied finishes and professional resprays. They resist chalking and fading longer than single-pack acrylics, but require a spray gun, careful mixing, and proper ventilation. If you are investing in a full HVLP setup for paint for aluminum windows across an entire home, a two-pack topcoat is worth the extra cost and complexity.
Finish sheen is a practical choice as much as an aesthetic one. Gloss finishes show every imperfection in the substrate but are easiest to clean. Satin sits in the middle, forgiving minor surface flaws while still repelling grime effectively. Matte finishes hide prep imperfections best but can mark and stain more easily in high-touch areas. For exterior window frames exposed to Australian weather, satin is the most popular compromise, delivering a modern look without the maintenance demands of high gloss or the dirt-catching tendencies of flat matte.
Whichever paint for aluminum window frames you select, compatibility with your primer system is critical. Self-etching primers pair well with acrylic topcoats applied within the specified recoat window. Epoxy primers accept virtually any topcoat chemistry. Check the primer manufacturer’s technical data sheet for approved topcoat pairings before purchasing, because a mismatch between layers causes lifting and wrinkling regardless of how perfect your surface prep was.
Spray Painting Technique and Application Method
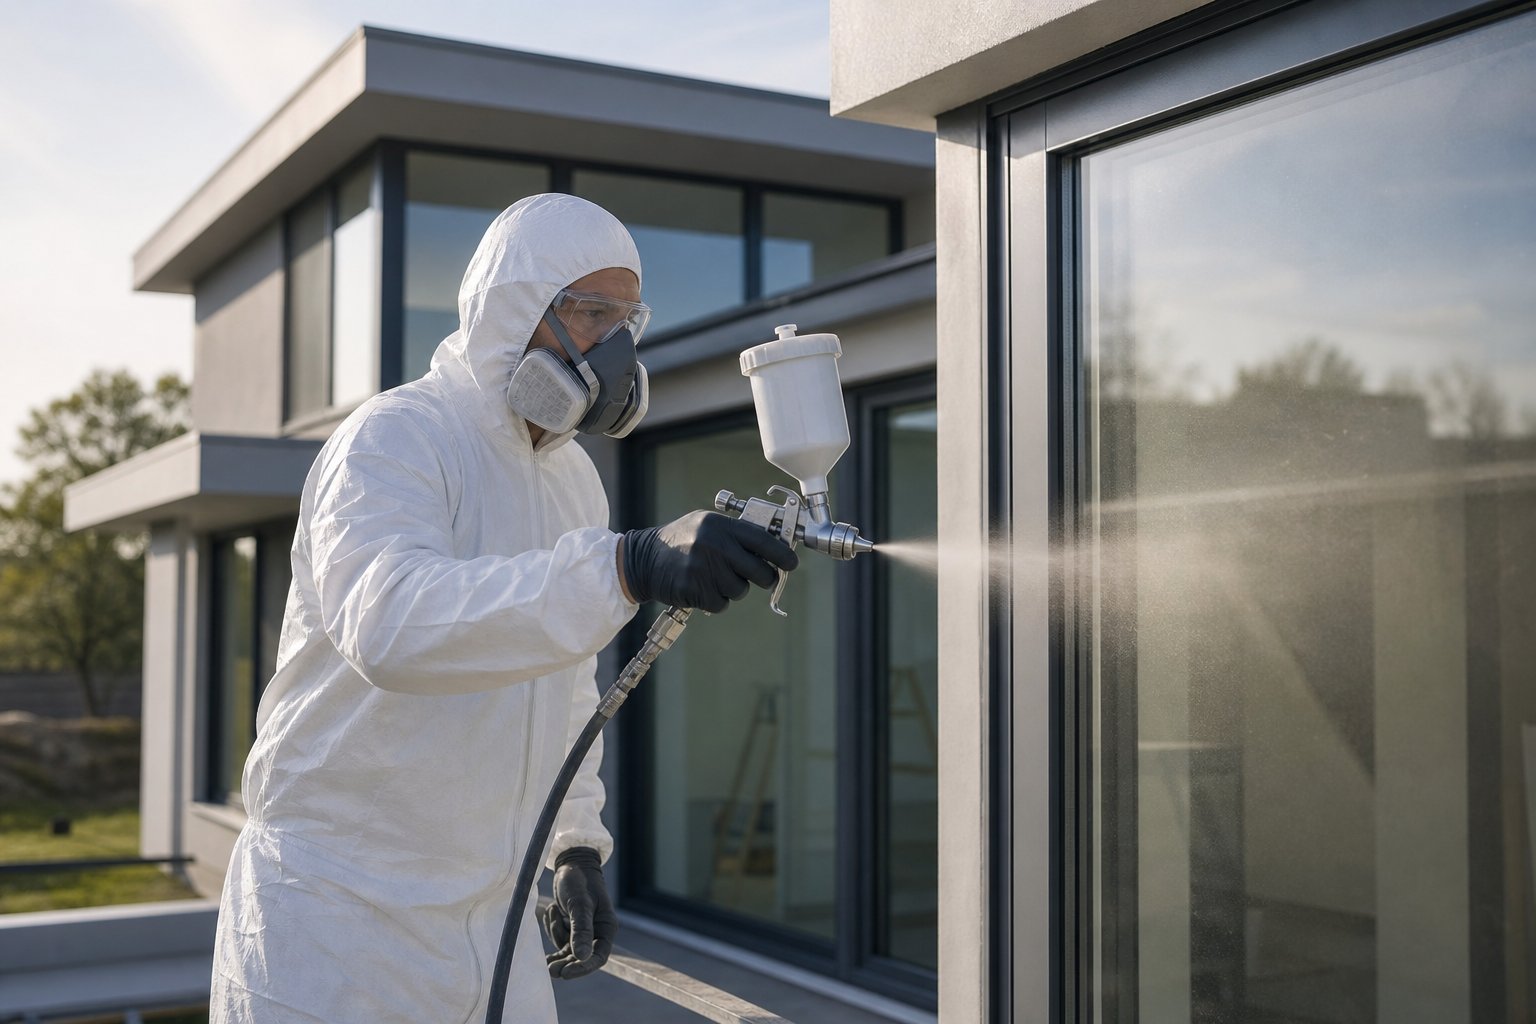
Primer and paint are only as good as the way they land on the frame. A quality product applied poorly produces runs, orange peel, and uneven coverage that undermines weeks of careful prep. The technique differences between an aerosol can and an HVLP gun are significant enough that each deserves its own approach.
Aerosol Spray Technique for Single Window Touch-Ups
Painting aluminum window frames with a rattle can suits small-scale work: a single frame refresh, a patch repair, or a colour change on a bathroom window. The principles are straightforward, but discipline matters more than skill here.
Hold the can 250 to 300 mm (10 to 12 inches) from the surface. Move in smooth, parallel passes along the length of the frame member, overlapping each stroke by about 50%. Keep the can moving at all times. Stopping mid-pass, even briefly, dumps excess paint and creates a drip. Angle the can slightly on frame returns and rebates so the spray hits the recessed surfaces squarely rather than skimming past them.
Follow this coat sequence for best results:
- First primer coat. One thin pass across all surfaces. Allow 10 minutes flash-off time until the surface looks matte and dry to the touch.
- Second primer coat (optional on scuffed powder coat, essential on bare aluminium). Another light pass. Allow 15-20 minutes before topcoat.
- First topcoat. Slightly heavier than primer passes, but still thin enough that no gloss pooling is visible. Allow 20-30 minutes between coats, or follow the can’s recoat instructions.
- Second topcoat. Final pass for uniform coverage and colour depth. Allow 24-48 hours full cure before removing masking tape.
Shake the can vigorously for at least 60 seconds before starting, and again every few minutes during use. Cold cans produce sputtery, uneven output, so store them at room temperature overnight before spraying. The same approach applies if you are painting aluminum storm windows on older homes where individual frames need localised attention rather than a full respray.
HVLP Spray Gun Application for Whole-House Projects
When the scope expands to an entire facade or multiple storeys, an HVLP (High Volume Low Pressure) gun delivers efficiency and finish quality that aerosols simply cannot match. This is how professionals paint aluminum window frames across whole properties in a single campaign.
Set the gun’s air pressure between 25-30 PSI at the cap for most acrylic and two-pack topcoats. Adjust the fluid needle to produce a full, wet fan pattern without heavy centre loading. Hold the gun 150-200 mm from the frame surface, which is closer than an aerosol because the lower velocity of HVLP atomisation requires a tighter distance for proper transfer efficiency.
Work top to bottom on each frame. Start with the horizontal head member, then move down each vertical jamb, finishing with the bottom rail. This sequence prevents overspray from settling on freshly coated surfaces below. On frames with deep profile sections, tilt the gun 15-20 degrees to reach into channels that a straight-on pass would miss.
For anyone learning how to paint aluminum windows across a whole home, maintaining a wet edge is critical. Complete each frame member in a continuous sequence without pausing mid-section. If you stop partway along a jamb and return after the edge has flashed off, you create a visible overlap line that no subsequent coat fully hides.
Painting aluminum storm windows and standard casement frames with a gun follows the same pass logic. Two coats of primer and two topcoats remain the standard, with flash-off times typically shorter for two-pack products (5-10 minutes between coats) and longer for single-pack acrylics (15-20 minutes).
Common Spray Painting Mistakes to Avoid
Whether you are painting aluminum windows with a rattle can or a professional rig, these errors cause the most grief:
- Applying coats too thick. Heavy coats trap solvents beneath the drying surface, causing bubbling, wrinkling, and extended cure times. Two thin coats always outperform one thick one.
- Spraying too close. Cutting the distance below 150 mm with a gun or below 200 mm with an aerosol concentrates paint in a narrow band and creates instant runs on vertical frame surfaces.
- Failing to maintain a wet edge. Stopping mid-frame and returning after the edge dries creates visible lap marks. Commit to finishing each section in one pass sequence.
- Ignoring flash-off times. Applying the next coat before the previous one has released its solvents traps moisture and weakens inter-coat adhesion. Patience between coats is not optional.
- Spraying at the wrong angle on returns. Frame profiles have recesses, channels, and bevels. A straight-on pass misses these areas entirely. Tilt the can or gun to hit every surface directly.
- Neglecting to strain paint before loading the gun. Dried flakes or contaminants in the paint cup clog the nozzle mid-job, producing spatter and uneven atomisation. Always strain through a fine mesh filter.
Getting technique right is half the battle. The other half is timing your application around weather conditions that either help or sabotage the chemistry happening on your frames.
Weather Conditions That Make or Break Your Results
Aluminium absorbs and radiates heat faster than timber or masonry. On a hot day, a dark-coloured frame can sit 10°C or more above ambient air temperature, accelerating solvent flash-off before the paint has time to level and bond. On a cold, dewy morning, moisture condenses onto the metal surface invisibly, trapping water beneath your primer. Either scenario ruins adhesion. When you paint metal window frames outdoors, environmental conditions matter as much as the product you spray.
Temperature and Humidity Requirements
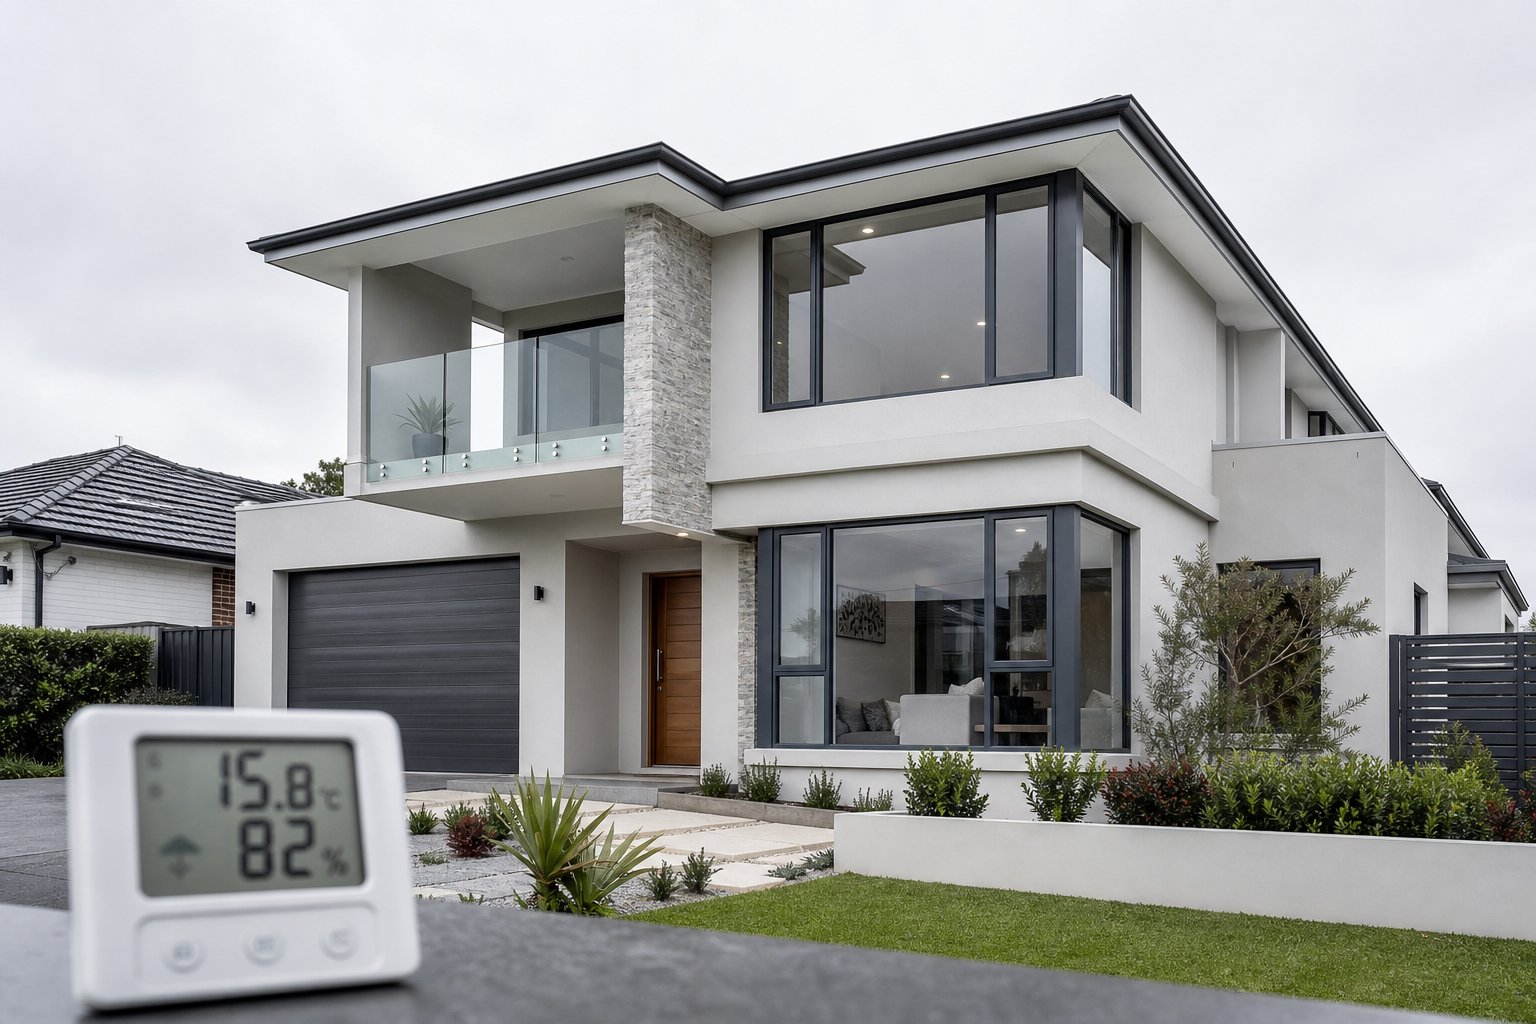
Most spray primers and topcoats formulated for aluminium specify an application window of 10-25°C with humidity below 65%. Outside this range, chemistry works against you. High heat forces solvents out before the film flows smooth, leaving orange peel texture. Cold slows curing so dramatically that dust and insects embed themselves in a tacky surface that refuses to harden. Humidity above 70% introduces microscopic moisture into the wet film, causing haze on clear coats and blistering under primers.
For painting exterior metal window frames in Australia, measure both air temperature and surface temperature. A cheap infrared thermometer pointed at the frame gives you the number that actually matters. If the metal reads above 35°C, it is too hot to spray regardless of what the ambient forecast says.
Wind and Weather Timing Considerations
Wind distorts your spray fan, carries overspray onto glass and brickwork, and deposits airborne grit into wet paint. Anything above 15 km/h makes precision work almost impossible. Light breezes under 10 km/h are manageable with careful gun angle, but dead-calm mornings deliver the cleanest results.
Direct sunlight creates uneven surface temperatures across a single frame. One jamb bakes in full sun while the other sits in shade, meaning flash-off times differ on the same window. Plan your sessions to follow shade around the building, or work early and late when the sun sits low. If you want to know how to paint metal window frames across a whole facade, work the shaded elevation first and circle back as shadows shift.
| Factor | Ideal | Acceptable | Unsuitable |
|---|---|---|---|
| Air temperature | 15-25°C | 10-15°C or 25-30°C | Below 10°C or above 35°C |
| Relative humidity | 40-60% | 60-70% | Above 70% or below 20% |
| Wind speed | Calm (under 5 km/h) | Light (5-15 km/h with windbreak) | Above 15 km/h |
| Sunlight | Overcast or shaded surface | Indirect or early/late angle | Direct midday sun on the frame |
| Rain forecast | No rain for 48 hours | Dry for 24 hours minimum | Rain expected within 12 hours |
In most Australian regions, autumn and spring offer the most reliable spray windows. Summer mornings work in southern states before temperatures climb, while tropical Queensland and the NT often favour the dry season from May through September. Check the Bureau of Meteorology forecast the evening before, confirm conditions at the frame surface that morning, and have a plan to stop if humidity spikes or wind picks up mid-session. A half-finished coat left to weather a sudden change is worse than waiting another day to start.
Conditions dictate when you spray. What happens after the last coat lands, the weeks and months of curing, exposure, and ageing, determines how long your finish actually holds up.
How Long Spray-Painted Frames Last and Maintenance Tips
A freshly sprayed frame looks fantastic on day one. The real question is whether it still looks good in year three, year five, or year ten. Longevity depends on the paint system you chose, how thoroughly you prepared the surface, and what the Australian climate throws at your frames between now and the next touch-up.
Expected Lifespan of Spray-Painted Aluminium Frames
Professional respray operators using two-pack polyurethane or acrylic systems on properly prepped aluminium guarantee their finishes for 10 years against cracking, peeling, fading, and discolouration. That figure assumes correct surface preparation, optimal spray conditions, and a high-quality coating applied by experienced hands. For a careful DIY job using self-etching primer and a reputable acrylic topcoat, expect a realistic lifespan of 5 to 7 years before the finish begins showing wear.
Several factors push that number up or down:
- Paint system quality. Two-pack coatings outlast single-pack acrylics by a significant margin. The hardener component in a 2K system cross-links the resin at a molecular level, creating a film far more resistant to UV, abrasion, and moisture than a single-component aerosol finish.
- Environmental exposure. North-facing frames in Queensland cop relentless UV year-round and degrade faster than south-facing frames in Melbourne. Coastal salt air accelerates chalking and can undermine adhesion at edges where the film is thinnest.
- Surface preparation quality. A frame that was rushed through prep, skipping the etch or spraying over residual contaminants, may begin peeling within 12 to 18 months regardless of how good the topcoat is.
- Previously painted surfaces. Repainting aluminium window frames that already carry an older coating introduces risk. If the original finish was inferior or poorly bonded, your new system inherits that weakness. Professional sprayers typically cannot guarantee longevity on previously painted frames because the unknown quality of the underlying coat becomes the weakest link.
Frames sheltered under deep eaves or verandahs naturally last longer than those fully exposed to weather. If you are repainting aluminium windows on a Queenslander with wide overhangs, you have a built-in advantage over a rendered two-storey with minimal projection above the openings.
Maintenance Routines to Extend Paint Life
A painted finish is not maintenance-free. Left alone, grime accumulates, salt deposits eat at edges, and UV slowly degrades the resin binder. Simple, regular care stretches the interval between repainting aluminium window frames dramatically.
- Wash frames every 3 to 4 months with mild soap and warm water. Use a soft cloth or sponge, never abrasive pads that scratch through the topcoat. Properties in harsh coastal or industrial areas should increase this to monthly.
- Rinse thoroughly after washing. Soap residue left on the surface attracts dirt faster and can degrade the paint film over time.
- Inspect edges and corners twice a year. These are the first areas where adhesion fails because the paint film is naturally thinner on sharp profiles. Look for hairline cracks, lifting edges, or colour change that signals UV breakdown.
- Clear drainage slots and weep holes. Blocked drainage traps water against the painted surface for extended periods, promoting osmotic blistering from beneath.
- Avoid harsh chemicals near frames. Bleach-based cleaners, acidic tile washes, and high-pressure cleaning all damage spray-painted finishes. If you are cleaning surrounding brickwork or render, mask the frames first.
- Lubricate hardware annually. Seized hinges force extra stress on frame corners, cracking paint at pivot points.
When damage does appear, catch it early. A small chip or scratch on a spray-painted aluminium frame can be touched up with a matching aerosol or brush-applied paint, provided you specify the exact colour reference and sheen level when ordering touch-up products. Lightly sand the damaged area, feather the edges into sound coating, apply a thin layer of self-etching primer, then build up colour coats to match the surrounding finish. Done within weeks of the damage appearing, a spot repair blends invisibly and prevents moisture from creeping beneath the adjacent film.
If you find peeling across large sections or chalking that does not wash off, the finish has reached the end of its effective life. At that point, the choice becomes either a full respray following all the preparation steps outlined earlier, or considering whether how to repaint aluminium windows for a second or third time still makes financial sense compared to starting fresh with factory-finished frames.
When Replacing Frames Makes More Sense Than Repainting
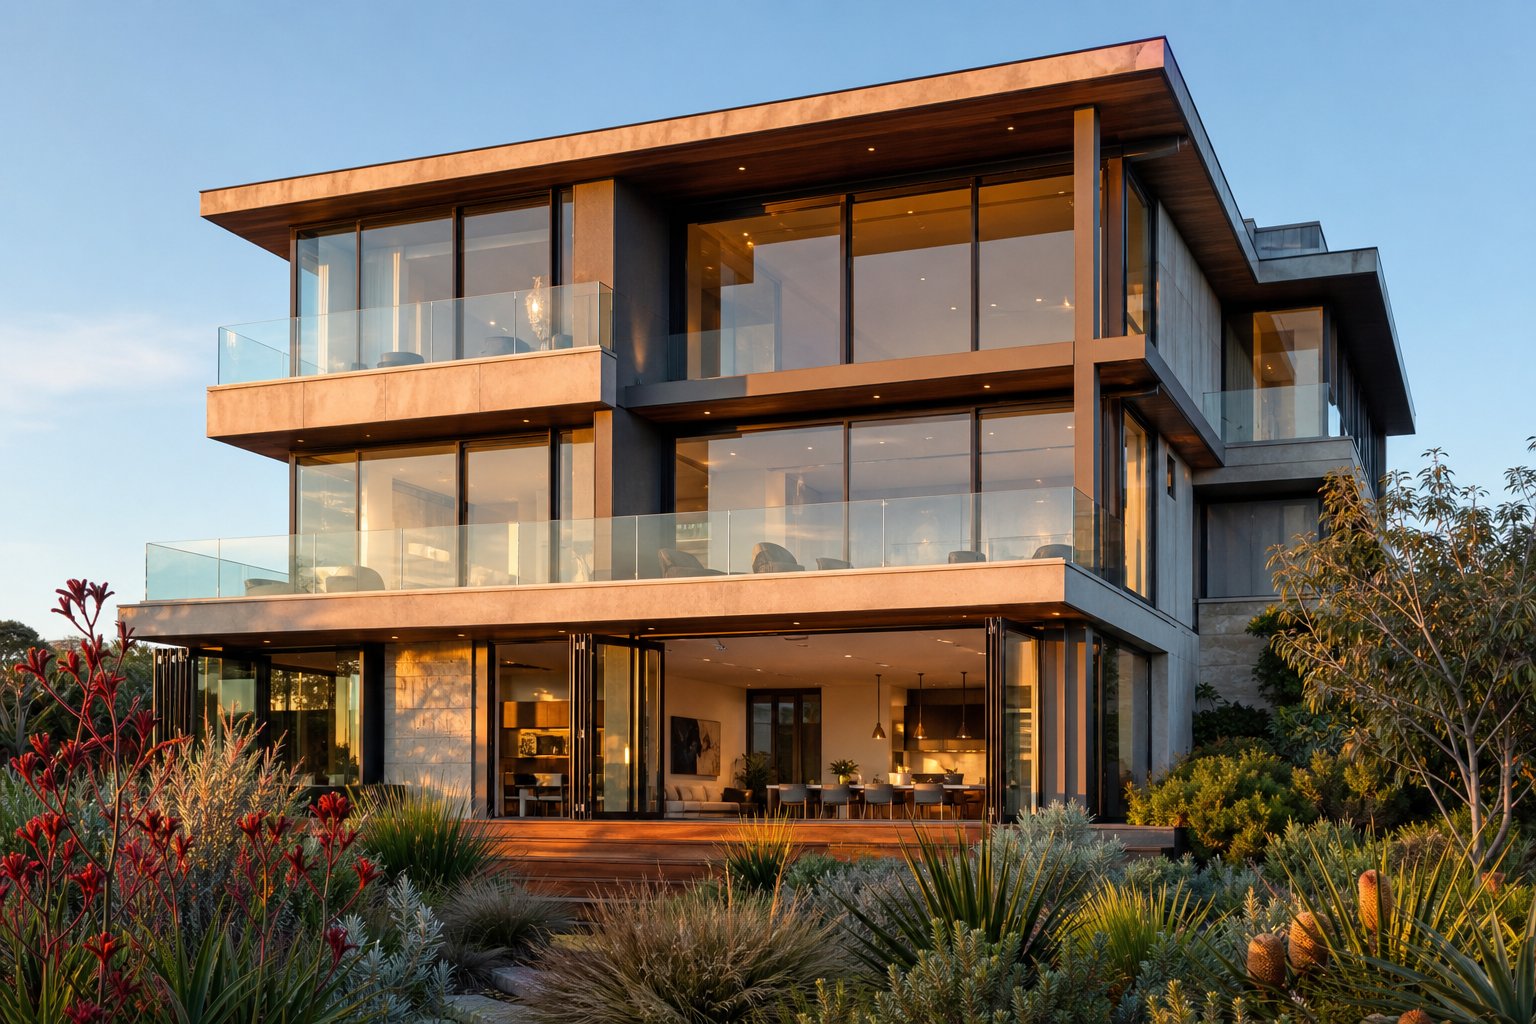
There comes a point where repainting stops being the smart financial move. A second respray adds cost. A third starts approaching the price of new frames entirely. And through all those cycles, the underlying aluminium keeps ageing, the hardware keeps wearing, and the thermal performance stays stuck at whatever standard the frame was built to decades ago.
Can you paint aluminium windows indefinitely? Technically, yes. Each new coat bonds to the previous one, and a well-prepped frame accepts fresh paint without complaint. But practically, every repaint cycle adds film thickness, softens corner details, and introduces another adhesion layer that could fail. At some stage, the honest calculation tips toward replacement rather than another weekend with masking tape and a spray gun.
When Factory-Finished Frames Outperform Repainting
Factory-applied powder coating on aluminium lasts 15 to 25 years outdoors with proper maintenance, and fluorocarbon formulations push that toward 30 years. Compare that against a DIY spray job lasting 5 to 7 years or even a professional respray guaranteed for 10. The maths favours factory finishes heavily over the long term, especially when you factor in the labour cost of repeated preparation and application cycles.
Replacement becomes the stronger option in these scenarios:
- You have already repainted twice or more. Multiple paint layers build thickness that obscures frame profiles, blocks drainage slots, and creates an increasingly fragile adhesion chain. Each respray carries the risk of the entire stack delaminating if any single layer fails.
- Frames lack thermal breaks. Older aluminium frames conduct heat and cold directly through the metal. Can you paint aluminum window frames to fix that? No. Paint changes appearance, not physics. If condensation forms on interior frame surfaces during winter or you feel radiant heat pouring through in summer, a thermally broken replacement frame solves the actual problem.
- You want a specific colour with a factory warranty. Painted aluminum window frames rely on your prep quality and the coating’s durability under local conditions. Factory powder coating is applied in a controlled environment with pre-treatment, precise film thickness, and curing temperatures that no onsite job replicates. The finish carries a manufacturer’s warranty that a rattle can never will.
- Hardware and seals have failed. Replacing rollers, stays, and perimeter seals on old frames can cost nearly as much as fitting new windows that come with modern hardware already integrated. Fresh paint on a frame with blown seals still leaks air and water.
- Energy performance matters to your household budget. Single-glazed aluminium frames without thermal breaks are among the worst performers under the NCC energy efficiency requirements. Upgrading to thermally broken, double-glazed aluminium systems can make a measurable difference to heating and cooling costs, particularly in climate zones with extreme summer heat or cold winters.
- Anodized aluminum window frames have degraded beyond recovery. Once anodising fails and the underlying aluminium pits, no surface treatment restores the original hardness and corrosion resistance. Painting over damaged anodising is a band-aid. Replacement gives you a fresh substrate with a coating system designed to last from day one.
Making the Right Decision for Your Home
The paint-or-replace decision is not purely financial. It also depends on how long you plan to stay in the property, whether you value energy efficiency gains, and how much ongoing maintenance you are willing to commit to.
If your frames are structurally sound, less than 15 years old, and only need a colour refresh, spray painting remains the practical choice. The prep and application process outlined in this guide delivers a finish that holds up well under Australian conditions for years at a fraction of the replacement cost. Can you paint aluminium windows and get a result you are happy with long-term? Absolutely, provided the substrate deserves the effort.
If your frames are approaching 25 to 30 years old, have been repainted before, show signs of corrosion or hardware fatigue, or sit in a home where thermal performance upgrades would pay for themselves in energy savings, replacement starts making more sense. Modern pre-finished aluminium window systems offer custom colour options applied in factory conditions, thermally broken profiles rated to current NCC standards, and warranties that cover the finish for decades rather than years. For homeowners exploring that path, MEICHEN’s aluminium windows provide a reference point for what factory-finished systems look like in terms of style, colour range, and performance specifications suited to Australian residential and commercial projects.
Neither option is universally right. A single faded frame on an otherwise modern home is a spray job. An entire house of tired, non-thermally-broken frames with failing seals is a replacement conversation. The key is matching the solution to the actual condition of your frames rather than defaulting to whichever option feels easier in the moment. Either way, you now have the knowledge to execute a spray paint job properly or to recognise when that effort is better invested elsewhere.
Frequently Asked Questions About Spray Painting Aluminium Window Frames
1. What type of primer should I use on aluminium window frames?
Use a primer specifically formulated for non-ferrous metals. Self-etching aerosol primer works well for DIY single-window projects because it contains phosphoric acid that dissolves the aluminium oxide layer and creates a bondable surface without mixing. For whole-house resprays with an HVLP gun, a two-component etch primer or epoxy primer provides stronger adhesion. Epoxy primer is particularly recommended for coastal Australian homes where salt spray demands maximum corrosion resistance. Never use a standard rust-inhibiting metal primer designed for steel, as it relies on iron oxide chemistry and will not bond to aluminium.
2. How long does spray paint last on aluminium window frames?
A professional respray using two-pack polyurethane or acrylic systems typically lasts around 10 years with proper surface preparation and application. A careful DIY job using self-etching primer and quality acrylic topcoat realistically lasts 5 to 7 years before showing wear. Factors that influence longevity include paint system quality, UV exposure intensity, coastal salt air, and how thoroughly the surface was prepared. Regular maintenance such as washing frames every 3 to 4 months and inspecting edges twice yearly can extend the finish life significantly.
3. Can you paint over existing powder-coated aluminium frames?
Yes, provided the existing powder coat is still firmly bonded to the frame. Test adhesion by pressing strong masking tape onto the surface and pulling it away sharply. If no flakes lift, the coating is sound. Scuff the surface lightly with an ultra-fine Scotch-Brite pad to break the gloss and create a mechanical key, then apply your primer and topcoat. If the powder coat is bubbling, peeling, or chalking, those areas must be sanded back to bare metal and treated with etch primer before recoating.
4. What weather conditions do I need for spray painting aluminium frames outdoors?
Aim for air temperatures between 15 and 25 degrees Celsius with relative humidity below 65 percent. Wind should be calm or very light, ideally under 10 km/h. Avoid direct midday sunlight on the frame surface, as aluminium absorbs heat quickly and can sit well above ambient temperature, causing solvents to flash off before the paint levels properly. Check the forecast for at least 24 to 48 hours of dry weather after application. In Australia, autumn and spring generally offer the most reliable spray windows across most climate zones.
5. Is it better to spray paint or replace old aluminium window frames?
Spray painting makes sense when frames are structurally sound, less than 15 years old, and only need a colour refresh. It costs a fraction of replacement and delivers good results for years with proper prep. Replacement becomes the better investment when frames have been repainted multiple times, show corrosion or hardware failure, lack thermal breaks, or when you want the longevity of a factory powder-coated finish that lasts 15 to 25 years. Modern thermally broken aluminium window systems also offer energy efficiency improvements that paint alone cannot provide.
More Window & Door Guides