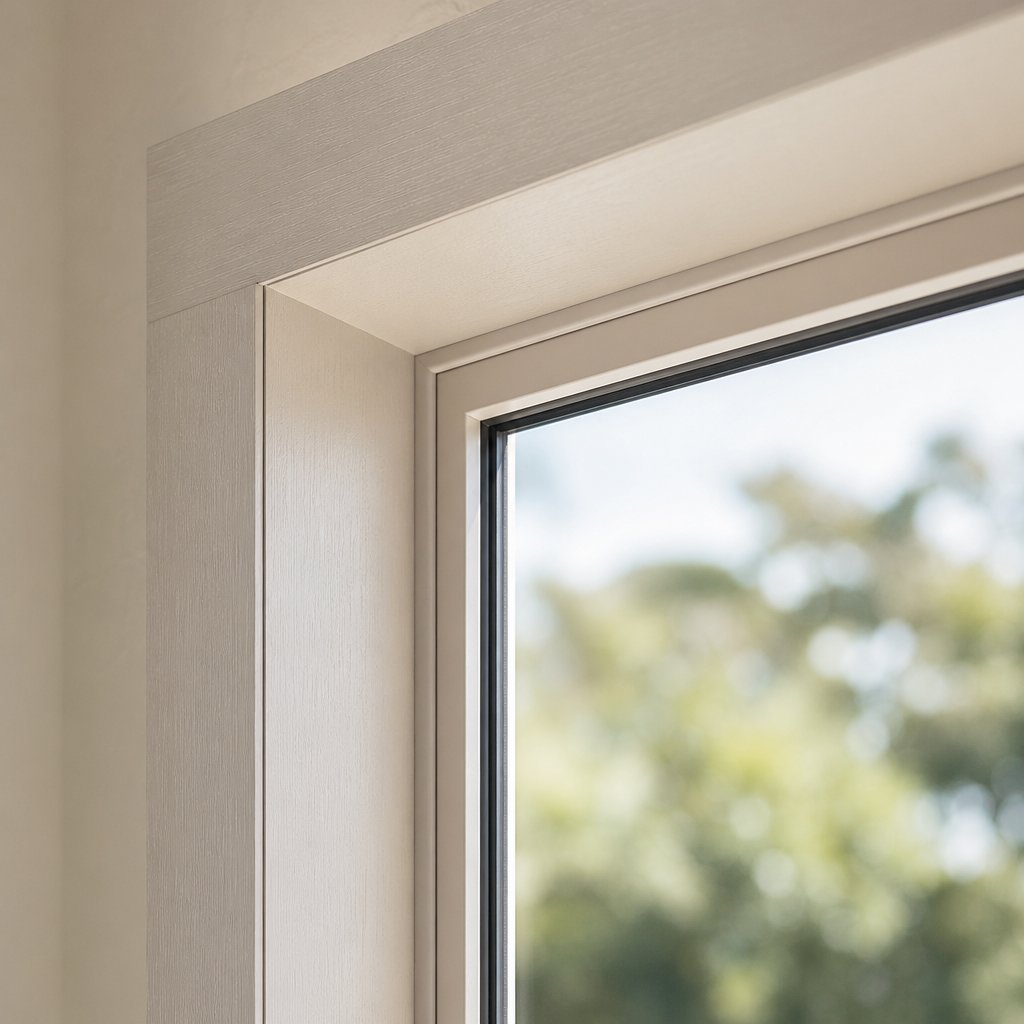
Yes, Aluminium Windows Can Be Repainted Successfully
Aluminium windows can be repainted without peeling off, provided you use the correct surface preparation and a compatible paint system. The key lies in creating mechanical adhesion through abrasion and applying a specialised primer designed to bond with aluminium’s oxide layer. With these steps done right, a repainted aluminium window frame can hold its finish for years.
The Short Answer for Homeowners
If you’ve been wondering whether you can paint aluminium window frames, the answer is a clear yes. Many Australian homeowners assume the smooth, non-porous surface of aluminium rejects paint entirely. That assumption is understandable — bare aluminium does form a thin oxide layer almost instantly when exposed to air, and standard house paint applied directly over that surface will eventually flake. But this isn’t a material limitation. It’s a preparation problem.
Aluminium windows are fully repaintable with proper surface preparation and a compatible paint system. The finish can last 5 to 10 years when the right primer and topcoat are used together.
Why Aluminium Accepts Paint Better Than You Think
Aluminium’s oxide layer is actually part of what makes painting aluminium windows a viable project. Unlike rust on steel, which continues to spread and undermine coatings, aluminium oxide is stable and self-limiting. It protects the metal beneath rather than degrading it. The challenge is simply that this oxide is slick — paint needs something to grip.
That grip comes from two sources. First, light sanding with the correct grit creates a micro-texture across the frame. Second, a self-etching or epoxy primer chemically bonds to the prepared surface, giving your topcoat a solid foundation. Both anodised and mill-finish aluminium respond well to this approach, though anodised frames require slightly more aggressive abrasion to break through their thicker protective layer.
Whether you can paint window frames yourself or need a professional depends on the scope of the job and the finish quality you’re after. Either way, the material itself is not the obstacle — technique and product selection are what separate a lasting result from a peeling one. The real question isn’t whether repainting works, but whether your specific frames are good candidates for it.
Assessing Your Frames Before You Start
Knowing that aluminium can window frames be painted is one thing. Deciding whether yours should be repainted is a different conversation entirely. Not every frame is a good candidate, and jumping straight into sanding and priming without an honest assessment can waste time and money — or mask problems that need a different solution altogether.
Signs Your Frames Are Good Candidates for Repainting
A frame that’s structurally sound but cosmetically tired is the ideal repainting candidate. The aluminium itself is doing its job — it’s just the surface finish that’s let you down. Here’s what to look for when assessing old aluminum window frames around your home:
- Surface chalking — a powdery residue on the existing paint that rubs off on your fingers. This indicates UV degradation of the old coating, not damage to the metal beneath.
- Faded or uneven colour — particularly common on north-facing frames in Australia, where intense sun exposure breaks down pigments over time.
- Minor surface scratches — shallow marks that affect appearance but haven’t penetrated to bare metal or caused corrosion.
- Cosmetic dissatisfaction — the frames function perfectly, but the colour no longer suits your home’s updated exterior palette.
- Intact seals and smooth operation — windows still open, close, and lock without resistance, and you don’t feel drafts around the edges.
If your metal window frames tick most of these boxes, repainting is a practical and cost-effective refresh. The underlying aluminium is likely in excellent condition, and painting an old window frame in this state can deliver results that last for years.
When Replacement Makes More Sense Than Repainting
Paint can’t fix structural failure. Some issues go deeper than the surface, and covering them with a fresh coat only delays an inevitable — and often more expensive — replacement down the track. Consider replacement rather than repainting if you notice:
- Structural corrosion or pitting — aluminium window corrosion that has eaten into the profile itself, creating rough craters or thinning the frame walls. This is more common in coastal areas where salt spray attacks unprotected aluminium over decades.
- Warped or bent frames — distortion that prevents the window from sitting square in its opening. No amount of paint corrects a frame that no longer seals properly.
- Failed seals causing drafts — if you feel air movement around closed windows, the weatherstripping or frame-to-glass seal has likely deteriorated beyond simple maintenance. Deteriorated seals force your heating and cooling system to work harder, increasing energy bills.
- Difficulty opening or closing — hardware that binds, sticks, or no longer latches securely suggests mechanical wear that repainting won’t address.
- Single glazing with no thermal break — older aluminum window frames built without insulation technology may underperform so significantly that repainting them is cosmetic investment in a window that needs a full upgrade for comfort and efficiency.
Well-maintained aluminium windows typically last 20 to 30 years before structural issues emerge. If your frames are approaching that age and showing multiple symptoms from the list above, replacement delivers better long-term value than a surface-level refresh.
Restrictions on Rental and Heritage Properties
Even when frames are perfect candidates for repainting, you may not have free rein to proceed. Two common scenarios require caution.
For rental properties, most Australian state tenancy laws require written landlord approval before making alterations — and changing the colour of window frames typically counts as an alteration. Check your lease agreement and contact your property manager before purchasing supplies. Some landlords welcome the improvement; others insist on professional work or specific colour matching.
Heritage-listed properties carry stricter obligations. In NSW, for example, changes to a heritage-listed place may require approval from your local council or the Heritage Council of NSW before any work begins. Similar frameworks exist in Victoria, Queensland, and other states. Altering the external appearance of heritage windows — even something as seemingly minor as a colour change — can trigger a development application or heritage exemption certificate process. Proceeding without approval risks fines and mandatory restoration to the original finish.
If your property falls into either category, confirm permissions first. For everyone else, the next step is understanding how surface preparation determines whether your new finish bonds permanently or begins peeling within months.
Surface Preparation That Determines Your Results
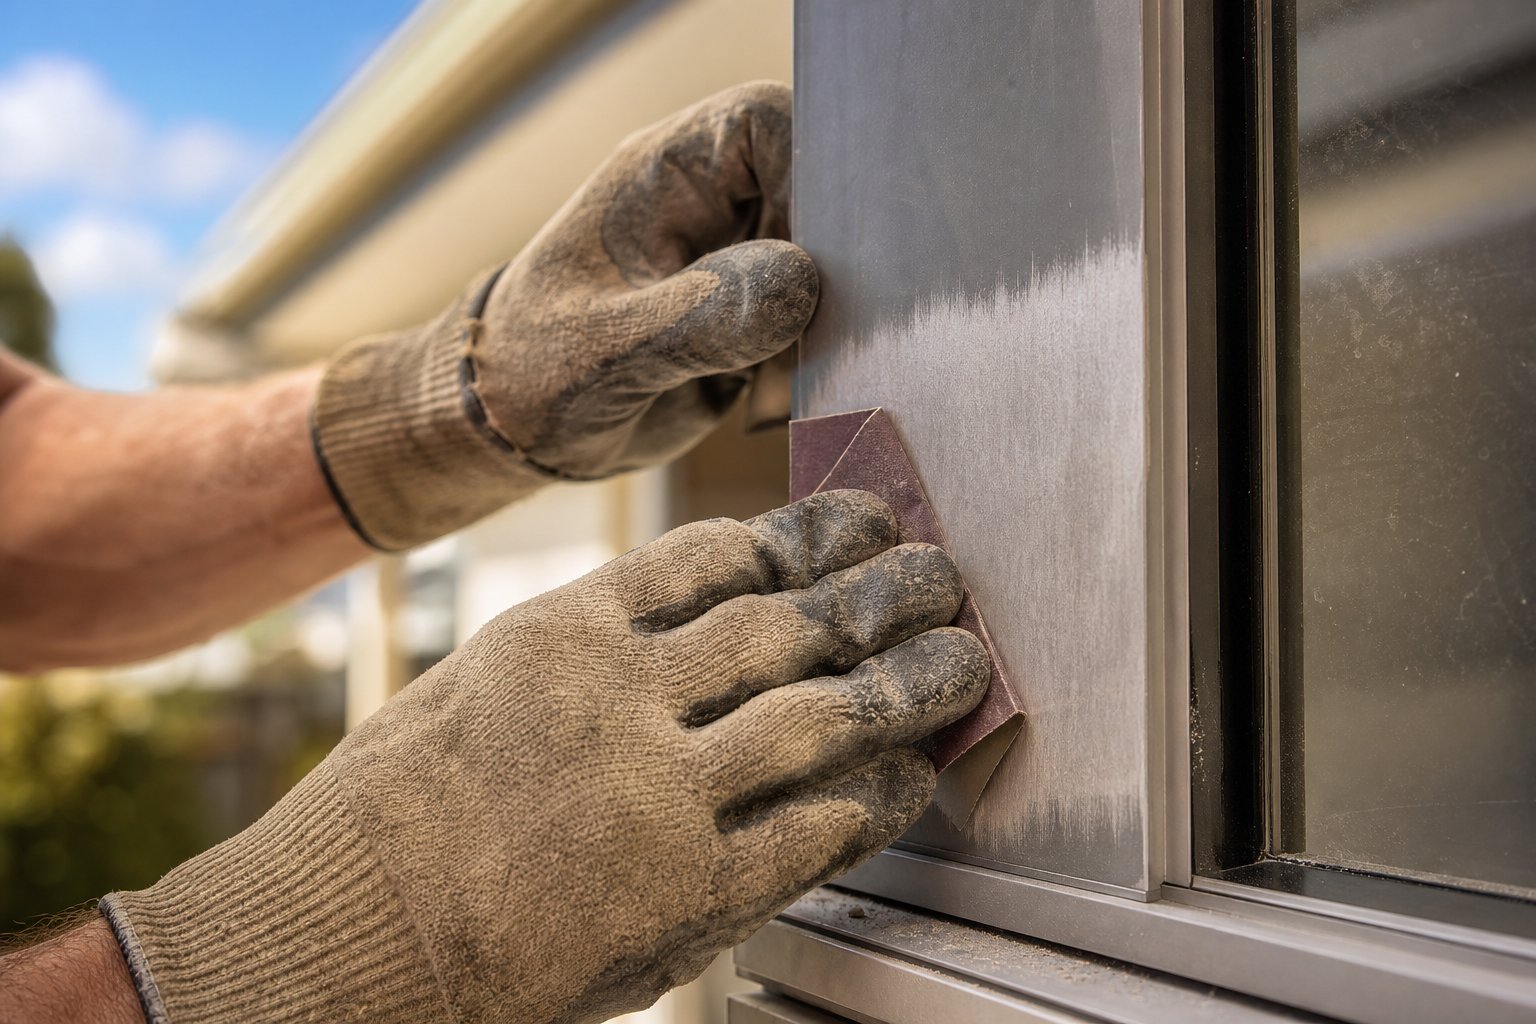
Every failed aluminium repaint job shares the same root cause: inadequate preparation. The paint itself rarely fails — it’s the bond between coating and metal that gives way. Understanding how to paint aluminium window frames properly means spending more time preparing than actually painting. Roughly 70 to 80 percent of your project time should go into the steps below.
Cleaning and Degreasing the Surface
Aluminium frames accumulate years of grime, oxidation residue, airborne grease, and environmental pollutants that are invisible to the eye but devastating to paint adhesion. Even frames that look clean carry a film that prevents primer from bonding at a molecular level.
- Remove loose debris — Brush away cobwebs, dust, and surface dirt with a stiff nylon brush. Pay attention to corners and drainage slots where grime compacts over time.
- Wash with sugar soap or TSP solution — Mix according to the manufacturer’s directions and scrub the entire frame surface with a sponge or non-scratch pad. Sugar soap cuts through oxidation buildup and greasy residues that plain water leaves behind. TSP (trisodium phosphate) is particularly effective on frames with heavy chalking or excessive oxidation.
- Rinse thoroughly — Use clean water to remove all soap residue. Any cleaning product left on the surface creates a barrier between primer and metal.
- Degrease with methylated spirits or acetone — Wipe the entire frame with a lint-free cloth dampened with methylated spirits. This removes silicone residues, fingerprint oils, and any remaining contaminants that soap missed. Acetone works faster but evaporates almost instantly, so work in small sections.
- Allow complete drying — Let the frames dry fully before sanding. Moisture trapped in joints or under old paint edges will cause bubbling later. In humid conditions, allow at least two hours.
Skipping the degreasing step is the single most common DIY mistake. Contaminants left on the surface cause adhesion failure, bubbling, or “fisheyes” in the finished paint — defects that only become visible after you’ve applied your topcoat.
Sanding Techniques for Different Frame Conditions
How do you paint aluminium successfully? You sand it first. Aluminium is a slick, non-porous metal, and paint needs micro-grooves to grip. Sanding creates that mechanical bond — without it, even premium primers sit on the surface like oil on glass.
The approach depends on your frame’s current condition:
Frames with flaking or peeling paint:
- Start with a hand scraper or putty knife to remove all loose and lifting paint back to bare metal. Test edges of intact-looking paint — if it lifts easily when scraped, it’s not properly bonded and must come off.
- Sand exposed bare metal areas with 120-grit sandpaper to remove corrosion and create a rough profile.
- Feather the edges where old paint meets bare metal using 180-grit, creating a smooth transition that won’t telegraph through your new finish.
- Finish the entire frame with 320-grit for a consistent adhesion profile across both bare and previously painted areas.
Frames with intact existing paint:
- No stripping required. Scuff sand the entire surface with 240-grit sandpaper to dull the sheen and create grip for the new primer.
- Finish with 320-grit for a uniform surface texture.
- Focus on glossy areas where the old paint is still smooth — these are the spots most likely to reject new coatings.
After sanding, wipe the entire frame with a tack cloth to pick up every particle of dust. Any sanding residue left behind compromises the primer’s ability to contact the metal directly.
Preparing Anodised Aluminium Frames
Anodized aluminum window frames present a unique challenge. The anodising process creates a hard, dense oxide layer — typically 5 to 20 microns thick — that’s significantly tougher than the natural oxide film on mill-finish aluminium. This layer is excellent for corrosion protection, but its smooth, sealed surface resists paint adhesion more aggressively than untreated aluminium.
If you’re learning how to repaint aluminum window frames that have been anodised, expect to invest more effort in abrasion:
- Use 120 to 180-grit sandpaper as your starting point rather than the 240-grit suitable for mill-finish frames. The goal is to physically break through the anodised layer and expose a surface with enough texture for primer to lock into. You’ll know you’ve sanded enough when the frame loses its characteristic metallic sheen and appears uniformly dull.
- Consider a chemical etching product if manual sanding isn’t cutting through effectively. Phosphoric acid-based etch solutions react with the oxide layer to create microscopic bonding points — similar to how the porous structure of unsealed anodised aluminium naturally anchors coatings in factory applications.
- Apply a self-etching primer immediately after preparation. Self-etching primers contain phosphoric acid that chemically bonds to aluminium, creating both a chemical and mechanical connection. On anodised surfaces, this dual-action adhesion is essential rather than optional.
The unsealed porous structure of freshly abraded anodised aluminium actually improves paint adhesion once you break through the sealed outer surface — those tiny pores act as anchors that lock primer in place. The difficulty is getting past that initial sealed barrier, which is why standard light scuff-sanding often fails on anodised frames.
Regardless of your frame type, the final preparation step is always the same: apply one even coat of etch primer or bonding primer to the entire surface. This primer is the bridge between your aluminium substrate and the topcoat system. Without it, how do you paint aluminum window frames and expect them to last? You don’t. The primer is non-negotiable.
With preparation complete, the next decision — which paint type and application method to pair with your primed frames — determines both the appearance and longevity of your finished result.
Choosing the Right Paint for Aluminium Frames
Your primer is on. The surface is prepped. The decision you make next — what paint to use on aluminium — determines whether your frames look factory-fresh for a decade or start chalking within a year. Not all paints perform equally on metal substrates, and aluminium’s thermal expansion behaviour narrows the field considerably.
Acrylic Latex Paint for Aluminium
For most Australian homeowners tackling a weekend repaint, a 100% acrylic latex is the best paint for aluminium in terms of balancing performance with ease of use. These water-based formulations clean up with soap and water, dry quickly between coats, and offer strong UV resistance — a critical factor given Australia’s intense solar exposure.
Acrylic latex flexes with the frame as temperatures shift throughout the day. Aluminium expands and contracts more than timber or uPVC, so this flexibility prevents the micro-cracking that leads to peeling. Quality exterior acrylics also resist chalking well, maintaining colour depth on north-facing frames that cop relentless sun. Products like Dulux Weathershield or similar exterior-grade metal paints work effectively as a window frame paint over a properly applied primer system.
The trade-off? Acrylic latex doesn’t achieve quite the same hardness or chemical resistance as epoxy or polyurethane options. For frames exposed to moderate conditions — sheltered suburban homes, interior windows, or south-facing elevations — this rarely matters. For harsher environments, the alternatives below earn their higher price.
Epoxy and Polyurethane Options Compared
Epoxy-based paints deliver exceptional adhesion and chemical resistance. They bond aggressively to primed aluminium and create a hard, durable shell that shrugs off moisture, cleaning chemicals, and physical abrasion. Professional painters often reach for epoxy when coating aluminum trim paint applications on commercial buildings or high-traffic areas.
The downside is UV sensitivity. Epoxy topcoats exposed to direct sunlight will chalk and lose gloss within two to three years — a significant limitation for exterior frames in Australia. This makes epoxy better suited as a primer or intermediate coat rather than a standalone finish on sun-exposed surfaces.
Polyurethane sits at the premium end. It combines the adhesion strength of epoxy with superior UV stability and gloss retention. A polyurethane topcoat on exterior aluminium frames resists fading, chalking, and abrasion longer than any other brush-applied option. It’s widely considered the best paint for aluminum window frames in high-exposure situations — coastal homes, north-facing walls, or frames that receive hours of direct sun daily.
The compromise is application difficulty. Polyurethane is less forgiving of brush marks, requires precise recoat timing, and demands good ventilation due to stronger solvent content. Many DIYers find it harder to achieve a smooth finish without spray equipment.
| Paint Type | Adhesion | UV Resistance | Durability | Ease of Application | Best Use Case | Interior/Exterior |
|---|---|---|---|---|---|---|
| Acrylic Latex (Water-Based) | Good (with primer) | High | Moderate (5-8 years) | Easy — brush, roller, or spray | General residential repainting | Both |
| Epoxy-Based | Excellent | Low (chalks in sun) | High (indoors/sheltered) | Moderate — two-part mixing required | Interior frames, sheltered areas, primer coat | Primarily interior |
| Polyurethane | Excellent | Very High | High (8-12 years) | Difficult — precise technique needed | High-exposure exterior frames | Primarily exterior |
Choosing the Right Primer System
Your topcoat is only as good as the primer beneath it. Three main options exist for aluminium, each suited to different scenarios:
- Self-etching primer — Contains phosphoric acid that chemically bonds to bare aluminium while depositing a protective coating. Ideal for DIY projects on mill-finish frames. Available in aerosol cans for easy application. One coat is typically sufficient.
- Two-part epoxy primer — The gold standard for adhesion and corrosion resistance, particularly in coastal or high-moisture environments. Requires mixing resin and hardener at precise ratios, and the pot life is limited once combined. Worth the extra effort on frames exposed to salt air or extreme weather.
- Bonding primer (adhesion promoter) — Designed to stick to slick surfaces including previously painted or powder-coated frames that are still intact. A good choice when you’re recoating over an existing finish rather than working on bare metal.
Whichever paint for aluminium you select, match it to your primer’s chemistry. Acrylic topcoats pair well with self-etching primers. Polyurethane finishes perform best over epoxy primer bases. Mixing incompatible systems — say, applying a solvent-based topcoat over a water-based primer — risks delamination between layers, which is far harder to fix than starting with the right combination.
Paint selection sets the ceiling for your project’s longevity. But even the best paint for aluminum windows fails if it’s applied poorly — which brings the focus to technique, tools, and the number of coats that actually deliver a lasting finish.
Application Methods and When to Use Each One
A quality paint on a perfectly prepped frame still looks amateur if the application technique falls short. Aluminium’s smooth profile is unforgiving — brush marks, drips, and uneven coverage show up far more than they would on textured timber. How do you paint window frames to get a result that actually looks professional? It comes down to choosing the right tool for the job and applying thin, controlled coats.
Brush and Roller Application Tips
Brushing and rolling suits homeowners tackling one or two windows, performing touch-ups on localised damage, or working in areas where overspray would hit neighbouring surfaces. It’s the more accessible method — no compressor, no masking entire walls — but it demands patience and technique on slick aluminium profiles.
Equipment you’ll need for brush and roller application:
- High-quality angled sash brush (50 mm) — synthetic bristles for water-based paints, natural bristles for solvent-based
- Small foam roller (100 mm) with a fine-nap sleeve (4-6 mm) for flat sections
- Painter’s tape and drop sheets
- Paint tray or small container for controlled loading
- Tack cloth for final dust removal between coats
The key to avoiding visible brush marks on aluminium is thin loading. Dip only the first third of the bristles, then lay the paint in one direction — working top to bottom on vertical sections. Resist the urge to overwork it. Two thin passes look far better than one heavy coat that sags or leaves ridges. Foam rollers work well on wider flat sections of the frame, delivering a smoother texture than bristle brushes alone.
If you’re learning how to paint an aluminum window frame by hand, keep your working sections small. Complete one frame member at a time (top rail, then sides, then bottom) to maintain a wet edge and avoid lap marks where partially dried paint overlaps fresh paint.
Spray Painting for a Factory-Like Finish
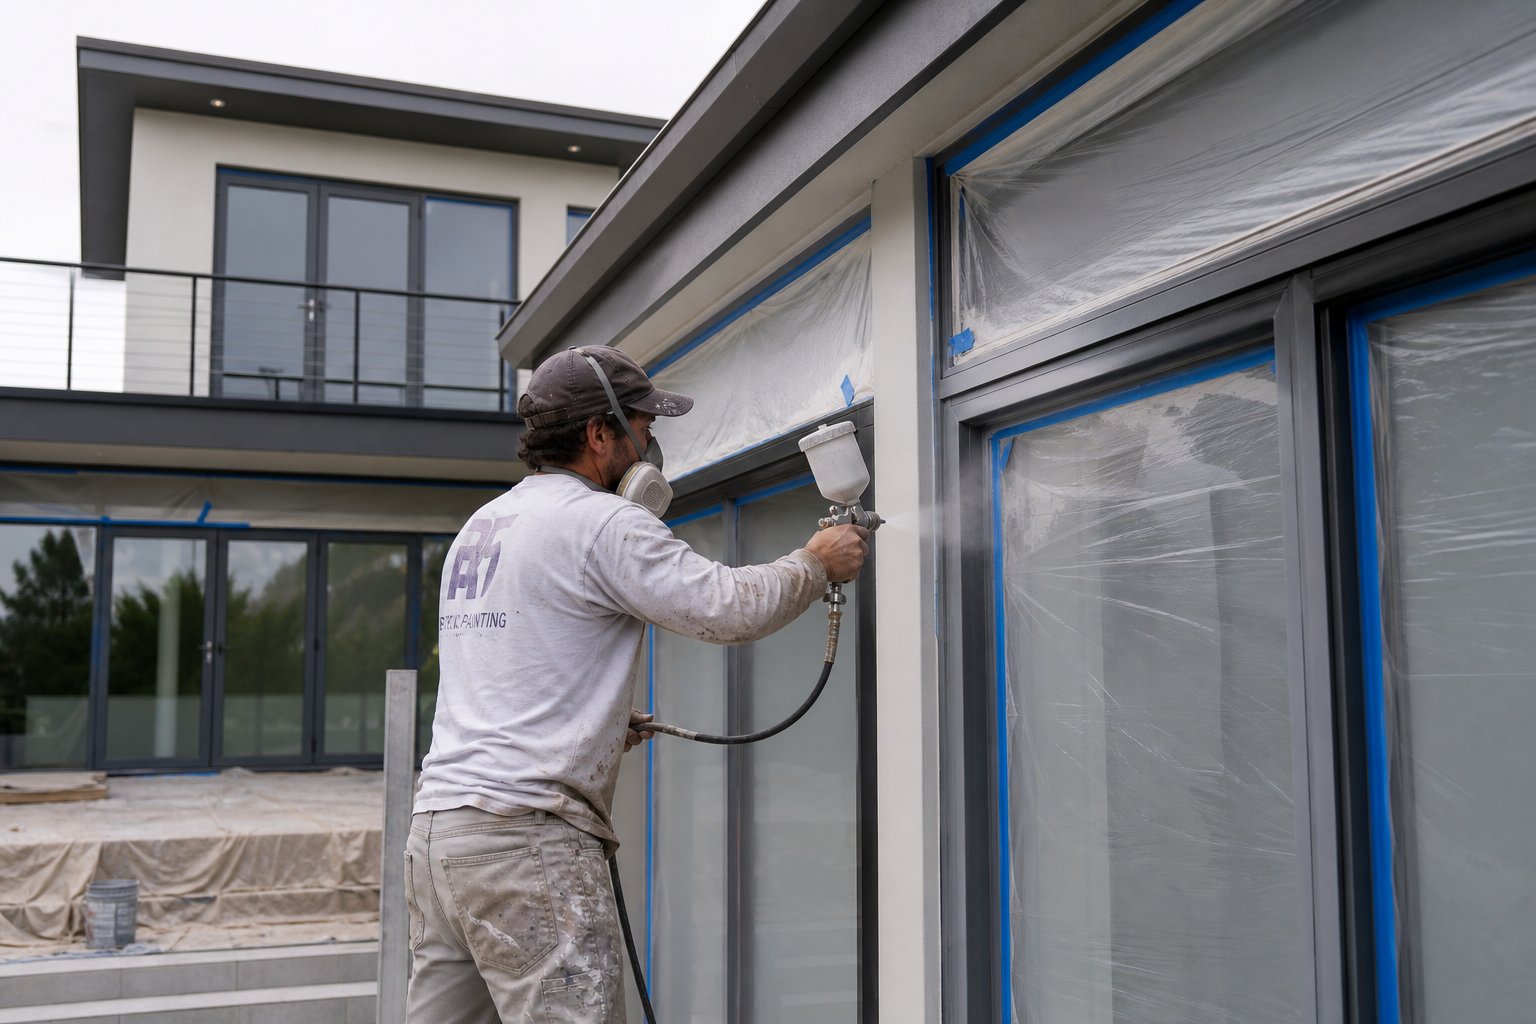
Can you spray paint aluminium? Absolutely — and for window frame painting across multiple openings, spraying delivers a noticeably superior result. The finish is smoother, more uniform, and closely mimics the factory-applied look of powder coating. Spray paint is more forgiving than brush application on aluminium’s smooth surface, making it a popular choice for DIY projects.
Equipment you’ll need for spray application:
- HVLP spray gun with compressor, or quality aerosol cans for smaller jobs
- Respirator mask rated for paint fumes (P2 minimum)
- Painter’s tape, masking paper, and plastic sheeting for extensive masking
- Drop sheets covering a wide radius (overspray travels further than you expect)
- Thinning agent if using HVLP with unthinned paint (check manufacturer’s ratio)
Spray from top to bottom using even, overlapping passes at a consistent distance of 200 to 300 mm from the surface. Move your arm at a steady pace — pausing creates heavy spots that drip. Multiple light coats build depth without runs. Each coat should look almost translucent when wet; full opacity comes from layering, not from a single heavy application.
The trade-off is preparation time. Masking glass, walls, sills, and surrounding surfaces properly can take longer than the actual painting. Outdoors, wind becomes a factor — even a light breeze sends overspray onto brickwork, cars, or garden beds. Choose calm, dry days with temperatures between 15°C and 30°C for best results.
How Many Coats You Actually Need
Regardless of method, the standard system to paint aluminum window frames properly is one coat of primer plus two topcoats. Here’s why each layer matters:
- Primer (one coat) — Creates the adhesion bridge between aluminium and paint. Self-etching primers typically need only a single pass. Allow it to dry according to the manufacturer’s recoat window — usually 30 minutes to two hours depending on the product and humidity.
- First topcoat — Builds colour coverage and seals the primer. Apply thin and even. Drying time between coats varies from 2 to 4 hours for acrylics, up to 24 hours for polyurethane systems.
- Second topcoat — Achieves full colour depth, uniform sheen, and the final protective layer. This coat determines how your frames look for years to come.
Darker colours over lighter frames — or vice versa — may need a third topcoat for complete opacity. Don’t rush drying times between layers. Recoating too early traps solvents beneath the surface, leading to bubbling or soft spots that scratch easily. In cooler weather or high humidity, extend drying times by at least 50 percent beyond what the tin suggests.
How to paint window frames that last comes down to discipline: thin coats, full drying, and no shortcuts on layer count. The temptation to apply one thick coat and call it done is strong, but aluminium punishes impatience with visible imperfections and premature failure.
Application technique controls the appearance. But even a flawless paint job faces a tougher opponent over time — the environment your frames live in every day.
How Climate and Exposure Shape Your Approach
Where your home sits geographically — and which direction each window faces — matters as much as the paint you choose. A frame sheltered under a deep eave in suburban Melbourne lives a completely different life to one copping salt-laden wind on a Queensland beachfront. Treating both identically is a recipe for premature failure on the exposed frame and over-engineering on the sheltered one.
Coastal and High-Exposure Environments
Salt spray is among the most aggressive forces acting on painted aluminium. Airborne chloride from ocean spray has been detected more than 80 kilometres inland, though concentrations intensify dramatically within the first few hundred metres of the shoreline. Unfinished aluminium exposed to this environment can develop visible pitting within weeks as chloride ions overwhelm the natural oxide layer.
For homeowners painting exterior metal window frames in coastal areas, preparation intensity needs to increase significantly:
- Use a two-part epoxy primer rather than a standard self-etching primer. Epoxy creates a denser barrier against moisture and salt penetration beneath the topcoat.
- Inspect for existing pitting before painting. Even minor surface pitting traps salt deposits that continue corroding under new paint. Sand these areas back to bright metal and treat with a corrosion-inhibiting primer.
- Choose a polyurethane or high-quality acrylic topcoat with marine-grade corrosion resistance. Standard interior-grade paints lack the binder density to resist salt intrusion over time.
- Ensure drainage paths remain clear — weep holes and frame channels that trap salinised water accelerate corrosion beneath the paint film, regardless of how well the visible surfaces are coated.
Can you paint aluminum clad windows in these environments and expect them to last? Yes, but only with this elevated preparation standard. Coastal frames may need recoating every four to five years rather than the seven to ten achievable in sheltered inland locations.
Interior vs Exterior Painting Requirements
Interior aluminium frames live a far gentler existence — no UV bombardment, no rain, no salt, no thermal cycling. This changes the equation considerably when painting metal window frames inside your home.
Preparation still matters, but you can afford to be less aggressive. A thorough clean, light scuff with 320-grit sandpaper, and a bonding primer is typically sufficient for interior frames. The topcoat options broaden too — standard interior acrylic paints, enamels, and even chalk-style finishes all perform adequately when UV and weather aren’t factors.
Can you paint window frames exterior and interior with the same product? Technically yes, if you’re using an exterior-grade acrylic. But there’s no need to pay the premium for UV stabilisers and weather-resistant binders on frames that never see sunlight. Interior frames also tolerate a wider sheen range — satin, semi-gloss, or even matte finishes work well without the durability concerns that limit exterior choices.
The performance expectation shifts too. An interior repaint on aluminium frames can comfortably last 10 to 15 years with minimal maintenance, simply because the stresses acting on the coating are so much lower.
How Sun Orientation Affects Paint Longevity
Not every frame on the same house ages at the same rate. In Australia, north-facing windows receive the most intense and prolonged UV exposure throughout the year. UV rays break down paint binders over time, causing chalking, colour fade, and eventual coating failure — and this degradation happens significantly faster on sun-drenched elevations.
South-facing frames, by contrast, receive minimal direct sun and experience less thermal cycling. They’re also more prone to moisture retention and mould growth in shaded, poorly ventilated positions. The paint challenge here isn’t UV — it’s sustained dampness.
A practical approach when learning how to paint metal window frames across an entire home:
- North-facing frames — Prioritise UV-resistant topcoats (polyurethane or premium acrylic with UV stabilisers). Expect to repaint these first, typically two to three years before other elevations need attention.
- East and west-facing frames — Moderate exposure. Standard exterior acrylic performs well. West-facing frames experience more thermal stress from afternoon heat, so flexibility in the paint film matters here.
- South-facing frames — Choose mould-resistant formulations. These frames stay cooler and damper, creating conditions where biological growth can undermine the paint film from beneath.
Sheltered frames under deep eaves or verandahs on any elevation behave more like interior frames in terms of UV exposure, though they still face temperature changes and airborne contaminants. Adjusting your product selection and maintenance schedule to match each frame’s actual conditions — rather than painting the whole house identically — extends the life of your work and avoids unnecessary early failures on the most exposed surfaces.
Understanding your environment helps you choose the right system. But even with perfect product selection and preparation, paint can still fail if specific application errors create weaknesses in the coating — problems that are entirely preventable once you know what causes them.
Common Paint Failures and How to Prevent Them
Does paint stick to aluminum permanently? It can — but only when every link in the chain holds. A single weak point in preparation, product choice, or application timing creates a failure that may not show up for weeks or months. Knowing what goes wrong and why puts you in a far stronger position to avoid it.
Why Paint Peels Off Aluminium Frames
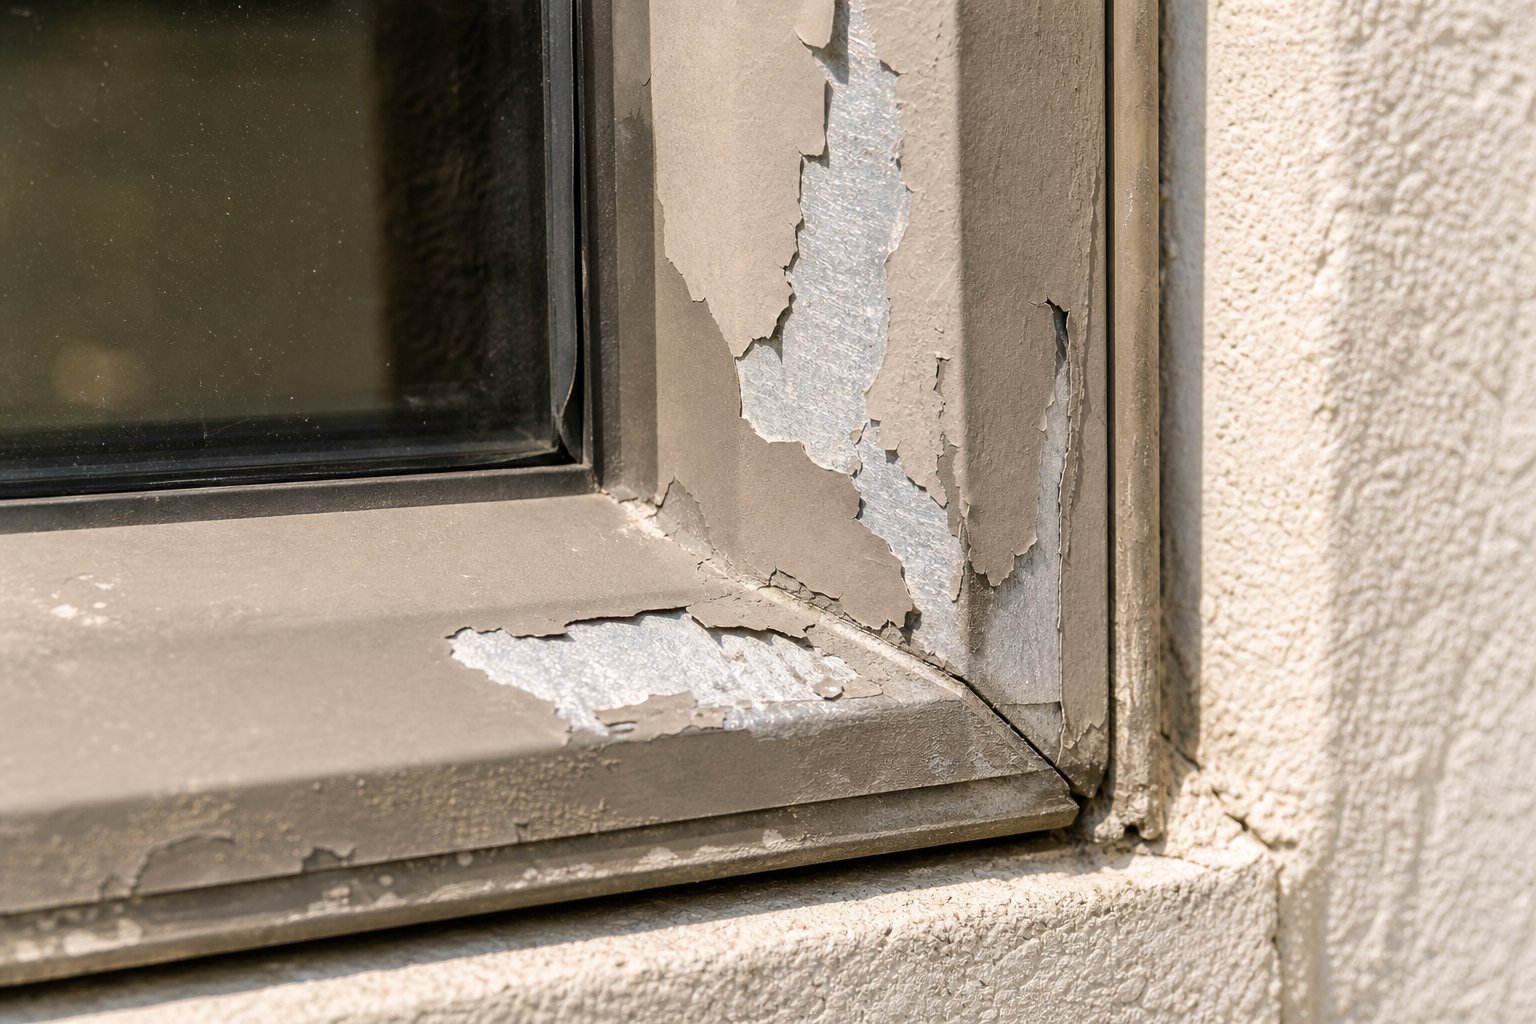
Peeling is the most common complaint with painted aluminum window frames, and it almost always traces back to what happened before the first coat went on. The paint itself isn’t defective — it simply never bonded properly to the substrate beneath it.
- Cause: Inadequate surface preparation — skipping the degreasing step, insufficient sanding, or failing to remove all loose existing paint before recoating. Contaminants as thin as a fingerprint oil film are enough to prevent adhesion.
- Cause: Incompatible or missing primer — applying topcoat directly to bare aluminium, or using a general-purpose primer not formulated for non-porous metal surfaces.
- Prevention: Follow the full preparation sequence: clean, degrease, sand to the correct grit profile, and apply a self-etching or epoxy primer before any topcoat. Self-etching primers chemically bond to aluminium, creating a foundation that mechanical abrasion alone cannot match.
If peeling appears only in isolated spots while the rest of the frame holds firm, the issue is localised contamination or a missed area during sanding — not a systemic product failure.
Chalking, Bubbling, and Cracking Explained
Beyond peeling, three other failure modes affect painting on aluminum surfaces. Each has a distinct cause and a straightforward prevention strategy.
Chalking
- Cause: UV radiation breaks down the paint binder over time, releasing pigment particles as a powdery residue on the surface. Epoxy-based paints are particularly vulnerable — exposure to weathering and ultraviolet light disintegrates the binder, leaving that characteristic chalky film.
- Prevention: Use acrylic or polyurethane topcoats with high UV resistance for any exterior-facing frame. Reserve epoxy for interior applications or as a primer layer beneath a UV-stable finish coat.
Bubbling
- Cause: Moisture trapped beneath the paint film, or solvents that couldn’t escape because the coating skinned over too quickly. Painting in direct sunlight or high humidity are the usual triggers — the surface dries before gases underneath can release.
- Prevention: Paint in shade or during cooler parts of the day (morning or late afternoon). Ensure frames are completely dry before coating. Avoid applying thick coats that trap solvents. Ideal conditions sit between 15°C and 25°C with humidity below 70 percent.
Cracking
- Cause: Thermal expansion mismatch. Aluminium expands and contracts significantly with temperature changes. A rigid paint film that can’t flex with the substrate develops fine cracks — especially on north and west-facing frames that experience large daily temperature swings.
- Prevention: Choose a flexible paint for metal frames — 100% acrylic latex formulations handle thermal movement far better than hard alkyd or brittle epoxy topcoats. Applying multiple thin coats rather than one thick layer also improves flexibility across the total film thickness.
How to Fix Failed Paint Without Starting Over
Catching failure early saves you from a full strip-and-repaint job. The repair approach depends on how far the damage has spread.
For localised peeling or bubbling (less than 10% of the frame):
- Scrape away all loose or blistered paint back to a firmly adhered edge.
- Sand the exposed area with 180-grit, feathering into the surrounding intact paint with 320-grit.
- Clean and degrease the bare patch.
- Spot-prime with self-etching primer, then build up topcoats to match the surrounding finish level.
For widespread chalking:
- Wash the entire frame with sugar soap to remove the powdery residue.
- Scuff sand the whole surface with 320-grit once clean.
- Apply a bonding primer over the existing paint, then recoat with a UV-resistant topcoat. No need to strip to bare metal if the underlying paint is still firmly bonded.
For cracking across large areas:
- Unfortunately, cracking usually indicates the entire paint system is too rigid. Spot repairs over cracked paint tend to fail again. Strip back to primer or bare metal, then recoat with a flexible acrylic system designed to paint metal window frames in high-thermal-movement situations.
Most failures are preventable. But when they do occur, acting quickly — before moisture reaches bare aluminium and corrosion begins — keeps the repair manageable. Left unchecked, a small chip becomes a large peel, and a large peel becomes a full repaint project that costs significantly more in time and materials than the original job.
Prevention and repair are within reach for confident DIYers. Still, some homeowners reach a point where the cycle of repainting every few years raises a bigger question: is there a longer-lasting alternative?
Professional Powder Coating vs DIY Repainting
That question — whether a longer-lasting alternative exists — leads to a fork in the road. Can you repaint aluminium window frames yourself and get a solid result? Yes, as the previous sections demonstrate. But the honest comparison between DIY repainting, professional respray services, and factory-finished replacement windows reveals very different outcomes in durability, cost over time, and finish quality.
| Option | Cost Range (AUD) | Durability | Finish Quality | Colour Options | Effort Required |
|---|---|---|---|---|---|
| New Powder-Coated Windows | $800–$2,500+ per window (supply and install) | 30–45 years | Factory-perfect, uniform | Full RAL range, dual-colour available | None — professional installation |
| Professional Respray / Powder Coating | $150–$400 per window | 15–25 years | Excellent — near-factory finish | Wide range, custom matching available | Moderate — frames may need removal |
| DIY Repainting | $30–$80 per window (materials only) | 5–10 years | Good — depends on skill | Limited to available retail paints | High — full prep, multiple coats |
What DIY Repainting Can Realistically Achieve
Repainting aluminium window frames yourself is a legitimate option when the goal is a cosmetic refresh on a handful of windows. The materials cost is low — primer, topcoat, sandpaper, and masking supplies typically run $30 to $80 per opening. For a homeowner with patience and reasonable hand skills, the result can look clean and hold up for five to ten years in moderate conditions.
Where DIY falls short is consistency and longevity. Brush marks on aluminium’s smooth profile are difficult to eliminate entirely without spray equipment. Colour matching across multiple frames painted on different days — or in different light conditions — often produces subtle variations visible from the street. And the durability ceiling is real: even a well-executed hand-applied finish won’t match the hardness or adhesion of a thermally cured coating.
DIY repainting aluminium windows makes the most sense for single windows, touch-ups on localised damage, or rental properties where you need a quick improvement without major investment. It’s also a reasonable choice for frames under deep eaves or on sheltered elevations where UV and weather exposure are minimal.
Professional Powder Coating and Respray Services
Hiring professional window frame painters or specialist aluminium respray services bridges the gap between DIY and full replacement. These operators use HVLP spray systems or, in some cases, remove frames entirely for off-site powder coating in a controlled oven environment.
Powder coating — where dry pigment is electrostatically applied and then cured at around 200°C — creates a finish that’s tougher and more resistant to scratches and fading than any liquid paint. The thermally bonded coating won’t peel, chip, or chalk the way brush-applied paint eventually does. Professional respray services that use two-pack automotive-style coatings achieve similar hardness without requiring frame removal, though the finish isn’t quite as uniform as true powder coating.
The catch is logistics. Full powder coating requires removing the window sash or entire frame from the opening — a job that involves resealing and refitting afterward. Not every frame can be removed without risking damage to surrounding brickwork or render. On-site respray avoids this but demands extensive masking and favourable weather. Expect to pay $150 to $400 per window depending on size, access difficulty, and whether removal is involved.
For homeowners repainting aluminium window frames across an entire home, professional services deliver a far more consistent result than weekend DIY — and the 15 to 25-year lifespan of a quality respray means you’re unlikely to face the job again.
When New Powder-Coated Windows Are the Smarter Investment
Sometimes the most cost-effective path isn’t repainting at all. If your aluminium frame windows are older single-glazed units without thermal breaks, spending money on cosmetic improvement doesn’t address the underlying performance gap. You’re painting frames that leak heat in winter, admit excessive solar gain in summer, and may not meet current NCC energy efficiency expectations.
Modern aluminium window systems arrive with factory-applied powder coating that’s engineered to last 30 to 45 years without recoating. The finish is applied under controlled factory conditions — consistent film thickness, proper curing temperature, multi-stage pre-treatment — producing a coating that outperforms any field-applied alternative. Manufacturers like MEICHEN offer custom aluminium window systems with standard colour ranges and project-specific colour matching, giving homeowners a factory-finished result in virtually any shade without the ongoing maintenance cycle of repainting.
The upfront cost is higher — typically $800 to $2,500 or more per window depending on size, glazing specification, and configuration. But spread across a 30-plus year lifespan with no repainting required, the per-year cost often undercuts the cycle of DIY repainting every five to eight years. Add the thermal performance gains from double glazing and thermally broken frames, and the energy savings further offset the initial investment.
New powder-coated windows make the strongest case when frames are structurally compromised, thermally underperforming, or when you’re already renovating and can absorb the installation into a broader project budget. For homeowners who simply want a colour change on sound, modern frames, professional respray remains the practical middle ground.
Whichever path you choose — DIY, professional respray, or new factory-finished aluminium frame windows — the next consideration is what happens after the work is done. A fresh finish is only the starting point; how you maintain it determines whether you get the full lifespan from your investment.
Aftercare and How Long Your New Finish Will Last
A freshly painted aluminium frame looks sharp on day one. The real test is whether it still looks that way in year five — or year eight. Maintenance isn’t glamorous, but a simple routine is the difference between a finish that reaches its full lifespan and one that deteriorates years ahead of schedule.
Maintenance Schedule for Repainted Frames
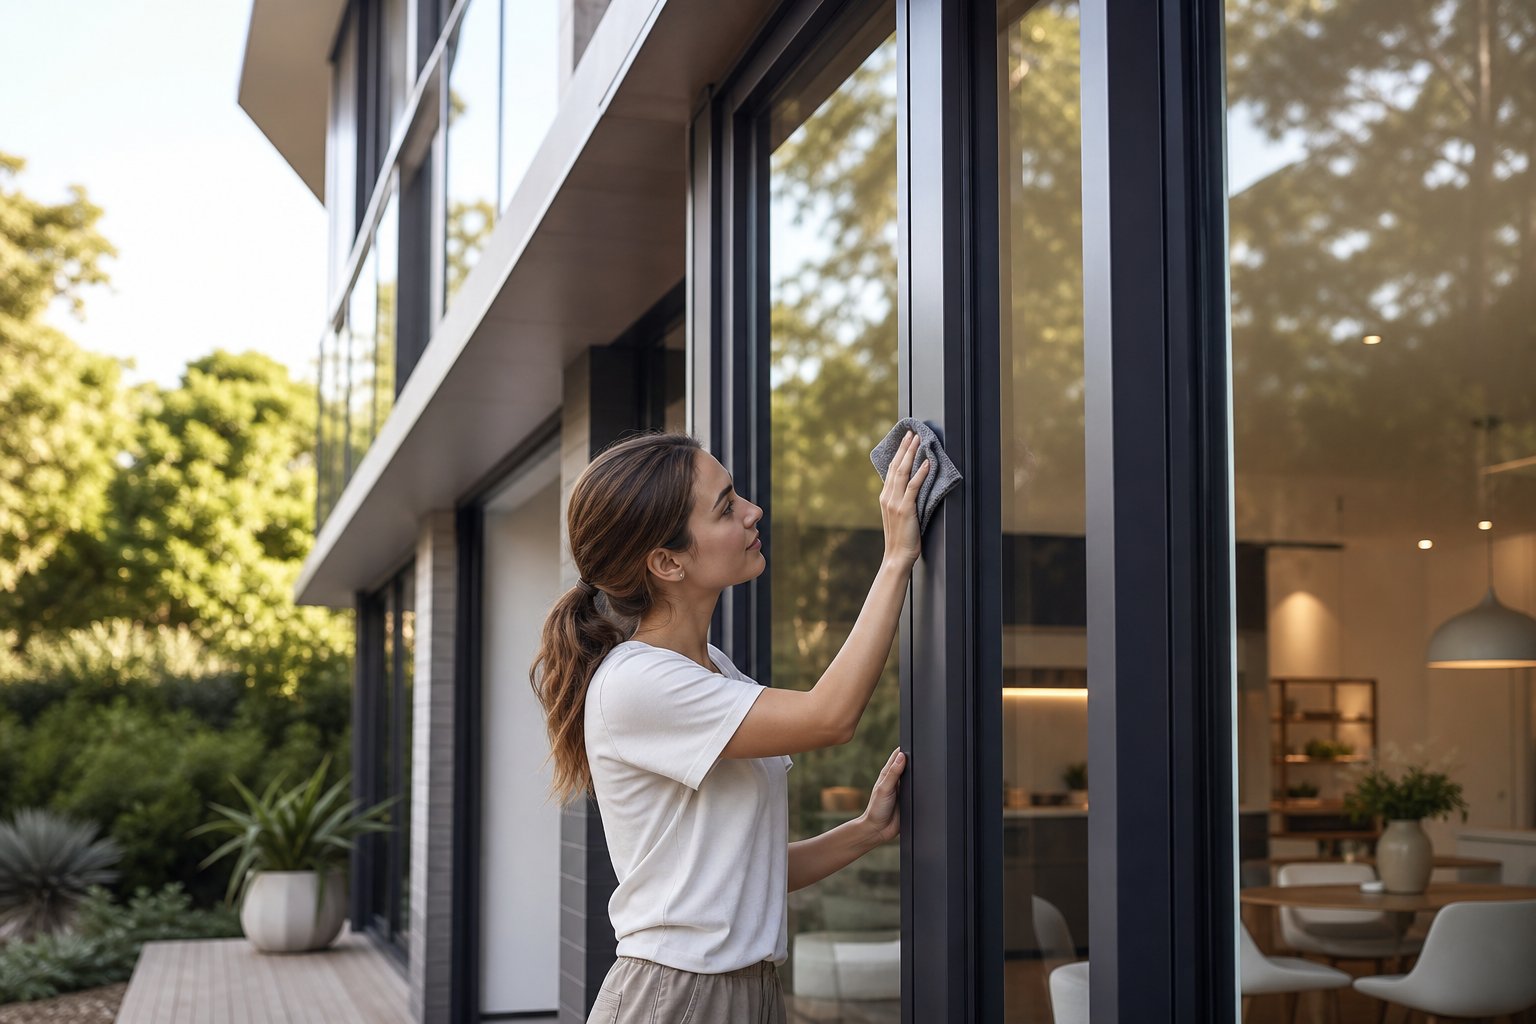
Once you’ve invested the effort to paint aluminum windows properly, protecting that investment takes minimal time. The cleaning approach mirrors general aluminium frame maintenance — gentle products, regular frequency, and no abrasive tools.
- Every 3 months (coastal or pool-adjacent homes): Wash frames with warm water and a mild detergent or car wash soap. Use a soft sponge or microfibre cloth — never scouring pads or steel wool, which scratch through the topcoat and expose primer or bare metal beneath.
- Every 6 months (suburban and inland homes): The same gentle wash, timed to coincide with seasonal changes. Pay attention to frames beneath trees where sap, bird droppings, or leaf tannins can stain and degrade the paint film if left sitting.
- Annually: Inspect every frame closely for chips, hairline cracks, or early chalking. Run your finger across the surface — if it picks up a powdery residue, the topcoat is beginning to break down. Catching this early means a light scuff-sand and single recoat rather than a full strip-back job.
- As needed: Touch up chips and scratches immediately. A small chip left exposed allows moisture underneath the surrounding paint, and what starts as a 5 mm nick becomes a 50 mm peel within a season.
Avoid ammonia-based glass cleaners dripping onto frames, pressure washers aimed directly at painted profiles, and any product labelled “heavy duty” or “industrial strength.” These strip protective layers faster than the weather does.
Realistic Longevity Expectations
How long will your repaint last? The honest answer depends on how thoroughly you prepared, what products you used, and where your frames sit.
- Well-prepared frames with quality acrylic or polyurethane topcoat: 7 to 10 years in moderate suburban conditions. North-facing frames may need attention closer to the 5-year mark due to UV intensity.
- Coastal or high-exposure frames: 3 to 5 years before touch-ups are needed, with a full recoat likely around year 7. Salt air and intense UV accelerate degradation regardless of paint quality.
- Interior frames: 10 to 15 years comfortably, given the absence of weather stress.
- DIY brush application vs professional spray: Professional spray finishes typically outlast brush-applied coats by two to three years due to more uniform film thickness and fewer weak points.
These figures assume you followed proper preparation. Skip the primer or sand inadequately, and you could see peeling within 12 months — turning what should be a decade-long result into an annual frustration.
Making Your Final Decision
Knowing how to paint aluminium windows is valuable. But knowing whether painting is the right choice for your situation matters more. The decision framework is straightforward once you weigh effort against outcome.
If your frames are structurally sound and you want a colour refresh on a budget, repainting delivers solid results for 5 to 10 years. If you’re tired of the maintenance cycle, or your frames need thermal and acoustic upgrades alongside cosmetic improvement, factory powder-coated aluminium windows eliminate repainting from your future entirely.
For homeowners who’ve read through how to repaint aluminium windows and decided the preparation, application, and ongoing upkeep suits their situation — go for it. The process works when done correctly, and the satisfaction of a DIY result that holds up is genuine.
For those planning a renovation or new build where long-term performance matters more than short-term savings, specifying factory-finished aluminium windows is the lower-maintenance path. MEICHEN’s aluminium window range offers factory-applied powder coating in custom colours — a finish engineered to last decades without the recoating cycle. It’s worth exploring if you’d rather invest once and move on.
Either way, can you paint aluminium windows successfully? Yes. The question was never really about whether it’s possible — it’s about whether it’s the right fit for your home, your budget, and how you want to spend your weekends five years from now.
Frequently Asked Questions About Repainting Aluminium Windows
1. What type of paint is best for aluminium window frames?
A 100% acrylic latex paint paired with a self-etching primer delivers the best balance of durability, UV resistance, and ease of application for most Australian homes. For high-exposure frames on north-facing walls or coastal properties, polyurethane topcoats offer superior gloss retention and longevity, lasting up to 12 years. Epoxy-based paints provide excellent adhesion but chalk quickly in direct sunlight, making them better suited as primer coats or for interior frames only.
2. How long does paint last on aluminium windows?
A properly prepared and painted aluminium window frame typically lasts 7 to 10 years in moderate suburban conditions. Coastal or high-UV environments reduce this to 3 to 5 years before touch-ups are needed. Interior frames can last 10 to 15 years due to the absence of weather stress. These figures assume correct surface preparation including degreasing, sanding, and application of a compatible primer system. Skipping preparation steps can result in peeling within 12 months.
3. Can you paint over powder-coated aluminium windows?
Yes, you can paint over powder-coated aluminium frames provided the existing coating is intact and firmly bonded. The process involves cleaning the surface thoroughly, scuff sanding with 240 to 320-grit sandpaper to dull the sheen, applying a bonding primer (adhesion promoter) designed for slick surfaces, and then finishing with your chosen topcoat. If the powder coating is flaking or damaged, those areas need to be sanded back to bare metal and treated with a self-etching primer before recoating.
4. Is it better to repaint or replace old aluminium windows?
Repainting suits frames that are structurally sound but cosmetically faded, chalked, or scratched. It costs $30 to $80 per window in materials for DIY. Replacement makes more sense when frames show structural corrosion, warping, failed seals causing drafts, or are single-glazed without thermal breaks. Modern factory powder-coated aluminium windows from manufacturers like MEICHEN last 30 to 45 years without recoating and offer thermal performance gains that offset the higher upfront cost over time.
5. Do you need to prime aluminium before painting?
Primer is non-negotiable when painting aluminium. The metal’s smooth oxide layer prevents topcoat adhesion without an intermediary bonding layer. Self-etching primers containing phosphoric acid chemically bond to bare aluminium and are ideal for DIY projects. Two-part epoxy primers offer superior corrosion resistance for coastal environments. Bonding primers work best over intact existing paint or powder coating. Applying topcoat directly to aluminium — even sanded aluminium — leads to peeling within months.
More Window & Door Guides