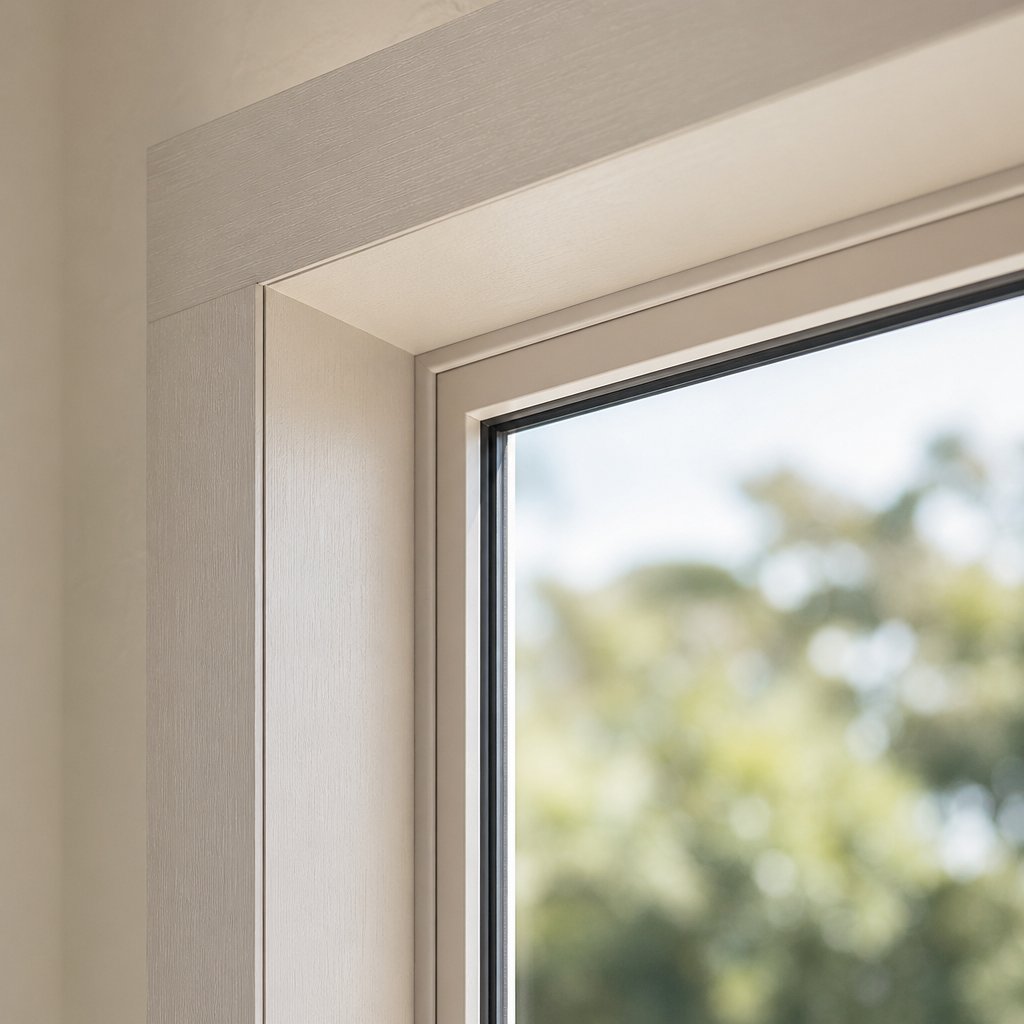
Step 1 – Assess Your Powder Coated Frames and Understand the Challenge
Can you paint aluminium window frames that already have a powder coated finish? Yes, but only if you respect what makes this surface so different from bare timber or metal. Powder coating is not paint in the traditional sense. It is a dry powder fused to the aluminium under heat, forming a thermoset or thermoplastic shell that is ultra-smooth, non-porous, and chemically bonded to the substrate. That factory-applied finish is precisely why your frames have lasted so long without flaking or rusting, and it is also why a fresh coat of house paint will slide right off without proper preparation.
Why Powder Coated Aluminium Resists Paint
Standard paints rely on microscopic pores and surface texture to grip a substrate. Powder coating eliminates both. During manufacturing, electrostatically charged powder particles are sprayed onto grounded aluminium profiles, then cured in an oven at around 200°C. The result is a tough, cohesive film with superior resistance to chipping, scratching, and chemical attack. That same resilience makes painting over powder coat a genuine adhesion challenge. There is no tooth for new coatings to bite into, and the surface energy is low enough that many primers simply bead up or peel within months.
This does not mean the project is impossible. It means the preparation method matters far more than the paint you choose. Understanding that distinction early saves you from the frustration of watching fresh colour lift off in sheets six months down the track.
Diagnose Your Frame Condition Before Starting
Before you gather supplies, walk around your home and assess each frame. The condition of your coated aluminium determines how aggressive your preparation needs to be. Frames generally fall into one of three categories:
- Intact but wrong colour – The surface is glossy or semi-glossy, smooth to the touch, and shows no visible deterioration. You simply want a different shade. This requires the lightest preparation approach.
- Lightly chalked or faded – Rubbing a dark cloth across the frame leaves a white powdery residue. The colour looks washed out, particularly on sun-facing elevations. Chalking occurs when UV radiation degrades the coating binders, and this loose material must be completely removed before any new paint will hold.
- Heavily degraded coating – Visible cracking, flaking, or bare aluminium patches are present. Corrosion may be starting at joints. This condition demands the most thorough preparation, including localised stripping and etch priming of exposed metal.
Identifying your starting point honestly is the single most important step. If you can paint over powder coating successfully, it is because you matched your preparation intensity to the actual surface condition rather than skipping steps.
What to Expect From This Project
For a typical Australian home with six to eight window openings, expect the full process to span three to five days. That includes cleaning, sanding, priming, and applying two topcoats with appropriate drying time between each stage. Weather windows matter too, since exterior frames in coastal or humid regions need dry, mild conditions for proper curing. Can you paint aluminium in a single weekend? Possibly for one or two small frames, but rushing a full house almost guarantees adhesion failures down the line.
The good news is that the materials themselves are straightforward and readily available from any decent hardware store. Knowing exactly what to buy, and why each item earns its place on the list, keeps the project moving without unnecessary trips back for forgotten supplies.
Step 2 – Gather Your Tools and Materials
Having the right supplies on hand before you start means fewer interruptions and better results. Every item on this list serves a specific purpose in the adhesion chain, so resist the temptation to substitute or skip. Below is a complete breakdown organised by project phase, with quantities estimated for a typical home with six to eight aluminium window openings.
Complete Tools and Abrasives List
| Category | Item | Quantity (6-8 Windows) | Purpose |
|---|---|---|---|
| Cleaning | Sugar soap concentrate | 1 litre | Removes dirt, cobwebs, and organic buildup |
| Cleaning | Methylated spirits or isopropyl alcohol | 500 ml | Degreases surface and eliminates silicone residues |
| Cleaning | Lint-free cloths | 10-12 cloths | Wipe-down without leaving fibres behind |
| Preparation | 320-grit sandpaper (sheets or rolls) | 6-8 sheets | Keys intact powder coat without cutting through |
| Preparation | 240-grit sandpaper | 4-6 sheets | More aggressive prep for degraded or flaking coatings |
| Preparation | Scotch-Brite grey scuff pads | 4 pads | Reaches into profiles, corners, and mullion intersections |
| Preparation | Painter’s tape (24 mm and 48 mm widths) | 4-6 rolls | Masks glass edges and hardware |
| Preparation | Plastic sheeting or masking paper | 10-15 m | Protects glass panes and surrounding walls |
| Priming | Bonding primer (for intact powder coat) | 1-2 litres | Promotes adhesion on smooth, non-porous surfaces |
| Priming | Etch primer (for bare aluminium patches) | 1 x 400 ml aerosol or 500 ml tin | Chemically bonds to exposed metal and prevents oxidation |
| Painting | Exterior acrylic or DTM topcoat | 2-4 litres | Provides colour, UV resistance, and weather protection |
| Painting | 400-grit sandpaper | 3-4 sheets | Light de-nib between topcoats for a smooth finish |
Choosing Between Etch Primer and Bonding Primer
This decision depends entirely on what your frames revealed during the condition assessment. If the powder coat is intact and you simply want a colour change, a bonding primer designed for glossy or difficult surfaces is the right choice. These products use specialised resins that grip slick finishes without needing bare metal contact. Look for labels that say “adhesion primer” or “bonding primer” at your local hardware store.
Etch primer enters the picture when you have exposed aluminium. Bare aluminium oxidises almost instantly, forming a thin layer that kills adhesion. Etch primers contain mild acids, typically phosphoric acid, that dissolve this oxide layer while simultaneously depositing a protective coating. They are the best paint for aluminium surfaces that have lost their factory finish. For frames with a mix of intact powder coat and bare patches, use etch primer on the exposed spots and bonding primer everywhere else. This targeted approach gives each surface exactly what it needs.
One critical note: standard rust-inhibiting primers formulated for steel are not suitable paint for metal frames made from aluminium. They lack the chemistry to bond with non-ferrous metals and will fail within months.
Paint Application Equipment Options
Window frame geometry creates a unique challenge. You are working with narrow, flat sections interrupted by corners, gaskets, and hardware recesses. The method you choose for painting aluminum trim affects both the finish quality and the time investment.
A 50 mm angled brush offers the most control for cutting in around glass and reaching tight mullion joints. It is the most accessible option and requires minimal setup. The trade-off is visible brush marks on flat sections unless you maintain a wet edge and use quality paint for aluminum windows with good self-levelling properties.
A small foam roller (75-100 mm) covers flat frame faces quickly and leaves a finer texture than bristle brushes. Pair it with a brush for corners and you get a solid combination of speed and precision. Rollers work well when you want to paint window frames efficiently without investing in spray equipment.
A spray gun or HVLP system delivers the smoothest, most factory-like result. Professional painters favour spray application because it eliminates brush marks entirely and provides even coverage across complex profiles. The downside is significant: you need thorough masking of all glass, walls, and surrounding surfaces, plus calm weather conditions to avoid overspray drift. For a full house of windows, the extra masking time is often worth the superior window frame paint finish you achieve.
Whichever method you choose, the real performance comes from what sits beneath the topcoat. Proper surface preparation and the correct primer do the heavy lifting, and that critical cleaning and keying process is where your attention turns next.
Step 3 – Clean and Degrease the Frame Surface
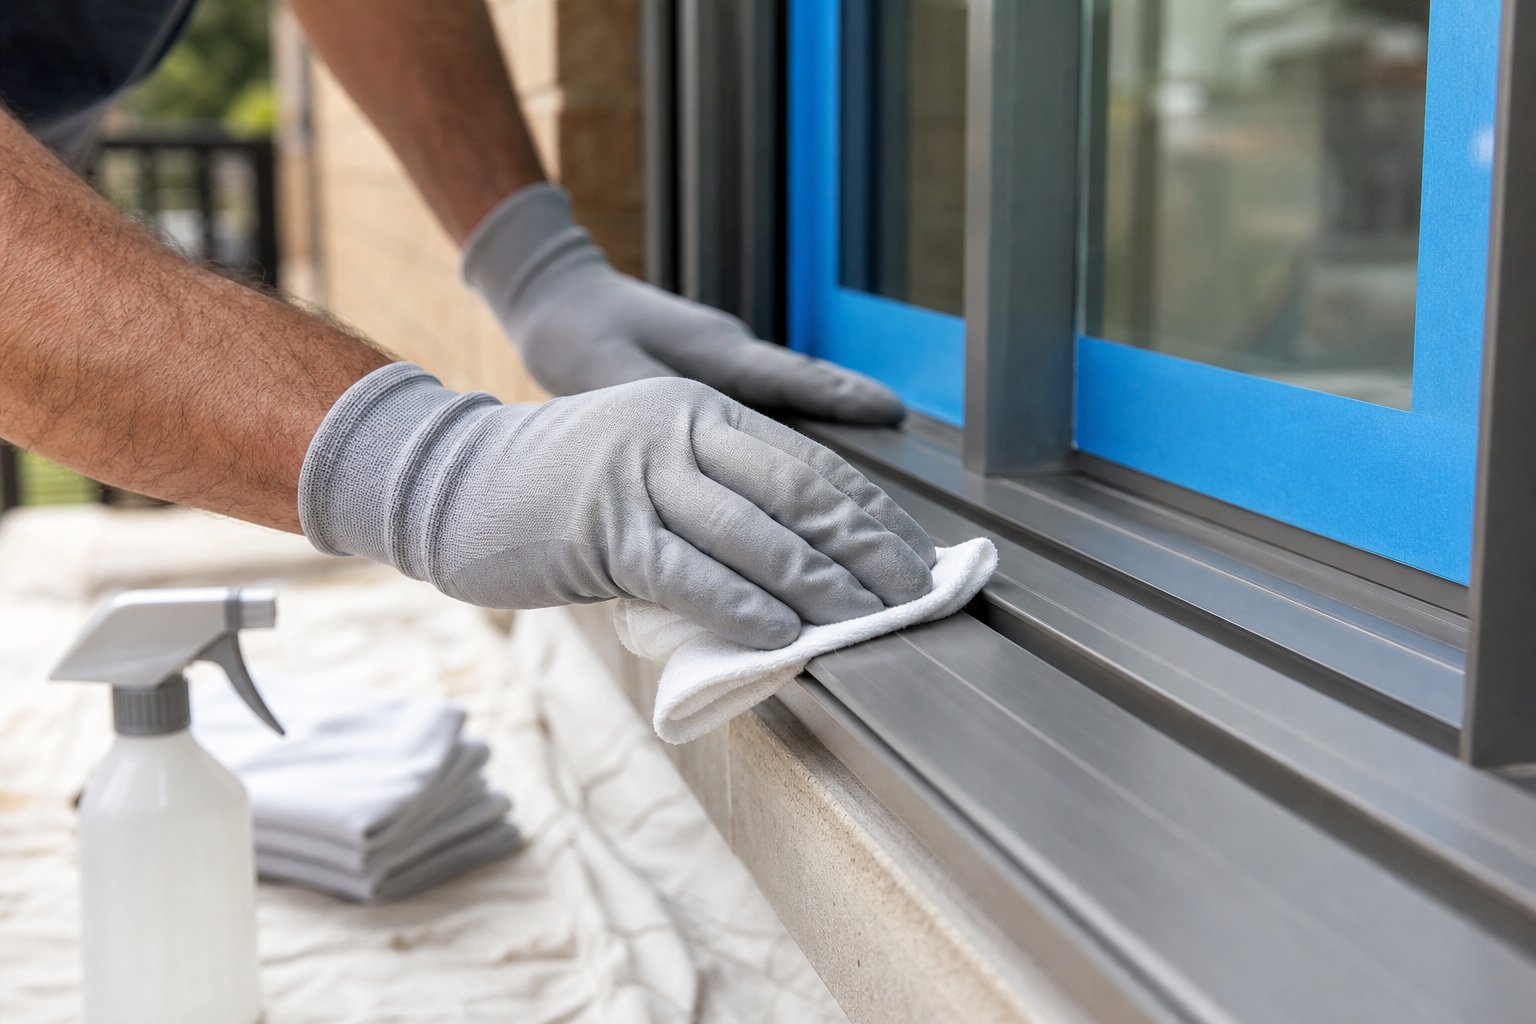
Surface contamination is the invisible enemy of every window frame painting project. Dirt, oils, and degraded coating residue sit between your primer and the powder coat, creating weak points where adhesion fails months later. This cleaning phase is not optional prep work you can rush through on a Saturday morning. It is the foundation that determines whether your finish lasts two years or ten.
Two-Stage Cleaning Process
Effective cleaning happens in two distinct passes, each targeting different contaminants. Combining them into a single step leaves residues behind that cause fish-eye defects and delamination.
Stage one: sugar soap wash. Mix sugar soap concentrate with warm water according to the label directions and scrub every millimetre of the frame using a soft-bristled brush or sponge. This removes the visible grime — dirt, cobwebs, mould, bird droppings, and atmospheric deposits that accumulate on exterior aluminium. Pay particular attention to the top rail and horizontal surfaces where debris settles. Rinse thoroughly with clean water and allow the frames to dry completely.
Stage two: solvent degrease. Wipe the entire frame with methylated spirits or isopropyl alcohol on a lint-free cloth. This eliminates invisible contaminants that sugar soap cannot touch: silicone residues from window sealants, fingerprint oils, and airborne hydrocarbons from nearby roads. Change your cloth frequently so you are lifting contaminants off the surface rather than spreading them around. One critical caution: never apply solvent cleaners when the aluminium is warm from direct sun, as heat can soften the powder coat and allow the solvent to damage the existing finish.
Between these two stages, check for chalking. Press a dark-coloured cloth firmly against the frame and drag it across the surface. White powdery residue on the cloth confirms UV degradation of the coating binders. If chalking is present, you must remove it entirely through repeated wiping with methylated spirits until the cloth comes away clean. Any chalk left behind acts as a release layer that prevents your primer from gripping.
Weather Conditions and Timing for Exterior Frames
Can you paint window frames exterior in any weather? Absolutely not. Temperature, humidity, and moisture all influence how well coatings bond and cure. Getting the timing wrong undermines every other step you have completed.
Aim for an ambient temperature between 10°C and 25°C. Below 10°C, most primers and paints struggle to coalesce properly, leaving a weak film. Above 25°C, coatings flash off too quickly, preventing proper flow and adhesion. Humidity should sit below 85% relative humidity — high moisture levels slow drying dramatically and risk trapping water beneath the paint film, which leads to bubbling and mould growth.
For Australian conditions, midday through early afternoon typically offers the best working window. Early morning surfaces carry residual dew that is invisible to the eye but devastating to adhesion. Late afternoon brings dropping temperatures and rising humidity as the air cools. If you are painting aluminum window frames on the coast or in tropical regions like North Queensland, monitor conditions closely and be prepared to stop work if a sea breeze rolls in with salt-laden moisture.
Never paint in direct sunlight or when rain is forecast within 24 hours. Direct sun causes rapid surface drying while the underlying film remains uncured, leading to cracking and poor adhesion. Rain within the curing window washes uncured paint off the surface or traps moisture beneath the film, guaranteeing failure.
Masking Glass and Hardware Properly
Knowing how to paint the window frame without damaging surrounding surfaces comes down to thorough masking. This step takes time, but it protects your glass, rubber seals, and hardware from primer and paint that are extremely difficult to remove once cured.
Start by applying painter’s tape along the glass edge where it meets the frame, pressing firmly to create a tight seal that prevents bleed-through. Run your fingernail or a plastic scraper along the tape edge to bond it securely. Then attach plastic sheeting or masking paper to cover the full glass pane, leaving only the frame profiles exposed. For windows with multiple panes, mask each section individually to maintain clean lines at every glazing bar.
Remove or mask all hardware — handles, locks, stays, and friction hinges. If removal is impractical, wrap components tightly with tape. Protect rubber gaskets and weather seals with a single layer of tape to prevent primer solvents from degrading the rubber. Finally, mask surrounding brickwork or render for at least 50 mm beyond the frame edge to catch any overspray or accidental brush contact.
Can you paint aluminium windows without masking? Technically yes, but the cleanup time and risk of permanent damage to glass coatings and seals make it a false economy every time. Proper masking takes thirty minutes per window and saves hours of remedial work later.
With frames cleaned, conditions confirmed, and masking complete, the surface is ready for the mechanical preparation that gives primer something to grip. Sanding technique on powder coat requires a lighter touch than most people expect.
Step 4 – Sand for Adhesion and Apply Primer
Sanding powder coat is counterintuitive. Every instinct says to sand hard and strip back to bare metal, but that approach destroys the very layer protecting your aluminium from corrosion. The goal here is subtle: dull the sheen, create microscopic texture, and give your primer something to lock onto. Get this right and you can paint over powder coat with confidence that the finish will hold for years rather than weeks.
Sanding Technique for Powder Coated Surfaces
The entire sanding-to-priming sequence follows a strict order. Skipping steps or reversing them introduces weak points that show up as peeling months later.
- Start with 320-grit sandpaper on flat frame faces. Use light, even pressure in one direction. You are not trying to cut through the powder coat — just remove the gloss until the surface appears uniformly matte. No shiny patches should remain when you hold the frame at an angle to the light.
- Switch to Scotch-Brite grey scuff pads for profiles and curves. These conform to rounded edges, rebates, and decorative mouldings where flat sandpaper cannot reach. Work the pad into every contour until the entire profile feels slightly rough to the touch.
- Vacuum or wipe away all sanding dust. Use a clean, dry lint-free cloth followed by a final wipe with methylated spirits. Residual dust trapped beneath primer compromises adhesion just as effectively as a glossy surface does.
- Inspect under strong light. Run your fingertips across every section. Any slick or glossy spots need another pass with the scuff pad before you move to priming.
- Apply bonding primer in thin, even coats. Use a 50 mm brush or spray in light passes, building coverage gradually rather than flooding the surface. One medium coat is better than one heavy coat that sags into corners.
- Allow 2-4 hours drying time between primer coats. Temperature and humidity affect this window — cooler days push toward the longer end. The primer is ready for a second coat or topcoat when it feels dry and slightly powdery to a light touch, with no tackiness remaining.
For frames with exposed bare aluminium patches, apply etch primer to those areas first and let it cure before covering the entire frame with bonding primer. This two-primer approach ensures each surface type gets the chemistry it needs. Can you paint powder coated metal without sanding at all? Technically you can apply paint, but it will not stay. The mechanical profile created by scuffing is the only thing giving your primer purchase on this non-porous finish.
Applying Bonding Primer Correctly
Thin coats are everything when painting over powder coated metal. A heavy primer coat pools in corners, takes forever to dry, and shrinks as solvents evaporate — pulling away from the substrate in the process. Apply just enough to see even, semi-transparent coverage on the first pass. The second coat, applied after the recommended drying window, builds opacity and film thickness without the risks of a single heavy application.
If you are brushing, work in one direction along the length of each frame section to avoid lap marks. If spraying, keep the gun 150-200 mm from the surface and use overlapping passes at a consistent speed. Either way, watch for runs at corners and wipe them immediately with a dry brush tip before they set.
Handling Problem Areas at Joints and Corners
Mullion intersections, mitre joints, and the tight angles where frame meets sill are where most adhesion failures begin. Paint builds up in these recesses, dries slowly, and often sits on poorly sanded surfaces because flat sandpaper cannot reach them. This is precisely why Scotch-Brite pads earn their place on your materials list — they flex into every crevice that sandpaper skips.
When priming these areas, use a small artist’s brush or a cut-down 25 mm brush to work primer into joints without flooding them. Painting over powdercoat at corners demands patience: two whisper-thin coats with full drying between each will always outperform one thick coat that traps solvent and eventually blisters.
Knowing how to paint over powder coated metal properly means accepting that primer is not just a colour base — it is the structural bond holding your entire paint system together. Once it has cured fully and feels hard rather than rubbery, the frame is ready for topcoat selection and application, where the choice between paint systems determines the final look and longevity of your work.
Step 5 – Choose Your Paint System and Apply the First Coat
Your primer has cured, the surface feels hard and uniform, and the frame is ready for colour. This is where the project starts to feel rewarding — but the paint system you select here determines whether that satisfaction lasts five years or fifteen. Not all exterior coatings perform equally on primed powder coat, and the application method you choose shapes the final appearance just as much as the colour itself.
Paint System Options Compared
Three main categories of exterior paint work over bonding primer on aluminium frames. Each brings trade-offs in adhesion, durability, ease of use, and finish quality. How do you paint aluminum window frames that will face Australian sun, coastal salt air, and temperature swings? You pick the system that matches your climate exposure and skill level.
Acrylic latex is the most popular choice for residential projects, and for good reason. Its flexible film reduces cracking as aluminium expands and contracts through daily temperature cycles. It dries quickly, cleans up with water, produces low odour, and resists UV-driven chalking better than most alternatives. The limitation is film thickness — acrylic builds a thinner coating per pass, which means you need at least two topcoats for adequate weather protection on exterior frames.
Oil-based alkyd paints deliver a harder, more abrasion-resistant finish that self-levels beautifully on flat frame sections. Adhesion to primed surfaces is excellent, and the denser film provides strong moisture resistance. The downsides are meaningful though: longer drying times (8-16 hours between coats versus 2-4 for acrylics), higher VOC content requiring good ventilation, and a tendency to yellow over time on white or light-coloured frames. If you want to paint aluminium window frames in a dark charcoal or black, alkyd performs well. For whites and creams, look elsewhere.
Direct-to-metal (DTM) coatings sit at the premium end. These specialist products combine primer and topcoat chemistry into a single formulation with built-in corrosion inhibitors and industrial-grade adhesion. They bond aggressively to prepared surfaces and resist chipping, scratching, and weathering at a level that standard house paints cannot match. The trade-off is cost — expect to pay two to three times more per litre than quality acrylic — and limited colour ranges from some manufacturers. For frames exposed to harsh coastal conditions or heavy use, the investment often pays for itself in longevity.
| Type | Adhesion | Durability | Ease of Use | Dry Time | Best For |
|---|---|---|---|---|---|
| Acrylic Latex | Good (over bonding primer) | 5-10 years exterior | High — water cleanup, low odour | 2-4 hours recoat | Most residential projects, light colours, DIY-friendly |
| Oil-Based Alkyd | Excellent | 8-12 years exterior | Moderate — solvent cleanup, strong odour | 8-16 hours recoat | Dark colours, high-wear areas, experienced painters |
| Direct-to-Metal (DTM) | Superior | 10-15 years exterior | Moderate — specific application requirements | 4-6 hours recoat | Coastal exposure, commercial properties, maximum longevity |
For most Australian homeowners tackling this project themselves, a quality exterior acrylic in a satin or semi-gloss finish hits the sweet spot between performance and practicality. It forgives minor application imperfections, dries fast enough to apply two coats in a single day, and holds colour stability under intense UV exposure.
Spray vs Brush Application Technique
Can you spray paint over powder coating for a factory-smooth result? Absolutely — and spray application is how professionals achieve that seamless finish on aluminium frames. An HVLP gun or airless sprayer lays down an even film with zero brush marks, wrapping colour uniformly around profiles, rebates, and corners in a way that brushes simply cannot replicate.
The catch is preparation overhead. Spraying window frames demands meticulous masking of every glass pane, rubber seal, surrounding wall surface, and any hardware you could not remove. On a calm day with no wind, overspray stays manageable. On a breezy afternoon — common in most Australian coastal suburbs — paint mist drifts onto cars, neighbouring fences, and freshly washed laundry. Budget an extra 30-45 minutes of masking per window if you choose spray, and only work in still conditions.
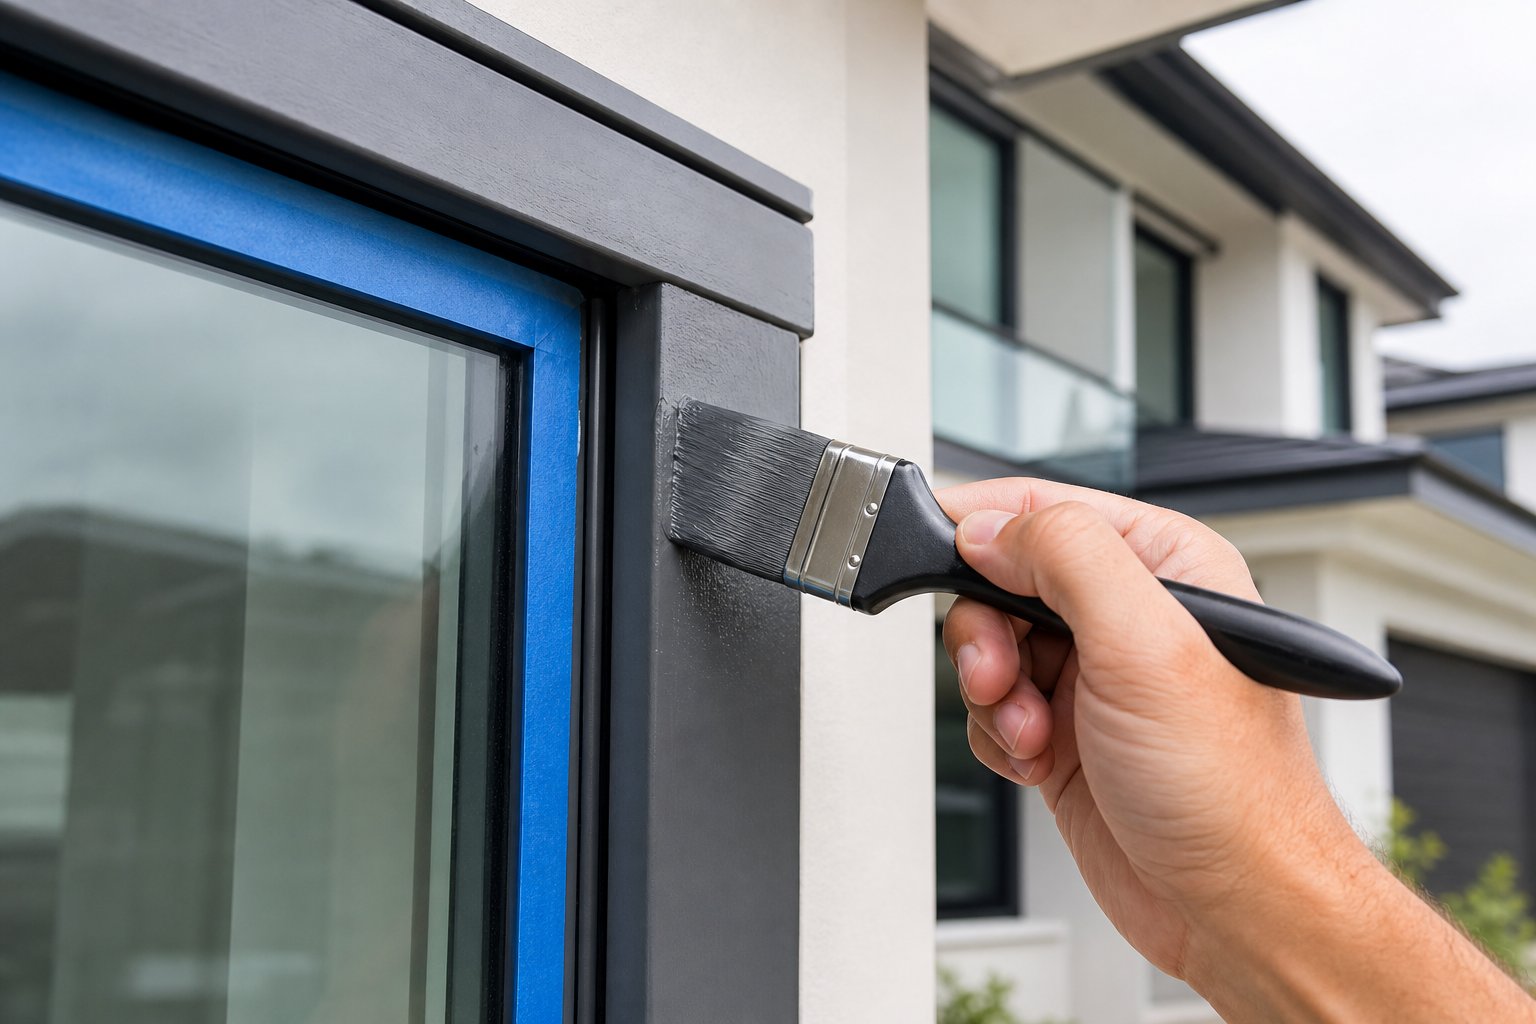
Brush application is more forgiving of imperfect masking and requires minimal equipment. A quality 50 mm angled brush handles most frame geometry well. The technique that eliminates visible brush marks on flat sections is straightforward: load the brush lightly, lay paint on in one smooth stroke along the length of the frame member, then tip off gently without reloading. Work in sections short enough that the leading edge stays wet — typically one full frame side at a time. If you go back into paint that has started to tack, you will drag the surface and leave marks that cure permanently.
A hybrid approach works well for DIY painters who want to paint aluminum window frames to a high standard without full spray equipment. Use a spray can of matching paint for complex profiles and mullion intersections where brush marks are most visible, then brush the larger flat sections with careful technique. This gives you spray-quality coverage in the fiddly areas without masking the entire house.
Colour Selection and Matching
Powder coated aluminium frames are manufactured using the RAL colour system — a standardised palette of over 200 colours used across the window industry worldwide. If you want to match your existing frame colour exactly, identifying the original RAL code is the starting point. Check your window documentation, contact the original installer, or take a clean sample chip to a paint retailer with spectrophotometer colour-matching capability.
Popular RAL colours on Australian homes include RAL 7016 (Anthracite Grey), RAL 9005 (Jet Black), RAL 9016 (Traffic White), and RAL 7035 (Light Grey). If you are changing colour rather than refreshing the existing shade, consider how your choice interacts with the property’s overall palette. Contemporary homes with dark brick or rendered walls suit deep charcoals and blacks. Weatherboard cottages and Queenslanders often look best with softer whites or light greys that complement timber detailing.
One performance consideration that many people overlook: darker colours absorb significantly more solar heat than lighter shades. On west-facing aluminium frames in Perth or Brisbane, a jet black finish can push surface temperatures well above ambient, accelerating paint film degradation and increasing thermal expansion stress on seals. If you are set on a dark colour for sun-exposed frames, a DTM coating with superior heat resistance is worth the premium.
Lighter colours are more forgiving in terms of heat absorption but show dirt and chalking more readily. Satin finishes strike a practical balance — they resist staining better than matte and hide minor surface imperfections that semi-gloss would highlight.
With your paint system chosen and colour confirmed, the first coat goes on thin and even. Resist the urge to achieve full coverage in a single pass. One thin coat that dries uniformly creates a far stronger bond than a heavy coat that sags at corners and traps solvents against the primer. Work methodically around each frame — top rail first, then sides, then sill — maintaining a wet edge throughout each section. The real durability comes from building film thickness gradually across multiple coats, each one bonding to the last in a layered system that resists peeling from the outside in.
Step 6 – Apply Additional Coats and Allow Full Cure
That first coat looks promising, but it is doing less than you think. A single topcoat on exterior aluminium frames delivers incomplete UV protection, insufficient film thickness for weather resistance, and uneven colour density that becomes obvious in raking light. The real performance of your paint system emerges from the second and third coats — each one adding measurable durability that a single pass simply cannot provide.
Why Multiple Thin Coats Outperform One Thick Coat
It is tempting to load the brush and try to finish in one heavy pass. The logic seems sound: more paint equals more protection. In practice, the opposite is true. A thick coat traps solvents beneath the surface skin, creating internal stress as those solvents slowly escape over days and weeks. The result is shrinkage, solvent pop, and eventual cracking that compromises the entire film. Two or three thin coats, each allowed to release its solvents fully before the next is applied, build a dense, stress-free film with superior hardness and flexibility.
For exterior frames facing Australian conditions — intense UV, wide temperature swings, and coastal salt exposure — two topcoats is the minimum. Three coats are justified on west-facing or north-facing frames that cop relentless sun. Each coat adds roughly 25-40 microns of dry film thickness, and you need a total of at least 60-80 microns of topcoat to resist chalking and colour fade over a five-to-ten year cycle. If you are repainting aluminium window frames in a lighter colour over a darker base, a third coat also ensures complete opacity without relying on excessive film build in any single pass.
Inter-Coat Preparation and Timing
The window between coats is not dead time — it is where adhesion between layers is either secured or lost. Each paint type has a specific recoat window during which the next coat bonds chemically and mechanically to the layer beneath.
Acrylic latex: Recoat after 2-4 hours in temperatures between 15-25°C. In cooler conditions (10-15°C), extend this to 4-6 hours. The surface should feel completely dry with no tackiness when you press a knuckle lightly against it.
Oil-based alkyd: Recoat after 8-16 hours. These coatings cure through oxidation rather than evaporation, so rushing the interval traps uncured material beneath the fresh coat. Patience here prevents wrinkling.
DTM coatings: Recoat after 4-6 hours typically, though product-specific data sheets vary. Always check the manufacturer’s technical data sheet (TDS) for exact recoat windows.
Temperature is the single largest variable affecting dry time. A coat that feels ready in three hours at 22°C may need five or six hours at 12°C. Do not rely on the clock alone — touch-test the surface in the thickest areas (corners, bottom rails where paint accumulates) before proceeding.
Between coats, lightly scuff the dried surface with 400-grit sandpaper or a Scotch-Brite grey pad. This step takes only a few minutes per frame but creates micro-texture that the next coat grips. Wipe away dust with a clean, dry cloth before applying the subsequent coat. Skipping this inter-coat sand is the most common shortcut that leads to delamination between topcoat layers — the paint peels off in sheets rather than wearing gradually.
Can you repaint aluminium window frames without sanding between coats if you stay within the recoat window? For most acrylics, yes — applying the second coat while the first is within its open recoat window allows chemical bonding without mechanical scuffing. Once that window closes (typically 24-48 hours), the surface has cured enough that sanding becomes mandatory for inter-coat adhesion.
Curing Timeline and Post-Paint Care
Understanding the difference between dry-to-touch, dry-to-recoat, and full cure prevents the most common post-painting mistakes. These are not interchangeable terms — they describe fundamentally different stages of film development.
Dry-to-touch means the surface no longer transfers paint to a light finger press. For water-based acrylics, this happens within 30 minutes to 1.5 hours. The film is still soft and vulnerable.
Dry-to-recoat means solvents have escaped sufficiently for the next coat to bond without trapping volatiles. This is your 2-16 hour window depending on paint type.
Full cure is when the film reaches maximum hardness, chemical resistance, and adhesion strength. For water-based acrylic paints, full cure takes 14-30 days. Oil-based systems typically reach full hardness in 7-15 days. Until this point, the paint is progressively hardening but remains susceptible to damage from mechanical stress, cleaning chemicals, and moisture entrapment.
Do not operate windows — open, close, or lock them — for at least seven days after the final coat. The friction of moving sashes against freshly painted frames will gouge the uncured film, creating adhesion failures that worsen over time. If ventilation is essential during this period, leave windows in their painted position or use alternative openings elsewhere in the home.
Masking tape removal has its own timing sweet spot. Pull tape when the final coat is dry to touch but not yet hard — typically 1-2 hours after the last coat for acrylics. At this stage, the paint film is firm enough not to smear but flexible enough to break cleanly along the tape edge. Wait too long and the cured paint bridges over the tape, tearing jaggedly when you pull. Remove too early and wet paint bleeds under the edge. Peel tape back at a 45-degree angle, pulling slowly and steadily away from the painted surface.
How to repaint aluminium windows on the interior follows the same layering principles but with reduced demands. Interior frames avoid UV exposure, rain, and temperature extremes, so a single primer coat plus one or two topcoats of interior-grade acrylic provides adequate protection. You can also use lower-sheen finishes (matte or low sheen) that hide surface imperfections without sacrificing durability in a sheltered environment. Recoat times are generally shorter indoors due to stable temperatures, and full cure happens faster without humidity fluctuations slowing the process.
During the full cure period — whether interior or exterior — avoid washing frames, leaning objects against them, or allowing curtains and blinds to contact the surface. Even fingerprints pressed into uncured paint can leave permanent impressions. Treat your freshly painted frames as fragile for the first two weeks, and they will reward you with a hard, resilient finish that resists the peeling and chipping that plagues rushed jobs.
Of course, even the most careful multi-coat application cannot prevent every issue. Certain failure patterns crop up repeatedly on window frames, and knowing how to identify and fix them early saves you from stripping back to bare primer and starting over.
Step 7 – Troubleshoot Common Paint Failures on Window Frames
Even with careful preparation, paint failures on metal window frames do occur. Some show up within weeks, others take a full season of weather exposure to reveal themselves. The key is recognising each failure type early, understanding what caused it, and applying the correct fix rather than simply painting over the problem again. Painting metal window frames successfully means knowing what can go wrong and having a plan for each scenario.
Below are the most common failures you will encounter when painting on aluminum frames, along with their root causes and targeted solutions.
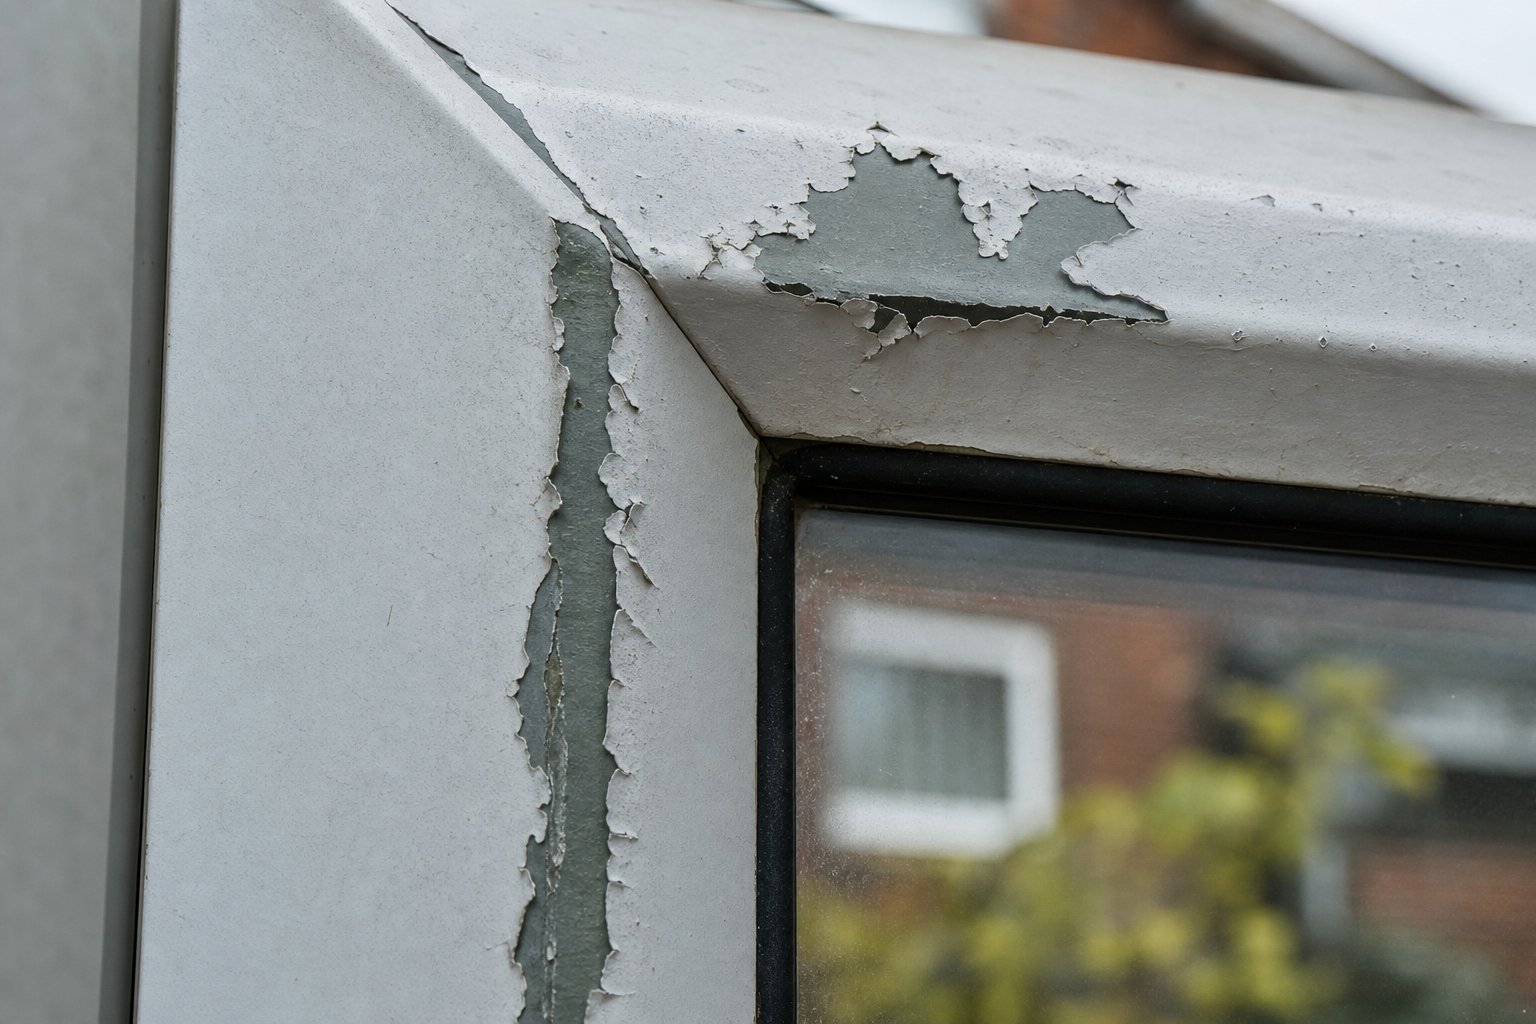
- Peeling and flaking at joints — Caused by insufficient sanding and primer coverage in tight corners and mullion intersections. Paint lifts in curls or chips away when touched.
- Bubbling and blistering — Caused by trapped moisture beneath the film, either from painting over a damp surface or applying coats in high humidity. Bubbles range from pinhead-sized to large blisters.
- Chalking and fading — Caused by UV breakdown of the paint binder system. The surface feels powdery and colour appears washed out, particularly on north and west-facing frames.
- Sheet adhesion failure — Caused by primer incompatibility, contaminated surfaces, or skipping the sanding step entirely. Paint peels away in large sheets rather than small flakes, often revealing the original powder coat beneath with no primer residue attached.
Peeling and Flaking at Joints
Corners and mitre joints are where most failures begin because they are the hardest areas to prepare properly. Flat sandpaper cannot reach into a 90-degree internal angle, and brushes tend to deposit too much paint in recesses where drying is slowest. The result is thick, poorly adhered paint sitting on a glossy, unscuffed surface — a combination guaranteed to fail.
The fix requires stripping the affected area back to sound coating. Use a plastic scraper or the edge of a Scotch-Brite pad to remove all loose and flaking material until only firmly adhered paint remains. Feather the edges of the surrounding sound paint with 320-grit sandpaper so there is no hard step between bare and painted surfaces. Clean the exposed area with methylated spirits, apply bonding primer with a small artist’s brush, allow full drying, then rebuild with two thin topcoats. If you are painting an old window frame where previous coats have already failed at joints, strip those areas completely rather than layering over existing weakness.
Prevention is straightforward: during initial preparation, spend extra time working Scotch-Brite pads into every corner and joint. These areas need more attention than flat faces, not less. When priming and painting, use a cut-down brush to apply thin, controlled coats that do not pool.
Bubbling and Moisture-Related Failures
Bubbles in your paint film are a sign that moisture or air was trapped beneath the surface during application. On aluminium window frames, this typically happens in one of three scenarios: painting over morning dew that has not fully evaporated, applying coats when relative humidity exceeds 85%, or painting in direct sunlight where the surface skin dries before underlying solvents can escape.
Small, isolated bubbles can sometimes be sanded flat once fully cured, then spot-primed and recoated. Widespread blistering requires a more aggressive approach — scrape and sand the entire affected section back to sound primer or bare powder coat, confirm the surface is completely dry (wait for a run of warm, dry days), then reprime and recoat in appropriate conditions. There is no shortcut here. Painting over bubbled areas without addressing the moisture source guarantees the problem returns.
For frames in humid coastal regions or tropical areas of Queensland and the Northern Territory, timing your project for the dry season makes a measurable difference. Winter and early spring in these climates offer lower humidity and more predictable weather windows than the wet season months.
Testing Adhesion Before Full Commitment
Before committing to painting every frame on your home, verify that your preparation method and paint system actually bond properly. The cross-hatch adhesion test based on ASTM D3359 gives you a reliable answer using nothing more than a sharp blade and a piece of tape.
Here is how to perform it on a test section:
- Choose an inconspicuous area of frame — the bottom rail or a section hidden behind a flyscreen works well.
- Complete your full preparation, priming, and topcoat process on this small test patch (roughly 50 mm x 50 mm).
- Allow the paint to cure for at least 7 days to reach near-full hardness.
- Using a sharp utility knife or dedicated crosshatch cutter, score a grid of parallel lines approximately 2 mm apart in both directions, cutting through the paint film to the substrate. You should have a grid of small squares.
- Press a strip of strong adhesive tape (packaging tape works) firmly over the scored grid, rubbing it down to ensure full contact.
- Pull the tape off swiftly at a 180-degree angle — straight back over itself in one quick motion.
- Inspect the grid. If no paint has lifted onto the tape and all squares remain intact, your system has passed. Any squares pulling away indicate an adhesion problem that needs solving before you proceed with the full project.
This test takes minimal time and materials but can save you from painting an entire house of windows with a system that will fail within a year. If the test reveals poor adhesion, revisit your sanding technique first — insufficient scuffing is the most common culprit. If adhesion still fails after thorough sanding, try a different bonding primer. Not all primers grip every powder coat formulation equally, and switching products often resolves the issue.
For those wondering how to paint metal frame windows that have already experienced partial failure, the cross-hatch test is equally valuable as a diagnostic tool. Perform it on areas where the paint appears sound — if those sections also fail the test, you are dealing with a systemic problem (wrong primer, contaminated surface) rather than localised preparation gaps.
Touch-Up Techniques for Minor Damage
Not every chip or scratch demands a full repaint. Small areas of damage from impact, abrasion, or hardware contact can be repaired without stripping entire frames. The key to an invisible touch-up on aluminium window frames is matching both the colour and the sheen precisely.
Sand the damaged area lightly with 400-grit paper to feather the edges and remove any loose material. Clean with methylated spirits. If bare aluminium or powder coat is exposed, spot-prime with a small brush and allow to dry. Then apply topcoat using a fine artist’s brush, building thin layers until the repair sits flush with the surrounding paint. Slightly overfill the repair and allow it to cure fully, then wet-sand with 600-grit to level it with the adjacent surface if needed.
Can you paint metal window frames in isolated spots without visible patchiness? Yes, provided you use the same paint from the same batch and apply it in similar weather conditions to the original job. Colour match is critical — keep leftover paint sealed and stored for exactly this purpose. Touch-ups performed with aged or different-batch paint often show as slightly different shades, particularly on lighter colours where even minor tint variations are visible in direct light.
Knowing how to diagnose and fix these common failures gives you confidence that your project will hold up over time. But there is a broader question worth addressing honestly: at what point does repainting stop being the smart choice, and when does professional respraying or full replacement deliver better value for your investment?
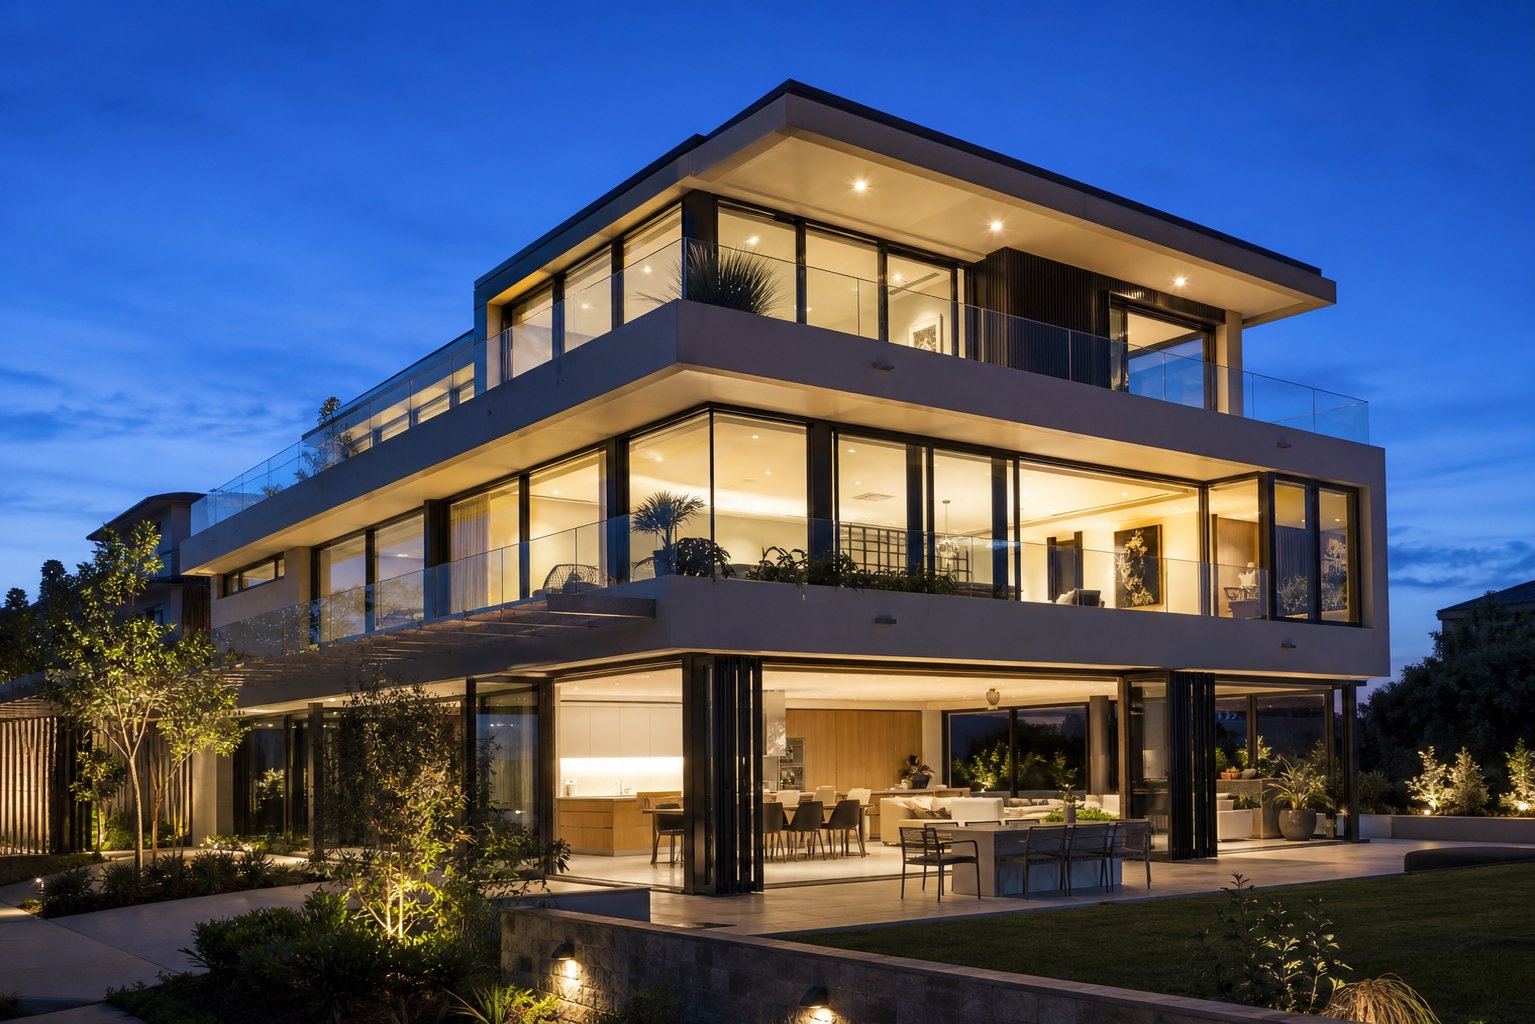
Step 8 – Decide Between DIY Repainting and Professional Alternatives
Repainting powder coated aluminium frames yourself is entirely achievable — the previous steps prove that. But achievable and advisable are not always the same thing. Your specific situation, the condition of your frames, and your long-term goals for the property all factor into whether DIY is the smartest use of your time and money, or whether professional respraying or full replacement delivers a better return.
| Factor | New Aluminium Windows | Professional Respray | DIY Repaint |
|---|---|---|---|
| Cost (typical home, 6-8 windows) | $15,000 – $40,000+ AUD | $2,500 – $7,500 AUD | $300 – $800 AUD (materials only) |
| Durability | 20-30+ years (factory powder coat) | 10-15 years | 5-10 years |
| Finish Quality | Factory-perfect, consistent coating of aluminium | Near-factory smooth finish | Good with careful technique |
| Warranty | 10-15 year manufacturer warranty | 5-7 year workmanship warranty | None |
| Thermal Performance | Modern thermally broken frames, double/triple glazing | No improvement (existing frame) | No improvement (existing frame) |
| Timeframe | 2-4 weeks (manufacture + install) | 3-5 days on-site | 3-5 days (your labour) |
When DIY Repainting Makes Sense
DIY is the right call when your frames are structurally sound, the existing powder coat is intact or only lightly chalked, and you are primarily after a colour change. A single feature window, a small granny flat, or a tight renovation budget all point toward doing it yourself. If you have the patience for proper preparation and can work within the weather windows your climate allows, the materials cost for a full house sits between $300 and $800 AUD — a fraction of any professional alternative.
DIY also makes sense when you enjoy the process. Painting aluminium window frames is satisfying work when done methodically, and the skills transfer directly to future maintenance and touch-ups. You control the timeline, the colour, and the quality standard.
Where DIY falls short is on multi-storey homes requiring scaffolding or elevated work platforms, heavily degraded coatings that demand industrial-grade stripping, or situations where you simply want a flawless factory finish without visible brush texture. These scenarios push the project beyond weekend-warrior territory.
When Professional Respraying Is Worth the Cost
Hiring specialist window frame painters makes sense when the scope exceeds your comfort level or when finish quality is non-negotiable. Professional resprayers use HVLP or airless equipment to apply industrial-grade coatings — often the same acrylic lacquers used in automotive refinishing — that deliver a smooth, even result indistinguishable from factory powder coating.
At $250 to $600 per window depending on size, access, and condition, professional respraying costs significantly less than replacement while still providing a 10-15 year lifespan with warranty backing. Most jobs complete within a week with minimal disruption to your household. For two-storey homes, coastal properties with heavy oxidation, or anyone who values their weekends, the professional route often represents the best balance of cost and outcome.
Can you powder coat over powder coat as an alternative to paint? Technically yes, but it requires removing the frames entirely and sending them to a powder coating facility — impractical for installed windows. On-site respraying with liquid coatings is the professional standard for frames that remain in place.
When Replacement Outperforms Repainting
Here is the honest conversation most painting guides avoid: if your aluminium frames are thermally inefficient single-glazed units from the 1980s or 1990s, have failed rubber seals allowing drafts and water ingress, or show structural corrosion at corners and joints, repainting is purely cosmetic. You are spending time and money making a failing component look better without addressing the actual problems — poor insulation, condensation, noise transmission, and energy loss.
Powder coating over paint applied on-site will never match the durability of factory-applied powder coating on new aluminium profiles. Factory processes involve electrostatic application in controlled environments followed by oven curing at 200°C — conditions impossible to replicate on an installed window. When frames are beyond cost-effective repair, replacement with modern aluminium windows featuring factory-applied custom powder coating in standard or custom RAL colours eliminates the repainting cycle entirely. New units offer thermally broken frames, double or triple glazing options, multiple opening configurations, and design support for colour and finish selection — all backed by manufacturer warranties that no repaint can match.
Can you powder coat aluminium windows that are already installed? Not without removing them, stripping the existing finish, and processing them through a full powder line. At that point, the labour cost approaches or exceeds the price of new frames that also deliver modern thermal performance, improved security hardware, and compliance with current NCC energy requirements.
The decision framework is straightforward. If your powder coated aluminum frames are structurally sound with intact seals and you want a colour refresh, repaint them — DIY or professional. If the coating is heavily degraded but the frames function well, professional respraying delivers the best value. If the frames themselves are failing — poor thermal performance, corroded joints, blown seals, or non-compliant hardware — replacement is the only option that solves the actual problem rather than masking it with fresh colour.
Whichever path you choose, the preparation principles covered throughout this guide apply. Whether you are sanding and priming yourself this weekend or briefing a professional team on your colour preferences, understanding the process ensures you get a result that lasts — and know exactly what to expect along the way.
Frequently Asked Questions About Painting Powder Coated Aluminium Window Frames
1. Can you paint over powder coated aluminium without sanding?
Technically you can apply paint without sanding, but it will not adhere properly and will peel within weeks or months. Powder coating creates an ultra-smooth, non-porous surface with low surface energy that standard paints cannot grip. Scuffing with 320-grit sandpaper or a Scotch-Brite grey pad creates the microscopic texture that bonding primer needs to lock onto. Skipping this step is the single most common cause of sheet adhesion failure on powder coated frames.
2. What is the best paint for aluminium window frames in Australia?
For most Australian homeowners, a quality exterior acrylic in satin or semi-gloss finish over a bonding primer provides the best balance of durability, UV resistance, and ease of application. Acrylic latex flexes with aluminium as it expands and contracts through daily temperature cycles, resists chalking under intense Australian sun, and allows recoating within 2-4 hours. For coastal properties or frames facing harsh exposure, direct-to-metal (DTM) coatings offer superior longevity of 10-15 years but cost two to three times more per litre.
3. How long does painted powder coated aluminium last before needing a repaint?
With proper preparation, bonding primer, and two quality topcoats, a DIY repaint on powder coated aluminium frames typically lasts 5-10 years on exterior surfaces. Professional resprays using industrial-grade coatings can achieve 10-15 years. Longevity depends heavily on UV exposure, climate conditions, and preparation quality. North and west-facing frames in Australian conditions degrade faster than sheltered south-facing ones. Factory-applied powder coating on new aluminium windows lasts 20-30 years by comparison, which is why replacement sometimes offers better long-term value for heavily degraded frames.
4. Do I need etch primer or bonding primer for powder coated window frames?
The choice depends on your frame condition. Use bonding primer (also labelled adhesion primer) on intact powder coat surfaces where you simply want a colour change — it grips slick finishes without needing bare metal contact. Use etch primer only on areas where bare aluminium is exposed, as it contains phosphoric acid that dissolves the oxide layer and creates a chemical bond with the raw metal. Many frames need both: etch primer on exposed patches and bonding primer over the remaining intact powder coat. Standard rust-inhibiting primers designed for steel are not suitable for aluminium and will fail.
5. Is it better to repaint aluminium window frames or replace them?
Repainting makes sense when frames are structurally sound with intact seals and you want a colour refresh — materials cost $300-$800 AUD for a typical home. However, if frames have failed seals, poor thermal performance, structural corrosion, or are single-glazed units from the 1980s-90s, repainting is purely cosmetic and does not address the underlying issues. Modern aluminium windows with factory-applied powder coating, thermally broken frames, and double glazing eliminate the repainting cycle entirely while improving energy efficiency, security, and comfort — backed by 10-15 year manufacturer warranties.
More Window & Door Guides