Why Aluminium Windows Need a Different Spray Paint Approach
Grab a generic aerosol can from the hardware store, spray it onto an aluminium window frame, and within a few months you will likely watch it bubble, crack, and peel away. It is not a quality problem with the paint itself. It is a chemistry problem with the surface underneath.
Why Standard Spray Paint Fails on Aluminium
Aluminium is not like timber or steel. The moment bare aluminium contacts air, it forms a microscopically thin oxide layer across its entire surface. This oxide is invisible, chemically stable, and incredibly smooth. Standard spray paints simply cannot grip it. The bond stays purely mechanical and weak, so moisture eventually works its way beneath the film and lifts it off completely.
Here is the real challenge: even after you sand aluminium back to bright metal, the oxide layer reforms within minutes. That means ordinary surface prep does not solve the adhesion problem. Only paint systems specifically engineered to chemically bond with aluminium oxide, or to etch through it, will deliver a finish that lasts.
This is why so many DIY repaints fail on aluminium window frames across Australian homes. The surface looks ready, the paint goes on smoothly, and everything seems fine, until it does not. Choosing the best spray paint for aluminium windows starts with understanding this invisible barrier.
What This Guide Covers
Can you spray paint aluminium and get professional-grade results at home? Absolutely, but only with the right knowledge. This guide works as a decision-making framework rather than a single product recommendation. You will learn how to evaluate spray paint for aluminium based on resin type, primer compatibility, and durability under Australian UV and coastal conditions. We cover surface preparation techniques, application methods for both aerosol cans and spray guns, troubleshooting common failures, and when a project warrants professional help.
The best paint for aluminium is never just about the topcoat. It is about the complete system, from primer chemistry to cure schedule, working together against a surface that actively resists adhesion. That system starts with understanding exactly what aluminium oxide does to paint at a molecular level.
Understanding Aluminium Adhesion and Primer Science
That invisible oxide layer is more than a nuisance. It is a self-repairing chemical shield that actively undermines every coat of aluminium paint you apply, unless your primer system is designed to defeat it. To choose the best paint for aluminium window frames, you need to understand what is happening at the molecular level and which primer chemistry matches your specific situation.
The Aluminium Oxide Problem Explained
When bare aluminium meets air, it instantly generates a thin film of aluminium oxide (Al2O3). This layer is only nanometres thick, yet it is remarkably hard, non-porous, and chemically resistant. Most paints rely on surface porosity or roughness to create a mechanical grip. Aluminium oxide offers neither. The surface is so smooth and chemically inert that standard coatings sit on top rather than bonding into it.
Worse still, this oxide is hydrated and inherently unstable for long-term coating adhesion. Water molecules can migrate along the paint-oxide interface, displacing the bond from the edge inward. The paint film itself may remain intact, yet it lifts cleanly off the metal beneath. This hydration-driven disbondment is why spray paint for aluminium fails even when it appeared to adhere perfectly during application.
Sanding helps temporarily by removing the loose, contaminated outer oxide and creating mechanical tooth. But as PPG’s bare aluminium preparation guidelines note, oxidation can reform on exposed aluminium surfaces in as little as 15 minutes. That narrow window demands either immediate priming or a primer chemistry that can bond with the reformed oxide itself.
Primer Types That Solve Adhesion Issues
Three primer systems address this oxide challenge in fundamentally different ways. Choosing the best paint for painting aluminium windows depends on matching the right primer to your project scope and skill level.
Etch primers contain phosphoric acid and a cross-linking resin. The acid reacts with the aluminium oxide, converting it into a stable aluminium phosphate layer that resists moisture displacement. The resin then bonds chemically to both the new phosphate surface and the topcoat above, creating a continuous molecular bridge from metal to paint. Professional two-pack etch primers deliver the strongest chemical key and are the gold standard for long-term durability.
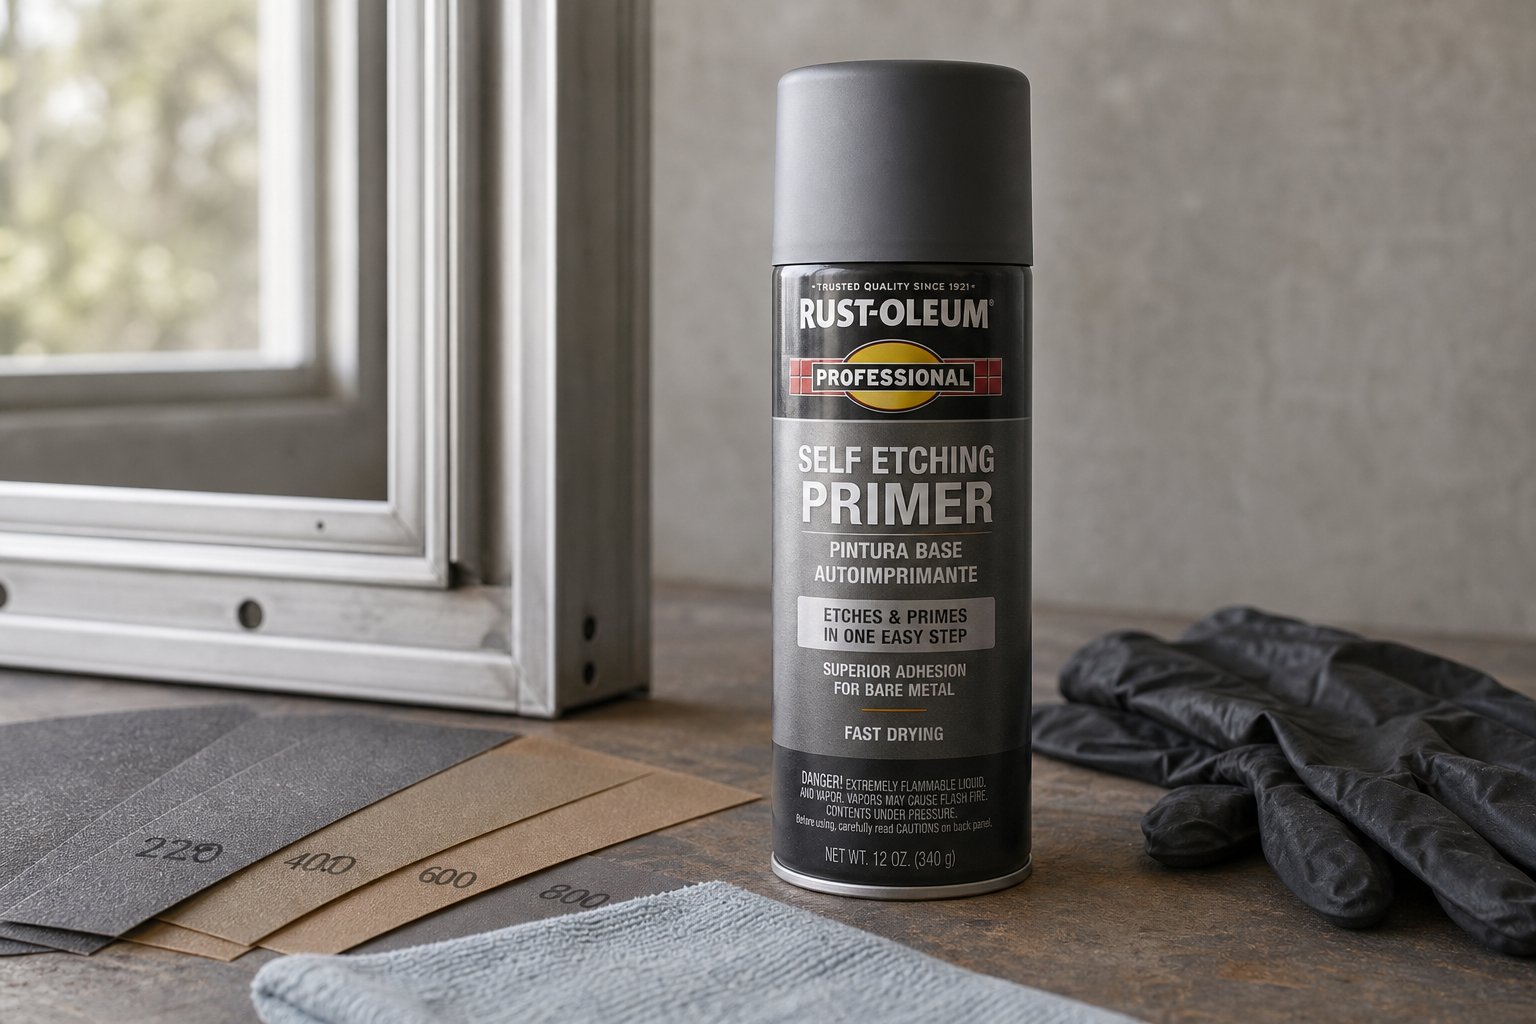
Self-etching aerosol primers use the same acid-etch principle in a single-pack spray can. They combine phosphoric acid with zinc pigments and a fast-drying resin, making them accessible for DIY applications on one to four window frames. The trade-off is a thinner film build and slightly less chemical resistance than two-pack systems, but for residential aluminium windows the performance is more than adequate when properly applied.
Bonding primers take a different approach. Rather than chemically converting the oxide, they use specialised resins with extremely strong adhesive properties that grip the oxide layer through molecular attraction and micro-mechanical interlocking. These work well over previously painted surfaces or where acid etching is impractical.
| Primer Type | How It Works | Best Use Case | Typical Drying Time |
|---|---|---|---|
| Etch Primer (two-pack) | Phosphoric acid converts oxide to stable aluminium phosphate; resin bonds chemically to both surfaces | New bare aluminium requiring maximum long-term adhesion and corrosion resistance | 30-60 minutes before recoat |
| Self-Etching Aerosol | Acid and zinc pigments etch and bond in a single spray application | DIY projects on 1-4 window frames; freshly sanded bare aluminium | 10-15 minutes between coats; topcoat within 20 minutes |
| Bonding Primer | High-adhesion resins grip oxide through molecular attraction and micro-mechanical key | Previously painted frames or surfaces where acid etching is unsuitable | 60-90 minutes before topcoat |
Matching Primer to Surface Condition
Your window frames will fall into one of three conditions, and each demands a different primer strategy.
New bare aluminium offers the cleanest starting point but also the fastest re-oxidation risk. Sand with 120-180 grit, solvent-wipe immediately, and apply a self-etching or two-pack etch primer within 15 minutes. This scenario gives you the strongest possible chemical bond because the primer contacts a fresh, active surface.
Previously painted frames in reasonable condition do not need stripping back to bare metal. Sand the existing coating with 240-320 grit to create mechanical tooth, clean thoroughly, and apply a bonding primer. The bonding primer adheres to both the old paint and the new topcoat, bridging the two layers without the complications of acid-etching over existing coatings.
Oxidised or chalky surfaces present the trickiest scenario. That white, powdery residue on older aluminium frames is a thick, loose oxide that must be removed entirely before any primer can work. Scrub with a non-woven abrasive pad, wash with a dedicated aluminium cleaner to dissolve remaining oxidation, rinse and dry completely, then apply a self-etching primer to the refreshed surface. Skipping the oxide removal step here is the single most common reason spray paint for aluminum peels from aged window frames.
With the right primer matched to your surface condition, you have built the foundation for a durable finish. The next decision, choosing the actual spray paint that goes over that primer, depends on resin chemistry, UV resistance, and whether an aerosol can or spray gun suits your project scale.
How to Evaluate Spray Paint for Aluminium Windows
A solid primer foundation only performs as well as the topcoat sitting above it. The resin chemistry of your spray paint determines how long that finish resists UV degradation, chalking, and physical wear under Australian conditions. Picking a good spray paint for aluminum window frames means looking beyond the colour swatch and reading what the can is actually made of.
Spray Paint Resin Types Compared
Acrylic spray paints are the most common option on hardware store shelves. They dry fast, offer good colour retention, and clean up easily. For window frames shielded from direct sun by eaves or verandahs, a high-quality acrylic delivers reasonable durability at a lower price point. The trade-off is reduced hardness compared to enamel or two-pack systems, meaning scratches show more readily on high-traffic frames.
Enamel formulas cure to a harder, more abrasion-resistant film. They self-level well, producing a smoother finish with fewer brush marks or orange peel texture. Alkyd enamel aerosols suit window frames exposed to moderate weather and occasional physical contact, like sliding window tracks or frames near walkways. Drying times run longer than acrylics, so patience between coats pays off.
Epoxy coatings bond tenaciously to primed aluminium and resist chemical attack, making them popular for industrial applications. However, straight epoxy chalks rapidly under UV exposure. Unless you plan to apply a UV-stable clear coat over the top, epoxy alone is a poor exterior choice for windows facing north or west in Australian homes.
Polyurethane two-pack (2K) aerosols represent the premium tier. They combine the hardness of epoxy with excellent UV resistance and gloss retention. A durable spray paint in 2K polyurethane can hold its finish for years on fully exposed frames. The downside is cost, limited pot life once the hardener is activated, and mandatory respiratory protection during application.
Aerosol Can vs HVLP Spray Gun
Project scale dictates application method more than skill level. For one to four window frames, the best spray can paint in an aerosol format keeps things simple. There is no compressor to set up, no gun to clean, and no leftover mixed paint to waste. You get consistent pressure straight from the can, which suits weekend DIY jobs where setup time matters.
Once your project exceeds four or five windows, an HVLP (High Volume Low Pressure) spray gun becomes the smarter choice. HVLP systems deliver greater control over spray patterns and pressure, producing smoother coverage with less overspray. You buy paint in bulk tins at a fraction of the per-litre cost of aerosols, and the atomisation quality is noticeably finer. For a full-house repaint involving ten or more openings, an HVLP setup can halve your paint costs while producing a more uniform finish across every frame.
Both methods rely on the same resin chemistries and primer systems. The difference is efficiency and economy at scale, not final quality. A well-applied aerosol coat is indistinguishable from a spray gun coat on a single window.
Key Selection Criteria for Window Frames
Not every tin labelled “metal spray paint” is formulated for aluminium. Many are designed for ferrous metals like steel and iron, with rust-inhibiting pigments that serve no purpose on a non-ferrous substrate. Before purchasing, check the product label or technical data sheet for explicit mention of non-ferrous metals, aluminium, or compatibility with aluminium primers.
When evaluating products, rank these criteria by importance for exterior window applications:
- Adhesion to primed aluminium — the topcoat must bond securely to your chosen primer system without lifting or delaminating over time
- UV resistance — Australian UV levels are among the highest globally, so look for coatings with UV stabilisers or HALS (hindered amine light stabilisers) to prevent chalking and colour fade
- Flexibility — aluminium expands and contracts with temperature swings; a rigid paint film will crack at joints and corners
- Hardness and abrasion resistance — window frames cop bumps from furniture, cleaning equipment, and opening hardware
- Finish type — gloss reflects more UV and hides surface imperfections but shows every flaw in application; satin offers a forgiving middle ground; matte suits heritage or contemporary aesthetics but attracts dirt more readily
- Recoat compatibility — choose a topcoat that can be touched up or recoated without full stripping in future maintenance cycles
A high quality spray paint for metal that ticks all these boxes will typically identify itself as suitable for “non-ferrous metals” or “aluminium and galvanised surfaces” on the label. Generic rust-prevention sprays marketed for steel gates and tools rarely meet the flexibility and adhesion requirements that window frames demand. Spending a few extra dollars per can on a product engineered for aluminium avoids the frustration of watching a cheaper alternative peel within a season.
With the right product selected, the next variable that determines success or failure sits entirely in your hands: surface preparation. Even the best spray paint for aluminium windows will underperform on a poorly prepared frame.
Step-by-Step Surface Preparation for a Lasting Finish
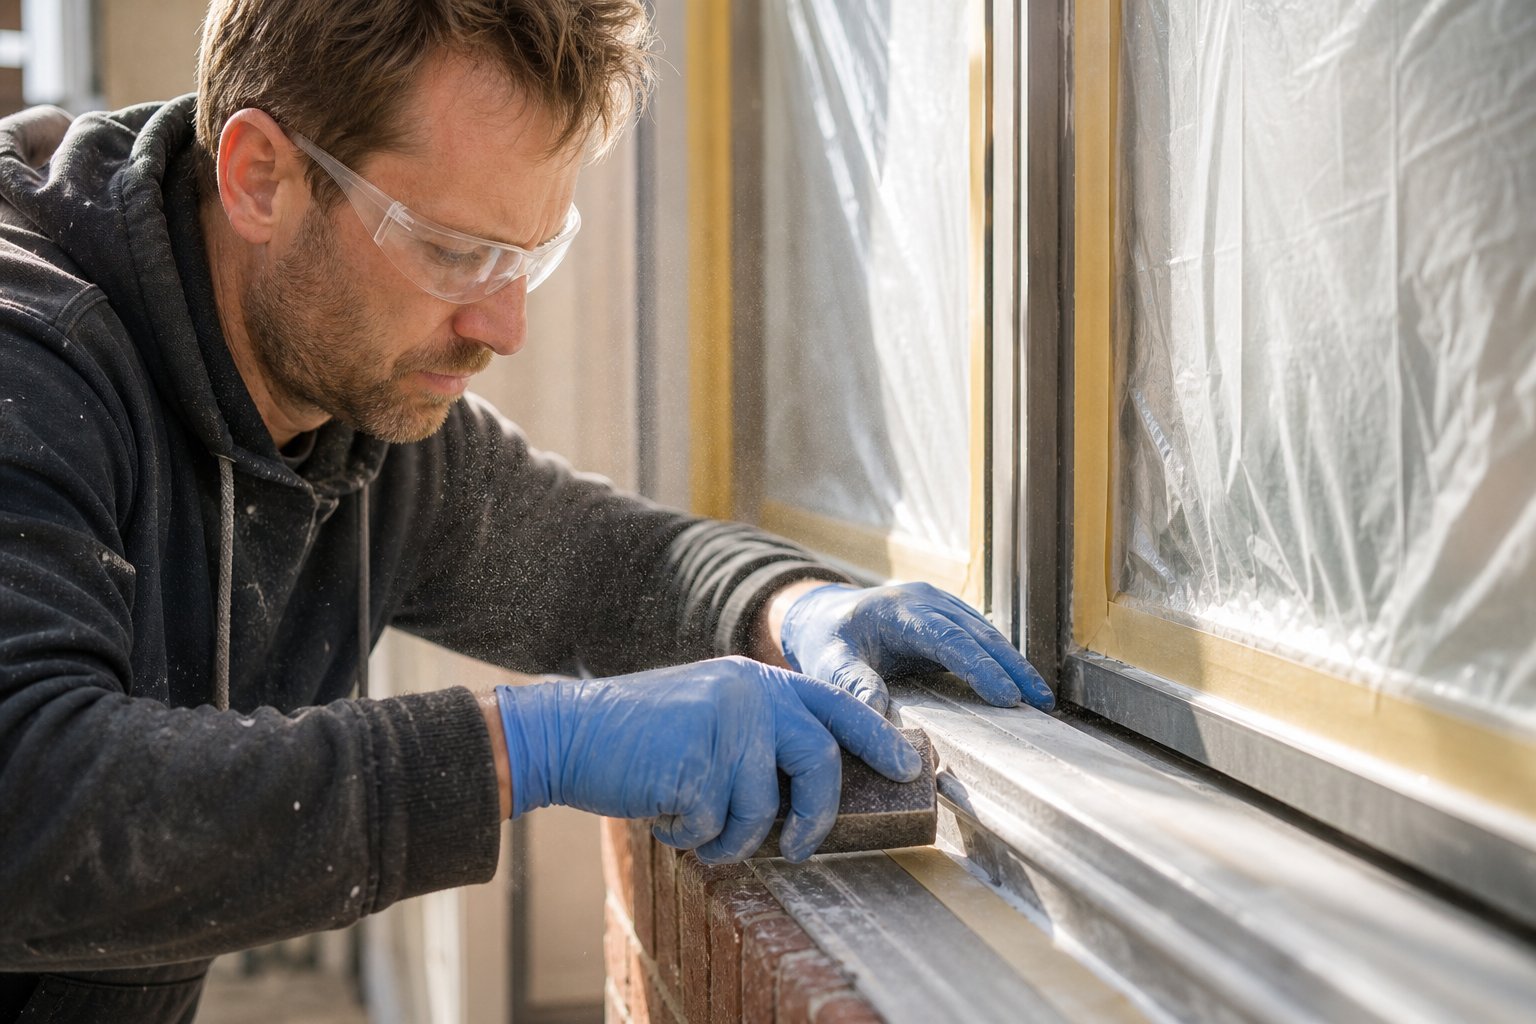
Ask any professional painter what determines whether a coating lasts five years or five months on aluminium, and the answer is always the same: preparation. The actual spraying takes minutes. The prep work that makes those minutes count can take hours. Skipping any step in this sequence is the single fastest path to peeling paint and wasted weekends repainting aluminium windows all over again.
Assessing Your Window Frame Condition
Before touching sandpaper or spray cans, spend ten minutes examining each frame closely. You are looking for four things that will change your preparation approach.
Chalking shows as a white, powdery residue that rubs off on your finger. It means the existing coating has broken down under UV exposure and must be fully removed before any new paint can bond.
Existing paint condition tells you whether you can sand and paint over the current finish or need to strip back further. Run a putty knife firmly across the surface. If paint lifts at the edges, it has lost adhesion and must be scraped away — painting over poorly bonded layers guarantees future failure.
Corrosion appears as pitting or rough white patches where the oxide layer has thickened unevenly. Light corrosion sands out; heavy pitting may require chemical treatment or professional assessment.
Silicone contamination is the hidden problem. If window sealants have been applied or refreshed over the years, microscopic silicone residue on adjacent frame surfaces will cause fisheyes in your paint film. A standard degrease will not remove it — you need a dedicated silicone remover or wax-and-grease solvent.
Surface Cleaning and Sanding Steps
How do you paint aluminium so the finish actually holds? Follow this sequence without skipping ahead:
- Wash with sugar soap or a purpose-made degreaser — scrub the entire frame surface with a non-woven pad and rinse thoroughly. This removes grime, salt deposits, oxidation residues, and oily fingerprints that block adhesion. For frames near kitchens or barbecue areas, a solvent wipe after water-based cleaning catches grease that sugar soap misses.
- Scrape any loose or flaking paint — use a plastic or stainless steel scraper to avoid gouging the soft aluminium beneath. Work methodically around the frame, testing edges of intact paint to confirm they are genuinely bonded.
- Sand to the appropriate grit — this creates the mechanical tooth your primer needs. For bare aluminium, 120-180 grit provides aggressive bite. For previously painted surfaces in good condition, 240-320 grit deglosses without cutting through to metal. For corrosion spots sanded back to bare aluminium, feather the edges of surrounding paint with 180 grit so the transition is smooth.
- Wipe down with a tack cloth — after sanding, fine aluminium dust clings to every surface. A tack cloth picks up particles that a dry rag simply pushes around. Wipe every face, edge, and rebate of the frame. Any dust left behind will be trapped under your primer as gritty contamination.
- Apply silicone remover if contamination was detected — wipe on with a clean cloth, then wipe off with a second clean cloth before the solvent evaporates. Do not let it air-dry on the surface.
- Apply primer within 15 minutes of final sanding — on bare aluminium, the oxide reforms rapidly. Your etch primer or self-etching aerosol needs to contact a fresh, active surface for maximum chemical bond. On previously painted surfaces using a bonding primer, timing is less critical but same-day application is still best practice.
This workflow is how to spray paint aluminum window frames with professional-grade results. Industry surface preparation standards emphasise that any contaminants left behind — oils, dust, salts, or silicone — can cause adhesion failures, blistering, or fisheyes in the finished paint film. Every step in the sequence removes a specific contaminant or creates a specific bonding condition.
Masking Techniques for Glass and Hardware
Proper masking protects glass, rubber seals, hinges, and locks from overspray while also creating crisp paint edges that look intentional rather than accidental. For anyone learning how to repaint aluminium window frames, masking is where the difference between amateur and professional results becomes most visible.
Use a quality painter’s tape rated for exterior UV exposure — cheap masking tape leaves residue on glass baked by Australian sun and peels off mid-job. Apply tape directly along the glass-to-frame junction, pressing firmly into the corner with a plastic scraper to prevent paint bleed underneath. Cover the glass fully with plastic sheeting or masking paper taped to the outer edges, ensuring no gap where aerosol mist could drift in.
Remove handles, locks, and stays wherever practical. If removal is not feasible, wrap hardware tightly in painter’s tape and plastic, paying attention to any moving parts that could break the tape seal when the window is operated during curing.
Mask adjacent brickwork, render, or weatherboards at least 50 mm beyond the frame edge. Overspray from aerosol cans drifts further than most people expect, especially in any breeze. Take five extra minutes on masking now, or spend an hour scrubbing paint mist off glass and walls later.
Preparation accounts for roughly 80 percent of a successful paint job’s outcome. The frames are now clean, sanded, dust-free, and masked. The primer is bonded. Everything that follows — application technique, coat timing, and curing conditions — builds on this foundation, and poor technique on a well-prepared surface is far easier to fix than perfect technique on a poorly prepared one.
Application Technique and Timing for Australian Conditions
A clean, primed frame is only half the job done. How you apply the topcoat — distance, speed, overlap, and timing between coats — determines whether you get a smooth, factory-like finish or a textured mess that traps dirt. Aluminium spray paint behaves predictably once you understand the physics of atomisation, and the parameters below apply whether you are using the best aerosol spray paint from a rattle can or running an HVLP gun off a compressor.
Spray Technique for Even Coverage
Hold the can or gun 200-250 mm from the frame surface. Closer than 200 mm concentrates too much paint in one spot, causing runs. Further than 300 mm disperses the spray pattern so much that paint particles partially dry in the air before landing, creating a gritty texture rather than a smooth film.
Move at a steady, consistent speed — roughly 300 mm per second works for most aerosol products. Begin the spray pass just before the frame edge and release just after you pass the opposite edge. This “lead in, lead out” technique prevents heavy buildup at the start and stop points where most beginners get drips.
Overlap each pass by 50 percent. If your spray fan is 80 mm wide, your next pass should start 40 mm from the edge of the previous one. This overlap eliminates banding and ensures no thin spots where primer shows through. Work in one direction — either top to bottom or left to right — and maintain that orientation for the entire coat.
Two to three light coats build a more durable film than one heavy coat. Each pass should deposit just enough paint to look wet and slightly glossy. If you see the surface turning thick and reflective like a puddle, you have applied too much and a run is forming. Light coats flash off faster, bond more tightly to each other, and resist chipping better than a single thick application.
Coat Timing and Cure Schedule
Three distinct drying stages govern when you can recoat, handle, and fully use your windows:
- Dust-free time (5-10 minutes) — the surface is no longer tacky enough to trap airborne particles, but it is far too soft to touch or recoat
- Touch-dry time (20-45 minutes) — a light finger touch leaves no mark, but the film has not hardened enough for mechanical stress
- Full cure time (5-7 days for most single-pack products; 24-48 hours for 2K polyurethane) — the coating has reached its final hardness, chemical resistance, and flexibility, and windows can be operated normally
Flash-off time between coats sits in the gap between dust-free and touch-dry — typically 10-20 minutes for acrylic aerosols and 15-30 minutes for enamel formulas at 20-25°C. Apply your next coat during this window. Waiting too long allows the previous coat to cure past the point where the next coat can chemically melt into it. If you miss the recoat window (usually stated on the can label), you may need to lightly sand with 400 grit before applying additional coats to restore inter-coat adhesion.
Ambient conditions matter as much as technique. Most manufacturers specify application between 10°C and 30°C with relative humidity below 65 percent. Paint applied below 10°C cures too slowly, remains soft, and attracts dirt. Above 30°C, solvents flash off before the paint film can level, leaving orange peel texture. Humidity above 70 percent traps moisture within the film, causing blushing (a milky haze) in clear coats and weakened adhesion in pigmented layers.
Those parameters sound straightforward until you factor in Australian climate zones, where conditions vary dramatically across regions and seasons.
Best Seasons to Spray Paint in Australia
Timing your project to the right season prevents the frustration of weather-related paint failures. Temperature, humidity, and rainfall all affect how paint adheres, dries, and cures — and getting conditions wrong compromises even a well-executed job. Tropical and subtropical regions like Far North Queensland and the Northern Territory contend with monsoonal humidity that can exceed 80 percent for months, narrowing the usable painting season considerably. Southern regions like Victoria and Tasmania face the opposite challenge: winter temperatures regularly dip below 10°C, stalling cure times and risking poor film formation.
| Australian Region | Optimal Spray Painting Months | Key Constraint |
|---|---|---|
| Tropical North (QLD, NT) | May to September | High humidity and monsoonal rain outside dry season |
| Subtropical (SE QLD, Northern NSW) | April to October | Summer humidity frequently exceeds 70%; storm season unpredictable |
| Temperate (Sydney, ACT, Adelaide) | March to May, September to November | Mid-summer heat above 35°C causes rapid drying; winter mornings too cool |
| Southern (Melbourne, TAS) | October to March | Winter temperatures regularly below 10°C; slow cure risk |
| Arid/Inland (Central NSW, WA interior) | March to May, August to October | Extreme summer heat; large day-night temperature swings crack fresh films |
| Coastal WA (Perth) | March to November | Mild winters allow extended season; summer afternoons too hot |
Within any region, the best approach is to paint during the stable part of the day. Morning dew lifts by mid-morning, and afternoon heat peaks around 2-3 pm. A window between 9 am and 1 pm typically offers the most consistent conditions for applying weather resistant spray paint — warm enough for proper flow-out, cool enough to avoid flash-drying.
If your project spans multiple days, check evening temperatures too. A coat applied at 4 pm that then sits through a 5°C overnight will not cure properly. Aim to finish your final coat early enough that the film reaches at least touch-dry before temperatures drop.
Personal protective equipment deserves as much attention as timing. Spray painting generates a fine mist of solvent-laden particles that pose genuine health risks. At minimum, wear a respirator rated for organic vapour and particulate (P2/A1 combination filter), sealed safety glasses to protect eyes from drift, and nitrile gloves to prevent skin absorption of solvents. Work outdoors where possible. If spraying under a carport or covered area, ensure cross-ventilation so solvent vapours do not accumulate at breathing height. Automotive paint in a aerosol can — particularly 2K polyurethane formulations containing isocyanates — demands an even higher level of respiratory protection; a full-face supplied-air respirator is recommended for these products.
With technique dialled in, timing planned around your local climate, and protective gear sorted, the application itself becomes the most satisfying part of the project. But even with perfect conditions and steady hands, problems occasionally emerge in the finished film. Knowing how to identify and fix common defects saves you from stripping back and starting over.
Troubleshooting Common Spray Paint Problems on Aluminium
Even when you follow every preparation step and spray with steady hands, defects can still appear. Some reveal themselves within hours. Others take weeks or months to surface. Recognising what went wrong — and why — lets you choose the right repair rather than guessing your way into a bigger mess. Can you spray paint aluminum windows and get a flawless result every time? Realistically, no. But you can fix most problems without starting from scratch, as long as you catch them early and understand their root causes.
Paint Peeling and Adhesion Failures
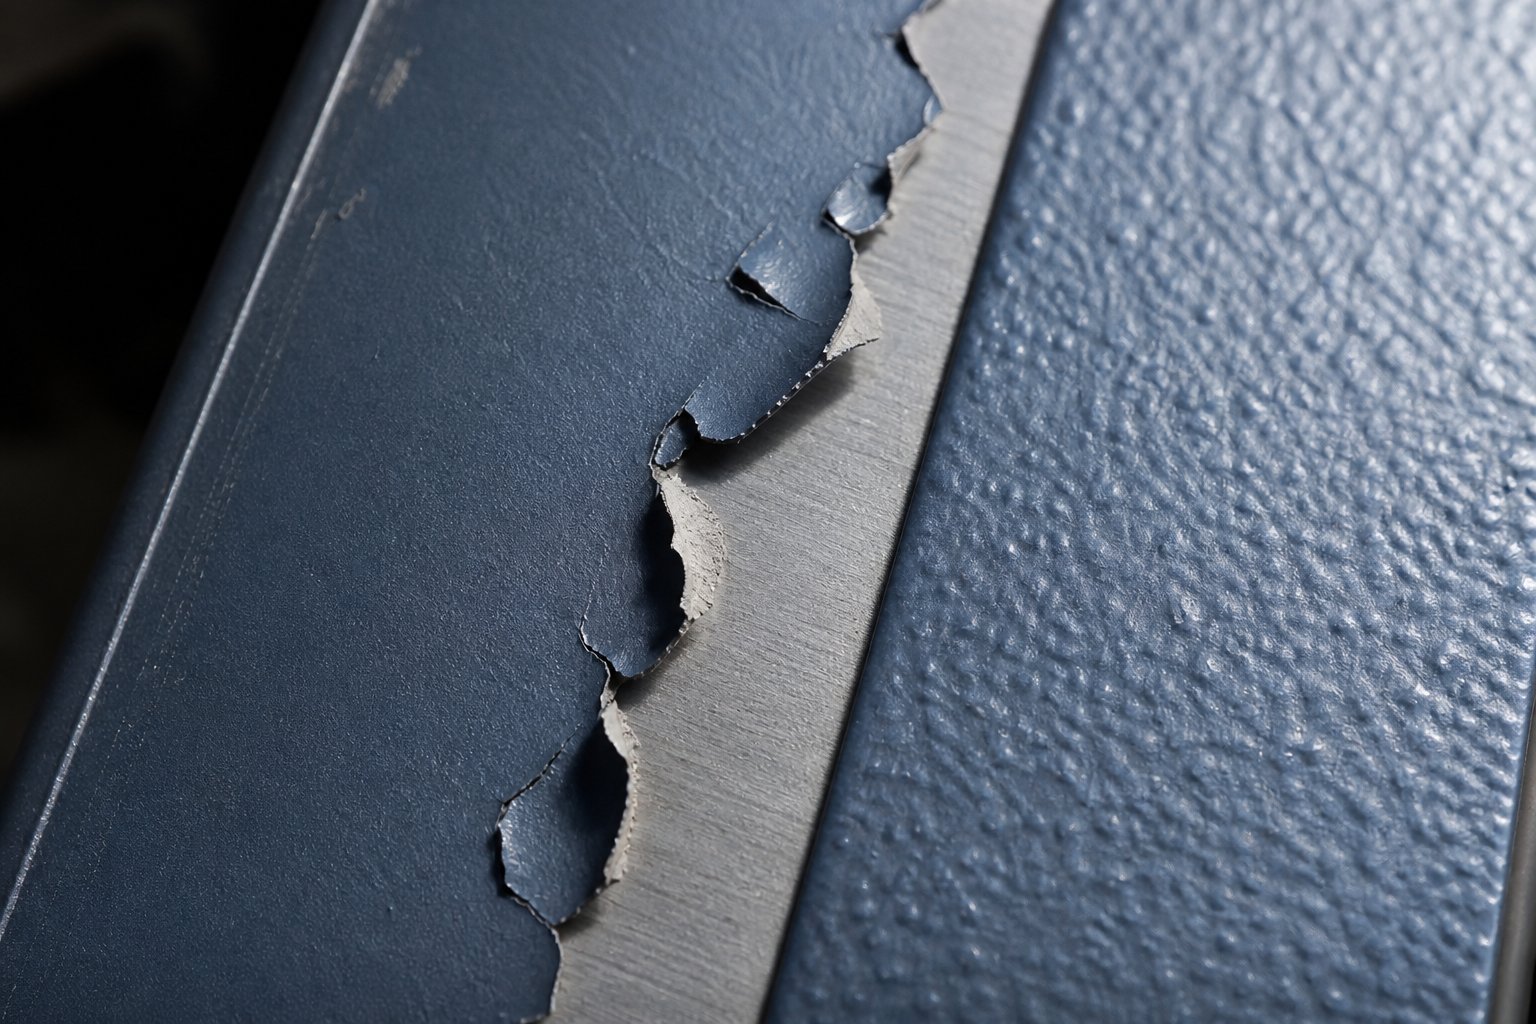
Peeling is the most common failure on aluminium frames, and nearly always traces back to one of two causes: inadequate surface preparation or a skipped primer coat. When paint lifts from the substrate in sheets or curls away at the edges, it means the coating never formed a true bond with the surface below. On aluminium, this happens because the oxide layer rejected the paint film from day one. The coating looked fine initially — smooth, even, good colour — but moisture migrated beneath it along the unbonded interface until entire sections detached.
If peeling is localised to a few small spots, you can repair without a full strip. Sand back the peeling area plus 50 mm of surrounding paint to create a feathered edge, clean with solvent, apply self-etching primer to any exposed bare aluminium, then recoat. If peeling is widespread across most of the frame, a patch repair will not hold. The entire surface has failed adhesion, and the only reliable fix is complete removal and repainting from scratch.
Can you spray paint on aluminum and avoid peeling entirely? Yes — but only if you treat the oxide layer with an appropriate primer system and apply it within the recoat window. Skipping primer to save time is the single most expensive shortcut on aluminium projects, because the full strip-and-repaint costs triple the original primer investment.
Texture Problems and How to Fix Them
Orange peel gives the surface a dimpled, citrus-skin texture instead of a smooth gloss. It happens when paint particles do not atomise finely enough or when they partially dry before reaching the surface. Spraying too close in high heat, using insufficient air pressure on an HVLP gun, or applying paint that has thickened in a cold can all produce this effect. Pittsburgh Spray Equipment notes that orange peel is primarily caused by insufficient break-up of paint particles during atomisation — the larger the droplet reaching the surface, the more textured the finish appears.
Prevention means maintaining 200-250 mm spray distance, working in temperatures between 15°C and 28°C, and thinning paint slightly if the product allows it. To fix orange peel after the paint has cured, wet-sand with 800-1200 grit paper, then polish with cutting compound to restore a smooth surface. If the texture is too severe to sand flat without cutting through the colour coat, the affected area needs sanding back to primer and respraying.
Runs and sags form when too much paint lands in one spot before solvents can flash off. This typically results from holding the can too close, moving too slowly, or spraying in cool conditions where evaporation slows dramatically. The extra film weight pulls downward before it sets, leaving visible drip lines or curtain-like waves. Let the run cure fully — do not try to wipe it off while wet — then sand flat with 400-600 grit, re-prime if you break through to metal, and apply fresh topcoat in lighter passes.
Fisheyes are small, circular craters that appear moments after spraying. Each crater has a tiny contaminant at its centre, almost always silicone. Window sealants, furniture polish overspray, or even contaminated compressed air can deposit invisible silicone on your frames. The paint physically recoils from these spots because silicone has extremely low surface energy. Prevention requires thorough degreasing with a dedicated wax-and-silicone remover before priming. If fisheyes appear mid-coat, stop spraying immediately. Let the coat dry, sand the entire surface, re-clean with silicone remover, and recoat. Adding a fisheye eliminator additive to your paint is a last-resort workaround but does not address the underlying contamination.
Fading and chalking develop over months rather than hours. They indicate the paint film is breaking down under UV radiation — shedding pigment particles as a powdery residue on the surface. This is almost always caused by using an interior-rated paint or a coating without UV stabilisers on an exterior application. Australian UV intensity accelerates this degradation dramatically, especially on north- and west-facing frames. Prevention is product selection: choose a waterproof spray paint for metal with explicit exterior and UV-resistance ratings. Once chalking has started, the degraded layer must be sanded off entirely and replaced with a UV-stable topcoat. No amount of cleaning or clear-coating over chalked paint will restore durability.
| Problem | Cause | Prevention | Fix |
|---|---|---|---|
| Peeling / flaking | Skipped primer; inadequate surface prep; oxide layer not addressed | Always use self-etching or bonding primer; sand and clean thoroughly before coating | Sand back to sound surface, feather edges, re-prime bare aluminium, recoat |
| Orange peel texture | Spraying too close; high ambient temperature; insufficient atomisation | Maintain 200-250 mm distance; spray in 15-28°C conditions; use correct tip/pressure | Wet-sand with 800-1200 grit once cured; polish with cutting compound; respray if severe |
| Runs and sags | Heavy coats; moving too slowly; cold conditions slowing solvent evaporation | Apply multiple light passes; keep steady speed; avoid spraying below 10°C | Allow full cure; sand flat with 400-600 grit; touch up with light coats |
| Fisheyes (craters) | Silicone contamination from sealants, polishes, or compressed air | Clean with dedicated silicone remover before priming; filter compressor air | Sand entire surface, re-clean with silicone remover, recoat from primer if needed |
| Fading / chalking | Interior-rated paint used outdoors; no UV stabilisers in formula | Select exterior-rated, UV-resistant topcoat; use water resistant spray paint for metal with HALS | Sand off degraded layer completely; recoat with UV-stable exterior paint |
When to Strip and Start Over
Touch-ups and spot repairs work when the problem is localised and the rest of the paint system is sound. But certain situations call for a complete strip back to bare aluminium:
- Peeling affects more than 30 percent of the frame surface
- Multiple failure types appear simultaneously — peeling plus fisheyes plus chalking indicates systemic issues with the original application
- Paint was applied directly to aluminium without any primer, meaning the entire film lacks chemical adhesion
- Previous coats have built up to excessive thickness, creating intercoat delamination where layers separate from each other rather than from the metal
Safe paint removal from aluminium requires a gentler approach than stripping steel. Benjamin Moore’s paint removal guide emphasises that aluminium is a soft, non-ferrous metal that damages easily — aggressive wire wheels or coarse abrasives gouge the substrate, creating low spots visible under new paint. Use a metal-safe chemical paint stripper formulated for non-ferrous surfaces, apply according to the manufacturer’s instructions, and remove softened paint with a plastic scraper rather than a metal blade. For stubborn areas, a stainless steel wire brush used gently avoids the deep scratching that brass or carbon steel brushes can cause.
After stripping, wash residual stripper chemicals off the surface completely. Any stripper left in corners or rebates will attack your fresh primer. Rinse with clean water, allow the frame to dry fully, sand lightly with 180 grit to create tooth, and apply your etch primer within fifteen minutes of sanding. You are essentially resetting to the beginning of the preparation process, but this time with the knowledge of what caused the original failure.
Scratch resistant spray paint and durable finishes do not come from buying the most expensive product on the shelf. They come from diagnosing problems honestly, correcting causes rather than covering symptoms, and accepting that sometimes a full restart is faster and cheaper than layering repairs over a compromised system. Knowing when to push through a fix and when to strip back is one of the key differences between a lasting result and a recurring headache — and it is the same judgement call that separates a manageable DIY project from one that genuinely needs professional intervention.
DIY Spray Painting vs Hiring a Professional
That judgement call — fix it yourself or hand it over — depends on more than confidence with a spray can. Some projects genuinely suit a weekend DIY approach. Others carry risks where the cost of failure outweighs any savings on labour. Understanding where your project sits on that spectrum prevents expensive do-overs and potential safety issues.
DIY-Friendly Projects vs Professional Jobs
A ground-floor home with two to four aluminium window frames in reasonable condition is the sweet spot for DIY. You can reach every surface safely, manage prep and spraying in a single day, and the investment in the best aerosol paint and primer still comes in well under a professional quote. The risk of error stays low because the scope is manageable and mistakes on one frame teach you before you reach the next.
Scale, access, and complexity shift that equation quickly. Consider hiring a professional when your project involves any of the following:
- More than six to eight windows, where consistency across every frame matters and industrial spray painting equipment delivers a more uniform result than dozens of aerosol cans
- Second-storey or higher windows requiring scaffolding or ladder work — working at height with a spray can in one hand creates genuine fall risk
- Pre-1970s homes where original paint may contain lead, requiring licensed removal and disposal under Australian work health and safety regulations
- Strata or body corporate properties where external colour changes need approval before any work begins
- Frames with severe corrosion, multiple previous coatings, or evidence of structural damage to the aluminium itself
- Any situation requiring two-pack isocyanate coatings (heavy duty spray paint systems), which demand supplied-air respiratory protection and controlled application environments
Professional painters bring more than skill — they bring accountability. A reputable operator provides a warranty on workmanship, carries insurance for property damage, and takes responsibility for surface failures within the guarantee period. That accountability matters when you are coating ten or fifteen frames across an entire home.
Australian Regulations and Strata Rules
Spray painting at home is not unregulated. Several layers of rules apply depending on where and how you work.
VOC limits: Australian paint manufacturers must comply with Product Emission Standards that cap volatile organic compound levels in architectural coatings. Low-VOC and water-based spray paints reduce exposure risk for DIY users and neighbours, but solvent-based products — often the more durable exterior options — still sit within legal limits when used outdoors with appropriate ventilation.
Aerosol disposal: Empty aerosol cans go into household recycling in most council areas. Partially full cans are classified as hazardous waste and cannot enter general waste streams. Check your local council’s hazardous waste collection schedule for proper disposal. Puncturing pressurised cans yourself is dangerous and illegal in most jurisdictions.
External colour changes: If you live in a strata-titled property, painting the exterior of your windows — even in the same colour — typically requires body corporate approval through a special resolution. Changing to a different colour almost certainly does. Freestanding homes face fewer restrictions, but heritage overlays, neighbourhood character provisions, or development covenants may still apply. Check with your local council before committing to a colour that could trigger a compliance notice.
Lead paint: Homes built before 1970 in Australia may have lead-based coatings on original window frames. Disturbing lead paint through sanding creates hazardous dust governed by the Work Health and Safety Regulation 2011. If you suspect lead, test first with a DIY swab kit. Positive results mean the job falls outside safe DIY territory — engage a licensed lead paint removalist.
Cost Factors to Consider
Cheap aerosol paint tempts budget-conscious homeowners, but the per-window economics tell a fuller story. A single frame sprayed with quality self-etching primer plus a durable topcoat in aerosol format costs roughly $25-$40 AUD in materials. Multiply that across twelve windows and add masking supplies, sandpaper, degreaser, and PPE, and a DIY full-house job runs $400-$600 in consumables alone — plus a full weekend or more of your time.
Professional quotes for aluminium window repainting typically range from $80-$150 per standard window (supply and labour), depending on condition, access, and location. That premium buys surface assessment, proper chemical preparation, spray gun application, and a workmanship guarantee. For a twelve-window home, you are comparing $400-$600 plus two days of labour against $1,000-$1,800 with warranty coverage and no personal time investment.
The real cost calculation, though, includes failure. A botched DIY job that peels within a year means buying all the same materials again, spending another weekend stripping and repainting, and potentially paying a professional to fix what went wrong. That double-up erases every dollar saved on the first attempt.
For larger renovation projects involving many windows, it is also worth considering whether repainting is the right approach at all. Pre-finished aluminium window systems with factory-applied powder coating eliminate the repainting cycle entirely, offering colour durability measured in decades rather than years. When the scope of repainting approaches the point where professional labour, scaffolding, and materials rival a meaningful fraction of replacement cost, that comparison deserves serious thought — especially once you factor in the ongoing maintenance commitment that every spray-painted surface eventually demands.

Long-Term Maintenance and When to Consider Replacement
A freshly sprayed aluminium window frame looks sharp on day one. The real question is how it looks in year three, year five, and beyond. Every spray-painted surface — regardless of whether you used the most durable spray paint for metal available — enters a slow degradation cycle the moment it faces Australian weather. Managing that cycle through planned maintenance extends the life of your finish significantly. But at a certain point, the maths of repeated repainting starts pointing toward a different solution entirely.
Maintenance Schedule After Spray Painting
Treat your freshly painted frames like an investment that needs periodic attention rather than a set-and-forget finish. A simple routine prevents small problems from escalating into full adhesion failures:
- Every 3 months (coastal or industrial areas) / every 6 months (suburban or rural) — wash frames with mild detergent and warm water using a soft cloth. Salt spray, pool chlorine, and industrial pollutants accelerate coating breakdown when left to accumulate, so regular cleaning removes corrosive deposits before they interact with the paint film.
- Annually — inspect every frame closely for chips, scratches, or early signs of chalking. Run a finger over north- and west-facing surfaces to check for powdery residue. Look for hairline cracks at corners where thermal movement stresses the paint.
- Immediately upon discovery — touch up any chips or scratches that expose bare aluminium. Once moisture reaches unprimed metal through a paint defect, corrosion creeps beneath the surrounding film like water under wallpaper. A five-minute touch-up today prevents a full-frame strip and repaint next year.
- Every 5-8 years (sheltered frames) / every 3-5 years (fully exposed frames) — plan a complete repaint cycle. Even uv resistant paint for metal with quality UV stabilisers will eventually chalk and lose gloss under sustained Australian solar radiation.
These intervals are guides, not guarantees. Frames facing the afternoon western sun or copping salt-laden onshore winds degrade faster than those tucked under deep eaves on the south side of a home.
How Climate Degrades Paint Over Time
Australia’s UV environment ranks among the harshest globally, and UV radiation breaks down the chemical bonds in a coating’s resin matrix over time — causing chalking, colour shift, and loss of gloss regardless of the original product quality. Darker colours absorb more UV energy and fade faster than lighter tones. North- and west-facing surfaces receive the most punishment, while shaded elevations may last years longer from the same can of paint.
UV is not the only aggressor. Coastal salt air deposits a fine, hygroscopic film on frame surfaces that holds moisture against the paint and accelerates micro-cracking. Temperature cycling — hot days expanding the aluminium substrate followed by cool nights contracting it — stresses the paint film at every corner, joint, and glazing bead. Over hundreds of cycles, even flexible coatings develop hairline fractures that admit moisture to the primer layer beneath.
The compounding effect matters. Marine spray paint for metal and heavy-duty spray paint for metal formulations resist these forces longer than standard products, but no spray-applied wet paint film — regardless of resin type — matches the durability of a factory-cured finish. Powder coating is typically three to six times thicker than wet spray paint, and the thermal bonding process creates a stronger, more chip-resistant structure than air-dried or even 2K cured films achieve on site.
When Replacement Outperforms Repainting
There is a tipping point where repeated spray painting becomes more expensive and time-consuming than it is worth. If you have repainted your aluminium windows two or three times over a decade — spending weekends on prep, buying primer and topcoat, masking glass, and still watching the finish deteriorate within a few years — the cycle itself is the problem, not your technique or product choice.
Modern factory-finished aluminium windows use superdurable polyester powder coating or anodising processes that deliver 15 to 20 years of colour stability with minimal chalking. Premium PVDF finishes push that to 20-30 years. These coatings are applied in controlled factory environments with electrostatic adhesion, oven-cured for permanent cross-linking, and tested against accelerated weathering standards that no rattle-can product is designed to meet.
For homeowners reaching that tipping point, MEICHEN’s aluminium window systems offer factory-applied finishes in custom colour options engineered for Australian conditions — eliminating the repainting cycle entirely. The frames arrive pre-finished with powder-coated durability that outlasts any site-applied spray paint by a significant margin. When you factor in the accumulated cost of multiple repaints, consumables, PPE, and lost weekends over a window’s lifetime, pre-finished replacement frames often represent better long-term value than perpetual maintenance.
That said, replacement is a bigger decision than repainting. It involves measuring, ordering, installation, and potentially council approvals. For readers whose frames are structurally sound and whose maintenance routine keeps the finish in acceptable condition, spray painting remains a valid and cost-effective approach — especially with the right product selection and preparation discipline. The key is being honest about whether your maintenance cycle is sustainable or whether it has become a recurring burden that a permanent solution would eliminate.
Best Paint for Aluminum Window Frames
Every decision in this guide funnels down to four variables. Get these right and you will spray paint aluminium window frames with results that hold up for years. Get any one wrong and you are back to sanding within a season.
Surface condition dictates primer choice. Bare aluminium needs a self-etching or two-pack etch primer applied within minutes of sanding. Previously painted frames in sound condition call for a bonding primer over a deglossed surface. Chalky, oxidised frames require full oxide removal before etching primer can do its job.
Climate exposure dictates resin type. North- and west-facing frames under intense UV need polyurethane or UV-stabilised acrylic topcoats. Sheltered, south-facing windows tolerate standard enamel. Coastal homes demand coatings with explicit salt-spray resistance ratings.
Project scale dictates application method. One to four windows suit the best aluminium spray paint in aerosol format. Five or more frames justify an HVLP gun for efficiency, cost savings, and a finer atomised finish.
Budget vs longevity dictates quality tier. A cheap single-pack acrylic lasts two to three years in full exposure. A premium 2K polyurethane aerosol lasts five to eight. The upfront price difference is small compared to the labour cost of stripping and repainting sooner.
Your Spray Paint Selection Checklist
Walk through this sequence before purchasing anything. Each step narrows your product choice so you buy once and paint once:
- Assess frame condition — bare metal, sound existing paint, or chalky/oxidised surface
- Select the matching primer system — etch, self-etching aerosol, or bonding primer
- Identify sun exposure and climate zone — determines whether you need UV-stabilised or standard resin
- Count your windows — four or fewer suits aerosol; more than four suits an HVLP setup
- Choose resin type — acrylic for sheltered, enamel for moderate, polyurethane for maximum durability
- Confirm label compatibility — check that the product explicitly states suitability for non-ferrous metals or aluminium
- Plan your timing — check the seasonal guide for your region and aim for a stable weather window of at least three consecutive days
- Gather PPE and masking materials — respirator, safety glasses, nitrile gloves, quality tape, and plastic sheeting
Notice what is not on this list: the topcoat brand. That is deliberate. What is the best paint for aluminum windows? It is whichever product meets the criteria above for your specific situation. Primer selection and surface preparation carry more weight than any brand name printed on a can. A mid-range topcoat over a perfectly prepared, correctly primed surface will outperform a premium topcoat over rushed prep every single time.
Matching Paint Choice to Your Project
For a single bathroom window that needs freshening up, a self-etching primer aerosol and a quality acrylic enamel topcoat will handle the job in an afternoon for under $40 AUD. For a full-house exterior repaint across ten or more openings, invest in an HVLP gun, bulk polyurethane topcoat, and two-pack etch primer — the setup cost pays for itself in better coverage and reduced per-window material expense.
And for homeowners undertaking a broader renovation where multiple windows need attention simultaneously, it is worth stepping back and asking whether repainting is the right investment at all. MEICHEN’s aluminium window range delivers factory-finished frames in custom colours with powder-coated durability that outlasts any site-applied spray paint by decades. When the scope of your project justifies new window installation, pre-finished systems eliminate the spray painting process entirely — no primer chemistry to match, no recoat windows to hit, no maintenance cycle to repeat every few years. It is a permanent solution for homeowners ready to step off the repainting treadmill.
Whatever path you choose, the fundamentals remain the same. Respect the oxide layer, prime correctly, spray in the right conditions, and let the coating cure fully before putting your windows back to work.
Frequently Asked Questions About Spray Painting Aluminium Windows
1. Can you spray paint aluminium window frames?
Yes, you can spray paint aluminium window frames successfully, but only with the correct preparation and product system. Aluminium forms an oxide layer that resists standard paint adhesion, so you need a self-etching or bonding primer before applying your topcoat. Sand the surface with 120-180 grit for bare aluminium or 240-320 grit for previously painted frames, degrease thoroughly, and apply primer within 15 minutes of sanding. Without this primer step, any spray paint will eventually peel regardless of brand or quality. For homeowners wanting a permanent colour solution without ongoing maintenance, factory powder-coated aluminium windows from suppliers like MEICHEN offer decades of colour stability without repainting.
2. What type of spray paint is best for aluminium?
The best spray paint for aluminium depends on your exposure conditions. Polyurethane two-pack (2K) aerosols offer the highest durability with excellent UV resistance and gloss retention, lasting five to eight years on fully exposed frames. For sheltered windows, high-quality acrylic spray paints provide good colour retention at a lower cost. Enamel formulas sit between the two, curing harder than acrylics with better abrasion resistance. Whichever resin you choose, confirm the label explicitly states compatibility with non-ferrous metals or aluminium — generic metal spray paints designed for steel lack the flexibility aluminium frames require during thermal expansion.
3. Do you need primer before spray painting aluminium?
Primer is non-negotiable on aluminium surfaces. The oxide layer that forms instantly on bare aluminium creates a smooth, non-porous barrier that topcoats cannot grip without chemical intervention. Self-etching primers use phosphoric acid to convert the oxide into a stable aluminium phosphate layer that bonds chemically to both the metal and topcoat. Bonding primers work through molecular attraction over previously painted surfaces. Skipping primer is the single most common reason spray paint peels from aluminium window frames, and the cost of stripping and repainting is roughly triple the original primer investment.
4. How long does spray paint last on aluminium windows in Australia?
Spray paint longevity on aluminium windows in Australia varies significantly based on product quality, surface preparation, and exposure. A premium 2K polyurethane topcoat over properly etched primer lasts five to eight years on fully exposed frames. Standard acrylic aerosols last two to four years before visible chalking or fading appears. North- and west-facing windows degrade fastest due to intense UV, while south-facing or eave-protected frames last considerably longer. Coastal homes face additional salt-spray degradation that shortens all paint lifespans. Regular washing every three to six months and prompt touch-up of chips extends the finish significantly between full repaints.
5. Is it better to spray paint or powder coat aluminium windows?
Powder coating outperforms spray painting in every durability metric. Factory powder coating is three to six times thicker than wet spray paint, thermally bonded for permanent cross-linking, and delivers 15 to 30 years of colour stability depending on the formula. Site-applied spray paint, even premium 2K polyurethane, requires repainting every five to eight years. However, powder coating cannot be applied on site — it requires factory oven-curing. For existing windows in good structural condition, spray painting remains a cost-effective maintenance option. For homeowners replacing windows or undertaking major renovations, pre-finished powder-coated systems like MEICHEN’s aluminium windows eliminate the repainting cycle entirely and offer superior long-term value.
More Window & Door Guides