Essential Tools and Materials for Aluminium Window Fabrication
Building an aluminium window from raw profiles is not reserved for large-scale factories. Plenty of small workshops across Australia produce quality frames using relatively modest equipment. The difference between a weekend hobbyist and a professional fabricator comes down to tooling precision, material selection, and process discipline. Before you cut a single extrusion, getting your aluminium window frame materials checklist sorted saves time, money, and frustration down the track.
What You Need Before You Start
A complete aluminium window making tools list covers five categories. Miss one component and you will stall mid-build. Here is the full bill of materials needed to fabricate aluminium windows for a standard casement or fixed-frame project:
- Profiles: Aluminium extrusions (frame, sash, mullion, and transom sections), glazing beads, and corner cleats or connector keys sized to your chosen profile system.
- Hardware: Friction stays or hinges, handles, multi-point locking mechanisms, espagnolette bars (for casement types), and stainless-steel screws (typically 4 mm x 25 mm pan-head).
- Glazing: Glass units (4 mm single-glazed or sealed IGU for double-glazed), setting blocks, packers, and appropriate spacer bars if assembling your own units.
- Sealants and Seals: EPDM rubber gaskets, wedge gaskets, bubble gaskets, neutral-cure silicone, and foam backing rod for perimeter sealing.
- Drainage: Weep hole covers, pressure-equalisation slots, and drainage routing templates.
- Tools: Mitre saw with a TCT aluminium-rated blade (80+ teeth), corner crimping press or clamp, copy router or drill press, deburring tool, digital angle finder, tape measure, and a square for checking diagonals.
Skill Levels and Realistic Expectations
Your budget and end goal determine which path makes sense. A DIY enthusiast working on a single shed or studio window can manage with a quality mitre saw, a manual corner crimper, and basic hand tools. Total outlay for DIY aluminium window fabrication supplies at this level sits around $1,500 to $3,000 AUD for tooling alone, excluding materials.
A small workshop producing ten or more windows a month benefits from a double-head cutting saw, a hydraulic four-corner crimper, and a copy routing machine. This mid-range setup typically runs between $15,000 and $40,000 AUD, depending on whether you source new or second-hand equipment. Factory-level automation with CNC machining centres is a different conversation entirely, suited to commercial volumes of hundreds of units per month.
Be honest about your production goals. A single well-made window is achievable in a garage over a weekend. Scaling beyond that without the right machinery introduces inconsistency, and inconsistency in aluminium fabrication means poor seals, draughty frames, and water ingress.
With your materials gathered and your skill level mapped, the next critical factor is precision. Every dimension in window fabrication traces back to one thing: the accuracy of your opening measurements and the tolerances you allow for fitting.
Step 1: Design Your Window and Measure the Opening
A perfectly fabricated aluminium frame is worthless if it does not fit the opening it was built for. Measurement errors as small as 5 mm can mean the difference between a snug, weathertight installation and a frame that either jams in the reveal or leaves gaps that no amount of silicone can fix. This step is where most DIY projects go wrong, so treat it as the foundation of everything that follows.
How to Measure Window Openings Accurately
You need three width measurements and three height measurements for every opening. Measure the width at the top, middle, and bottom of the reveal. Then measure the height on the left side, centre, and right side. Record the smallest figure in each direction, as this represents the tightest point your frame must clear.
Here is the process for measuring window openings for aluminium frames:
- Clear any debris, old sealant, or render from the reveal so you are measuring the structural opening, not surface finishes.
- Measure width at three points (top, middle, bottom) and record the smallest value.
- Measure height at three points (left, centre, right) and record the smallest value.
- Check diagonals corner to corner. If the two diagonal measurements differ by more than 3 mm, the opening is out of square and you will need to account for this with packing during installation.
- Deduct your fitting tolerance from the smallest width and height figures to arrive at the finished frame size.
For aluminium window size calculation tolerances, the standard practice is to deduct 10 mm per side from the structural opening. On a 1200 mm wide opening, your finished frame width would be 1180 mm (1200 minus 10 mm on each side). This 10 mm gap on each edge allows room for levelling, shimming, and applying perimeter sealant. Ordering too tight is one of the most common and costly mistakes in aluminium window fabrication.
One detail often overlooked: if your floor is not yet finished, factor in the final floor build-up. A tiled floor with underlay can add 15 to 25 mm of height, which directly affects sill clearance and threshold alignment. Measure from the finished floor level, or calculate the build-up and deduct accordingly.
Choosing Between Casement, Sliding, Tilt-and-Turn, and Fixed Windows
The window type you choose dictates your entire fabrication approach. Profile sections differ, hardware routing changes, and drainage requirements shift depending on whether the sash swings, slides, or stays fixed. Choosing the right aluminium window type before you cut anything saves rework and wasted material.
| Window Type | Fabrication Complexity | Hardware Required | Best Use Scenario |
|---|---|---|---|
| Fixed | Low. Frame only, no opening sash. | None (glazing beads and gaskets only) | Feature windows, highlight panels, areas where ventilation is not needed |
| Casement | Medium. Requires sash frame, hinge routing, and lock keep machining. | Friction stays, espagnolette handle, multi-point lock, keeps | Bedrooms, living areas, kitchens and bathrooms needing maximum airflow |
| Sliding | Medium-High. Requires precise track alignment and interlocking sash profiles. | Rollers, interlocks, flush lock, anti-lift blocks | Balconies, patios, wide openings where swing clearance is limited |
| Tilt-and-Turn | High. Dual-action mechanism demands exact hinge and striker positioning. | Tilt-and-turn gear set, corner drives, multi-point lock, restrictors | Upper-storey rooms, secure night ventilation, easy-clean access from inside |
For a first-time fabricator, a fixed window is the simplest starting point. There is no sash to build, no hardware to route, and no weatherstripping overlap to manage. A casement is the logical next step and represents the most common residential window type across Australia. Sliding windows introduce track tolerances and roller alignment, while tilt-and-turn systems require specialised hardware sets and extremely precise machining of the sash profile.
Consider your climate zone as well. In cyclone-prone regions of northern Queensland or the NT, casement windows with robust multi-point locking offer superior resistance to wind pressure. In temperate southern states, tilt-and-turn windows provide excellent controlled ventilation without compromising security. Sliding windows suit wide openings facing covered outdoor areas where swing clearance is impractical.
With your opening measured, tolerances calculated, and window type selected, you have a clear design brief. The next decision shapes everything from cutting angles to thermal performance: which aluminium alloy and profile system to use.
Step 2: Select the Right Aluminium Profiles and Alloys
Profile selection is not just a purchasing decision. The alloy you choose determines how cleanly your saw cuts, how well your corners crimp, how the frame responds to anodising or powder coating, and ultimately how the finished window performs over decades of Australian sun, salt air, and temperature swings. Getting this wrong cascades through every downstream step.
Understanding Aluminium Alloys for Window Profiles
Not all aluminium is created equal. The 6xxx series (aluminium-magnesium-silicon alloys) dominates window fabrication, but two grades come up repeatedly: 6063 and 6061. Knowing the difference helps you choose the best aluminium alloy for window frames based on your specific project demands.
6063-T5 is the industry standard for window extrusions worldwide, and for good reason. Its chemical makeup (roughly 0.7% magnesium and 0.4% silicon) makes it exceptionally easy to extrude into the thin-walled, hollow shapes that window profiles require. It accepts anodising and powder coating beautifully, offers excellent corrosion resistance, and provides sufficient tensile strength (around 150 MPa minimum) for residential and most commercial applications. If you are sourcing profiles from an Australian supplier for a standard residential project, you will almost certainly receive 6063-T5.
When comparing 6063 vs 6061 aluminium for windows, the key trade-off is strength versus workability. 6061 delivers higher tensile strength (approximately 310 MPa in T6 temper) and greater hardness, making it suitable for large-span windows in high-wind environments or structural curtain wall applications. However, it is harder to extrude into complex shapes, produces a coarser surface finish, and does not anodise as uniformly. For most fabricators learning how to make aluminium windows in a small workshop, 6061 introduces unnecessary difficulty without meaningful benefit.
A third option, 6060, occasionally appears in lighter-duty or decorative applications. It shares similar corrosion resistance with 6063 but offers lower mechanical strength, making it unsuitable for load-bearing frames or areas exposed to significant wind pressure.
The practical takeaway: unless your project involves multi-storey commercial glazing, cyclone-rated openings, or unusually large spans, 6063-T5 is the alloy to specify. It cuts cleanly, crimps predictably, and finishes well.
Thermal Break vs Non-Thermal Break Profiles
Alloy grade determines the raw material properties, but profile design determines thermal performance. This is where the choice between thermal break and non-thermal break profiles becomes critical, particularly for Australian homes chasing higher NatHERS ratings or compliance with the National Construction Code’s energy efficiency provisions.
A standard (non-thermal break) profile is a continuous aluminium section connecting the interior and exterior faces of the frame. Aluminium conducts heat roughly 1,000 times more efficiently than timber, so this unbroken metal path creates a thermal bridge. In summer, outdoor heat travels straight through the frame into your living space. In winter, indoor warmth escapes outward. The result is higher energy bills and, in humid climates, condensation forming on the interior frame surface.
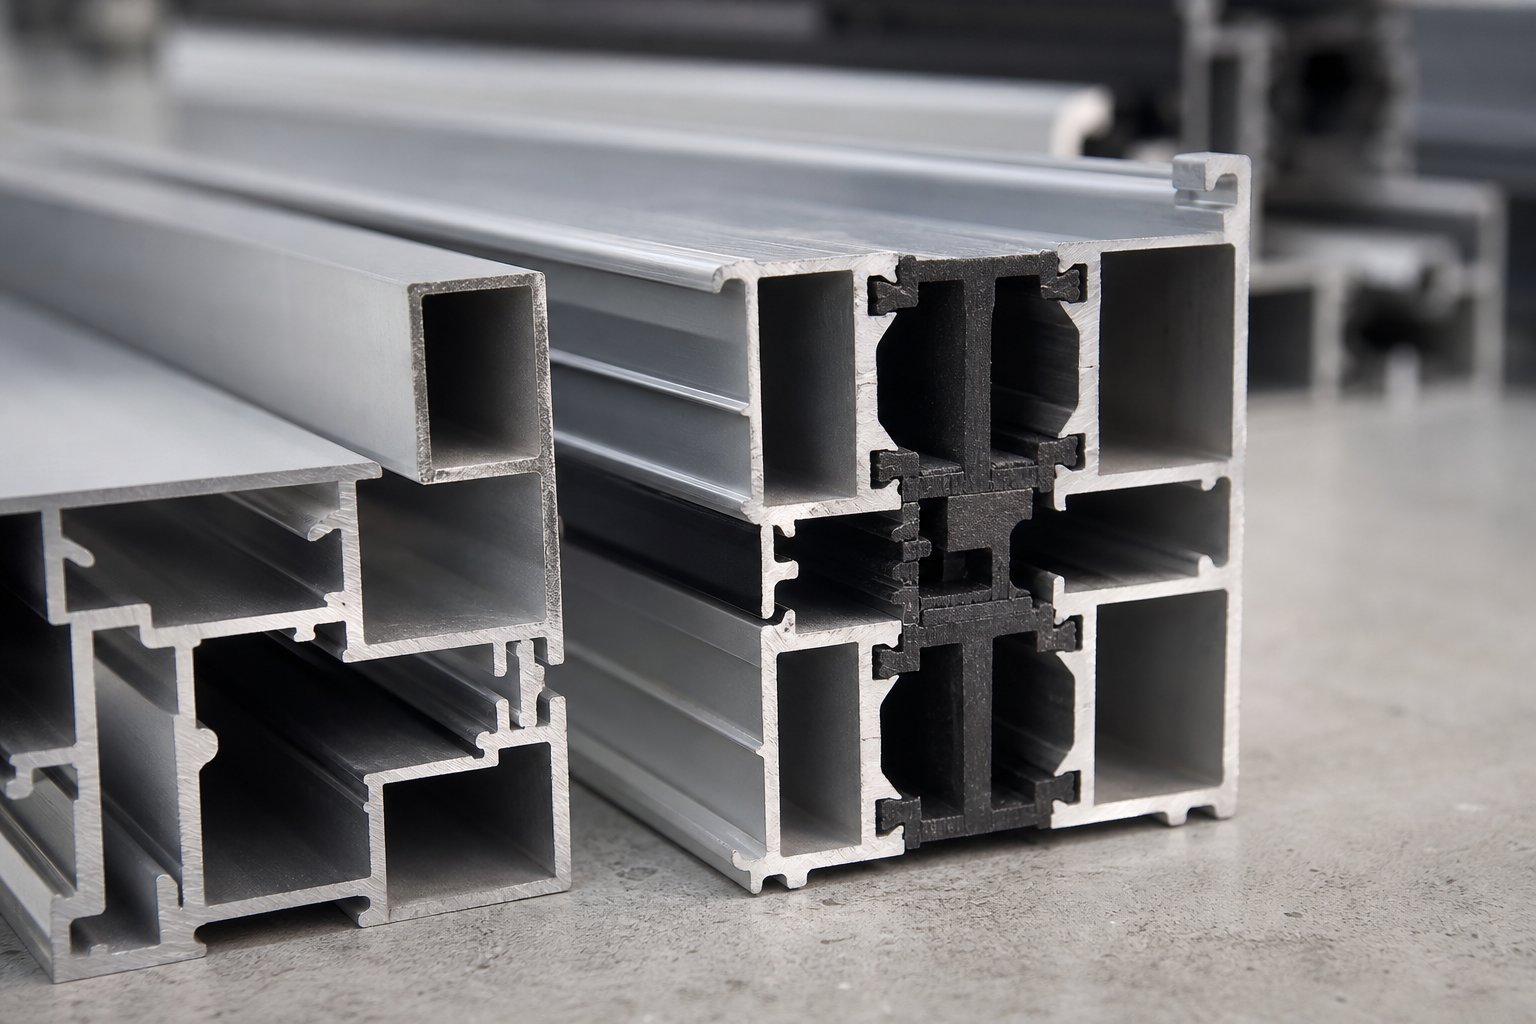
Thermally broken aluminium window profiles solve this by splitting the frame into two separate aluminium sections joined by a polyamide (nylon) insulating strip. This strip interrupts the conductive path, dramatically reducing heat transfer across the frame. The interior aluminium stays closer to room temperature, cutting condensation risk and improving occupant comfort.
For fabricators, the distinction matters beyond energy performance. Thermal break profiles are more complex to work with. They require careful handling during cutting to avoid delaminating the polyamide strip, and crimping pressures must be calibrated to avoid cracking the insulating barrier. Assembly tolerances are tighter, and the profiles themselves cost more per lineal metre.
How to choose aluminium extrusion profiles for windows comes down to climate and compliance. In temperate southern cities like Melbourne, Hobart, or Canberra where winter temperatures regularly drop below 5°C, thermal break profiles are increasingly expected for new builds and major renovations. In tropical northern regions, the primary concern shifts to solar heat gain, and thermal break profiles help reduce cooling loads. For sheds, garages, or non-habitable structures in mild climates, standard profiles remain perfectly adequate and significantly cheaper.
Whichever profile system you select, confirm that your corner cleats, gaskets, glazing beads, and hardware are all designed for that specific system. Mixing components across incompatible profile ranges is a common mistake that leads to poor seals and failed assemblies. Your alloy and profile choice locks in the cutting angles, crimping method, and glazing approach for every step that follows.
Step 3: How to Cut Aluminium Window Profiles Accurately
Your profiles are selected, your dimensions are calculated, and now the saw becomes the single point where precision either holds or falls apart. A profile that is 0.5 mm short rarely looks like a problem at the bench. The trouble surfaces during assembly when corners refuse to close, gaskets gap, and frames rack out of square. Cutting is the step that locks in quality for everything downstream.
Cutting Profiles with a Mitre Saw
For small workshops and DIY fabricators, a mitre saw fitted with the correct blade is the most practical tool for the job. The critical detail is blade selection. A standard wood blade will grab, chatter, and leave ragged edges on aluminium. You need a dedicated mitre saw blade for cutting aluminium extrusions: carbide-tipped, non-ferrous rated, with 80 to 100 teeth on a 250 mm or 300 mm diameter disc. The high tooth count produces finer chips and a smoother cut face, reducing deburring time significantly.
Follow this sequence for clean, repeatable cuts:
- Measure and mark. Use a fine-tip marker or scribe with an engineer’s square. Double-check every dimension against your cut list before the blade touches metal.
- Secure the profile. Clamp the extrusion firmly to the saw fence. Any movement during cutting causes chatter, burrs, and inaccurate angles. For longer sections, support the overhanging end to prevent deflection.
- Set your angle. Casement and fixed frames typically require 45-degree mitre cuts at corners. Sliding window head and sill profiles often use 90-degree square cuts. Confirm the angle with a digital angle finder before committing.
- Cut with controlled speed. Lower the blade steadily and let it feed at its own pace. Forcing the cut generates heat, which causes aluminium to smear onto the blade teeth and produces rough edges.
- Apply light lubrication. A spray of cutting wax or light oil on the blade reduces friction, extends blade life, and improves surface finish on thicker profiles.
- Deburr immediately. Use a deburring tool or fine flat file to remove sharp edges from the cut face. Clean edges are essential for tight corner joints and proper gasket seating.
Safety matters here. Always wear safety glasses, hearing protection, and gloves when cutting aluminium. Fine metal chips are sharp and travel fast. Keep fingers well clear of the blade path, and never reach across the cutting zone while the blade is spinning down.
Using Dedicated Aluminium Window Making Machines
Once production moves beyond a handful of windows per month, a dedicated aluminium window making machine for cutting transforms consistency and throughput. These purpose-built saws, particularly double-head models, cut both ends of a profile in a single cycle. That eliminates re-clamping, reduces handling, and holds length tolerances within ±0.1 to 0.2 mm across an entire batch.
CNC-controlled cutting saws use servo-driven positioning and programmable angle heads. You input your cut list once, and the machine delivers repeatable results regardless of operator fatigue or shift changes. For fabricators producing casement windows with 45-degree mitres, the angle accuracy alone (typically ±0.05 to 0.1 degrees) eliminates the visible corner gaps that plague hand-cut frames after powder coating.
The investment is substantial, with entry-level single-head CNC saws starting around $10,000 to $15,000 AUD and double-head machines running considerably higher. But the payback comes through reduced waste, fewer rejects, and faster cycle times of three to five profiles per minute compared to one or two on a manual setup.
Common Mistakes Cutting Aluminium Window Frames
Most cutting errors fall into a few predictable categories:
- Wrong angle. A mitre that is off by even half a degree creates a visible gap at the corner joint. Always verify your saw’s angle calibration before starting a batch, and check the first cut with a protractor or combination square.
- Incorrect length. Measuring once and cutting optimistically is the fastest way to waste material. Measure twice, cut once. On thermal break profiles, remember that the polyamide strip adds a fraction of resistance during cutting, so maintain steady feed pressure.
- Excessive burrs. Dull blades, wrong tooth count, or forcing the feed speed all produce rough edges. If burrs are appearing mid-batch, the blade is likely due for replacement. Track blade hours rather than calendar days.
- Profile deformation. Over-clamping thin-walled sections crushes the profile. Use wider clamp pads with softer contact material, and support the extrusion close to the cut line to minimise flex.
Material waste adds up quickly at $15 to $30 AUD per lineal metre for quality profiles. A disciplined approach, cutting the longest pieces first and nesting shorter offcuts from the remaining stock, keeps waste below 10 percent on a well-planned job.
Clean, accurate cuts are only half the equation. Those precisely dimensioned pieces now need to come together into a rigid, square frame, and the method you use to join the corners determines whether the window holds its shape for decades or racks under its own weight.
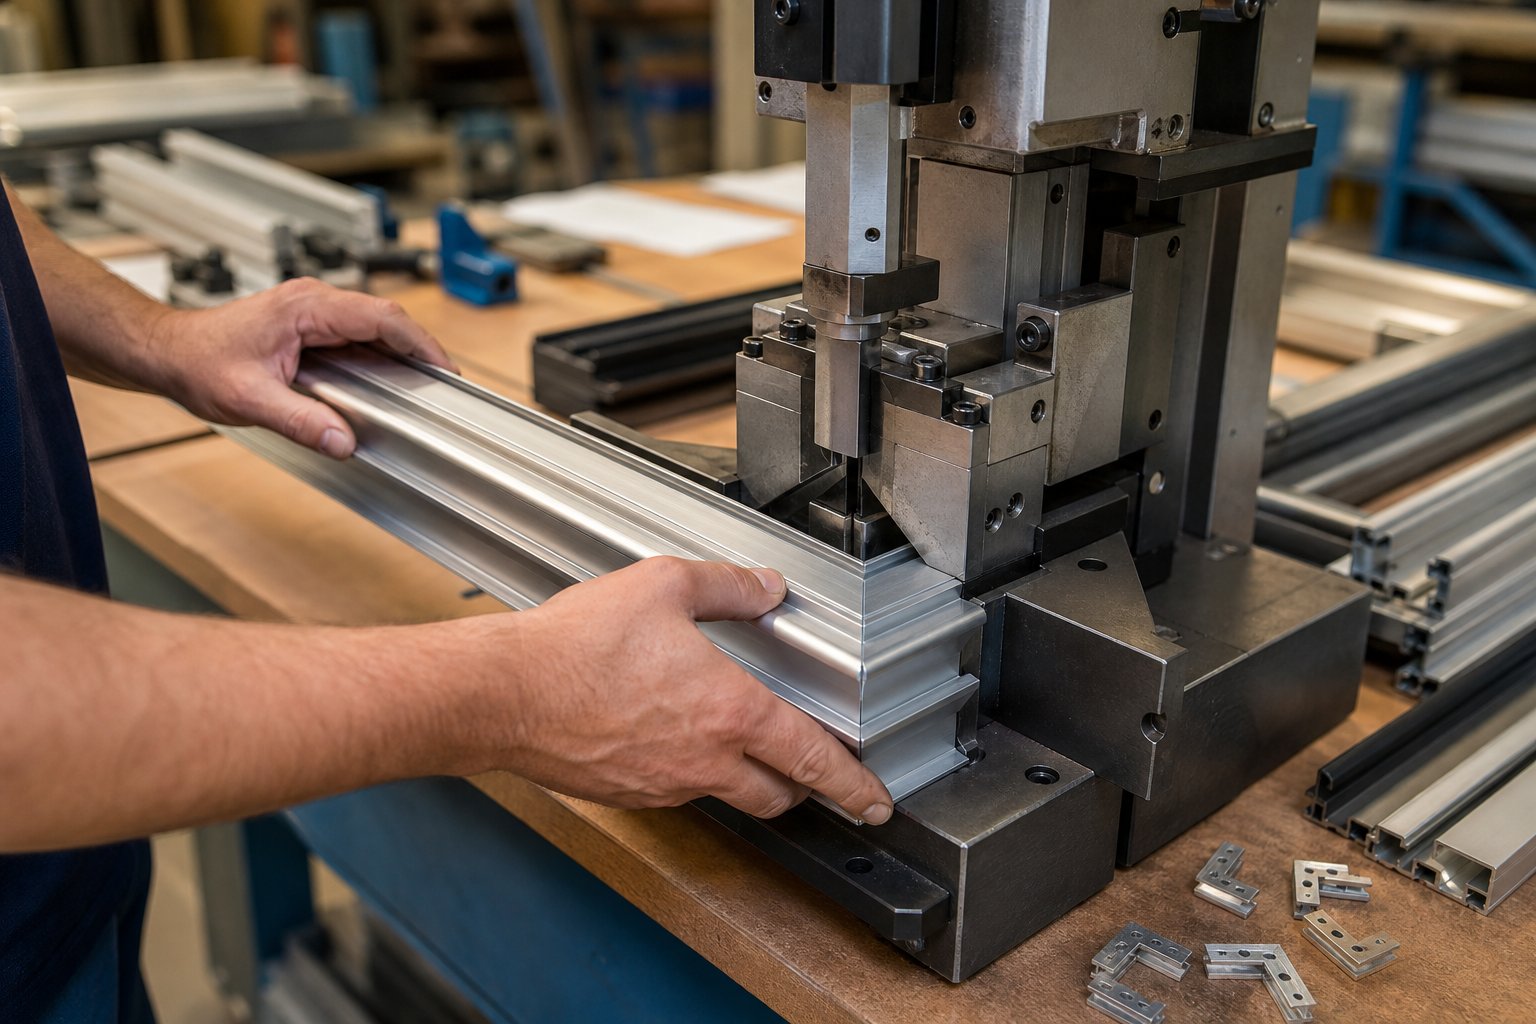
Step 4: Aluminium Window Frame Assembly Step by Step
A pile of precisely cut profiles is not a window. It becomes one only when those pieces are joined into a rigid, square frame that resists racking, sheds water, and holds glass securely for the life of the building. The assembly phase is where fabrication skill shows most clearly. Tight corners, properly seated hardware, and functional drainage separate a professional result from a frame that leaks at the first heavy rain.
Corner Crimping and Mechanical Joining
The most common method for joining aluminium window frame corners in residential fabrication is the corner cleat and crimp system. A corner cleat, sometimes called a corner key, is a small L-shaped or cross-shaped insert made from aluminium or reinforced nylon. It slides into the hollow chambers of two adjoining profile ends, bridging the joint internally. Once positioned, a crimping press deforms the outer wall of the profile inward, locking the cleat in place through mechanical interference.
Here is the aluminium window corner crimping technique laid out in sequence:
- Dry-fit the corner cleat. Insert the cleat into one profile end, checking that it seats fully into the correct chamber. The fit should be snug but not forced. If the cleat binds, check for burrs on the cut face.
- Apply corner sealant. Run a bead of neutral-cure silicone or dedicated corner glue along the mitre face before joining. This seals the joint against water ingress and adds rigidity once cured.
- Bring the profiles together. Slide the second profile onto the exposed end of the cleat, pressing the mitre faces firmly together. The joint should close with no visible gap along the external edge.
- Crimp the joint. Position the corner in your crimping press and activate. The press drives small indentations (typically two per side) into the profile wall, permanently gripping the cleat beneath. A single-head crimper handles one corner at a time. A four-head hydraulic crimper does all four corners simultaneously, which keeps the frame square under even pressure.
- Reinforce with screws if required. For larger frames or high-wind applications, drive a stainless-steel self-tapping screw through the profile wall into the cleat at each corner. This provides secondary mechanical fixing beyond the crimp alone.
- Check squareness immediately. Measure both diagonals of the assembled frame. If the two measurements match within 1 mm, the frame is square. If they differ, apply gentle pressure across the longer diagonal before the sealant sets. Once the silicone cures, correction becomes extremely difficult.
The difference between crimped and welded corners is worth understanding. Welding (TIG or MIG) fuses profiles into a seamless joint that is extremely strong and permanent, but it demands specialised equipment, skilled labour, and post-weld grinding to restore the surface finish. Welded corners suit large-format structural frames and curtain wall systems. For standard residential windows, crimped joints with corner cleats provide more than adequate strength, allow faster production, and require far less expensive tooling. Most Australian window fabricators producing residential and light commercial frames rely on crimping as their primary joining method.
Material choice for the cleat itself matters too. Aluminium cleats offer the highest shear strength and are standard for casement and awning windows that experience repeated opening forces. Reinforced nylon cleats are lighter and cheaper, suitable for fixed-frame windows where the joint carries only dead load from the glass. Adjustable or articulated corner connectors exist for non-standard angles, though these are uncommon in typical rectangular window fabrication.
Installing Hardware and Drainage
With a square, crimped frame in hand, the next task is installing hardware on aluminium window frames. The specific components depend on whether you are building a casement, sliding, or fixed window, but the general principle is the same: hardware must be positioned precisely so that sashes operate smoothly, locks engage fully, and seals compress evenly.
For a casement window, the assembly sequence runs as follows:
- Mark hinge positions. Friction stays (the standard hinge type for Australian casement windows) mount to the top rail of the sash and the head of the frame. Position them according to the manufacturer’s template, typically 100 to 150 mm from each corner. Mark screw holes with a centre punch.
- Drill pilot holes. Use a drill bit slightly smaller than the screw shank to prevent the aluminium from splitting or the screw from stripping. A 2.5 mm bit suits most 4 mm hardware screws.
- Fix friction stays. Secure with stainless-steel screws. Check that the stay arm moves freely through its full arc without binding against the frame or gasket.
- Install the handle and espagnolette mechanism. The handle spindle passes through a pre-machined hole in the sash stile. The espagnolette bar connects to locking cams that engage with keeps mounted on the frame. Align keeps so that the cams draw the sash firmly against the weatherseal when locked.
- Fit keeps and striker plates. Position these on the frame to match the cam locations. Misalignment here means the lock either will not engage or will not compress the seal adequately, leading to air leakage.
Sliding windows follow a different logic. Instead of hinges, you install roller carriages into the bottom rail of the sliding sash. These rollers sit in a track channel machined into the sill profile. Interlocking stile profiles overlap when the window is closed, and a flush-mounted lock secures the sash against the frame. Anti-lift blocks prevent the sash from being levered out of the track from outside, an important security consideration.
Drainage is the detail that separates a window that performs from one that fails. Every aluminium frame needs weep holes to allow any water that penetrates the outer seal to drain back outside rather than pooling inside the frame and eventually leaking into the wall cavity. Drill weep holes (typically 5 mm x 20 mm slots) through the outer face of the sill profile at roughly 300 mm intervals. Fit snap-on weep covers to prevent wind-driven rain from entering back through the drainage path. On casement sashes, drainage slots in the bottom rail allow water to escape from the glazing rebate down into the sill channel and out through the frame weep holes.
One final check before moving on: operate the window through its full cycle several times. Open, close, lock, unlock. Listen for binding, watch for uneven gaps between sash and frame, and confirm that the seal compresses uniformly all the way around. Adjustments are simple at this stage. After glazing, they become significantly harder.
The frame is now structurally complete, hardware is fitted, and drainage is functional. What remains is the element that gives the window its primary purpose: the glass. Selecting and installing the correct glazing unit is where weatherproofing, thermal performance, and long-term durability all converge.
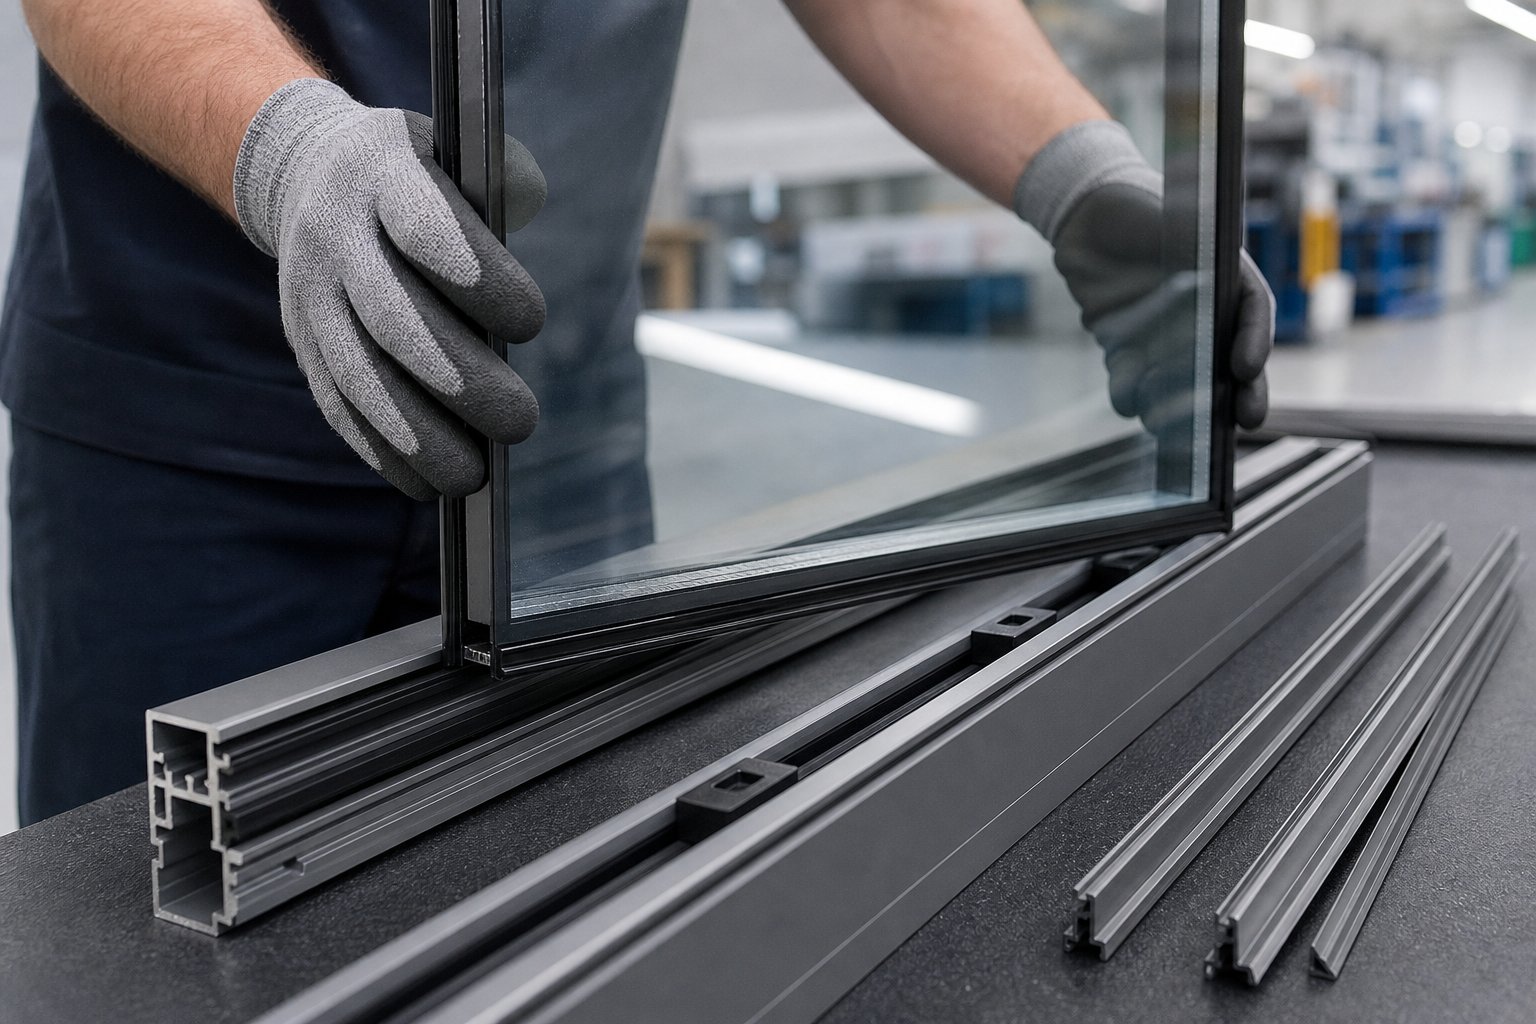
Step 5: How to Glaze Aluminium Window Frames
Glass transforms a hollow aluminium frame into a functioning window. It sounds obvious, but the glazing process carries more technical nuance than most fabricators expect. The wrong glass thickness, a poorly compressed gasket, or a missing setting block can lead to cracked panes, condensation between layers, or water streaming down your interior wall during a storm. Getting this step right means understanding both the glass unit itself and the system of components that hold it securely in place.
Selecting Glass Units for Your Window
The first decision is whether to use a single pane or a sealed double-glazed unit (IGU). For non-habitable structures like sheds, garages, or pool enclosures in mild climates, a single pane of 4 mm or 5 mm toughened glass may suffice. It is cheaper, lighter, and simpler to install. But for any habitable room in a new build or major renovation, the National Construction Code’s energy efficiency requirements effectively mandate a double glazed unit for aluminium windows in most Australian climate zones.
A standard IGU consists of two panes of glass separated by a sealed spacer bar, with the cavity between them filled with air or argon gas. Argon is denser than air and reduces convective heat transfer across the cavity, improving thermal performance by roughly 30 percent compared to an air-filled unit. Common configurations for residential aluminium windows include:
- 4-12-4: Two panes of 4 mm glass with a 12 mm air or argon gap. Total unit thickness of 20 mm. Suits most standard aluminium profiles with a glazing rebate depth of 22 to 24 mm.
- 4-16-4: Two panes of 4 mm glass with a 16 mm gap. Total thickness of 24 mm. Offers better thermal and acoustic performance but requires a deeper profile rebate.
- 5-12-5: Two panes of 5 mm glass with a 12 mm gap. Total thickness of 22 mm. The thicker glass improves acoustic insulation and is often specified near busy roads or flight paths.
Matching glass specification to frame depth is critical. If your profile’s glazing rebate is only 20 mm deep and you order a 24 mm thick IGU, the unit physically will not seat into the frame. Measure the available rebate depth before ordering glass, and confirm that the combined thickness of glass unit plus gasket compression fits within that space.
Low-E (low emissivity) coatings add another layer of performance. A microscopically thin metallic coating on one interior surface of the IGU reflects radiant heat back toward its source. In Australian conditions, a Low-E coating on surface two (the inner face of the outer pane) reduces solar heat gain in summer, cutting cooling loads. For colder southern climates where winter heating dominates, a coating on surface three (the outer face of the inner pane) helps retain interior warmth. Specifying the correct Low-E position for your climate zone directly affects WERS ratings and NatHERS compliance.
For safety-critical locations such as windows within 800 mm of floor level, adjacent to doors, or in wet areas, AS 1288 mandates the use of safety glass. This means either toughened (tempered) or laminated glass. Toughened glass shatters into small, relatively harmless granules on impact. Laminated glass holds together when broken because a PVB interlayer bonds the fragments. Both options are available in IGU configurations, so safety compliance does not limit your thermal performance choices.
Installing Glazing Beads and Gaskets
With the correct glass unit in hand, the installation process relies on a system of components working together to hold the glass, seal against weather, and allow for thermal movement. Each part has a specific function:
- Setting blocks: Small pads (typically neoprene or HDPE) placed beneath the glass unit to support its weight and prevent direct aluminium-to-glass contact. Positioned at quarter points from each corner on fixed windows, or at specific locations on opening sashes per the hardware manufacturer’s guidance.
- Location blocks (packers): Placed at the sides and top of the glass to centre the unit within the rebate and prevent lateral movement. These ensure even gasket compression around the full perimeter.
- Back seal (wedge gasket or backing gasket): A continuous rubber seal fitted into the frame rebate before the glass is placed. It cushions the glass against the aluminium and provides the primary weather seal on the frame side.
- Glazing beads: Aluminium or PVC snap-in strips that secure the glass from the interior side. They clip into a channel in the frame profile and press against the front gasket to lock everything in place.
- Front gasket (wedge or flipper gasket): Fitted between the glazing bead and the glass face. This seal completes the weathertight envelope and accommodates slight dimensional variations in the glass unit.
- Silicone sealant: Applied externally at the glass-to-frame junction where additional weatherproofing is needed, particularly on exposed or high-wind installations. Use neutral-cure silicone only, as acid-cure variants corrode aluminium.
The installation sequence for aluminium window glazing beads and gaskets follows a logical order:
- Fit the back seal. Press the continuous wedge gasket into the rebate channel around the full perimeter of the frame. Ensure it sits evenly without twisting or bunching at corners. Cut mitres at corners for a neat fit, or use a continuous loop with a butt joint at the bottom rail.
- Place setting blocks. Position them on the sill at quarter points. For a 1200 mm wide window, that means roughly 300 mm in from each corner.
- Lower the glass unit into the frame. Tilt the top edge in first, then lower the bottom edge onto the setting blocks. Never drop or slide the unit, as this can damage the IGU edge seal and lead to premature unit failure.
- Insert location blocks. Pack the sides and top to centre the glass within the rebate. The gap between glass edge and aluminium should be even all the way around.
- Fit the front gasket. Press the wedge gasket onto the glass face or into the glazing bead channel, depending on your profile system. Some systems use a gasket that clips directly to the bead before installation; others require the gasket to be seated against the glass first.
- Snap in glazing beads. Starting at one corner, press the bead firmly into the frame channel using a rubber mallet or nylon drift. Work around the perimeter. The bead should click positively into place. If it resists, check that the gasket is not bunched beneath it.
- Apply external silicone if required. Run a neat bead of neutral-cure silicone along the external glass-to-frame junction. Tool it smooth with a wetted finger or silicone finishing tool. This step is particularly important on fixed windows and the fixed panes of sliding assemblies where the external gasket alone may not provide sufficient weather resistance in exposed locations.
Proper drainage function remains important even after glazing. As industry guidance confirms, aluminium joinery is designed as a “water in, water out” system. Water will inevitably find its way past the outer gasket during heavy rain. The frame channels this moisture internally to the weep holes you drilled during assembly. After glazing, verify that no sealant or gasket material has blocked these drainage paths.
EPDM vs TPE Gaskets for Aluminium Windows
Gasket material choice affects seal longevity, compression behaviour, and how well the window performs over time. The two dominant materials in aluminium window fabrication are EPDM (ethylene propylene diene monomer) rubber and TPE (thermoplastic elastomer).
EPDM has been the traditional choice for decades. It offers excellent resistance to UV, ozone, and weathering, which matters enormously for Australian conditions where gaskets face intense solar radiation year-round. EPDM handles temperature extremes well (rated to approximately 160°C) and maintains its compression set over long periods, meaning it continues to seal effectively without going flat. Its main limitations are a narrower range of available colours (predominantly black) and higher tooling costs for custom profiles.
TPE gaskets are increasingly common in modern aluminium window systems. They offer greater design flexibility, easier processing during manufacture, and a wider colour range for aesthetic matching. TPE can be recycled back into production, which appeals to environmentally conscious fabricators. However, TPE has lower heat resistance (around 100°C) and generally lower abrasion resistance than EPDM. In practice, this means TPE gaskets may degrade faster on north-facing windows that receive sustained direct sun in Australian conditions.
For most residential aluminium window projects in Australia, EPDM remains the safer long-term choice, particularly for external-facing seals exposed to UV and temperature cycling. TPE works well for internal glazing gaskets and beads where UV exposure is minimal and colour matching with the frame finish is desirable. Some profile systems use a combination: EPDM for the weather-facing back seal and TPE for the interior glazing bead gasket.
Regardless of material, proper compression is what makes any gasket work. A gasket that is under-compressed allows air and water to pass. One that is over-compressed deforms permanently and loses its recovery, eventually creating gaps as the material fatigues. The target is typically 20 to 30 percent compression of the gasket’s free height. If your glazing bead snaps in too easily with almost no resistance, the gasket is likely under-compressed. If the bead refuses to seat without excessive force, something is misaligned or the wrong gasket size has been used.
With the glass sealed into a weathertight, properly drained frame, the window is structurally and functionally complete. What remains is the surface itself. Raw aluminium left untreated will oxidise, pit, and discolour within months of exposure to Australian coastal air or UV. The finishing process protects your work and defines the window’s final appearance for decades to come.
Step 6: Aluminium Window Surface Finish Options and Protective Coatings
An unfinished aluminium frame might look acceptable on the workbench, but expose it to coastal salt spray, UV radiation, or even urban pollution and the surface degrades fast. Pitting, chalky oxidation, and uneven discolouration appear within months. The best protective coating for aluminium window frames depends on your environment, aesthetic goals, and budget. Each method offers a different balance of durability, colour range, and long-term maintenance.
Powder Coating, Anodising, and Timber-Effect Finishes
Three surface treatments dominate the aluminium window industry in Australia. Understanding how they differ helps you choose the right finish before committing, because changing your mind after application is expensive or impossible.
Powder coating is the most common finish on residential aluminium windows. A dry powder (typically polyester resin) is electrostatically sprayed onto the frame and then cured in an oven at around 180 to 200°C. The result is a tough, uniform film between 60 and 80 microns thick that resists chipping, fading, and weathering. Colour options are virtually unlimited, from standard Monument and Surfmist to custom-matched RAL or Dulux shades. For fabricators working without factory-scale equipment, powder coating is typically outsourced to a local coater, with turnaround of three to five business days.
Anodising takes a fundamentally different approach. Rather than adding a layer on top, the process converts the aluminium surface itself into a hard aluminium oxide through an electrochemical bath. This oxide layer is integral to the metal, meaning it cannot peel or flake. Anodised finishes typically last 10 to 20 years in outdoor environments and offer exceptional corrosion resistance, making them ideal for coastal properties exposed to salt air. The trade-off is a more limited colour palette. Anodising produces natural silver, bronze, champagne, and black tones, but vibrant reds, greens, or blues are not achievable through standard architectural anodising processes.
Timber-effect finishes give aluminium frames the visual warmth of wood without the maintenance burden. These are applied over a powder-coated base layer using either sublimation transfer or laminate wrapping techniques. The result is a frame that looks like oak, walnut, or cedar but will not rot, warp, or require repainting every few years.
When weighing powder coating vs anodising aluminium windows, consider the environment and desired appearance. Anodising suits projects where a metallic, architectural aesthetic is preferred and long-term corrosion resistance is paramount. Powder coating suits projects requiring specific colours, brand matching, or integration with existing building finishes.
| Finish Method | Durability | Approximate Cost (AUD per m²) | Colour Options | Maintenance |
|---|---|---|---|---|
| Powder Coating (polyester) | 15-25 years before recoat needed | $30-$60 | Virtually unlimited (RAL, Dulux, Colorbond range) | Wash with mild soap annually; no repainting |
| Anodising (architectural grade) | 20+ years; integral to metal | $50-$90 | Limited: natural silver, bronze, champagne, black | Rinse with water; avoid alkaline cleaners |
| Timber-Effect (sublimation) | 15-20 years depending on UV exposure | $80-$140 | Wide range of timber species replications | Same as powder coating; avoid abrasive cleaning |
| PVDF (fluorocarbon coating) | 25-30+ years; premium performance | $90-$150 | Good range; excellent colour retention | Minimal; exceptional fade resistance |
Achieving a Timber Look on Aluminium Frames
Timber look aluminium window frames have surged in popularity across Australian residential projects. Homeowners want the warmth and character of natural wood without the ongoing sanding, oiling, and repainting that real timber demands in harsh Australian conditions.
Sublimation film transfer (SFT) is the most widely used technique. The process starts with a standard powder-coated base layer in a colour matched to the desired timber tone. A specialised polyester film printed with a high-resolution woodgrain pattern is then wrapped around the profile and vacuum-sealed against the surface. The assembly passes through an oven where heat causes the ink to sublimate, meaning it transitions from solid to gas and penetrates directly into the powder coating beneath. Once cooled, the film is removed and the grain pattern remains permanently bonded to the surface. The finish is not a sticker or a wrap that can peel. It is embedded within the coating itself.
A second method, powder-to-powder application, builds the timber pattern using multiple layers of coloured powder forced through a patterned sieve. This approach produces a more tactile, textured finish that some fabricators consider more authentic than sublimation. However, it is slower and more labour-intensive because each face of the profile must be treated separately. Some Australian suppliers are adopting this method for premium projects where the additional cost is justified by the richer surface texture.
Vinyl wrapping and real timber veneer lamination also exist but are less common on window frames due to lower UV resistance and potential delamination over time in exposed conditions. For exterior-facing aluminium windows in Australia, sublimation transfer remains the most durable and practical timber-effect option.
Finish choice carries compliance implications worth noting. High-quality powder coating should be uniform, free of bubbles, and resistant to light scratching. For windows that must meet AS 2047 performance requirements, the surface treatment must not compromise the profile’s structural integrity or seal performance. Some warranty programs from profile suppliers are only valid if an approved coating system is used and applied by a certified applicator. Using a non-approved finish, or applying powder coating at incorrect film thickness, can void both the profile warranty and the coating warranty simultaneously. If your project requires compliance documentation for council approval or a building certifier, confirm that your chosen finish meets the relevant durability grade under AS/NZS 3715 (for powder coating) or AS 1231 (for anodising).
Surface finishing is the last step before your window faces the real world. But a flawless finish on a poorly assembled frame still results in a failed product. The final phase brings everything together: systematic quality inspection and verification that the finished window meets the performance standards required for installation in an Australian building.
Step 7: Quality Inspection Checklist for Aluminium Windows
A window can look perfect on the bench and still fail in service. Frame racking that is invisible to the naked eye allows water in during wind-driven rain. A gasket that appears seated might be under-compressed by just enough to whistle on a cold night. Catching these issues before installation is far cheaper than diagnosing them after the plasterboard is up and the painter has finished. A structured inspection process turns common aluminium window fabrication mistakes into problems you solve once rather than repeat on every unit.
Common Fabrication Mistakes and How to Fix Them
Most defects trace back to a handful of recurring errors. Knowing what to look for, and how to fix aluminium window frame problems at the bench rather than on site, saves time and materials. Here is a troubleshooting checklist organised by symptom:
- Frame is out of square (diagonals differ by more than 1.5 mm): The most likely cause is uneven crimping pressure or a corner cleat that did not seat fully. If the sealant has not cured, apply diagonal pressure to correct. If cured, disassemble the affected corner, clean the joint, re-seat the cleat, and re-crimp with verified pressure.
- Visible gap at mitre joints after powder coating: The cutting angle was off, typically by 0.3 to 0.5 degrees. Powder coating thickness (60-80 microns) makes marginal gaps more obvious. Prevention is the only real fix here. Recalibrate your saw and cut test pieces before committing to a batch.
- Gasket does not compress evenly around the perimeter: Check for bunching at corners, an oversized gasket profile, or glazing beads that have not fully clicked into the channel. Remove the bead, re-seat the gasket ensuring it lies flat without twisting, and refit. Target 20 to 30 percent compression of the gasket’s free height.
- Water pools inside the frame during hose testing: Blocked or missing weep holes. Verify that drainage slots are clear of silicone overspill, paint, or gasket material. Each sill section needs at least two unobstructed weep slots with covers fitted.
- Glass cracks during or shortly after installation: Usually caused by missing or incorrectly positioned setting blocks, which concentrate the unit’s weight on a single point. Can also result from over-tightened glazing beads forcing uneven pressure onto the glass edge. Re-glaze with blocks at quarter points and confirm even clearance around the perimeter.
- Hardware binds or lock does not engage: Misaligned keeps or friction stays mounted off-template. Remove the hardware, re-mark positions using the manufacturer’s jig or template, drill fresh pilot holes, and refit. Never force a lock to engage by bending the keep, as this stresses the frame and wears the mechanism prematurely.
- Sash misalignment causing uneven gaps: On casement windows, check that friction stays are identical length and mounted at equal heights. On sliding windows, adjust roller height using the built-in screw mechanism until the sash sits parallel to the head track.
Run every window through a full operational cycle before it leaves the workshop. Open, close, lock, unlock. Then perform a water spray test on the external face for at least fifteen minutes, checking internally for any moisture penetration. Catching a drainage fault at this stage costs five minutes. Catching it after installation costs hours of remedial work and potential damage to surrounding finishes.
Meeting Building Regulations and Energy Ratings
Fabricating a window that works mechanically is one thing. Fabricating one that satisfies Australian building compliance is another. Aluminium window building regulation compliance centres on three core documents that apply whether you are a factory or a one-person workshop.
AS 2047 (Windows and external glazed doors in buildings) is the primary performance standard. It sets minimum requirements for structural adequacy under wind load, water penetration resistance, and air infiltration. Every window installed in an Australian building must be tested or assessed against AS 2047 for the specific wind region and terrain category of the site. A hand-fabricated window that has not been tested to this standard cannot legally be installed in a habitable building without engineering certification.
AS 1288 (Glass in buildings) governs glass selection and installation. It specifies where safety glass is mandatory, minimum thickness for given spans and wind loads, and edge clearance requirements within the frame. Non-compliance here is a serious safety issue, not just a paperwork problem.
The National Construction Code (NCC), specifically Section J for energy efficiency, sets thermal performance requirements that vary by climate zone. Windows must achieve minimum U-values and Solar Heat Gain Coefficient (SHGC) ratings appropriate to their orientation and location. The Window Energy Rating Scheme (WERS) provides a standardised way to demonstrate compliance, rating windows from one to ten stars for both heating and cooling performance. Thermally broken frames with Low-E double glazing typically achieve the ratings needed for NCC compliance in most zones, while non-thermal break frames with single glazing rarely meet current requirements for habitable rooms.
Ventilation requirements under NCC Volume 2 also apply. Habitable rooms generally need openable windows providing a minimum ventilation area, and trickle ventilators may be required in higher-performance builds to maintain air quality without excessive energy loss.
Windows that do not meet AS 2047, AS 1288, and NCC energy provisions may fail building inspections, void home insurance policies, and create personal liability for the fabricator or installer. If your hand-fabricated window cannot be tested or certified to these standards, it should only be used in non-habitable structures such as sheds, workshops, or garages where compliance requirements are less stringent.
For fabricators serious about supplying windows for residential projects, the practical path to compliance involves using a tested profile system from an established supplier. These systems come with existing AS 2047 test reports covering a range of sizes and configurations. By fabricating within the tested parameters of that system, you inherit the compliance documentation without needing to commission independent testing for every window you produce, which would be prohibitively expensive for small-volume work.
Quality inspection and compliance verification mark the boundary between a workshop exercise and a product fit for a real building. For many fabricators, this is also the point where the limitations of hand-built windows become clear, particularly when projects demand certified performance data, warranty coverage, or multi-unit consistency that only engineered systems can deliver.
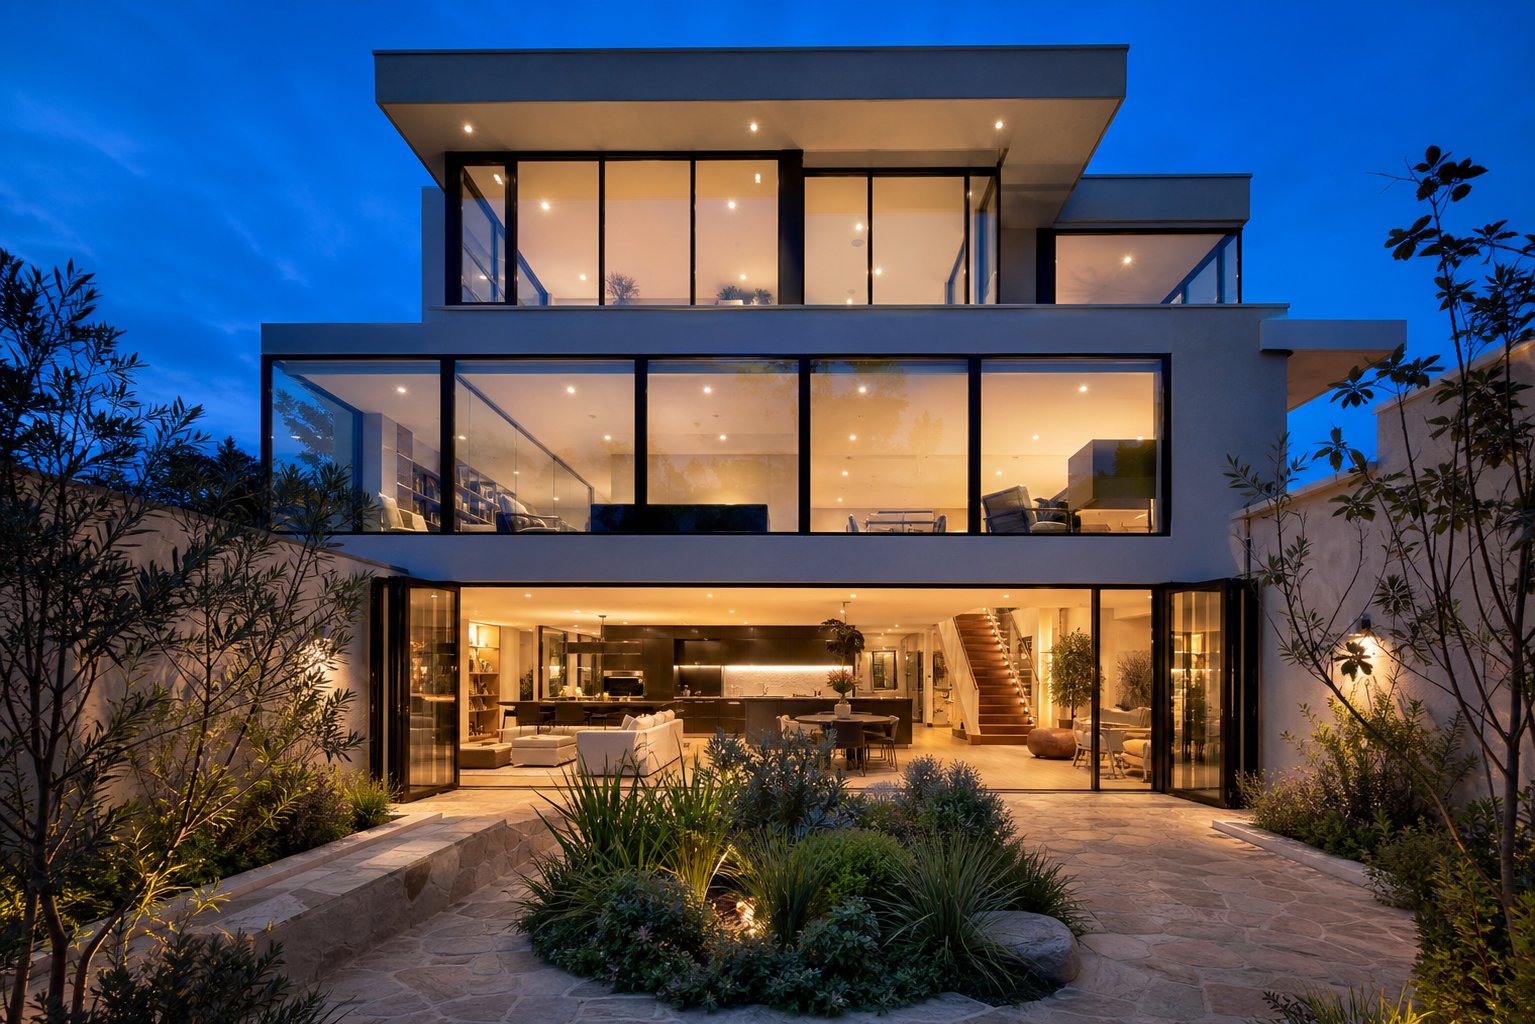
Step 8: When to Use Professional Aluminium Window Systems
Learning how to make aluminium windows in a small workshop teaches you something valuable beyond the fabrication itself. It reveals exactly where hand-built methods hit a ceiling. A single casement for a garden studio or a fixed panel for a shed is well within reach. But the moment a project involves multiple storeys, certified performance data, or a client expecting a ten-year warranty backed by an established manufacturer, the calculus shifts. Recognising that boundary early saves money, time, and reputation.
When to Move Beyond DIY Fabrication
Several scenarios signal that DIY vs professional aluminium window fabrication is no longer a fair comparison. The gap is not about skill. It is about what the project demands and what a hand-fabricated window can realistically deliver.
- Multi-storey residential or commercial buildings: Wind loads increase with height and exposure. AS 2047 testing for upper-storey windows in higher wind regions requires independently verified performance data that hand-fabricated frames cannot provide without expensive one-off testing.
- Projects requiring council sign-off or building certification: A certifier needs documented compliance. Tested profile systems come with existing AS 2047 reports covering specific size and configuration ranges. A workshop-built window without this documentation creates an approval bottleneck that stalls the entire build.
- High-performance thermal requirements: Achieving NCC Section J compliance in climate zones 6, 7, or 8 (think Melbourne, Canberra, Hobart) typically demands thermally broken frames with specific U-value and SHGC ratings. These systems are engineered as integrated packages where profile, gasket, glazing, and hardware are designed to work together. Replicating that integration from individual components in a small workshop is technically possible but commercially impractical.
- Volume consistency across a full house or development: Ten or twenty windows that must match in finish, operation, and seal performance require production-level quality control. Batch-to-batch variation in hand-crimped corners, manually routed hardware pockets, and individually fitted gaskets compounds across a large schedule.
- Warranty and insurance expectations: Homeowners and builders increasingly expect product warranties of ten years or more. A hand-fabricated window carries only the fabricator’s personal guarantee. Professional systems from established manufacturers back their products with documented warranty programs that satisfy lenders, insurers, and future buyers.
- Architectural specifications requiring slim sightlines or large spans: Ultra-slim profiles and structurally glazed systems are engineered to precise tolerances that depend on factory-controlled fabrication. The profile geometry, reinforcement, and hardware integration in these systems cannot be replicated with standard workshop tooling.
None of this diminishes the value of understanding fabrication from the ground up. Knowing how corners are crimped, how drainage works, and why gasket compression matters makes you a better specifier, a sharper buyer, and a more informed project manager when you do engage professional systems.
Exploring Professional Aluminium Window and Door Systems
Professional aluminium window and door manufacturers offer purpose-engineered systems that address every limitation listed above. These are not simply bigger versions of workshop-built frames. They are integrated platforms where every component, from the alloy extrusion to the final gasket, is designed, tested, and warranted as a complete assembly.
The range of thermal break aluminium window systems for buildings available today covers virtually every architectural intent and performance target:
- Thermal break systems: Polyamide-insulated profiles achieving whole-window U-values well below 2.0 W/m²K. These suit climate zones where heating and cooling loads drive energy costs, and where NCC compliance demands verified thermal performance.
- Non-thermal break systems: Cost-effective solutions for mild climates, non-habitable structures, or commercial applications where thermal performance is secondary to structural strength and slim aesthetics.
- Ultra-slim profiles: Minimalist sightlines as narrow as 20 to 30 mm that maximise glass area for contemporary architectural designs. These systems use high-strength alloys and precision engineering to maintain structural adequacy despite the reduced frame width.
- Facade and curtain wall systems: Engineered for multi-storey commercial and residential buildings where the window system forms part of the building envelope structure. These require project-specific engineering and are far beyond workshop fabrication capability.
- Full-house custom configurations: Coordinated systems covering windows, doors, bi-folds, sliding doors, and louvres in matching profiles and finishes. A unified system ensures consistent sightlines, hardware logic, and weatherproofing across every opening in a home.
For readers who have followed this fabrication guide and are now planning a real building project, manufacturers like MEICHEN offer the full spectrum of these systems, from thermally broken residential windows through to facade solutions and custom whole-house packages. Their product range illustrates what becomes available when you move from sourcing individual profiles and components to specifying a complete, tested system backed by manufacturing consistency and documented compliance.
The transition from fabricating your own frames to specifying professional systems is not a step backward. It is a recognition that different project scales demand different approaches. The knowledge you have built through understanding alloy selection, cutting tolerances, corner joining, glazing methods, and compliance requirements makes you a far more capable client when engaging with professional manufacturers. You know what questions to ask, what specifications matter, and what separates a well-engineered system from a marketing brochure. That understanding is the real value of learning the craft from scratch.
Frequently Asked Questions About Making Aluminium Windows
1. What aluminium alloy is best for making window frames?
6063-T5 is the industry standard for aluminium window extrusions. It offers excellent extrudability into thin-walled hollow shapes, accepts powder coating and anodising well, provides strong corrosion resistance, and delivers sufficient tensile strength (around 150 MPa) for residential and most commercial applications. The higher-strength 6061-T6 alloy (310 MPa) is only necessary for large-span windows in high-wind environments or structural curtain wall systems, and it is harder to work with in a small workshop setting.
2. Can I make aluminium windows at home without factory equipment?
Yes, a DIY fabricator can produce quality aluminium windows with a mitre saw fitted with an 80+ tooth TCT aluminium-rated blade, a manual corner crimping press, a drill press or copy router, and basic hand tools. Total tooling outlay sits around $1,500 to $3,000 AUD. Fixed windows are the simplest starting point since they require no sash, hardware routing, or weatherstripping overlap. Casement windows are the logical next step. However, hand-fabricated windows should only be installed in non-habitable structures unless they can be certified to AS 2047 performance standards.
3. What is the difference between thermal break and non-thermal break aluminium window profiles?
Non-thermal break profiles are continuous aluminium sections that create a direct thermal bridge between interior and exterior, allowing heat to transfer freely through the frame. Thermal break profiles split the frame into two separate aluminium sections joined by a polyamide (nylon) insulating strip that interrupts this conductive path. Thermal break systems dramatically reduce heat transfer, cut condensation risk, and improve energy ratings. They cost more per lineal metre and require more careful handling during fabrication, but are increasingly expected for new builds in cooler Australian climate zones to meet NCC energy efficiency provisions.
4. How do I ensure my aluminium windows comply with Australian building regulations?
Australian compliance centres on three key documents: AS 2047 for structural adequacy, water resistance, and air infiltration; AS 1288 for glass selection and safety glazing requirements; and the National Construction Code (NCC) Section J for energy efficiency. The most practical path for small fabricators is to use a tested profile system from an established supplier that comes with existing AS 2047 test reports. Fabricating within the tested parameters of that system lets you inherit compliance documentation without commissioning expensive independent testing for each window.
5. When should I choose professional aluminium window systems over DIY fabrication?
Professional systems become the better choice when projects involve multi-storey buildings with higher wind loads, council sign-off requiring documented AS 2047 compliance, high-performance thermal targets for NCC Section J, volume consistency across a full house, warranty expectations exceeding ten years, or architectural specifications demanding ultra-slim sightlines. Manufacturers like MEICHEN offer complete tested systems spanning thermal break, non-thermal break, ultra-slim, facade, and full-house custom configurations that deliver certified performance data and manufacturing consistency beyond what workshop fabrication can achieve.
More Window & Door Guides