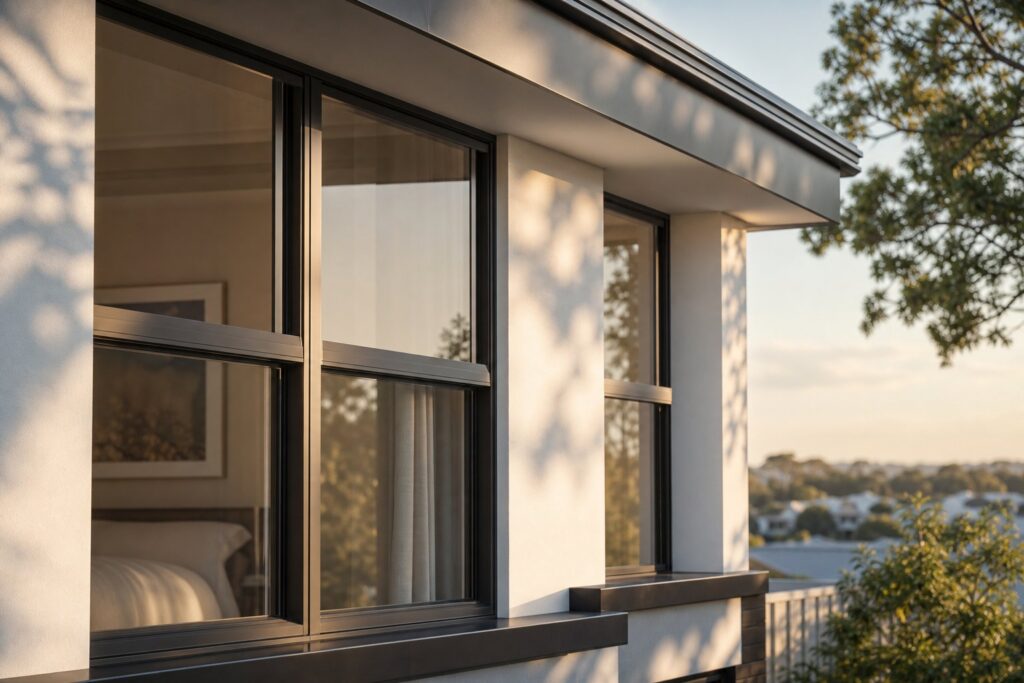
What Aluminium Window Sealing Strips Do and Why They Matter
A draught creeping past a closed window is rarely the frame’s fault. More often, it traces back to the narrow strip of material wedged between sash and frame — the component doing the real work of keeping weather on the outside where it belongs.
What Is an Aluminium Window Sealing Strip
An aluminium window sealing strip is a flexible gasket or profile seated within the channels of an aluminium window frame. Its job is mechanical and straightforward: compress against the sash or frame at every junction point, forming a continuous barrier against air, water, dust, and noise infiltration. These strips sit in purpose-extruded grooves milled into the aluminium profile during manufacture, running the full perimeter of each operable sash.
When the window locks shut, hardware pulls the sash tight against the seal. The strip deforms just enough to fill micro-gaps caused by manufacturing tolerances and thermal movement, then recovers its shape once the window opens again. This repeated compression-and-recovery cycle is the strip’s entire working life — and the reason material choice matters far more than most homeowners realise.
How Sealing Strips Differ From General Weatherstripping
Generic foam tapes and rubber adhesive strips sold at hardware stores are designed as universal fixes. They stick to timber, uPVC, or metal alike without accounting for the specific behaviour of any one frame material. Aluminium weatherstripping, by contrast, is engineered around the unique demands of aluminium frames.
The difference comes down to three factors. First, aluminium channels are narrow and precisely shaped — a bulky foam tape simply won’t seat properly. Second, aluminium expands and contracts with temperature changes more aggressively than timber or uPVC. A seal designed for windows and aluminium seals must tolerate that movement without losing contact or taking a permanent set. Third, the smooth, non-porous surface of anodised or powder-coated aluminium demands specific adhesion chemistry that generic tapes often lack.
Material compatibility with the aluminium frame is the single biggest factor in seal longevity. A strip that performs well on a timber window may fail within a year on aluminium due to thermal expansion mismatch and adhesive incompatibility with the non-porous surface.
Understanding this distinction is the starting point. The next consideration — which profile shape actually suits your window — determines whether that seal performs for two years or ten.
Sealing Strip Profile Types Explained
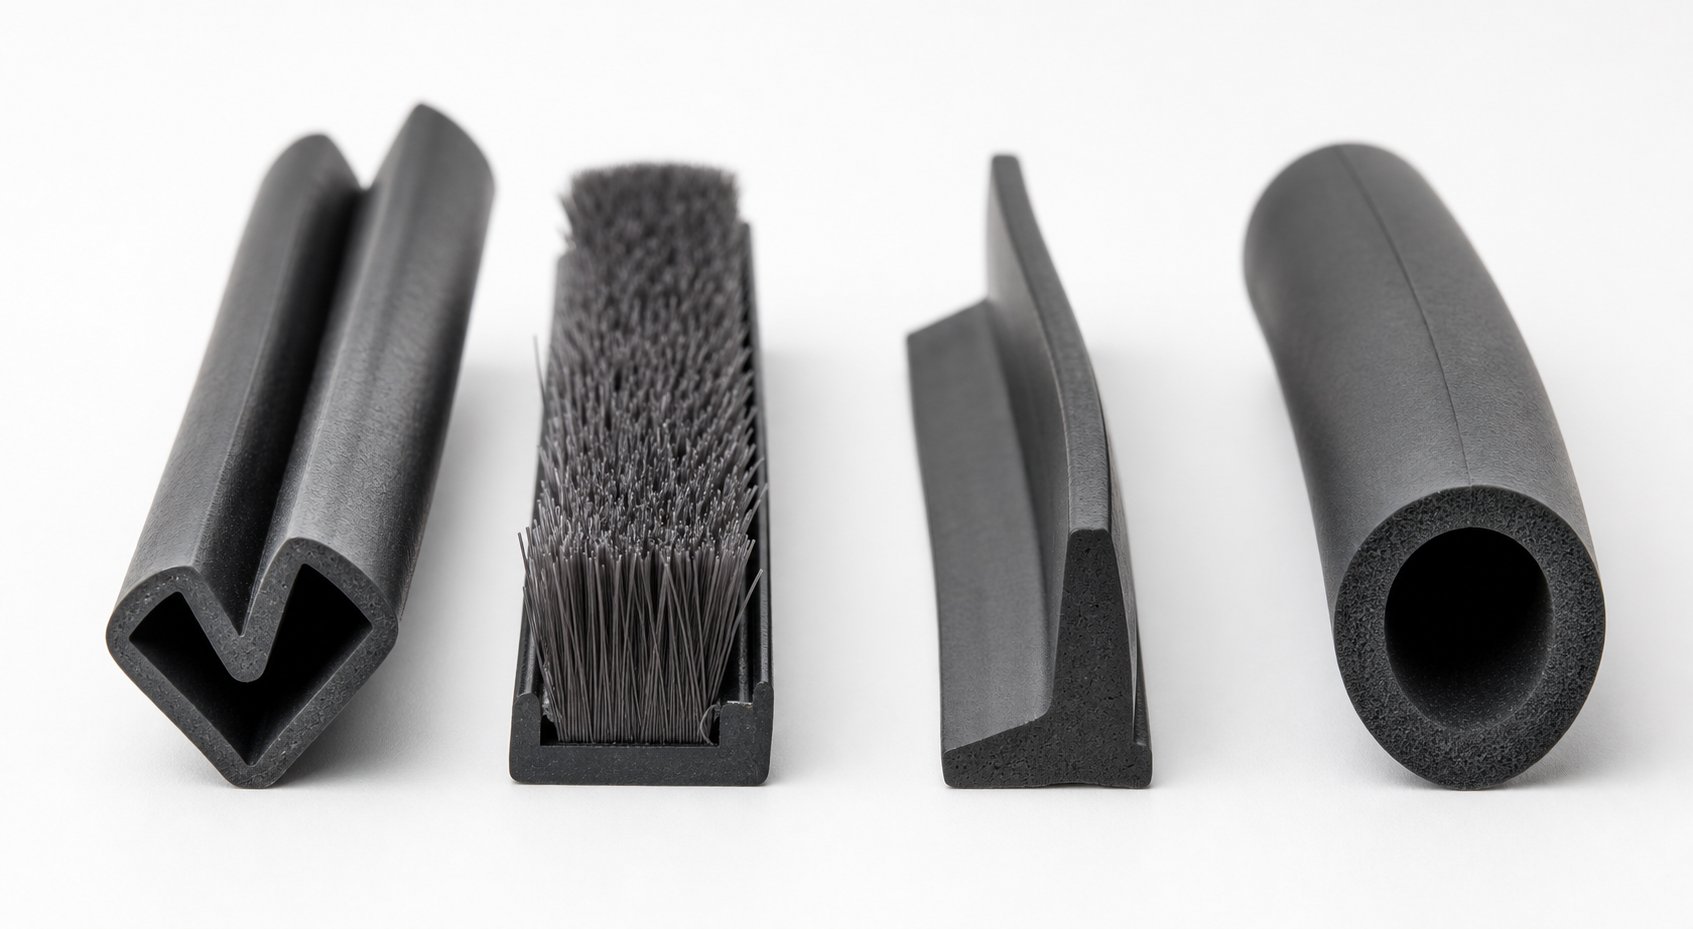
Profile shape dictates how a seal makes contact, how much compression it needs, and how long it lasts under repetitive cycling. Four distinct profiles dominate the aluminium window market, each solving a different sealing problem. Picking the wrong one is one of the fastest routes to premature failure.
V-Strip and Tension Seal Profiles
A V-strip — sometimes called a tension seal — is a thin piece of material folded into a V shape that springs open to press against both sides of a gap. When seated inside an aluminium channel, it relies on its own spring tension rather than compression from the sash. This makes it well suited to meeting rails on double-hung windows and any application where the closure force is light.
Aluminium itself is actually one of the materials used to manufacture metal weather strip V-profiles, alongside bronze and stainless steel. Metal versions outlast plastic alternatives by a wide margin because they resist compression set entirely — the spring never goes flat. Flexible PVC and polypropylene V-strips are cheaper and easier to cut, but they stiffen in cold weather and lose their spring over a shorter timeframe.
Pile Brush and Rubber Blade Profiles
Pile strips pack thousands of fine synthetic fibres into a narrow aluminium or plastic carrier. They excel in sliding window tracks because the fibres flex with sash movement rather than creating friction. Dust and debris pass through less easily than you might expect — the fibre density creates a surprisingly effective air barrier while still permitting smooth operation.
Rubber blade seals, also called fin seals, take a different approach. A single flexible fin extends from a rigid base and bends flat against the opposing surface when the sash closes. Casement and awning windows benefit most from this profile because hinged sashes generate enough closure force to deflect the blade fully. Think of it as a vinyl clad weatherstrip that wipes rather than compresses — ideal where water runoff needs a clean shedding path rather than pooling against a compressed bulb.
Compression Bulb and Hollow Tube Seals
Compression bulb seals feature a hollow or semi-hollow cross-section that deforms under pressure, spreading outward to fill irregularities in the frame-to-sash junction. The hollow centre allows greater deformation with less force, meaning windows lock shut more easily while still achieving a tight seal. EPDM rubber is the standard material here due to its UV stability and resistance to permanent compression set.
These profiles suit tilt-and-turn hardware and heavy-duty casement systems where multi-point locking generates significant and even compression. For metal weather stripping door seal applications on aluminium-framed entries, compression bulbs are similarly the go-to choice because they tolerate the heavier impact forces of door closure without splitting.
| Profile Type | Best Window Style | Durability Rating | Ease of Installation | Typical Lifespan |
|---|---|---|---|---|
| V-Strip (Tension Seal) | Double-hung, meeting rails | High (metal) / Moderate (PVC) | Moderate — requires precise channel fit | Metal: 15–20 years; PVC: 5–8 years |
| Pile/Brush Strip | Sliding windows and doors | Moderate | Easy — press-fit into carrier groove | 8–12 years |
| Rubber Blade (Fin Seal) | Casement and awning | Moderate to High | Moderate — alignment critical | 8–15 years |
| Compression Bulb | Tilt-and-turn, heavy casement, doors | High (EPDM) | Moderate — correct sizing essential | 10–15 years |
Lifespan figures assume correct installation and material-appropriate maintenance. A compression bulb rated for fifteen years will fail in three if it is oversized for the channel and permanently over-compressed every time the window latches.
Knowing the profile is only half the equation. The other half is understanding which aluminium window configuration actually demands each shape — because a perfectly good seal in the wrong application performs no better than a damaged one.
Matching the Right Strip to Your Window Type
Your window’s operating mechanism determines exactly how the sash meets the frame — the angle of approach, the force of closure, and how much sliding friction the seal must endure. Start with the window type, not the strip material, and the correct profile choice becomes obvious.
Sealing Strips for Sliding Aluminium Windows
Horizontal and vertical sliding windows demand a window frame seal that stays out of the sash’s way. Every time you slide the panel open or shut, the seal drags against the moving frame. A compression bulb here would create so much friction that the window becomes stiff within months — and the constant abrasion shreds the rubber surface.
Pile brush strips solve this by using thousands of fine polypropylene fibres that bend flat as the sash passes, then spring upright to block airflow once the window is closed. The fibres create negligible resistance during operation while still forming an effective barrier against dust and draughts. Most aluminium sliding window tracks feature a milled groove specifically sized for a standard pile carrier, making replacement straightforward. For aluminium door weather strip applications on heavy sliding panels, a slightly denser pile with a taller fin height handles the greater gap tolerances common in door-weight sashes.
Sealing Strips for Casement and Awning Windows
Casement and awning windows hinge on one side and swing outward or upward. When locked shut, multi-point hardware pulls the sash firmly against the frame perimeter. This strong, even closure force is precisely what compression bulbs and rubber blade seals need to function correctly.
A compression bulb deforms under that locking pressure, expanding sideways to fill any micro-gaps between sash and frame. Rubber blade profiles work similarly — the fin deflects flat to create a wiping contact that sheds water away from the junction. Both profiles rely on the window’s hardware generating adequate force, so if your casement latches feel loose, even a brand-new seal will underperform. Aluminium door weather stripping on hinged entry doors follows identical logic: the closer and latch must compress the seal firmly for a proper air barrier.
Sealing Strips for Tilt-and-Turn Windows
Tilt-and-turn systems present a unique challenge. In turn mode the sash swings inward like a door, compressing the seal evenly around its full perimeter. In tilt mode only the top edge gaps open while the bottom rail stays locked — meaning the seal along the lower edge remains under full compression while the top section experiences repeated flexing at a shallow angle.
This dual-action movement requires a seal that recovers quickly from varied compression depths without taking a permanent set. EPDM compression bulbs with a hollow centre are the standard choice because their elastic memory handles both full compression and partial deflection cycle after cycle. The seal must run uninterrupted around corners with welded or mitred joints to maintain performance across both opening modes.
- Sliding windows and doors: Pile/brush strip — low friction, consistent airflow resistance during lateral sash movement.
- Casement and awning windows: Compression bulb or rubber blade — leverages strong multi-point closure force for full-perimeter sealing.
- Tilt-and-turn windows: Hollow EPDM compression bulb — accommodates two distinct opening actions and varied compression depths.
- Double-hung windows: V-strip tension seal at meeting rails; pile strip in vertical sliding tracks.
Selecting the right profile for your window style is the first defence against premature failure. But even the correct strip will degrade faster than expected if your local climate actively works against the seal material — and in much of Australia, it does.
Climate and Environmental Factors That Affect Seal Performance
Australia dishes out some of the harshest conditions a sealing strip will ever face. Intense UV, wide temperature swings, coastal salt spray, and humidity that barely lets up — these forces attack different seal materials in different ways, and understanding that relationship is the difference between a strip lasting a decade and one crumbling in two summers.
UV Exposure and Heat Resistance
North-facing aluminium windows in Australian homes cop relentless solar radiation. UV photons break the molecular chains in polymer-based seals, a process called photo-oxidation that turns flexible rubber brittle and causes surface cracking. Foam strips deteriorate fastest — their open-cell structure exposes more material surface to radiation, accelerating breakdown from the outside in.
Material choice makes an enormous difference here. EPDM rubber outperforms PVC and generic rubber compounds in high-UV environments because its saturated polymer backbone contains no double bonds in the main chain for ozone or UV to attack. Standard EPDM grades operate continuously from -40°C to +120°C, and correctly specified strips achieve outdoor service lives of 20 to 30 years even under sustained sunlight. PVC seals, by contrast, plasticise and harden within a few seasons of direct exposure, losing the flexibility needed to maintain contact with the frame as it expands through the day.
For any weather strip aluminium door or window assembly facing prolonged sun, EPDM is the default specification. It costs marginally more than PVC or silicone-coated foam, but the lifespan difference justifies it several times over in avoided replacements.
Cold Climate Compression and Coastal Conditions
In alpine and southern regions where overnight temperatures drop near or below freezing, certain rubber compounds stiffen and lose their elastic recovery. A seal that compresses readily at 25°C may barely deform at -5°C, leaving micro-gaps the metal weather barrier was supposed to eliminate. Low-temperature EPDM grades maintain flexibility down to -50°C, making them the practical choice for highland areas of Victoria, Tasmania, and the NSW Tablelands.
Coastal properties face a different aggressor. Salt-laden air settles on aluminium frames and creeps into adhesive bond lines. Over repeated wet-dry cycles, chloride ions attack both the adhesive layer and the aluminium oxide film beneath it, causing adhesive-backed strips to peel away from the channel. Weather stripping aluminum door assemblies in beachside homes often fail at the adhesive interface well before the seal material itself wears out. Friction-fit or mechanically retained profiles avoid this entirely because they don’t rely on a chemical bond to the frame surface.
Humidity compounds the problem. In tropical Queensland and coastal NSW, moisture absorption causes some foam and sponge-rubber strips to swell within their channels, increasing friction on sliding sashes and distorting compression geometry on casement seals.
Aluminium conducts heat roughly 1,000 times faster than timber and around 3 times faster than steel. This high thermal conductivity means aluminium frames track ambient temperature changes almost immediately, expanding and contracting more rapidly than timber or uPVC alternatives. The seal material must accommodate that greater temperature-driven frame movement without losing contact or taking a permanent compression set.
Climate is the invisible variable that turns a well-chosen seal into a short-lived one. Knowing what your environment throws at the frame gives you the criteria to select a material that fights back — but even the best material fails if the installation itself is flawed.
Step-by-Step Installation for Aluminium Frames
A seal can only perform as well as its installation allows. Rushed prep, sloppy cuts, or a strip crammed into a dirty channel will underperform regardless of how well-suited the material is to your climate. The good news is that fitting a new aluminium window sealing strip is a straightforward job — most homeowners can handle a single window in 15 to 30 minutes once they understand the process.
Surface Preparation and Channel Cleaning
Old adhesive residue, oxidation film, and built-up grime are the three enemies of a clean bond or a proper friction fit. Skip this step and you will be repeating the job within a season.
Start by opening the window fully to expose the seal channel. Use a flathead screwdriver or plastic pry tool to pull out the old strip — work slowly to avoid gouging the channel walls. Once the old material is removed, vacuum loose debris from inside the groove.
For cleaning, reach for isopropyl alcohol (rubbing alcohol) and a lint-free cloth. Isopropyl dissolves adhesive residue and degreases the surface without attacking anodised or powder-coated finishes the way abrasive pads or acetone-based solvents would. Run the soaked cloth along the full channel length, then let it dry completely. Aluminium’s non-porous surface dries quickly — two or three minutes in warm weather is usually enough.
Avoid steel wool, sandpaper, or scouring pads. These scratch through protective coatings and expose raw aluminium to corrosion, especially in coastal areas where salt air is already working against you.
Measuring, Cutting and Fitting the Strip
Measure the full perimeter where the seal sits — all four sides of the sash or frame opening. Add roughly 10 per cent to your total length to allow for corner wastage and minor trimming errors. A flexible fabric tape measure conforms to the channel better than a rigid steel rule.
Cut the strip with sharp scissors or a fresh utility blade. Dull blades compress the rubber rather than slicing cleanly, leaving ragged ends that create gaps at joints. For corners, two approaches work depending on profile type:
- Butt joints: Cut each length square at 90 degrees and push the ends together tightly at the corner. Suited to compression bulbs where the material deforms enough to close micro-gaps.
- Mitre cuts: Angle-cut each adjoining length at 45 degrees so they marry into a neat corner. Best for rigid-backed pile strips or blade seals that won’t stretch to fill gaps.
Fit the strip so it compresses about 20 to 30 per cent of its uncompressed height when the window latches shut. Under-compression leaves gaps the seal cannot bridge. Over-compression forces the material into permanent deformation — known as compression set — where it flattens and never recovers its original shape. If you find yourself forcing the window shut or the latch feels significantly harder than before, the strip is likely oversized for the channel depth.
Securing Adhesive-Backed Versus Friction-Fit Strips
Installation technique splits into two camps depending on how the strip attaches to the aluminium frame.
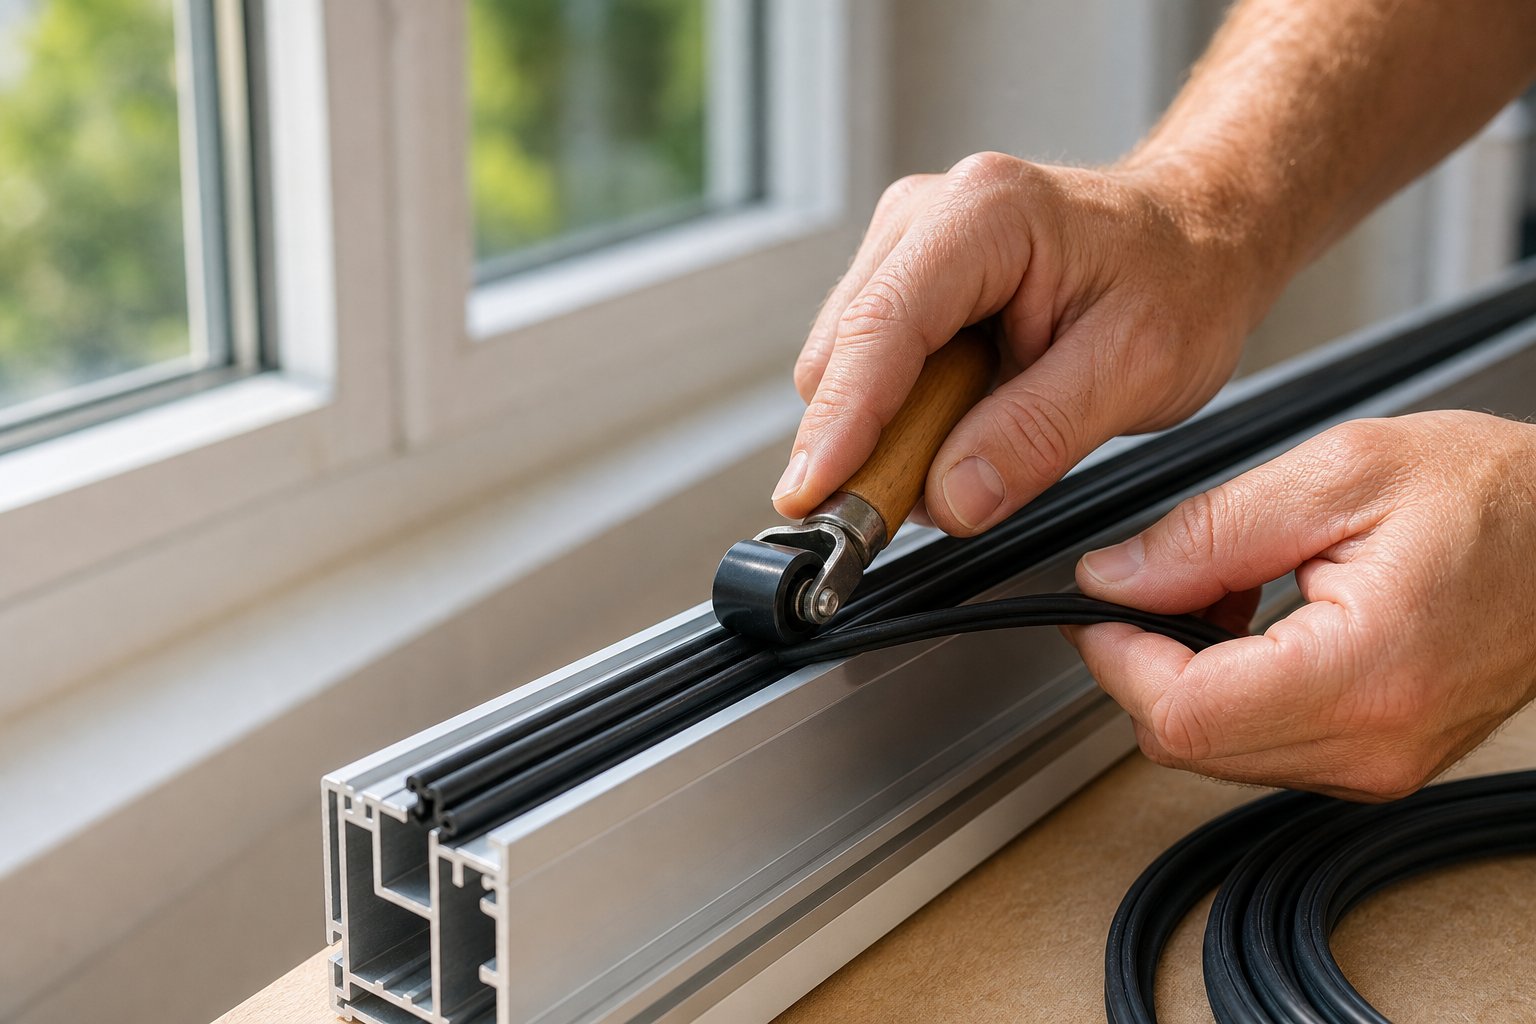
Adhesive-backed strips rely on a pressure-sensitive tape layer bonded to one face. Peel back about 100 mm of the release liner at a time — exposing the entire length at once invites the adhesive to stick to itself or to the wrong surface. Press the strip firmly into the channel starting at one end, smoothing it forward progressively. A small roller or even a wooden spoon handle provides consistent pressure. Ambient temperature matters: most adhesives require a minimum surface temperature of around 10°C to bond properly. On cold mornings, a quick pass with a hair dryer warms the aluminium enough for reliable adhesion.
Friction-fit (push-in) strips have a shaped base — typically a barbed or arrow-headed foot — that locks into the extruded groove by mechanical interference alone. No adhesive is involved, which makes these strips more reliable in coastal and high-humidity environments where adhesive bonds deteriorate. Use a roller tool or the flat of a wooden block to press the strip’s base into the groove until you feel it click past the retention lip. Work in short sections of 150 to 200 mm, checking alignment as you go. The strip should sit uniformly without bulging or twisting along its length.
- Open the window fully and remove the old sealing strip using a flathead screwdriver or plastic pry tool.
- Vacuum loose debris from the channel, then wipe the groove clean with isopropyl alcohol on a lint-free cloth.
- Allow the channel to dry completely — two to three minutes in warm conditions.
- Measure the full perimeter of the seal channel and add 10 per cent for corner cuts and trimming.
- Cut the new strip to length using sharp scissors or a fresh utility blade, angling corners at 45 degrees (mitre) or cutting square (butt joint) depending on profile type.
- For adhesive-backed strips, peel the release liner progressively and press firmly into the channel using a roller tool. For friction-fit strips, push the barbed base into the groove in short sections until it clicks past the retention lip.
- Work around all four sides, ensuring joints at corners sit tightly with no visible gap.
- Close the window and engage the latch. Check that the sash closes with moderate resistance — not too easy (under-compression) and not forced (over-compression).
- Perform the paper test: close the window on a sheet of paper at several points around the perimeter. The paper should pull free with noticeable drag. If it slips out freely, the seal is not making adequate contact at that location.
- Trim any excess material flush with the frame edge and run your finger along the full perimeter to confirm the strip is seated uniformly.
Proper installation gives the seal its best chance at a full service life. But even a perfectly fitted strip will eventually degrade — and knowing how to spot the early signs of failure before draughts and leaks return is what separates reactive homeowners from proactive ones.
Troubleshooting Failed Seals and Knowing When to Replace
Seals don’t fail overnight. They send signals — subtle at first, then impossible to ignore. A faint whistle near the frame during a westerly wind. A thin line of dust collecting along the sash edge where none existed before. Condensation forming in corners that used to stay dry. Recognising these early symptoms and tracing them to their root cause lets you act before a minor gap becomes a full-perimeter failure.
Common Failure Modes and Their Causes
Every aluminium window sealing strip eventually reaches end of life, but premature failure almost always traces to one of four mechanisms.
Compression set is the most common. When a seal stays compressed under locking pressure day after day, the polymer chains reorganise into their deformed shape and lose the elastic memory needed to spring back. Open the window after months of continuous closure and the strip stays flat — it no longer rebounds to fill the gap when the sash closes again. EPDM resists this better than PVC or silicone-coated foam, but no material is immune if the strip is oversized and permanently over-compressed.
Adhesive failure ranks second. Temperature cycling expands and contracts the aluminium frame faster than the adhesive bond can flex. Over repeated daily thermal cycles, the bond line fatigues and peels. Coastal environments accelerate this when salt deposits infiltrate the adhesive edge and weaken the chemical grip on the non-porous aluminium surface. You’ll notice the strip pulling away from the channel wall, often starting at corners where peel forces concentrate.
UV-induced cracking affects any seal material exposed to direct sunlight. Photo-oxidation hardens the surface layer first, creating fine surface cracks that propagate deeper with each expansion cycle. North-facing windows in Australian homes suffer most — the strip may look intact from a distance while the contact face is riddled with micro-fractures that leak air freely.
Incorrect profile selection is a human error rather than material degradation, but it produces identical symptoms. A pile strip fitted to a casement window cannot generate the compression needed for air sealing. A compression bulb forced into a sliding track creates friction, abrasion, and rapid wear. The strip technically “fails,” but the real failure happened at the selection stage.
Diagnosing Persistent Drafts After Installation
You fitted a new seal last month, yet draughts persist. Before blaming the strip, rule out the two other culprits that produce identical symptoms: frame misalignment and insufficient hardware force.
Start with a simple draught test. Light a stick of incense or a candle and move it slowly along the closed window perimeter. Watch the smoke trail — where it deflects sharply toward or away from the frame, air is passing through. Mark each leak point with a small piece of painter’s tape so you can correlate them afterwards.
If leaks cluster at one corner or along one edge only, the issue is likely frame misalignment rather than strip failure. Aluminium frames can shift slightly as buildings settle or fasteners loosen. A gap that’s 2 mm wider on one side than the other means the seal compresses unevenly — sealing well on one edge while leaving a clear path for air on the opposite side. Check with a feeler gauge or simply look for inconsistent daylight gaps around the sash perimeter.
If leaks appear uniformly around the entire perimeter, suspect the window hardware. Multi-point locks and espagnolette handles pull the sash against the seal at multiple positions. If those lock points aren’t drawing the sash close enough — due to worn strikers, loose keeps, or a handle that doesn’t cam to full engagement — the seal never reaches its designed compression depth. The shake test confirms this: grip the closed sash and push and pull gently. Any detectable movement means the hardware isn’t holding the sash tight against the seal. Adjusting or replacing the striker plates often resolves the draught without touching the seal itself.
Only after ruling out misalignment and hardware should you conclude the strip is at fault. Door weather stripping metal assemblies follow the same diagnostic logic — hinges sag, latches wear, and frames shift before the seal material itself gives up.
When to Replace Rather Than Repair
Minor issues sometimes respond to spot fixes. A short section of adhesive lifting can be re-bonded with a compatible contact adhesive. A compression bulb with surface dust can be cleaned and lubricated to restore flexibility. But these repairs buy time, not performance — and there are clear indicators that the strip has moved beyond patching.
- Visible cracking or splitting along the seal’s contact face — once cracks penetrate beyond the surface layer, the material cannot maintain an air barrier regardless of compression.
- Permanent compression set — the strip no longer rebounds when the window is opened. If you can press the seal flat with your finger and it stays dented for more than a few seconds, elastic recovery is gone.
- Hardening or brittleness — the material feels rigid rather than rubbery, snaps when bent sharply, or crumbles when pinched. UV damage and age-related deterioration are irreversible once the polymer has cross-linked beyond its design limits.
- Adhesive bond failure over more than 30 per cent of the strip’s length — patching short sections works, but when the majority of the bond has let go, the strip no longer seats correctly and full replacement is faster and more reliable.
- The strip is older than its rated lifespan — foam and PVC seals beyond 5 years, EPDM beyond 12 to 15 years, or any seal material that has endured prolonged UV or salt exposure beyond its design intent.
- Persistent draught or water intrusion after hardware adjustment — if the frame is aligned, the locks pull tight, and air still passes through, the seal is the confirmed failure point.
- Visible daylight through the seal line when viewed from inside with exterior light behind — a definitive sign that the strip has either shrunk, shifted out of its channel, or lost too much section height to bridge the gap.
Attempting repair on a seal showing two or more of these signs wastes time and materials. A full perimeter replacement using the correct profile and material for your window type and climate restores the assembly to its designed performance in under an hour per window — a modest investment compared to the ongoing energy loss and comfort issues of a compromised seal.
Replacement addresses the immediate problem, but it doesn’t prevent recurrence. The habits you build around inspection, cleaning, and proactive maintenance are what determine whether your next seal lasts its full rated lifespan or falls short again.
Maintenance Habits That Extend Seal Lifespan
Replacing a failed seal fixes today’s problem. Maintaining a healthy seal prevents the next one. Most homeowners never think about their window sealing strips between installation and failure — and that neglect is exactly why so many strips die years before their rated lifespan expires. A few minutes of attention at the right intervals keeps the material supple, the bond intact, and the compression geometry working as designed.
Seasonal Inspection and Cleaning Routine
Twice a year is the minimum. The ideal schedule aligns with the transitions into summer and winter — the two seasons that stress seals most through UV intensity and thermal cycling respectively. Mark your calendar for early November and early May, and your window seal strip maintenance becomes a habit rather than an afterthought.
During each inspection, open every operable window and run your fingertip along the full perimeter of the seal. You’re checking for three things: tackiness or stickiness that indicates surface degradation, hardened or brittle sections that have lost flexibility, and any spots where the strip has pulled away from the channel or compressed flat permanently. Pay extra attention to corners and the bottom rail — these collect the most moisture and debris.
Cleaning is simple but demands the right approach. Use warm water with a few drops of mild dish soap on a soft cloth. Wipe along the seal surface gently to remove accumulated dust, pollen, and grime that can abrade the contact face over time. Rinse with a clean damp cloth and let the strip air-dry before closing the window. This matters because trapping moisture against the seal-to-frame junction promotes mould growth on pile fibres and accelerates adhesive deterioration in humid climates.
What you avoid matters as much as what you use. Petroleum-based solvents, acetone, methylated spirits, and bleach all attack rubber compounds. They strip plasticisers from PVC seals and degrade EPDM surfaces, leaving the material dry and prone to cracking. Stick to isopropyl alcohol only for adhesive residue removal on the aluminium channel itself — keep it off the seal material.
Extending Strip Lifespan Through Proper Maintenance
Beyond basic cleaning, targeted maintenance actions vary by strip profile. Pile strips in sliding tracks benefit most from periodic lubrication. A light application of silicone-based spray every six months keeps the fibres flexible and reduces the friction load that gradually wears them down. Silicone won’t attract dust the way oil-based lubricants do, and it remains effective across a wide temperature range — critical for aluminium frames that cycle between hot and cold daily.
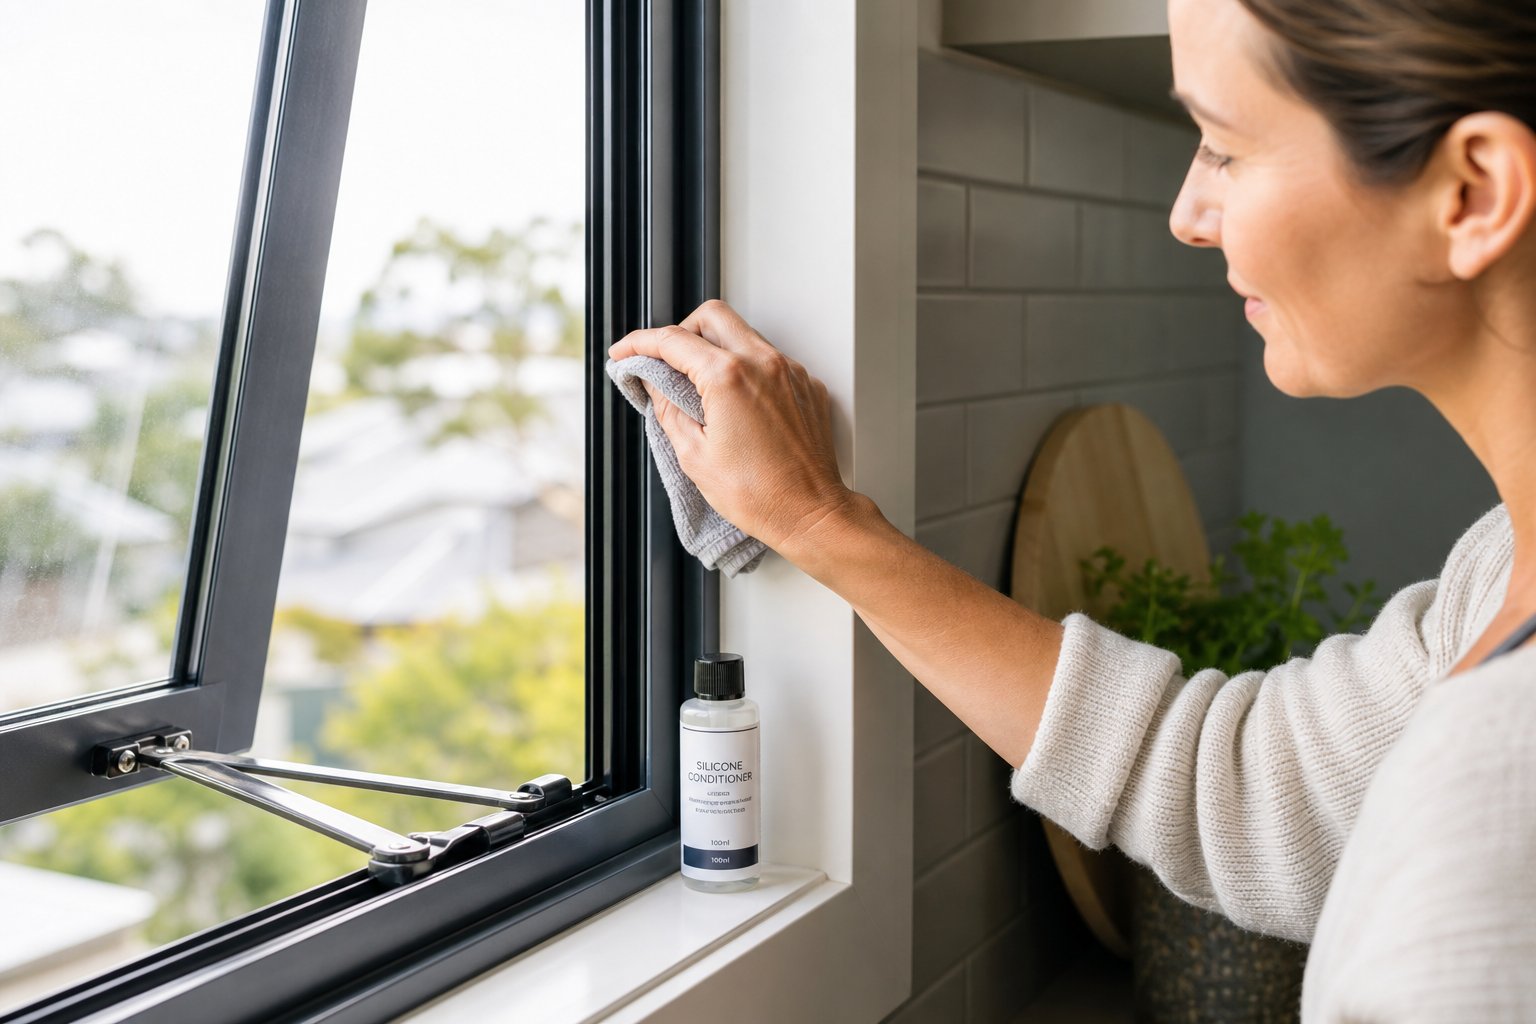
For compression bulbs and rubber blade seals, a thin coat of silicone conditioner (the same product used for automotive door seals) maintains surface suppleness and provides a mild UV barrier. Apply it with a soft cloth during your seasonal inspection, working it over the contact face. This small step slows photo-oxidation and helps the material retain its elastic recovery under repeated compression cycles.
Three common mistakes shorten seal life dramatically:
- Painting over seals — Paint bonds to the rubber surface and cracks with every compression cycle, pulling material away and creating leak paths. Mask your seals before painting aluminium frames.
- Using harsh solvents in the channel — Cleaning the aluminium groove with acetone or paint thinner damages any adhesive bond beneath the strip and can chemically attack the seal material from behind.
- Leaving windows permanently closed — Seals need periodic relief from compression. Opening windows regularly, even briefly, allows the material to recover and reduces compression set accumulation over time.
How to maintain window sealing strips depends partly on which profile you’re working with. The table below breaks down specific tasks and frequencies for each seal type, giving you a practical maintenance calendar to follow.
| Maintenance Task | Frequency | Applicable Strip Types | Notes |
|---|---|---|---|
| Visual inspection for cracking, compression set, and detachment | Seasonal (twice yearly) | All types | Check corners and bottom rails first — highest failure risk zones |
| Gentle cleaning with warm soapy water | Seasonal (twice yearly) | All types | Avoid petroleum solvents, bleach, and abrasive pads |
| Silicone spray lubrication on fibres and tracks | Every 6 months | Pile/brush strips | Use silicone-based only — oil attracts debris and clogs fibres |
| Silicone conditioner application on contact face | Seasonal (twice yearly) | Compression bulbs, rubber blades | Provides UV barrier and maintains elasticity |
| Check adhesive bond integrity along full length | Seasonal (twice yearly) | Adhesive-backed strips | Re-bond any lifting sections promptly before peel propagates |
| Open windows briefly to relieve compression | Monthly | Compression bulbs, rubber blades, V-strips | Even 30 minutes monthly reduces compression set buildup |
| Vacuum debris from sliding track grooves | Monthly | Pile/brush strips | Grit embedded in fibres acts as abrasive during sash movement |
| Full performance test (paper drag test at multiple points) | Annual | All types | Compare results year to year — declining drag signals approaching replacement |
| Assess overall condition against rated lifespan and plan aluminium window seal replacement | Annual | All types | EPDM: replace around 12–15 years; PVC/foam: 5–8 years; pile: 8–12 years |
Consistent maintenance won’t make a seal last forever, but it reliably delivers the full rated lifespan rather than a fraction of it. And when the time does come for a complete aluminium window seal replacement, you’ll make that decision from data — annual test results trending downward — rather than from a sudden draught on a cold July morning.
This maintenance-first mindset also reveals a broader truth about sealing performance: aftermarket strips, however well maintained, still operate within the constraints of a retrofit fit. The highest-performing seals are those engineered into the window system from the factory floor — and understanding why changes how you evaluate your next set of aluminium windows.

Choosing Aluminium Windows With Superior Built-In Seals
Aftermarket sealing strips are a necessary fix for ageing windows, but they operate under an inherent handicap. They’re adapting to a channel that wasn’t designed around them. The adhesive must bond to an existing surface. The compression ratio is a best guess rather than an engineered specification. Every retrofit strip is, at its core, a workaround — and workarounds have a ceiling.
Factory-fitted window seals face none of these constraints. When the seal is designed alongside the frame profile, the gasket geometry, compression depth, drainage path, and hardware pull force all work as a single coordinated system. That distinction explains why purpose-engineered aluminium window gasket seal assemblies consistently outlast and outperform aftermarket alternatives by significant margins.
Why Factory-Integrated Seals Outperform Retrofits
The performance gap comes down to three engineering advantages that no aftermarket strip can replicate.
Engineered tolerances. When a manufacturer designs the frame extrusion and the seal profile simultaneously, the channel dimensions match the gasket cross-section to a fraction of a millimetre. The result is a predetermined compression ratio — typically between 20 and 30 per cent — that delivers optimal sealing force without risking compression set. Retrofit strips must accommodate manufacturing variability across dozens of different frame profiles from different eras and brands, so they’re sized conservatively. That compromise either under-compresses (leaving gaps) or over-compresses (accelerating fatigue).
Multi-point locking alignment. Premium aluminium window systems position their lock points in direct correspondence with the seal’s compression zones. Each striker and cam is calibrated to pull the sash inward at the exact locations where the gasket needs uniform pressure. In a retrofit scenario, the existing hardware was designed for the original seal’s profile — swap in a different strip height or stiffness, and the force distribution shifts. Some zones get too much pressure while others get too little.
Purpose-designed drainage. Water will always find a way to the seal face during driving rain. Factory-engineered systems account for this by incorporating sloped internal rebates and pressure-equalised drainage slots that channel water away from the gasket before it can pool. As detailed in Cherwell Windows’ analysis of weatherproofing components, engineered drainage slopes within the frame direct water toward discreetly placed ports, while pressure-equalised barriers prevent wind-driven rain from penetrating past the primary seal line. Aftermarket installations can’t add drainage geometry that doesn’t exist in the original extrusion. The strip does its best to resist water pressure, but without an active drainage path, moisture dwells against the seal and accelerates degradation.
Advanced sealing systems in quality aluminium windows also feature dual-seal configurations — an outer weather seal and an inner air seal separated by a drained chamber. If wind-driven rain breaches the outer gasket, water collects in the intermediate space and drains harmlessly through weep slots rather than entering the building. This redundancy is impossible to achieve with a single aftermarket strip pressed into a single channel.
What to Look for in Quality Aluminium Window Systems
If you’re specifying new aluminium windows — whether for a renovation, a new build, or a full window replacement program — the best aluminium window seal system is one you never need to think about replacing. These specification points separate engineered performance from basic compliance:
- Dual-seal or triple-seal configurations — Look for systems with at least two independent seal lines (weather seal plus air seal) separated by a pressure-equalised drainage cavity. Three-seal systems add a central compression gasket for acoustic performance.
- Replaceable gasket design — Even factory fitted window seals eventually reach end of life. The best systems use friction-fit gaskets seated in standard-profile grooves, allowing full perimeter replacement without removing the window from the opening. Avoid systems where the seal is bonded permanently into the frame with no removal path.
- EPDM or TPE gasket material — Confirm the manufacturer specifies EPDM rubber or thermoplastic elastomer (TPE) for all seal components. These materials deliver the UV stability, elastic memory, and temperature range that Australian conditions demand.
- Thermal break compatibility — In thermally broken aluminium profiles, the seal must bridge the interior face without creating a thermal short-circuit across the polyamide break. Quality systems position the gasket on the warm side of the thermal break to prevent condensation forming on or near the seal surface.
- Tested to AS 2047 — Australian Standard AS 2047 sets performance requirements for windows including air infiltration, water penetration, and structural adequacy. Windows tested and certified to this standard have demonstrated their sealing performance under controlled laboratory conditions at specified pressure differentials — not just in calm weather.
Manufacturers who engineer their seal systems as integrated components rather than afterthoughts typically publish compression ratio data, gasket material specifications, and drainage design details in their technical literature. If a supplier can’t tell you what seal material their windows use or how the drainage path works, that silence tells you something about how much engineering went into the system.
For Australian homeowners and builders looking at purpose-engineered aluminium window assemblies where sealing performance is designed into the frame profile from the outset, MEICHEN’s aluminium window systems represent this integrated approach — offering window configurations where gasket geometry, hardware alignment, and drainage engineering work as a unified system across residential and commercial applications. It’s one strong example of what to look for when evaluating quality-focused manufacturers in the Australian market.
The broader lesson across this entire article is straightforward: an aluminium window sealing strip fails before it should when it’s fighting against its environment, its installation, or its own design limitations alone. Remove those conflicts — through correct profile selection, climate-appropriate materials, proper installation technique, consistent maintenance, and ultimately through windows engineered as complete sealing systems — and the strip simply does its job, quietly and reliably, for the full span of its rated life.
Aluminium Window Sealing Strip FAQs
1. How often should I replace the sealing strip on my aluminium windows?
Replacement timing depends on the strip material and your local climate. EPDM rubber seals typically last 12 to 15 years, pile brush strips around 8 to 12 years, and PVC or foam strips only 5 to 8 years. Coastal salt air, intense UV on north-facing windows, and prolonged compression without relief can shorten these figures significantly. Perform an annual paper drag test around the window perimeter — if the paper slips free without resistance at any point, the seal is no longer making adequate contact and replacement should be scheduled.
2. What is the best type of sealing strip for sliding aluminium windows?
Pile brush strips are the clear choice for sliding aluminium windows. Their fine polypropylene fibres flex flat as the sash passes, creating minimal friction during operation while springing upright to block draughts when closed. Compression bulbs and rubber blades are unsuitable for sliding tracks because they generate excessive friction and wear rapidly from abrasion. Most aluminium sliding window frames include a factory-milled groove sized for a standard pile carrier, making aftermarket replacement straightforward.
3. Why does my aluminium window seal keep peeling off?
Adhesive failure on aluminium frames is commonly caused by temperature cycling, poor surface preparation, or coastal salt infiltration. Aluminium expands and contracts more rapidly than timber or uPVC, fatiguing adhesive bonds over repeated thermal cycles. Salt deposits also weaken the chemical grip on the non-porous aluminium surface. To prevent peeling, clean channels thoroughly with isopropyl alcohol before installation, ensure a minimum surface temperature of 10 degrees Celsius during fitting, and consider switching to friction-fit strips with a barbed mechanical base that locks into the groove without relying on adhesive.
4. Can I install aluminium window sealing strips myself?
Yes, most homeowners can replace a sealing strip on a single window in 15 to 30 minutes. The process involves removing the old strip, cleaning the channel with isopropyl alcohol, measuring the perimeter, cutting the new strip to length, and pressing it into place. The key is achieving 20 to 30 per cent compression when the window latches — enough to seal gaps without permanently deforming the material. Avoid abrasive cleaning methods that damage anodised finishes, and use sharp cutting tools for clean ends at corner joints.
5. Are factory-fitted aluminium window seals better than aftermarket strips?
Factory-integrated seals consistently outperform aftermarket retrofits because they are engineered as part of a complete system. The gasket cross-section matches the channel to sub-millimetre tolerances, multi-point locking hardware aligns precisely with compression zones, and purpose-designed drainage paths prevent water pooling against the seal. Dual-seal configurations with a drained intermediate chamber provide redundancy that a single aftermarket strip cannot replicate. When specifying new windows, look for replaceable EPDM gaskets, dual-seal designs, and certification to AS 2047 for proven sealing performance.
More Window & Door Guides