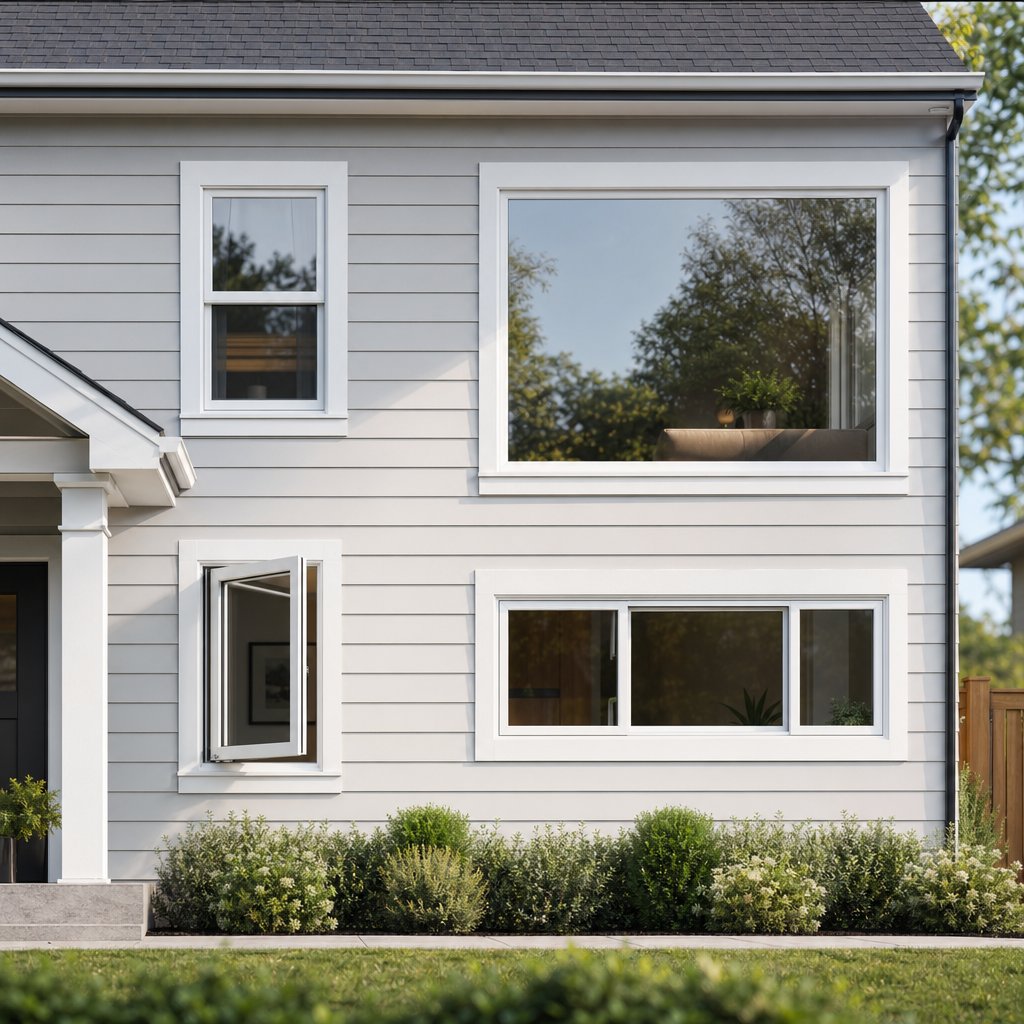
What Are Timber Reveals and Why They Matter
Every window sits inside a hole in the wall. The visible surface between the window frame and the surrounding plaster or cladding is the reveal, and in Australian residential construction, timber is the go-to material for finishing this junction. When paired with aluminium frames, timber reveals create a design combination that delivers structural performance on the outside and natural warmth on the inside.
A timber reveal is the shaped timber board that lines the internal edges of a window opening, bridging the gap between the aluminium window frame and the finished wall surface. It provides structural support for fixing the frame into the stud wall while delivering a clean, warm interior finish.
What Is a Window Reveal in Construction
In construction terms, a reveal refers to the return surface visible when you look at a window or door opening from inside the room. It has three or four faces: two vertical sides (called jambs), a horizontal top (the head), and often a horizontal bottom (the sill). The reveal exists because walls have depth. A standard timber-framed wall in Australia might be 90 mm or more thick, and the aluminium window frame rarely occupies that full depth. The reveal fills the remaining space, giving the window a finished edge and providing the fixing point that secures the aluminium frame to the stud wall.
Around 90 percent of residential window installations in Australia use some form of reveal. Whether it is a boxed configuration wrapping all four sides or a no-bottom-reveal setup for floor-to-ceiling glazing, the principle stays the same: the reveal connects the window unit to the building structure.
Why Pair Timber With Aluminium Frames
Aluminium handles the hard work. It resists corrosion, holds tight tolerances, supports large spans of glass, and shrugs off UV exposure without degrading. But aluminium feels cold to the touch and looks industrial up close. Timber solves that problem at the interior junction.
The difference between timber and aluminium window reveals comes down to what each material does best. Timber adds tactile warmth, absorbs sound, takes paint or stain beautifully, and blends with skirting boards, architraves, and other interior joinery. It also insulates better than metal, reducing the risk of condensation where the frame meets the wall. This pairing gives you weather-tough aluminium facing the elements and inviting natural timber facing the room, a combination that suits everything from coastal builds in Queensland to brick veneer homes in Melbourne’s suburbs.
The result is a window system where neither material compromises the other. Each plays to its strength, and the reveal is where they meet.
When Timber Reveals Are the Right Choice
Knowing what timber reveals do is one thing. Deciding whether they belong in your project is another. The answer depends on your build type, your budget, the look you are chasing, and how comfortable you are with a saw in hand.
New Builds Versus Renovation Projects
A new build gives you the luxury of planning reveals into the framing stage. Your carpenter sets the stud openings to accommodate both the aluminium frame and the reveal timber, so everything lines up flush once plasterboard goes on. Tolerances are tighter, scribing is minimal, and the whole process moves quickly.
Timber reveals for renovation windows demand more patience. Existing openings rarely sit perfectly square or plumb after decades of settling. You need to measure each window individually, account for uneven plaster depths, and often scribe the reveal boards to follow irregular wall surfaces. That said, renovations are where timber reveals really shine visually. They cover rough edges left by old frame removal and give a dated opening a clean, modern finish without the cost of re-plastering the entire surround.
Bay windows and projecting configurations work well with timber reveals too, though they introduce angled cuts and more complex joinery at the corners. Standard rectangular openings are the simplest starting point for anyone tackling their first reveal project.
Situations Where Alternatives May Work Better
Timber is not always the right call. Honest assessment upfront saves time and money down the track. Plaster returns suit ultra-minimal interiors where you want the wall to flow uninterrupted to the frame edge. Shadow-line trims deliver that sharp architectural groove popular in architect-designed homes. And in wet areas like bathrooms or laundries, moisture-resistant alternatives such as aluminium reveal trims or PVC boards reduce long-term maintenance risk compared to timber exposed to constant humidity.
Use this checklist to gauge whether timber reveals suit your situation:
- Your interior style leans warm, natural, or transitional rather than stark industrial
- The windows are in dry living areas (bedrooms, living rooms, studies)
- You have access to accurate frame profile dimensions before cutting
- Your budget allows for quality timber and proper finishing (paint, stain, or clear coat)
- You or your carpenter can achieve clean mitre joints and tight scribes
- The window configuration is standard rectangular, or you are comfortable with angled joinery for bays
- You prefer a finish that can be refinished in place rather than replaced entirely
If most of those points line up, timber reveals are a strong fit. If several do not, a plaster return or pre-finished aluminium trim might deliver a better result with less effort. Neither option is inherently superior. The right choice matches the project, not a trend.
For projects where timber does make sense, the next consideration is which species to use, because not all timber performs equally once it is fixed against an aluminium frame.
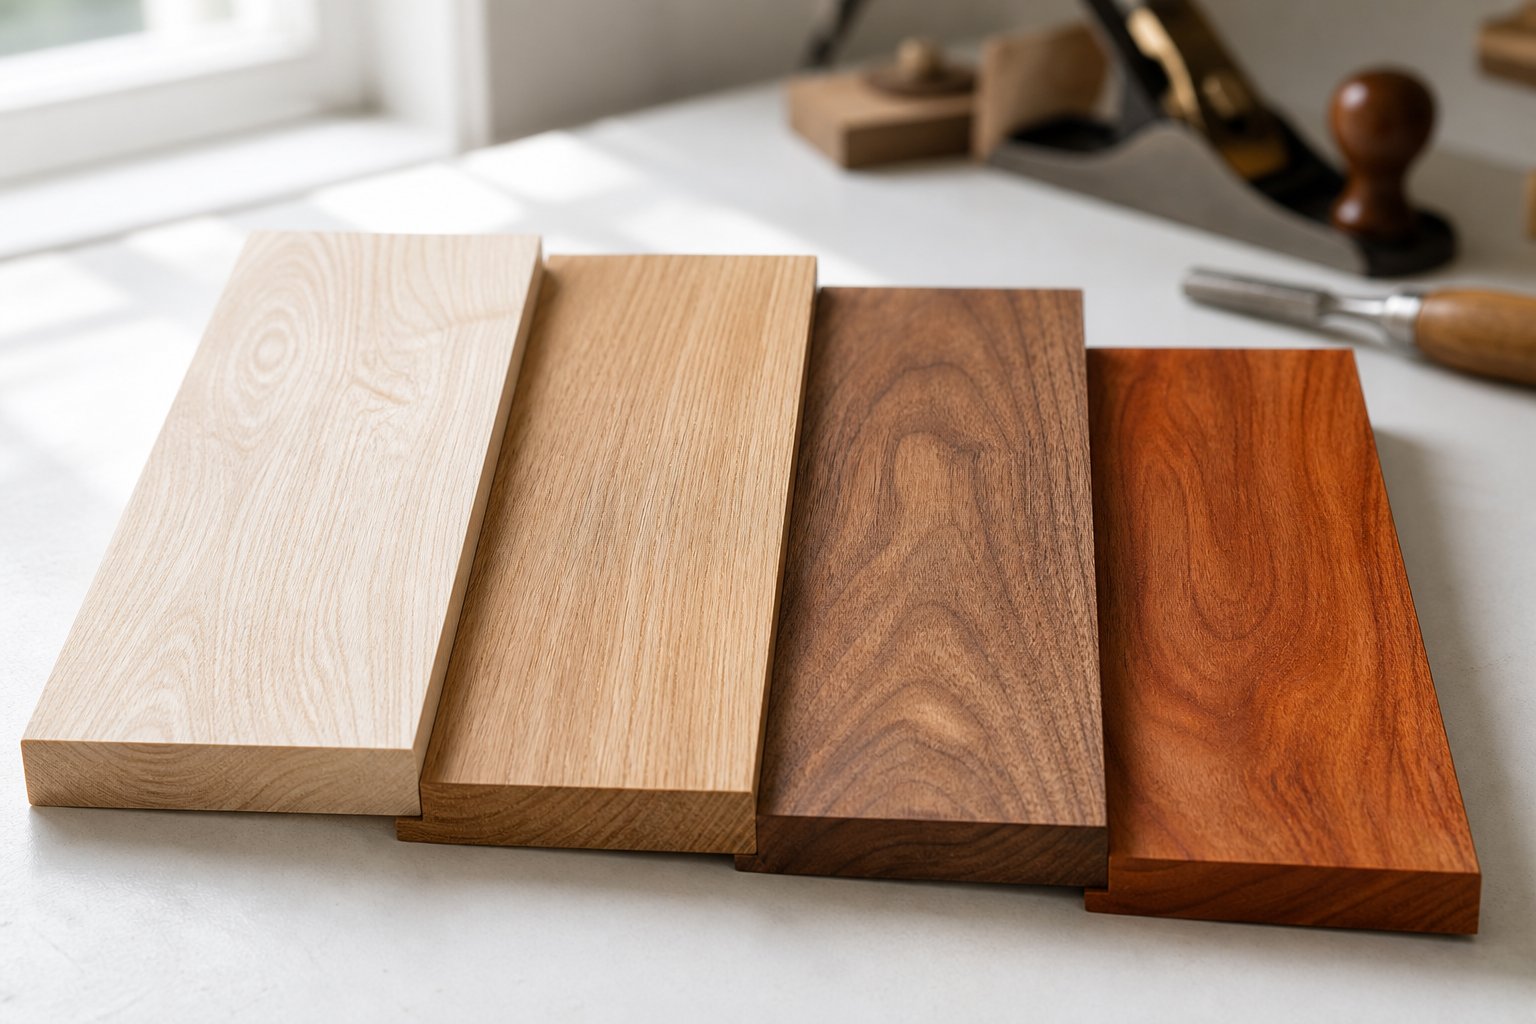
Choosing the Best Timber Species for Window Reveals
Species selection shapes everything that follows — how easily the boards machine, how well they hold a finish, and how long they last sitting against an aluminium frame. The wrong timber warps, splits at fixings, or drinks moisture through unsealed end grain. The right one stays flat, takes paint or stain cleanly, and handles the minor humidity shifts that occur at any window junction.
Australian builders typically work with four main species groups for reveals: radiata pine, western red cedar, meranti, and select hardwoods like Victorian ash or Tasmanian oak. Each sits at a different point on the cost-versus-performance spectrum, and the best choice depends on whether you are painting, staining, or clear-coating — and whether the reveal faces any moisture exposure.
Softwood Options for Budget-Friendly Projects
Radiata pine dominates the budget end of the market, and for good reason. It is locally grown, widely stocked at every timber yard in the country, easy to cut with standard tools, and holds paint exceptionally well. For interior-only reveals that will be painted white or a solid colour, pine is hard to beat on value.
Finger-jointed pine takes this a step further. The laminating process removes natural defects and creates a dimensionally stable board that resists warping — a genuine advantage for long reveal runs on wide openings. CT Joinery notes that finger-jointed pine produces rigid, durable frames that do not warp, making it a reliable choice for painted joinery applications.
The trade-off with softwood is durability. Pine has minimal natural resistance to moisture or decay, so it relies entirely on its finish coat for protection. In a dry living room or bedroom, that is perfectly fine. In a window opening that occasionally sees condensation or sits in a poorly ventilated corner, pine can swell and soften over time if the paint film breaks down. It also dents more easily than hardwood, which matters if the reveal sits at a high-traffic point like a kitchen pass-through window.
For hardwood or softwood for aluminium window reveals decisions on a tight budget, pine wins every time — provided you commit to proper priming on all faces (including end grain and the back face against the wall) before installation.
Hardwood and Engineered Timber for Premium Results
When the brief calls for a natural timber finish, or the reveal faces any risk of moisture, stepping up to a hardwood or durable softwood like cedar changes the equation entirely.
Western red cedar sits in the mid-to-premium range. Its natural oils provide genuine decay resistance without chemical treatment, and its warm reddish-amber tones look stunning under a clear coat or light stain. Cedar is lightweight, stable, and machines cleanly. It absorbs varnish and oils well, making it ideal where you want the grain visible rather than hidden under paint. The species is rated highly durable, with an air-dry density around 390 kg/m³ — light enough to handle easily but dense enough to hold fixings securely.
When comparing cedar vs pine for window reveals, the difference shows most clearly in longevity and finish options. Pine needs paint for protection; cedar can go either way. Pine costs less upfront; cedar costs less in maintenance over a decade.
Meranti occupies a similar price bracket to cedar but offers different strengths. It is denser, harder, and more resistant to mechanical damage. Meranti timber reveals deliver excellent durability in applications where the reveal might cop a knock or face occasional moisture — think kitchen windows above a sink or windows in a sunroom with limited ventilation. The grain is tighter and more uniform than cedar, taking stain evenly without blotching. Installation-wise, meranti is forgiving and straightforward to work with, accepting nails and screws without pre-drilling in most cases.
Victorian ash and Tasmanian oak (both marketed names for the same eucalyptus species group) represent the premium local hardwood option. They are dense, hard-wearing, and feature a pale, even grain that suits Scandinavian-inspired interiors. These species take clear coats beautifully and resist denting far better than softwoods. The downside is cost and workability — they are harder to machine, require sharp tooling, and can split if fixings are placed too close to edges without pilot holes.
Accoya (acetylated modified timber) deserves a mention for projects demanding maximum longevity. This engineered product carries a 50-year above-ground warranty, is dimensionally stable, and resists moisture at a level comparable to tropical hardwoods. It paints and machines like softwood but performs like the best hardwoods. The cost is premium, but for high-value homes or difficult-to-access windows where you never want to replace a reveal, it can justify the investment.
| Species | Durability Rating | Cost Tier | Workability | Moisture Resistance | Recommended Application |
|---|---|---|---|---|---|
| Radiata Pine | Low (requires coating) | Budget | Excellent — cuts, nails, and sands easily | Poor without paint | Interior painted reveals in dry areas |
| Finger-Jointed Pine | Low-Moderate (stable, requires coating) | Budget | Excellent — pre-machined, minimal waste | Poor without paint | Long runs, wide openings, painted finish |
| Western Red Cedar | High (natural oils) | Mid-Premium | Good — lightweight, machines cleanly | Good — naturally decay resistant | Stained or clear-coated reveals, visible grain |
| Meranti | Moderate-High | Mid | Good — dense but forgiving with fixings | Moderate — better than pine, below cedar | Stained reveals, areas with occasional moisture |
| Victorian Ash / Tas Oak | Moderate | Premium | Moderate — requires sharp tools, pilot holes | Moderate | Clear-coated premium interiors |
| Accoya (Modified) | Very High (Class 1) | Premium | Good — machines like softwood | Excellent — minimal movement | High-value builds, hard-to-access locations |
Timber Grading for Reveal Boards
Species alone does not guarantee a clean result. The grade of timber you select matters just as much, particularly for reveals where every face is visible at close range.
For painted reveals, a “clear” or “select” grade with minimal knots produces the smoothest finish. Knots bleed tannin through paint over time, creating yellow spots that require extra sealer coats to block. In pine, look for clear or select grade boards — these cost more per lineal metre than standard framing pine, but the difference is modest compared to the labour cost of filling and re-coating knotty boards.
For stained or clear-coated reveals, grading becomes even more critical. Any defect is permanently visible. Clear Vertical Grain (CVG) is the top appearance grade for cedar, offering tight, straight grain lines with no knots — ideal for a refined natural finish. The next step down, A & Better Clear, still suits most residential reveal work where finishing requirements are not as exacting.
In practice, most Australian timber yards stock reveal-grade pine and cedar in standard profiles ready to go. For meranti and hardwoods, you may need to order specific lengths or have boards dressed to your required width and thickness. Either way, inspect boards for straightness before purchasing — a bowed reveal board fights you at every stage of installation, and no amount of packing fully corrects a twist once it is fixed in place.
With the right species and grade selected, the next step is getting the dimensions right. Reveal boards need to match your specific wall thickness and aluminium frame profile, and the tolerances involved are tighter than most people expect.
Timber Reveal Dimensions and Tolerances for Aluminium Windows
Getting the species and grade right means nothing if the board does not fit the opening. Timber reveal dimensions for aluminium windows depend on a simple relationship: the reveal must span the distance between the aluminium frame edge and the finished internal wall surface. Get that measurement wrong by even a few millimetres and you end up with a reveal that either sits proud of the plaster or falls short, leaving an ugly gap no architrave can hide.
Recommended Dimensions by Wall Thickness
The formula is straightforward. For external cladded construction (weatherboard, fibre cement sheet, or similar), the reveal width equals the stud size plus the internal lining thickness. For a standard 90 mm stud with 10 mm plasterboard, that gives you a 100 mm reveal requirement — which rounds to the closest standard reveal size of 98 mm. A 70 mm stud with the same lining calls for an 81 mm reveal.
Brick veneer adds another variable: the cavity between the stud and the brickwork. Here, the window reveal depth for a 90 mm wall in brick veneer construction jumps to 138 mm (stud + 10 mm lining + approximately 35 mm cavity). For 70 mm or 75 mm studs in brick veneer, the standard size is 116 mm. That 138 mm figure is typically the largest standard reveal profile stocked by Australian suppliers, so anything beyond it requires custom milling.
If bracing ply sits behind the cladding, add its thickness (usually 7 mm or 9 mm) to the calculation. Miss this and the reveal comes up short.
Standard timber reveal thickness and width also varies with the aluminium frame profile type. A flush-mount frame sits level with the external wall face, giving the reveal the full wall depth to cover. An offset or recessed frame sits further inboard, reducing the reveal depth needed. Always confirm the exact frame profile depth from the manufacturer’s drawings before ordering timber — a 5 mm difference in frame setback changes your reveal width by the same amount.
| Construction Type | Stud Size (mm) | Internal Lining (mm) | Cavity (mm) | Standard Reveal Width (mm) | Recommended Clearance per Side (mm) |
|---|---|---|---|---|---|
| External Cladding | 70 | 10 | N/A | 81 | 3 – 5 |
| External Cladding | 90 | 10 | N/A | 98 | 3 – 5 |
| Brick Veneer | 70 – 75 | 10 | ~35 | 116 | 3 – 5 |
| Brick Veneer | 90 | 10 | ~35 | 138 | 3 – 5 |
| Brick Veneer | 100 | 10 | ~35 | 138 | 3 – 5 |
Note: These figures assume standard residential construction. Always verify against your actual aluminium frame profile and wall build-up before committing to a cut.
Tolerances and Expansion Gaps
Timber moves. It swells in humid weather and shrinks in dry conditions. Aluminium barely moves at all. That mismatch means you need a deliberate clearance tolerance for timber window reveals — a gap between the timber board and the aluminium frame that accommodates seasonal movement without binding or opening up visibly.
Industry guidance from warranty providers recommends a minimum 5 mm perimeter gap for aluminium frames in openings up to 3 metres wide, increasing to 7.5 mm for openings between 3 and 4.5 metres. For the timber reveal itself, a 3 to 5 mm expansion gap between the timber and aluminium frame handles normal seasonal movement in most Australian climate zones. Coastal and tropical regions with higher humidity swings may benefit from sitting at the upper end of that range.
Gaps that are too tight cause problems quickly. The timber swells into the aluminium, creating pressure that can bow the reveal board or stress the frame joints. Gaps that are too wide look unfinished and allow draughts if not properly sealed. The sweet spot is a consistent 3 to 5 mm clearance, packed with a closed-cell foam backing rod and sealed with a flexible sealant that moves with the timber rather than cracking.
A few practical rules keep tolerances in check:
- Measure each opening individually — stud walls are rarely perfectly consistent across a house
- Allow the timber to acclimatise to the room’s humidity for at least 48 hours before cutting to final size
- Seal all six faces of the reveal board (front, back, both edges, and both ends) to slow moisture uptake and reduce movement
- Use packers during installation to maintain even clearance around the frame before final fixing
- For openings wider than 3 metres, increase the expansion gap between timber and aluminium frame to at least 5 to 7.5 mm
Reveals also add to the overall window dimensions. Each reveal board adds approximately 20 mm per side, meaning a window with reveals on all four edges gains roughly 40 mm in both height and width compared to the bare aluminium frame size. Factor this into your stud opening dimensions during the framing stage, or you will be trimming reveals down on site — a fixable problem, but one that wastes time and material.
Dimensions and tolerances are the invisible foundation of a clean reveal installation. They determine whether the finished result looks tight and professional or gapped and amateur. With the numbers confirmed, the next question is how to actually get those boards cut, fitted, and fixed in place.
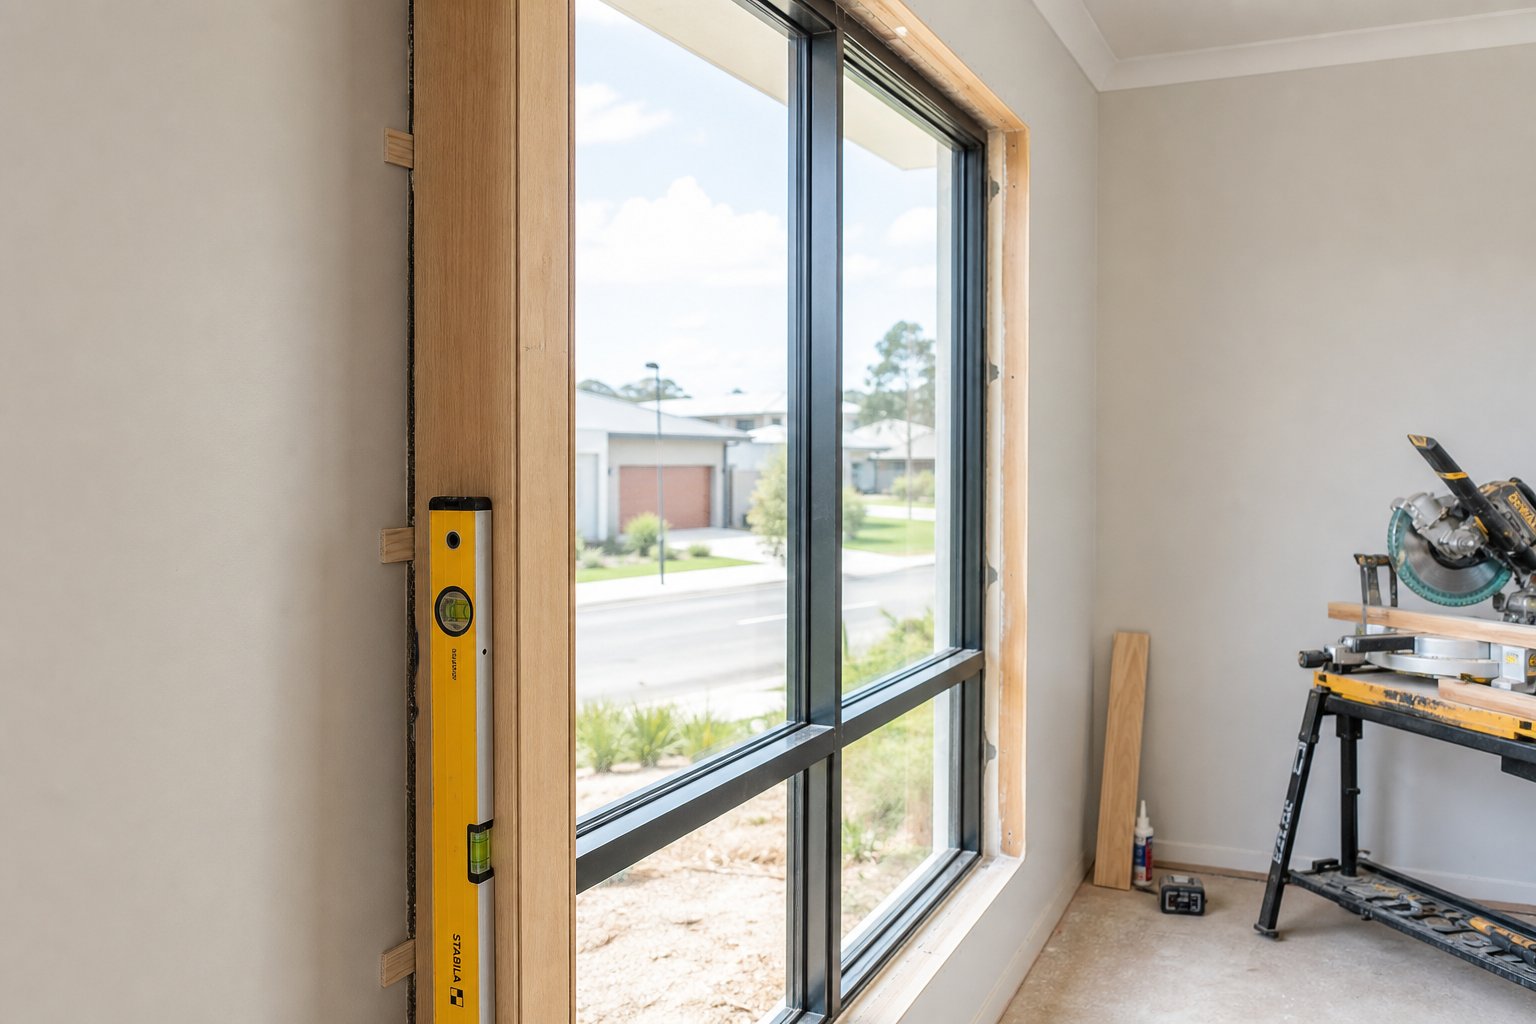
How to Install Timber Reveals on Aluminium Windows Step by Step
Accurate numbers on paper only matter if the boards end up fixed straight, flush, and tight. The timber reveal installation step by step process is methodical rather than difficult, but it punishes shortcuts. Skip the test-fit and you discover a 2 mm error after the adhesive sets. Rush the packing and the reveal drifts out of plumb over a full-height opening. Patience at each stage pays off in a result that looks like it grew there.
Tools and Materials Checklist
Gather everything before you start. Hunting for a missing item mid-install means wet adhesive curing while you drive to the hardware store. Here is what you need for fitting timber window reveals:
| Category | Items |
|---|---|
| Measuring | Tape measure, combination square, spirit level (600 mm and 1200 mm), digital angle finder for out-of-square openings |
| Cutting | Drop saw (mitre saw) with fine-tooth blade, hand plane, block plane for scribing adjustments, jigsaw for notching |
| Fixing | Construction adhesive (polyurethane-based for timber-to-frame bond), 50 mm lost-head nails or 8-gauge countersunk screws, nail punch |
| Packing and Alignment | Timber packers (assorted 3 mm to 10 mm), closed-cell foam backing rod, painter’s tape for holding position during cure |
| Finishing | Flexible acrylic sealant, 120-grit sandpaper, wood filler, primer (if not pre-primed) |
Fitting Sequence for Aluminium Frames
The process follows a logical order. Each step depends on the one before it, so resist the temptation to jump ahead.
- Confirm frame profile dimensions. Before cutting any timber, verify the exact aluminium frame depth and setback from the manufacturer’s profile drawings. This single measurement determines your reveal width. Working with a manufacturer that provides detailed engineering drawings — such as MEICHEN’s project-based supply service — simplifies this step considerably, as installers can confirm exact dimensions before committing to timber cuts.
- Measure each opening individually. Check the stud opening at three points across the width and three points down the height. Record the smallest measurement for each dimension. Note any out-of-square conditions with your angle finder.
- Cut the head piece first. The head reveal runs the full width of the opening. Cut it to length, allowing for your planned clearance gap (3 to 5 mm) at each end against the aluminium frame.
- Cut the two jamb pieces. These run from the underside of the head reveal down to the sill. Measure the exact distance and subtract your clearance gaps.
- Cut the sill piece last. The sill sits between the two jambs in a boxed configuration. Its length equals the distance between the inner faces of the jamb boards.
- Test-fit all pieces dry. Hold or temporarily tape each board in position. Check that clearance gaps are consistent, the head is level, and both jambs are plumb. This is where you catch errors without consequence.
- Pack for plumb and level. Insert timber packers between the reveal boards and the studs at fixing points (typically 450 mm centres). Adjust until the spirit level reads true on every face. The RMIT BuildRight guide confirms that packing the opening ready for the frame, then fixing through the reveals into the studs, is the standard method for aluminium window installations.
- Scribe to uneven walls. If the plaster or stud face is irregular, hold the reveal board in its packed position and run a pencil compass along the wall surface to transfer the profile onto the timber. Plane or sand to the scribed line for a gap-free fit.
- Fix the reveals. Apply a bead of polyurethane construction adhesive to the back of each board, then nail or screw through the reveal into the studs at each packer location. Punch nail heads below the surface for filling later. For a purely adhesive fix (no visible fixings), use painter’s tape and temporary bracing to hold boards in position during the 24-hour cure.
- Seal the junction. Press closed-cell backing rod into the gap between the timber reveal and the aluminium frame, then run a bead of flexible sealant over it. Tool the sealant smooth with a wetted finger or caulking tool. This joint must remain flexible to accommodate timber movement.
DIY Versus Professional Installation
Fixing timber reveals to aluminium frames as a DIY project is realistic for anyone comfortable with a mitre saw and a spirit level — provided the openings are standard rectangles and the window count is manageable. A single window in a study or bedroom makes a good first project. Five or six windows across a living area, especially with varying sizes, starts to demand the speed and consistency a professional joiner brings.
Consider calling in a tradesperson when:
- You have more than four or five windows to reveal in one go
- Openings are significantly out of square (more than 5 mm deviation across the frame)
- The project involves bay windows, corner windows, or angled configurations
- You want a stained or clear-coated finish where every joint must be flawless
- Access is difficult — high windows, stairwell openings, or second-storey voids
Regardless of who does the work, one principle holds: accurate aluminium frame profile dimensions from the window manufacturer are essential before cutting reveal timber. A supplier that coordinates engineering details and provides full profile drawings as part of their services and project support removes the guesswork that causes costly re-cuts on site.
With the reveals fixed and sealed, the next decision shapes how the finished result actually looks — and that comes down to what you put on the timber’s surface.
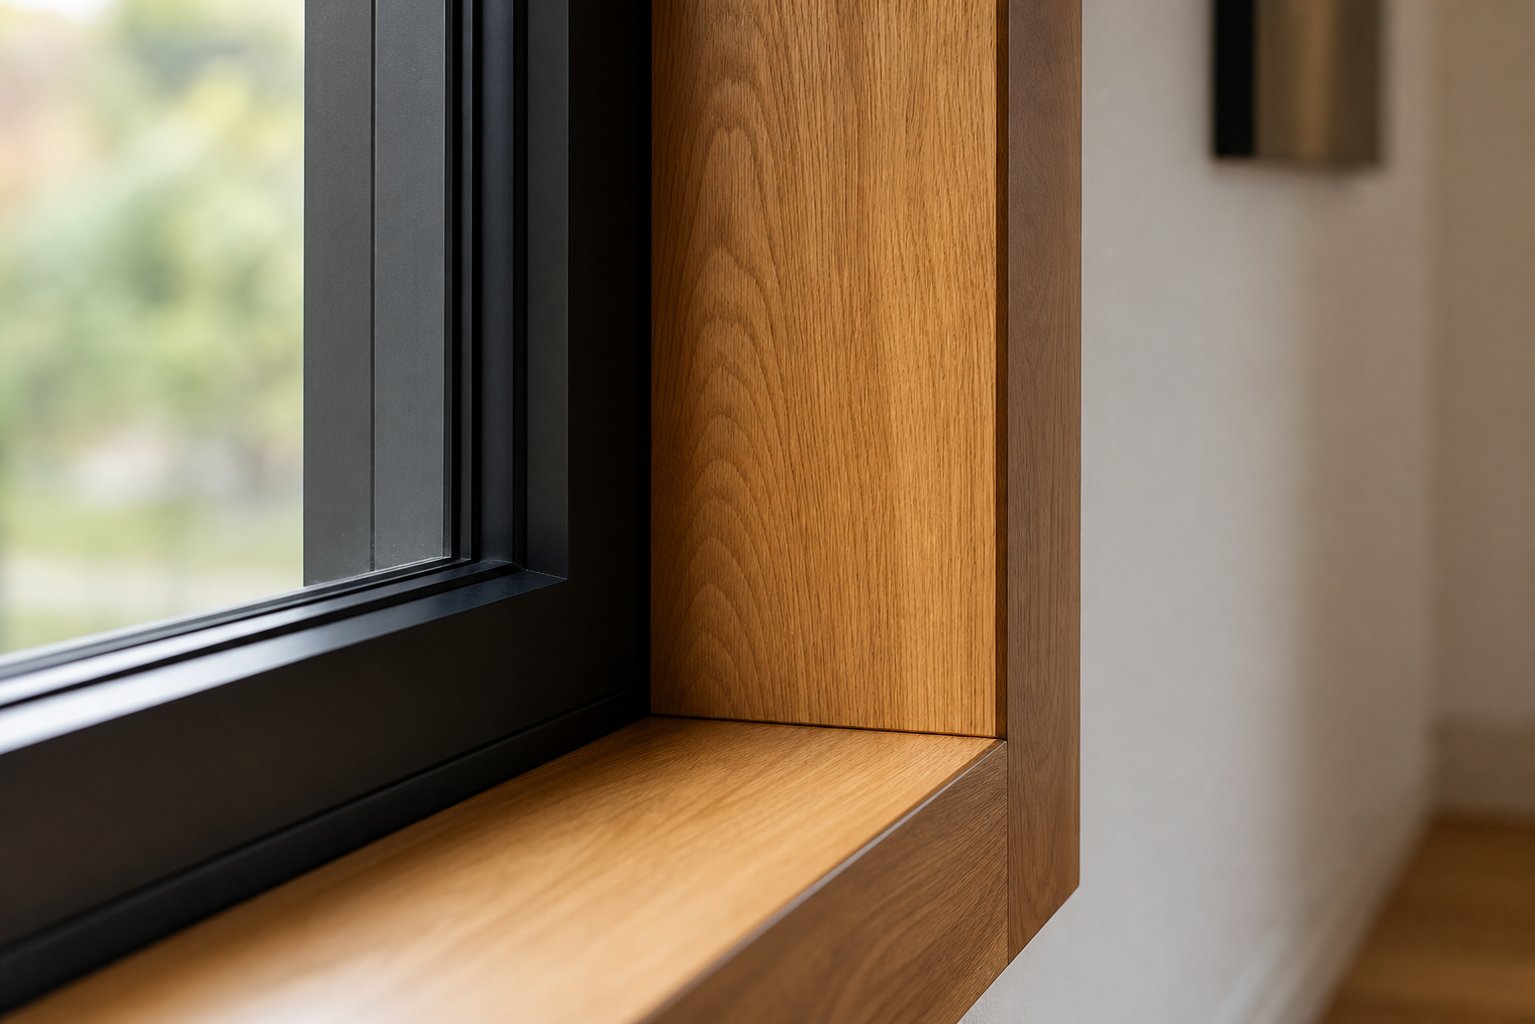
Best Finish for Timber Window Reveals
The surface treatment you choose does more than protect the timber. It defines the visual relationship between the reveal and the aluminium frame sitting beside it. A painted reveal disappears into the wall. A stained reveal draws the eye. An oiled reveal invites touch. Each option interacts differently with the aluminium colour next to it, and getting that pairing right is what separates a considered interior from one that feels slightly off.
Whether you paint or stain timber reveals on aluminium windows depends on three things: the timber species you selected, the look you want to achieve, and how much maintenance you are willing to commit to over time.
Paint Finishes for a Clean Uniform Look
Paint is the most common finish for timber reveals in Australian homes, and it suits budget-friendly species like radiata pine and finger-jointed pine perfectly. A solid paint film hides grain, knots, and filler — which is exactly what you want when the timber is a structural element rather than a feature.
The system matters more than the topcoat colour. A proper paint finish on a reveal board follows this sequence:
- Sand all faces to 120 grit for a consistent key. Pay extra attention to any machining marks on the face that will be visible.
- Prime all six faces — front, back, both edges, and both cut ends. End grain absorbs moisture fastest, so it needs two coats of primer to seal properly. Skipping the back face is a common shortcut that leads to cupping as moisture enters unevenly.
- Fill any nail holes or imperfections with a quality wood filler after the first primer coat has dried. Sand flush once cured.
- Apply two topcoats of acrylic enamel in satin or semi-gloss. These sheens clean easily and resist scuffing better than flat finishes in high-traffic areas near windows.
- Caulk the junction between the reveal and the wall with a paintable flexible acrylic sealant. Run a final bead where the reveal meets the plasterboard, then paint over it for a seamless line.
Pre-primed reveal boards save a step on site. Many Australian timber suppliers stock pine reveals with a factory-applied primer coat, meaning you only need to seal the cut ends and apply topcoats after installation. This speeds up the process considerably on multi-window projects.
Painted reveals work with every aluminium frame colour because you control the match precisely. White reveals against white frames create a seamless, recessive look. White reveals against black or charcoal frames produce a crisp contrast that highlights the window as a design element. You can even colour-match the reveal paint to the aluminium powdercoat for a fully integrated appearance — most paint suppliers can scan a sample of the aluminium colour and mix an acrylic enamel to match.
Stain and Clear Coat for Natural Timber Character
Stain and clear coat finishes let the timber do the talking. They suit species with attractive grain patterns — western red cedar, meranti, Victorian ash, and Tasmanian oak all respond well to transparent finishes that enhance rather than hide the wood’s natural character.
A timber stain penetrates the wood and changes its colour while leaving the grain visible. It offers some protection but is not a standalone finish for reveals. After staining, a clear coat (polyurethane or water-based acrylic varnish) goes over the top to seal the surface and provide moisture resistance. This two-step approach gives you colour control plus a durable protective layer.
Species selection matters here more than with paint. Pine takes stain unevenly because its soft earlywood absorbs more than the denser latewood, creating a blotchy appearance. Cedar and meranti absorb stain consistently thanks to their more uniform density, producing an even tone across the board. Victorian ash takes clear coat beautifully with minimal stain — its pale, fine grain looks refined under a satin polyurethane without any added colour.
For clear coat for timber reveals moisture protection, water-based polyurethane is the go-to choice for interior applications. It dries clear without yellowing (unlike oil-based poly, which ambers over time), resists household humidity, and cleans up with water. Apply three coats minimum, sanding lightly with 220 grit between each coat. The result is a smooth, sealed surface that repels moisture at the timber-aluminium junction where condensation occasionally forms.
Oil finishes represent a third path. Penetrating timber oils soak into the wood rather than forming a film on top, which means they never peel or flake. They bring out grain depth and create a tactile, natural feel. The trade-off is durability — traditional wood oils are not as hard-wearing as varnish and require more frequent reapplication, typically every 12 to 18 months on interior reveals that see regular sun exposure. They suit low-traffic windows in living areas where the natural look matters more than maximum longevity between maintenance cycles.
How to Match Timber Reveals to Aluminium Frame Colours
This is where most projects either come together or fall slightly flat. The aluminium frame colour is fixed — you chose it during the window specification stage and it is not changing. The reveal finish needs to complement that choice, whether through harmony or deliberate contrast.
Black aluminium frames (the most popular choice in contemporary Australian homes) pair naturally with light-toned timber. The contrast between dark metal and warm wood creates visual depth without competing elements. A clear-coated Tasmanian oak or lightly stained cedar reveal against a matt black frame reads as intentional and refined. Painting the reveal white against black frames works too, but you lose the warmth that timber brings — at that point, a plaster return achieves the same effect for less cost.
White aluminium frames suit bolder timber tones. A walnut-stained meranti or a dark-oiled cedar reveal pops against a white frame, drawing attention to the window surround as a feature. This pairing works particularly well in coastal homes where the white frame reflects the exterior light and the timber grounds the interior.
Grey and bronze aluminium frames sit in the middle ground. They pair well with mid-toned timbers — natural cedar without heavy stain, or Victorian ash with a honey-toned oil. Avoid matching grey frames with grey-stained timber, as the two similar tones flatten each other and the reveal loses definition against the frame.
Use this guide to match finish types with species and frame colours:
- White paint on pine — pairs with any aluminium colour; best with black or charcoal frames for clean contrast, or white frames for a seamless look
- Clear coat on Tasmanian oak — pairs with black or dark grey frames; the pale timber and dark metal create a Scandinavian-modern aesthetic
- Warm stain on western red cedar — pairs with black, bronze, or monument grey frames; the amber-red timber tones complement warm metallics
- Dark stain on meranti — pairs with white or silver frames; creates a bold feature reveal that anchors the window
- Natural oil on Victorian ash — pairs with black or charcoal frames; delivers a soft, tactile contrast without heavy colour
- Colour-matched paint (any species) — pairs with the same aluminium colour for a fully integrated, minimal appearance where the reveal blends into the frame
Whatever finish you choose, one rule applies universally: the junction between the timber reveal and the aluminium frame must be sealed with a flexible sealant, not a rigid filler. Paint, stain, and clear coat all stop at that junction line. The sealant bead handles the movement. Trying to bridge the gap with a rigid finish leads to cracking within the first seasonal cycle.
Finish selection also determines how the reveal performs over time in different climates — and Australian conditions vary dramatically from tropical humidity in the north to dry cold in the southern highlands. That climate factor shapes both how often you maintain the finish and how aggressively moisture attacks the timber beneath it.
Climate Considerations and Weatherproofing
Australia does not have one climate. It has dozens. A timber reveal in a Darwin apartment faces relentless humidity and monsoon moisture. The same board in a Hobart townhouse deals with cold mornings, condensation, and limited winter sun. And a coastal home on the NSW South Coast cops salt-laden air that corrodes metal and degrades unprotected timber in equal measure. The finish you applied in the previous step only works as well as your understanding of what it is defending against.
Timber reveals in humid coastal climates face a compounding challenge: the timber wants to absorb moisture from the air while the aluminium frame beside it remains dimensionally inert. That mismatch drives most of the problems people encounter with reveal installations over time — not because the materials are wrong, but because the climate was not factored into the detailing.
Humidity and Moisture Management
Timber is hygroscopic. It absorbs water vapour from the surrounding air and releases it as conditions dry out. This is actually a benefit in moderate climates — engineered timber research confirms that timber’s ability to absorb and release moisture helps regulate indoor humidity, contributing to healthier indoor environments. The problem starts when absorption outpaces release.
In high-humidity regions (tropical Queensland, coastal Northern Territory, and parts of northern NSW), indoor relative humidity can sit above 70 percent for months at a time. At these levels, unsealed timber reveals absorb moisture continuously, swelling across the grain. A reveal board that was cut to a precise 98 mm width in winter can push past 100 mm by mid-summer in a poorly ventilated room. That 2 mm expansion presses the timber into the aluminium frame, creating pressure that bows the board or forces the sealant joint open.
Mitigation strategies work in layers:
- Species selection — Cedar and Accoya move less than pine in response to humidity changes. Their cellular structure and natural oils (or acetylation treatment) limit moisture uptake at the fibre level.
- Sealing all faces — The single most effective step. Coating every surface slows moisture absorption dramatically, even if the finish is just a basic primer on the hidden back face.
- Ventilation — Rooms with poor airflow trap humid air against the reveal surface. Mechanical ventilation or simply opening windows during dry periods helps equalise moisture levels and lets the timber breathe back out.
- Acclimatisation — Storing reveal timber in the room where it will be installed for at least 48 to 72 hours before cutting allows the boards to reach equilibrium with local humidity. Cutting and fixing a board straight from the timber yard — where it may have been stored at a different moisture content — invites movement after installation.
The condensation risk at the timber-aluminium window junction deserves specific attention. Aluminium conducts heat roughly 1,000 times more readily than softwood timber. Thermal conductivity data shows aluminium sitting around 160 to 200 W/m·K compared to timber’s 0.10 to 0.15 W/m·K. In practice, this means the aluminium frame cools faster than the timber reveal on cold nights. Moisture in the indoor air condenses preferentially on the coldest surface — which is the aluminium frame edge and, critically, the junction where timber meets metal.
Thermally broken aluminium frames reduce this effect significantly by interrupting the thermal bridge within the frame itself. But even with a thermal break, the exposed inner edge of the aluminium can still run cooler than the adjacent timber on winter mornings in southern states. That thin line of condensation, repeated daily over months, wicks into any unsealed end grain on the reveal board. Over years, it softens pine and can discolour even hardwood if left unchecked.
The fix is straightforward: seal the end grain where the reveal meets the frame with two coats of primer or end-grain sealer before installation, and maintain the flexible sealant bead at the junction so condensation runs down the frame to the sill rather than sitting against raw timber.
UV Exposure and Sun-Facing Windows
In the Southern Hemisphere, north-facing windows receive the most intense and sustained UV exposure. A reveal board on a north-facing living room window in Brisbane or Perth can see direct sunlight for six or more hours daily through summer. That UV energy degrades timber finishes faster than any other single factor.
The damage mechanism is well documented. UV rays interact with the wood surface, breaking down lignin — the natural polymer that gives timber its colour and structural cohesion. Unprotected timber greys, cracks, and loses surface integrity within months of sustained exposure. Even under a clear coat, UV penetrates transparent finishes and attacks the wood beneath, eventually causing the coating to peel as the substrate degrades.
For reveals on sun-facing windows, your finish options narrow:
- Pigmented finishes (paint or heavily pigmented stain) block UV most effectively. The pigment particles physically prevent UV from reaching the timber surface. White and light colours reflect more solar energy; dark colours absorb heat but still block UV penetration into the wood.
- UV-inhibitor clear coats extend the life of transparent finishes but do not eliminate degradation entirely. They buy time — perhaps doubling the interval between recoats — but eventually the inhibitors break down and the timber beneath starts to suffer.
- Penetrating oils with UV filters offer moderate protection and are easy to reapply, but they require the most frequent maintenance cycle of any finish on a sun-exposed reveal (every 12 to 18 months).
The differential temperature behaviour at the junction adds another layer. Aluminium’s low thermal mass means it heats up and cools down rapidly with direct sun exposure. On a hot afternoon, the aluminium frame edge facing the room can be noticeably warmer than the timber reveal beside it. This temperature differential stresses the sealant joint between the two materials, which is why flexible sealants (silicone or polyurethane) outperform rigid fillers at this junction — they stretch and compress with the daily thermal cycle without cracking.
West-facing windows deserve equal caution. They catch low-angle afternoon sun that penetrates deeper into the room and hits the reveal at a sharper angle, concentrating UV on a smaller area of the board. East-facing reveals get morning sun but at lower intensity and for shorter duration, making them less demanding on finishes. South-facing reveals in Australia receive minimal direct UV and are the least maintenance-intensive orientation.
Seal all six faces of every reveal board — front, back, both edges, and both cut ends — regardless of climate zone, orientation, or species. Uneven moisture uptake through unsealed faces is the primary cause of cupping, warping, and premature finish failure in timber reveals.
This principle applies whether you are building in tropical Cairns or temperate Adelaide. The climate determines how aggressively moisture and UV attack the timber, but the defence strategy stays the same: seal completely, maintain the finish before it fails, and respect the expansion gap that lets timber and aluminium coexist without fighting each other.
Climate dictates the pace of deterioration, but it does not make timber reveals impractical in any Australian region. It simply changes the maintenance rhythm — and knowing what that rhythm looks like before you commit helps set realistic expectations for the years ahead.
How Long Do Timber Reveals Last Around Aluminium Windows
A well-installed and properly finished timber reveal should last the life of the building. That is not marketing optimism — it is what happens when the right species meets the right finish and gets checked on a predictable schedule. The aluminium frame beside it will not rot, peel, or warp, so the reveal is the element that needs your attention. Fortunately, maintaining timber window reveals is neither expensive nor time-consuming. It just requires consistency.
Most failures trace back to neglect rather than material deficiency. A painted pine reveal in a dry bedroom can go a decade without needing more than a wipe-down. The same board on a sun-drenched north-facing window with a cracked sealant joint might show moisture damage within three years. The difference is not the timber — it is whether someone noticed the early warning signs and spent twenty minutes with a brush and a tube of sealant.
Routine Inspection and Care Schedule
Set aside one walk-around per year — ideally at the start of autumn before winter rains arrive in southern states, or before the wet season in tropical regions. You are looking for five things:
- Finish integrity — Run your eye along each reveal face. Look for chalking (a powdery residue on painted surfaces), flaking, bubbling, or areas where the sheen has dulled noticeably compared to surrounding sections. These indicate the protective film is breaking down.
- Sealant condition at the timber-aluminium junction — Press the sealant bead gently with a fingertip. It should feel flexible and bonded to both surfaces. Cracking, pulling away from the aluminium, or hardening means moisture can wick behind the reveal board.
- Signs of moisture ingress — Dark staining along the bottom edge of a reveal, soft spots when pressed firmly, or a musty smell near the window all suggest water is getting in. Check the sill area first — gravity sends moisture there.
- Timber movement — Gaps opening between the reveal and the wall, or between mitre joints at corners, indicate the timber has shrunk. Minor seasonal gaps (under 1 mm) are normal and close again as humidity rises. Persistent gaps wider than 1.5 mm warrant re-caulking.
- Fixing integrity — Nail pops or visible screw heads that have lifted suggest the board is pulling away from the studs. This usually means moisture has caused swelling and contraction cycles that work fixings loose over time.
Between annual inspections, a quick visual check every few months catches problems early. Parsons Joinery recommends opening all windows periodically and checking that everything moves freely — a good habit that also lets you glance at the reveal condition while you are there. Dealing with peeling paint, heavy staining, or swelling timber early prevents the kind of damage that requires full board replacement later.
Timber Reveal Refinishing Schedule
Different finishes wear at different rates, and the refinishing approach varies for each. The good news is that reveals can almost always be refinished in place — you do not need to remove the board from the wall. A light sand, a fresh coat, and a new sealant bead at the junction is typically all it takes.
For painted reveals, the process is straightforward: lightly sand the existing surface to create a key (180 to 220 grit), spot-prime any bare patches or filled areas, then apply one or two fresh topcoats. If the existing paint is sound and just looking tired, a single topcoat over a scuff-sanded surface refreshes the appearance without building up excessive film thickness.
Stained and clear-coated reveals require slightly more effort. The old clear coat needs to be sanded back enough to accept a new layer without peeling — usually a thorough sand with 180 grit across the entire face. If the stain beneath has faded unevenly (common on sun-exposed reveals), you may need to sand deeper and re-stain before applying fresh clear coat.
Oiled reveals are the simplest to refinish but need it most often. Wipe the surface clean, let it dry, and apply a fresh coat of the same oil with a lint-free cloth. No sanding required unless the surface has become rough or grey.
| Finish Type | Typical Lifespan Before Refinishing | Signs It Needs Attention | Refinishing Difficulty |
|---|---|---|---|
| Acrylic paint (interior) | 7 – 10 years | Chalking, yellowing, hairline cracks, loss of sheen | Easy — sand, spot-prime, topcoat |
| Pigmented stain + clear coat | 5 – 7 years | Fading colour, peeling clear coat edges, dull patches | Moderate — sand back, re-stain if needed, recoat |
| Clear coat only (polyurethane) | 4 – 6 years | Milky appearance, peeling at edges, timber greying beneath | Moderate — full sand-back of affected areas, recoat |
| Penetrating oil | 12 – 18 months | Dry feel, loss of depth, timber looking flat or grey | Easy — clean and re-oil, no sanding |
These intervals assume typical interior conditions. Sun-facing reveals on north or west orientations may need attention at the shorter end of each range. Reveals in shaded, well-ventilated rooms often exceed the upper end comfortably.
Coastal properties shorten every timeline. Salt air accelerates finish breakdown even on interior surfaces if windows are opened regularly. If you live within a few kilometres of the coast, shift each interval down by roughly 20 to 30 percent and inspect sealant joints twice yearly rather than once.
Signs Timber Window Reveals Need Replacing
Refinishing fixes surface problems. It cannot fix structural ones. Knowing when a reveal has moved beyond maintenance into replacement territory saves you from repeatedly patching a board that is already compromised.
Replace rather than refinish when you find:
- Softness or sponginess — Press firmly with a fingertip. Healthy timber resists moderate finger pressure. If you can press a shallow indentation into the surface, rot has penetrated beyond the finish layer and the board’s structural integrity is gone.
- Persistent warping or cupping — A reveal that has bowed away from the wall or cupped across its face will not flatten with refinishing. The internal moisture gradient has permanently deformed the fibres.
- Recurring paint failure in the same spot — If the same section of a reveal keeps peeling or bubbling despite proper preparation and recoating, moisture is entering from behind or through a failed sealant joint that cannot be accessed without removing the board.
- Visible mould growth on the back face — If you can see or smell mould at the edges of the reveal, the concealed face is likely worse. This indicates sustained moisture trapping between the timber and the wall framing.
- Splitting or cracking through the board thickness — Surface checks are cosmetic and fillable. A crack that runs through the full thickness of the reveal compromises its ability to hold fixings and creates a direct moisture path to the back face.
Replacement is straightforward in most cases. A single reveal board can be carefully levered off, the opening checked for any moisture damage to the studs behind, and a new board cut and fitted using the same process as the original installation. The aluminium frame itself is unaffected — one of the advantages of this two-material system is that each component can be serviced independently.
Realistic expectations help here. Painted pine reveals in dry interior rooms routinely last 15 to 20 years before needing replacement — and often longer if maintained on schedule. Cedar and Accoya reveals in the same conditions can exceed 25 years without structural issues. Even in demanding coastal or tropical environments, a well-maintained hardwood reveal should deliver a solid decade before replacement enters the conversation.
Maintenance keeps the timber performing. But the real key to longevity starts earlier — in the planning stage, where material choices, timeline coordination, and supplier communication set the project up for a result that holds together year after year.
Planning Your Timber Reveal Project
Good reveals start long before anyone picks up a saw. The difference between a smooth install and a frustrating one usually comes down to sequencing — ordering the right materials at the right time, confirming dimensions before committing to cuts, and building in enough lead time for timber to acclimatise. Knowing how to plan timber reveals for an aluminium window project means thinking backwards from installation day and lining up every dependency in advance.
Sequencing Your Project Timeline
The critical rule: never order reveal timber until you have confirmed final frame dimensions from your aluminium window supplier. Frame profiles vary between manufacturers and even between product lines within the same brand. A 3 mm difference in frame depth changes your reveal width, and cutting boards to an assumed dimension invites waste.
Coordinating timber reveals with the window delivery timeline follows a logical sequence. Once the aluminium frames are manufactured and delivery is scheduled, you have the confirmed profile drawings needed to calculate exact reveal widths. Order your timber at that point — not before. This gives you time to have boards dressed to the correct dimensions, inspect them for straightness, and begin pre-finishing while the windows are in transit.
Pre-finishing is the step most people skip and later regret. Priming or sealing all six faces of each reveal board is far easier on sawhorses in the garage than balanced on a ladder against a wall. Ordering timber reveals before aluminium window installation allows you to complete this preparation work without holding up the build schedule. Aim to have boards fully primed (or stained and sealed, if that is your chosen finish) at least 48 hours before installation day, giving coatings time to cure fully.
Acclimatisation matters too. Store the finished boards inside the room where they will be installed for a minimum of 48 to 72 hours. This lets the timber reach moisture equilibrium with the indoor environment, reducing post-installation movement that opens gaps or stresses sealant joints.
Working With Your Window Supplier
Your aluminium window manufacturer holds information that directly affects reveal success: exact frame profile depths, installation method recommendations, and flashing details that determine how much of the wall depth the reveal needs to cover. Getting this data early — ideally during the quoting stage — prevents assumptions that lead to re-cuts on site.
Manufacturers that support the full project lifecycle make this coordination straightforward. MEICHEN’s project-based supply approach, for example, covers system recommendation, engineering coordination, material calculation, and delivery logistics as part of their service. For builders and contractors planning reveal work, this means exact frame dimensions and installation details are available upfront — not chased down after the windows arrive on a truck. That level of coordination removes the guesswork that causes delays and material waste.
Use this project checklist for timber window reveals to track key milestones from measurement through to final inspection:
- Confirm wall construction type and stud dimensions for each opening
- Request detailed frame profile drawings from the aluminium window manufacturer
- Calculate reveal widths based on confirmed frame depth and wall build-up
- Select timber species and grade appropriate to your finish and climate
- Order reveal timber once frame dimensions are locked in — allow for 10% waste on cuts
- Pre-finish all boards (prime, stain, or seal all six faces) before installation day
- Acclimatise finished boards in the installation room for 48 to 72 hours minimum
- Confirm window delivery date and schedule reveal installation for the day after frames are fixed
- Install reveals with correct packing, clearances, and flexible sealant at all junctions
- Apply final topcoats and touch up any transport marks after fixing
- Inspect sealant joints, finish integrity, and alignment before signing off
The entire process, from initial measurement to final inspection, typically spans two to four weeks for a standard residential project — assuming the aluminium windows have a four-to-six-week manufacturing lead time. Factoring reveal preparation into that window means both elements arrive at the installation stage ready to go, with no idle trades waiting on materials.
Timber reveals for aluminium windows reward careful planning with a result that looks effortless. The warmth of natural timber against the precision of aluminium framing creates an interior finish that ages gracefully, maintains easily, and suits Australian homes from the tropics to the southern coast. Get the sequence right, choose your materials with intention, and the reveals will do their job quietly for decades.
Frequently Asked Questions About Timber Reveals for Aluminium Windows
1. What is a timber reveal on a window?
A timber reveal is the shaped board that lines the internal edges of a window opening, bridging the gap between the aluminium frame and the finished wall surface. It covers the jambs (vertical sides), head (top), and often the sill (bottom) of the opening. The reveal serves a dual purpose: it provides a fixing point that secures the aluminium frame into the stud wall, and it delivers a clean, warm interior finish. In Australian residential construction, timber reveals are the most common method for finishing this junction, with around 90 percent of window installations using some form of reveal system.
2. What size timber reveal do I need for aluminium windows?
Reveal width depends on your wall construction. For external cladding with a 90 mm stud and 10 mm plasterboard, the standard reveal width is 98 mm. For a 70 mm stud with the same lining, it is 81 mm. Brick veneer construction adds the cavity width, pushing a 90 mm stud to a 138 mm reveal. Always confirm the exact aluminium frame profile depth from the manufacturer before ordering, as frame setback directly affects the reveal dimension. Working with a supplier like MEICHEN that provides detailed engineering drawings through their project-based supply service at meichenwindows.com.au/services/ ensures you have accurate profile data before committing to cuts.
3. Can I install timber reveals on aluminium windows myself?
DIY installation is realistic for anyone comfortable with a mitre saw and spirit level, provided the openings are standard rectangles. A single window makes a good first project. The process involves measuring each opening, cutting boards with 3 to 5 mm clearance gaps, packing for plumb and level, fixing with adhesive and mechanical fasteners, then sealing the timber-to-aluminium junction with flexible sealant. Consider hiring a professional for projects with more than four windows, significantly out-of-square openings, bay or corner configurations, or when a flawless stained finish is required.
4. How long do timber reveals last around aluminium windows?
Longevity depends on species, finish, and maintenance consistency. Painted pine reveals in dry interior rooms routinely last 15 to 20 years before needing replacement. Cedar and Accoya reveals in similar conditions can exceed 25 years without structural issues. Even in demanding coastal or tropical environments, well-maintained hardwood reveals deliver a solid decade. The key factors are sealing all six faces of the board, maintaining the flexible sealant at the aluminium junction, and refinishing before the protective coating breaks down. Annual inspections catch early warning signs before they become costly problems.
5. What is the best timber species for window reveals in Australia?
The best species depends on your finish preference and budget. Radiata pine is ideal for painted reveals in dry areas — it is affordable, widely available, and holds paint well. Western red cedar suits stained or clear-coated reveals where you want visible grain, offering natural decay resistance and dimensional stability. Meranti works well for areas with occasional moisture exposure, such as kitchen windows, thanks to its density and even stain absorption. Victorian ash delivers a premium clear-coated finish for contemporary interiors. For maximum longevity in difficult locations, Accoya modified timber carries a 50-year warranty and resists moisture like tropical hardwood while machining like softwood.
More Window & Door Guides