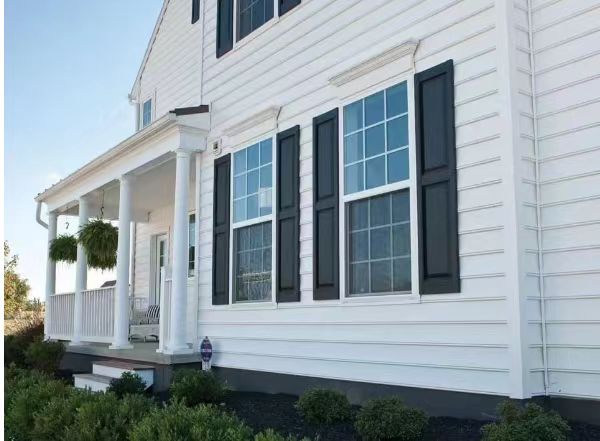
What Window Dimensions Mean and Why They Matter
Window dimensions are the standardized width-by-height measurements used to specify the size of residential and commercial window units. Whether you are planning a new build, a renovation, or a straightforward replacement, these numbers drive every decision from framing to final installation. Get them wrong, and you are looking at ordering errors, code violations, and returns that can cost thousands.
The tricky part is that a single window actually has three distinct measurement layers: the nominal notation (the shorthand code you see on spec sheets), the actual unit size (the manufactured frame dimensions), and the rough opening size (the framed hole in your wall). This article breaks down all three so you can read any spec sheet, order confidently, and avoid the mistakes that derail projects.
What Window Dimensions Actually Refer To
When you see a set of window dimensions, the width is always listed first, followed by the height. A label reading “36 x 48” means 36 inches wide and 48 inches tall. Sounds simple enough, but here is where confusion creeps in: those numbers might describe the glass area, the frame exterior, or the rough opening depending on who provided them. A double hung window labeled at one size by the manufacturer may require a noticeably different rough opening, and a casement window of the same nominal size could have different frame proportions altogether. Confusing these references is the single most common source of ordering mistakes across standard window sizes.
Why Getting Dimensions Right Saves Time and Money
A mismatch of even half an inch can mean shimming, reframing, or shipping a unit back at your expense. Ill-fitting windows also invite drafts, water leaks, and long-term structural issues. Standard sizes exist precisely to simplify manufacturing, shorten lead times, and keep costs well below custom orders. When you know the regular window size options available for your project, you can match your openings to stock units and skip the premium pricing. Even the largest window in a product line follows a predictable sizing logic once you understand the system.
Window dimensions are always listed width x height. Mixing up the order is the single most frequent measurement mistake homeowners make.
With that foundation in place, the real question becomes: how do you actually read the sizing codes printed on supplier catalogs and building plans?
How the Four-Digit Window Notation System Works
Flip through any supplier catalog, building plan, or spec sheet and you will run into codes like 2030, 2846, or 4052. These four-digit numbers are not random part numbers. They are a compact shorthand the window industry uses to communicate width and height in a single string. Once you know how to crack the code, you can decode the window dimensions for sliding windows, bathroom windows, bay windows, or a transom window without second-guessing yourself.
Breaking Down the Four-Digit Code
The system splits the four digits into two pairs. The first two digits represent the width in feet and inches. The last two digits represent the height in feet and inches. Within each pair, the first digit is feet and the second digit is inches (counted in increments, where each digit represents that many inches beyond the whole foot).
Imagine you are looking at the code 2846. Here is how to read it:
- The first pair, 28, means 2 feet 8 inches wide (32 inches total).
- The second pair, 46, means 4 feet 6 inches tall (54 inches total).
So a 2846 window is 32 inches wide by 54 inches tall. That is one of the most common double hung window sizes you will find in residential catalogs.
A few more worked examples make the pattern stick:
- 2030 — 2 feet 0 inches wide by 3 feet 0 inches tall (24 in. x 36 in.). A compact unit often used in bathrooms or utility spaces.
- 2436 — 2 feet 4 inches wide by 3 feet 6 inches tall (28 in. x 42 in.). A mid-range size popular in hallways and smaller bedrooms.
- 3040 — 3 feet 0 inches wide by 4 feet 0 inches tall (36 in. x 48 in.). A versatile size that works in kitchens, bedrooms, and living areas.
- 4052 — 4 feet 0 inches wide by 5 feet 2 inches tall (48 in. x 62 in.). A larger unit suited to living rooms or anywhere you want generous natural light.
One important detail: these nominal sizes do not represent the exact manufactured dimensions. The actual window unit is typically about half an inch smaller in both width and height to allow clearance for shimming and levelling during installation. A 3040 will not measure precisely 36 by 48 inches out of the box. The notation tells you the intended opening range, not the tape-measure size of the frame.
Where You Will Encounter This Notation
You will see four-digit codes on manufacturer spec sheets, supplier order forms, architectural blueprints, and even permit documents. It is the shared language between builders, architects, and window companies. That said, not every brand applies the system identically. Some manufacturers use the code to reference the rough opening rather than the unit size, while others point to the actual frame measurement. A small difference in interpretation can mean ordering a unit that is an inch too wide or too narrow, so always confirm with the specific manufacturer’s size chart before placing an order.
A practical tip: before you start shopping, list every notation code relevant to your project alongside the decoded measurements. This simple reference sheet saves time when comparing double hung window sizes, casement options, or any other style across multiple suppliers. The table below covers six of the most commonly encountered codes to get you started.
| Notation Code | Width (in.) | Height (in.) | Width (mm)* | Height (mm)* |
|---|---|---|---|---|
| 2030 | 24 | 36 | 610 | 914 |
| 2436 | 28 | 42 | 711 | 1067 |
| 2846 | 32 | 54 | 813 | 1372 |
| 3040 | 36 | 48 | 914 | 1219 |
| 3446 | 40 | 54 | 1016 | 1372 |
| 4052 | 48 | 62 | 1219 | 1575 |
*Metric equivalents are approximate conversions. Readers working with Australian or international standards should verify against local supplier specifications, as metric sizing conventions may differ from these rounded figures.
Knowing how to read the code is only half the puzzle. Each of these nominal numbers maps to three distinct physical measurements — the rough opening, the unit frame, and the visible glass — and mixing them up is where costly ordering mistakes happen.
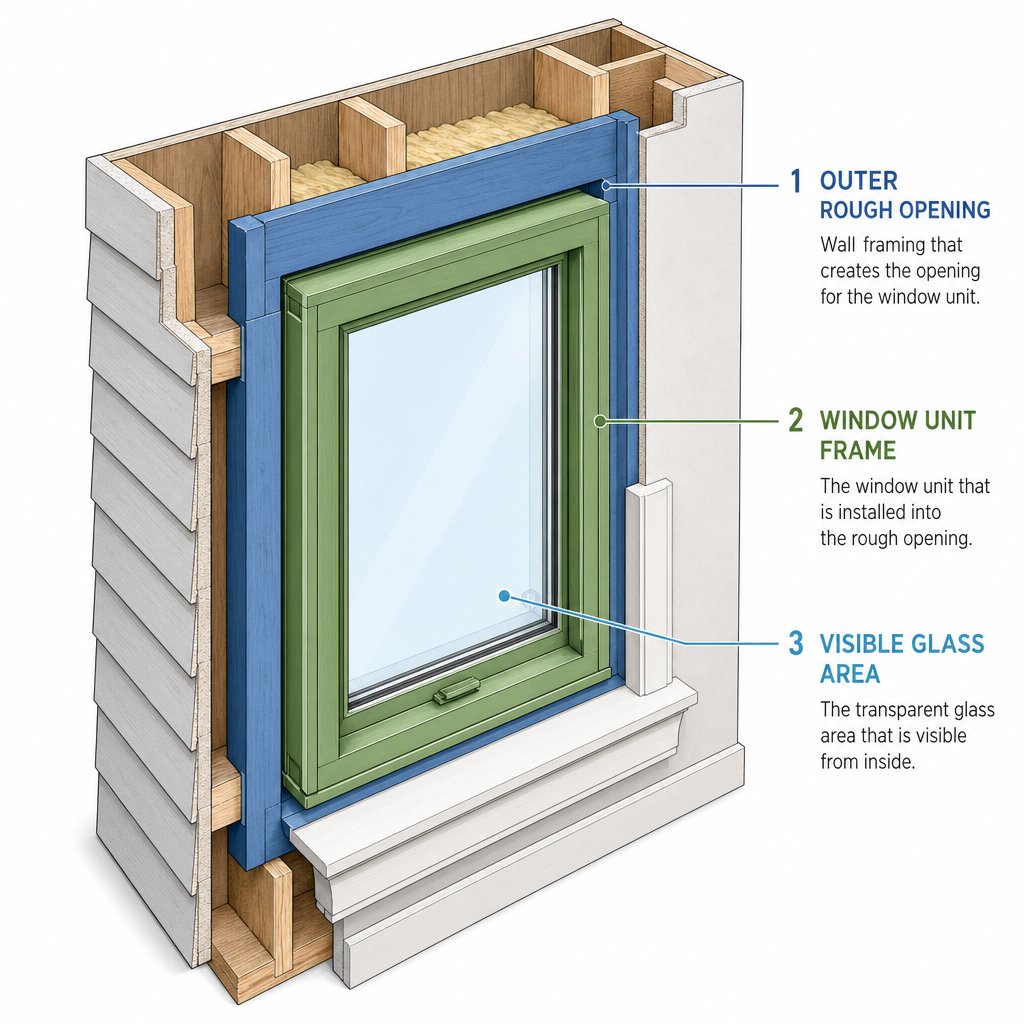
Rough Opening vs Unit Size vs Glass Size Explained
Every window you order, install, or replace has three separate sets of numbers attached to it. They look similar on paper, but they describe very different things. Confusing one for another is how projects end up with units that are too tight to fit or too loose to seal, and it happens more often than you might expect. The Window and Door Manufacturers Association reports that measurement errors account for 78% of window installation problems and warranty claims. Most of those errors trace back to this exact mix-up.
Three Measurements Every Window Has
Think of it as three layers, each one nested inside the last:
- Rough opening (RO) — the framed hole in your wall. This is the structural opening built by the framing crew, and it is intentionally larger than the window itself. Industry practice calls for the rough opening to be roughly 1/4 inch to 1/2 inch wider and taller than the window unit on each side. That gap provides room for shimming, levelling, insulation, and minor adjustments during installation.
- Unit size (actual window size) — the exterior measurement of the manufactured window frame. This is what the factory ships. It includes the full frame and sash assembly but not the shims, foam, or trim that surround it once installed. Window thickness also factors in here, since the frame depth must match or be adapted to your wall depth for a flush fit.
- Glass size (daylight opening) — the visible glazed area you actually see and look through. The frame, sash rails, and muntins all eat into the overall unit footprint, so the glass dimension is always noticeably smaller than the unit size.
Here is how those three layers compare for a common 3040 window (one of the most popular standard window dimensions on the market):
| Measurement Type | Width (in.) | Height (in.) | What It Describes |
|---|---|---|---|
| Rough Opening | 36 1/2 | 48 1/2 | Framed hole in the wall |
| Unit Size | 35 1/2 | 47 1/2 | Manufactured frame exterior |
| Glass Size (Daylight) | 32 3/4 | 40 1/4 | Visible glazed area |
Notice the spread. The rough opening is a full inch wider and taller than the unit, and the glass area is several inches smaller in each direction. When you are comparing window sizes across suppliers, knowing which number you are looking at changes everything.
Why Confusing These Measurements Causes Problems
Imagine you measure your rough opening at 36 1/2 by 48 1/2 inches and order a window using those exact numbers as the unit size. The factory builds a frame to 36 1/2 inches wide, but your opening is also 36 1/2 inches wide, leaving zero clearance. The unit physically will not slide into the opening without forcing it, risking damage to the frame and the surrounding wall structure.
Flip the mistake and the consequences are just as frustrating. If you provide the unit size when the supplier expects the rough opening dimension, you receive a window that is too small. Gaps around the frame mean excessive shimming, weak structural support, and compromised seals. Research suggests that ill-fitted windows can contribute to 25-30% of residential air leakage, potentially adding hundreds of dollars annually to energy bills.
The practical fallout goes beyond energy loss. Reframing an opening that is the wrong size can cost several hundred dollars in labor and materials. Return shipping on a mis-ordered unit adds more. And if you are working with windows 6 windows deep into a whole-house order, one repeated measurement mistake multiplies across every unit on the truck. Always confirm which measurement your supplier is referencing, rough opening or unit size, before you finalize any order.
How Tolerances Affect Fit
Even when you order the right size, manufactured windows carry small dimensional tolerances, slight variances from the stated measurements that are considered acceptable by the factory. A unit listed at 35 1/2 inches wide might arrive at 35 7/16 or 35 9/16 inches. These fractions matter when your rough opening is already tight.
This is exactly why rough openings are built with that extra clearance buffer. The gap absorbs tolerance variations and gives the installer room to shim the window plumb and level. For a small bathroom window or a large picture unit alike, the principle is the same: the opening must account for real-world manufacturing variance, not just the number on the spec sheet.
Rather than relying on a generic “add half an inch” rule, check the manufacturer’s installation guide for their specified rough opening requirements for each model. Different window styles, frame materials, and even window thickness profiles can shift the recommended clearance. That one extra step eliminates the guesswork and keeps your project on track.
With the relationship between these three measurements clear, the next question is practical: what are the actual standard dimensions available for each window type, and which sizes fit which applications?
Standard Dimensions for Every Window Type
Knowing the difference between a rough opening and a unit size keeps you from ordering the wrong number. But which numbers should you actually be ordering? That depends entirely on the type of window. Each style has its own range of standard sizes shaped by how the window operates, where it is typically installed, and what structural limits the design imposes. Below is a window size chart covering every major residential type, so you can match the right dimensions to the right application without flipping between five different catalogs.
Double Hung and Single Hung Window Dimensions
These are the workhorses of residential construction. Both styles feature vertically sliding sashes — a double hung window allows both sashes to move, while a single hung only lets the bottom sash slide up. Because they are the most widely installed type in North American homes, manufacturers offer them in the broadest variety of standard sizes. Widths typically range from 24 to 48 inches, and heights span 36 to 72 inches. That spread covers everything from a narrow hallway unit to a tall bedroom window, making it easy to find a normal window size for almost any room. The average window height for a double hung in most homes falls between 48 and 60 inches, which aligns well with standard wall framing and sill heights.
Casement and Sliding Window Dimensions
Casement windows hinge on one side and crank outward, which gives them excellent ventilation but limits how wide a single panel can practically be. Standard casement widths run from about 16 to 48 inches, with heights reaching up to 72 or even 84 inches. The taller, narrower proportions make them a popular choice for kitchens and bedrooms where you want airflow without sacrificing wall space.
Sliding windows flip that ratio. They glide horizontally on a track, so they handle wider openings with ease. Standard widths range from 36 to 84 inches, while heights typically sit between 24 and 60 inches. If you need a wide view in a living room or basement, a slider in the upper end of that range can be the biggest window option available without going custom.
Picture, Bay, Bow, Awning, and Transom Window Dimensions
Picture windows are fixed panes designed purely for light and views. Without any operating hardware, they can be manufactured in sizes that other styles cannot match. Standard picture widths range from about 24 to 96 inches, and heights from 24 to 96 inches, making them the go-to for a statement feature wall or a generous living room focal point.
Bay and bow windows are composite units. A bay typically combines a large center pane with two angled side windows, while a bow uses four or more equally sized panels in a gentle curve. Overall widths range from roughly 36 to 120 inches, with heights between 36 and 72 inches. Beyond width and height, bay units also have a projection depth — usually 12 to 24 inches — that extends outward from the wall plane.
Awning windows hinge at the top and swing outward from the bottom, allowing ventilation even during light rain. Their standard window size range mirrors casement windows closely: 16 to 48 inches wide and 24 to 84 inches tall. You will often see them stacked below or above other window types for added airflow.
Transom windows sit above doors or other windows as decorative or light-boosting accents. They are characteristically short and wide, with standard widths from 24 to 48 inches and heights typically between 12 and 24 inches. Because they are non-operable in most cases, sizing is flexible within that compact range.
The table below pulls all of these ranges into a single reference. Bookmark it, print it, or save it to your phone — it is the one resource you will keep coming back to as you plan your project.
| Window Type | Min Width (in.) | Max Width (in.) | Min Height (in.) | Max Height (in.) | Notes |
|---|---|---|---|---|---|
| Double Hung | 24 | 48 | 36 | 72 | Widest variety of standard sizes; suits most rooms |
| Single Hung | 24 | 48 | 36 | 72 | Same size range as double hung; lower cost option |
| Casement | 16 | 48 | 24 | 84 | Taller and narrower; ideal for kitchens and bedrooms |
| Sliding | 36 | 84 | 24 | 60 | Best for wide openings; wider than tall |
| Picture | 24 | 96 | 24 | 96 | Fixed pane; largest standard sizes available |
| Bay | 36 | 120 | 36 | 72 | Composite unit; adds 12-24 in. projection from wall |
| Bow | 48 | 120 | 36 | 72 | Curved composite; typically four or more panels |
| Awning | 16 | 48 | 24 | 84 | Top-hinged; ventilates in rain; often paired with other types |
| Transom | 24 | 48 | 12 | 24 | Short and wide; decorative accent above doors or windows |
Keep in mind that these ranges represent the most commonly stocked standard sizes across major manufacturers. Some brands extend slightly beyond these figures, and a normal window size in one product line may not exist in another. Always cross-reference with your chosen supplier’s catalog before finalizing your order.
Dimensions alone do not tell the whole story, though. The right size for a bedroom differs from the right size for a basement or a kitchen — not just because of aesthetics, but because building codes and practical constraints vary from room to room.

Room-by-Room Window Dimension Guide
A 36-by-48-inch double hung is a perfectly good window, but put it in a bathroom and you have a privacy problem. Put it in a basement bedroom and it might not meet egress code. The common window sizes that work beautifully in one room can be completely wrong for another, and the reasons go beyond personal taste. Building codes, counter heights, moisture exposure, and emergency escape requirements all shape which dimensions belong where.
Bedroom and Bathroom Window Dimensions
Bedroom windows carry a non-negotiable constraint: egress. The International Residential Code requires sleeping rooms to have at least one window large enough to serve as an emergency escape route. That means a minimum net clear opening of 5.7 square feet, a minimum clear width of 20 inches, and a minimum clear height of 24 inches (more on the specifics in the code section below). In practice, most builders use double hung or casement units in the range of 24 to 36 inches wide and 48 to 60 inches tall to comfortably clear those thresholds. The standard window height for a typical bedroom falls around 48 to 54 inches, which satisfies egress while keeping the sill at a comfortable level above the floor.
Bathrooms flip the priority. Privacy and moisture control matter more than maximizing light, so windows here tend to be smaller and placed higher on the wall. Common bathroom sizes run 24 to 36 inches wide by 36 to 48 inches tall. A small bathroom window is often a standard awning or casement unit, since hinged windows can stay cracked open for ventilation during rain without letting water in. Frosted or obscure glass adds privacy without sacrificing daylight.
Kitchen and Living Room Window Dimensions
Kitchen windows are almost always installed above the countertop and sink, which fixes the sill height at roughly 36 to 42 inches from the floor. That constraint limits how tall the window can be before it runs into upper cabinets or the soffit. The result is a standard window width of 24 to 36 inches and a height of 24 to 36 inches for most kitchen installations. Casement and awning styles are popular here because a crank handle is easier to reach over a deep countertop than a sliding sash.
Living rooms are where you can go big. This is the natural home for picture windows, wide sliders, or even bay and bow configurations. Standard living room units commonly range from 48 to 96 inches wide and 48 to 72 inches tall. The height of standard window units in this space tends to sit at the upper end of available ranges because taller openings flood the room with light and create a stronger visual connection to the outdoors.
Basement and Utility Room Window Dimensions
Basement windows serve a primarily functional role: basic light and ventilation. In older homes, you will often find small sliders or awning units measuring 30 to 36 inches wide by 12 to 24 inches tall. However, if the basement contains a bedroom, egress requirements apply in full, and those compact sizes will not pass inspection. Egress-compliant basement windows typically need to be at least 32 to 36 inches wide and 48 inches tall, often paired with a window well to meet the maximum sill-height rule.
Utility rooms and garages are the least demanding spaces. A fixed or awning-style window in the 24-by-24-inch to 36-by-24-inch range provides enough light for a laundry area or workshop without creating a security concern. These are among the most common window sizes stocked by suppliers, so availability is rarely an issue.
Here is a quick-reference summary pairing each room with its typical standard dimensions:
- Bedroom: 24-36 in. wide x 48-60 in. tall (double hung or casement; must meet egress)
- Bathroom: 24-36 in. wide x 36-48 in. tall (awning, casement, or double hung; privacy glass recommended)
- Kitchen: 24-36 in. wide x 24-36 in. tall (casement or awning above countertop)
- Living Room: 48-96 in. wide x 48-72 in. tall (picture, sliding, bay, or bow)
- Basement (non-egress): 30-36 in. wide x 12-24 in. tall (slider or awning)
- Basement (egress bedroom): 32-36 in. wide x 48+ in. tall (casement or slider with window well)
- Utility/Garage: 24-36 in. wide x 24 in. tall (fixed or awning)
Picking the right size for each room gets you most of the way there, but size alone does not guarantee code compliance. Egress minimums, accessibility rules, and energy glazing limits all impose hard constraints on which window dimensions you can legally install, and those requirements deserve a closer look.
Building Code Requirements That Affect Window Dimensions
You can pick the perfect window size for every room in the house, but if that size does not satisfy your local building code, the inspector will send you back to the drawing board. Code requirements set hard floors and ceilings on window dimensions — minimums you must meet for safety, and maximums you may need to respect for energy performance. Overlooking either one leads to failed inspections, costly replacements, and project delays that no amount of careful measuring can fix after the fact.
Egress Window Dimension Requirements
The International Residential Code (IRC), specifically Section R310, requires every sleeping room and habitable basement space to have at least one emergency escape and rescue opening. In most cases, that means a window. The code does not tell you which window style to use, but it does define the minimum window size that qualifies as a safe exit. Four numbers matter:
| Requirement | Minimum / Limit | IRC Reference | What It Means in Practice |
|---|---|---|---|
| Net Clear Opening Area | 5.7 sq. ft. (5.0 sq. ft. at grade level) | R310.2.1 | The actual unobstructed space when the window is fully open — not the frame size or the pane of glass, but the hole a person can physically pass through. |
| Minimum Net Clear Width | 20 inches | R310.2.1 | The opening cannot be too narrow for an adult’s shoulders, regardless of total area. |
| Minimum Net Clear Height | 24 inches | R310.2.1 | The opening cannot be too short to crawl through, even if the width compensates on area. |
| Maximum Sill Height | 44 inches above finished floor | R310.2.2 | The bottom of the opening must be reachable without a step stool — critical for children and elderly occupants. |
All four criteria must be satisfied simultaneously. A window that clears the area requirement but falls short on width, or meets every dimensional threshold but sits 46 inches off the floor, will fail inspection just the same. And notice the distinction: these numbers describe the net clear opening, the usable space when the window is fully open. That is a smaller number than the frame size printed in the catalog, which brings us to the most common compliance trap.
How Window Dimensions Affect Code Compliance
Here is where homeowners and even some contractors get caught. A window casement unit labeled 36 by 48 inches sounds like it should easily exceed the 5.7-square-foot minimum — after all, 36 times 48 equals 1,728 square inches, or 12 square feet. But that is the frame dimension. The net clear opening, once you subtract the sash, hinges, and hardware, could be several inches smaller in each direction. A double hung window is especially prone to this gap because only one sash opens at a time, cutting the usable escape height roughly in half. A double hung that looks generously sized on paper may deliver a net clear opening well below the 5.7-square-foot threshold.
Casement windows tend to perform better for egress because the entire sash swings outward, allowing the full frame width to count toward the clear opening. Sliding windows fall somewhere in between — only the operable panel counts, and the center meeting rail eats into the available space. The average window size in a product line does not guarantee compliance for any of these styles.
The takeaway is straightforward: never assume a standard manufactured windows size meets egress requirements based on nominal dimensions alone. Check the manufacturer’s published egress compliance data for each specific unit. That data sheet lists the certified net clear opening, which is exactly what the building inspector will measure on site.
Accessibility and Energy Code Considerations
Egress is the most dimension-critical code requirement, but it is not the only one. Two other regulatory areas can influence which window dimensions you are allowed to install.
Accessibility (ADA and fair housing guidelines): In accessible design — particularly multifamily housing covered by the Fair Housing Act — operable windows must be usable by people with limited mobility. That typically means hardware no higher than 48 inches from the floor and operating mechanisms that do not require tight grasping or twisting. While these rules affect hardware placement more than overall window size, they can constrain sill heights and favor certain styles (like casement cranks) over others (like tall double hungs with high upper sash locks).
Energy codes and glazing limits: The International Energy Conservation Code (IECC) and state-level energy standards in some jurisdictions cap the total glazing area as a percentage of gross wall area. The prescriptive path in the IECC, for example, limits fenestration to around 15% of gross wall area unless you use the performance-based compliance path. In practical terms, this means you cannot simply fill every wall with floor-to-ceiling glass without either upgrading to higher-performance glazing or demonstrating overall energy compliance through modeling. If you are planning a room with multiple large openings, verify that your combined windows size stays within the allowable glazing ratio — or budget for the higher-rated glass needed to offset the additional thermal exposure.
Code compliance is the non-negotiable foundation, but it only tells you what you must do. The next challenge is execution: measuring your openings accurately enough that the windows you order actually fit the spaces you have planned for them.
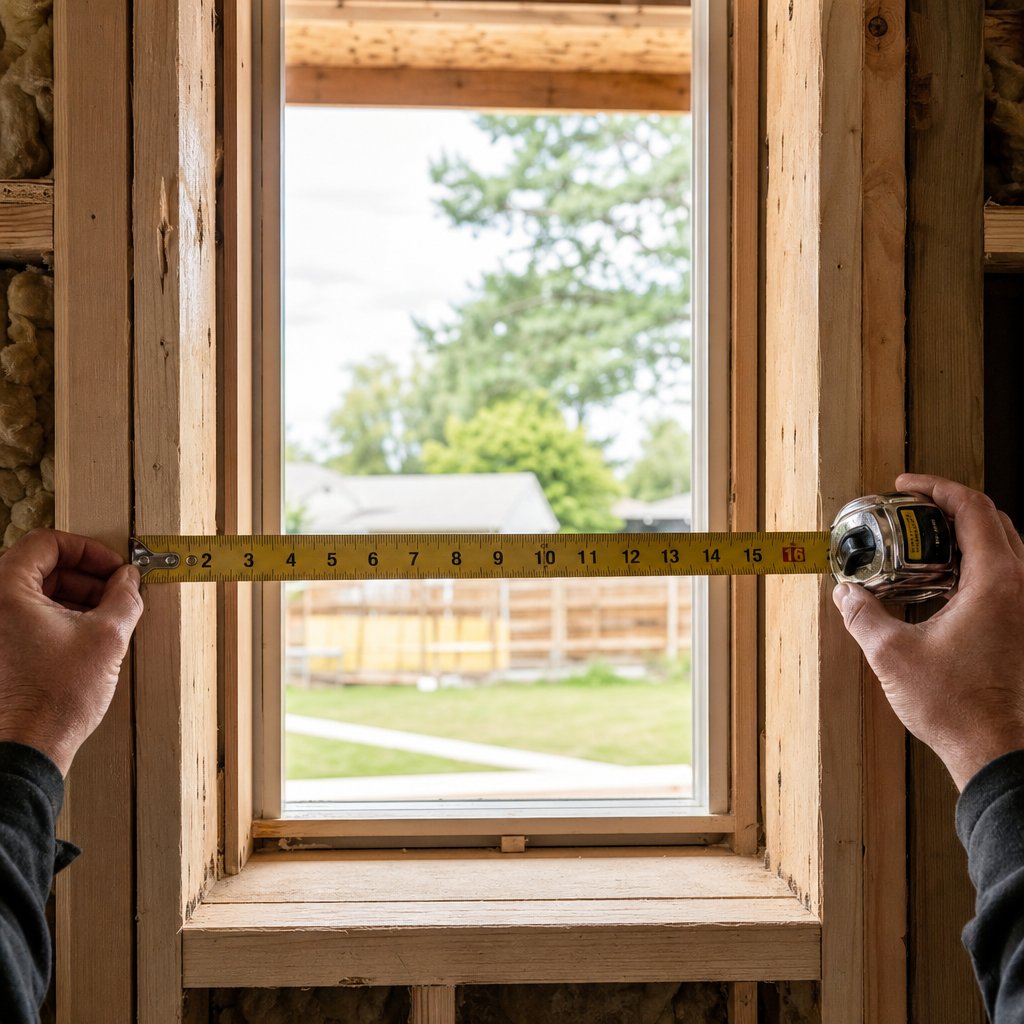
How to Measure Windows Without Costly Mistakes
Every sizing chart, notation code, and code requirement covered so far depends on one thing: an accurate measurement. Get the numbers right and the rest falls into place. Get them wrong and you are dealing with returns, reframing, and delays that dwarf the cost of the window itself. The Window and Door Manufacturers Association estimates that measurement errors account for 78% of window installation problems and warranty claims. Whether you are framing a new wall or pulling out an old unit, the process below keeps you on the right side of that statistic.
How to Measure for New Construction Windows
In new construction, you are measuring the rough opening — the framed hole in the wall that will receive the window. The rough opening should be built to the manufacturer’s specified dimensions for the unit you have chosen, but framing is not always perfect. Lumber can warp, and cuts can drift. So even in a brand-new wall, you need to verify.
Here is the standard process:
- Measure width in three places. Run your tape horizontally across the top, middle, and bottom of the opening. Record all three numbers.
- Measure height in three places. Run your tape vertically on the left side, center, and right side, from the sill plate to the bottom of the header. Record all three.
- Use the smallest measurement in each direction. The narrowest width and the shortest height become your ordering dimensions. This guarantees the unit will fit through the tightest point of the opening.
Before you put the tape away, check for square. Measure both diagonals of the opening corner to corner. If the two diagonal measurements are within 1/4 inch of each other, the opening is square enough for a standard install. A difference greater than that may require shimming adjustments or, in severe cases, reframing. Use a 4-foot level against the side jambs to confirm plumb and across the sill to confirm level. Tall windows and wide openings are especially prone to racking during framing, so do not skip this step on larger units.
How to Measure for Replacement Windows
Replacement projects are a different scenario. Instead of measuring a bare rough opening, you are measuring inside the existing window frame because the new unit will fit within it. The frame stays in place and the old sashes come out.
The approach mirrors the new-construction method, with one key difference in where you place the tape:
- Width: Measure jamb to jamb — the inside edges of the vertical frame members — at the top, middle, and bottom. Do not include any trim, casing, or decorative molding. Raise the lower sash to expose the jamb at the bottom if needed.
- Height: Measure from the sill (where the sash rests when closed, not the interior stool) to the head of the frame on the left, center, and right.
- Use the smallest width and the smallest height. These are your ordering numbers.
One detail that catches people off guard: depth. Most replacement windows need at least 3 1/4 inches of jamb depth to sit properly in the frame. Open the window and measure from the inside face of the trim to the outside edge of the frame at the sill. If your existing frame is shallower than that — common in older or modular homes — you may need an extension jamb or a different product line to achieve a flush fit.
A practical tip worth repeating: measure every window individually. Two openings in the same room that look identical can differ by half an inch or more, especially in older homes where settling has shifted the framing over decades. Assuming they match is one of the fastest ways to end up with a unit that does not fit typical window sizes for your home.
Common Measurement Mistakes to Avoid
Even experienced DIYers fall into predictable traps. Here are the most frequent errors, ranked by how often they cause ordering problems:
- Recording height before width. Standard window measurements are always listed width first, then height. Swap the two and you will order a window that is rotated 90 degrees from what you need. A 30-by-48-inch unit is not the same as a 48-by-30-inch unit.
- Skipping the square check. An out-of-square opening can make a correctly sized window impossible to shim level. If your diagonals differ by more than 1/4 inch, address the framing before ordering.
- Measuring from the trim instead of the frame edge. Trim and casing sit on top of the frame and add inches that do not belong in your measurement. Always measure from the jamb or the rough framing, never from decorative molding.
- Ignoring sill slope. Exterior sills are angled to shed water. If you rest your tape on the sloped surface instead of measuring from the flat interior sill point, your height reading will be short. On crank windows and awning units where the sash swings outward, this error also affects how the weatherstripping seats against the frame.
- Rounding up instead of recording exact numbers. A measurement of 35 3/4 inches is not 36 inches. Rounding up by even a quarter inch can push you into a standard window length that does not actually fit your opening. Always record the precise figure and let the manufacturer’s sizing chart determine the correct unit.
Each of these mistakes leads to the same outcome: a window that either will not fit or fits poorly enough to compromise performance. A steel tape measure, a level, and ten extra minutes of careful work are all it takes to avoid them.
Accurate measurements get the right window into the right opening. But sizing decisions also ripple into a less obvious area — how much energy your home gains or loses through every square inch of glass.
How Window Dimensions Affect Energy Efficiency
A bigger window lets in more light. It also lets in more heat in summer and lets more warmth escape in winter. That tradeoff sounds obvious, but most homeowners choose their window dimensions based on aesthetics and room function alone, without considering the energy consequences baked into every extra square inch of glass. The U.S. Department of Energy estimates that roughly 30% of a home’s heating energy is lost through windows, and about 76% of sunlight hitting standard double-pane glass converts to indoor heat. Scale those numbers up with larger openings and the impact on your utility bills grows fast.
How Window Size Affects Thermal Performance
Two ratings govern how a window handles energy: U-factor and SHGC (Solar Heat Gain Coefficient). The U-factor measures how well the unit resists heat flow through its materials — lower means better insulation. SHGC measures how much solar radiation passes through the glass — lower means less heat enters the room. Both ratings apply to the entire window assembly, frame and glass combined, and both shift as the size of the unit changes.
Here is why that matters. A smaller window has proportionally more frame relative to its glass area. Since frame materials (especially insulated vinyl, fiberglass, or thermally broken aluminium) typically resist heat transfer better than glass does, a compact unit can post a slightly better overall U-factor than a larger unit built with the same components. As the glass area grows, the glazing dominates the thermal equation. A standard bedroom window size of 36 by 48 inches behaves differently from a 48-by-72-inch picture window, even when both use identical low-E coated double-pane glass, simply because the bigger unit exposes more glazing to outdoor temperature swings.
Solar heat gain follows the same logic. A larger pane of glass collects more solar energy across its surface. On a south-facing wall in winter, that can be a benefit — free passive heating. On a west-facing wall in summer, it becomes a cooling load your air conditioner has to fight. Understanding what is a standard window size for each orientation helps you predict how much thermal exposure each opening creates before you commit to a purchase.
Balancing Dimensions with Energy Efficiency Goals
Climate zone is the single biggest variable in this balancing act. In cooler northern climates, moderately sized north-facing windows reduce heat loss while south-facing units can be slightly larger to capture winter solar gain. In warmer southern climates, controlling the dimensions of west-facing and east-facing windows limits afternoon and morning cooling loads. Research published in Heliyon found that heating and cooling loads increase linearly with the window-to-wall ratio, and that reducing the ratio from 0.28 to 0.14 saved 34% to 44% on cooling energy alone across multiple climate zones.
Energy codes in many jurisdictions reinforce this relationship by capping the total glazing area as a percentage of wall area. The IECC prescriptive path, for example, limits fenestration to roughly 15% of gross wall area unless you demonstrate compliance through performance modeling. So if you are planning a room with multiple large openings, the combined average window dimensions across that wall may push you past the allowable ratio — requiring either smaller units or higher-performance glass to compensate.
The good news is that advances in glazing technology let you go bigger without paying a steep energy penalty. Low-E coatings, argon gas fills, and thermally broken frames all improve U-factor and SHGC performance at any size. What is the width of a standard window that still performs well thermally? With the right glass package, even a 48-inch-wide unit can hit ENERGY STAR targets. Australian-standard-compliant aluminium window systems, like those in MEICHEN’s aluminium windows range, are engineered with thermal breaks and energy-rated glazing specifically so that larger window dimensions do not compromise thermal performance.
The practical takeaway: do not shrink your windows just to save energy, and do not upsize them without accounting for the thermal cost. Match your average window dimensions to the orientation and climate demands of each wall, invest in high-performance glazing where you want generous openings, and verify that your total glass area stays within code limits. That approach gives you the light and views you want without turning your HVAC system into the most expensive appliance in the house.
Energy performance is one side of the sizing equation. The other is deciding whether standard off-the-shelf dimensions will work for your project or whether custom sizing is worth the added cost and lead time.
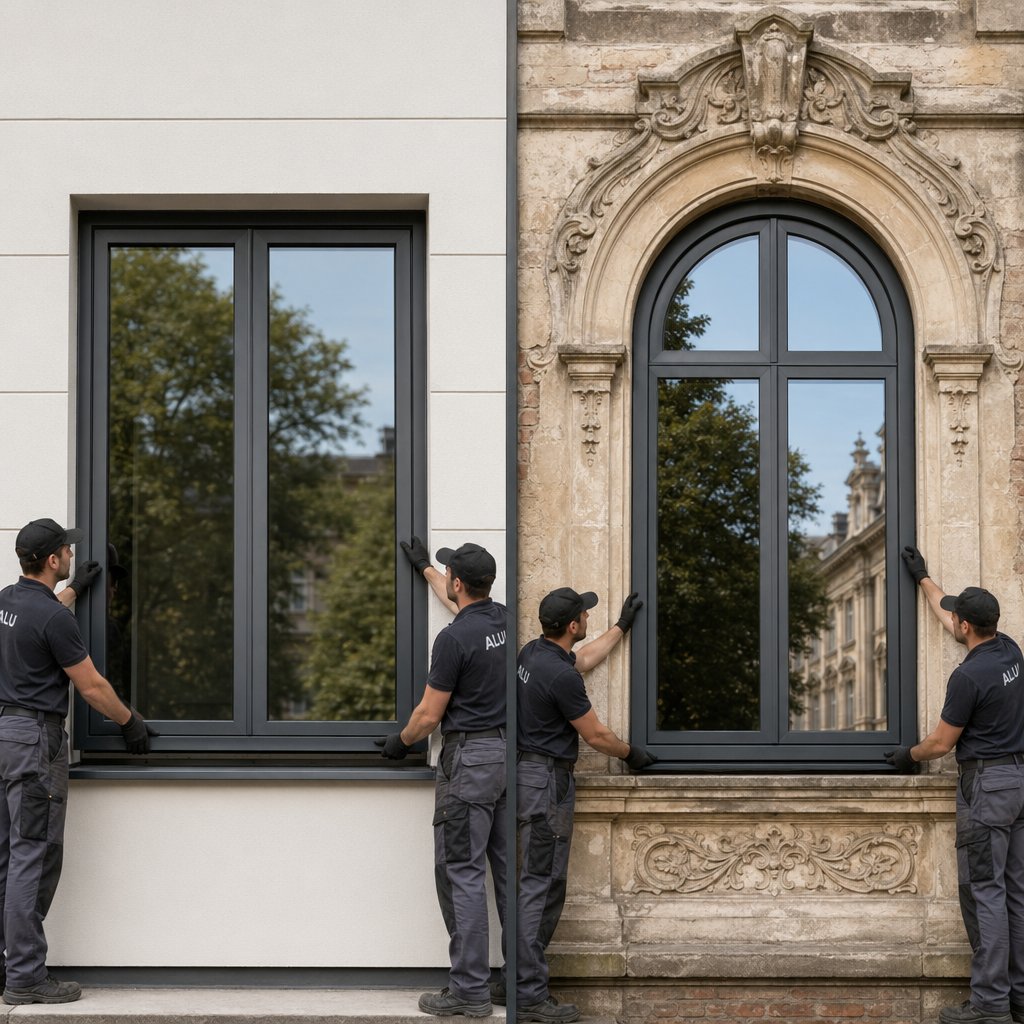
Choosing Between Standard and Custom Window Dimensions
You have the window measurements, you know the code minimums, and you understand how size affects energy performance. The final decision is whether to order standard size windows or go custom. The answer depends less on preference and more on what your openings actually require.
When Standard Window Dimensions Are the Right Choice
For most projects, standard dimensions are the smarter path. They cost less because manufacturers produce them in volume. They ship faster — often within days rather than weeks. And they are stocked by nearly every supplier, so sourcing a replacement years down the road is straightforward.
Standard sizing is ideal in two scenarios. First, new construction, where you control the framing and can build every rough opening to match a stock unit from the manufacturer’s window sizes chart. Second, replacement projects where the existing opening aligns with a current standard size. The average bedroom window size of roughly 32 by 54 inches, for example, maps directly to a 2846 notation code that every major brand carries. If your openings fall within the ranges covered earlier in this article, standard size windows will get the job done at a fraction of the custom price.
Even common specialty units follow this logic. A 3×5 window (36 by 60 inches) is a widely stocked double hung that clears egress requirements in most jurisdictions. Standard picture window sizes cover openings up to 96 inches in either direction. Unless your project demands something outside those bounds, there is rarely a reason to pay the custom premium.
Start with standard dimensions wherever possible. Reserve custom sizing for openings that genuinely cannot accommodate a standard unit — it saves time, cost, and complexity.
When Custom Dimensions Make Sense
Custom sizing earns its higher price tag in specific situations. Historic homes are the most common case — decades of settling, non-standard original framing, and preservation requirements often produce openings that no stock unit fits cleanly. Architectural designs calling for unusual proportions, like an extra-tall narrow slot or an oversized arched transom, also fall outside standard catalogs.
Sometimes the math simply does not work. If resizing a rough opening means cutting into a structural header, rerouting plumbing, or disturbing exterior cladding, the reframing cost can exceed the custom window premium. In those cases, ordering a unit built to the existing opening is the more economical move.
Before committing to custom, consider the middle-ground options. Filler strips can close small gaps between a standard unit and an oversized opening. Extension jambs adapt a standard frame to a deeper-than-usual wall. And minor reframing — adding a jack stud or adjusting a sill plate — can bring an oddball opening in line with a stock size for less than a custom order would cost. Exhaust these alternatives first.
Choosing a Window System That Fits Your Project
Whichever route you take, sourcing all your windows from a single system simplifies everything — consistent frame profiles, matching finishes, unified hardware, and one set of installation specs to follow. Look for a supplier that offers both standard and custom sizing across multiple window types so you are not forced to mix brands when one opening does not cooperate.
For Australian projects, MEICHEN’s aluminium windows collection covers casement, sliding, and awning types in both standard and custom configurations, all built to Australian standards for new builds and renovations alike. It is a practical starting point for readers who have worked through the window measurements and sizing decisions in this article and are ready to match those numbers to actual products.
Whether your project calls for a single replacement unit or a full house of windows, the sizing principles stay the same. Decode the notation, confirm which measurement your supplier expects, verify code compliance, measure twice, and choose standard dimensions whenever the opening allows it. That sequence turns what could be a thousands-of-dollars mistake into a straightforward, confident order.
Frequently Asked Questions About Window Dimensions
1. What is the most common standard window size for residential homes?
The most common residential window size is the 3040 double hung, which translates to 36 inches wide by 48 inches tall. This size works well in bedrooms, kitchens, and living areas because it provides adequate natural light, meets egress code requirements for sleeping rooms, and aligns with standard wall framing heights. Single hung and double hung windows in this size range are stocked by virtually every major manufacturer, making them easy to source and replace.
2. How do I read the four-digit window size code on spec sheets?
The four-digit code splits into two pairs representing width and height. The first two digits indicate width in feet and inches, and the last two indicate height in feet and inches. For example, code 2846 means 2 feet 8 inches wide (32 inches) by 4 feet 6 inches tall (54 inches). These nominal codes represent the intended opening range rather than the exact manufactured frame size, which is typically about half an inch smaller to allow installation clearance. Always confirm with your specific manufacturer whether the code references the rough opening or the unit size.
3. What is the difference between rough opening and actual window size?
The rough opening is the framed hole in your wall, built intentionally larger than the window unit to allow for shimming, levelling, and insulation. The actual window size (unit size) is the exterior measurement of the manufactured frame. Typically, the rough opening is 1/2 inch to 1 inch larger than the unit on each side. A third measurement, the glass size or daylight opening, describes only the visible glazed area. Confusing these three measurements is the leading cause of ordering errors, so always confirm which measurement your supplier expects before placing an order.
4. What size window is required for bedroom egress code compliance?
The International Residential Code requires bedroom windows to provide a minimum net clear opening area of 5.7 square feet (5.0 square feet at grade level), a minimum clear width of 20 inches, a minimum clear height of 24 inches, and a maximum sill height of 44 inches from the finished floor. All four criteria must be met simultaneously. Importantly, these measurements refer to the usable opening when the window is fully open, not the frame dimensions listed in catalogs. Casement windows generally perform better for egress than double hung units because the entire sash swings open.
5. Should I choose standard or custom window dimensions for my project?
Standard window dimensions are the better choice for most projects because they cost less, ship faster, and are widely available for future replacements. They work well for new construction where you control the framing and for replacements where existing openings match current standard sizes. Custom dimensions make sense for historic homes with non-standard openings, architectural designs requiring unusual proportions, or situations where resizing the rough opening would be structurally impractical. Before committing to custom, consider alternatives like filler strips, extension jambs, or minor reframing, which can adapt an oddball opening to a stock size at lower cost. Australian homeowners can explore suppliers like MEICHEN that offer both standard and custom aluminium window options to cover all project scenarios.
More Window & Door Guides