What Drives the Price of New Windows and Doors
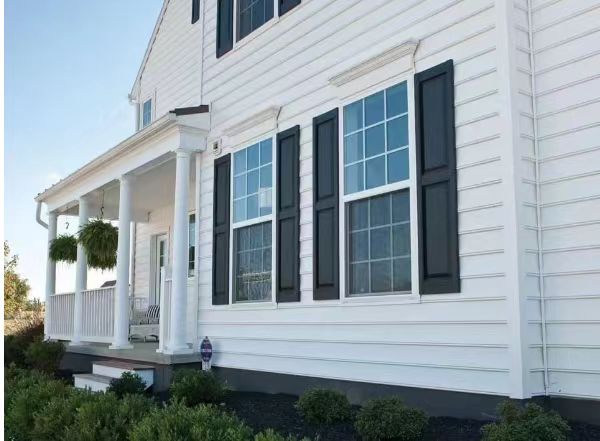
You start browsing for a new exterior door or a set of replacement windows, and within minutes the quotes range from a few hundred dollars to several thousand. Whether you are comparing home depot doors and big-box options or specialty suppliers, the spread can feel random. It is not. Every price tag traces back to a handful of measurable variables, and understanding them puts you in control of the budget instead of the other way around.
This guide is an independent pricing resource, not a sales page. It covers both windows and doors in equal depth within a single article, something most guides skip by treating doors as an afterthought.
What Actually Determines Windows and Doors Prices
Five primary cost levers shape what you will pay:
- Frame material – Vinyl, aluminium, timber, composite, and fibreglass each sit at a different price point and carry different maintenance and performance trade-offs.
- Glass type and glazing layers – Single, double, or triple pane glass, plus coatings like Low-E and gas fills, directly affect both thermal performance and cost.
- Size and configuration – A standard double-hung window costs far less than a custom bay unit. The same logic applies when you are shopping for front doors near me searches versus ordering a fully custom entryway.
- Installation complexity – Insert replacements are simpler than full-frame tear-outs. Factors like building height, exterior cladding material, and structural modifications can push labor costs higher.
- Regional labor markets – A project in a high-cost metro area will carry different labor rates than the same scope in a regional town.
Why Pricing Varies So Widely Across Projects
A single window can range from under $200 to well over $2,000, and doors follow a similar spread. Even browsing home depot exterior house doors or a home depot garage door listing reveals dramatic jumps between entry-level and premium options. The reason is that each of the five levers above stacks on top of the others.
Material and labor each represent roughly half of the total project cost, so focusing only on the sticker price of the product itself means you are seeing just half the picture.
That ratio shifts with project complexity. A straightforward swap of a standard exterior door keeps labor modest, while a full home depot house renovation involving structural changes and permit requirements can tip the balance toward labor. The sections ahead break down every one of these cost drivers in detail, starting with a side-by-side comparison of frame materials, so you can match each decision to your actual budget.

Frame Material Costs Compared Side by Side
The frame is the backbone of every window and door unit. It determines how much you pay upfront, how much you spend on upkeep over the years, and how well the product insulates your home. Yet most pricing guides gloss over material differences with vague labels like “budget” or “premium.” Here, you will see real cost ranges for each major frame type so you can weigh the trade-offs before requesting a single quote.
Vinyl and UPVC Frames
Vinyl and UPVC (unplasticized polyvinyl chloride) sit at the budget-friendly end of the spectrum. A standard vinyl window typically runs $100 to $900 for the unit alone, making it the lowest-cost door and frame option for most residential projects. Thermal performance is respectable, with U-factors generally landing between 0.20 and 0.40. Maintenance is close to zero since the material resists moisture, rot, and corrosion without ever needing paint or stain.
The trade-off? Limited color and finish choices. Vinyl frames cannot be repainted easily, and darker shades may warp under intense heat. If aesthetics rank high on your list, or you live in an extreme-heat climate, you will want to weigh those limitations against the savings. Still, vinyl holds roughly 66% of the residential window market share in the United States, which speaks to its value proposition for the average homeowner.
Aluminium Frames
Aluminium occupies the mid-to-premium tier and is the go-to choice when you want slim sightlines, high structural strength, and a long service life. Pricing for aluminium window frames ranges from about $75 to $400 for basic models, but that number climbs once you add thermal break technology and a quality powder-coat finish, both of which are essential for energy performance and longevity.
Without a thermal break, aluminium conducts heat rapidly, pushing U-factors above 1.0. With a proper thermal break, performance improves to the 0.40 to 0.60 range. That gap matters because it directly affects your heating and cooling bills. Powder-coat finishes open up a wide palette of colors and protect against corrosion, though coastal homeowners should verify the coating grade to guard against salt-air damage. For exterior door applications, aluminium frames pair well with large glass panels, making them popular for sliding and bay doors where strength-to-weight ratio is critical.
Timber and Composite Frames
Timber is the traditional premium choice. Expect to pay anywhere from $150 to $1,300 or more per window, depending on the wood species. Pine sits at the lower end, while hardwoods like mahogany push costs higher. A solid wood exterior door with window sidelights can easily exceed $2,000 before installation.
The appeal is undeniable: natural grain, excellent insulation (U-factors around 0.25 to 0.35), and the ability to paint or stain any color you like. The catch is maintenance. Wood frames need repainting or restaining every three to seven years, and in humid climates, you are also watching for rot, warping, and pest damage. That ongoing upkeep can add $200 to $500 per year to your total window expense.
Composite frames offer a middle path. They blend wood fibers with synthetic materials to mimic the look of real timber while cutting maintenance demands. Pricing typically falls between $300 and $1,200 per window. Quality varies by manufacturer, so research specific product lines carefully. Composite is a newer category, and long-term performance data is still catching up to the marketing claims.
Fibreglass Frames
Fibreglass lands between aluminium and timber in price, generally $500 to $1,500 per window. It delivers excellent thermal stability because the material expands and contracts at nearly the same rate as glass, which keeps seals tight over decades. U-factors typically range from 0.20 to 0.35, rivaling the best vinyl and wood options.
Durability claims are strong, with manufacturers citing lifespans of 30 to 50 years. Fibreglass can also be painted, giving it an aesthetic edge over vinyl. The main drawback is availability. Fewer manufacturers produce fibreglass frames, which means fewer doors for sale in this material and potentially longer lead times. If you are browsing home depot doors exterior or similar big-box inventories, you will find far more vinyl and aluminium options on the shelf than fibreglass.
| Frame Material | Price Range per Window | Price Range per Exterior Door | Durability | Maintenance Level | Energy Efficiency | Aesthetic Flexibility |
|---|---|---|---|---|---|---|
| Aluminium | $75 – $400 (basic); higher with thermal break | $500 – $1,800 | Excellent (30-50 yrs) | Very Low | Poor without thermal break; Acceptable with | Good (wide powder-coat palette) |
| Vinyl / UPVC | $100 – $900 | $150 – $1,000 | Good (20-40 yrs) | Very Low | Good (U-factor 0.20-0.40) | Fair (limited colors, not paintable) |
| Timber | $150 – $1,300+ | $500 – $3,000+ | Good to Excellent (50-100 yrs with care) | High | Good to Excellent (U-factor 0.25-0.35) | Excellent (paint or stain any color) |
| Composite | $300 – $1,200 | $400 – $1,800 | Good (20-40 yrs) | Low to Moderate | Good (U-factor 0.25-0.40) | Good (wood-like appearance) |
| Fibreglass | $500 – $1,500 | $600 – $2,200 | Excellent (30-50 yrs) | Low | Excellent (U-factor 0.20-0.35) | Good (paintable) |
Note: Actual prices depend on supplier, region, project scale, and specific product features such as glazing type and hardware. Ranges above reflect typical residential pricing and may shift for commercial or custom orders.
Scan the table and one pattern stands out: the cheapest door window or frame upfront is not always the cheapest over its full lifespan. Aluminium costs less initially but may drive higher energy bills without a thermal break. Timber looks expensive at purchase, yet a well-maintained wood frame can outlast every other option on the list. The right choice depends on how you balance purchase price, ongoing costs, and performance, a calculation that gets even more interesting once you factor in the type and size of window you need.
Window Prices by Type and Size Category
Frame material sets the baseline, but the style of window you choose and the size of the opening it fills can shift the final number just as dramatically. A small single-hung vinyl unit and a large custom casement in fibreglass may share the same frame technology discussion, yet their price tags live in completely different worlds. This section breaks down what each window type actually costs, when you can stick with stock sizes, and where glazing upgrades start to multiply the bill.
Standard Window Types and Their Price Ranges
Not every window style carries the same manufacturing complexity. Moving parts, glass area, and structural engineering all factor in. Here is a general ranking from least to most expensive, based on typical residential pricing data:
- Single-hung – One movable sash, simple mechanics, and the lowest price point. Small units start around $150, with large versions reaching roughly $1,000. This is the budget workhorse for bedrooms, hallways, and rental properties.
- Double-hung – Both sashes move, improving ventilation and making cleaning easier. Expect to pay about $180 to $1,200 depending on size. The slight premium over single-hung reflects the added hardware and engineering.
- Sliding – Horizontal operation suits wide openings where a crank or sash would be impractical. Pricing runs from around $200 for a small unit to $1,400 for a large one. If you are comparing andersen window prices or other major brands, sliders often land in the mid-range of their catalogs.
- Casement – A crank mechanism swings the entire sash outward, creating an uninterrupted glass view and a tight seal when closed. That added complexity pushes costs to roughly $250 to $1,800. Casements are gaining popularity for their energy performance and clean sightlines.
- Awning – Similar to a casement but hinged at the top, awning windows allow ventilation even during light rain. Pricing is comparable to casements, generally $400 to $1,500 or more for larger sizes.
- Fixed picture – No moving parts, which sounds simple, yet picture windows tend to be large, and more glass means more cost. Small fixed units can start near $300, but a large picture window easily reaches $2,500. Bay and bow configurations, which combine multiple panels, can exceed $4,500.
Keep in mind that brand matters within each type. Researching andersen windows prices or renewal by andersen window prices alongside mid-tier and budget brands gives you a realistic sense of the spread. Premium brands often bundle better warranties and higher-grade hardware, which partly explains the anderson windows cost premium over builder-grade alternatives.
How Window Size Affects Your Total Cost
Window sizes fall into three practical categories, and knowing which one your project lands in is one of the fastest ways to predict cost:
- Standard stock sizes – Mass-produced dimensions that manufacturers keep in regular inventory. These are the most affordable because there is no custom fabrication involved. Most double-hung windows, for example, fit rough openings of 24 to 48 inches wide.
- Modified stock sizes – A standard product adjusted slightly in width or height. The modification adds a modest surcharge, typically 10 to 20 percent over stock pricing, but avoids the full cost of a custom order.
- Fully custom sizes – Built to your exact specifications. Custom windows can cost 25% to 75% more than their stock equivalents, and lead times stretch longer as well.
Before you assume custom is necessary, measure your existing openings and cross-reference them against standard size charts from two or three manufacturers. You might find that a stock unit fits with only minor trim adjustments. Choosing standard sizes wherever possible is one of the simplest ways to keep your project budget in check, especially if you are replacing multiple windows at once. The same logic applies if you are hunting for cheap exterior doors: stock dimensions almost always beat custom pricing.
Glazing Upgrades and Add-On Costs
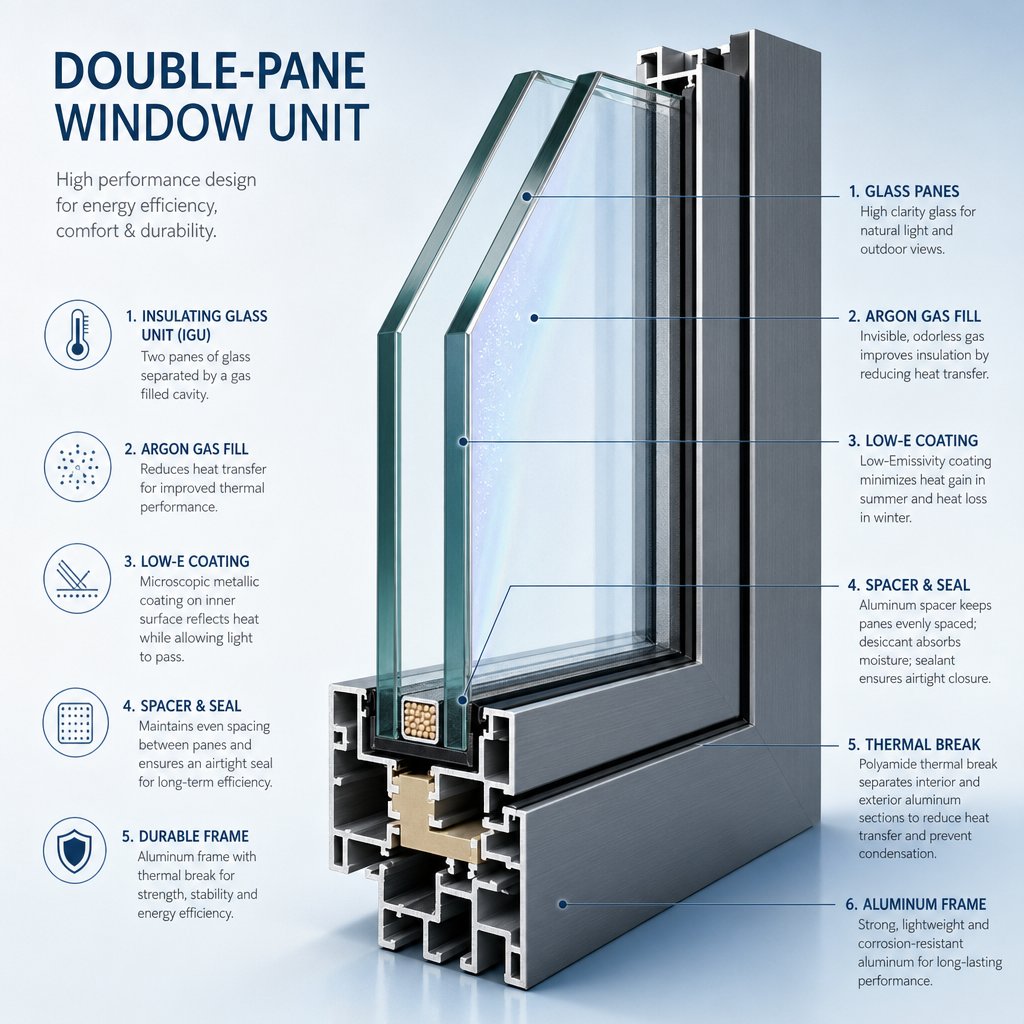
Glazing is where pricing jumps most dramatically, and it is also where the biggest energy savings hide. The core decision is how many panes of glass you want and what coatings or fills go between them.
Double versus triple glazing: Double-pane glass is the current residential standard. For a medium-sized window, the glass component alone typically runs $300 to $550. Stepping up to triple pane pushes that same size to roughly $450 to $800. The premium is significant, but triple glazing delivers superior insulation and noise reduction, making it a strong choice for extreme climates or street-facing rooms.
Low-E coatings: A Low-E (low-emissivity) coating reflects infrared heat while letting visible light pass through. Adding Low-E to double-pane glass typically increases the unit cost by 10 to 15 percent, yet it can reduce heating and cooling costs by 30 to 50 percent compared to single-pane windows. Different formulations target different climates: some prioritize winter heat retention, others focus on blocking summer solar gain.
Gas fills: Argon or krypton gas injected between panes improves thermal performance by roughly 30 percent over plain air. The incremental cost is modest, generally $10 to $25 per window, making it one of the most cost-effective upgrades available.
Specialty glass: Tinted, impact-rated, or laminated glass adds another layer of cost. Impact-rated glass, required by code in hurricane-prone regions, can add several hundred dollars per unit. Tempered and laminated options improve safety and UV protection but also raise the per-window price.
The smartest approach is to match glazing upgrades to your actual climate needs rather than defaulting to the highest tier across the board. A door window door combination facing a quiet backyard, for instance, may not need the same acoustic glazing as a street-side bedroom window. Prioritize where upgrades deliver the greatest return, and you will stretch your budget further. If you have been browsing home depot storm doors clearance deals or seasonal sales, remember that the glazing spec matters more to long-term value than the discount percentage.
With window types, sizes, and glazing mapped out, the next question is whether doors follow the same pricing logic. They share some of the same variables, but exterior and specialty doors introduce their own set of cost surprises that deserve equal attention.
Door Prices Broken Down by Material and Style
Doors share the same cost levers as windows — material, size, glazing, and installation complexity — but they also carry unique pricing variables that catch buyers off guard. Hardware is heavier duty, weatherproofing demands are higher, and the sheer range of configurations stretches from a basic steel slab to a multi-panel bi-fold wall of glass. If you have been pricing windows doors and more for a whole-home project, this section gives doors the same detailed treatment so you can budget both sides of the equation with equal confidence.
Exterior and Entry Door Price Ranges
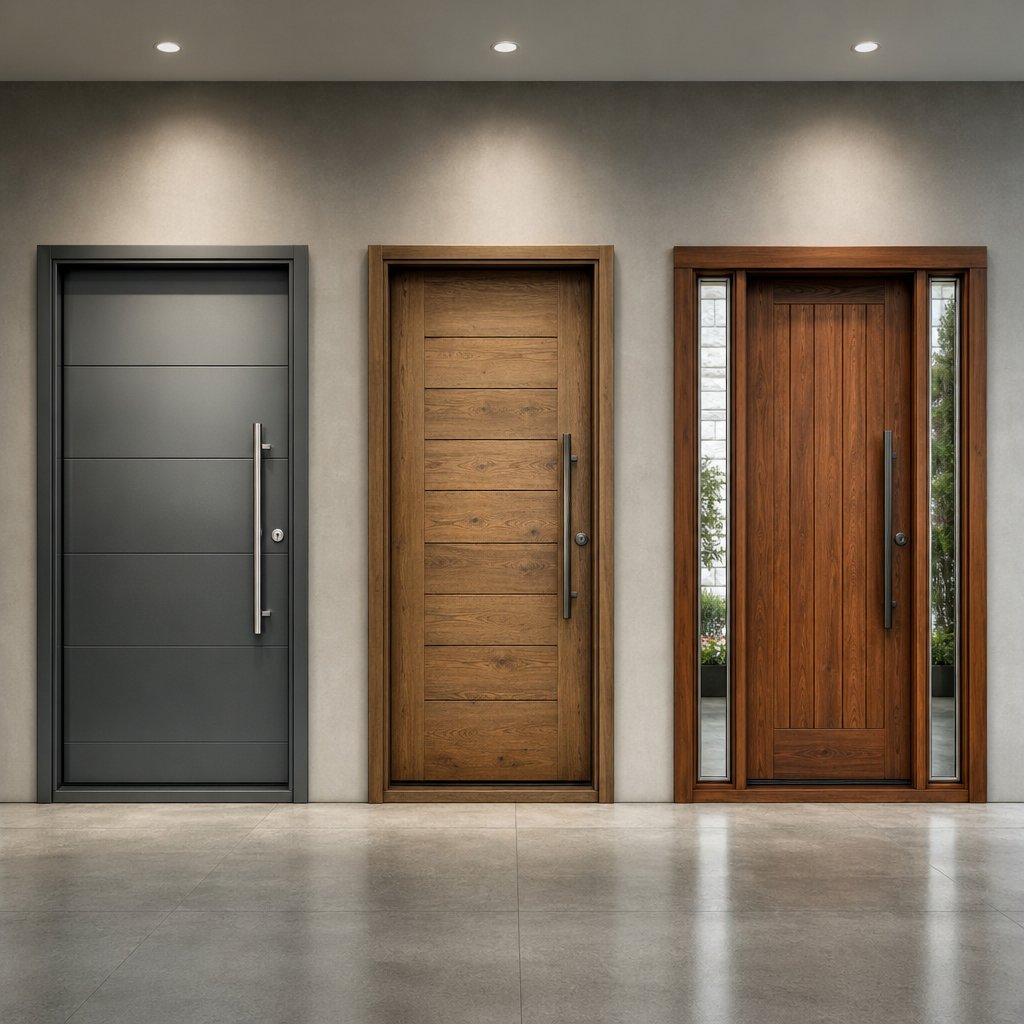
Three materials dominate the doors exterior market for residential entry points: steel, fibreglass, and wood. Each sits at a distinct price tier, and the right pick depends on how you balance upfront cost against long-term performance.
Steel is the budget champion. A steel entry door typically costs $300 to $800 for the unit itself, with installed prices running $400 to $1,000. Steel delivers excellent security — it is the hardest material to force open — and most models include a foam-insulated core that provides respectable energy performance. Maintenance is minimal: an occasional wipe-down and touch-up paint on any chips to prevent rust. The downside is that steel dents on impact and conducts heat, so a door in direct afternoon sun can feel warm to the touch.
Fibreglass hits the sweet spot for many homeowners. Expect to pay $500 to $1,500 for the door, with installed costs reaching $600 to $1,700. Fibreglass resists rot, rust, and warping, and many models feature wood-grain textures realistic enough to fool a casual glance. Insulation values are strong, and the material handles extreme weather better than wood. If you are browsing home depot entry doors or similar big-box selections, fibreglass options have expanded significantly in recent years, making this tier more accessible than it used to be.
Wood commands the highest price for its unmatched aesthetic appeal. Solid wood doors range from $700 to $3,000 or more, and front doors with windows or sidelights push that figure higher still. The natural grain, heft, and ability to carve or customize make wood the go-to for homeowners who want a statement entryway. The trade-off is maintenance: wood needs resealing or restaining every few years, and humidity can cause swelling or warping over time.
| Door Material | Price Range (Unit Only) | Installed Price Range | Insulation Value | Durability | Maintenance | Security Rating |
|---|---|---|---|---|---|---|
| Steel | $300 – $800 | $400 – $1,000 | Good (foam core) | Excellent | Very Low | Excellent |
| Fibreglass | $500 – $1,500 | $600 – $1,700 | Very Good | Excellent | Low | Very Good |
| Wood | $700 – $3,000+ | $800 – $3,500+ | Good to Excellent | Good (with maintenance) | High | Good |
Prices reflect typical single-entry residential doors. Double-door configurations, sidelights, and transoms add to these ranges.
Specialty Door Costs That Catch Buyers Off Guard
Standard hinged entry doors are only part of the picture. Specialty configurations carry significant premiums because they involve larger glass areas, more complex hardware, and multi-panel engineering that demands precision installation.
Sliding glass doors are among the most popular upgrades for patio and deck access. Installed costs run $450 to $3,500 depending on size, frame material, and glazing spec. A basic two-panel vinyl slider sits at the low end, while a wide aluminium unit with impact-rated glass pushes toward the top.
French doors add elegance but also cost. A pair of French doors typically runs $2,000 to $5,000 installed because the two-panel design requires careful alignment, robust hinges, and thorough weathersealing along the center meeting point. If you have been searching for used doors near me to save on this style, be cautious — pre-owned French doors often have worn seals that compromise energy performance.
Bi-fold (folding) doors represent the premium end of the spectrum. Material costs alone range from $3,050 for a 72-inch vinyl unit to over $13,500 for a wide aluminium configuration, with labor adding another $500 to $1,500 on top. Custom sizes push the total even higher — expect a 25% to 30% surcharge for non-standard dimensions. The wow factor is real, but so is the price tag.
Impact-rated doors are a code requirement in hurricane-prone coastal areas and a smart upgrade elsewhere. Impact glass and reinforced framing can add 30% to 50% over the cost of a standard door in the same style. The upside is that many insurance providers offer premium discounts for impact-rated products, which partially offsets the higher purchase price over time.
Across all specialty types, the renewal by andersen cost tier and similar premium brands tend to sit at the upper end of these ranges, bundling higher-grade hardware, better warranties, and tighter manufacturing tolerances. Budget brands close the gap on basic function, but the fit-and-finish difference is often visible side by side.
Door Hardware and Finishing Costs
The sticker price on a home depot door listing or any supplier quote covers the door slab or pre-hung unit. What it often does not include is the hardware and finishing that turn a raw door into a fully functional, weather-tight entry. These add-ons are easy to overlook during the planning stage, yet they can add 10% to 20% on top of the door unit cost.
Here is what to budget for:
- Handle sets: $30 to $250, depending on style and finish. Brushed nickel and matte black are popular mid-range choices; solid brass and designer lines cost more.
- Deadbolt locks: $40 to $200 for a standard mechanical deadbolt. Upgrading to a smart lock with keypad or app control pushes the range to $120 to $500.
- Hinges: $10 to $20 per door for standard hinges. Heavy or oversized doors may require specialty hinges at a higher price point.
- Weatherstripping: $15 to $75 per door. Quality weatherstripping is critical for energy performance and should be replaced any time you install a new exterior door.
- Paint or stain: $50 to $150 in materials if you handle it yourself; $100 to $300 if a professional applies the finish. Wood doors almost always need a finish coat before or shortly after installation.
- Sidelights and transoms: $400 to $2,000 for sidelights (glass panels flanking the door) and $300 to $900 for a transom window above. These decorative elements dramatically change curb appeal but also dramatically change the invoice.
- Threshold and sweep: $20 to $60. Often included with pre-hung units, but worth confirming — a missing threshold creates a direct path for drafts and water.
A practical rule of thumb: once you have selected your door, add 15% to 20% to the unit price to cover hardware, finishing, and small accessories. That buffer keeps the final checkout total from catching you off guard, whether you are buying from a local supplier or ordering doors online.
Material and style determine what you pay for the product itself, but they only tell half the story. The other half — labor, hidden fees, and installation surprises — is where budgets quietly balloon if you are not watching closely.
Labor Versus Material Costs and the Hidden Fees That Inflate Your Bill
You have picked your frame material, chosen a window type, and settled on a door style. The product price looks manageable. Then the installation quote arrives, and the total jumps by 40% to 60%. That sticker shock is the single biggest budgeting blind spot in any window and door project, and it hits harder when you do not understand where the labor dollars actually go.
What Percentage Goes to Materials Versus Labor
The general industry split lands close to 50/50, but that ratio is a starting point, not a rule. For a straightforward replacement where the new unit drops into an existing opening with no structural changes, materials may account for 55% to 60% of the total. Flip the scenario to a complex job and labor can dominate the invoice.
When does labor spike? Several situations push installation costs well above average:
- High-rise or upper-story access — Scaffolding, lifts, and additional safety measures add time and equipment rental fees.
- Structural modifications — Widening or reshaping an opening to fit a new configuration requires carpentry, header reinforcement, and sometimes engineering sign-off.
- Lead paint removal — Homes built before 1978 may have lead paint in existing frames or trim, triggering federally mandated abatement procedures and certified disposal that add hundreds to thousands per opening.
- Permit and inspection requirements — Some municipalities require permits for window or door replacements, especially when the opening size changes. Permit fees and the time spent coordinating inspections add to the labor side of the ledger.
For commercial doors near me searches or larger-scale projects, the labor share tends to climb even further because commercial installations often involve fire-rated assemblies, ADA compliance, and heavier units that demand specialized crews. Whether you are pricing a single front door home depot replacement or a whole-house overhaul, always ask the installer to break the quote into product cost and labor cost so you can see exactly where your money lands.
Hidden Installation Costs to Budget For
The quoted installation price rarely covers everything. Ancillary line items can add 15% to 25% on top of what you expected, and they tend to surface only after the old unit comes out. Here are the commonly overlooked costs:
- Old unit removal and disposal — Hauling away existing windows or doors, including disposal fees, is almost always an extra charge.
- Interior and exterior trim and casing — New units rarely match old trim profiles exactly, so replacement or custom milling is often necessary.
- Flashing and waterproofing — Proper flashing around the rough opening is critical to prevent moisture intrusion. Skipping it saves a few dollars now and costs thousands in water damage later.
- Drywall or siding repair — Removing a full frame frequently damages the surrounding wall surface, requiring patching, sanding, and repainting.
- Painting or finishing after installation — Interior and exterior touch-up work is almost always the homeowner’s responsibility unless explicitly included in the contract.
- Permit fees — Ranging from $50 to several hundred dollars depending on jurisdiction and project scope.
- Site cleanup — Debris removal, dust control, and restoring the work area to a livable state.
When you are wondering how much is a door or a window really going to cost, the honest answer includes every item on that list. Ask your installer which of these are included in the quote and which are billed separately. A detailed, itemized estimate is the only reliable way to compare bids apples to apples.
DIY Versus Professional Installation Trade-Offs
The temptation to save on labor by doing it yourself is understandable, especially after watching a confident tutorial that makes the job look like a weekend project. Reality is more nuanced. Installing a pre-hung interior door or swapping a spring door closer is a reasonable DIY task for a handy homeowner. Exterior windows and doors are a different story.
Exterior installations involve waterproofing, structural shimming, precise leveling, and integration with the building envelope. Improper installation often leads to higher energy costs, air leaks, and water intrusion that erode any labor savings within a few seasons. There is also the warranty factor: most major manufacturers require professional installation to keep product warranties valid. Void that warranty with a DIY install, and a future seal failure or hardware defect becomes an out-of-pocket expense instead of a covered claim.
Safety is the other consideration. You are handling heavy glass panels, often at height, with tight tolerances that leave little room for error. Professional crews carry insurance, specialized tools, and the experience to handle surprises like rotted framing or out-of-square openings that a door depot tutorial simply cannot prepare you for.
The bottom line: budget for professional installation on every exterior unit. If cash flow is tight, phase the project rather than cutting corners on labor. The savings from DIY exterior work rarely survive the first repair bill.
Labor and hidden fees explain where your money goes during installation, but they do not explain why two products that look identical on the shelf carry different price tags. That distinction often comes down to energy efficiency ratings, the invisible specs that quietly separate a bargain from a genuine value.
How Energy Efficiency Ratings Affect Your Window and Door Pricing
Two windows sit side by side on a showroom floor. Same frame material, same size, same color. One costs 30% more. The difference is not visible to the naked eye — it lives inside the glass unit and the frame engineering, expressed as a set of performance numbers most buyers glance at and ignore. Those numbers, however, directly determine how much you spend on heating and cooling for the life of the product. Understanding them turns a confusing price gap into a clear cost-versus-value decision.
Understanding U-Factor, SHGC, and Energy Ratings
Every window door unit and exterior entry sold in the U.S. carries a label from the National Fenestration Rating Council (NFRC) displaying standardized performance metrics. Two matter most:
- U-factor measures the rate of heat transfer through the entire assembly — glass, frame, and spacer combined. Values range from about 0.20 (excellent insulation) to 1.20 (poor insulation). Lower is better. Think of it this way: a low U-factor acts like a thick blanket between your living room and the outside air, while a high U-factor is closer to a thin sheet.
- Solar Heat Gain Coefficient (SHGC) indicates how much solar radiation passes through the glass and becomes heat inside your home. Values range from 0 to 1. A window with an SHGC of 0.25 blocks 75% of the sun’s heat, while one rated 0.60 lets more than half of it through. The ideal SHGC depends on your climate — hot regions benefit from lower values, while colder climates may want moderate SHGC on south-facing windows to capture free winter warmth.
These are not marketing labels. They are measurable, lab-tested performance metrics that directly affect your monthly energy bills. The U.S. Department of Energy estimates that roughly 30% of a home’s heating energy is lost through windows, and about 76% of sunlight hitting standard double-pane glass becomes indoor heat. When you are shopping for a house door, a picture window, or front house doors, the NFRC sticker tells you exactly how much thermal leakage you are buying into.
Certification programs like ENERGY STAR use these ratings to set minimum thresholds by climate zone. In the South Central U.S., for example, ENERGY STAR windows must hit a U-factor of 0.28 or below and an SHGC of 0.23 or below. Products that meet or beat those numbers qualify for rebates and tax incentives in many jurisdictions, which can offset part of the higher purchase price.
How Energy Performance Drives Price Differences
Every improvement in thermal performance adds a manufacturing step, and each step adds cost. Here is where the money goes:
- Thermal break technology in frames — Aluminium and steel frames conduct heat rapidly on their own. Inserting a low-conductivity barrier (the thermal break) between the interior and exterior faces of the frame dramatically improves U-factor but also adds material and engineering cost. This is the primary reason two aluminium windows at the same size can differ by $100 or more.
- Multiple glazing layers — Jumping from single-pane to double-pane glass is the single biggest efficiency gain per dollar. Adding a third pane improves insulation further, but the incremental benefit is smaller relative to the price jump. Energy-efficient double-pane windows can reduce heating and cooling costs by 10% to 30%, making them the standard for most residential projects.
- Gas fills — Argon or krypton gas between panes insulates roughly 30% better than plain air. The cost per window is modest (typically $10 to $25), making this one of the highest-value upgrades available.
- Low-E coatings — A microscopically thin metallic layer reflects infrared heat while allowing visible light through. Adding Low-E to double-pane glass raises the unit cost by about 10% to 15%, yet it can cut energy loss through the glass by up to half.
The concept of diminishing returns matters here. Going from single glazing to double glazing with Low-E and argon delivers a dramatic performance leap for a moderate cost increase. Stepping up to triple glazing with krypton fill adds another layer of improvement, but the per-dollar gain is smaller. For most homeowners, double-pane Low-E with argon hits the sweet spot. Triple glazing makes financial sense primarily in extreme climates or for noise-sensitive rooms.
If you are comparing the cost of andersen windows or other premium brands against mid-tier options, much of the price gap traces back to these glazing and frame technologies rather than the brand name itself. A budget window with basic double glazing and no thermal break will always cost less upfront — but it may cost more over a decade of energy bills.
Aluminium frames with thermal break technology represent a strong mid-to-premium option that balances energy performance with long-term durability and slim modern profiles. For Australian homeowners and builders, MEICHEN’s aluminium window range is one example of energy-efficient, Australian-standard-compliant systems that pair thermal break engineering with contemporary design. It is worth including alongside other options when you are gathering quotes and comparing specs.
Calculating Your Potential Return on Investment
Knowing that better ratings cost more is only half the equation. The other half is figuring out whether the upgrade pays for itself through lower energy bills. You do not need a spreadsheet wizard for this — a simple framework gets you close enough to make a confident decision.
- Identify your current annual energy costs. Pull your utility bills for the past 12 months and total them up. If you are in a door store and window showroom comparing options, having this number on your phone saves guesswork.
- Estimate the share lost through windows and doors. The Department of Energy’s 30% figure is a reasonable starting point for older homes with single-pane or early double-pane units. Newer homes with decent glazing may lose closer to 15% to 20%.
- Apply the expected efficiency improvement. If you are upgrading from single-pane to double-pane Low-E, expect to recapture roughly 25% to 40% of that heat loss. Moving from basic double-pane to high-performance double-pane with gas fill might recover 10% to 20%.
- Project annual savings against the upfront investment. Multiply your estimated energy loss through windows and doors by the expected improvement percentage. That gives you a rough annual savings figure. Divide the total upgrade cost by that annual savings to get your payback period in years.
Imagine you spend $3,000 per year on heating and cooling, and 25% of that ($750) escapes through aging windows and entry doors near me — or anywhere, for that matter. Upgrading to high-performance units that cut that loss by 35% saves roughly $260 per year. If the upgrade costs $8,000, the payback period lands around 30 years on energy savings alone. Factor in increased home value, improved comfort, and potential insurance or tax benefits, and the effective payback shortens considerably.
Climate zone heavily influences these numbers. A home in a region with extreme summers and cold winters will see faster payback than one in a mild coastal area, simply because the HVAC system works harder and the savings per degree of insulation improvement are larger. Homeowners shopping for a door for sale or a full set of replacement windows should run this calculation for their specific location before defaulting to the cheapest option on the shelf.
Energy ratings explain why identical-looking products carry different price tags, but they do not tell you which combination of features fits your specific budget. That is where a tiered framework — economy, mid-range, and premium — helps you match performance expectations to real-world spending limits.
Budget Tiers From Economy to Premium
Knowing the cost of individual materials, glazing options, and labor rates is useful, but it can feel like staring at a parts list without seeing the finished product. A simpler way to frame your budget is to think in tiers. Most residential window and door projects land in one of three spending levels, and each tier delivers a distinct combination of performance, appearance, and longevity. The table below puts all three side by side, starting with the tier that fits the widest range of homeowners.
| Budget Tier | Typical Window Cost (Installed) | Typical Door Cost (Installed) | Frame Materials | Glazing Standard | Warranty Length | Best Suited For |
|---|---|---|---|---|---|---|
| Mid-Range | $750 – $950 | $800 – $2,000 | Quality aluminium (with thermal break), upgraded vinyl, entry-level fibreglass | Double-pane Low-E with argon fill | 20 – 30 years (lifetime on glass) | Primary residences, 10-20 year ownership, best value sweet spot |
| Economy | $550 – $750 | $400 – $1,000 | Builder-grade vinyl, steel | Basic double-pane or single-pane with Low-E | 10 – 15 years | Rentals, investment properties, tight-budget renovations |
| Premium | $950 – $1,400+ | $1,500 – $3,500+ | Timber, composite, high-end aluminium, fibreglass | Triple-pane or advanced double-pane with krypton fill | Lifetime (all components) | Forever homes, heritage restorations, extreme climates |
Ranges reflect 2026 installed pricing for standard-sized units. Custom sizes, specialty configurations, and regional labor differences will shift these numbers.
Economy Tier and What You Get for Less
The economy tier covers builder-grade vinyl windows and steel entry doors with basic double glazing, limited color choices (typically white or almond), standard hardware, and shorter warranty coverage. You will not find triple-pane glass, designer finishes, or custom sizing here. What you will find is functional, code-compliant product that improves dramatically over aging single-pane units.
This tier makes sense for investment properties, rental units, or tight-budget renovations where performance matters more than curb appeal. If you are replacing all windows and doors across a rental portfolio, economy-tier products keep per-unit costs low while still delivering modern insulation and security. Shoppers browsing discount doors or scanning home depot windows in stock for immediate availability will land squarely in this range. The products work. They just will not last as long or perform as efficiently as the tiers above them, with replacement likely needed in 20 to 25 years and higher cumulative energy costs along the way.
Mid-Range Tier and the Best Value Sweet Spot
Most homeowners land here, and for good reason. The mid-range tier pairs quality aluminium or upgraded vinyl frames with double-pane Low-E glass and argon gas fill, a combination that meets or exceeds ENERGY STAR certification in most climate zones. Color and finish options expand well beyond basic white, warranties stretch to 20 years or more on components, and hardware operates noticeably smoother than economy-grade equivalents.
If you are wondering how much do andersen windows cost at this level, major brands like Andersen typically price their standard-tier double-hung models in the $750 to $950 range installed, which aligns closely with this tier. The andersen window cost reflects proven performance, legitimate warranties from an established manufacturer, and energy efficiency that delivers measurable savings of 10% to 15% over economy-tier products. You skip the premium price tag while avoiding the false economy of builder-grade units that need earlier replacement.
For a primary residence where you plan to stay 10 to 20 years, mid-range products offer the strongest financial return. The windows and doors last beyond most ownership periods, energy savings accumulate year over year, and resale value holds up well because buyers expect quality in a well-maintained home.
Premium Tier and When It Makes Sense to Invest
The premium tier is where timber, composite, and high-end aluminium frames meet triple glazing, krypton gas fills, custom sizing, and designer hardware backed by comprehensive lifetime warranties. Expect to pay $950 to $1,400 or more per window installed and $1,500 to $3,500 or more per door, depending on configuration and material.
That price tag raises an obvious question: when is it justified? Several scenarios tip the math in favor of premium:
- Forever homes — If you plan to stay 20 years or longer, the superior durability of premium products (40 to 50 year lifespans) means you likely never replace them again. Economy-tier windows may need a second round of replacement within that same period.
- Heritage restorations — Matching original proportions and architectural details often requires custom sizing and traditional materials like solid timber, which only the premium tier provides.
- Architecturally significant projects — Slim aluminium profiles, floor-to-ceiling glass walls, and multi-panel bi-fold configurations demand engineering that sits firmly in this range.
- Extreme climate zones — Triple glazing with krypton fill and advanced Low-E coatings delivers maximum thermal performance, and in regions with severe winters or intense summers, the energy savings close the gap on the higher upfront cost faster than in mild climates.
Premium does not automatically mean the best financial decision. A homeowner selling in five years will not recoup the extra investment at resale. And if the rest of the building envelope — insulation, ductwork, roofing — is underperforming, pouring the entire budget into top-tier windows and doors delivers diminishing returns. The smartest approach is often a blended strategy: premium products on high-visibility, high-exposure faces of the home, and mid-range units on secondary rooms and sheltered walls. That way you capture the aesthetic and performance benefits where they matter most without overextending the budget.
Choosing a tier gives you a spending framework, but the final price still shifts depending on when you buy and where you live. Seasonal demand cycles, regional labor markets, and project bundling strategies all create opportunities to stretch whichever tier you land in further than the sticker price suggests.
When to Buy Windows and Doors and How Location Affects Your Price
You have settled on a budget tier, picked your frame material, and narrowed down the glazing spec. The product side of the equation feels solid. Yet the same window ordered in January versus June — or quoted in a small regional town versus a major metro — can carry a noticeably different price tag. Timing and geography are two levers most buyers never think to pull, and they can quietly save (or cost) you hundreds per unit without changing a single product specification.
Seasonal Price Fluctuations and the Best Time to Buy
Windows and doors prices follow predictable demand cycles, and those cycles create real opportunities for buyers willing to be flexible with their calendar.
Spring and summer are peak renovation season. Homeowners want projects finished before winter, contractors are booked weeks out, and that high demand means less room to negotiate. Lead times stretch, scheduling gets tighter, and installers have little incentive to discount labor when the phone is already ringing.
Late autumn and winter flip the dynamic. Demand drops, crews have open slots, and many contractors actively seek work to keep their teams busy through the slow months. That shift creates three advantages for you:
- Shorter lead times — Orders process faster and installation dates open up sooner.
- More negotiating leverage — Installers are more willing to sharpen pricing or waive ancillary fees when their schedule has gaps.
- Off-season promotions — Manufacturers and retailers frequently run discounts during slower months to move inventory. Modernize notes that many homeowners find the best deals in August, November, and January, when demand dips due to vacations, back-to-school schedules, and cold weather.
Does cold weather compromise installation quality? Not with experienced professionals. Modern sealants and adhesives are formulated to cure in a wide temperature range, and a skilled crew knows how to manage exposure time so your home is never left open to the elements for long. Consumer Reports found that promotional pricing from major brands like Renewal by Andersen often extends well past advertised deadlines, reinforcing the point that urgency-driven sales tactics rarely reflect actual price increases. Practice patience — the deals tend to follow you.
One caveat: if you live in a region with extreme winters, scheduling windows and doors installation during a brief cold snap is fine, but planning a multi-week project through sustained sub-zero temperatures adds risk. Aim for late autumn or early spring in those climates to capture off-season pricing without battling the worst weather.
Regional Price Differences Across Markets
Imagine two identical projects — same window count, same frame material, same glazing spec. One is in downtown Chicago, the other in a mid-sized town in the rural Midwest. The Chicago project will almost certainly cost more, and the gap is not small. Regional variation is one of the least discussed factors in all about doors and windows pricing, yet it routinely swings total project cost by 15% to 30%.
Several forces drive that spread:
- Labor rates — Metropolitan areas carry higher wages, higher overhead, and higher insurance costs for contractors. A window installer in a major city may charge $50 to $80 per hour, while the same skill set in a regional area bills $35 to $55.
- Building code requirements — Codes vary by state, county, and even municipality. Coastal regions may mandate impact-rated glass. Cold-climate zones require lower U-factors by code, which pushes buyers toward higher-performance (and higher-cost) products as a baseline. A homeowner near the Gulf Coast faces different minimum specs than someone shopping at a san marcos home depot in central Texas.
- Material availability — Proximity to manufacturing hubs and distribution centers affects shipping costs. Regions far from major suppliers may see surcharges on specialty products or longer lead times that limit competitive bidding.
- Cost of living — Permit fees, disposal costs, and even parking for the installation crew all scale with local cost of living. These line items are easy to overlook individually, but they add up across a multi-unit project.
The practical takeaway: always collect quotes from local contractors rather than relying on national averages. National pricing guides — including the ranges in this article — give you a useful benchmark, but your actual window cost and door cost will reflect the market you live in. Three local quotes, itemized and compared line by line, tell you more about real pricing in your area than any online calculator.
Bundling Windows and Doors Into One Project
If your home needs both new windows and new exterior doors, the question of whether to tackle everything at once or phase the work across separate projects has real financial implications.
Bundling typically reduces per-unit installation cost for a straightforward reason: the installer mobilizes once. Setup, scaffolding, cleanup, and travel time are fixed costs that get spread across more units when the project is larger. Many suppliers also offer volume pricing on materials — ordering ten windows and two exterior doors home depot or through a specialty dealer often unlocks a lower per-unit rate than ordering five windows today and the rest next year. Consumer Reports documented bulk discount thresholds where buying nine or more windows from one installer cut the total by as much as 40%.
The flip side is cash flow. Bundling increases the total upfront outlay, which can strain a household budget even if the per-unit math looks better. Financing helps bridge the gap, but interest charges can erode the savings if the repayment period stretches too long. Renewal windows by andersen pricing and similar premium brands often include financing promotions — zero-interest periods of 12 to 18 months are common — but read the fine print. Rates after the promotional period can climb to 15% or higher.
A balanced approach works well for many homeowners: bundle the highest-priority replacements into one project to capture volume savings, then phase the remaining units into a second round when the budget recovers. Prioritize the windows and doors with the worst energy performance or the most visible damage first. That way you get the biggest comfort and efficiency gains immediately while keeping the overall financial commitment manageable.
Timing, location, and project scope all shape the final number on your invoice. The last piece of the puzzle is making sure that number is accurate, complete, and competitive — which means knowing exactly what a trustworthy quote looks like and where the smartest savings hide.
How to Compare Quotes and Save on Your Window and Door Project
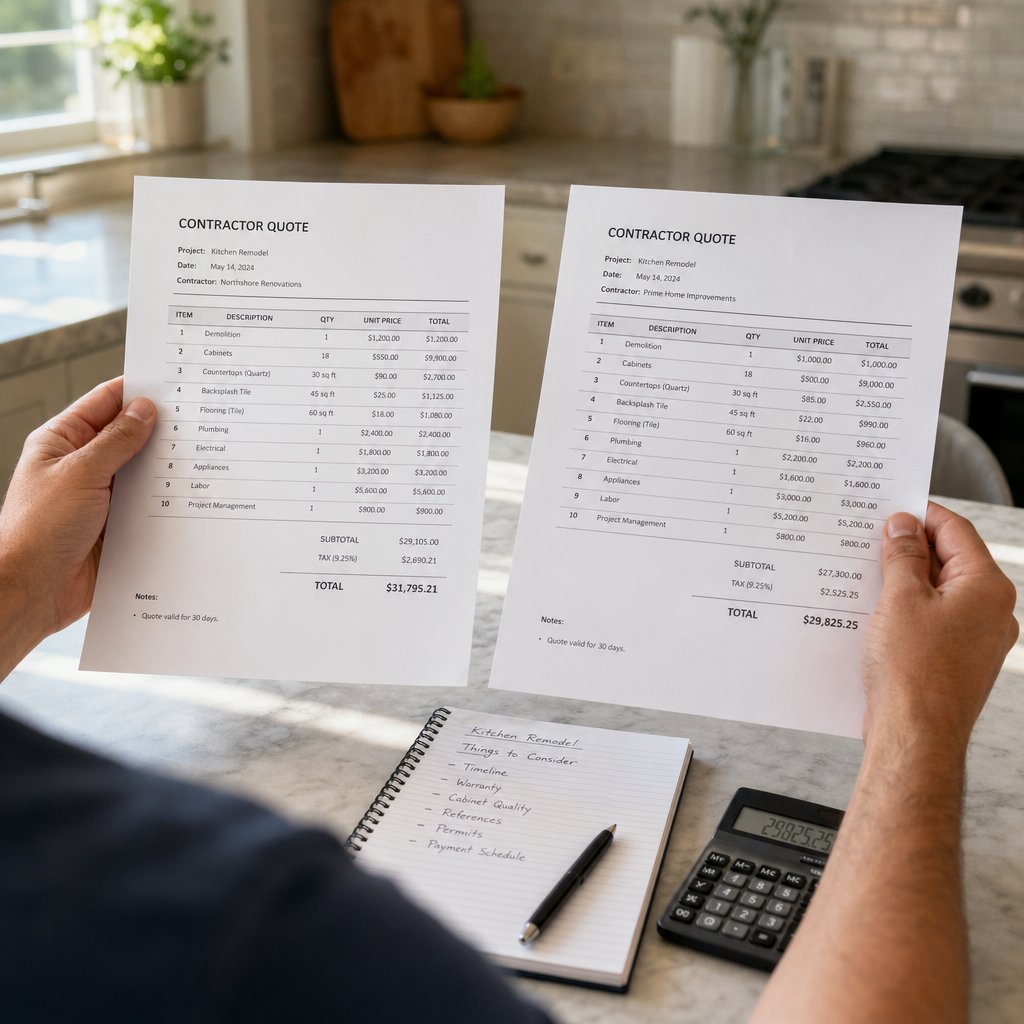
A well-researched budget tier, a clear material preference, and good timing only get you so far. The moment of truth arrives when two or three installer quotes land in your inbox and the totals differ by 20% to 30% for what looks like the same job. That spread is normal — Fenbro’s quoting team notes that most price gaps trace back to differences in product specification, installation scope, and warranty conditions rather than one company simply being cheaper. Knowing how to read those quotes line by line is the skill that separates buyers who get genuine value from those who just get a low number.
How to Compare Installer Quotes Like a Pro
The cheapest quote is not always the best deal, and the most expensive one is not automatically the safest bet. What matters is what each quote actually includes. Before comparing bottom-line prices, confirm that every proposal covers the same scope. A complete, trustworthy quote should itemize all of the following:
- Product brand and model — Not just “vinyl window” or “aluminium door,” but the specific system or profile name so you can verify specs independently.
- Frame material and glazing specification — Double or triple pane, Low-E coating, gas fill type, U-factor, and SHGC values. If these details are missing, you cannot make a fair comparison.
- Number of units — Confirm the count matches your project scope exactly.
- Removal and disposal of old units — Some quotes include this; others bill it as an extra. Disposal fees alone can run $25 to $75 per unit.
- Installation labor — Broken out separately from product cost so you can see the split.
- Trim and finishing — Interior and exterior casing, window sills, and any necessary molding work.
- Flashing and waterproofing — Critical for long-term performance. A quote that skips this line item is a quote that may skip the work.
- Permit fees — If your municipality requires permits for window or door replacement, the quote should state whether the installer handles the application and inspection coordination.
- Cleanup — Debris removal, dust control, and site restoration.
- Warranty terms for both product and labor — Product warranties come from the manufacturer; labor warranties come from the installer. Both should be clearly stated with duration and coverage details.
- Payment schedule — Deposit amount, progress payments, and final balance terms.
If a quote is missing three or more of these line items, ask for clarification before comparing on price. As one industry rule of thumb puts it: a lower quote that omits flashing, trim, and disposal is not actually lower — it is just incomplete. You will pay for those items eventually, either as change orders during the project or as repair bills afterward. The same logic applies whether you are evaluating a home depot door installation package, a local contractor’s proposal, or a premium brand’s turnkey service. Apples-to-apples comparison requires the same list of apples.
Credentials and Red Flags to Watch For
A detailed quote is a good sign, but it does not guarantee the company behind it will deliver. Before signing anything, verify a few key credentials:
- Relevant trade body registration — Membership in organizations like the American Window and Door Institute or regional builder associations signals professional accountability.
- Proper licensing and insurance — A lack of licensing and insurance is the first red flag when hiring any window or door installer. Licensing confirms the contractor meets state requirements, and insurance protects you from liability if something goes wrong on the job.
- Manufacturer-authorized installer status — Many brands require authorized installers to maintain product warranties. Ask whether the installer holds certification from the specific brand you are purchasing.
- Verifiable references — Request at least three recent project references and actually call them. Ask about timeline accuracy, cleanup quality, and how the company handled any issues that came up.
Equally important is knowing what to walk away from. These red flags should give you pause:
- Demands for full payment upfront — A reasonable deposit (10% to 30%) is standard. Asking for the full amount before work begins is not.
- No written contract — Vague or incomplete contracts often lead to misunderstandings and surprise costs. Every detail discussed verbally should appear in writing.
- Unwillingness to provide references or predominantly negative reviews — A reputable installer will have a track record they are happy to share. A lack of references is a warning sign of poor service or quality.
- High-pressure sales tactics — If someone pushes you to sign immediately, offers a “today only” discount, or drops the price 30% or more during a single appointment, question the transparency of their pricing. A trustworthy contractor respects your timeline and gives you space to compare options.
Searching for french doors near me or screen doors at home depot is the easy part. Vetting the people who will cut into your walls and seal your home against the weather is where the real due diligence happens. Spend an extra hour checking credentials now, and you avoid spending thousands fixing problems later.
Smart Ways to Reduce Your Total Project Cost
Even after choosing a budget tier and vetting your installer, there are practical strategies that shave real dollars off the final invoice without sacrificing quality. These are not gimmicks — they are decisions that experienced buyers and builders make routinely.
- Choose standard sizes over custom — As covered earlier, custom windows and doors can cost 25% to 75% more than stock equivalents. Measure your openings carefully and check manufacturer size charts before assuming custom is necessary. The same applies to a split door or any non-standard configuration — confirm the premium is justified by the design requirement.
- Get at least three quotes — Pricing ranges dramatically across companies, and your best value typically sits somewhere in the middle. Three itemized quotes give you enough data to spot outliers on both ends.
- Ask about off-season scheduling discounts — Late autumn and winter installations often come with lower labor rates and promotional pricing. Even a 5% to 10% discount on labor adds up across a multi-unit project.
- Consider phasing the project across multiple budget cycles — Replace the worst-performing doors in house and the most damaged windows first, then tackle the remaining units when cash flow allows. You capture the biggest comfort and efficiency gains immediately while spreading the financial commitment.
- Prioritize the highest-impact replacements first — A drafty, single-pane window on a sun-exposed wall delivers a faster energy payback than replacing a sheltered, double-pane unit that still performs adequately. Focus your budget where the return is greatest.
- Explore available rebates and tax credits — ENERGY STAR-certified products may qualify for federal tax credits and local utility rebates. These incentives can offset a meaningful portion of the andersen replacement windows cost or any other qualifying brand, effectively lowering your out-of-pocket expense.
- Negotiate as a package — If you are bundling windows and doors into one project, use the total volume as leverage. Suppliers and installers are more flexible on per-unit pricing when the overall order is larger.
For Australian homeowners and builders who identified aluminium as their preferred frame material in earlier sections, MEICHEN’s aluminium windows collection offers a range of energy-efficient, Australian-standard-compliant systems worth including in your quote-comparison process. Adding a specialist manufacturer alongside big-box and local options gives you a broader pricing picture and helps confirm whether the quotes you are receiving reflect fair market value.
One final thought: the goal is not to find the cheapest possible price. It is to find the best value for your specific situation — the combination of product quality, installation craftsmanship, warranty protection, and total cost that makes sense for your home, your climate, and your ownership timeline. A home depot window replacement quote, a premium brand proposal, and a local specialist bid can all represent good value if the scope is complete, the credentials check out, and the numbers align with the tier you have chosen. Compare carefully, ask the right questions, and the investment pays you back in comfort, efficiency, and peace of mind for decades.
Frequently Asked Questions About Windows and Doors Prices
1. How much should I budget for replacing all windows and doors in my home?
A whole-home replacement budget depends on the number of units, your chosen tier, and local labor rates. Economy-tier projects average $550 to $750 per window and $400 to $1,000 per door installed, while mid-range projects run $750 to $950 per window and $800 to $2,000 per door. For a typical three-bedroom home with 10 windows and 2 exterior doors, expect a total range of roughly $7,000 to $14,000 at mid-range. Bundling all units into one project often reduces per-unit installation costs by 10% to 40% because the installer mobilizes once and suppliers may offer volume pricing.
2. What is the cheapest window and door material that still performs well?
Vinyl (UPVC) is the most affordable window frame material, starting around $100 per unit, and it delivers solid thermal performance with U-factors between 0.20 and 0.40. For doors, steel is the budget leader at $300 to $800 per unit, offering excellent security and decent insulation through foam-core construction. Both materials require minimal maintenance. The trade-off is limited aesthetic flexibility — vinyl cannot be repainted easily, and steel can dent on impact. If energy efficiency and modern aesthetics matter equally, aluminium frames with thermal break technology offer a step up at a moderate price increase, particularly in ranges like MEICHEN’s aluminium window collection designed to meet Australian energy standards.
3. Is it worth paying more for triple-glazed windows over double-glazed?
Triple glazing adds roughly 30% to 50% over double-pane pricing for the glass component alone, pushing a medium window from the $300-$550 range to $450-$800. The upgrade delivers superior insulation and noise reduction, but the per-dollar efficiency gain is smaller than the jump from single to double glazing. Triple pane makes the strongest financial case in extreme climates with harsh winters or intense summers, where HVAC systems work hardest and energy savings accumulate faster. For mild climates or budget-conscious projects, double-pane Low-E glass with argon fill hits the performance sweet spot at a lower cost.
4. How much of my window and door project cost goes to installation labor?
Labor typically accounts for 40% to 50% of total project cost on a straightforward replacement. That ratio shifts higher when the job involves structural modifications, high-rise access requiring scaffolding, lead paint removal in pre-1978 homes, or permit and inspection requirements. Hidden costs like old unit disposal ($25-$75 per unit), trim replacement, flashing, drywall repair, and painting can add another 15% to 25% on top of the quoted installation price. Always request an itemized quote that separates product cost from labor and lists every ancillary charge so you can compare bids accurately.
5. When is the best time of year to buy replacement windows and doors?
Late autumn and winter typically offer the best pricing because installer demand drops and contractors actively seek work to fill their schedules. This slower season brings shorter lead times, more negotiating leverage on labor rates, and manufacturer promotions designed to move inventory. Many homeowners find the strongest deals in August, November, and January. Modern sealants cure effectively across a wide temperature range, so cold-weather installation does not compromise quality when handled by experienced professionals. Avoid peak spring and summer months when high demand limits both scheduling flexibility and discount opportunities.
More Window & Door Guides