Assess the Damage Before You Begin
Those chalky white streaks and rough patches on your aluminium window frames might look like a lost cause, but most deterioration is reversible with the right approach. The catch? Picking the wrong method for your specific problem can make things worse. A few minutes spent diagnosing what you’re actually dealing with saves hours of wasted effort and protects the frame from unnecessary damage.
Identify Your Type of Aluminium Deterioration
Aluminium window frames deteriorate in four distinct ways, and each one calls for a different fix. Run your fingers across the surface and compare what you see and feel against these indicators:
- Oxidation — A white or grey chalky residue that rubs off on your hand. The surface feels powdery and dull rather than smooth. This is the most common issue with oxidized windows exposed to weather over many years. Aluminium naturally forms a thin oxide layer for protection, but prolonged environmental exposure causes that layer to thicken and break down into visible residue.
- Pitting — Small craters or pinhole-sized dents scattered across the surface. Run a fingernail over the frame and you’ll catch on tiny rough spots. Pitting develops when chlorides from coastal salt air or pooled moisture attack localised areas of the metal.
- Staining — Discolouration that doesn’t wipe away. Dark streaks, greenish marks, or uneven patches caused by contact with other metals, runoff from building materials, or pollution deposits. The frame surface still feels relatively smooth underneath.
- Corrosion — Deeper structural damage where the metal itself is compromised. You’ll notice flaking, rough craters deeper than surface pitting, or areas where the frame feels noticeably thinner. Aluminium window corrosion at this level often results from years of untreated oxidation combined with persistent moisture exposure.
Correctly identifying your problem matters because treating deep corrosion like simple oxidation won’t hold, and aggressive sanding on a lightly oxidized frame removes material you didn’t need to touch.
How Finish Type Affects Your Restoration Approach
Your aluminium frames left the factory with one of three finishes, and each responds differently to restoration techniques:
- Mill finish — Raw aluminium with no coating beyond its natural oxide layer. These frames are the most straightforward to restore since you can sand, polish, and recoat without worrying about damaging a factory-applied treatment.
- Anodized — An electrochemical process thickens the natural oxide layer into a hard, wear-resistant surface that becomes part of the metal itself. Anodized aluminum windows require careful handling because aggressive sanding permanently removes the anodised layer, and it cannot be reapplied at home.
- Powder-coated — A baked-on paint finish that sits on top of the aluminium. Restoration here focuses on the coating rather than the metal beneath. Peeling or chalking powder coat needs stripping before refinishing.
Not sure which finish you have? Mill finish looks raw and metallic with visible rolling marks. Anodised frames have a uniform, slightly matte metallic sheen without a paint-like texture. Powder-coated frames show a consistent colour with a smooth, paint-like feel.
One safety note before you start: assessing upper-storey windows from a ladder introduces fall risk. Use binoculars from ground level for an initial check, and only work at height with a stable platform or scaffolding secured on level ground. Never lean out from inside to inspect exterior frame surfaces.
With your deterioration type and finish identified, you can plan a restoration approach matched to the actual problem rather than guessing your way through generic advice.
Step 1 – Gather Tools and Plan Your Project
Knowing what’s wrong with your frames is half the battle. The other half is having the right gear on hand before you start, so you’re not running to the hardware store mid-project with sanding dust still on your hands. A clear plan also helps you decide whether the job fits a single weekend or needs a few dedicated sessions spread across a fortnight.
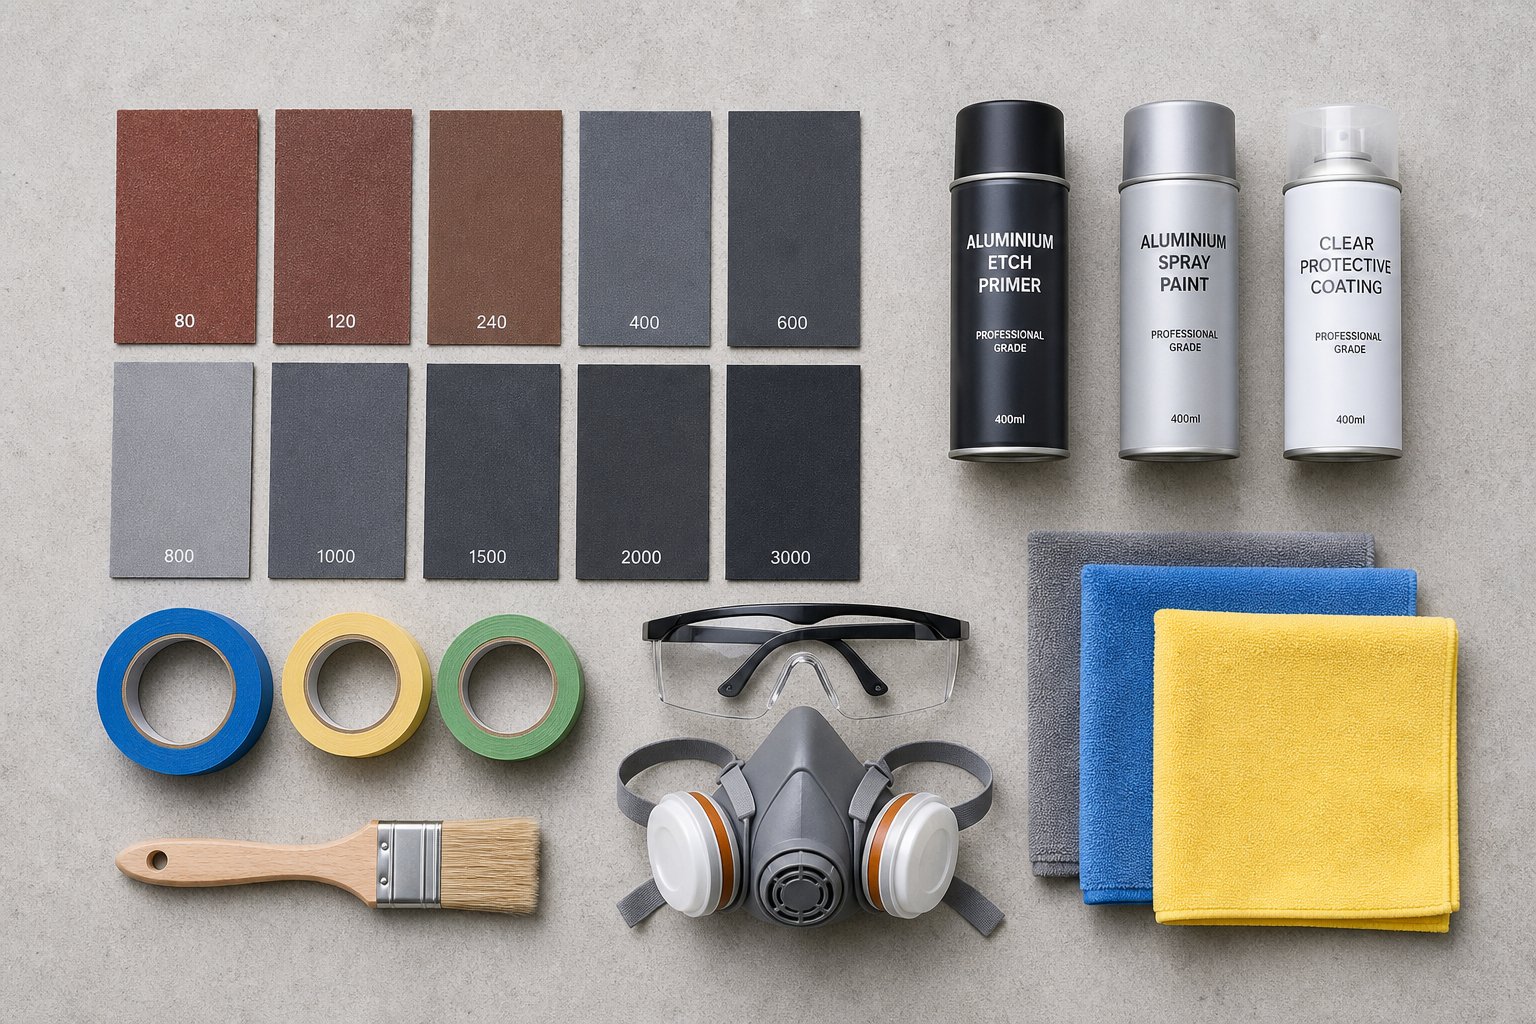
Essential Tools and Materials Checklist
Organise your supplies into five categories so nothing gets overlooked:
- Cleaning supplies — Mild detergent or commercial aluminium degreaser, microfibre cloths, lint-free rags, soft-bristle brush, bucket, and a garden hose or spray bottle for rinsing.
- Oxidation removal products — Fine-grit sanding sponges (220–320 grit for light work, 180 grit for heavier oxidation), Scotch-Brite abrasive pads, aluminium polish or dedicated oxide remover, and wet-and-dry sandpaper in progressive grits (400, 600, 800) for severe pitting.
- Surface repair materials — Aluminium-compatible epoxy filler, plastic applicator, 320–400 grit sandpaper for feathering repairs smooth, and tack cloths for dust removal between stages.
- Finishing products — Self-etching metal primer, acrylic enamel or epoxy-based paint for aluminum window frames, clear protective sealant (optional for extra UV resistance), and a quality spray gun or aerosol cans formulated for metal. If you’re planning on repainting aluminium window frames, choosing the right topcoat at this stage prevents adhesion failures later.
- Safety equipment — P2 respirator mask, chemical-resistant gloves, safety goggles, drop sheets, painter’s tape, and plastic masking film.
A note on chemical handling: oxidation removers and etch primers release fumes that irritate lungs and eyes. Always work in a well-ventilated area. Outdoors is ideal. If you’re working on frames still installed in the house, open adjacent windows and position a fan to draw fumes away from your breathing zone.
Budget Planning and Time Estimates by Severity
Your total spend and time commitment depend heavily on how damaged the frames are. The table below gives realistic DIY estimates for a standard home with 8–12 windows:
| Severity | Typical Scope | Estimated DIY Cost (AUD) | Time Required | Difficulty |
|---|---|---|---|---|
| Mild | Light oxidation, surface grime, minor dullness | $80–$200 | 1 weekend (1–2 days) | Beginner-friendly |
| Moderate | Visible oxidation, some pitting, staining, repainting needed | $250–$500 | 2–3 days | Intermediate |
| Severe | Heavy oxidation, deep pitting, corrosion, full strip and refinish | $500–$900 | 4–6 days (across 1–2 weekends) | Advanced |
These figures cover materials only. Professional spray-painting typically runs $250 to $600 per window in Australia, so a full-house professional job can reach $2,500–$7,500 depending on access and condition. DIY delivers significant savings if you’re comfortable with the prep work.
For anyone wondering how to repaint aluminum window frames on a budget, the moderate tier covers most suburban homes where frames have been neglected for five to ten years but haven’t reached structural failure.
Seasonal timing matters. Aim for mild, dry weather — spring or autumn in most Australian regions. Paint and primer need stable temperatures (roughly 10–30°C) to cure properly. High humidity slows drying and can trap moisture under coatings, while extreme summer heat causes paint to flash-dry before it levels out, leaving an uneven finish. Avoid painting on days with forecast rain within 24 hours of application.
With your materials sorted and a realistic timeline mapped out, the next priority is protecting the parts of your windows that shouldn’t be touched by chemicals, sandpaper, or paint.
Step 2 – Protect Hardware and Seals
Chemicals that strip oxidation from aluminium will destroy rubber seals in minutes. Etch primers bond permanently to anything they touch. Sanding dust works its way into lock mechanisms and grinds them down from the inside. Every component that isn’t aluminium needs protection before any restoration work begins — skip this step on an old aluminium window and you’ll trade a cosmetic problem for a functional one.
Mask and Remove Hardware Safely
Handles, locks, and hinges on aluminium window framing are typically held by Phillips-head or hex screws that come out easily with the right driver. Removing hardware entirely gives you unobstructed access to the frame surface and eliminates the risk of chemical splashes or accidental sanding damage. For anodized aluminium frame windows with concealed fixings, check for small plastic caps covering the screw heads.
As you remove each piece, drop the screws into a labelled zip-lock bag — one bag per window, marked with masking tape and a permanent marker noting its location (e.g., “kitchen left” or “bedroom upper”). Hinges especially vary between windows in older homes, and mixing them up during reinstallation creates alignment headaches.
If hardware is seized or you’d rather not remove it, wrap each piece tightly with painter’s tape, pressing the edges down firmly so no cleaning solution or primer can wick underneath.
Protect Seals, Weatherstripping, and Glass
Rubber weatherstripping and silicone seals are particularly vulnerable. Phosphoric acid in etching solutions degrades rubber, causing it to crack and lose flexibility. Solvent-based primers and paints soften silicone permanently. Even mild abrasive pads can nick seal edges enough to compromise their weather resistance.
Follow this sequence to mask everything properly:
- Inspect all rubber seals and weatherstripping. If they’re already cracked, brittle, or compressed flat, plan to replace them after restoration rather than protecting damaged material. Source compatible replacements from the window manufacturer or a specialist glazing supplier — bring a short sample piece for matching the profile.
- Press quality painter’s tape (such as 3M Blue or FrogTape) directly along the edge where the seal meets the aluminium frame. Run your fingernail along the tape edge to create a tight bond that prevents chemical creep.
- Tape off glass panes by running tape along the frame-to-glass junction, overlapping onto the glass by 2–3 mm. This small overlap also protects the glazing sealant beneath.
- Cover larger glass areas with plastic sheeting or builder’s paper, secured at the taped edges. This catches overspray during priming and painting stages.
- Protect surrounding wall surfaces, sills, and reveals with drop sheets taped at the frame perimeter. Rendered and painted walls stain easily from acid-based cleaners.
Take a moment to photograph each window before you start. The images serve as a reference for hardware placement and seal positioning when you’re reassembling everything at the end.
With glass, seals, and hardware shielded from harm, the frames are fully exposed and ready for the cleaning stage that reveals their true condition underneath years of grime.
Step 3 – Deep Clean the Aluminium Frames
Bare aluminium exposed to decades of weather rarely looks as bad as it actually is — or as good. Layers of grime, pollution deposits, and surface residue mask the true condition underneath, making it impossible to judge how much sanding or filling the frame actually needs. Cleaning isn’t just housekeeping before the real work begins. It is the diagnostic step that confirms your restoration plan or changes it entirely.
Choose the Right Cleaning Solution
Aluminium’s protective oxide layer is thinner than a human hair. Aggressive products strip it away or etch the metal surface, creating new damage in the process. Steel wool and abrasive scouring pads leave micro-scratches that trap moisture and accelerate future oxidation. High-pressure washers can force water behind seals you just spent time protecting. The goal is to remove contamination without touching the metal itself.
So how do you clean aluminium window frames without causing harm? Stick to products designed for the job:
- Safe choices — Mild dish soap diluted in warm water, dedicated aluminium window frame cleaner (pH-neutral formulas), automotive wash solutions, or a 50/50 mix of white vinegar and water for stubborn mineral deposits.
- Unsafe choices — Bleach, ammonia-based cleaners, caustic soda, acidic tile cleaners, steel wool, wire brushes, abrasive scouring pads, and high-pressure spray nozzles.
For frames with heavy environmental buildup — common in coastal areas or near busy roads — a non-abrasive commercial aluminium cleaner outperforms household soap. These formulations cut through oxidation residue and pollution films without altering the metal’s surface chemistry.
Three-Stage Cleaning Technique
Whether you’re tackling light dust or years of neglect, the process follows the same structure. Intensity and dwell time scale up with severity.
Stage 1 — Initial rinse. Use a garden hose on low pressure or a spray bottle to wet the entire frame and flush away loose dirt, cobwebs, and debris. This prevents gritty particles from scratching the surface during hands-on cleaning. For frames still installed, work from top to bottom so dirty water doesn’t run over sections you’ve already rinsed.
Stage 2 — Wash with a safe cleaner. Apply your chosen solution with a soft-bristle brush or microfibre cloth. Work in small sections, using gentle circular motions to lift grime without grinding it into the surface. For light buildup, a single pass does the job. Frames with years of accumulated deposits need a longer dwell time — apply the solution, let it sit for two to three minutes, then agitate with the brush before rinsing. Pay extra attention to the window sashes and track areas where grime concentrates.
Stage 3 — Final rinse and dry. Rinse all cleaner residue thoroughly with clean water. Any soap or cleaning solution left behind can cause staining or interfere with primer adhesion later. Dry the frames immediately with a lint-free cloth to prevent water spots and to stop moisture sitting in pitted areas.
If your windows have removable sashes, taking them out and cleaning on a flat surface gives you access to hidden edges and the frame rebate where dirt packs in over the years. Fixed frames cleaned in place still respond well to this method — just be more deliberate about catching runoff with drop sheets below.
Here’s the critical takeaway: once the grime is gone, you’ll see the frame’s real condition for the first time. Oxidation that looked severe under a layer of dirt might turn out to be superficial. Conversely, areas that seemed fine may reveal pitting or staining that only becomes visible on a clean surface. Reassess your damage diagnosis before moving to the next stage — the cleaning step often shifts a project from one severity tier to another.
Step 4 – Remove Oxidation and Surface Corrosion
Clean frames tell the truth. That white, chalky residue still clinging to the surface after a thorough wash isn’t dirt — it’s oxidation that has bonded to the metal and won’t budge without targeted removal. This is where the real restoration begins, and the method you choose needs to match the severity you’re looking at. Go too gentle on heavy buildup and you’ll waste a weekend achieving nothing. Go too aggressive on a light haze and you’ll grind away metal that was perfectly sound underneath.
A quick bit of science explains why this happens. Aluminium reacts with oxygen the instant it’s exposed to air, forming a microscopically thin aluminium oxide layer that actually protects the metal beneath. Under normal conditions, this passive layer is invisible and beneficial. But years of UV exposure, moisture cycling, salt air, and pollution cause that protective film to thicken unevenly, breaking down into the powdery white residue you see on oxidised aluminium window frames. In coastal Australian locations — think anywhere from the Gold Coast to the Mornington Peninsula — salt-laden air accelerates this process dramatically, turning mild surface fogging into heavy chalking within a few years.
Match Your Method to Oxidation Severity
The table below pairs each level of deterioration with the appropriate removal technique. Jumping straight to heavy sanding on a mildly affected frame removes material unnecessarily, while gentle polishing won’t touch deep window corrosion that has eaten into the surface.
| Severity | What You’ll See | Removal Method | Grit / Product | Notes |
|---|---|---|---|---|
| Mild | White haze, slight dullness, chalky residue transfers to fingers | Fine abrasive paste or aluminium polish | Non-scratch pad (Scotch-Brite white) or aluminium cream polish | Surface still feels smooth; no pitting visible |
| Moderate | Distinct white patches, rough texture, early pitting visible | Dedicated oxide remover (oxalic or phosphoric acid-based) or fine-grit sanding | 400–600 grit wet-and-dry sandpaper or chemical oxide remover | Neutralise acid products immediately after use; rinse thoroughly |
| Severe | Heavy white buildup, deep pitting, flaking, sandpaper-like texture | Progressive wet sanding followed by corrosion-inhibiting primer | Start at 240–320 grit, progress through 400, 600, then 800 grit | May require professional assessment if pitting exceeds 25% of metal thickness |
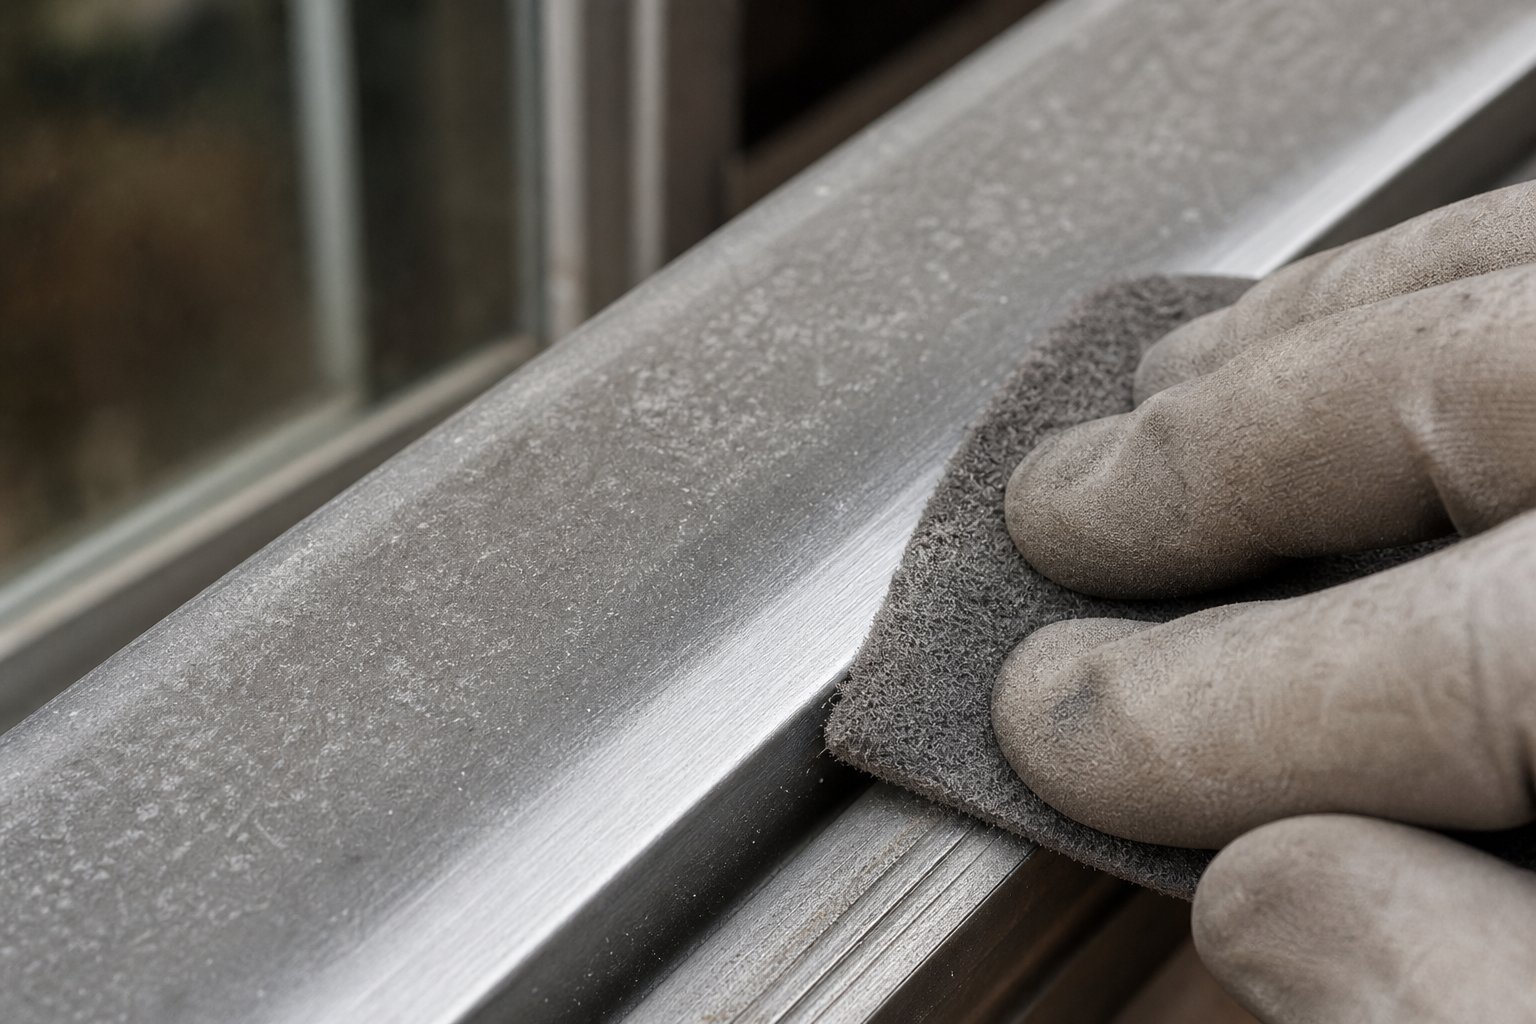
For mild oxidation: Apply a quality aluminium polish or fine abrasive cream to a non-scratch pad and work in straight, overlapping strokes along the length of the frame. The chalky layer lifts away quickly, revealing brighter metal beneath. Wipe residue with a clean microfibre cloth and inspect. One or two passes typically restores the surface.
For moderate oxidation: Chemical oxide removers containing oxalic acid dissolve the thickened oxide layer without requiring heavy abrasion. Apply the product according to label directions — typically a five to fifteen minute dwell time — then agitate gently with a non-metallic pad. If you prefer a mechanical approach, wet-sand with 400-grit paper using light, even pressure. Always sand in one direction, following the grain of the metal, and keep the surface wet to prevent clogging and heat buildup.
For severe oxidation with pitting: Start with 240 or 320 grit to level the worst craters, then work progressively through finer grits until the surface feels uniformly smooth at 800 grit. Wet sanding is essential here — water flushes aluminium particles from the paper, reduces friction heat, and produces a more consistent finish. Dry the frame completely before moving to the priming stage.
Anodised aluminium window frames demand a different approach entirely. The anodised layer is a deliberately thickened oxide coating created through an electrochemical process — it’s harder and more durable than the natural oxide on mill-finish frames. If the anodised surface is still intact (uniform colour, no flaking), stick to gentle chemical cleaners like citric or oxalic acid solutions to lift surface haze without disturbing the coating. Abrasive methods destroy anodising permanently, and you cannot re-anodise installed window frames — the process requires industrial immersion tanks. Once the anodised layer is gone, your only option is to treat the frame as bare aluminium and apply primer and paint.
Common Mistakes That Cause Further Damage
Restoration forums are full of homeowners who made their frames worse by rushing this step. These are the errors that turn a recoverable situation into a replacement conversation:
- Over-sanding anodised frames — Using abrasive pads or sandpaper on anodised aluminium window frames strips the protective layer in seconds. That coating took an industrial process to apply and cannot be restored at home. If you’re unsure whether your frames are anodised, test an inconspicuous spot with fine sandpaper — anodised surfaces resist scratching noticeably more than bare aluminium.
- Using incompatible chemicals — Chlorine-based cleaners, bleach, and caustic oven cleaners pit aluminium rapidly and cause irreversible damage. Steel wool embeds iron particles into the surface that trigger galvanic corrosion — tiny rust spots that spread outward from each embedded fragment when moisture is present.
- Failing to neutralise acid-based removers — Oxalic and phosphoric acid products keep reacting with the metal until fully rinsed away. Residual acid left in corners, joints, or pitted areas continues dissolving aluminium long after you’ve moved on. Rinse with generous amounts of clean water — ideally distilled or deionised to avoid hard-water deposits — and allow twelve to twenty-four hours of drying time before applying any coating.
- Sanding against the grain — Cross-grain scratches catch light differently and remain visible even under paint. Always work parallel to the length of the frame profile in consistent, overlapping strokes.
- Working in direct sunlight — Chemical removers evaporate rapidly on hot surfaces, leaving concentrated residue that etches the metal unevenly. Work in shade or during cooler parts of the day, particularly during Australian summers when frame surfaces can exceed 50°C in direct sun.
Once oxidation is removed and the surface is smooth, uniform, and completely dry, you’re looking at bare aluminium ready to accept filler where pitting remains or primer where the surface is sound. The quality of this step directly determines how well any subsequent coating adheres — and how many years it lasts before the cycle starts again.
Step 5 – Repair Pitting and Surface Damage
Smooth, oxidation-free aluminium still isn’t ready for paint if the surface is peppered with craters. Pitting leaves behind a landscape of tiny voids that trap moisture, undermine coating adhesion, and telegraph through even multiple layers of paint. Filling these imperfections creates the flat, uniform substrate that primers and topcoats need to perform properly — and it’s the difference between aluminium window repair that lasts a decade and a finish that peels within a year.
Fill and Smooth Surface Imperfections
For pits, scratches, and shallow gouges, an aluminium-compatible epoxy filler or two-part metal repair putty bonds directly to the bare metal and sands to a smooth finish. Follow this sequence:
- Wipe the sanded frame with a tack cloth or lint-free rag dampened with methylated spirits. Any dust or oil left in the pits prevents the filler from gripping.
- Mix your two-part epoxy filler according to the manufacturer’s ratio. Work in small batches — most formulas begin curing within five to ten minutes.
- Press filler firmly into each pit or scratch using a flexible plastic applicator. Slightly overfill each void, leaving the filler sitting just proud of the surrounding surface. Forcing material into the depression eliminates air pockets that cause the repair to pop out later.
- Allow full cure time before sanding. Rushing this step means the filler compresses rather than sands, leaving an uneven surface. Most products need two to four hours at moderate temperatures.
- Sand the cured filler flush with the frame using 320-grit paper, then refine with 400-grit for a seamless transition. Run your fingertips across the repair — you shouldn’t feel any ridge or depression where the filler meets bare aluminium.
- For damaged corners and mitred joints, build up filler in thin layers rather than one thick application. Thick fills shrink as they cure and crack under thermal movement. Shape the final layer to match the original profile using a damp finger or contoured sanding block.
- Wipe the entire frame with a tack cloth one final time. The surface should feel uniformly smooth with no grit, dust, or raised edges anywhere.
Proper surface preparation at this stage directly determines the longevity of any paint or protective coating applied afterward. A primer can’t bridge gaps that filler should have addressed, and topcoat won’t hide texture that sanding should have removed.
Assess Structural Integrity of Damaged Frames
Not every frame is worth repairing. Cosmetic damage — surface pitting, light scratches, minor staining — sits within the outer fraction of the metal’s thickness and doesn’t affect how the frame performs. Structural damage is a different story entirely.
Here’s how to tell the difference when repairing aluminium window frames:
- Cosmetic — Pits are shallow (under 1 mm deep), scattered, and the frame still feels solid when you press firmly on the profile. The frame holds its shape, hardware mounts securely, and the window operates smoothly.
- Structural — Pitting exceeds 1–2 mm depth, clusters in load-bearing sections (corners, hinge mounts, locking points), or the frame flexes noticeably under hand pressure. You might see daylight through corroded areas, or find that screws no longer grip because the surrounding metal has thinned.
Aluminium window frame repair makes financial sense when damage is cosmetic and confined to surface layers. Frames with pitting deeper than 2–3 mm or corrosion at structural joints have lost enough material that filler becomes a cosmetic bandage over a mechanical weakness. These frames may pass visual inspection after repair but fail under wind load or when hardware is tightened during reinstallation.
If you’re uncertain, measure the wall thickness of the frame profile at a corroded section versus an unaffected section. Losing more than 25–30% of the original thickness at any point — particularly at corners or where hinges mount — means the frame’s load-carrying capacity is compromised. At that point, the honest assessment is that replacement delivers better long-term value than repeated repair attempts.
Frames that pass the structural test emerge from this step with a surface that’s smooth, sound, and chemically clean — the ideal canvas for primer and paint to grip and protect for years to come.
Step 6 – Refinish with Paint or Protective Coating
A smooth, primed-ready surface is only potential until you lock it in with a finish that protects against the next decade of weather. This is the step that transforms dull, repaired aluminium back into something that actually looks intentional — and the finish you choose determines how long that transformation holds.
So, can you paint aluminium window frames? Absolutely — with the right preparation and primer system, paint adheres beautifully to aluminium and lasts years. The key is understanding that bare aluminium rejects standard house paint. You need a chemical bridge between the metal and your topcoat, and that bridge is an etch primer.
Painting Aluminium Frames Step by Step
If you’ve followed the previous steps, your frames are clean, smooth, and free of oxidation. Here’s how to paint aluminium window frames for a durable, professional-looking result:
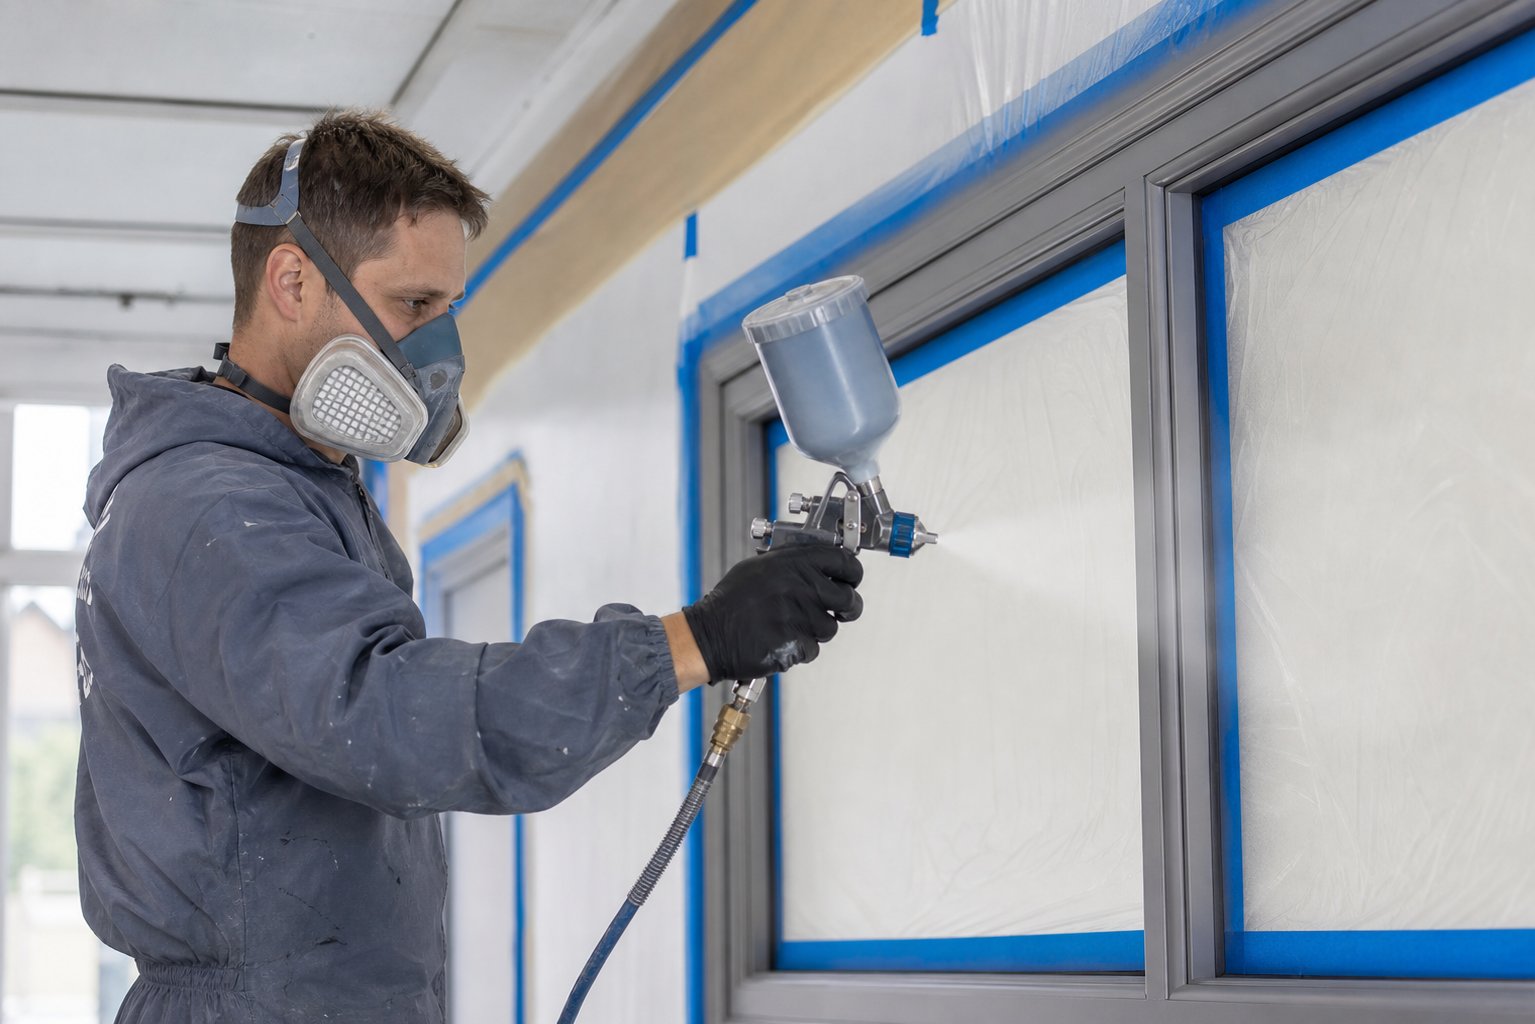
- Apply self-etching primer. Spray or brush a thin, even coat of self-etching primer formulated for non-ferrous metals. This primer contains mild phosphoric acid that chemically bonds to the aluminium oxide layer while laying down a surface that topcoat can grip. Keep passes light — heavy application causes runs in the narrow frame profiles. One coat is sufficient for self-etching formulas; two-part epoxy primers benefit from a second coat for maximum corrosion resistance.
- Observe the recoat window. Check the primer label for its recoat timing — typically one to four hours. Apply your topcoat within this window while the primer surface is still chemically receptive. Miss it, and you’ll need to lightly scuff with 320-grit paper before proceeding.
- Apply the first topcoat. Use a 100% exterior acrylic enamel or urethane-modified paint. Spray application (HVLP gun or quality aerosol) delivers the smoothest finish on narrow aluminium profiles where brush strokes show easily. If brushing, use a high-quality synthetic brush and work in long, even strokes along the frame length. Thin coats prevent drips and level out better than thick ones.
- Apply the second topcoat. After the first coat dries fully (four to twenty-four hours depending on product and humidity), lay down a second coat for complete colour depth and UV protection. Two coats is the minimum for exterior durability; a third coat adds insurance in harsh coastal or high-UV environments.
- Allow full cure time. The paint feels dry within hours, but full chemical curing takes seven to fourteen days. Avoid closing windows tightly against fresh paint, cleaning the frames, or reattaching hardware until curing is complete.
Painting anodised aluminium window frames requires extra attention during prep. The anodised layer is extremely hard and non-porous, so mechanical scuffing with 180–220 grit pads is essential to create adhesion. A two-part epoxy primer outperforms self-etching options on anodised surfaces because it forms a stronger chemical bond against that dense coating.
For colour matching, most paint suppliers can tint metal primers and topcoats to any colour you choose. If you’re trying to match existing frames on the same building, bring a small sample piece or use a colour-matching app — faded originals rarely match their original specification after years of UV exposure.
Powder Coating vs DIY Paint Comparison
Powder coating aluminium windows delivers a factory-quality finish that outperforms brush or spray painting on every durability metric. The process applies dry powder electrostatically, then bakes it in an oven at around 200°C, fusing it into a seamless, chip-resistant shell. The catch? It requires complete frame removal and professional equipment — not a weekend DIY job.
For homeowners weighing how to repaint aluminium window frames themselves versus sending them out for professional powder coating, this comparison clarifies the trade-offs:
| Factor | DIY Painting | Professional Powder Coating |
|---|---|---|
| Durability | 8–12 years with quality products and proper prep | 15–25 years; superior scratch and chip resistance |
| Cost per window (AUD) | $30–$80 in materials | $150–$400 per frame (supply and service) |
| DIY feasibility | High — achievable with careful preparation | Not DIY — requires industrial oven and electrostatic equipment |
| Finish quality | Good to very good; minor texture variation possible | Excellent; uniform, consistent, factory-level smoothness |
| Colour options | Virtually unlimited via tinting | Wide RAL colour range; some custom matching available |
| Downtime | Frames stay installed; 1–2 days per window | Frames removed for 3–7 days during processing |
A third option suits frames that are structurally sound and aesthetically acceptable but need ongoing protection: clear protective coatings. Marine-grade clear sealants or automotive clear coats add UV resistance and moisture protection without changing the frame’s appearance. These work particularly well on mill-finish aluminium where you want to preserve the natural metallic look rather than paint over it.
Whichever finish you choose, the longevity of the result depends entirely on what happens after the final coat cures. Environmental exposure starts working against your new finish from day one — and a simple maintenance routine is what separates a restoration that lasts from one that needs repeating in three years.
Step 7 – Maintain Your Restored Frames Long-Term
A fresh finish only stays fresh if you give it some ongoing attention. The good news is that maintenance after restoration is far less intensive than the restoration itself — a few hours per season keeps oxidation from creeping back and protects the work you’ve already invested in.
Seasonal Maintenance Schedule
Your maintenance frequency depends on two things: the type of finish now on your frames and how harsh your local environment is. Frames exposed to coastal salt air or heavy urban pollution need more frequent care than those in sheltered suburban settings. As a baseline, follow this cycle:
- Quarterly (every 3 months) — Wash frames with mild pH-neutral detergent and a soft cloth. Rinse thoroughly and dry. This removes salt, dust, and pollutant films before they bond to the surface and begin breaking down your coating.
- Biannually (spring and autumn) — Apply a thin layer of protective car wax or silicone-based sealant to painted or clear-coated frames. This sacrificial barrier absorbs UV damage and repels moisture, extending the life of the paint beneath. Lubricate all hardware with silicone spray at the same time.
- Annually — Conduct a close inspection for early oxidation signs: white haze, chalking, or any spot where the coating feels rough or has lost its sheen. Catching these early means a quick polish rather than a full strip-and-repaint job. Check seals and weatherstripping for cracking or compression while you’re at it.
Powder coated aluminium windows — whether factory-applied or professionally recoated — tolerate environmental exposure better than brush-applied paint, but they still benefit from quarterly washing. The powder coat surface resists scratching and UV degradation longer, so biannual waxing is optional rather than essential. Anodised finishes sit somewhere in between: they’re harder than paint but can develop localised chalking in high-UV areas if neglected for years.
If you find yourself needing to think about how to repaint aluminium windows again within three to five years, the maintenance schedule likely slipped — or the original prep wasn’t thorough enough. A well-maintained DIY paint job should hold eight to twelve years before repainting aluminium windows becomes necessary again.
Extend the Life of Your Restored Finish
Environmental factors dictate how aggressively you need to maintain. Here’s a quick reference:
- Coastal properties (within 5 km of the ocean) — Increase washing to every four to six weeks. Salt crystallises in frame crevices and accelerates coating breakdown rapidly if left unchecked.
- High-UV zones (northern Australia, west-facing elevations) — Prioritise UV-protective wax or sealant. Reapply every six months rather than annually.
- Urban or industrial areas — Airborne particulates and acid rain residue settle on horizontal frame surfaces. Monthly wipe-downs of sills and bottom rails prevent staining that etches through coatings over time.
- Sheltered suburban locations — The standard quarterly schedule is sufficient. These frames have the easiest maintenance profile.
It’s worth noting that modern aluminium window systems with factory-applied powder-coated finishes — like those from manufacturers such as MEICHEN — require significantly less upkeep than restored older frames. Factory powder coating is applied under controlled conditions with precise pre-treatment, electrostatic application, and oven curing that DIY methods can’t replicate. These systems come with durable colour options, quality hardware, and weather performance ratings designed to minimise ongoing maintenance from day one. For homeowners weighing long-term costs, understanding what genuinely low-maintenance aluminium looks like when properly manufactured puts the ongoing effort of maintaining restored frames into perspective.
Consistent upkeep protects your investment. But there comes a point with some frames where the maintenance cycle itself signals a deeper question — whether the frame is worth maintaining at all, or whether the money and time would serve you better directed elsewhere.
When Replacement Makes More Sense Than Restoration
Some frames fight back. You strip the oxidation, fill the pits, lay down fresh primer and paint — and eighteen months later the same chalky residue is creeping through again. Or the damage assessment from Step 1 revealed corrosion so deep that filler is holding the frame together more than the aluminium itself. Restoration is almost always the smarter first move, but there’s a threshold where persistence becomes false economy.
Signs Restoration Is No Longer Worth It
Knowing when to stop pouring time and money into old aluminium window frames saves you from a cycle of diminishing returns. These indicators suggest the frame has moved beyond viable restoration:
- Structural sections have lost more than 30% of their wall thickness — Corrosion at hinge mounts, corner joints, or locking points means the frame can no longer carry wind loads safely. Filler masks the problem visually but doesn’t restore mechanical strength.
- Frames are warped or bowed — Thermal cycling over decades can permanently distort old aluminium frames, creating gaps that no amount of seal replacement will close. If you can see daylight around a closed sash, the geometry is compromised.
- Repeated restoration within a five-year cycle — A properly executed restoration should hold eight to twelve years minimum. If you’re stripping and recoating every two to three years, the underlying metal condition is too degraded to hold finishes long-term.
- Single-glazed units with no thermal break — Many old metal window frames from the 1970s and 1980s use single-pane glass in a non-thermally-broken aluminium profile. These frames conduct heat directly between inside and outside, and restoration cannot address their fundamental thermal inefficiency.
- Failed compliance with current standards — Older aluminium frame windows may not meet current NCC requirements for energy efficiency (WERS ratings), fall prevention in upper storeys, or bushfire resistance in BAL-rated zones. Restoration improves appearance but cannot upgrade a frame’s engineering.
- Condensation between panes on double-glazed units — This signals permanent seal failure. The insulating gas has escaped, and the unit’s thermal performance has dropped to near single-glazed levels. Reglazing is sometimes possible, but in older frames with corroded rebates, the cost often approaches full replacement.
Making the Replace vs Restore Decision
The decision isn’t purely emotional — it’s a numbers exercise. When restoration costs climb above 60–70% of replacement cost, the financial logic shifts. New aluminium windows come with warranties, modern thermal performance, and a maintenance profile that resets the clock entirely. Restored frames, even well-done ones, carry the accumulated fatigue of their original lifespan.
This comparison frames the long-term picture for a standard window opening:
| Factor | Restoration | Replacement |
|---|---|---|
| Typical cost per window (AUD) | $150–$450 (DIY) / $300–$700 (professional) | $500–$1,500 (standard) / $1,500–$2,500+ (custom or high-performance) |
| Expected lifespan of result | 8–12 years before next major maintenance | 25–40 years with minimal upkeep |
| Energy efficiency | Limited by original frame design; no thermal break improvement possible | Thermally broken profiles with double glazing; meets current WERS and NatHERS standards |
| Aesthetic outcome | Good to very good; minor imperfections may remain in heavily pitted frames | Factory-perfect finish; consistent colour and profile across all openings |
| Ongoing maintenance | Quarterly cleaning, biannual waxing, periodic touch-ups | Quarterly cleaning only; factory powder coat resists degradation far longer |
| Compliance | Cannot upgrade to meet new NCC, BAL, or safety requirements | Engineered to current Australian Standards (AS 2047, AS 1288) |
For a home with ten old aluminium windows needing severe restoration, the DIY bill lands around $500–$900 in materials alone — plus multiple weekends of labour. Professional restoration pushes that to $3,000–$7,000. Full replacement for the same ten windows runs $5,000–$15,000 depending on specifications, but delivers decades of performance without the recurring maintenance cycle. When the gap between those figures narrows, replacement wins on lifetime value.
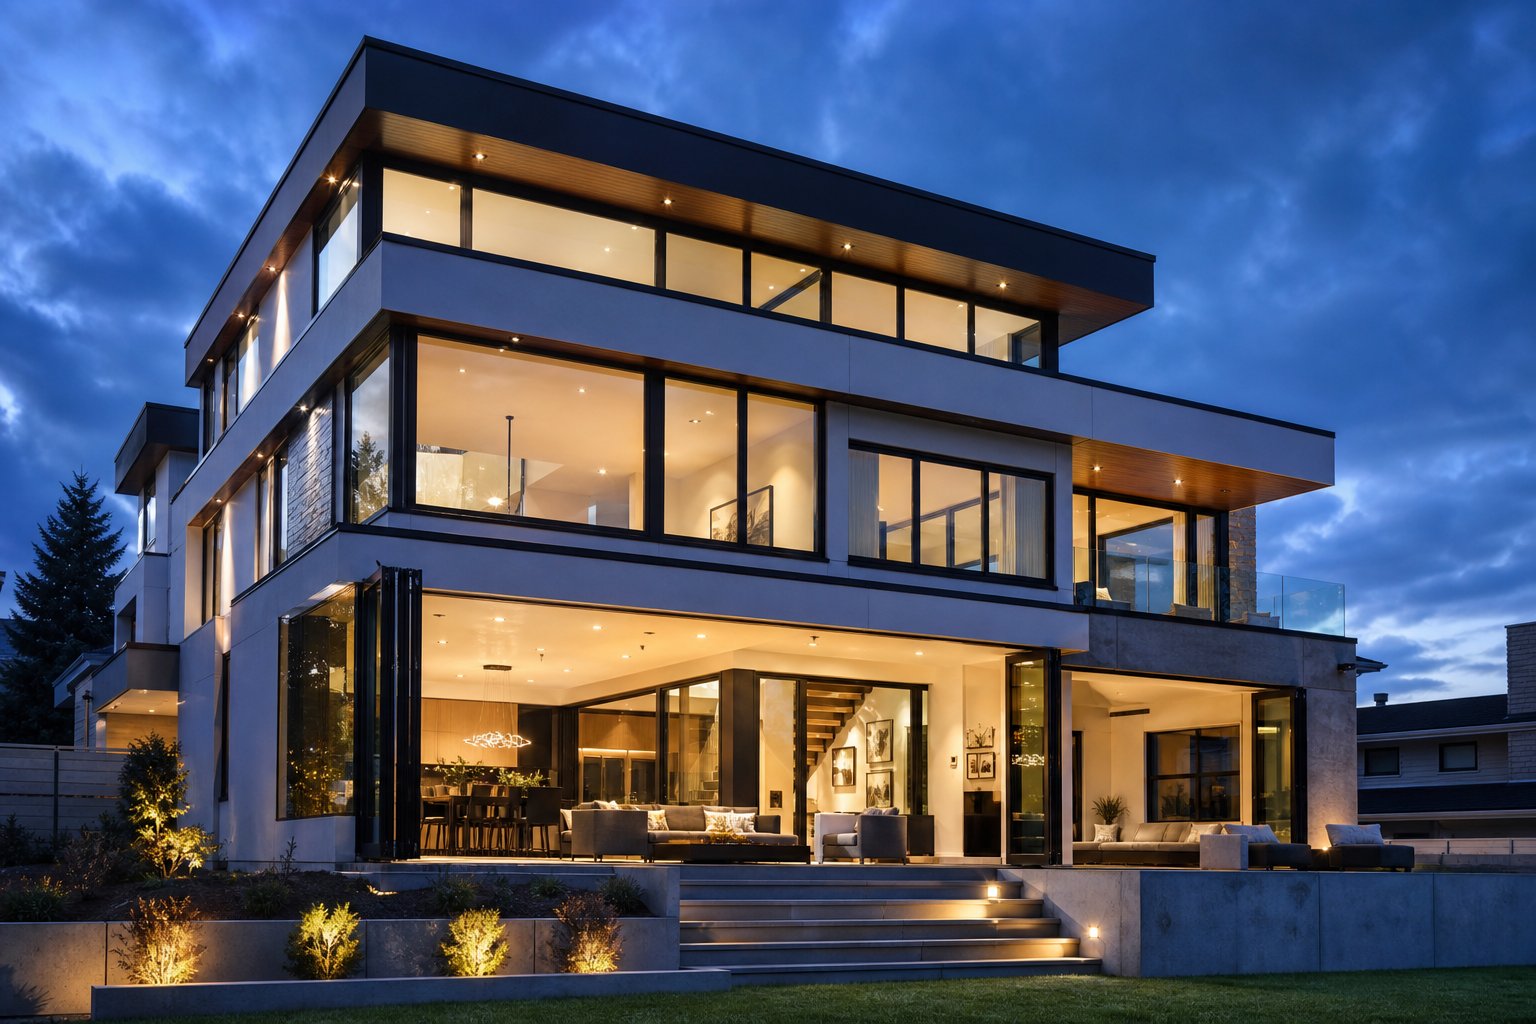
Modern aluminium window systems have evolved well beyond what those original frames offered. Manufacturers like MEICHEN produce thermally broken aluminium windows with durable powder-coated finishes, extensive colour options, quality hardware choices, and superior weather performance ratings — engineered for Australian conditions from coastal salt exposure to bushfire zones. Their systems support residential, apartment, and commercial projects with customisation that matches existing architectural styles, making replacement a long-term investment that eliminates recurring restoration costs rather than a compromise.
The honest framework is straightforward: if your frames are structurally sound, hold finishes well, and your primary issue is cosmetic, restore them. If they’re thermally inefficient, structurally compromised, non-compliant, or demanding restoration every few years, the smarter dollar goes toward replacement — and the quality of what’s available today makes that decision easier than it was a decade ago.
Frequently Asked Questions About Restoring Aluminium Window Frames
1. Can you paint aluminium window frames?
Yes, you can paint aluminium window frames successfully with proper preparation. The critical step is applying a self-etching primer formulated for non-ferrous metals before your topcoat. This primer chemically bonds to the aluminium oxide layer and creates a surface that paint can grip. Without it, standard house paint will peel within months. Use an exterior acrylic enamel or urethane-modified topcoat in at least two coats for lasting durability. With correct prep and quality products, a DIY paint job on aluminium frames can last eight to twelve years before recoating is needed.
2. How do you remove oxidation from aluminium window frames?
The removal method depends on severity. For mild oxidation (white haze that transfers to your fingers), a fine abrasive paste or aluminium cream polish applied with a non-scratch pad removes it in one or two passes. Moderate oxidation with rough texture responds to dedicated oxide removers containing oxalic or phosphoric acid, or wet sanding with 400-600 grit paper. Severe oxidation with deep pitting requires progressive wet sanding starting at 240-320 grit and working through to 800 grit. Always sand in one direction along the frame length, keep the surface wet, and neutralise any acid-based products with thorough rinsing afterward.
3. How much does it cost to restore aluminium window frames in Australia?
DIY restoration costs range from $80-$200 AUD for mild oxidation on a standard home with 8-12 windows, $250-$500 for moderate damage requiring repainting, and $500-$900 for severe corrosion needing full strip and refinish. Professional spray-painting runs $250-$600 per window, putting a full-house job at $2,500-$7,500. Professional powder coating costs $150-$400 per frame but delivers 15-25 years of durability compared to 8-12 years for DIY paint. Factor in your time commitment too: mild jobs take a weekend, while severe restoration spans 4-6 days across multiple weekends.
4. What is the difference between restoring anodised and powder-coated aluminium frames?
Anodised frames have a hard, electrochemically-created oxide layer that is part of the metal itself. You cannot re-anodise frames at home, so aggressive sanding permanently destroys this finish. Restoration is limited to gentle chemical cleaning with citric or oxalic acid solutions. If the anodised layer is already damaged, your only option is treating the frame as bare aluminium and applying primer and paint. Powder-coated frames have a baked-on paint finish sitting on top of the metal. Restoration focuses on the coating — peeling or chalking powder coat needs stripping back before you can refinish with new primer and topcoat or send frames out for professional re-powder-coating.
5. When should you replace aluminium window frames instead of restoring them?
Replacement becomes the smarter investment when frames have lost more than 30% of wall thickness at structural points, are warped or bowed beyond seal adjustment, require restoration every two to three years, or use single-glazed units without thermal breaks. Modern aluminium window systems from manufacturers like MEICHEN offer thermally broken profiles with factory powder-coated finishes lasting 25-40 years, double glazing for energy efficiency, and compliance with current NCC and Australian Standards. When restoration costs exceed 60-70% of replacement cost, the long-term value shifts decisively toward new windows that eliminate recurring maintenance cycles.
More Window & Door Guides