Planning Your Aluminium Window Installation
Whether you’re swapping out old timber frames on a Saturday afternoon or overseeing a contractor on a full renovation, understanding how to install aluminium windows gives you a serious advantage. You’ll know what good work looks like, what questions to ask, and where shortcuts cause problems down the line.
This guide walks through the entire process from start to finish: planning, measuring, preparation, fitting the aluminium window frame, sealing, inspection, and ongoing maintenance. It covers both retrofit installations (fitting a new window into an existing opening) and full new-construction installs into raw rough openings, across brick, timber-framed, and steel-framed walls. Most guides only tackle one scenario. This one handles both.
Who This Guide Is For
You don’t need to be a licensed glazier to get value here. This guide is built for:
- DIY homeowners confident with power tools and a spirit level
- Renovators replacing old timber, steel, or deteriorating aluminium windows
- Homeowners hiring a professional who want to verify the quality of the work
- Builders and owner-builders looking for a clear, wall-type-specific reference
Retrofit vs New-Construction Installation
The approach you take depends on what’s already there. A retrofit (or replacement) install slides a new aluminium window into an existing frame opening, keeping the surrounding wall intact. A new-construction install goes deeper: you’re working with a raw rough opening, integrating flashing, and anchoring directly into the structural frame. As Milgard notes, retrofit windows save time and labour costs since the contractor doesn’t need to remove exterior materials, while new-construction windows are nailed directly into the exposed studs for a more thorough result.
| Factor | Retrofit / Replacement | New Construction |
|---|---|---|
| Complexity | Low to moderate | Moderate to high |
| Tools required | Basic hand and power tools | Full toolkit plus flashing materials |
| Typical timeframe per window | 1 – 2 hours | 2 – 4 hours |
| Skill level | Confident DIYer | Experienced DIYer or professional |
What You Will Need Before You Start
Before ordering anything, it helps to map out the variables that shape your project’s scope and budget. How much does it cost to install aluminium windows? That depends on several moving parts: the window type (a simple aluminium sliding window costs less to fit than a large bifold), the size of each opening, your wall construction, the number of units, and whether you’re doing the labour yourself or hiring someone.
Aluminium window cost is driven by a combination of frame material, glass specification, hardware, and fabrication quality. Configuration differences alone can lead to price variations of 30-200%, so comparing quotes on unit price without understanding the full system is a common mistake. Focus on the spec, not just the sticker.
Plan for a full day per window if you’re working solo on a new-construction install, or a half-day per window for a straightforward retrofit. Either way, accurate measurements are the single most important factor in avoiding costly re-orders and delays.
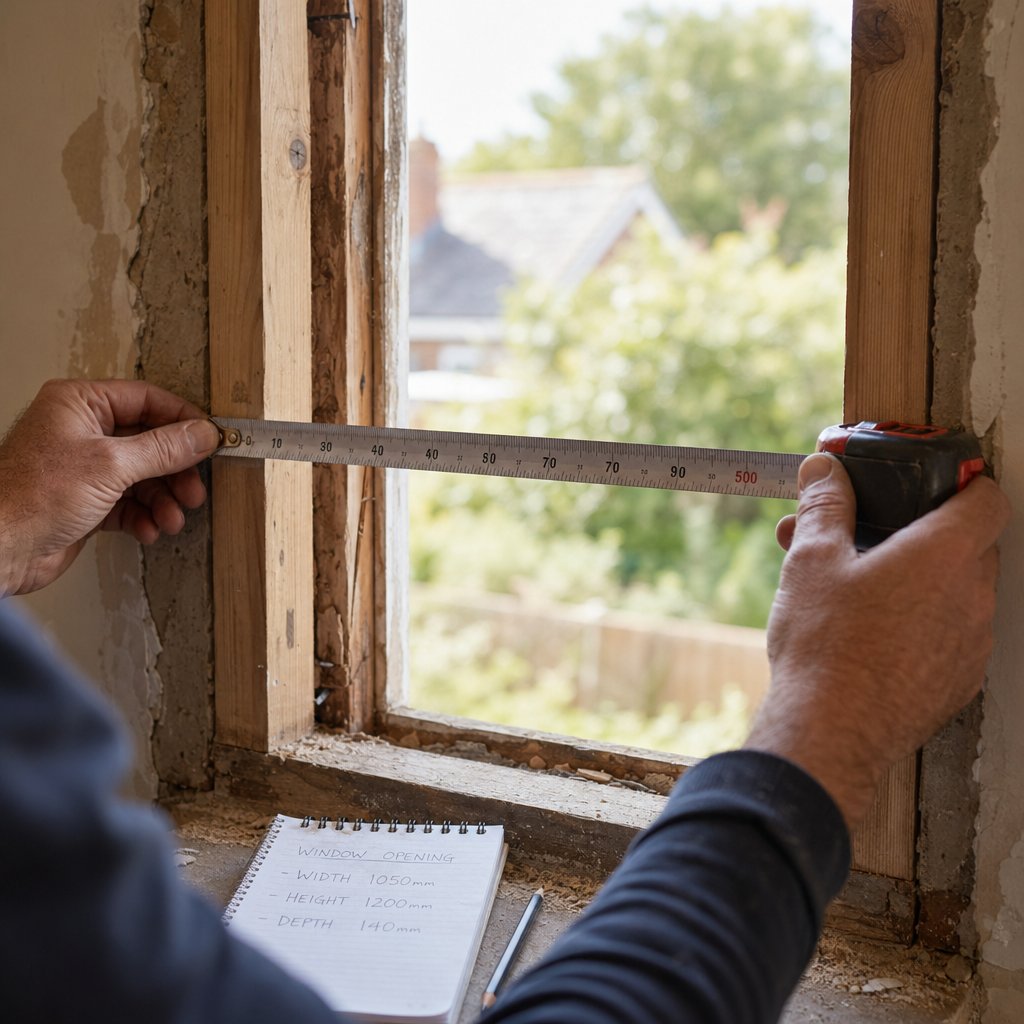
Step 1 – Measure the Opening and Order the Correct Size
A window that doesn’t fit its opening creates problems you can’t shim, seal, or trim your way out of. The Window and Door Manufacturers Association reports that measurement errors account for 78% of window installation problems and warranty claims. Whether you’re learning how to install aluminium windows in a brick wall or a steel frame, the measuring process is identical — and it’s the one step you absolutely cannot rush.
How to Measure a Rough Opening Accurately
The rough opening is the structural hole in your wall — the space framed by studs, header, and sill plate. You’re measuring this opening, not the old window sitting inside it. Existing windows may have settled or been incorrectly sized originally, so their dimensions are unreliable.
Grab a steel tape measure (cloth tapes stretch and give inconsistent readings), a notepad, and follow this sequence:
- Measure the width across the top of the rough opening, from the inside face of one stud to the other.
- Measure the width again at the middle of the opening.
- Measure the width a third time across the bottom.
- Measure the height on the left side, from the sill plate to the underside of the header.
- Measure the height at the centre.
- Measure the height on the right side.
- Measure both diagonals — top-left to bottom-right, and top-right to bottom-left.
- Record the smallest width and the smallest height. These are your ordering dimensions.
Why the smallest measurement? Walls shift, timber shrinks, and brick openings are rarely perfectly uniform. Using the smallest figure guarantees the window will physically fit through the tightest point of the opening. A window that’s even a few millimetres too wide won’t go in without reframing — and that turns a weekend job into a much bigger project.
One more thing: always measure each opening independently. Two windows in the same room might look identical, but as Lowe’s measuring guide points out, they often aren’t.
Determining the Right Window Size to Order
Your rough opening dimensions are not the same as the window unit size you need to order. The window must be smaller than the opening to leave room for shimming, squaring, and sealing around the perimeter.
Standard practice calls for roughly 10mm (about 3/8 inch) of clearance on each side — so the window unit should be approximately 20mm narrower and 20mm shorter than your smallest rough opening measurements. Some manufacturers specify slightly different tolerances, so always check the installation specs for your particular unit.
Here’s the key principle to remember: a window that’s slightly too small can be shimmed and sealed without issue. A window that’s too large means you’re either sending it back or cutting into your wall framing. When in doubt, err on the side of a marginally smaller unit.
Checking for Square and Level
Those diagonal measurements from step 7 tell you whether the opening is square. Compare the two figures. If they’re within 3mm (roughly 1/8 inch) of each other, the opening is close enough to square for a standard installation. Home Depot’s window guide notes that most replacement windows will fit securely if the diagonals are within 1/4 inch of each other.
If the difference is larger than that, you’ll also want to check plumb and level:
- Place a spirit level vertically against each side jamb to check plumb.
- Place the level horizontally on the sill to check level.
- If the bubble sits centred between the indicator lines, you’re good.
When an opening is noticeably out of square, you have two options. For minor deviations, you can correct the framing with shims during installation. For anything beyond 6mm out of square, it’s worth either reframing the opening to bring it back into true or ordering a custom-sized window built to your exact measurements. Custom sizing typically adds a few weeks to lead time and increases cost, but it’s far cheaper than fighting a bad fit for the life of the window.
With accurate measurements recorded and a correctly sized window on order, the next consideration is making sure you have the right tools and fixings lined up for your specific wall type and window style.
Step 2 – Gather Your Tools and Choose the Right Window
Having the right tools staged before the window arrives saves you from mid-install trips to the hardware store — and from improvising with the wrong fastener. The checklist below covers both retrofit and new-construction scenarios, so you’ll likely need a subset rather than every item listed.
Essential Tools and Materials Checklist
Imagine you’re halfway through fitting a frame and realise you don’t have the correct drill bit. That stall costs time and momentum. Lay everything out the night before and tick it off.
Tools:
- Spirit level (at least 600mm, ideally 1200mm for larger openings)
- Steel tape measure
- Drill/driver with a 3mm pilot bit and appropriate masonry or timber bits
- Masonry anchors or timber screws (matched to your wall type)
- Silicone sealant gun
- Low-expansion foam gun or can
- Packers and shims (various thicknesses)
- Utility knife
- Mini pinch bar
- Safety glasses and gloves
Materials:
- Self-adhesive flashing tape
- Sill pan or sub-sill tray
- Exterior-grade neutral-cure silicone
- Backer rod (closed-cell, sized to your gap width)
- Fixings appropriate to the wall substrate — dynabolts for brick, bugle screws for timber, self-tappers for steel
- Staple gun and staples (if integrating building wrap)
A second pair of hands is technically a tool, too. Aluminium frames are lighter than timber, but anything wider than about 1200mm gets awkward to lift, level, and hold in place solo. As A&L Windows recommends, have a friend on standby for the positioning stage.
Choosing the Right Aluminium Window Type for Your Project
Not all aluminium windows install the same way. A sliding window sits on a track and needs precise sill levelling. A casement window hinges outward and demands accurate plumb on the jambs. A bifold spans a wide opening and requires structural headers and multiple fixing points. Knowing these differences before you order helps you plan the right approach — and gives you a realistic sense of how much to install aluminium windows of each type.
| Window Type | Typical Use Case | Installation Complexity | Key Installation Differences |
|---|---|---|---|
| MEICHEN aluminium windows (sliding, awning, casement, fixed) | Residential builds, renovations, and multi-unit developments across Australia | Low to moderate | Australian-standard-compliant frames with consistent tolerances; energy-efficiency rated; clear installation specs simplify both DIY and professional fitting |
| Sliding | Bedrooms, living areas, kitchens — anywhere space is tight | Low | Track must be perfectly level; sashes ride on rollers, so sill alignment is critical |
| Awning | Bathrooms, kitchens, high-set ventilation | Low to moderate | Hinges at the top; needs clearance above for the sash to open outward; weathersealing around the hinge line is key |
| Casement | Living rooms, studies, bedrooms wanting maximum airflow | Moderate | Side-hinged; jambs must be plumb for the sash to close flush and compress the seal evenly |
| Fixed | Feature windows, highlight panels, picture windows | Low | No moving parts — simplest to install; focus is entirely on squareness and sealant quality |
| Bifold | Indoor-outdoor transitions, wide openings | High | Multiple panels on a shared track; requires a structural header, precise track levelling, and professional fitting for spans over 3m |
| Louvre | Tropical climates, laundries, ventilation-focused rooms | Moderate | Multiple glass blades in a single frame; frame must be perfectly plumb or blades won’t seal when closed |
If you’re weighing up options, MEICHEN’s aluminium window range is worth exploring — their collection covers sliding, awning, casement, and fixed configurations, all built to Australian standards with energy-efficiency ratings that help meet NCC compliance requirements. It’s a practical starting point when you need consistent quality across multiple window types in a single project.
Matching Fixings to Your Wall Construction
Here’s where many guides fall short. The fastener that anchors your aluminium window frame to a timber stud won’t work in a brick wall, and neither will hold in a steel frame. Whether you’re figuring out how to install aluminium windows in a timber frame, drilling into double brick, or tapping into steel studs, the fixing method changes everything — from the drill bit you reach for to the spacing between anchors.
The same principle applies to accessories. Planning to install burglar bars on aluminium windows later? The wall substrate determines whether you’ll use expansion bolts, coach screws, or self-tapping fasteners for those brackets, too.
Step 4 breaks down the exact fixing approach for each wall type in detail. For now, identify what your walls are made of and make sure your fixings match — it’s the difference between a frame that stays put for decades and one that works loose within a year.
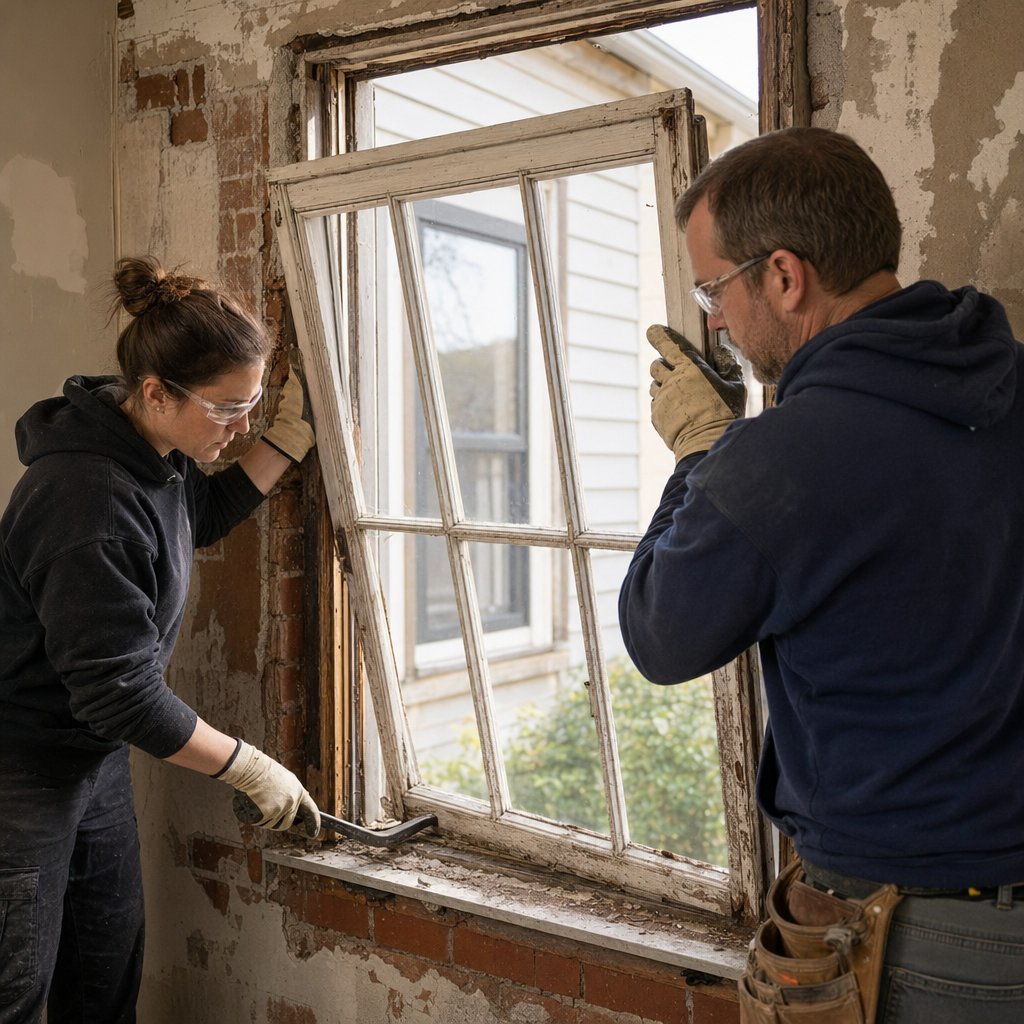
Step 3 – Remove the Old Window or Prepare the Rough Opening
Tools staged, fixings matched to your wall type, and the new aluminium window on its way. The opening itself needs to be ready to receive it. What that preparation looks like depends entirely on whether you’re pulling out an old window or working with a brand-new rough opening that’s never held one.
Removing an Old Window Safely
Ripping out an old window in one piece sounds efficient, but it’s the fastest way to damage the surrounding wall — especially if you’re learning how to install an aluminium window in a brick wall, where the masonry around the reveal is unforgiving. Take it apart in stages instead:
- Remove the sashes or operable panels first. Sliding sashes lift out of their tracks; casement and awning sashes usually detach after removing hinge pins or screws. Set the glass aside safely.
- Score through old sealant and paint lines around the frame perimeter with a sharp utility knife. This breaks the bond between the frame and the wall without tearing render or plaster.
- Back out all screws or pull nails securing the frame to the wall substrate. Check the head, sill, and both jambs — older installations sometimes have hidden fixings behind trim.
- Pry the frame out carefully using a flat bar or mini pinch bar. Work from the sill upward, applying even pressure to avoid cracking brickwork or splitting timber studs.
- Clean the opening thoroughly. Scrape away old sealant, foam residue, and debris so you’re left with a clean, solid surface for the new installation.
Wear gloves and safety glasses throughout — old sealant can flake into sharp fragments, and hidden nails are common. For anything wider than 1200mm or heavier than about 30kg, have a second person help support the frame as it comes free.
Preparing a New Rough Opening
If there’s no existing window to remove, your job is to confirm the rough opening is structurally sound and properly weatherproofed before the aluminium frame goes in.
Start by checking the framing. Place a spirit level against each jamb stud to verify plumb, and across the sill plate to confirm level. Inspect the header for any sagging or cracking — it carries the load above the opening, so any compromise here needs fixing before you proceed.
The most critical weatherproofing element is the sill pan. This is a waterproof tray installed at the base of the rough opening, designed to catch and redirect any moisture that gets past the sealant line. As Building Science Corporation explains, an effective pan flashing needs four things: a continuous waterproof surface without holes or wrinkles, a back dam or positive slope directing water outward, end dams at both sides to prevent lateral water movement into the wall, and proper lapping over the drainage plane below the opening.
You can form a sill pan in the field using self-adhesive flashing membrane, or use a manufactured tray. Either way, press the membrane tightly into the corners — if it spans across the corner rather than sitting flush, the window’s edge can puncture it during installation, creating a leak path exactly where water collects most.
One detail that’s easy to overlook: the bottom edge of the sill pan must remain open to drain. Sealing the window’s bottom flange to the wall traps any water that reaches the pan, defeating its entire purpose. Seal the jambs and head, but leave the sill free to weep.
Retrofit Insert vs Full-Frame Replacement
When replacing an existing window, you’ll face a choice that shapes the entire project: do you slide a new unit into the old frame, or strip everything back to the rough opening?
A retrofit insert — sometimes called a pocket replacement — fits inside the existing frame. The original jambs, sill, and head stay in place. This is faster, less disruptive, and typically more affordable. It’s the practical route when the existing frame is still square, solid, and free of rot or corrosion. If you’re looking at how to install aluminium window inserts, this is the method — the new unit simply slides into the old frame and gets shimmed, sealed, and secured.
The tradeoff? You lose a small amount of glass area because the new window sits inside the old frame rather than replacing it. This Old House notes this can reduce natural light compared to a full-frame approach — worth considering if maximising daylight matters to you.
A full-frame replacement removes everything back to the raw rough opening. It takes longer and costs more, but it lets you inspect for hidden water damage, replace deteriorated flashing, and start fresh with a properly sealed installation. It’s the right call when the existing frame is warped, damaged, or out of square — or when you want to change the window size or style entirely.
If the existing frame is sound, an insert replacement gets you a quality result with less disruption. If there’s any doubt about the frame’s condition, go full-frame — hidden damage only gets worse behind a new window.
Whichever path you choose, the opening is now clean, level, and ready. The next variable is the wall itself — because the way you anchor and flash an aluminium frame into brick, timber, or steel changes significantly.
Step 4 – Adapt the Installation to Your Wall Type
Your opening is clean, level, and ready. But the wall surrounding it dictates almost every decision from here — what fixings you use, how you flash the perimeter, and where the tricky spots hide. A masonry anchor driven into brick behaves nothing like a screw biting into a timber stud, and both are worlds apart from a self-tapper threading into a steel channel. Getting this wrong doesn’t just weaken the installation. It can crack brickwork, split framing, or leave the frame loose enough to rattle in the wind.
This is the step most guides skip entirely. They’ll tell you how to install a aluminium window as if every wall is the same. It isn’t. Here’s what changes for each construction type.
Installing in Brick or Double-Brick Walls
Brick walls present two challenges that timber and steel don’t: the surface is irregular, and you can’t screw directly into it without pre-drilling and using the right anchor. Whether you’re working with single brick veneer (a timber or steel frame behind a single layer of brick) or solid double-brick construction, the fixing approach centres on masonry anchors.
For single brick veneer, the aluminium window frame typically sits against a timber or steel reveal — a sub-frame lining the inside of the opening that bridges the gap between the brick skin and the structural frame behind it. The window screws into this reveal, not into the brick itself. If no reveal exists, you’ll need to install one before the window goes in, using treated timber or a purpose-made aluminium sub-frame.
Double-brick walls are denser and more rigid. Here, the window frame anchors directly into the masonry using sleeve anchors or dynabolts. Pre-drill through the aluminium frame and into the brick at each fixing point, insert the anchor, and tighten until snug — but not so tight that the frame distorts. Brick doesn’t flex like timber, so over-tightening can crack the masonry or bow the aluminium profile.
Sealing against brickwork requires extra attention because the surface is never perfectly flat. Apply a generous bead of exterior-grade silicone between the frame and the brick, and use backer rod in any gap wider than 6mm to give the sealant something to compress against. Without backer rod, silicone stretches too thin across wide gaps and fails prematurely. As 475 High Performance Building Supply details in their masonry window installation guide, integrating the window’s weather barrier with the surrounding wall assembly is critical — the flashing must lap correctly over the drainage plane to direct water outward rather than into the wall cavity.
Installing in Timber-Framed Walls
Timber framing is the most forgiving substrate to work with. You can screw directly through the aluminium window frame into the timber studs using galvanised bugle screws or timber-specific window screws — no anchors, no pre-drilling into masonry, no special brackets. That simplicity is why timber-frame installations are the most common DIY scenario.
The key consideration here is the building wrap. Timber-framed walls rely on a weather-resistant barrier (building wrap or house wrap) stapled to the exterior face of the studs. When you cut an opening for the window, you’re cutting through that barrier, and every cut edge becomes a potential entry point for water.
To maintain the weather barrier’s integrity, you’ll need to integrate flashing tape with the existing wrap using a shingle-lapping sequence:
- Cut the building wrap in an inverted Y pattern at the opening and fold the flaps inward around the rough opening edges.
- Apply a strip of self-adhesive flashing tape across the sill, extending at least 150mm past each side of the opening. This piece goes on first.
- Apply flashing tape up each jamb, overlapping the sill tape at the bottom corners.
- Apply the head flashing tape last, overlapping the jamb tapes. This top-down lapping ensures water always runs over the tape below rather than behind it.
Think of it like roof shingles — each layer overlaps the one beneath it so gravity pulls water across the surface rather than under it. Skip this sequence and you create a funnel that channels rain directly into the wall cavity.
When driving screws through the aluminium frame into the studs, space them every 300-450mm and keep them at least 50mm from the corners of the frame. Hitting the stud squarely matters — a screw that misses the stud and bites only into the sheathing has almost no holding power.
Installing in Steel-Framed Walls
Steel framing is increasingly common in residential and commercial construction, but it introduces two complications that brick and timber don’t: you need specialised fasteners, and you have to manage thermal bridging.
Standard wood screws won’t grip steel studs. You’ll need self-tapping (or self-drilling) screws rated for the gauge of steel you’re fastening into — typically 0.75mm to 1.2mm BMT (base metal thickness) for residential steel framing. These screws have a drill-point tip that cuts its own hole and threads into the steel in one motion. Alternatively, some installers use steel angle brackets fixed to the studs first, then screw the window frame to the brackets. QE Buildings recommends using self-drilling screws or fasteners specifically designed for steel structures, tightening each screw evenly for balanced support.
Thermal bridging is the bigger concern. Steel conducts heat roughly 400 times faster than timber. Without a thermal break between the aluminium window frame and the steel stud, you’re creating a direct path for heat transfer through the wall — which leads to condensation on the interior frame surface in cold weather and undermines the energy performance of the entire window system.
The fix is a thermal break strip — a thin layer of non-conductive material (typically a rigid plastic or composite clip) placed between the aluminium frame and the steel stud at every fixing point. Some window systems include integrated thermal breaks in their frame profiles, but if yours doesn’t, adding a separate strip is essential. It’s a small detail that makes a measurable difference to condensation risk and energy efficiency.
Flashing in steel-framed walls follows the same shingle-lapping principle as timber framing, but you’ll want to use a flashing tape rated for adhesion to steel surfaces — not all tapes bond well to galvanised or zinc-coated steel. Check the tape manufacturer’s compatibility list before you start.
Wall Type Comparison at a Glance
| Factor | Brick / Double Brick | Timber Frame | Steel Frame |
|---|---|---|---|
| Recommended fixings | Sleeve anchors, dynabolts, or masonry screws | Galvanised bugle screws or timber window screws | Self-tapping / self-drilling screws rated for steel gauge |
| Flashing method | Silicone sealant with backer rod; flashing tape over frame flanges lapped into drainage plane | Self-adhesive flashing tape integrated with building wrap in shingle-lap sequence | Flashing tape rated for steel adhesion, shingle-lapped; thermal break at fixing points |
| Key challenges | Irregular surface; risk of cracking masonry from over-tightening; may need a reveal or sub-frame | Maintaining building wrap continuity; hitting studs accurately; avoiding splits near stud edges | Thermal bridging; fastener compatibility with steel gauge; condensation management |
| Estimated difficulty | Moderate to high | Low to moderate | Moderate |
Region-Aware Notes
Your wall type isn’t random — it’s largely determined by where you live and what local building codes favour. A few practical notes worth keeping in mind:
- In Australia, brick veneer over a timber or steel frame is the dominant residential construction method. If you’re installing aluminium windows in an Australian home, you’re most likely dealing with a brick skin and a reveal system.
- In North America, timber framing (2×4 or 2×6 stud walls with sheathing and house wrap) is standard for residential builds. Flashing integration with the weather-resistant barrier is a code requirement in most jurisdictions.
- In parts of South Africa and the UK, solid double-brick construction remains common, particularly in older homes. These walls are thick, heavy, and require masonry-specific anchors and deeper reveals.
- Steel framing is growing in popularity across all regions for its termite resistance and dimensional stability, but local codes may require specific thermal break details — especially in climate zones with high heating or cooling loads.
Always check your local building code requirements before starting. Fixing methods, flashing details, and even the minimum number of anchors per frame can vary by jurisdiction.
With the wall-specific preparation sorted, the next move is getting the aluminium frame into position — and making sure it sits perfectly level, plumb, and square before a single screw goes in.
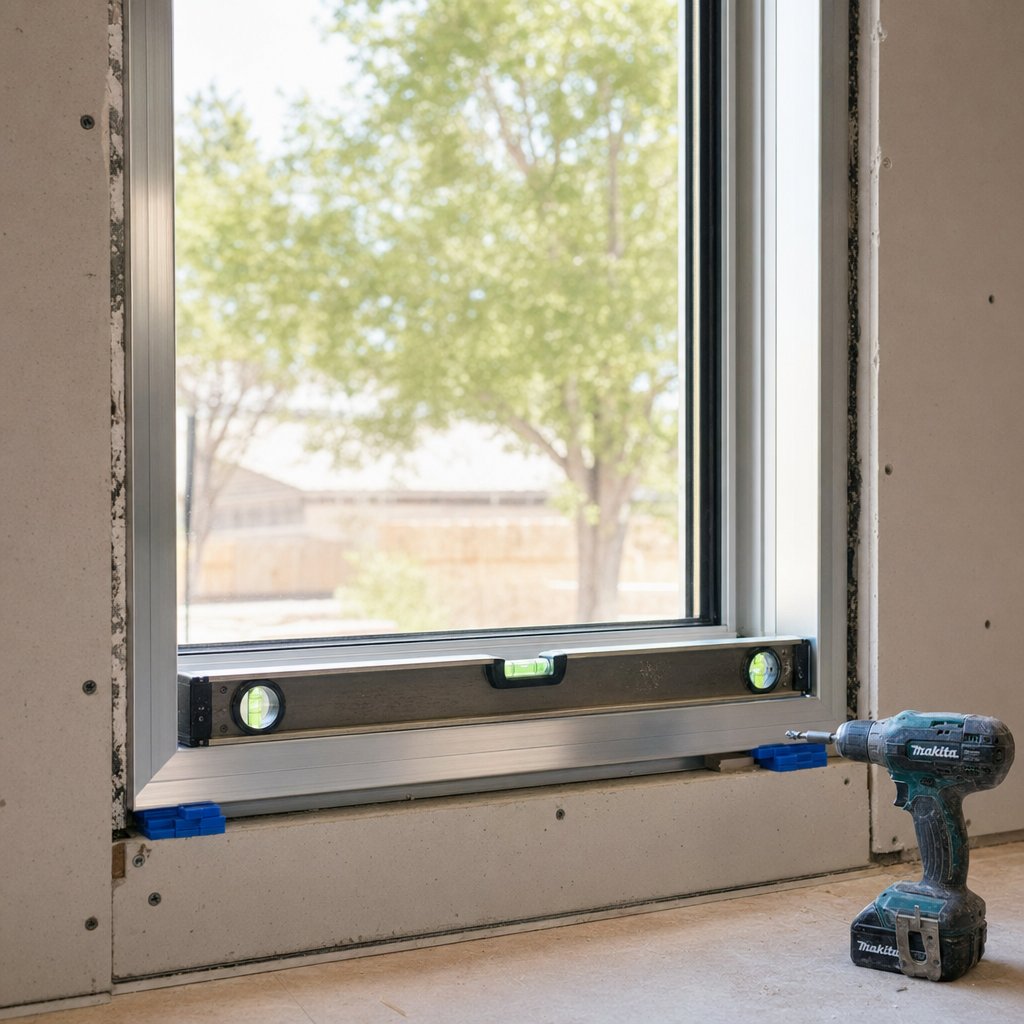
Step 5 – Fit the Window Frame and Secure It in Place
This is the step everything else has been building toward. Your opening is clean, your wall type is accounted for, and the right fixings are within arm’s reach. Fitting the aluminium window frame into position is equal parts patience and precision — rush the shimming and you’ll fight a sticky sash or a drafty seal for years.
Positioning and Shimming the Window
You’ll want a helper for this stage. Even a lightweight aluminium frame gets unwieldy when you’re trying to hold it steady, check level, and insert shims simultaneously. Here’s the sequence:
- Apply a continuous bead of exterior-grade silicone along the sill pan or sub-sill tray. This creates the primary water barrier beneath the frame.
- Lift the window into the opening and rest it on the sill. Centre it roughly within the space, leaving an even gap on each side.
- Insert shims at both bottom corners and at the midpoint of the sill. These carry the full weight of the unit, so use paired shims (one from each direction) to support the entire depth of the frame evenly.
- Place your spirit level across the sill of the window frame. Adjust the bottom shims until the bubble sits dead centre. As Deslauriers’ shimming guide explains, you should use shims in pairs so the full depth of the frame is supported — a single shim only contacts one edge and lets the frame rock.
- Check plumb by holding the level vertically against each side jamb. Add shims at the sides — roughly 150mm from the top and bottom corners, plus at any midpoints — until both jambs read plumb.
- Add shims at the head of the frame if there’s any gap between the top of the window and the header. The frame should sit snugly against the shims without being forced.
- Measure the diagonals of the frame opening (corner to corner, both ways). If they match within 2-3mm, the frame is square.
- Open and close every operable sash, sliding panel, or awning arm. The window must operate smoothly before you drive a single screw. If a sash binds or a lock doesn’t engage, adjust your shims until it moves freely.
That last point is non-negotiable. A window that’s hard to open at this stage will only get worse once the fixings compress the frame into its final position. Test it now, not after you’ve sealed everything up.
Securing the Frame with the Correct Fixings
With the frame shimmed, levelled, and operating smoothly, it’s time to lock it in place. Drill pilot holes through the pre-punched fixing holes in the aluminium frame — most manufacturers mark these locations — and drive your fixings into the wall substrate using the wall-type guidance from the previous step: masonry anchors for brick, bugle screws for timber studs, self-tappers for steel.
Fixing spacing matters. Place a fastener within 150mm of each corner, then space additional fixings every 300-450mm along the jambs, head, and sill. This distributes the load evenly and prevents the frame from flexing between anchor points.
Here’s where a common mistake creeps in: over-tightening. It’s tempting to crank each screw down hard, but aluminium profiles are hollow extrusions — they’ll bow inward under excessive pressure. A bowed frame pinches the sash, makes the window difficult to operate, and breaks the weatherseal’s contact. Tighten each fixing until it’s snug and the frame sits firm against the shims, then stop. After every two or three screws, re-check the frame with your spirit level and test the sash operation again. If anything has shifted, back the screw off slightly and re-shim.
Once all fixings are driven, snap or trim the shims flush with the wall surface. Shims left protruding will interfere with foam insulation and interior trim later on.
Installing Without Reveals
In some wall types — particularly brick veneer or rendered masonry — there’s no timber reveal lining the opening. The aluminium frame sits directly against the masonry or the plaster return, and you’re left with a visible gap between the frame edge and the wall face. Sounds like a problem, but it’s a standard scenario with a clean solution.
External aluminium capping (sometimes called reveal trim or surround trim) clips or screws onto the outer edge of the window frame and covers the junction between the frame and the wall. It creates a neat, finished appearance while also providing a secondary barrier against water tracking along the frame edge. For interior finishes, plaster can be returned directly to the frame, or you can install a thin aluminium angle trim to create a crisp shadow line.
The approach works well when you’re learning how to install a aluminium window frame in a masonry opening where traditional timber architraves aren’t part of the design. Just make sure the capping is sealed to the frame with silicone at the top and sides — and left open at the bottom to allow any trapped moisture to drain, the same weep principle that applies to the sill pan.
The window must be level, plumb, and square before any fixings are driven home. Every correction gets harder once screws are in place.
With the frame locked in and operating correctly, the focus shifts to what keeps it performing long-term — sealing the perimeter against weather, insulating the interior gap, and fitting the hardware and accessories that complete the installation.
Step 6 – Seal, Insulate, and Finish the Installation
A perfectly shimmed and secured frame means nothing if water or air finds a way past it. The sealing and insulating stage is what separates an installation that looks good on day one from one that still performs flawlessly five years later. Every gap around the perimeter is a potential leak path, and every unsealed joint is an invitation for drafts, moisture damage, and energy loss.
Applying Exterior Sealant and Flashing Tape
The exterior seal is your first line of defence against rain, wind, and dust. Whether you’re finishing an aluminium window in a brick wall or a timber-framed opening, the sealant and flashing sequence follows the same logic: work from the bottom up, and lap everything like roof shingles so water always runs over the layer below.
- Press closed-cell backer rod into any gap between the frame and the wall that’s wider than 6mm. The backer rod gives the silicone a consistent depth to bond against and prevents it from stretching too thin across wide voids. Size the rod slightly larger than the gap so it compresses snugly into place.
- Run a continuous bead of exterior-grade neutral-cure silicone around the full perimeter of the frame, starting at one bottom corner and working up one jamb, across the head, and down the other jamb. Leave the bottom edge unsealed — just as with the sill pan, this gap allows any trapped moisture to weep outward rather than pooling behind the frame.
- Tool the sealant immediately with a wet finger or a silicone finishing tool. This presses the bead firmly into contact with both the frame and the wall surface, eliminating air pockets and creating a smooth, professional finish. Untooled sealant looks rough and bonds poorly at the edges.
- Apply self-adhesive flashing tape over the frame flanges (if your window has a nailing fin or flange detail). Start with the bottom strip first, extending it at least 150mm past each side of the frame. Then apply the side strips, overlapping the bottom tape at the corners. Finish with the head strip, overlapping the side tapes. This shingle-lap sequence ensures water hitting the flashing always flows downward and outward. As Benjamin Obdyke notes, proper sequencing is essential — working from the bottom and shingle-lapping to the top keeps the water control layer continuous.
Insulating the Interior Gap
Flip to the inside of the wall. That small gap between the window frame and the rough opening framing — typically 10-15mm on each side — needs to be filled with insulation that also acts as an air barrier. Fiberglass stuffed into this space might seem like a quick fix, but as Indiana Spray Foam explains, fiberglass is not an air barrier — no matter how tightly it’s packed, air still passes through it, leading to drafts and energy loss over time.
The right product is low-expansion window and door foam. Unlike standard expanding foam, this formulation expands gently — just enough to fill the void without exerting pressure on the frame. High-expansion foam is the single biggest material mistake in window installation. It pushes inward as it cures, bowing the aluminium profile and causing the same sash-binding and seal-breaking problems you’d get from over-tightened screws.
Apply the foam from the interior side, starting at the bottom and working upward. Push the nozzle deep enough that the foam reaches the exterior sheathing — you should hear it contact the back of the cavity. Apply in a single pass, then come back with a second thin layer once the first has begun to set. This two-pass approach fills the entire depth without overfilling.
Once the foam has fully cured (typically 4-8 hours depending on humidity and temperature), trim the excess flush with the interior wall surface using a flat razor knife or serrated foam saw. Keeping it flush is important — protruding foam prevents interior trim, architraves, or plasterboard from sitting flat against the framing. With the foam trimmed, you can install your interior reveals, architraves, or plaster returns to complete the finished look.
Installing Fly Screens, Hardware, and Accessories
The frame is sealed, insulated, and trimmed. The final stage brings the window to full working order. If you removed glazing beads or glass panels to reduce weight during installation, now is the time to refit them — along with all the hardware and accessories that make the window functional and secure.
- Refit any glazing beads or glass panels that were removed for installation. Press the beads firmly into their channels until they click or snap into place, ensuring the glass is seated evenly with no gaps.
- Install handles and aluminium window locks. Most handles attach with two machine screws through the sash profile. Align the lock keeper on the frame so the latch engages with a firm, clean click — if you need to force it, the keeper is misaligned. Knowing how to install aluminium window locks correctly matters for both security and daily usability.
- Fit aluminium window security stays if your windows require restricted opening for child safety or ventilation control. These stays screw into the frame and sash, limiting how far the window can open while still allowing airflow. As Suburban Security Screens notes, security fixings should be installed from the interior side of the frame where possible — it’s more secure because the fasteners are harder to tamper with from outside.
- Fit fly screens or security screens into the manufacturer’s screen channel or recess. Standard aluminium fly screens flex into the channel with light pressure on the corners. Security screens are stiffer due to their thicker frames (typically 9-11mm) and may need to be riveted or screwed into place for a tamper-resistant fit.
- Test every moving part. Open and close each sash, engage every lock, slide each fly screen in and out. Everything should move smoothly without binding, rattling, or requiring excessive force.
With the window fully sealed, insulated, accessorised, and tested, the installation itself is complete. What determines whether it stays that way comes down to how you inspect the finished work and what you do in the months that follow.
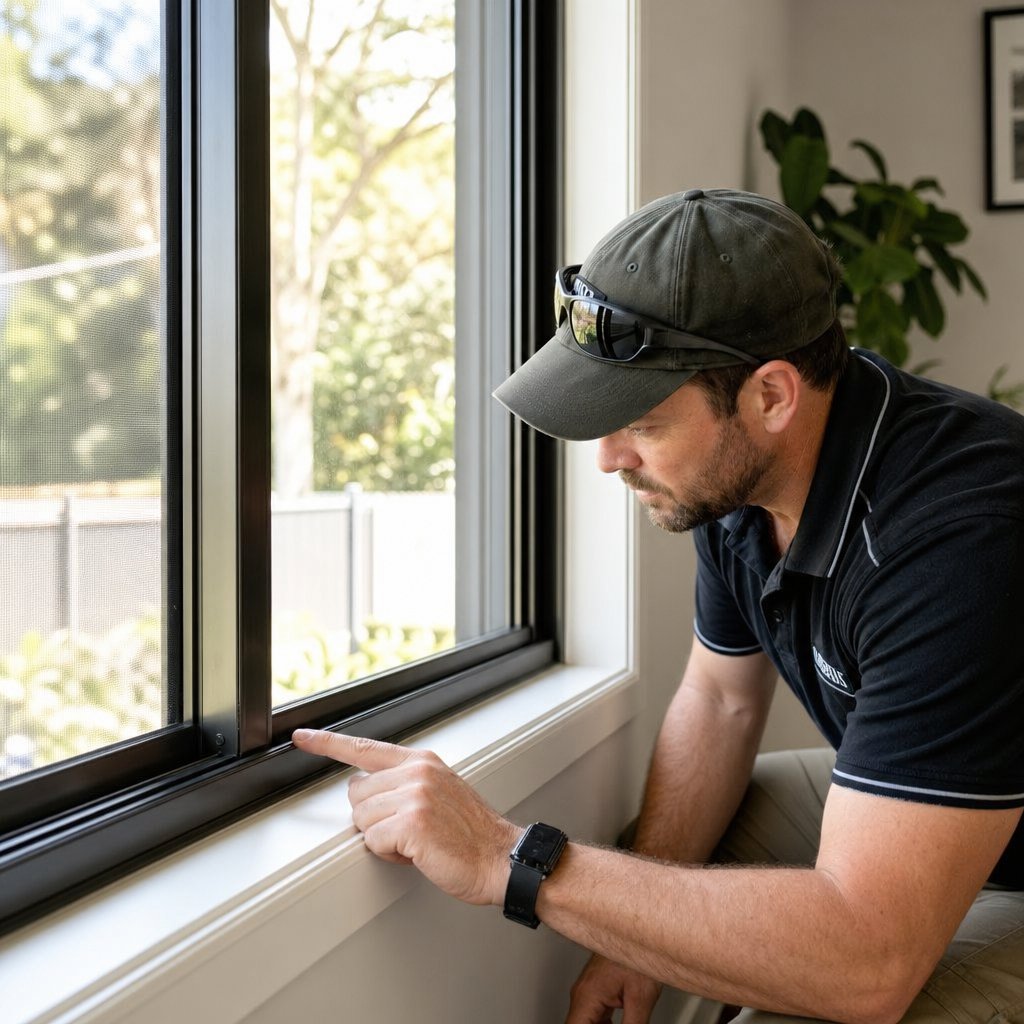
Step 7 – Inspect Your Work and Maintain Your Windows
A finished installation looks great from across the room. Up close is where the truth lives. A missed sealant line, a lock that doesn’t quite engage, or a flashing tape edge that’s lifting — these small oversights turn into real problems once the first heavy rain arrives. Spending fifteen minutes on a structured inspection now saves you hours of remediation later.
Post-Installation Inspection Checklist
Work through this list for every window you’ve installed, not just the first one. Fatigue and familiarity breed shortcuts on the third or fourth unit.
- Open and close every operable sash, slider, or awning panel. Movement should be smooth and consistent across the full range — no binding, scraping, or uneven resistance.
- Engage all locks and handles. Each latch should click firmly into its keeper without forcing. If it doesn’t, the keeper is likely misaligned or the frame has a slight bow.
- Inspect every sealant line around the exterior perimeter. Run your finger along the bead and feel for gaps, thin spots, or areas where the silicone hasn’t adhered to both surfaces.
- Check that flashing tape is properly lapped — sides over bottom, head over sides. Lift the edges gently to confirm adhesion. Any tape that peels back easily needs to be pressed down or replaced.
- Run a garden hose over the exterior of the window for several minutes, starting at the sill and working upward. Check the interior for any signs of water tracking in. As Lowe’s window maintenance guide recommends, also look for moisture between panes on double-glazed units — it indicates a seal failure in the insulated glass unit itself.
- Check for drafts from the inside using a candle, incense stick, or a thin strip of tissue held near the frame edges. Any flicker or movement points to an air leak that needs re-sealing.
Ongoing Maintenance for Aluminium Windows
Aluminium frames are genuinely low-maintenance — they won’t rot, warp, or need repainting like timber. But low-maintenance isn’t zero-maintenance. Tracks collect grit, weatherstripping compresses over time, and sealant degrades under UV exposure. A simple seasonal routine keeps everything working the way it should. MG Window Systems notes that regular care is still essential to prevent minor issues from becoming larger problems, even with aluminium’s inherent durability.
- Every three months, vacuum or brush out the sliding tracks and drainage slots. Grit and debris in the track act like sandpaper on rollers and weatherseals, accelerating wear. Clear the weep holes at the base of the frame so trapped water can drain freely.
- Twice a year, apply a silicone-based spray lubricant to sliding tracks, hinges, and lock mechanisms. Avoid petroleum-based lubricants — they attract dust and can degrade rubber seals. A light spray keeps moving parts operating smoothly and reduces friction on hardware.
- Once a year, inspect all weatherstripping around the sash perimeter. Press it with your finger — it should spring back. If it stays compressed, feels brittle, or shows cracks, replace it. Worn weatherstripping is the most common cause of drafts in otherwise well-installed aluminium windows and doors.
- Once a year, inspect every exterior sealant line. GE Sealants identifies the telltale signs of failure: beads that crack under light pressure, edges lifting from the substrate, sealant that powders or flakes, and lines that have visibly shrunk away from the frame. Re-seal any compromised sections promptly — don’t layer new sealant over old. Remove the failed bead, clean the surface, and apply fresh.
When to Re-Inspect After Installation
Your installation will face its real test the first time conditions push it hard. Three milestones matter most:
- After the first heavy rain — check every window interior for water tracking, staining, or dampness around the frame edges. Pay particular attention to the sill corners, where water pressure is highest.
- After the first significant temperature swing — aluminium expands and contracts with heat. A hot day followed by a cool night can open micro-gaps in sealant lines that weren’t visible at install time. This is especially relevant if you’ve installed aluminium windows in double brick, where the masonry and the aluminium frame expand at different rates.
- At the six-month mark — a general re-inspection of sealant adhesion, hardware operation, and weatherstrip condition. By this point, the building has cycled through enough temperature and moisture variation to reveal any latent issues.
Catching a small sealant failure early prevents costly water damage later. A five-minute check after the first storm is worth more than a major repair twelve months down the track.
Whether you’ve fitted a single aluminium window frame in a bathroom renovation or replaced every opening across an entire home in Australia, the inspection and maintenance routine is identical. The installation quality is set — your job now is to protect it. And if something doesn’t look or feel right during any of these checks, the next section covers the most common problems, their likely causes, and when it makes sense to call in a professional.
Troubleshooting Mistakes and Knowing When to Call a Pro
Even careful installers run into problems. The difference between a frustrating outcome and a quick fix usually comes down to recognising what went wrong and knowing the right correction — rather than layering more sealant or driving more screws into an already compromised frame. Whether you’ve been following detailed how to install aluminium windows instructions for the first time or you’ve done a dozen installs before, these are the issues that come up most often.
Common Installation Mistakes and How to Fix Them
Most problems trace back to one of four root causes: shimming errors, incomplete sealing, incorrect flashing, or over-tightened fixings. The table below covers the scenarios you’re most likely to encounter — and what to do about each one.
| Problem | Likely Cause | Fix |
|---|---|---|
| Window not sitting square — uneven gaps around the frame | Shims incorrectly placed or missing at key support points | Remove fixings, re-shim at all corners and midpoints using paired shims, re-check diagonals, and re-secure once the frame reads level and plumb |
| Drafts felt around the frame after installation | Incomplete sealant line, missing backer rod, or gaps in the interior foam | Identify the leak point using a candle or tissue strip, then re-seal with exterior silicone and backer rod on the outside or low-expansion foam on the inside |
| Water ingress during rain | Flashing tape not lapped correctly — water running behind rather than over the layers | Remove exterior trim or capping, strip the old flashing tape, and re-apply in the correct shingle-lap sequence: bottom first, then sides, then head |
| Window difficult to open or close | Frame bowed inward from over-tightened fixings or high-expansion foam pushing against the profile | Loosen the fixings nearest the binding point, re-shim to restore the correct frame profile, and re-secure without over-tightening. If foam is the culprit, cut it out and re-apply with low-expansion formula |
| Lock or handle won’t engage properly | Keeper misaligned due to frame distortion or incorrect positioning | Loosen the keeper screws, close the sash, mark the correct keeper position, and re-fix. If the frame itself is bowed, address the frame issue first |
| Sealant cracking or pulling away within months | Wrong sealant type (acidic-cure silicone on aluminium), joint too wide without backer rod, or sealant applied over dirty surfaces | Remove the failed bead completely, clean both surfaces with isopropyl alcohol, insert backer rod if the gap exceeds 6mm, and re-seal with neutral-cure exterior-grade silicone |
A pattern worth noting: Lifetime Home Remodeling identifies spray foam misuse and poor flashing adherence as two of the most frequent installation errors across all window types. Both are entirely preventable with the right materials and a bit of patience. High-expansion foam and rushed flashing tape application account for a disproportionate share of callbacks — whether you’re learning how to install aluminium windows in timber frames or working with brick or steel.
When to DIY and When to Call a Professional
There’s a line between a rewarding weekend project and a job that genuinely needs a licensed installer. Crossing it doesn’t mean you’ve failed — it means you’re making a smart call about risk, safety, and long-term performance.
Professional installation is strongly recommended in these scenarios:
- Multi-storey buildings where working at height introduces serious safety risks — professional installers have scaffolding, harnesses, and the training to use them
- Structural modifications or load-bearing walls where removing or enlarging an opening requires engineering sign-off and temporary support
- Large or heavy units such as bifold windows, stacker doors, or any panel wider than 2.4m that requires multiple people and precise track alignment
- Installations requiring compliance certification — in Australia, for example, certain window replacements must meet BAL (Bushfire Attack Level) ratings or NCC energy provisions, and only a licensed installer can issue the compliance documentation
- Situations where the rough opening needs significant reframing — if the studs, header, or sill plate are damaged, rotted, or out of square beyond what shims can correct, a carpenter or builder should handle the structural work before the window goes in
As Pella’s installation guide puts it, even the highest-quality window won’t perform properly if it’s not installed correctly. The skills required go beyond basic carpentry — precision measurement, weatherproofing integration, and code compliance all factor in. Be honest about your experience level before starting.
One practical way to reduce installation headaches — whether you’re doing it yourself or handing it to a tradesperson — is to start with well-engineered windows that have consistent manufacturing tolerances and clear installation specs. MEICHEN’s Australian-standard-compliant aluminium windows are a good example: their frames are built to tight dimensional tolerances with documented installation details, which means less guesswork during fitting and fewer surprises when you check for square. When the window itself is precisely made, the installation process becomes more predictable — and that’s true regardless of whether you’re working in South Africa, Australia, or anywhere else.
Getting the Best Result From Your Project
Every step in this guide circles back to three fundamentals: careful measuring, correct preparation, and patient shimming. Get those right and the rest — sealing, fixing, finishing — falls into place naturally. Rush any one of them and you’ll spend more time troubleshooting than you saved.
If you’ve followed the process from planning through to inspection, you now understand how to install aluminium windows across different wall types, different window styles, and different project scenarios. That knowledge is valuable whether you’re holding the drill or watching someone else hold it. A well-installed aluminium window should operate smoothly, seal tightly, and look clean for decades — and you’ll know exactly what “well-installed” looks like.
Frequently Asked Questions About Installing Aluminium Windows
1. Can I install aluminium windows myself, or do I need a professional?
A confident DIYer with basic power tools and a spirit level can handle most single-storey retrofit installations, especially sliding and fixed window types. However, professional installation is strongly recommended for multi-storey buildings, structural modifications to load-bearing walls, large bifold or stacker units wider than 2.4 metres, and any project requiring compliance certification such as BAL ratings or NCC energy provisions. Starting with well-engineered windows that have consistent manufacturing tolerances, like MEICHEN’s Australian-standard-compliant aluminium range (https://meichenwindows.com.au/aluminium-windows/), makes both DIY and professional fitting more predictable by reducing guesswork during the shimming and squaring process.
2. How much does it cost to install aluminium windows?
The cost varies significantly based on several factors: window type (a simple sliding window costs less to fit than a large bifold), the size of each opening, your wall construction (brick, timber, or steel), the number of units being installed, and whether you handle the labour yourself or hire a tradesperson. Configuration differences alone in frame material, glass specification, hardware, and fabrication quality can lead to price variations of 30-200%. Rather than comparing quotes on unit price alone, focus on the full system specification, including energy-efficiency ratings and compliance with local building standards, to get an accurate picture of total project cost.
3. What is the difference between retrofit and new-construction aluminium window installation?
A retrofit or replacement installation fits a new aluminium window into an existing frame opening, keeping the surrounding wall structure intact. It typically takes 1-2 hours per window and suits confident DIYers. A new-construction installation works with a raw rough opening, requiring full structural preparation including sill pan flashing, weather barrier integration, and direct anchoring into the framing. This approach takes 2-4 hours per window and demands more experience. Within retrofit work, you can also choose between an insert replacement (sliding the new unit into the old frame) or a full-frame replacement (stripping everything back to the rough opening for a more thorough seal).
4. How do I prevent water leaks after installing aluminium windows?
Water leak prevention relies on three key practices. First, install a sill pan or sub-sill flashing at the base of the rough opening before the window goes in, ensuring it slopes outward and has end dams at both sides. Second, apply self-adhesive flashing tape in the correct shingle-lap sequence: bottom strip first, then sides overlapping the bottom, then head overlapping the sides, so water always flows over each layer rather than behind it. Third, seal the exterior perimeter with neutral-cure silicone over backer rod, but leave the bottom edge unsealed so any trapped moisture can weep outward. After installation, test with a garden hose and re-inspect after the first heavy rain and at the six-month mark.
5. Does the wall type affect how aluminium windows are installed?
Yes, wall construction significantly changes the fixing method, flashing approach, and preparation required. Brick and double-brick walls need masonry anchors or dynabolts, often require a timber or aluminium reveal sub-frame, and demand careful sealing against irregular surfaces using backer rod and silicone. Timber-framed walls allow direct screw fixing into studs and require flashing tape integration with the existing building wrap in a shingle-lap sequence. Steel-framed walls need self-tapping screws rated for the steel gauge and, critically, a thermal break strip between the aluminium frame and steel stud to prevent condensation and energy loss. Always match your fixings and flashing materials to your specific wall substrate before starting.
More Window & Door Guides