Assess Your Frame’s Finish and Scratch Depth
Grabbing sandpaper and going straight at a scratched aluminum frame is the fastest way to make things worse. The repair method that works perfectly on one frame type can ruin another, so a quick diagnosis saves time, money, and frustration. Two things matter before you touch any abrasive: what finish your frame has, and how deep the damage goes.
How to Identify Your Frame’s Finish Type
Aluminium window frames in Australian homes typically have one of three finishes, and each responds differently to scratch repair.
Powder-coated frames are the most common on modern installations. Look for a thick, opaque colour layer that covers the metal completely. If you find a chip or deep scratch, you’ll often see distinct coating layers sitting on top of the bare aluminium beneath — the finish covers the metal rather than growing from it.
Anodized frames have a harder, thinner finish that’s actually part of the metal surface. The giveaway is a smooth metallic sheen where the underlying grain or brushed texture remains visible through the finish. An anodized aluminum scratch tends to show as dulling or abrasion rather than a peeling flake, because the protective oxide layer is integrated into the aluminium itself.
Mill finish (raw aluminium) is less common on window frames but appears on some older or industrial installations. It looks like bare silvery metal with visible die lines, minor surface marks, and no uniform coating. Does aluminum scratch easily in this state? Yes — without a protective finish, raw aluminium is softer and more vulnerable to surface damage from everyday contact.
The Fingernail Test for Scratch Depth
Run your fingernail across the damaged area perpendicular to the scratch direction. This simple test tells you which repair path to follow:
- Surface scuffs (fingernail glides over): The scratch sits within the top layer only. You’ll see faint marks or light discolouration, but no material has been removed. Fix with polishing compound alone.
- Medium scratches (fingernail catches slightly): The damage has cut through the clear coat or anodized layer but hasn’t exposed bare metal. You can feel a groove, and the scratch may appear lighter than the surrounding finish. Fix with wet sanding followed by buffing and polishing.
- Deep gouges (fingernail catches firmly, bare metal visible): The scratch has penetrated completely through the finish, exposing raw aluminium. You’ll see a distinctly different colour in the scratch channel. Fix with sanding, colour-matched touch-up paint, and clear coat.
Scratches in aluminum frames often fall into the first two categories — scuffs from furniture delivery, ladder contact, or window hardware rubbing over time.
Why Window Frames Need a Different Approach
Generic aluminium polishing guides assume you can lay the piece flat on a workbench. Window frames don’t cooperate that way. You’re working vertically, which means polishing compound runs downward and sanding pressure is harder to keep even. Glass sits millimetres away from your work area, rubber seals can be permanently stained by abrasive residue, and the frame stays exposed to UV and rain long after the repair is done. These constraints shape every step that follows — from how you mask the surrounding surfaces to which products you choose and how you apply them.
Step 1 – Gather the Right Tools and Materials
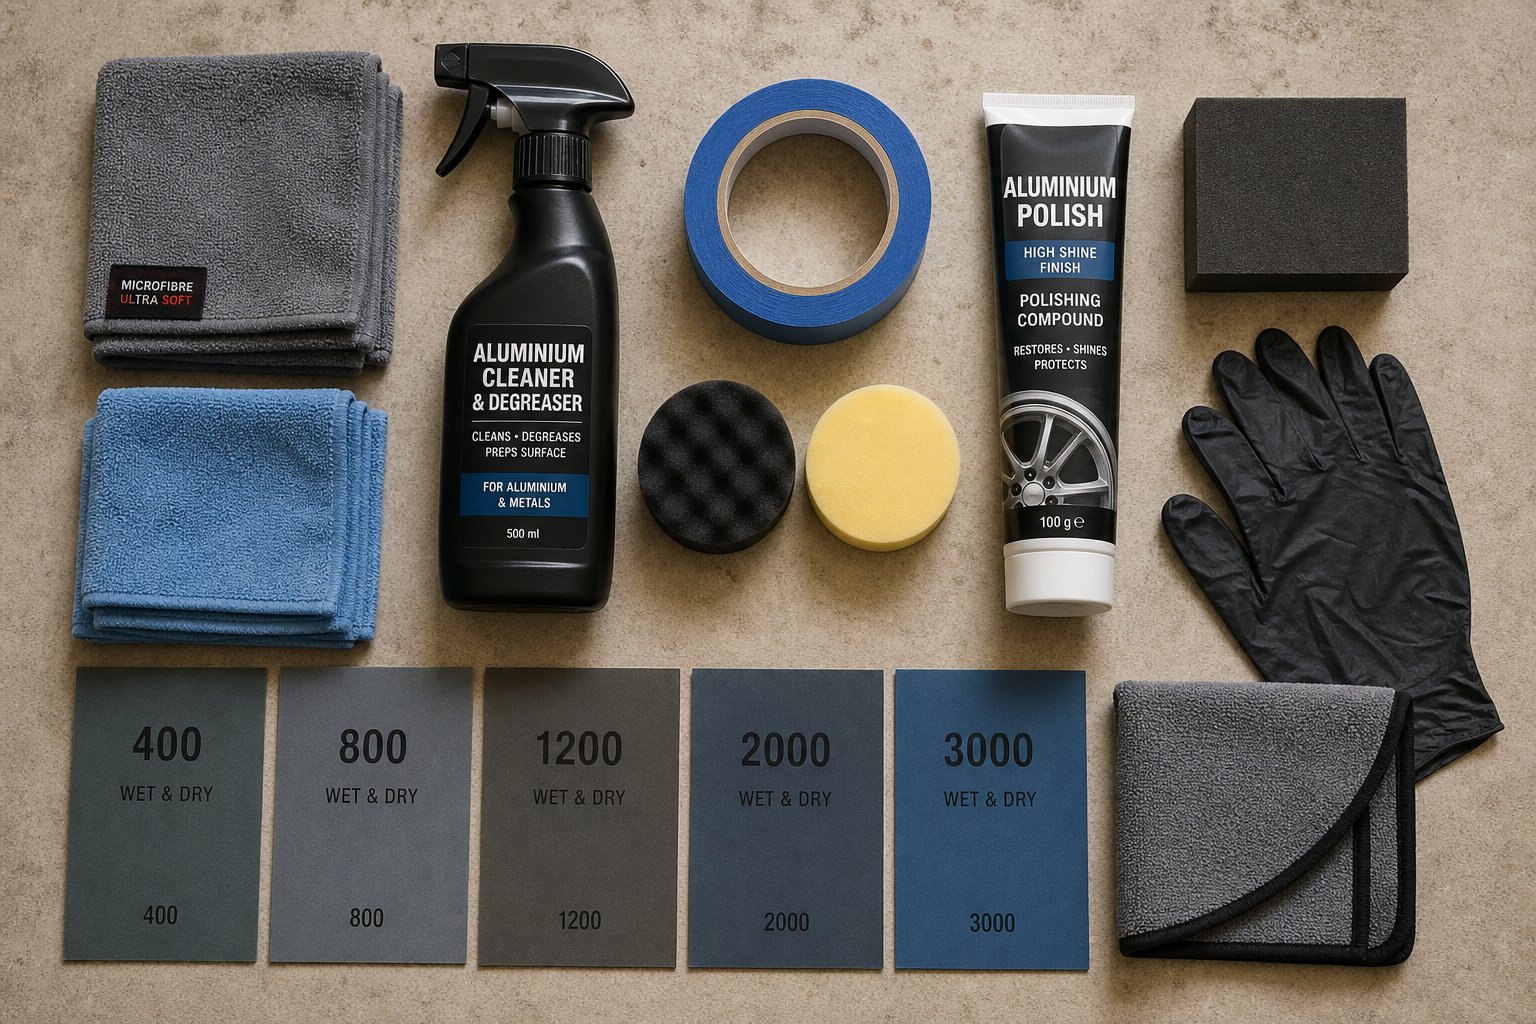
Your scratch severity assessment determines exactly what you need to buy — nothing more. A surface scuff requires a $20 trip to the hardware store, while a deep gouge through powder coating calls for a more involved kit. Here’s a breakdown organised by repair level so you’re not spending money on supplies that won’t apply to your situation.
Essential Supplies for Every Repair
Regardless of scratch depth, these items form the foundation of any window frame repair:
- Microfibre cloths (at least 3–4, as you’ll need clean ones for each stage)
- Isopropyl alcohol or mineral spirits for degreasing the scratch area
- Painter’s tape (low-tack to avoid residue on glass and seals)
- Plastic sheeting or drop cloths to protect glass panes
- Spray bottle filled with clean water
- Nitrile gloves and a dust mask for sanding work
These universal items handle surface preparation and protection. Skipping the cleaning and masking supplies is a false economy — trapped grit under a polishing pad creates fresh scratches, and compound splatter on glass is surprisingly difficult to remove.
Polishing Supplies for Light Scratches
For surface scuffs that don’t catch your fingernail, the materials list stays short. You’ll need an aluminium-specific polishing compound (an effective aluminum scratch remover for minor damage), foam applicator pads, and a soft buffing cloth. Generic metal polish technically works, but formulas designed specifically for aluminium contain finer abrasive particles that cut through oxidation without leaving haze on the softer metal. Look for pads for polishing aluminum that are non-abrasive foam rather than wool — foam distributes pressure more evenly on flat window frame surfaces and won’t leave fibre residue in the frame’s grain.
Sanding and Buffing Kit for Medium to Deep Scratches
Deeper damage requires a progressive sanding approach. For medium scratches on anodized frames, you’ll work through 800, 1000, 1500, and 2000 grit wet-and-dry sandpaper. Deep scratches through powder coating need a coarser starting point: 400, 600, 800, 1000, then 1500 grit. Pick up a small foam sanding block to wrap the paper around — this keeps pressure even across the scratch rather than concentrating it under your fingertips.
Beyond sandpaper, you’ll need aluminum polishing pads (both foam and wool types), rubbing compound for the initial cut after sanding, and a finer polishing compound for the finishing pass. An aluminium buffer — whether a handheld foam pad or a drill-mounted buffing wheel — speeds up the compound stage considerably on longer frame sections. For powder-coated frames with deep damage, add a colour-matched touch-up paint pen and a clear coat spray to the list. Aluminium buffing pads in various densities let you transition smoothly from cutting compound to final polish without switching tools constantly.
The table below matches each scratch level to its required materials and a general cost range (AUD). Prices vary by brand and retailer, so treat these as ballpark tiers rather than exact figures.
| Scratch Level | Required Materials | Approximate Cost Range (AUD) |
|---|---|---|
| Light (surface scuffs) | Aluminium polishing compound, foam applicator pads, microfibre cloths, isopropyl alcohol, painter’s tape | Under $30 |
| Medium (through clear coat/anodizing) | All of the above + wet-and-dry sandpaper (800–2000 grit), foam sanding block, rubbing compound, buffing tools for aluminum (foam and wool pads) | $30–$80 |
| Deep (bare metal exposed) | All of the above + coarser sandpaper (400–800 grit), colour-matched touch-up paint pen, clear coat spray, 1500-grit finishing paper | $80+ |
Most of these supplies are available at Bunnings, Supercheap Auto, or specialist automotive paint suppliers. Buying a sandpaper variety pack rather than individual sheets usually saves a few dollars and gives you spare grits for touch-ups down the track. With your materials sorted by severity level, the next priority is protecting everything around the repair zone — because the wrong prep can undo even the best polishing work.
Step 2 – Prepare the Work Area and Protect Surrounding Surfaces
A polishing pad loaded with compound doesn’t care whether it’s touching your aluminium frame or the glass beside it. Sanding dust settles on rubber seals, abrasive residue stains gaskets, and one careless stroke can turn a simple metal scuff repair into a much bigger problem. Proper masking and cleaning take ten minutes — skipping them can cost hours of corrective work.
Mask Off Glass, Seals, and Hardware
Start by applying low-tack painter’s tape directly along the rubber window seals and glass edges. Press the tape firmly against each seal using a plastic spreader or old credit card to prevent compound from bleeding underneath — professional detailers recommend ensuring the surface is clean and dry before taping so adhesion stays consistent along the full run.
Cover the glass pane itself with plastic sheeting taped at the edges. Even fine sanding dust can create hairline scratches on metal and glass alike if it gets trapped under a cloth later. Remove handles, locks, or stays where possible. If hardware can’t be removed, wrap it tightly with tape and plastic to keep abrasive particles out of moving parts.
Clean the Damaged Area Thoroughly
Understanding how to clean aluminum without scratching it further is half the battle. Wipe the frame down with a damp microfibre cloth to lift loose dirt, cobwebs, and surface grit. Follow up with isopropyl alcohol on a fresh cloth to degrease the scratch zone — this removes invisible films from silicone sprays, insect residue, and oxidation products that interfere with compound adhesion.
Pay particular attention to the scratch itself. Grit lodged inside the groove will get dragged across the surface the moment you apply a polishing pad, creating fresh scratches on metal you’re trying to repair. A cotton bud dipped in isopropyl alcohol works well for cleaning inside deeper grooves.
Check Weather and Temperature Conditions
Aluminium frames absorb heat quickly, and environmental conditions directly affect how polishing compounds perform. Aim for a temperature range between 15–25°C. Cold weather keeps compounds too stiff to spread evenly, while excessive heat causes polishing products to burn in or dry before they can do their job — both scenarios produce uneven results and potential surface damage.
Avoid high-humidity days if your repair involves touch-up paint or clear coat application, as moisture trapped beneath coatings causes adhesion failure and bubbling within weeks. Early morning or late afternoon on a mild, overcast day gives you the most forgiving working window.
Never sand or polish a hot aluminium frame in direct sun. Heat causes uneven compound distribution, accelerates drying before the abrasive can cut properly, and can soften or damage adjacent rubber seals.
With your work area masked, cleaned, and conditions confirmed, the frame is ready for the actual scratch removal process — starting with the lightest, least invasive method first.
Step 3 – Polish Out Light Surface Scratches and Scuffs
Most scratches on aluminium window frames never actually cut through the finish. They sit on the surface as faint scuffs — the kind left by a ladder leaning against the frame, a delivery box scraping past, or hardware rubbing during operation. If your fingernail glides over the mark without catching, polishing compound alone will handle it. This is the simplest repair in the process, but technique still matters. The wrong motion or too much pressure turns a quick fix into a visible patch.
Apply Polishing Compound With Controlled Pressure
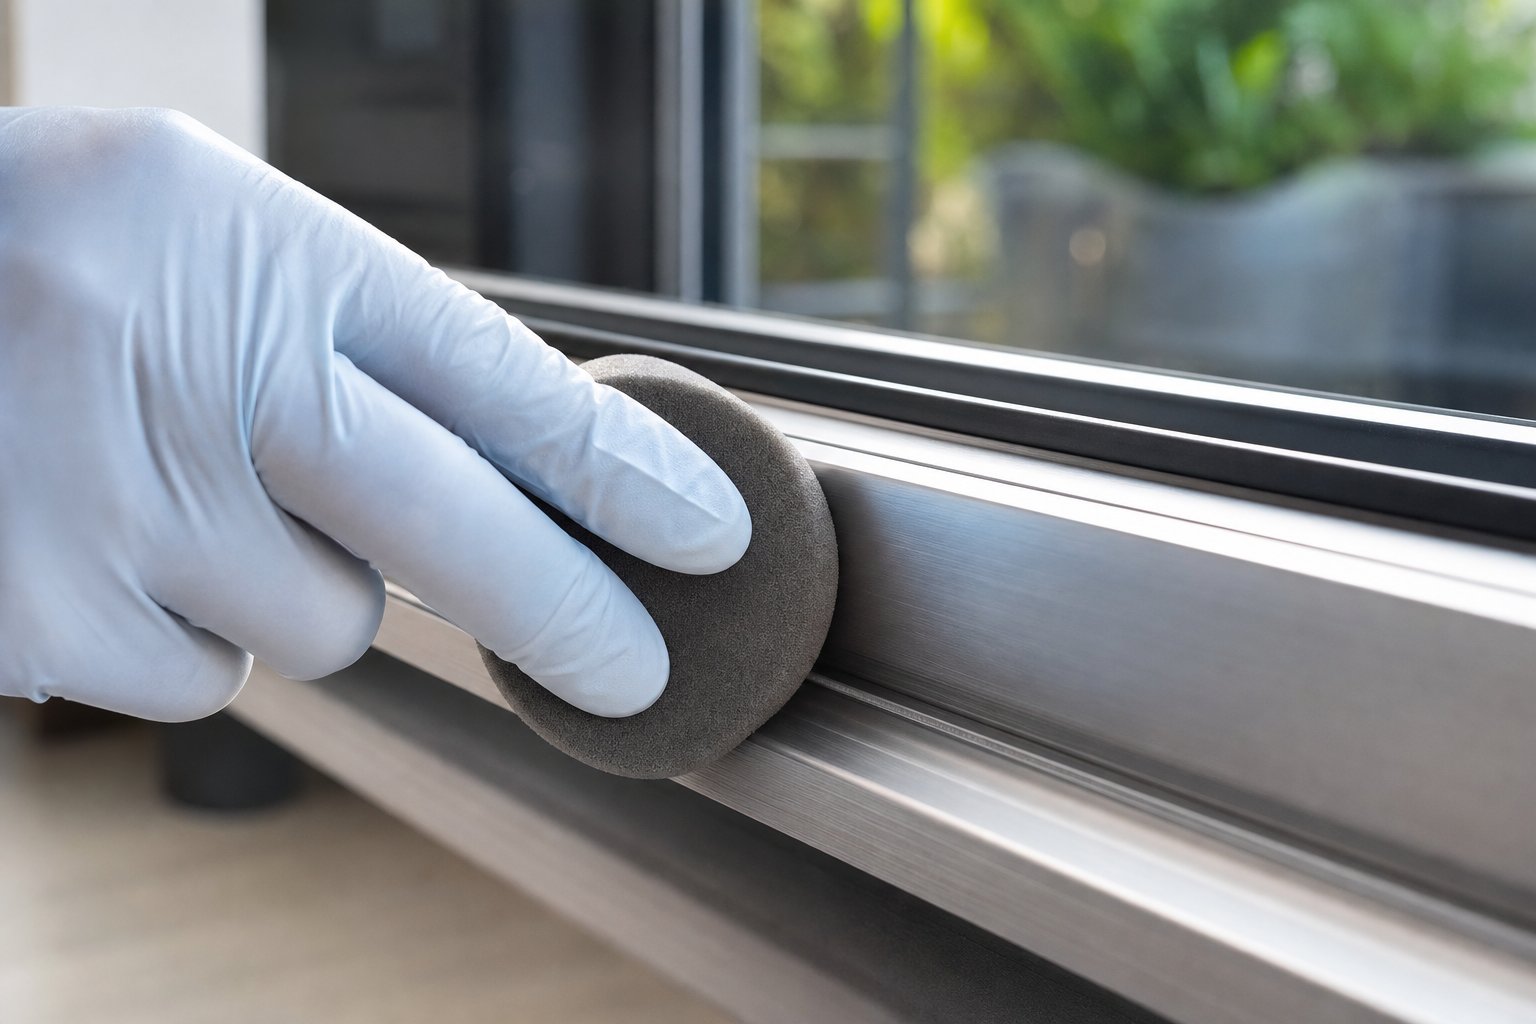
Place a small dab of aluminium polishing compound — roughly the size of a pea — onto a foam applicator pad. Less is more here; excess compound just smears across the frame and wastes product without improving the cut.
Work in straight lines along the direction of the scratch, matching the frame’s natural grain. This is the key difference between learning how to buff scratches out of aluminum window frames versus polishing a flat panel on a bench. Circular motions create swirl marks that catch light differently from the surrounding surface, making the repair area more obvious rather than less. On window frames with a brushed or linear grain, circular buffing is especially visible.
Apply moderate, even pressure — enough that the pad compresses slightly but not so much that you’re flexing the foam flat. Keep the area slightly damp with a light mist from your spray bottle. The moisture acts as a lubricant, helping the compound’s fine abrasive particles glide rather than dig.
Three to five passes along the scratch length typically removes light surface damage. After each set of passes, wipe the area with a clean section of microfibre cloth and inspect your progress in good light. If the scratch is fading but still faintly visible, apply a fresh dab of compound and repeat. If it hasn’t changed at all after two rounds, the damage likely runs deeper than the surface layer — move to the wet-sanding method in the next section rather than increasing pressure here.
Buff to a Uniform Finish
Once the scratch disappears, residual compound haze will remain on the frame. Switch to a clean, dry microfibre cloth and buff the area using light pressure in the same linear direction you used for polishing. This restores the frame’s original sheen and removes any remaining compound residue.
The critical step most people skip: blend outward. If you only buff the immediate repair zone, you’ll create a visible boundary where the polished section meets the untouched frame — a slightly shinier rectangle that catches the eye. Instead, gradually extend your buffing strokes 50–100 mm beyond the repair area on all sides, using progressively lighter pressure as you move outward. This feathers the transition so the polished zone merges seamlessly with the surrounding finish.
For anyone wondering how to buff out scratches on metal without leaving evidence of the repair, this blending technique is the difference between invisible results and an obvious patch. Take your time with it — rushing the blend is the most common reason DIY polishing looks amateur.
Special Considerations for Anodized Frames
Anodized aluminium demands extra caution. The anodized layer is a controlled oxide finish that’s harder than the metal beneath it, but it’s also relatively thin. Aggressive polishing can cut through this layer, leaving a dull, lighter patch that’s impossible to reverse without professional re-anodizing. As specialist guidance from Shengxin Aluminium notes, anodized aluminium is not a good candidate for traditional metal polishing — the finish should be preserved rather than abraded through.
For polishing brushed aluminum frames with an anodized finish, stick to these rules:
- Use only a non-abrasive aluminium polish specifically labelled safe for anodized surfaces
- Test in an inconspicuous area first — the bottom edge of the frame or behind a curtain line
- Use minimal pressure and fewer passes than you would on powder-coated frames
- Stop immediately if you notice colour change, uneven sheen, or increasing dark residue on your cloth
If the scratch shows a visible colour difference — lighter or shinier metal inside the groove compared to the surrounding finish — the damage has penetrated the anodized layer entirely. Polishing won’t restore it. That colour mismatch means you’re looking at exposed bare aluminium beneath the oxide coating, and no amount of surface buffing will rebuild what’s been removed. In that case, you’ll need the wet-sanding and touch-up approach covered next, which addresses how to buff out scratches on aluminum that have cut through the protective finish into the metal itself.
Step 4 – Sand and Buff Medium-Depth Scratches
Scratches that catch your fingernail have cut past the surface finish into the material beneath. Polishing compound alone won’t level them — you need to physically remove a thin layer of surrounding material to bring the surface flush with the bottom of the scratch. This is where wet sanding comes in, and it’s the most technically demanding step in the entire process. Get the grit progression right and you’ll achieve near-invisible results. Skip a step or press too hard, and you’ll create a dull patch that’s harder to fix than the original scratch.
So how do you get scratches out of aluminum frames that are too deep for polish but haven’t exposed bare metal? The answer is controlled, progressive wet sanding followed by compound buffing — essentially the same technique professional automotive refinishers use on painted panels, adapted for vertical aluminium window frames.
Wet Sand With Progressive Grits
Wrap your wet-and-dry sandpaper around a small foam sanding block. This distributes pressure evenly across the scratch rather than concentrating force under your fingertips, which would create uneven low spots. Soak the sandpaper in water for 5–10 minutes before starting — fully saturating the abrasive prevents premature clogging and makes the paper more flexible against the frame’s flat profile.
Keep the surface wet at all times using your spray bottle. The water serves as a lubricant that carries away removed material, reduces friction, and prevents heat build-up — all critical when working on aluminium that conducts heat rapidly. Sand in one direction only, along the frame’s length, using light even strokes. Never sand across the frame’s width or in circles; directional sanding follows the frame’s grain and produces a finish that blends naturally once buffed.
The grit you start with depends on your frame’s finish type. Progress through each step without skipping — each finer grit removes the scratch pattern left by the previous one.
For anodized frames:
- Start at 1000 grit — sand until the scratch edges feel level with the surrounding surface
- Progress to 1500 grit — remove the 1000-grit scratch pattern until the haze becomes finer and more uniform
- Finish at 2000 grit — create a smooth, consistent surface ready for compound buffing
For powder-coated frames:
- Start at 600 grit — level the scratch edges and any raised burrs around the damage
- Progress to 800 grit — refine the surface and remove the coarser scratch pattern
- Move to 1000 grit — further smooth the area until previous sanding marks disappear
- Finish at 1500 grit — prepare a fine, uniform surface for compound work
Light pressure is essential throughout. You’re levelling the scratch edges to meet the surrounding surface, not grinding material away aggressively. Let the abrasive do the cutting — pressing harder just removes more coating than necessary and risks sanding through to bare metal. Check your progress frequently by wiping the area dry and inspecting under good light. You’ll know it’s time to move to the next grit when the previous grit’s scratch pattern has been replaced by a finer, more uniform haze.
Buff the Sanded Area to Restore Sheen
After your final grit pass, the frame will look uniformly hazy — matte and dull where you’ve sanded. This is normal and expected. The buffing stage brings back the sheen.
Apply a small amount of rubbing compound to a foam buffing pad and work in straight lines along the frame’s length, just as you did when sanding. Rubbing compound contains a coarser abrasive than polish, so it cuts through the sanding haze quickly. Work in small sections — roughly 150–200 mm at a time — to prevent compound from running down the vertical surface before you’ve had a chance to work it in. If you’re learning how to get scratches out of aluminum frames for the first time, this is the stage where patience pays off most visibly. The haze will gradually clear with each pass until the surface begins reflecting light again.
Once the sanding haze disappears, switch to a finer polishing compound on a clean pad. This second pass removes the micro-scratches left by the rubbing compound and restores a finish closer to the original frame surface. Two to three passes with polishing compound typically achieves the result you’re after.
Blend the Repair Into Surrounding Surface
The sanded and buffed zone will look slightly different from the untouched frame around it — often marginally shinier or with a subtly different texture. Feathering the edges makes this transition invisible to the eye.
Using your polishing compound on a clean foam pad, extend your buffing strokes progressively outward from the repair zone. Reduce pressure gradually as you move away from the centre of the repair. The goal is a soft gradient rather than a hard line between the worked area and the original surface. Extend at least 50–100 mm beyond the sanded zone on each side.
For anyone wondering how to take scratches out of aluminum frames without leaving obvious evidence of the repair, this blending step is what separates a professional-looking result from an amateur one. The human eye picks up abrupt transitions in sheen far more readily than it notices a uniformly slightly different finish across a broader area.
Wipe the entire section down with a clean, damp microfibre cloth to remove all compound residue, then inspect from a normal viewing distance — the angle someone would see the frame from inside or outside the house. If the repair blends at arm’s length, you’ve succeeded. Minor imperfections visible only at close inspection with a torch are perfectly acceptable for a DIY result.
Medium-depth scratches that respond well to this method leave the existing finish largely intact. Deep gouges that expose bare metal beneath the coating, however, need a fundamentally different strategy — one that involves rebuilding the finish layer rather than simply smoothing what remains.
Step 5 – Repair Deep Scratches and Restore Damaged Coatings
A scratch that reveals bare silvery metal beneath your frame’s finish has breached the entire protective coating. Polishing and buffing won’t help here — there’s no remaining finish to smooth out. Instead, you need to rebuild the coating from the substrate up. Removing scratches from aluminum frames at this depth is less about abrasion and more about filling, colour matching, and sealing. The approach differs depending on whether your frame is powder-coated or anodized, and the expectations for each are quite different.
Sand the Scratch Smooth and Feather the Edges
Deep scratches often leave raised burrs or rough edges where the coating has been displaced rather than cleanly cut. Before any paint goes on, these need to come off. Start with 400-grit wet-and-dry sandpaper wrapped around your foam block, and lightly sand along the scratch to flatten any ridges and smooth the exposed metal. The goal here isn’t a polished surface — it’s a flush, smooth channel that paint can adhere to evenly.
Progress through 600 grit, then 800 grit, feathering the edges where the scratch meets the intact coating. This feathering creates a gradual transition rather than a sharp step between bare metal and finish, which helps the touch-up paint blend visually and bond mechanically. Keep the surface damp throughout and use minimal pressure — you’re preparing a base for adhesion, not trying to make bare metal scratch free through polishing alone.
Wipe the sanded area clean with isopropyl alcohol on a lint-free cloth. Any dust, oil, or moisture left in the scratch channel will compromise paint adhesion and cause peeling within months.
Apply Colour-Matched Touch-Up Paint
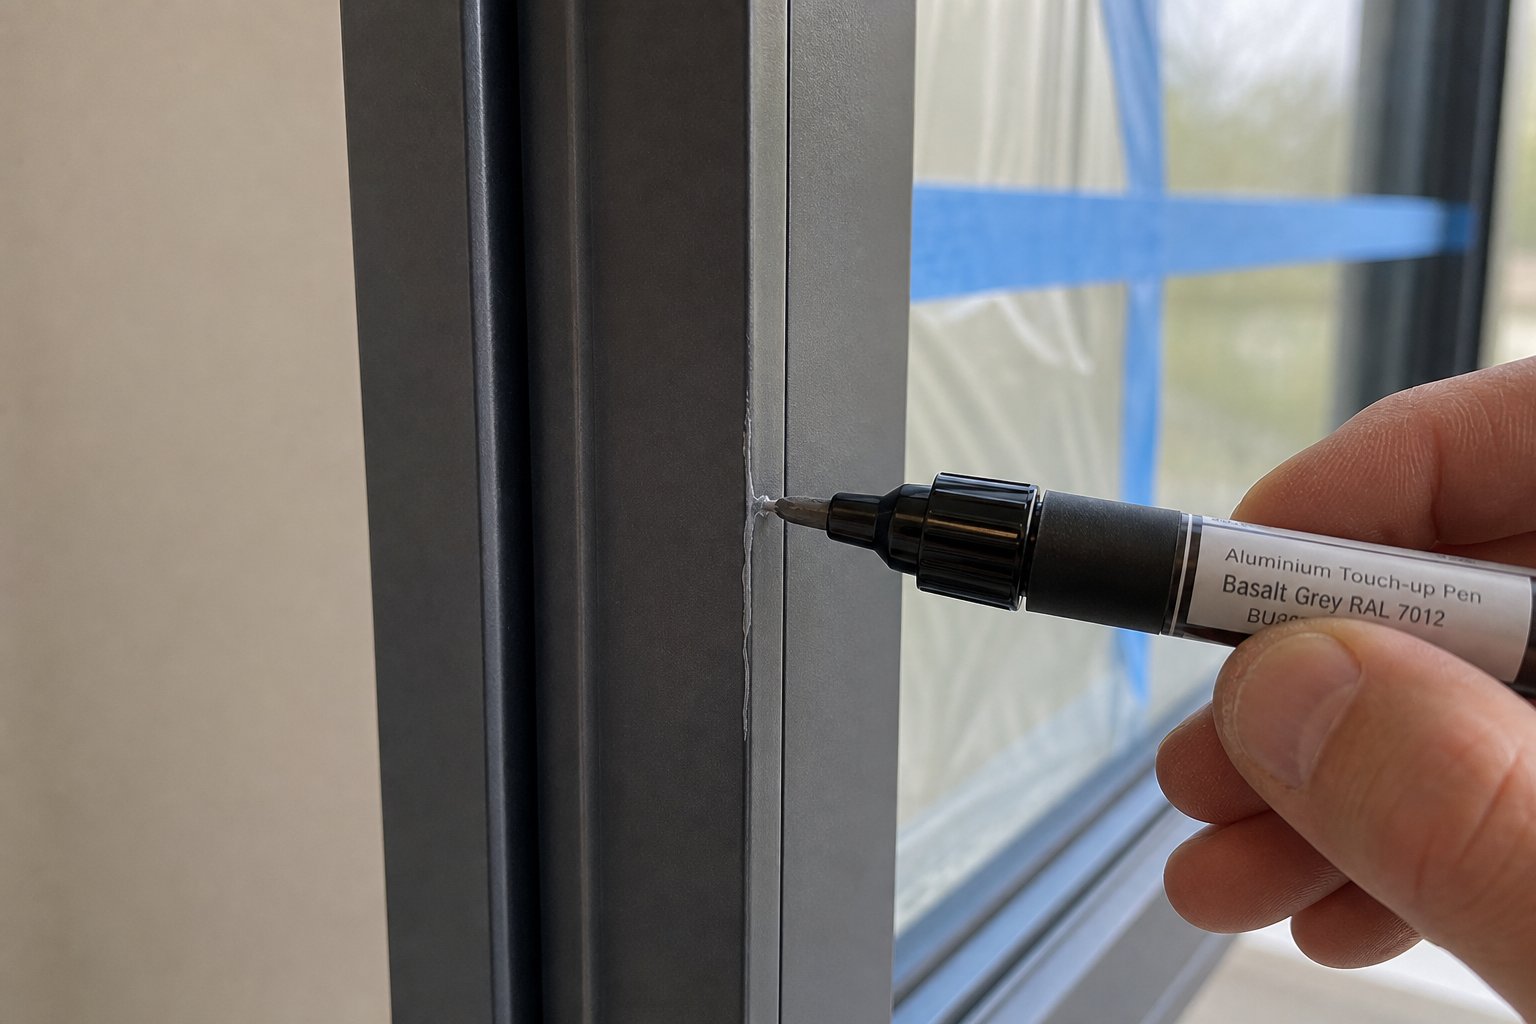
For powder-coated frames: Source a colour-matched touch-up paint pen or small pot from your frame manufacturer or a specialist supplier. Many Australian powder coaters keep records of original colour codes — check your window installation paperwork or the frame’s internal edge for a colour reference sticker.
Apply thin coats using a fine artist’s brush or the pen’s built-in applicator. Work in short, controlled strokes along the scratch, building up gradually rather than flooding the channel in one pass. Allow each coat to dry fully — typically 30–60 minutes between coats depending on temperature — before adding the next. Two to three coats usually brings the fill level flush with the surrounding surface.
Once the final coat has cured completely (24–48 hours), lightly wet-sand with 1500-grit paper to level any slight ridges where the touch-up paint sits above the original coating. Follow with a light polish to blend the sheen.
For scratched anodized aluminum frames: True anodizing is an electrochemical process that cannot be replicated at home with a brush. The colour in an anodized finish sits inside the oxide pores of the metal itself — no liquid paint perfectly replicates that depth and translucency. Your best DIY option is a colour-matched enamel or a specialist anodized touch-up pen that stains the exposed metal to approximate the surrounding colour. Apply in thin layers, allowing each to flash off before adding the next, and seal with a clear lacquer designed for anodized surfaces. The result won’t be invisible, but it restores protection and reduces visual contrast significantly.
Deep scratches on anodized frames often look better with professional repair than DIY touch-up paint. Anodized colour is integral to the oxide layer, and brush-applied paint rarely matches its depth, translucency, or weathering behaviour. If the scratch is on a prominent, highly visible section of frame, a professional re-anodizing service or factory refinish delivers a far more convincing result.
Seal With Clear Coat for Powder-Coated Frames
Touch-up paint alone lacks the UV resistance and gloss consistency of the original factory powder coat. A clear coat layer over the repair bridges that gap — it protects the fresh paint from sun damage, matches the surrounding finish’s sheen, and provides a sacrificial barrier against future minor scuffs.
Mask carefully around the repair area, extending tape at least 20–30 mm beyond the touched-up zone. Use a clear coat spray designed for automotive or industrial use, and apply in light, even passes from approximately 200 mm distance. On vertical window frames, the temptation is to spray heavily to get full coverage in one pass — resist it. Heavy application causes drips and runs that are difficult to fix without starting over. Two to three light coats with 10–15 minutes flash-off time between each produces a smooth, even film.
Match the clear coat’s gloss level to your frame’s original finish. If your frames have a satin or matte powder coat, use a satin clear rather than high-gloss — a shiny patch on a matte frame draws the eye just as much as the original scratch did. Once cured, the repair should be visually subtle from normal viewing distance, with the colour match doing most of the heavy lifting.
Knowing how to remove scratches from bare metal and rebuild the coating above it gives you a complete repair path for even the worst cosmetic damage. The final piece of the puzzle is protecting that fresh repair — and the rest of your frames — from future damage, which comes down to the right sealant and a simple ongoing maintenance routine.
Step 6 – Seal and Protect the Repaired Surface
A freshly repaired frame looks great the day you finish it. Six months of Australian sun, salt air, and rain without protection? That repair starts fading, oxidising, and picking up new scuffs all over again. Sealing the surface after removing scratches from metal is what separates a repair that lasts years from one that needs redoing every season. Think of it as locking in the work you’ve already done.
Apply a Protective Wax or Sealant
A thin layer of carnauba wax or synthetic polymer sealant creates a sacrificial barrier between your aluminium frame and the outside world. Minor scuffs hit the wax layer first rather than the frame’s finish — and wax is far easier to reapply than repeating an entire scratch repair.
Apply a small amount of paste wax or liquid sealant to a clean foam applicator pad and work it across the repaired area in thin, even strokes. Extend coverage to the entire frame section rather than just the repair zone — this avoids a visible difference in sheen between protected and unprotected areas. Allow the product to haze (typically 5–15 minutes depending on temperature), then buff off with a fresh microfibre cloth.
Which product type suits window frames best? Carnauba wax delivers a warm, natural depth of shine but typically lasts only 4–6 weeks in exposed conditions. Synthetic polymer sealants offer 4–6 months of protection with better UV and chemical resistance — a more practical choice for aluminium window frame repair where you don’t want to be reapplying product every month. For frames in sheltered positions, reapplication every 6–12 months is usually sufficient. Coastal or north-facing frames exposed to intense UV and salt spray benefit from a sealant refresh every 3–4 months.
Consider a UV-Resistant Clear Coat for Exposed Frames
Frames that cop direct sun for most of the day — particularly in Queensland, Western Australia, or any north-facing elevation — face accelerated UV degradation on repaired areas. Touch-up paint and polished surfaces lack the baked-on resilience of factory powder coating, making them more vulnerable to fading and chalking.
A UV-resistant clear coat sealant (available as a spray or wipe-on liquid) adds a harder, longer-lasting protective film than wax alone. Apply it the same way you’d apply clear coat during a deep scratch repair: mask adjacent surfaces, spray in light even passes from 200 mm distance, and build two to three thin coats rather than one heavy one. On vertical frames, work from bottom to top so any overspray settles on areas you haven’t coated yet rather than on freshly applied film.
For coastal properties where salt air accelerates corrosion, this step is particularly worthwhile. The clear coat prevents moisture and salt from reaching the repaired aluminium beneath, extending the life of your work significantly.
Ongoing Maintenance to Prevent New Scratches
Protection isn’t just about products — it’s about habits. A simple routine keeps your frames looking sharp between major interventions:
- Clean monthly with mild soap and a soft microfibre cloth. Never use abrasive pads, scouring creams, or steel wool — as window maintenance specialists note, these scratch through protective coatings and create the exact damage you’ve just spent time repairing.
- Lubricate hardware with silicone-based spray every 6 months. Stiff hinges and locks cause metal-on-metal contact scratches each time the window operates — a few seconds of lubrication prevents months of gradual wear.
- Trim vegetation that sits within reach of frames. Branches and palm fronds scraping against aluminium in wind create fine surface scratches that accumulate over time.
- Inspect seals annually for cracking or shrinkage. Deteriorating rubber seals expose frame edges to moisture ingress and can shift position, rubbing against the frame during thermal expansion.
How to fix scratched metal once is a useful skill. Not needing to do it again is better. These maintenance steps address the root causes of most window frame scratches rather than just treating the symptoms after the fact.
Worth noting: modern powder-coated aluminium frames with quality factory finishes resist scratching far better than older anodized or mill-finish frames. The powder coating process creates a thicker, harder surface layer that shrugs off the kind of everyday contact that leaves visible marks on thinner finishes. If you find yourself repairing aluminium window frames repeatedly — the same frames picking up damage season after season — the finish itself may have reached the end of its effective life. At that point, upgrading to a durable powder-coated system like MEICHEN’s aluminium windows, which offer a wide range of colour options and robust weather performance designed for Australian conditions, can be more cost-effective long-term than ongoing patch repairs. It’s a practical consideration rather than an immediate necessity — but one worth factoring into your maintenance planning if the repairs keep stacking up.
Protection and maintenance handle the future. But what about frames where the damage is too widespread, the finish too far gone, or the cost of repeated repairs no longer makes sense? That’s a different decision entirely — one that weighs DIY effort against professional service against starting fresh.

When to DIY, Hire a Professional, or Upgrade Your Frames
Not every scratch warrants the same response. A single scuff on an otherwise solid frame is a weekend project. A network of deep gouges across ageing aluminium that’s already pitting and oxidising? That’s a different conversation entirely. Knowing where your situation falls — and being honest about it — saves you from pouring time and money into diminishing returns.
When DIY Repair Makes Sense
The methods covered in this guide work best under specific conditions. DIY is the right call when:
- The damage is limited to surface scuffs or isolated medium scratches — one or two spots, not the entire frame perimeter
- Your frames are in good overall condition with no corrosion, seal failure, or structural issues beyond the cosmetic scratch
- You have powder-coated frames with an available colour-match paint (check your installation paperwork for the colour code)
- Cosmetic improvement is the goal rather than factory-perfect restoration — a 90% result at arm’s length is realistic for DIY
If you’re figuring out how to get a scratch out of metal for the first time, starting with a light scuff on an inconspicuous section builds confidence before tackling visible damage. A quality aluminium scratch remover and some patience handle most everyday marks without professional help.
When to Call a Professional
Some situations demand specialist equipment, colour-matching expertise, or commercial aluminum polishing techniques that go beyond what’s practical at home. Consider professional repair when:
- Deep scratches span multiple frame sections or wrap around corners where consistent blending is difficult
- The frames are anodized and colour matching is critical — professionals can access factory-matched stains and re-anodizing services that produce far more convincing results than brush-applied paint
- Structural damage accompanies the cosmetic scratches — bent profiles, cracked welds, or compromised drainage channels need fabrication skills, not just polishing
- The windows are heritage-listed or architecturally significant, where council requirements may dictate specific restoration methods
Professional aluminium frame repair in Australia typically runs between $150–$400 per window depending on damage severity and access difficulty — significantly less than full replacement. For frames that are structurally sound but cosmetically tired across their full surface, a professional can remove scratches from metal efficiently using rotary tools and industrial compounds that achieve results in hours rather than days.
When Replacement Is the Smarter Investment
There’s a tipping point where repair costs — whether DIY or professional — stop making financial sense. Replacement becomes the better path when:
- Widespread corrosion or pitting extends beyond surface scratches into the aluminium substrate itself
- The frames are outdated single-glazed units where energy efficiency gains from modern double glazing justify the investment (relevant for NatHERS compliance in renovations)
- Seals have failed, frames are warping, or hardware is no longer serviceable — signs the entire system has reached end of life
- Cumulative repair costs over the past few years are approaching 50% or more of replacement value
Modern aluminium window systems with factory-applied powder-coated finishes are engineered to resist the scratching and weathering issues that plague older frames. Products like MEICHEN’s aluminium windows offer customisable colour options — including popular aluminium black windows and contemporary charcoal tones — along with robust hardware and thermally broken profiles designed for Australian conditions. They suit residential renovations, apartment projects, and commercial applications equally, delivering the kind of durable, low-maintenance performance that eliminates the cycle of ongoing scratch repair.
The table below puts all three options side by side to help you decide which path fits your situation.
| Factor | Frame Replacement (Modern Powder-Coated Aluminium) | DIY Repair | Professional Repair |
|---|---|---|---|
| Cost (AUD) | $800–$2,000+ per window (supply and install) | $30–$80 per repair | $150–$400 per window |
| Time | 1–3 days for full installation (multiple windows) | 2–4 hours per scratch | 1–2 days turnaround |
| Finish Quality | Factory-perfect, consistent, warranted | Good (80–90% match at viewing distance) | Very good (95%+ match) |
| Best For | End-of-life frames, energy upgrades, widespread damage, long-term value | Isolated scratches on otherwise sound frames | Multiple scratches, anodized colour matching, visible high-traffic areas |
Knowing how to get rid of scratches on metal is a genuinely useful skill — it handles the majority of everyday window frame damage without spending a cent on professional labour. But it’s equally important to recognise when the frame itself, not just the scratch, is the problem. A clear-eyed assessment of your frame’s overall condition, the extent of the damage, and your tolerance for imperfection points you toward the right decision every time.
Frequently Asked Questions About Removing Scratches From Aluminium Window Frames
1. Can you polish scratches out of aluminium window frames without damaging the finish?
Yes, light surface scratches that don’t catch your fingernail can be polished out using aluminium-specific polishing compound and a foam applicator pad. The key is working in straight lines along the frame’s grain rather than circular motions, using moderate pressure, and keeping the surface slightly damp. For anodized frames, use only non-abrasive polish labelled safe for anodized surfaces, as aggressive polishing can strip the oxide layer and create irreversible dull patches.
2. What grit sandpaper should I use for scratches on aluminium window frames?
The correct grit progression depends on your frame’s finish type and scratch depth. For medium scratches on anodized frames, progress through 1000, 1500, then 2000 grit. For powder-coated frames, start coarser at 600 grit and work through 800, 1000, then 1500. Deep scratches exposing bare metal require starting at 400 grit. Always wet sand, never skip grits in the sequence, and use a foam sanding block to distribute pressure evenly across the scratch.
3. How do I know if my aluminium window frame is anodized or powder-coated?
Powder-coated frames have a thick, opaque colour layer that sits on top of the metal. If you find a chip, you’ll see distinct coating layers above the bare aluminium. Anodized frames have a thinner finish with a smooth metallic sheen where the metal’s grain or brushed texture remains visible through the surface. Scratches on anodized frames appear as dulling rather than peeling flakes, because the protective oxide layer is integrated into the aluminium rather than applied over it.
4. Is it worth repairing deep scratches on aluminium window frames or should I replace them?
DIY repair makes sense for isolated scratches on frames that are otherwise in good condition. However, replacement becomes more cost-effective when frames show widespread corrosion, failed seals, warping, or when cumulative repair costs approach 50% of replacement value. Modern powder-coated aluminium window systems offer factory-perfect finishes with superior scratch resistance, making them a practical long-term investment if your existing frames require frequent repairs.
5. How can I prevent future scratches on my aluminium window frames?
Apply a synthetic polymer sealant or carnauba wax after repair to create a sacrificial barrier that absorbs minor scuffs before they reach the frame surface. Maintain frames monthly with mild soap and a soft microfibre cloth, lubricate hardware every six months to prevent metal-on-metal contact, trim nearby vegetation that may scrape frames in wind, and inspect rubber seals annually. For frames in direct sun or coastal environments, a UV-resistant clear coat sealant provides longer-lasting protection than wax alone.
More Window & Door Guides