Assessing Your Timber Frame Before You Begin
A successful aluminium window installation starts well before you pick up a drill. The condition of your timber frame dictates whether you can proceed directly or need to address structural issues first. Getting this assessment wrong leads to warped frames, failed seals, and costly rework down the track.
Is Your Timber Frame Ready for Aluminium Windows
Timber frames degrade in ways that are not always obvious from the surface. A frame might look solid while concealing moisture damage, soft spots, or structural movement that will compromise a new window within months. Before committing to any aluminum window installation project, inspect the opening thoroughly. Press a flat-blade screwdriver into the timber at multiple points, particularly along the sill and lower corners where water tends to pool. Sound timber resists penetration; compromised timber gives way easily.
Your frame needs remedial work before installation if you find any of the following:
- Soft or spongy timber indicating rot, especially at sill level and lower jamb corners
- Visible warping or bowing in the head, jambs, or sill exceeding 3 mm across the span
- Inadequate structural support, such as missing or undersized lintels above the opening
- Openings out of square beyond 5 mm tolerance when measured diagonally
- Evidence of active moisture ingress, staining, or mould growth within the reveal
- Previous fixings that have pulled loose, suggesting the timber can no longer hold fasteners reliably
New Build vs Retrofit Considerations
New-build timber frames offer a controlled environment. The framing is fresh, square, and built to known specifications. You can integrate building wrap and flashing before the window arrives, creating a clean weatherproofing sequence from the start.
Retrofit scenarios are less predictable. Older timber-framed homes, whether weatherboard, fibro, or clad construction, may have experienced decades of seasonal movement. Timber settles, shrinks, and shifts over time. Removing an existing window often reveals hidden damage that was masked by trims and paint. Budget extra time for preparation if you are replacing windows in an established structure.
Understanding the Aluminium-to-Timber Interface
Aluminium and timber behave differently under temperature and moisture changes. Research into differential movement shows that aluminium expands and contracts at a significantly higher rate than timber when temperatures shift. In Australian conditions, where summer surface temperatures on dark-coloured frames can exceed 60 degrees Celsius, this differential creates stress at the junction between the two materials.
Timber also responds to moisture. It swells when wet and shrinks when dry, moving perpendicular to the grain. A correct window installation accounts for both of these behaviours by incorporating adequate clearance gaps, flexible sealants, and fixings that allow controlled movement without binding the aluminium frame.
This guide walks through each step for DIY-capable readers. Some stages, particularly structural modifications and compliance documentation under the NCC, may warrant professional involvement. Those points are flagged as they arise.
With your frame assessed and any remedial work complete, the next critical task is getting your measurements right, because timber openings demand a more careful approach than masonry.
Step 1 Measure the Opening and Select Your Window
Timber openings rarely stay perfectly true over time. Unlike masonry, which holds its dimensions rigidly, a timber frame can shift by several millimetres as the structure settles, moisture levels fluctuate, and seasonal cycles take their toll. A single measurement taken at one point tells you almost nothing useful. Accurate measuring is the foundation of a warp-free aluminium window installation, and timber frames demand a more methodical approach than brick or block.
How to Measure a Timber Opening Accurately
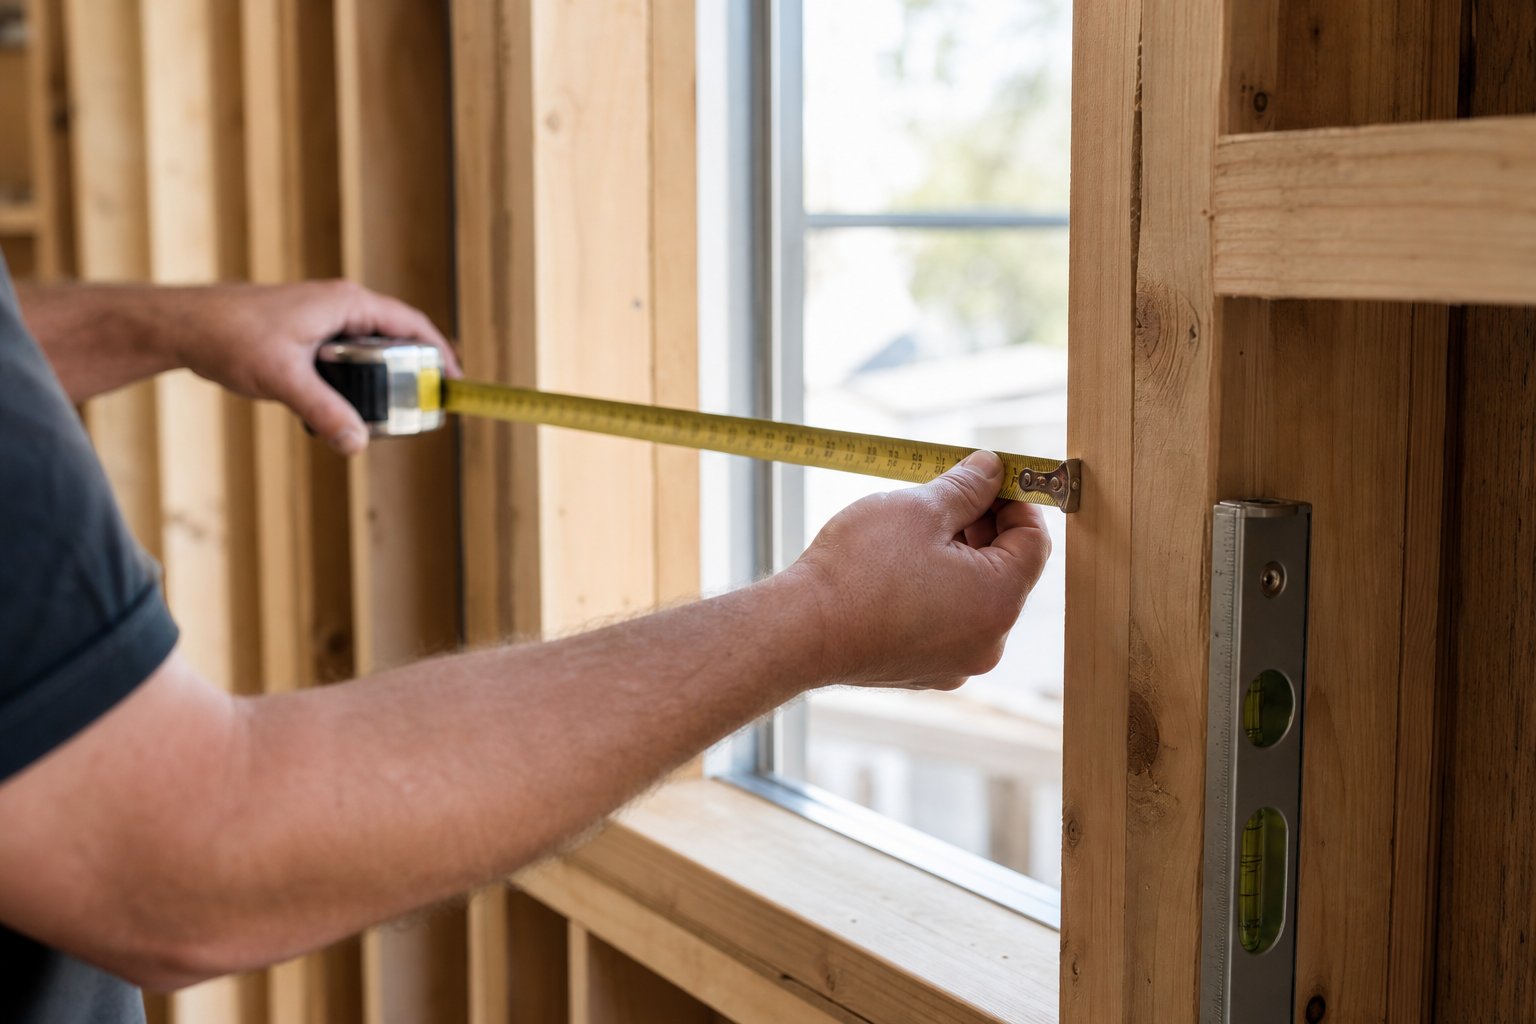
Grab a quality steel tape measure and take readings at three positions for each dimension. For width, measure across the opening at the top, middle, and bottom. For height, measure from sill to head on the left side, centre, and right side. Record all six figures.
The smallest measurement in each direction becomes your governing dimension. This is the figure you use to determine the maximum window size that will physically fit into the opening without forcing it. Forcing an oversized frame into a tight spot is one of the fastest ways to distort the aluminium and ruin the sliding action of your sashes.
A few practical tips specific to timber frames:
- Check for bow or belly in the head and sill by holding a straight edge across the span. Any deviation greater than 2 mm needs to be addressed with packing during installation.
- Measure diagonals corner to corner. If the two diagonal measurements differ by more than 5 mm, the opening is out of square and will need correction before the window goes in.
- In retrofit situations, take measurements at the structural timber, not at any existing linings or trims that may have shifted independently.
- For older homes where settling has occurred, re-measure after removing the existing window. The act of removal can release tension and allow the opening to move slightly.
Timber frames require tighter tolerance checks than masonry because the substrate itself can move. A masonry reveal is essentially fixed once the mortar cures. Timber continues to respond to its environment for the life of the building. Your measurements need to account for this ongoing behaviour.
Calculating Clearance Gaps for Packing
The clearance gap is the space between the aluminium frame and the timber reveal on all sides. This gap serves two purposes: it provides room for plastic packers to level and square the window, and it accommodates future timber movement without transferring stress into the aluminium frame.
Too tight, and seasonal timber expansion will squeeze the frame and bind the sashes. Too loose, and you lose structural fixing integrity and create sealing challenges. The table below shows recommended clearance gaps for timber frame openings in Australian residential construction:
| Position | Minimum Gap (mm) | Maximum Gap (mm) | Notes |
|---|---|---|---|
| Sill (bottom) | 5 | 10 | Must support window weight on packers at fixing points |
| Head (top) | 5 | 10 | Allows for potential downward settling of the head timber |
| Jambs (sides) | 3 | 8 | Accounts for lateral timber movement across the grain |
These tolerances are tighter than what you would typically allow in a masonry opening, where 10 to 15 mm per side is common. The reason is straightforward: timber fixings rely on screw engagement into solid material, and excessive gaps mean your fixings are anchoring through a thick layer of packer rather than drawing the frame firmly against the substrate.
To calculate your window order size, take your smallest opening measurement and subtract twice the clearance gap. For example, if your smallest width measurement is 1200 mm and you are working with a 5 mm gap each side, your window frame width should be 1190 mm. Industry guidance on reveal sizing confirms that reveals add 40 mm to both the height and width of a window, so factor this in if your system uses timber reveals attached to the aluminium fin.
Choosing the Right Aluminium Window System
Not every aluminium profile system suits a timber substrate equally well. The key considerations when selecting your sliding aluminium windows or any other configuration for a timber frame include:
- Fixing method: Some systems are designed for fin-fixing into stud framing, while others use direct face-fixing through the jambs. Fin-fixed systems with timber reveals are the standard approach for new-build timber frames in Australia. Direct-fix (defin) systems work better for retrofit into existing finished openings.
- Profile depth: The frame depth needs to sit within your wall thickness. For a typical 90 mm stud with 10 mm internal lining, a standard sliding window aluminium frame depth of 50 to 65 mm leaves adequate room for reveals and external cladding.
- Thermal performance: If you are working toward NatHERS compliance or targeting a specific WERS rating, thermally broken profiles offer better performance but come with a deeper frame section. Confirm the frame depth works within your wall build-up before ordering.
- Drainage design: Every alum sliding window relies on weep holes and drainage channels to manage condensation and wind-driven rain. Verify that the drainage path will not be obstructed by your sill detail or external cladding arrangement.
For a single window replacement, these decisions are relatively simple. Larger projects involving multiple openings, mixed window types, or compliance-critical builds benefit from professional drawing review and system selection support before manufacturing begins. Builders and contractors coordinating multi-unit developments or custom specifications can access end-to-end project services covering engineering documentation, system selection, and delivery planning to ensure every window arrives correctly specified for its timber frame opening.
With your measurements confirmed and window system selected, the next step is assembling the right fixings and materials, because the wrong screw type or sealant chemistry can undermine even the most precise measurement work.
Step 2 Gather Your Tools, Fixings, and Materials
Having the right gear on hand before fitting aluminium windows prevents mid-job hardware store runs and compromised substitutions. Timber substrates are more forgiving than masonry in some respects, but they demand specific fixing types and sealant chemistry that you cannot swap out without consequences.
Essential Power Tools and Hand Tools
Most of what you need for aluminium windows installation into timber is standard carpentry and glazing kit. Gather the following before your window arrives:
- Cordless drill/driver with clutch control for progressive tightening
- Impact driver (optional, useful for longer coach screws in hardwood frames)
- Spirit level, minimum 1200 mm length
- Steel tape measure and combination square
- Caulking gun rated for high-viscosity sealants
- Pry bar and oscillating multi-tool (retrofit removal)
- Utility knife and heavy-duty scissors for flashing tape
- Rubber mallet for seating packers without damaging the aluminium frame
- Safety glasses, gloves, and hearing protection
Fixings and Fasteners for Timber Substrates
Screw selection matters more than most people realise. The wrong gauge or length leads to either a loose frame that rattles or a distorted one that binds. When you fit aluminium windows to timber, your fixings need to penetrate at least 25 mm into solid timber beyond any packer thickness.
- Timber frame screws (primary fixing): 10-gauge (5 mm diameter) countersunk screws, 50 to 75 mm long depending on packer depth. Stainless steel or zinc-plated to resist corrosion at the aluminium interface.
- Coach screws (heavy-duty option): 8 mm diameter hex-head, 65 to 100 mm long. Use where the frame weight is substantial or wind loads are high, such as large sliding panels in exposed coastal locations.
- Spacing: Maximum 600 mm centres between fixings, with the first fixing 100 to 150 mm from each corner of the aluminium frame.
- Edge distance: No fixing closer than 50 mm to the end of a timber member to avoid splitting.
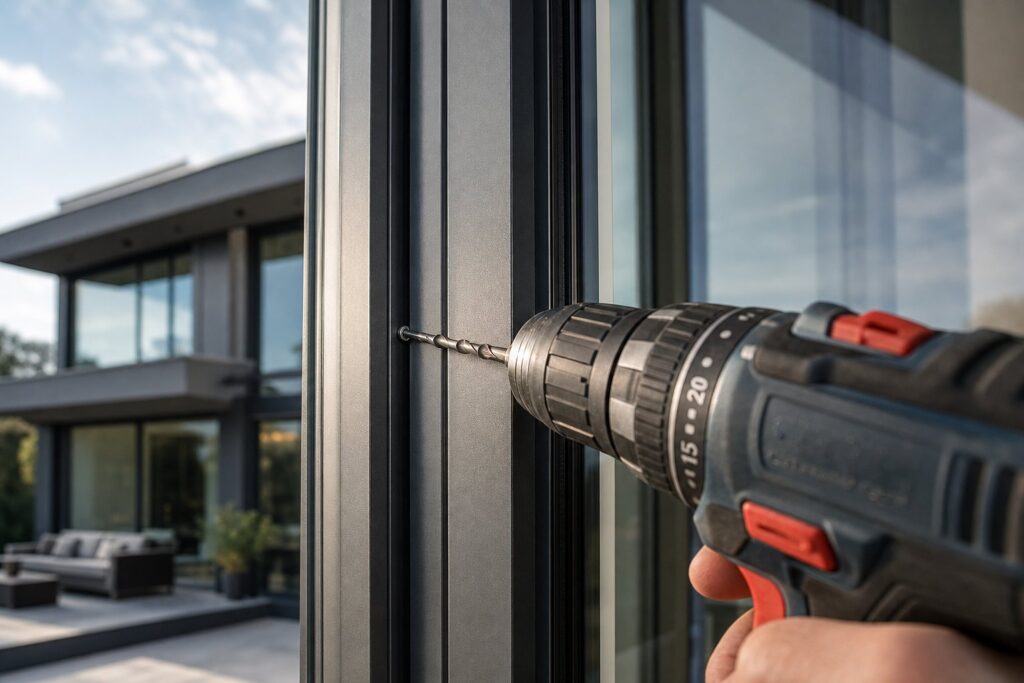
Pre-drilling pilot holes in both the aluminium frame and the timber prevents splitting and ensures the screw draws the frame tight against the packers without wandering off-line.
Sealants, Flashings, and Weatherproofing Materials
Sealant chemistry is non-negotiable. Acidic-cure silicones release acetic acid as they set, which corrodes aluminium over time. Always use neutral-cure silicone for any joint where the sealant contacts the aluminium frame directly.
- Neutral-cure silicone sealant: For the perimeter seal between aluminium and timber. Select a product rated for at least 20% movement capability.
- Closed-cell foam backer rod: Inserted into the gap before sealant application to control bead depth and prevent three-sided adhesion.
- Self-adhesive flashing tape: 150 mm wide minimum, applied to the sill and jambs before the window is positioned. Creates the primary moisture barrier behind the frame.
- Building wrap or house wrap: For integration with the existing wall membrane in new-build or re-clad situations.
- Cavity barriers: Required where the window opening intersects a ventilated cavity, particularly in bushfire-prone areas where NCC compliance demands non-combustible cavity closers.
Packing materials:
- Plastic packers: The standard choice. Compression-resistant, rot-proof, and available in graduated thicknesses from 1 mm to 10 mm. Use these at all fixing points and load-bearing positions along the sill.
- Timber shims: Acceptable for temporary positioning during levelling, but replace with plastic packers at permanent fixing points. Timber shims can absorb moisture, swell, and transfer that moisture into the aluminium frame junction.
Gathering everything in advance keeps the installation moving efficiently. The real payoff comes in the next phase: preparing the timber opening itself so the window seats cleanly and the weatherproofing layers integrate without gaps.
Step 3 Prepare the Timber Frame Opening
Preparation separates a lasting installation from one that leaks within a year. Timber frames demand more groundwork than masonry because the substrate is organic, moisture-sensitive, and prone to movement over decades of service. Skipping this stage, or rushing through it, leaves you sealing a new aluminium window into an opening that is already working against you.
Removing an Existing Window Safely
If you are replacing sliding windows in a retrofit scenario, the old unit needs to come out without damaging the surrounding timber structure. Careless removal tears away good timber, enlarges the opening beyond tolerance, and creates extra remedial work.
- Remove any internal trims, architraves, and sill boards first. Score paint lines with a utility knife to prevent tearing the plasterboard face.
- Cut through the perimeter sealant between the old frame and the reveal using an oscillating multi-tool or sharp utility knife.
- Remove fixing screws or nails from the frame. If screws have corroded and will not back out, cut them flush with the timber using a reciprocating saw fitted with a metal-cutting blade.
- Lift the old frame out carefully. For larger openings, remove sashes and glass first to reduce weight and avoid breakage.
- Scrape away old sealant residue, expanding foam, and any degraded flashing material from the reveal surfaces. You need clean, sound timber for the new weatherproofing layers to bond properly.
Once the opening is bare, inspect the exposed timber closely. This is often the moment you discover hidden rot or insect damage that was concealed behind trims for years. Address any soft or compromised timber now, before proceeding. Knowing how to replace a sliding window properly means accepting that the removal phase sometimes reveals more work than expected.
Squaring and Checking the Timber Reveal
A square opening is essential for smooth sash operation. Aluminium sliding frames have zero tolerance for racking; even a few millimetres of distortion across the diagonal will cause binding or uneven gaps that defeat the weatherseals.
Measure both diagonals of the opening, corner to corner. If the two measurements match within 3 mm, the opening is acceptably square. A difference greater than 5 mm requires correction before the window goes in.
Remedial options for an out-of-square timber opening include:
- Packing the reveal: For minor discrepancies (3 to 5 mm), you can correct during the packing and levelling stage by shimming the window square within the opening.
- Planing or trimming: Where one jamb has swelled or shifted inward, carefully plane it back to achieve a parallel reveal. Check that you are not removing structural timber beyond safe limits.
- Sistering new timber: If a jamb or head has twisted or bowed significantly, fix a straight length of treated timber alongside the existing member to create a true fixing surface.
Timber frames move because the material responds to moisture cycling. Older weatherboard and fibro homes in coastal areas are particularly susceptible. This is why how to replace sliding windows in timber construction always involves more checking than the same job in a brick veneer wall.
Installing Building Wrap and Flashing Tape
The weatherproofing layer goes in before the window, not after. This sequence ensures water that penetrates behind the frame hits a membrane and drains outward rather than soaking into the timber structure.
- If the existing building wrap is intact around the opening, cut it in a modified I-shape: a horizontal slit along the head and vertical slits down each jamb. Fold the flaps inward and staple them to the reveal faces, creating a lapped membrane surface inside the opening.
- Apply self-adhesive flashing tape to the sill first. The tape should extend at least 150 mm up each jamb and wrap over the face of the sill timber to the exterior. This creates a sill pan that catches and redirects any water that reaches the bottom of the frame.
- Flash the jambs next, overlapping the sill tape by at least 50 mm. Work from bottom to top so each layer shingles over the one below.
- Leave the head flashing until after the window is installed. It will lap over the top of the frame flange, completing the shingle sequence.
Sill preparation deserves particular attention. The sill timber must slope outward with a minimum fall of around 5 to 10 degrees so water drains away from the frame rather than pooling against it. If the existing sill is flat, a tapered packer or a bevelled timber strip fixed to the sill creates the necessary slope before the flashing tape goes on. Flat sills trap water, and trapped water rots timber. In regions with heavy wind-driven rain, combining a sloped sill with a back dam at the interior edge provides the most reliable drainage.
With the opening squared, flashed, and sloped correctly, the timber frame is ready to receive the aluminium window. The next task, positioning and packing the frame, determines whether the sashes glide freely or bind under load.
Step 4 Position, Pack, and Level the Window
Packing and levelling is where timber frame installations diverge most sharply from masonry work. A brick reveal holds its shape indefinitely once the mortar sets. Timber settles under load, shrinks as it dries, and swells when moisture returns. These micro-movements mean the packers beneath and beside your sliding window frame are doing more than filling a gap. They are creating a stable platform within a substrate that will continue to shift subtly over the life of the building.
Timber frames typically require more packing points and finer adjustments than masonry openings. Where a brick reveal might need packers only at fixing positions, a timber reveal often demands additional support at intermediate points to prevent the aluminium frame from deflecting between fixings as the timber moves seasonally.
Placing Packers at the Correct Positions
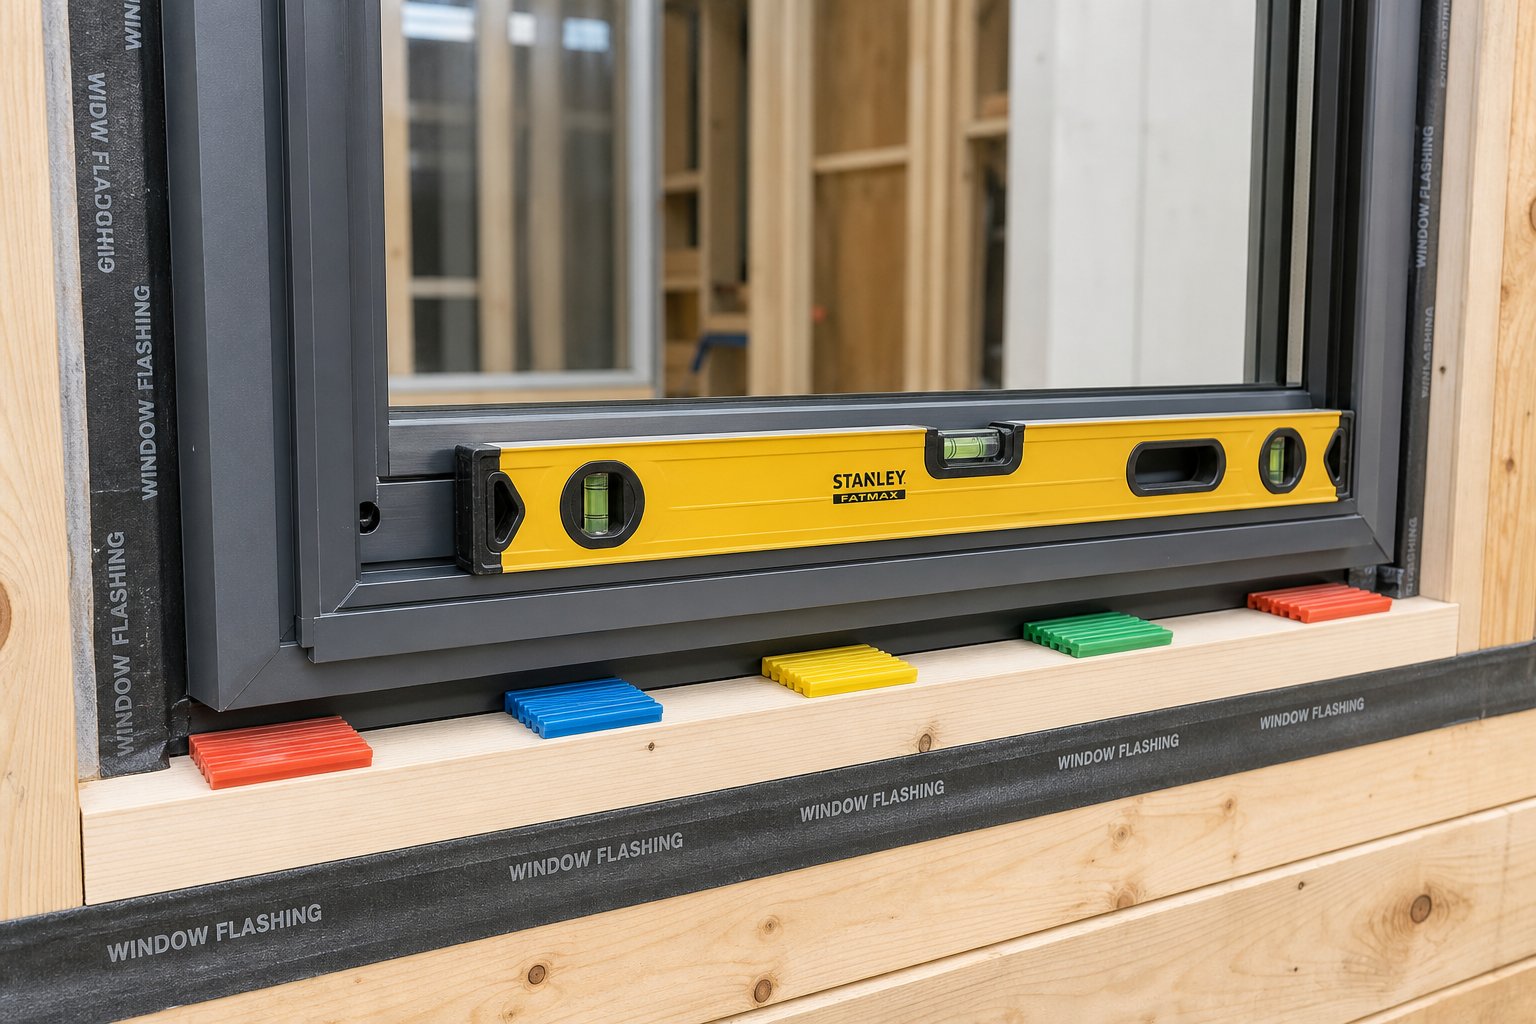
Packer placement follows a specific logic. Every fixing point needs a packer directly behind it so the screw draws the aluminium frame tight against a solid bearing surface rather than flexing it into a void. Beyond that, additional packers go at thirds along the sill and head to distribute the load evenly.
For a typical 1200 mm wide opening, your sill packer layout looks like this:
- One packer at each jamb fixing point, approximately 100 to 150 mm from each corner
- One packer at the centre, or at third points if the span exceeds 900 mm
- Additional packers at hinge or lock strike positions if the system has opening sashes
Repeat the same pattern along the head. Side jamb packers sit at each fixing location and at any intermediate point where the frame could bow inward under cladding pressure or seasonal timber expansion.
Use plastic packers exclusively at permanent positions. They resist compression, will not rot, and do not wick moisture into the aluminium-to-timber junction. Stack multiple thicknesses to build up the required depth rather than relying on a single thick packer that might compress unevenly over time.
Lifting and Seating the Window in the Opening
Before lifting, set your sill packers in position at the correct heights. Use a spirit level across the packer tops to confirm they create a level bearing line. Adjust individual packer stacks until the level reads true. This pre-setting saves significant time once the weight of the window is resting on them.
Lift the window into the opening with a helper for anything wider than 600 mm. Aluminium frames are lighter than timber equivalents, but an awkward grip while manoeuvring through a tight clearance gap risks scratching the finish or knocking packers out of position. Lower the frame onto the sill packers gently, letting the weight settle evenly across all bearing points.
Understanding how to put in a window frame without distortion means resisting the urge to shove it into place. If the frame does not drop in with light guidance, something is wrong. Either the opening is tighter than measured, a packer has shifted, or the frame is catching on flashing tape. Back out, identify the obstruction, and resolve it before applying force.
Shimming for Level, Plumb, and Square
With the frame resting on the sill packers, check level across the sill using your 1200 mm spirit level. Adjust sill packers as needed to bring the bubble dead centre. Then check plumb on both jambs. A sliding frame in a window opening that is even slightly out of plumb will cause the sash to drift open or closed under gravity, and uneven weatherseal compression leads to draughts.
Work through this sequence:
- Level the sill by adjusting packer thickness at each bearing point
- Plumb the left jamb by inserting or adjusting side packers at the top and bottom fixing positions
- Plumb the right jamb using the same method
- Check the head for level as a confirmation. If the sill is level and both jambs are plumb, the head should read level automatically. If it does not, one jamb has a twist that needs correcting.
- Measure both diagonals to confirm square
Always check that both diagonal measurements match before driving any fixings. An out-of-square frame will prevent smooth sliding operation, and correcting it after the screws are in means backing everything out and starting again.
Once level, plumb, and square readings all confirm, slide the sashes back and forth several times. They should glide freely without resistance or binding at any point in their travel. If a sash feels tight at one end, the frame is still slightly racked. Adjust your packers until the operation is smooth and consistent across the full range of movement.
Only when the sashes operate perfectly should you reach for the drill. The fixing stage locks everything in place permanently, and any distortion introduced by the screws themselves needs to be caught in real time, which is exactly what the next step addresses.
Step 5 Secure the Frame Without Distortion
Screws are permanent. Every fixing you drive either locks the frame in its correct position or introduces a distortion you will fight for the life of the window. The most common failure in sliding window installation into timber frames is not a measurement error or a bad seal. It is over-tightened fixings that pull the aluminium profile inward, pinching the sliding track and creating a sash that binds, judders, or refuses to latch properly.
Aluminium extrusions are strong in tension but relatively easy to deflect under point loads. A single screw driven too hard at mid-span can bow the jamb inward by a millimetre or more, enough to make a slider window installation feel wrong from day one. The solution is not fewer fixings. It is the right fixings, in the right sequence, tightened progressively while you monitor sash operation in real time.
Selecting the Right Screw Type and Length
Your screw choice depends on the timber species, the packer depth behind the frame, and the wind load the window needs to resist. The critical rule: the threaded portion must penetrate at least 25 mm into solid timber beyond any packer or air gap. Industry installation guidance confirms this minimum engagement for reliable pull-out resistance in timber substrates.
For most residential slider window installations in Australian softwood framing (pine, treated pine), a 10-gauge (5 mm diameter) countersunk timber screw in 65 to 75 mm length handles the job. Hardwood frames or situations with thick packer stacks may call for a longer screw or an 8 mm coach screw at primary load-bearing points.
Always use screws with a corrosion-resistant finish. Zinc plating is the minimum; stainless steel is preferable in coastal zones where salt air accelerates galvanic corrosion at the aluminium-to-steel interface. Avoid black phosphate drywall screws entirely. They are brittle, prone to snapping under lateral load, and offer no corrosion protection.
The table below summarises recommended fixing specifications for different timber frame scenarios:
| Timber Frame Thickness | Screw Type | Diameter | Length | Max Spacing | Edge Distance from Frame Corner |
|---|---|---|---|---|---|
| 45 mm (standard stud) | Countersunk timber screw | 10-gauge (5 mm) | 65 mm | 600 mm | 100–150 mm |
| 70 mm (double stud or lintel) | Countersunk timber screw | 10-gauge (5 mm) | 75 mm | 600 mm | 100–150 mm |
| 90 mm (solid post or engineered timber) | Hex-head coach screw | 8 mm | 100 mm | 450 mm | 100–150 mm |
| Any (high wind zone or large panel) | Hex-head coach screw | 8 mm | 75–100 mm | 450 mm | 100 mm |
Pre-drill pilot holes through the aluminium frame and into the timber. A pilot hole slightly smaller than the screw core diameter prevents the timber from splitting near the edge and ensures the screw tracks straight rather than following the grain off-line. For softwood, a 3.5 mm pilot suits a 5 mm screw. For hardwood, step up to 4 mm.
Fixing Sequence to Prevent Frame Distortion
How you drive the screws matters as much as which screws you choose. The correct sequence for how to install sliding window frames without distortion follows a progressive, cross-checking pattern rather than working sequentially around the perimeter.
- Drive the first screw into the top corner of one jamb. Snug it lightly, just enough to hold the frame against the packer. Do not fully tighten.
- Move to the diagonally opposite corner, bottom of the other jamb. Drive that screw to the same light snug.
- Check your diagonal measurements again. They should still match. If they have shifted, loosen and adjust before proceeding.
- Drive the remaining corner fixings, top of the second jamb and bottom of the first, again to a light snug only.
- Install intermediate fixings along both jambs at the specified spacing, all to light snug tension.
- Now begin progressive tightening. Work from one corner, tightening each screw by a quarter turn, then move to the next. Cycle through all fixings repeatedly rather than fully tightening any single screw in one go.
This approach distributes clamping force evenly across the frame. Fully tightening one screw before the others are engaged concentrates all the load at a single point, pulling the profile inward at that location. Progressive tightening keeps the frame straight.
Checking Operation Between Each Fixing
After each tightening pass, slide the sashes through their full travel. This is your real-time distortion detector. A sash that moved freely before you started tightening but now drags at a specific point tells you exactly where the frame has been pulled in. Back off the nearest screw by half a turn and recheck.
Pay particular attention to the mid-span fixings on longer jambs. These are the most likely to introduce bow because they sit furthest from the rigid corners. If a mid-span fixing causes binding, confirm that the packer behind it is the correct thickness. A packer that is even 0.5 mm too thin allows the screw to draw the frame past flush, creating a pinch point in the track.
The final check before moving on: lock and unlock the sash hardware at multiple positions along the travel. Locking mechanisms are less tolerant of frame distortion than the sliding action itself. A latch that engages with resistance or fails to throw fully indicates the frame is still slightly racked at that point.
With the frame secured and sashes confirmed operating smoothly under full fixing load, the installation is structurally complete. What remains is sealing the junction between aluminium and timber, a step that determines whether the surrounding timber stays dry or begins to degrade from the day the job is finished.
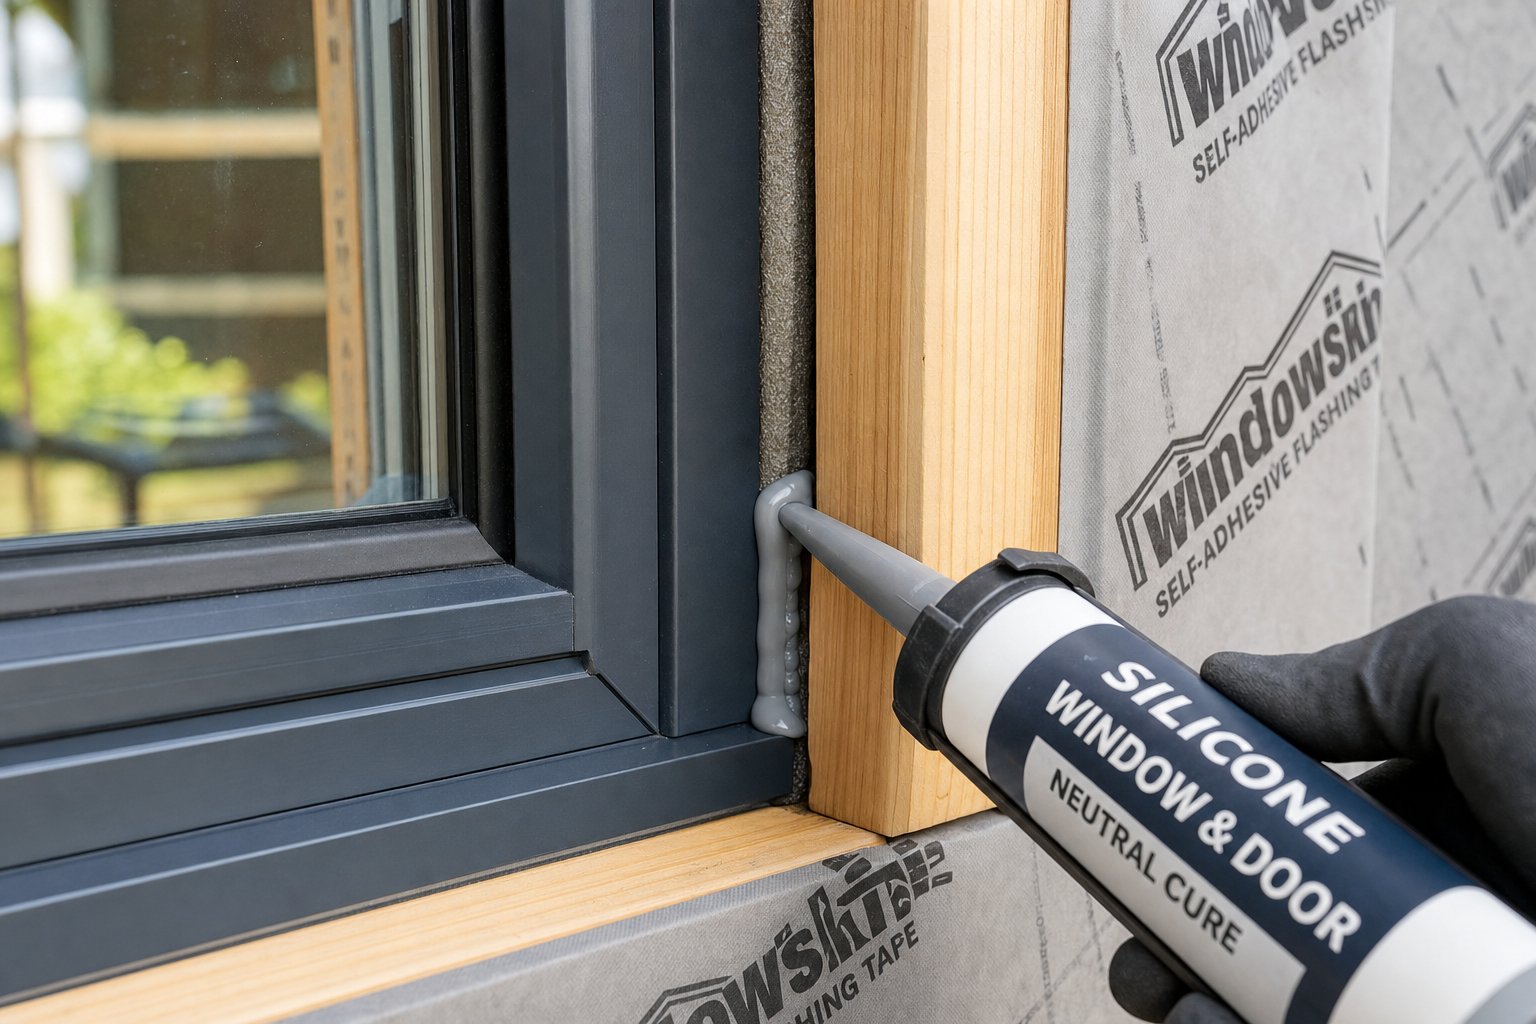
Step 6 Weatherproof the Aluminium-to-Timber Junction
Timber rots from moisture, not from age. Every sliding windows installation into a timber frame creates a junction where two materials meet, and that junction is the single most vulnerable point in the entire wall assembly. Get the weatherproofing wrong here and water finds its way into the timber structure within a few seasons, silently degrading the framing you just spent hours preparing and squaring.
Inadequate weatherproofing is the primary cause of timber frame degradation around window openings. Not poor fixings, not bad measurements. Water. The good news is that a methodical sealing sequence, applied in the correct order, creates a durable barrier that lasts decades. The key is understanding that no single seal does the job alone. You need a layered system.
The Three-Line Seal Principle Explained
Professional window installations rely on three distinct defence lines working together. Each line has a specific role, and skipping any one of them compromises the entire system.
- Line 1 — Inner airtight seal: Positioned on the room side of the frame-to-timber junction. Its job is to prevent warm, moist interior air from reaching the cold zone within the wall cavity. This seal stops condensation forming inside the wall structure. It also contributes to the home’s energy performance by reducing air leakage, which matters for NatHERS compliance.
- Line 2 — Drainage cavity: The gap between the inner and outer seals acts as a pressure-equalised drainage zone. Any moisture that bypasses the outer weather seal hits this cavity and drains downward and outward through the sill drainage path you established during preparation. This cavity must remain open and unobstructed. Filling it solid with sealant or foam defeats its purpose entirely.
- Line 3 — Outer weather seal: The exterior-facing seal that takes the brunt of wind-driven rain, UV exposure, and temperature cycling. It deflects the majority of water away from the junction but is not expected to be perfectly watertight under all conditions. That is why the drainage cavity behind it exists as a backup.
This layered approach means that when you are installing aluminium windows into timber, you work from the inside out. The interior seal goes on first, the exterior seal last. Reversing this sequence traps moisture between layers with no escape path.
Applying Sealant at the Aluminium-to-Timber Junction
The perimeter sealant joint between the aluminium frame and the timber reveal needs to accommodate movement without cracking or peeling away from either surface. Aluminium expands at roughly 23 micrometres per metre per degree Celsius. Timber moves with moisture changes rather than temperature. These two different movement patterns stress the sealant joint continuously, which is why neutral-cure silicone rated for at least 25% movement capability is the professional standard for this application.
Never use acetoxy-cure silicone (the type that smells like vinegar as it sets). It releases acetic acid during curing, which corrodes aluminium finishes over time and has poor adhesion to many timber surfaces.
Follow this sequence for the weatherproofing application from inside to outside:
- Apply the interior airtight seal first. Run a continuous bead of neutral-cure silicone or MS polymer sealant around the full interior perimeter where the aluminium frame meets the timber reveal. MS polymer is the better choice here if the joint will be painted over as part of the interior finish.
- Confirm the drainage cavity remains clear. Do not fill the gap between the frame and timber with expanding foam or sealant. If you need thermal or acoustic insulation in this zone, use a compressible foam backing strip that still allows drainage at the sill.
- Insert closed-cell polyethylene backer rod into the exterior joint gap. The rod diameter should be approximately 25 to 30 percent larger than the gap width so it compresses and holds position without falling through. For a typical 8 mm gap, use a 10 mm backer rod.
- Apply the exterior weather seal over the backer rod. Gun a continuous bead of neutral-cure silicone into the joint, filling from the backer rod face to the outer edge of the frame and timber.
- Tool the bead immediately using a profiling tool or wetted finger. Press firmly to ensure full contact with both the aluminium and timber surfaces. Shape a slightly concave profile so water runs off the bead rather than pooling against it.
The backer rod is critical. Without it, sealant bonds to three surfaces simultaneously — both sides of the joint and the back of the cavity. This three-sided adhesion prevents the sealant from stretching freely when the joint moves, causing it to tear down the centre rather than flexing. Two-sided adhesion with a backer rod behind allows the bead to stretch and compress as designed.
For joint widths between 6 and 10 mm, apply sealant to a depth equal to the width. For joints wider than 10 mm, maintain a 2:1 width-to-depth ratio. A 12 mm wide joint gets a 6 mm deep sealant bead over the backer rod.
Head Flashing and Water Management
Water running down the face of the wall above the window is the biggest external threat to the aluminium-to-timber junction. Head flashing intercepts that water and kicks it outward, away from the frame, before it can reach the vulnerable top seal.
The head flashing installs after the window is fixed and sealed but before the external cladding is completed. It integrates with the building wrap you folded back during preparation:
- Cut a length of metal or rigid flashing to extend at least 50 mm beyond the window frame on each side. This overhang prevents water from wrapping around the ends and running down the jambs.
- Bend the flashing to create a slight outward slope, typically 5 to 10 degrees, so water sheds forward rather than sitting flat against the wall.
- Fix the flashing above the window head, tucking the top edge under the building wrap so the wrap laps over the flashing. This maintains the shingle principle: upper layers always overlap lower layers, directing water outward at every transition.
- Seal the top edge of the flashing to the building wrap with self-adhesive flashing tape, pressing firmly to ensure full adhesion.
- Apply a bead of sealant along the junction where the bottom edge of the head flashing meets the top of the aluminium frame, creating a continuous water barrier across the head.
In regions with heavy rainfall or significant wind exposure — coastal NSW, tropical Queensland, or anywhere facing prevailing weather — consider a stepped head flashing with a secondary drip edge. This double-kick design handles higher water volumes without overflowing back toward the frame.
How to install a sliding window that stays watertight for decades comes down to respecting this layered sequence. Each element supports the others. The flashing sheds bulk water. The outer seal handles residual moisture. The drainage cavity catches anything that gets past. The inner seal keeps conditioned air where it belongs. Remove any one layer and the system eventually fails, taking the timber frame with it.
With the weatherproofing complete, the window is structurally fixed and sealed against the elements. What remains is confirming everything operates correctly, fitting the finishing trims, and establishing a maintenance routine that protects your work for the long term.
Step 7 Commission, Adjust, and Finish
A window that is fixed, sealed, and weatherproofed is not yet a finished installation. Commissioning is the process of confirming every moving part works as intended under real operating conditions. Skipping this step means discovering problems weeks later when a sash refuses to lock or water pools inside the track during the first heavy rain.
Testing Sash Operation and Locking Hardware
Run through the following commissioning checklist systematically before fitting any trims:
- Slide each sash through its full travel in both directions. Movement should feel smooth and consistent with no tight spots, dragging, or sudden resistance.
- Engage and disengage all locking mechanisms at multiple positions along the track. Latches should throw fully and retract cleanly without forcing.
- Check weatherseal compression by closing the sash and inspecting the seal contact around the full perimeter. Even compression indicates a square frame; gaps or bunching point to residual distortion.
- Inspect weep holes and drainage slots at the sill. Confirm they are clear of sealant, packer debris, or protective film. Pour a small amount of water into the outer track to verify it drains freely to the exterior.
- Test the flyscreen track if applicable. Screens should glide without catching on fixings or sealant that has squeezed into the channel.
If a sash feels tight, the most likely cause is a frame that has been pulled slightly inward at a fixing point. Back off the nearest screw by a quarter turn and retest. If a sash feels loose or rattles, the rollers may need adjustment. Most aluminum windows sliding on modern track systems have height-adjustment screws accessible from the sash edge or underside. Raise the rollers incrementally until the sash sits firmly against the weatherseal without dragging on the track. Knowing how to put sliding window back in frame after roller adjustment simply means lifting the sash at an angle, engaging the top guide first, then lowering the rollers onto the track.
Installing Trims and Finishing the Reveal
Internal architraves and external trims serve both aesthetic and functional roles. They conceal the packer zone and sealant joints while providing an additional layer of weather protection at the frame perimeter.
For internal reveals, timber or MDF architrave fixed to the surrounding wall framing is standard. Leave a 2 mm gap between the architrave and the aluminium frame, filled with a paintable sealant, rather than butting hard against the metal. This gap accommodates differential thermal movement and prevents the trim from levering against the frame as temperatures shift.
External trims depend on your cladding type. Weatherboard homes typically use a timber reveal or cover mould that laps over the frame flange. Rendered walls receive a bellcast bead or stop bead at the frame edge. In both cases, the trim must not obstruct weep holes or compress the outer weatherseal.
Maintenance Schedule for Long-Term Performance
Aluminium frames are low-maintenance, but the timber surrounding them is not. A structured routine protects both materials and extends the life of your installation well beyond the typical 15 to 25 year lifespan of untreated timber junctions. Industry data on aluminium window longevity shows that well-maintained frames deliver 40 to 50 years of service when the surrounding structure is kept sound.
- Monthly: Clean tracks and drainage channels. Vacuum debris from the sill track to prevent grit from damaging rollers.
- Quarterly: Inspect weep holes for blockage. Check perimeter sealant for cracking, peeling, or separation from either surface.
- Bi-annually (spring and autumn): Lubricate rollers, locks, and handles with a silicone-based dry lubricant. Condition any exposed rubber gaskets.
- Annually: Inspect the timber reveal and sill for early signs of moisture damage, paint breakdown, or fungal growth. Recoat or treat exposed timber before degradation progresses.
- Every 3 to 5 years: Reassess perimeter sealant joints. Neutral-cure silicone typically lasts 15 to 20 years, but UV-exposed exterior beads in harsh Australian conditions may need reapplication sooner.
One final note on compliance: depending on your state or territory, replacing windows in a timber-framed structure may trigger requirements under the NCC for energy performance, bushfire resistance (BAL ratings), or structural adequacy. Some councils require compliance documentation or a building certifier sign-off for how to replace sliding window units in habitable rooms, particularly where the opening size or glazing type changes. Check with your local council before closing up the job to confirm whether any certification applies to your specific project.

Common Mistakes and When to Call a Professional
Even careful installers make errors that compromise the finished result. The difference between a window that performs flawlessly for decades and one that binds, leaks, or degrades the surrounding timber often comes down to a handful of avoidable mistakes. Recognising these pitfalls before you start is far cheaper than fixing them after the sealant has cured and the trims are on.
Five Mistakes That Ruin Timber Frame Installations
Each of these errors is specific to the aluminium-to-timber interface. They rarely occur in masonry installations because the substrate behaves differently. Timber is forgiving in some ways and ruthlessly punishing in others.
- Over-tightening fixings: The single most common failure. Driving screws too hard pulls the aluminium jamb inward, pinching the sliding track and creating binding that worsens over time as the timber dries and shrinks further around the distorted frame. The consequence is a sash that drags, refuses to lock, or wears through its weatherseals prematurely. Progressive tightening with operation checks between passes prevents this entirely.
- Inadequate or missing packers: Skipping intermediate packers between fixing points leaves the aluminium frame spanning unsupported across the gap. Under wind load or seasonal timber movement, the frame deflects inward at those unsupported zones. The result is uneven weatherseal compression, draughts, and water ingress at the low-pressure points. Every fixing needs a packer behind it, and additional packers at thirds along the span keep the frame straight.
- Skipping the weatherproofing sequence: Applying the exterior seal before the interior seal, or worse, filling the entire perimeter gap with expanding foam, traps moisture inside the wall with no drainage path. Water that enters the junction has nowhere to go except into the timber framing. Within two to three years, concealed rot develops behind the trims. The three-line seal principle exists for a reason: inner airtight seal, drainage cavity, outer weather seal, applied in that order.
- Using acidic-cure sealant on aluminium: Acetoxy silicone (the type that smells like vinegar while curing) releases acetic acid that corrodes aluminium finishes and attacks powder coating. The damage is not immediately visible. Over 12 to 18 months, the sealant-to-frame bond fails, the finish discolours, and pitting develops beneath the bead. Always specify neutral-cure silicone or MS polymer for any joint contacting aluminium.
- Failing to check square before fixing: Driving screws into a frame that is out of square locks the distortion permanently into the installation. A racked frame causes uneven gaps at the sash perimeter, binding at one corner, and latch mechanisms that will not engage fully. Checking diagonals takes thirty seconds. Correcting a fully fixed, out-of-square frame means removing every screw and starting the packing process from scratch.
Every one of these mistakes is preventable with patience and method. None of them require advanced skill to avoid. They happen when installers rush, skip verification steps, or use whatever materials are closest to hand rather than the correct specification.
Troubleshooting Binding, Leaks, and Drafts
If your installation is complete and something is not right, the symptom usually points directly to the cause.
Sash binding or dragging: Run your finger along the inside face of both jambs, feeling for a point where the aluminium bows inward. That bow corresponds to an over-tightened fixing. Back the screw off by half a turn and retest. If the binding occurs at the head or sill rather than the jambs, the frame is likely sitting on an uneven packer stack. Remove the sash, check packer heights with a straight edge, and correct any high points.
Water leaking at the sill: The most common cause is blocked weep holes. Clear them first. If water still enters, check whether the sill has adequate outward fall. A flat or back-sloping sill directs water inward rather than shedding it to the exterior. The fix requires removing the frame, correcting the sill slope with a tapered packer, and reinstalling. Research into window leak causes confirms that perimeter air leaks and poor sealing are responsible for the majority of water and draught issues, even in relatively new installations.
Drafts around the frame perimeter: Cold air entering around the frame rather than through the sash indicates a failed or incomplete perimeter seal. Check the interior sealant bead for cracks, gaps, or sections where it has pulled away from the timber or aluminium. Reapply neutral-cure silicone to any compromised sections after cleaning the surfaces with isopropyl alcohol. If the draught persists despite intact sealant, the issue may be structural air leakage through the timber framing itself rather than the window junction. Older weatherboard and fibro homes are particularly prone to this.
Condensation forming on the glass or frame: Internal condensation on single-glazed aluminium windows in winter is a physics problem, not an installation defect. The glass surface temperature drops below the dew point of the indoor air. Double glazing with a thermally broken frame largely eliminates this. If condensation forms between double-glazed panes, the insulated glass unit seal has failed and the glass needs replacement, not the frame.
When to Engage Professional Installation Support
A single window replacement in a sound timber frame is well within reach for a competent DIYer who follows the process methodically. Certain scenarios, however, push beyond what a solo installer should attempt without professional backing.
Structural modifications: If the opening needs to be enlarged, a new lintel installed, or load-bearing framing altered, an engineer’s input is required. Cutting structural timber without understanding load paths can compromise the entire wall panel. This is not a grey area.
Multi-unit projects: Installing five or more windows across a building introduces coordination challenges that compound quickly. Sequencing deliveries, managing multiple opening sizes, ensuring consistent specifications across different wall build-ups, and meeting programme deadlines all benefit from project management experience. Errors multiply when you are repeating the same process across dozens of openings under time pressure.
Compliance-critical installations: Projects requiring BAL-rated glazing in bushfire zones, cyclone-rated frames in northern Australia, or specific NatHERS performance targets need windows manufactured to certified specifications with supporting documentation. Getting the specification wrong means the window either fails to meet code or needs to be replaced entirely. Australian window standards under AS 2047 set minimum performance requirements for structural adequacy, weather resistance, and operating force, and compliance documentation must accompany the finished installation for building certifier sign-off.
Custom engineering requirements: Non-standard opening shapes, oversized panels, structural glazing, or unusual load conditions require engineering calculations specific to the project. Off-the-shelf sizing charts do not cover these situations.
For builders, developers, and contractors coordinating larger aluminium window projects in timber frame construction, particularly across Sydney and broader NSW, working with a supplier that provides end-to-end project services covering drawing review, custom engineering, system selection, documentation coordination, and delivery planning removes the specification risk from the equation. The windows arrive correctly sized, rated, and documented for each opening, which is the foundation that correct installation depends on.
Whether you handle the installation yourself or engage professional support, the principles remain identical: measure carefully, pack thoroughly, fix progressively, seal methodically, and verify at every stage. Timber frames reward patience and punish shortcuts. Follow the sequence laid out in this guide and your aluminium windows will operate smoothly, stay watertight, and protect the timber structure around them for decades of reliable service.
Frequently Asked Questions About Installing Aluminium Windows Into Timber Frames
1. Can you fit aluminium windows directly into a timber frame?
Yes, aluminium windows can be installed directly into timber frames using either fin-fixing or direct face-fixing methods. The key is ensuring the timber is structurally sound, free from rot, and the opening is square within 5 mm tolerance. You need to account for differential thermal expansion between aluminium and timber by incorporating adequate clearance gaps (3 to 10 mm depending on position), flexible neutral-cure sealants, and plastic packers that allow controlled movement without binding the aluminium frame over time.
2. What clearance gap should I leave between an aluminium window and a timber frame?
For timber frame openings in Australian residential construction, recommended clearance gaps are 5 to 10 mm at the sill and head, and 3 to 8 mm at the jambs. These tolerances are tighter than masonry installations because timber fixings rely on screw engagement into solid material. The gap accommodates seasonal timber movement and provides space for plastic packers to level and square the window without transferring stress into the aluminium profile.
3. Why do my aluminium sliding windows stick after installation in a timber frame?
Binding or sticking sashes almost always result from over-tightened fixings that pull the aluminium jamb inward, pinching the sliding track. Run your finger along the inside face of both jambs to feel for a bow point corresponding to a tight screw. Back that screw off by half a turn and retest. Other causes include uneven packer stacks at the sill creating a tilted frame, or an out-of-square installation where diagonal measurements were not verified before fixing. Progressive tightening with sash operation checks between each pass prevents this issue entirely.
4. What type of sealant should I use for aluminium windows in timber frames?
Always use neutral-cure silicone or MS polymer sealant rated for at least 20 to 25 percent movement capability. Never use acetoxy-cure silicone (the type that smells like vinegar while setting), as it releases acetic acid that corrodes aluminium finishes and degrades powder coating over 12 to 18 months. For interior joints that will be painted, MS polymer offers better paintability. For exterior weather seals, neutral-cure silicone provides superior UV resistance and long-term flexibility against both aluminium thermal expansion and timber moisture movement.
5. When should I hire a professional to install aluminium windows into timber frames?
A single window replacement in a sound timber frame suits a competent DIYer, but professional support is warranted for structural modifications requiring new lintels or load-bearing changes, multi-unit projects with five or more windows where specification errors multiply, compliance-critical installations needing BAL-rated or cyclone-rated glazing with AS 2047 documentation, and custom engineering for non-standard openings or oversized panels. Builders and contractors managing larger projects can access end-to-end project services from suppliers like MEICHEN Windows (meichenwindows.com.au/services) covering drawing review, system selection, and delivery coordination.
More Window & Door Guides