Why Measuring Glass in an Aluminium Frame Requires a Different Approach
Search for how to measure a window online and you will find dozens of guides explaining how to size a rough opening for a brand-new frame. That is not what this article covers. Here, the frame stays put. The glass inside it — cracked, fogged, or failed — needs replacing, and you need exact window measurements to order a pane that drops in without a second attempt.
Most resources treat these two jobs as interchangeable, but they are fundamentally different. Measuring a rough opening involves standard home window dimensions and structural tolerances. Measuring glass for an existing aluminium frame means working within a fixed rebate system where every millimetre counts. The profile, gaskets, and glazing beads already dictate the window size your replacement must match.
Measuring Glass vs Measuring the Window Opening
When how are windows measured for full replacement, tradespeople record the structural opening and allow for shimming, flashing, and new frame clearances. Normal window dimensions guides focus on that process. But when the aluminium frame is staying and only the glass unit is being swapped, you are measuring the internal rebate channel — the precise pocket machined into the aluminium extrusion that holds the pane in place. The visible glass area is not your measurement reference. The rebate is.
Who This Guide Is For
This guide serves DIY homeowners replacing a single cracked pane and tradespeople compiling glass orders across multiple sites. If your window is large (over 2 square metres), located at height, or sits in a position that requires safety glass under AS 1288, consider having a professional glazier verify your figures before ordering.
Accurate glass measurement depends on understanding your specific aluminium profile’s rebate system, not just holding a tape to the visible glass area.
The steps ahead walk through frame anatomy, glass identification, safe bead removal, rebate measurement, thickness checks, deduction calculations, and finally placing a correct order — each building on the last so nothing gets missed.
Step 1 Gather Your Tools and Learn Aluminium Window Anatomy
Getting accurate window dimensions from an aluminium frame is not a job you can wing with whatever is lying in the junk drawer. The wrong tools introduce measurement error at every step, and even a 2mm discrepancy can mean a pane that will not seat properly. Gather everything before you touch the frame.
Essential Tools for Accurate Glass Measurement
- Steel retractable tape measure (minimum 3m) — fabric tapes stretch and sag, giving unreliable readings across a rebate opening. A rigid steel blade stays straight and locks in place.
- Digital caliper or glass thickness gauge — essential for measuring pane thickness and sealed unit build-up to the nearest 0.1mm. A standard tape cannot do this.
- Suction cups (one or two) — once glazing beads are removed, the glass is free to fall inward. Suction cups let you control the pane safely.
- Stiff putty knife or glazing bead removal tool — needed to lever snap-fit aluminium beads out of the frame without bending them.
- Flat-blade screwdriver — useful for screw-fixed beads and for gently prying gaskets aside to inspect rebate depth.
- Marker pen and notepad — record every measurement immediately. Relying on memory across multiple readings invites mistakes.
- Safety gloves and eye protection — broken or chipped glass edges are razor-sharp, and old gaskets can flick debris when disturbed.
- Steel rule or depth gauge — for measuring rebate depth (front face to back of channel), which determines the maximum glass unit thickness the frame accepts.
Aluminium Window Anatomy for Glass Measurement
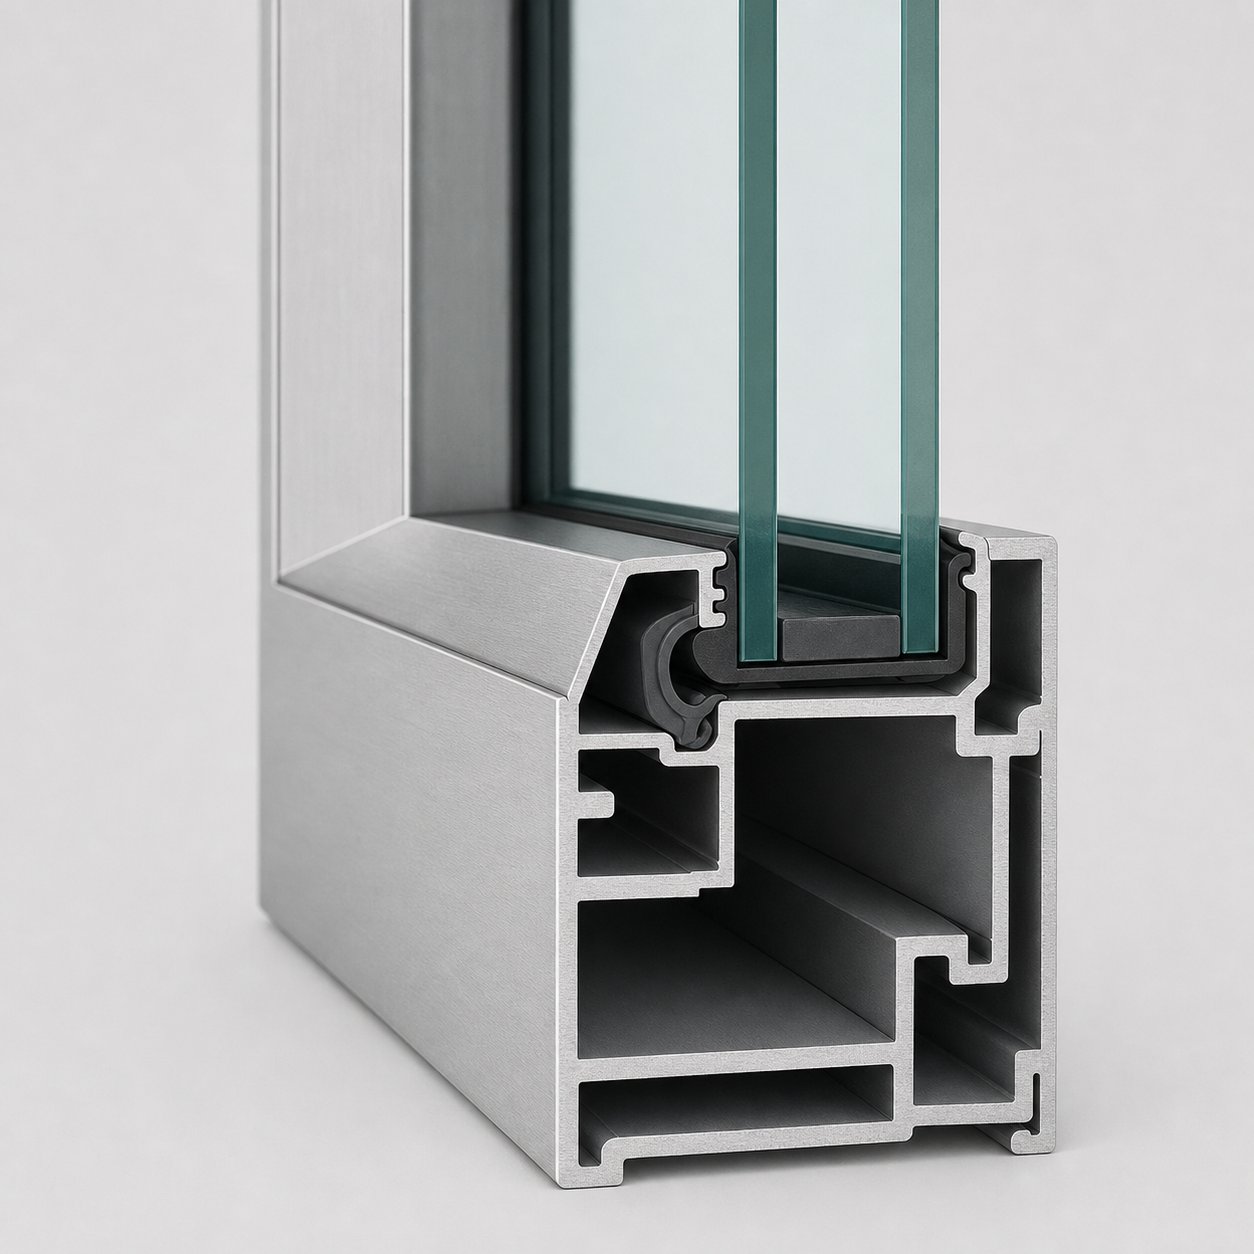
Before measuring anything, you need to understand the dimensions of a window frame at the component level — specifically the parts that hold and seal the glass. Aluminium windows are not all built the same way. Profile systems vary between manufacturers, and the rebate depths, gasket thicknesses, and glazing bead designs differ from one system to the next. A one-size-fits-all measurement approach fails precisely because of these variations.
Here are the four components that directly affect your glass measurement:
The rebate is the channel machined into the aluminium extrusion that the glass sits inside. Think of it as a shallow pocket running around the full perimeter of the frame. Its width and depth define the maximum glass size and thickness the frame can accept.
The glazing bead is a clip-in or screw-fixed aluminium strip that secures the glass from one side — typically the interior. It snaps or screws into the frame after the glass is placed, locking the pane into the rebate. When framing window glass for measurement, this bead must come off to expose the full rebate face.
The gasket or rubber seal sits between the glass edge and the aluminium rebate on both sides. Usually made from EPDM rubber, it cushions the glass against the metal, provides weather sealing, and compensates for minor dimensional tolerances. Gasket thickness directly affects how much clearance you need to allow when calculating your final glass order size.
Drainage slots are small channels cut into the bottom rebate that allow any moisture reaching the glass pocket to weep outward. They do not affect your width or height measurement, but knowing they exist helps you orient the frame correctly during inspection.
Thermal break aluminium systems — common in modern awning and fixed windows across Australia — add another layer of complexity. The polyamide strip separating the interior and exterior aluminium sections changes the rebate geometry compared to older non-thermally-broken profiles. Manufacturers document these specifications in detail. For example, the MEICHEN MC100 Awning Window (Fixed Window) product page outlines rebate depths, compatible glass build-up options, and gasket configurations for its thermal break system — the kind of documentation that helps you identify your own frame’s specifications or understand how a particular profile is engineered to accept specific glass unit dimensions.
If you can identify your window’s manufacturer or profile system, look up its technical data sheet. It will tell you the designed rebate depth and recommended glass thickness range, saving guesswork later in the process.
Step 2 Identify Your Existing Glass Type Without Removing the Pane
Knowing what glass is already in the frame shapes every decision that follows — from the measurements you take to the specification you hand your supplier. Order the wrong type and you will either fail a compliance check or end up with a unit that does not fit the rebate depth. Identification comes first, tape measure second.
Three methods let you determine glass type while the pane is still seated in the aluminium frame: visual inspection for spacer bars, checking the glass edge for laminate interlayers, and reading any etched safety markings on the surface.
Spotting Double Glazing and Sealed Units
Look at the glass edge where it meets the glazing bead. If you can see a metallic strip or a dark-coloured bar running around the perimeter between two sheets of glass, you are looking at a sealed insulated glass unit (IGU). That strip is the spacer bar — either a traditional aluminium spacer or a modern warm-edge composite type — and it separates the two panes to create the insulating air or gas cavity.
Not sure whether you are seeing one pane or two? Hold a pen light or the flame of a lighter close to the glass surface at night or in a dim room. Count the reflections. A single pane produces two reflections (one from each face). A double-glazed IGU produces four — two from the outer pane and two from the inner pane. If you count six reflections, you have triple glazing.
This reflection method also reveals whether a Low-E coating is present. If one of the four reflections appears a slightly different colour — a faint purple, greenish, or bluish hue compared to the orange-yellow of the others — that surface carries a Low-E metallic oxide coating. Noting this now saves confusion later when specifying the replacement unit’s build-up.
Identifying Laminated and Toughened Glass
Toughened (tempered) glass carries a permanent etch mark stamped into the surface during manufacture. Check each corner of the pane — the mark is usually a small logo or text identifying the manufacturer, the standard (AS/NZS 2208 in Australia), and the word “toughened” or a “T” designation. This stamp cannot be removed or faked, and its presence confirms the glass was heat-treated to safety-glass standards.
Laminated glass is identified differently. Tilt your line of sight so you are looking at the exposed glass edge at a shallow angle — where the pane meets the glazing bead or frame. Laminated glass reveals a visible interlayer sandwiched between two (or more) glass sheets. This interlayer, typically a polyvinyl butyral (PVB) film, may appear as a thin translucent or slightly milky line. You can also tap the glass gently: laminated panes produce a duller, more muted sound compared to the sharper ring of a single monolithic sheet, because the plastic interlayer dampens vibration and sound transmission.
Why does this matter before you measure replacement windows? Because Australian building regulations under AS 1288 mandate safety glass — either toughened or laminated — in specific locations. If your existing pane sits in one of these positions, the replacement must match or exceed that safety rating. You cannot substitute standard annealed float glass regardless of what fits the rebate.
Locations where safety glass is typically required in aluminium windows:
- Glazing adjacent to doors (within 500mm of a doorway)
- Panes with a lower edge less than 800mm above finished floor level
- Bathrooms, ensuites, and other wet areas
- Overhead glazing (skylights, sloped windows, glass canopies)
- Glass in balustrades or barriers
Use the following visual cues to confirm each glass type before proceeding:
- Double or triple glazed IGU — visible spacer bar at the edge; multiple flame reflections (four for double, six for triple); possible Low-E colour shift in one reflection
- Toughened glass — permanent corner etch mark referencing AS/NZS 2208 or manufacturer logo; shatters into small granular pieces if already broken
- Laminated glass — visible interlayer at the edge (translucent or slightly opaque line between sheets); duller tap sound; remains held together by the interlayer if cracked
- Standard annealed float glass — no etch mark, no interlayer, single spacer-free pane, sharp ring when tapped
Record what you find. When measuring replacement windows, the glass type dictates not just the specification on your order form but also the thickness, the rebate depth required, and whether the unit can be cut on site or must arrive at exact dimensions. Toughened glass, for instance, cannot be trimmed after manufacture — every millimetre of your measurement must be right before the order goes in.
Step 3 Remove the Aluminium Glazing Beads Safely
You know what glass type you are dealing with. The next physical step in measuring a window to replace the pane is getting the glazing beads off so you can access the rebate channel underneath. Rush this and you risk bending a bead beyond reuse — which turns a glass replacement into a bead replacement as well.
Most aluminium windows in Australian homes use beads fitted from the interior side of the frame. That means you will be working from inside the property, which is both safer and more convenient. Before you touch anything, photograph the bead layout, gasket positions, and any orientation marks. These photos become your reassembly reference later.
Identifying Your Glazing Bead Type
Aluminium glazing beads fall into two categories, and the removal technique differs for each:
- Snap-fit beads — no visible screws anywhere along the bead length. Look closely at the mitre joints in the corners: you will see a slight gap or a fine line where the bead meets the frame. These beads clip into a channel in the aluminium extrusion and are held by friction and a locking leg.
- Screw-fixed beads — small countersunk screws visible along the bead face or hidden beneath plastic caps. These are more common on older commercial aluminium systems or high-security installations. Remove the screws first, then the bead lifts away.
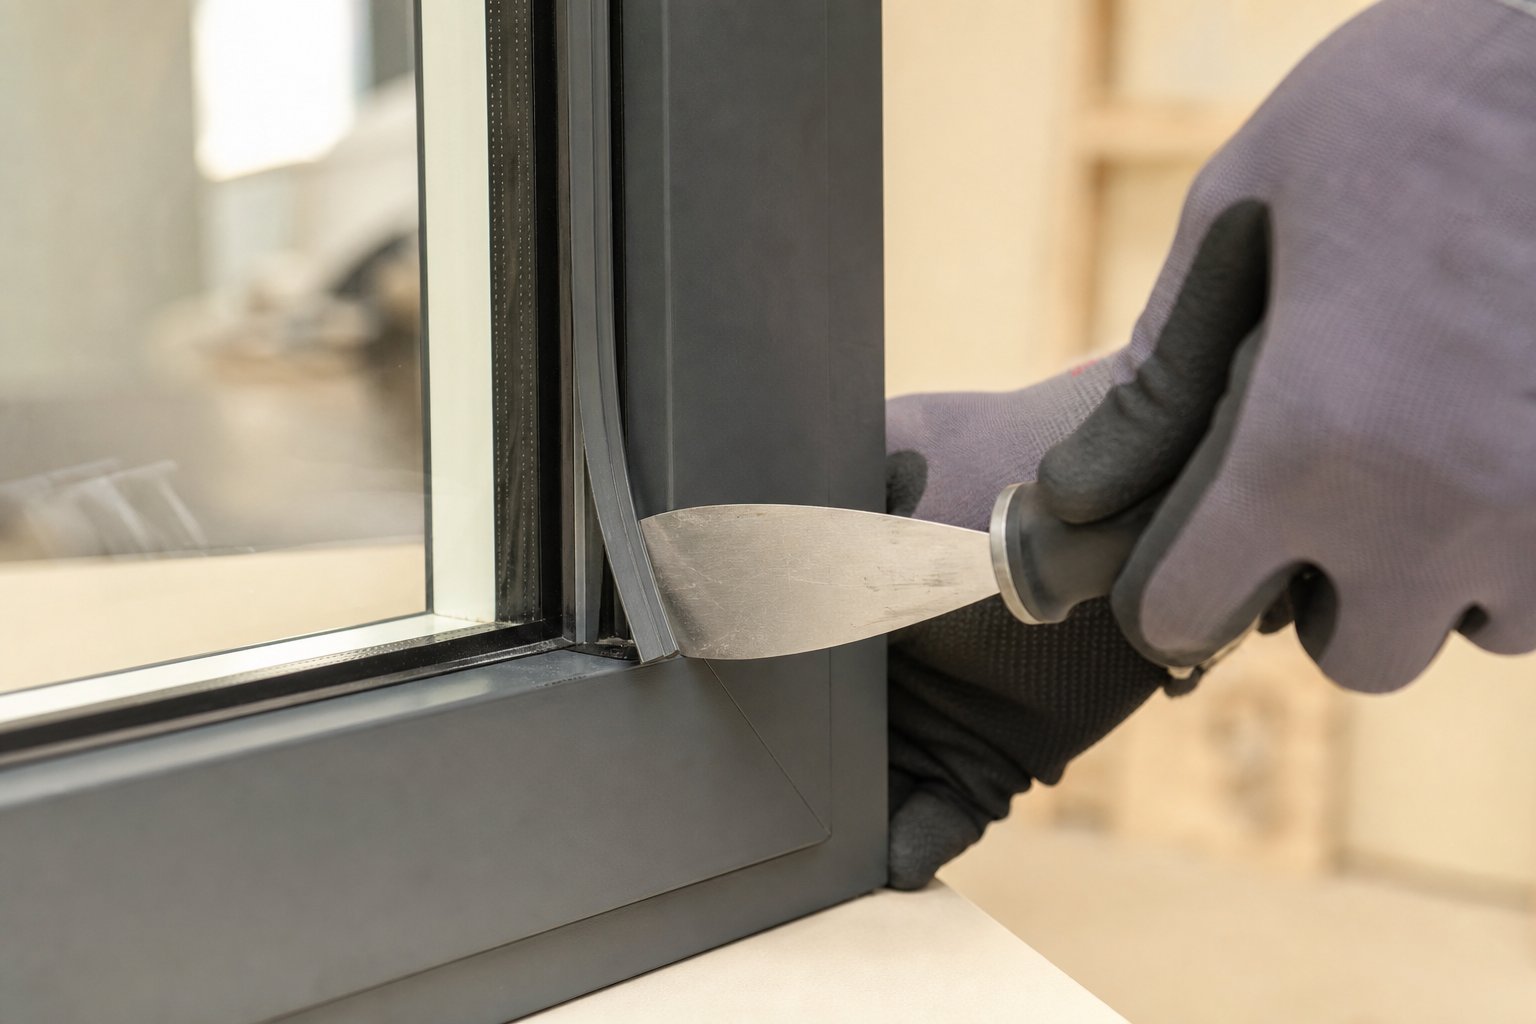
For snap-fit beads — by far the most common type in residential aluminium windows — removal requires a stiff putty knife or a dedicated bead removal tool. Insert the blade into the gap between the bead and the frame at the midpoint of the longest bead (not at the corner mitre). Angle the blade slightly and lever outward with steady, controlled pressure. The bead should pop free from its locking channel. Work along the length in both directions from your starting point until the full bead releases.
Safe Removal Sequence for Snap-Fit Beads
The order you remove beads matters. Get it wrong and the glass can fall inward unexpectedly. Follow this sequence:
- Remove the longest bead first — usually the bottom horizontal on a portrait-oriented window, or one of the sides on a landscape pane.
- Remove the two side beads next.
- Attach suction cups to the glass face before removing the final bead (typically the top horizontal). This gives you positive control of the pane so it cannot drop.
- Remove the top bead last while holding the glass steady with the suction cups.
Resist the urge to force a stubborn bead. Excessive levering pressure bends the thin aluminium profile permanently, and replacement beads are profile-specific — not something you can pick up at a hardware store. If a bead will not release, reposition your tool closer to the locking leg and try again with a shallower angle.
With all four beads removed and the glass either held by suction cups or still seated in the rebate by gravity, you now have clear access to how to measure window rebate dimensions accurately. Set the beads aside in order (label them top, bottom, left, right if they are different lengths) along with their gaskets, and keep everything together for reinstallation. The exposed rebate channel is your measurement surface — and that is where the precision work begins.
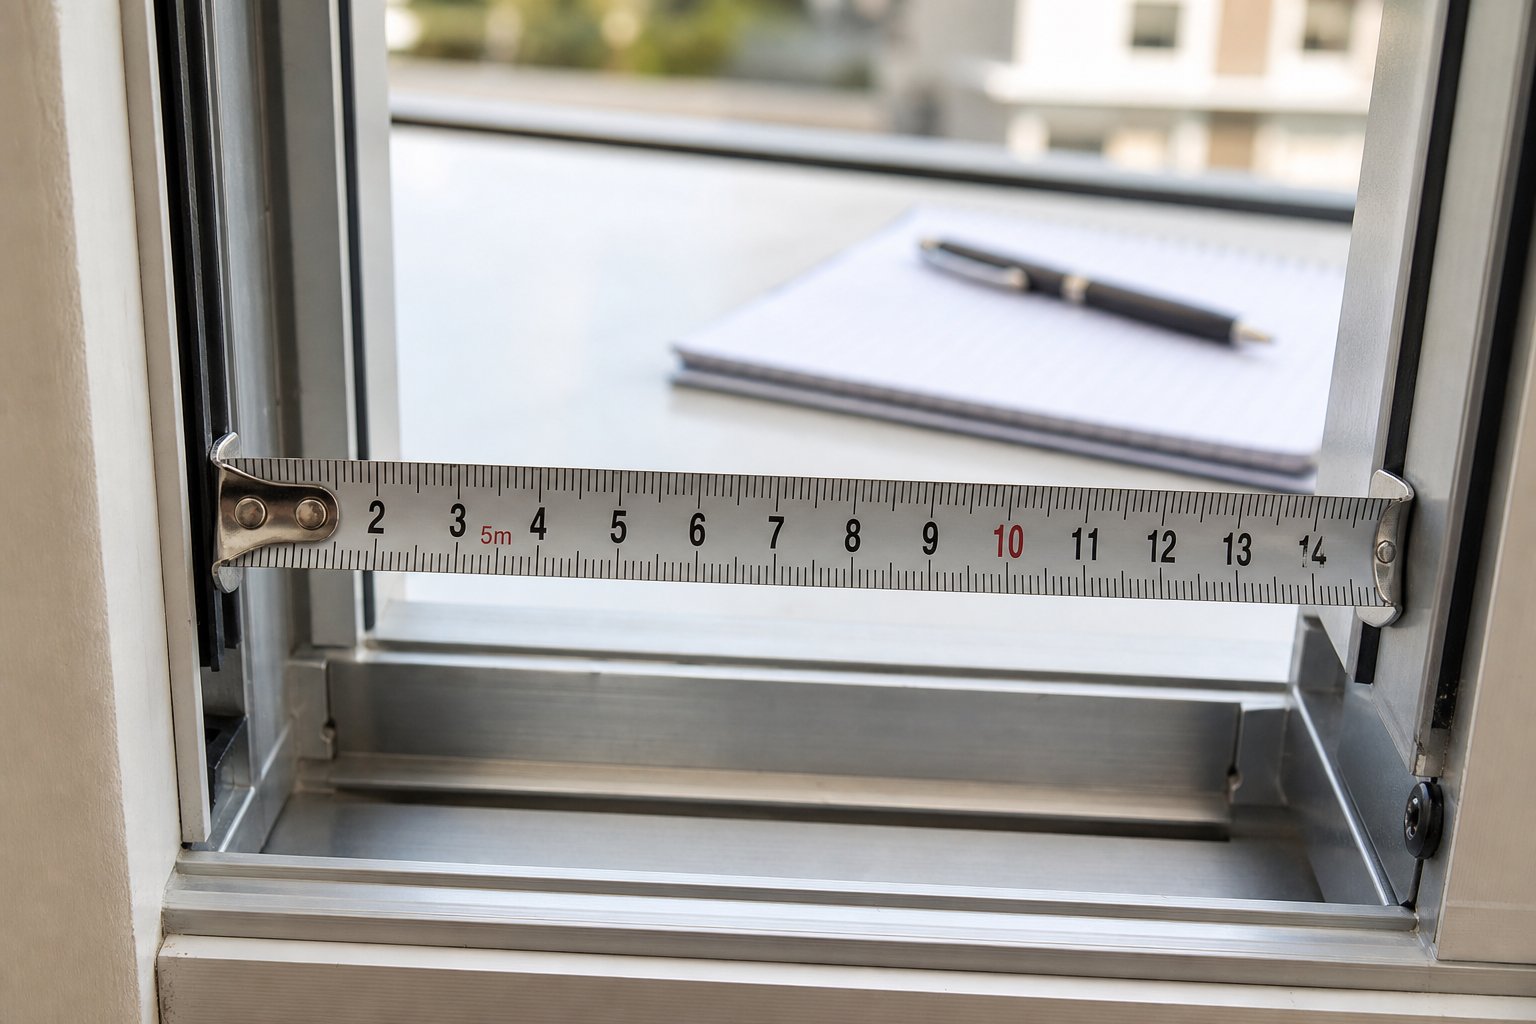
Step 4 Measure the Glass Rebate Width and Height Accurately
With the glazing beads off and the rebate channel fully exposed, you are looking at the actual pocket that holds the glass in place. This is where you measure windows for a glass order — not the visible pane area, not the outer frame edge, and not the wall opening. The rebate faces on opposite sides of the frame define the maximum size of window your replacement glass can be.
Grab your steel tape measure, notepad, and pen. Every reading from this point forward goes down in millimetres. Australian glass suppliers work exclusively in metric, and rounding to the nearest inch introduces errors that guarantee a mis-sized pane. If your tape shows both scales, read only the millimetre side.
Measuring Rebate Width and Height
To understand how to measure window size from the rebate, picture the channel as a rectangular opening with a face on each side. You are measuring the distance between opposing rebate faces — the clear space the glass must fit within.
Take three width readings across the frame:
- One at the top of the rebate opening
- One at the midpoint
- One at the bottom
Then take three height readings:
- One at the left side
- One at the centre
- One at the right side
Record all six figures. The smallest width reading becomes your working width, and the smallest height reading becomes your working height. Aluminium frames — particularly in older Australian homes that have experienced minor structural movement — can be slightly out of square. A frame that measures 602mm at the top and 600mm at the bottom is not unusual. Using the largest figure would give you a pane that physically cannot enter the tighter section of the rebate.
A question that trips people up: window measurements height or width first? The industry convention in Australia is width first, then height. A reading of 900 x 1200 means 900mm wide by 1200mm tall. Reversing these numbers on your order form delivers a pane rotated 90 degrees from what you need — and if it is toughened glass, it cannot be recut.
Checking for Square
Even if your three width readings are close and your three height readings match, the frame could still be racked into a parallelogram shape. To check, measure both diagonals of the rebate opening — corner to corner in each direction. If the two diagonal measurements differ by more than 3mm, the frame is out of square. In that case, the glass may need to be cut as a trapezoid to fit, or the frame itself may need adjustment before a rectangular pane will seat correctly. Flag this with your glass supplier when ordering.
Use a simple window measurement chart like the one below to keep your readings organised and legible:
| Position | Width Reading (mm) | Height Reading (mm) |
|---|---|---|
| Top / Left | ____ | ____ |
| Middle / Centre | ____ | ____ |
| Bottom / Right | ____ | ____ |
| Diagonal 1 | ____ mm | |
| Diagonal 2 | ____ mm | |
| Working dimension (smallest) | ____ | ____ |
Fill this in for every pane you measure. When you are handling multiple windows across a property, labelling each chart with the room and position (for example, “bedroom 2 — south wall”) prevents mix-ups at ordering time.
One critical point before you move on: these rebate measurements are not your final glass order size. They represent the maximum opening the frame provides. The actual size of window glass you order will be smaller — reduced by specific clearance deductions that account for gaskets, thermal expansion, and installation tolerance. Those calculations come next, and skipping them is the single fastest way to end up ordering twice.
For now, confirm your window length and width figures, double-check them against the chart, and have a second person verify the tape position if the pane is large or the reading is difficult to take solo. Precision at this stage carries through every step that follows.
Step 5 Measure Glass Thickness and Sealed Unit Depth
Width and height tell your supplier how large the glass needs to be. Thickness tells them how to build it. Get the width right but the thickness wrong and you will receive a unit that physically cannot seat into the rebate — or one that rattles loosely because the gaskets have nothing to compress against. This window measurement is just as critical as the face dimensions, yet it is the one most DIYers skip or guess at.
Measuring Single Pane Thickness
With the glazing bead already removed from the previous step, the glass edge is exposed along at least one side of the frame. Place the jaws of a digital caliper directly onto the glass edge and close them gently until they contact both faces. Read the display. Common single-pane thicknesses found in aluminium windows across Australia are 4mm, 5mm, and 6mm — with 6mm being standard for larger fixed panes and windows in exposed locations.
If you were unable to remove the glazing bead (perhaps the window is at height or the beads are screw-fixed and you lack access), you can still measure window glass thickness from one side using an optical glass thickness gauge. These instruments work on the principle of optical reflection — a light source hits the glass surface, refracts through the pane, and reflects back from each glass-to-air interface. The gauge calculates thickness based on the distance between those reflections. You simply press the device flat against the glass and read the result. Digital models display both glass thickness and air gap dimensions simultaneously, making them particularly useful for sealed units still in the frame.
Measuring Sealed Double-Glazed Unit Dimensions
Insulated glass units are not a single thickness — they are a sandwich with a specific build-up. To measure window units correctly, you need three figures: the thickness of the outer pane, the width of the spacer bar (which defines the air or gas cavity), and the thickness of the inner pane. Added together, these give the overall unit thickness.
With the bead off and the IGU edge visible, use your caliper to measure the total unit thickness across all layers. Then look at the spacer bar — the metallic or composite strip running around the perimeter between the two panes. Its width is the cavity dimension. Subtract the spacer width from the overall thickness, divide the remainder by two, and you have each individual pane thickness. For example, a unit measuring 20mm overall with a 12mm spacer bar means each glass pane is 4mm thick. Record this as 4-12-4.
Why does the spacer width matter? It determines the insulating cavity size, which directly affects thermal and acoustic performance. A 12mm cavity performs adequately, but a 16mm argon-filled gap delivers noticeably better U-values. Your replacement does not have to replicate the original build-up exactly — but it must fit the available rebate depth.
That brings us to the final thickness measurement: rebate depth itself. This is the distance from the front face of the aluminium frame (where the glazing bead sits) to the back wall of the rebate channel. Insert a steel rule or depth gauge into the rebate pocket and measure straight back to the stop. Record this figure in millimetres.
The rebate depth determines the maximum overall unit thickness your frame can accept. The glass unit must sit within this depth with enough room for gaskets on both the interior and exterior faces. Each gasket typically compresses to around 2-3mm, so you need the unit thickness plus gasket allowances on both sides to fall within the total rebate depth. If your rebate measures 24mm deep and you have 3mm gaskets each side, the maximum unit thickness is approximately 18-20mm.
To help you calculate window specifications or cross-check what your frame can accommodate, here are common IGU configurations used in aluminium windows across Australia:
- 14mm (4-6-4) — the slimmest sealed unit available, designed for heritage and slim-profile aluminium frames with shallow rebates of 18-20mm
- 16mm (4-8-4) — slightly improved thermal performance while still fitting older aluminium systems
- 20mm (4-12-4) — the most common configuration in 1980s-90s domestic aluminium frames with 24mm rebates; a practical balance of performance and compatibility
- 24mm (4-16-4) — better thermal performance with a wider gas cavity; requires rebate depths of 28mm or more
- 28mm (6-16-6) — thicker panes for acoustic or structural performance in modern thermally broken aluminium systems
- 32-36mm (triple glazed) — only suitable for deep-rebate modern aluminium profiles with 40mm+ rebate depths
Record your rebate depth alongside the existing unit’s build-up. If you are upgrading from basic clear glass to a Low-E argon-filled unit, confirm the new configuration still fits within the measured depth before placing the order. A unit that is even 2mm too thick will not compress past the gaskets, and forcing it risks cracking the seal — defeating the purpose of a sealed replacement entirely.
Step 6 Calculate Deduction Allowances for the Correct Glass Size
Your rebate measurements tell you the maximum space available. They do not tell you the size of glass to order. This distinction trips up more people than any other step when learning how to measure for replacement windows — and it is the reason panes arrive too large to fit or too small to seal properly. Raw rebate dimensions must be reduced by specific clearance deductions before they become a valid glass order size.
Understanding Edge Clearance and Expansion Gaps
Glass cannot fill the rebate opening completely. It needs room to be physically installed (you have to angle it in), room for gaskets to compress and form a weathertight seal, and room for the aluminium frame to expand without crushing the pane.
That last point is the one most people miss. Aluminium has a thermal expansion coefficient roughly 2.5 times greater than glass. On a hot Australian summer day, an aluminium frame expands noticeably more than the glass sitting inside it. Without adequate edge clearance, the frame contracts around the pane in winter or — more critically — the glass binds against the rebate faces during thermal cycling, creating stress concentrations that lead to cracking. This is not theoretical. It is the mechanism behind many unexplained glass failures in dark-coloured aluminium frames on north and west elevations.
Edge clearance also accounts for manufacturing tolerances. No glass pane is cut to absolute perfection, and no aluminium frame is extruded to zero deviation. The clearance gap absorbs these small real-world variations so the unit still fits.
Standard Deduction Calculations for Aluminium Frames
The general principle is straightforward: deduct a clearance allowance from each edge of your working rebate measurement. Typical edge clearances for residential aluminium windows in Australia range from 3mm to 5mm per side, depending on the frame profile system, gasket thickness, and glass type. A 3mm deduction per side is common for smaller panes in standard profiles. Larger panes, darker frame colours (which absorb more heat), and frames in direct sun exposure often warrant 5mm per side.
Your frame manufacturer’s glazing manual is the definitive source for the correct deduction. If you identified the profile system in Step 1, look up its recommended edge cover and clearance specifications. When that documentation is unavailable, a 5mm deduction per side provides a safe general allowance for most Australian aluminium residential windows.
Here is how to measure window for replacement glass using a sample calculation:
| Dimension | Calculation | Example |
|---|---|---|
| Glass Width | Smallest rebate width − (left clearance + right clearance) | 600mm − (5mm + 5mm) = 590mm |
| Glass Height | Smallest rebate height − (top clearance + bottom clearance) | 1200mm − (5mm + 5mm) = 1190mm |
If your frame manufacturer specifies asymmetric clearances — say 3mm on the sides and 5mm top and bottom — apply those values instead. The table structure stays the same; only the deduction figures change.
One non-negotiable warning: toughened glass cannot be cut, drilled, or modified after manufacture. Every dimension you provide to the supplier is final. If your deduction calculation is wrong by even 2mm on a toughened pane, the entire unit must be scrapped and reordered at full cost. This is precisely why measuring for replacement windows demands a measure-twice discipline that goes beyond casual DIY habits.
Before you finalise your order dimensions, have a second person independently verify the tape position and read the measurement. Compare their figures to yours. If there is any discrepancy, measure a third time together and agree on the reading. For anyone learning how to measure for window replacement on a large or expensive pane — particularly toughened Low-E sealed units that can cost several hundred dollars — this two-minute verification step is the cheapest insurance against ordering twice.
With your final glass width and height calculated, you now have the dimensions your supplier needs. But dimensions alone do not constitute a complete order. The glass type, thickness build-up, coatings, and edge treatments all form part of the specification — and getting those details right is what separates a smooth installation from another trip back to the drawing board.

Step 7 Specify and Order Your Replacement Glass Correctly
Dimensions alone do not make a glass order. Your supplier needs a complete specification — a single document that tells them exactly what to manufacture, how to finish it, and what performance characteristics the unit must deliver. Miss a detail and you will either receive a phone call asking for clarification (delaying the order) or a unit that technically fits the rebate but fails to meet building code or performance requirements.
Think of the specification as the translation layer between your tape measure readings and the finished product. Every measurement you have taken across the previous steps feeds into this final document, but so do decisions about glass type, coatings, and edge treatment that go beyond raw numbers.
What Information Your Glass Supplier Needs
When you contact a glass supplier — whether a local glazier or an online cut-to-size service — provide the following details as a complete package. Submitting partial information invites assumptions, and assumptions lead to errors.
- Finished glass width and height (after deductions) — stated in millimetres, width first. For a custom window size, precision to the nearest millimetre is expected.
- Glass type — specify whether you need standard annealed float, toughened (tempered), or laminated glass. If your window sits in a safety glass location under AS 1288, this is non-negotiable.
- Thickness or IGU build-up — for single panes, state the thickness (e.g. 6mm). For sealed units, provide the full makeup: outer pane thickness + spacer width + inner pane thickness (e.g. 6mm Clear Toughened + 16mm Argon + 6mm Low-E Toughened).
- Coatings — Low-E coatings, solar control films, or tinted glass. Specify which surface the coating sits on (surface 2 or surface 3 in a double-glazed unit) if you have a preference or are matching an existing installation.
- Gas fill — air, argon, or krypton in the sealed cavity. Argon is standard for most residential IGUs in Australia and delivers measurably better thermal performance than air at minimal extra cost.
- Spacer type — standard aluminium spacer or warm-edge composite. Warm-edge spacers reduce heat loss at the glass perimeter and lower the risk of edge condensation.
- Edge work — arrised (lightly sanded edges), flat polished, or pencil polished. Most glass seated in aluminium rebates behind gaskets only needs arrised edges, but exposed-edge applications require a polished finish.
- Quantity — obvious, but worth stating explicitly when ordering multiple panes of different sizes across a project.
Submitting all eight points together eliminates back-and-forth. If you are learning how to measure for new windows across an entire property, create a simple spreadsheet with one row per pane and columns matching the list above. Hand the whole sheet to your supplier in one go.
Choosing the Right Glass Configuration for Your Aluminium Window
Replacing glass is an opportunity to upgrade performance — but only if the new unit is compatible with your frame’s rebate depth and gasket system. You cannot simply order the thickest, highest-performing IGU available and expect it to fit a frame designed for a slimmer unit.
Glass selection directly affects three things: thermal performance (measured as U-value), condensation resistance, and compliance with the National Construction Code energy provisions. A lower U-value means less heat transfer through the glass, which translates to better comfort and lower energy bills. In climate zones across southern Australia, the NCC increasingly demands glazing U-values that older single-glazed or basic double-glazed units cannot achieve.
Low-E coatings are the most cost-effective upgrade when replacing glass in an existing aluminium frame. Applied as a microscopically thin metallic oxide layer on one surface of the IGU, a Low-E coating can reduce energy loss by 30 to 50 percent compared to uncoated glass. Different Low-E formulations target different climates — high solar gain variants suit cooler regions where you want winter warmth, while low solar gain coatings are better for north and west-facing windows in hot Australian summers.
Modern aluminium window systems are engineered to accept specific glass build-ups that balance U-value, solar heat gain, and acoustic performance within the constraints of the profile’s rebate geometry. Manufacturers document these compatible configurations in their technical literature. The MEICHEN MC100 Fixed Window page, for instance, details its compatible glass build-ups alongside Low-E options and U-value performance data — illustrating how to measure size of new window glass not just physically but in terms of performance matching. This kind of documentation shows why matching glass to frame engineering matters: the rebate depth, gasket compression, and drainage design are all calibrated around a specific range of unit thicknesses and weights.
If you are upgrading from clear float to a high-performance sealed unit, cross-reference your measured rebate depth (from Step 5) against the new unit’s overall thickness plus gasket allowances. A unit that is too thick will not seat. One that is too thin leaves the gaskets under-compressed, which compromises the weather seal and can allow water ingress over time.
For anyone working through how to measure for a new window pane for the first time, the safest approach is to provide your rebate depth alongside your preferred glass configuration and let the supplier confirm compatibility. Experienced suppliers deal with aluminium frame constraints daily and can recommend a build-up that maximises performance within your available depth — saving you from ordering a unit that arrives perfect on paper but impossible to install.
Common Glass Measurement Mistakes and How to Avoid Them
A perfect specification means nothing if the numbers feeding it are wrong. Every glass supplier has a shelf of mis-ordered panes that arrived exactly as requested — and fit nothing — because the person measuring made an avoidable error. Knowing how to measure a window for replacement is half the battle. Knowing where others consistently go wrong is the other half.
Measuring the Visible Glass Instead of the Rebate
This is the single most common mistake. You look at the pane, place your tape across what you can see, and write down the number. The problem is that the glazing bead overlaps the glass edge by 8 to 15mm on each side. The visible area is always smaller than the actual glass sitting in the rebate. If you order based on the daylight dimension (the glass you can see), your replacement arrives undersized — too small to engage the gaskets properly and too loose to form a weather seal.
The fix is simple: always measure the rebate opening with the beads removed, as covered in Steps 3 and 4. If you cannot remove the beads, add the bead overlap to each side of your visible measurement — but this introduces guesswork, which is why bead removal remains the reliable method.
Ignoring Frame Out-of-Square Issues
Assuming the frame is a perfect rectangle is the second most expensive assumption. Aluminium frames shift over time — building settlement, thermal cycling, and even incorrect installation can rack a frame into a slight parallelogram. Order a rectangular pane for a frame that is 4mm out of square and the glass will bind in one corner while leaving a visible gap in the opposite corner. Neither outcome is acceptable.
Always measure both diagonals. If they differ by more than 3mm, discuss the situation with your supplier before ordering. Some glaziers can cut to a trapezoid shape, or the frame may need adjustment first.
Forgetting to Specify Safety Glass Where Required
Ordering standard annealed float glass for a location that mandates toughened or laminated glass under AS 1288 creates two problems at once. First, it is a compliance failure — your building does not meet the relevant Australian Standard, which matters for insurance and resale. Second, toughened glass cannot be recut after manufacture. If you realise the mistake after delivery, the entire pane must be scrapped and reordered as safety glass from scratch. That is double the cost and double the lead time.
Before you finalise any order, cross-check the pane location against the safety glass requirements outlined in Step 2. If in doubt, order toughened — it costs marginally more but eliminates the compliance risk entirely.
Other Errors That Lead to Reorders
Beyond the big three, these smaller mistakes account for a surprising number of rejected or returned glass orders:
- Confusing width and height — stating 1200 x 900 when you mean 900 x 1200 delivers a pane rotated 90 degrees. Width always comes first in Australian glass ordering convention.
- Failing to account for gasket compression — the glass must be small enough to slide past uncompressed gaskets during installation, then allow those gaskets to press firmly against the pane once seated.
- Not checking rebate depth against IGU thickness — a 24mm sealed unit will not fit a 22mm deep rebate, regardless of how perfectly the width and height match.
- Measuring in inches when the supplier works in millimetres — this sounds unlikely, but imported tape measures with imperial scales on the prominent edge catch people out regularly.
- Ordering without confirming deductions — submitting raw rebate dimensions as the glass size, forgetting that clearance deductions must be applied first.
If you are still uncertain about how to measure a window size correctly after working through this guide, or if the pane is large, expensive, or toughened, consider one final safeguard: confirm your dimensions directly with the supplier before they cut. Many Australian glass suppliers will review your measurements over the phone or via email and flag anything that looks unusual — a width-to-height ratio that seems inverted, a thickness that does not match the stated frame type, or deductions that appear too large or too small.
For high-value orders — particularly toughened Low-E sealed units that can run several hundred dollars per pane — asking a professional glazier to verify your measurements on site is a modest investment. Their call-out fee is a fraction of the cost of a mis-ordered unit that cannot be returned or recut. When learning how do you measure for replacement windows across an entire home, that single verification visit can validate every measurement in one session and give you confidence to place the full order without hesitation.
Ultimately, knowing how to measure windows to replace glass in aluminium frames comes down to discipline: measure the rebate not the daylight area, check for square, confirm safety glass requirements, apply the correct deductions, and verify before committing. Follow those principles and you will order once, install once, and move on.
Frequently Asked Questions About Measuring Glass for Aluminium Windows
1. Do I measure the visible glass or the rebate opening when ordering replacement glass?
Always measure the rebate opening, not the visible glass area. The glazing bead overlaps the glass edge by 8 to 15mm on each side, making the daylight area significantly smaller than the actual pane sitting in the frame. Measuring only what you can see results in an undersized replacement that cannot engage the gaskets or form a proper weather seal. Remove the glazing beads to expose the full rebate channel, then measure between opposing rebate faces at three points for both width and height.
2. How much smaller should the glass be than the rebate opening in an aluminium window?
Glass must be cut smaller than the rebate to allow for installation clearance, gasket compression, and thermal expansion of the aluminium frame. Typical edge clearances for Australian residential aluminium windows range from 3mm to 5mm per side. A 5mm deduction per side is a safe general allowance when manufacturer documentation is unavailable. The exact figure depends on your frame profile system, gasket thickness, glass type, and frame colour — darker frames absorb more heat and expand further, requiring larger clearances.
3. How do I know if my aluminium window needs safety glass?
Under Australian Standard AS 1288, safety glass (toughened or laminated) is mandatory in several locations: glazing adjacent to doors within 500mm, panes with a lower edge less than 800mm above floor level, bathrooms and wet areas, overhead glazing, and glass in balustrades. Check for a permanent etch mark in the corner of your existing pane — this confirms toughened glass. Laminated glass shows a visible interlayer at the edge. If your window sits in any mandated location, the replacement must be safety glass regardless of what was previously installed.
4. Can I measure glass thickness without removing the glazing beads?
Yes, using an optical glass thickness gauge. This device presses flat against the glass surface and uses light reflection principles to calculate pane thickness and air gap dimensions without disassembly. It is particularly useful for sealed double-glazed units still in the frame, as it can display both individual pane thicknesses and cavity width simultaneously. However, removing the beads and using a digital caliper on the exposed edge remains the most accurate method when access allows.
5. What order should I remove aluminium glazing beads to avoid the glass falling?
Remove the longest bead first (usually the bottom horizontal), then the two side beads, and finally the top bead last. Before removing that final top bead, attach suction cups to the glass face so you have positive control of the pane. This sequence ensures the glass remains supported by the top bead and gravity until you are ready to handle it. Never use excessive force on snap-fit beads — they are profile-specific and difficult to replace if bent.
More Window & Door Guides