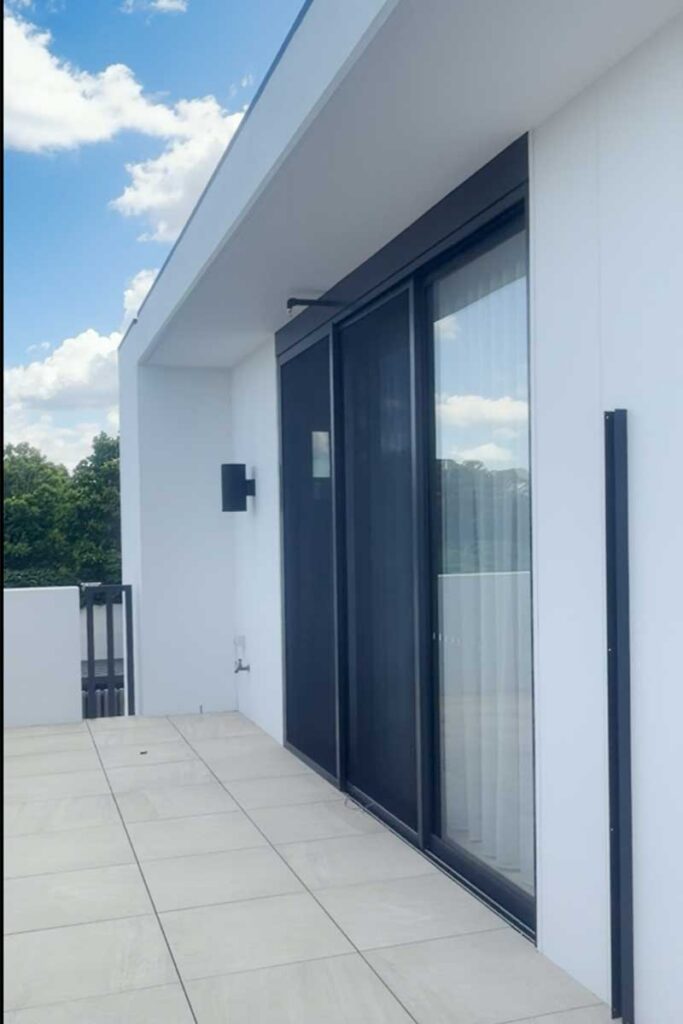
Why Aluminium Windows Lose Their Seal Over Time
That persistent cold draught creeping around your aluminium window frames is not random bad luck. It is a predictable consequence of the material itself. Aluminium conducts heat over 1,000 times faster than uPVC or timber, which means the metal responds rapidly to outdoor temperature swings. As it heats, it expands. As it cools, it contracts. This constant thermal cycling places stress on the rubber gaskets, adhesive seals, and mastic joints that keep air from passing through. Season after season, those seals compress, crack, and eventually fail — leaving gaps too small to see but large enough to feel on a cold winter evening.
Understanding how to draught proof aluminium windows starts with recognising why they develop these problems in the first place. Timber frames absorb and release moisture rather than heat, and uPVC is a poor conductor that barely moves with temperature. Aluminium does both — it moves and it transfers cold directly into your living space. That combination makes window seal draught a far more common complaint on metal-framed homes than on any other frame type.
Why Aluminium Frames Are Prone to Draughts
Every aluminium window has multiple points where air can sneak through once the original sealing begins to degrade. The frame itself remains dimensionally stable overall, but its micro-movements at connection points and seal interfaces accumulate damage over years of exposure. Coastal homes in Sydney, Perth, or Queensland cop additional punishment from salt air, which accelerates rubber deterioration and corrodes sealant at corner joints.
Five common draught entry points to be aware of on aluminium windows:
- Perimeter seals — the rubber compression gaskets around the sash that press against the frame when closed
- Glazing beads — the strips holding glass in place, which can loosen and allow air past the glass-to-frame junction
- Drainage slots — small weep holes designed to let water escape but which lose their internal baffles or covers over time
- Corner mitre joints — where frame sections meet at 45-degree cuts and sealant eventually shrinks or cracks
- Hardware mounting points — hinges, locks, and handles that penetrate the frame and create potential air paths
Draught proofing windows effectively means addressing whichever of these points has failed on your particular frames — not just slapping foam tape on the most obvious gap.
Thermally Broken vs Non-Thermally Broken Frames
Your draught-proofing strategy depends heavily on which type of aluminium frame you have. A thermally broken frame splits the aluminium into two separate sections joined by an insulating polyamide strip. This design reduces heat transfer through the frame and typically uses more sophisticated multi-point seal systems. A non-thermally broken frame is a single continuous piece of aluminium running from outside to inside with no barrier in between.
Most older Australian homes — particularly those built before stricter NCC energy requirements — have non-thermally broken aluminium windows. These frames experience greater temperature differentials between their inner and outer faces, which drives more aggressive thermal movement at the seal interface. The seals fitted to these older systems are often simpler single-point gaskets that wear faster and offer fewer compression stages.
Thermally broken frames tend to hold their seals longer because the insulating strip reduces the thermal stress cycle. But they are not immune. Window draught proofing on thermally broken systems typically focuses on hardware alignment and gasket replacement, while non-thermally broken windows often need attention at the frame-to-wall junction and corner joints as well.
The workflow ahead follows a logical sequence: diagnose exactly where your draughts enter, match the fix to your window type and frame construction, install the right seal materials, then verify the results hold up. Each step builds on the previous one, so accurate diagnosis at the start saves wasted effort and money further down the line.
Step 1 Diagnose Exactly Where Draughts Enter Your Frames
Sealing the wrong spot is the single most common reason DIY draught proofing fails. A draft from window frames can feel diffuse — cold air spreads quickly once inside — so your body alone is a poor tool for pinpointing the actual entry point. Before you buy a single strip of seal material, spend fifteen minutes running a structured diagnostic. It costs nothing and will direct every dollar you spend afterwards to the exact location that matters.
The Candle and Paper-Strip Test Method
Two simple tests reveal virtually every draught path through an aluminium frame. Both work best on a cool, breezy day when the pressure difference between indoors and outdoors is strong enough to draw air through even small gaps.
- Close all interior doors and windows except the one you are testing. Turn on a bathroom exhaust fan or rangehood to create slight negative pressure inside the room. This amplifies airflow through any gap in the window you are examining.
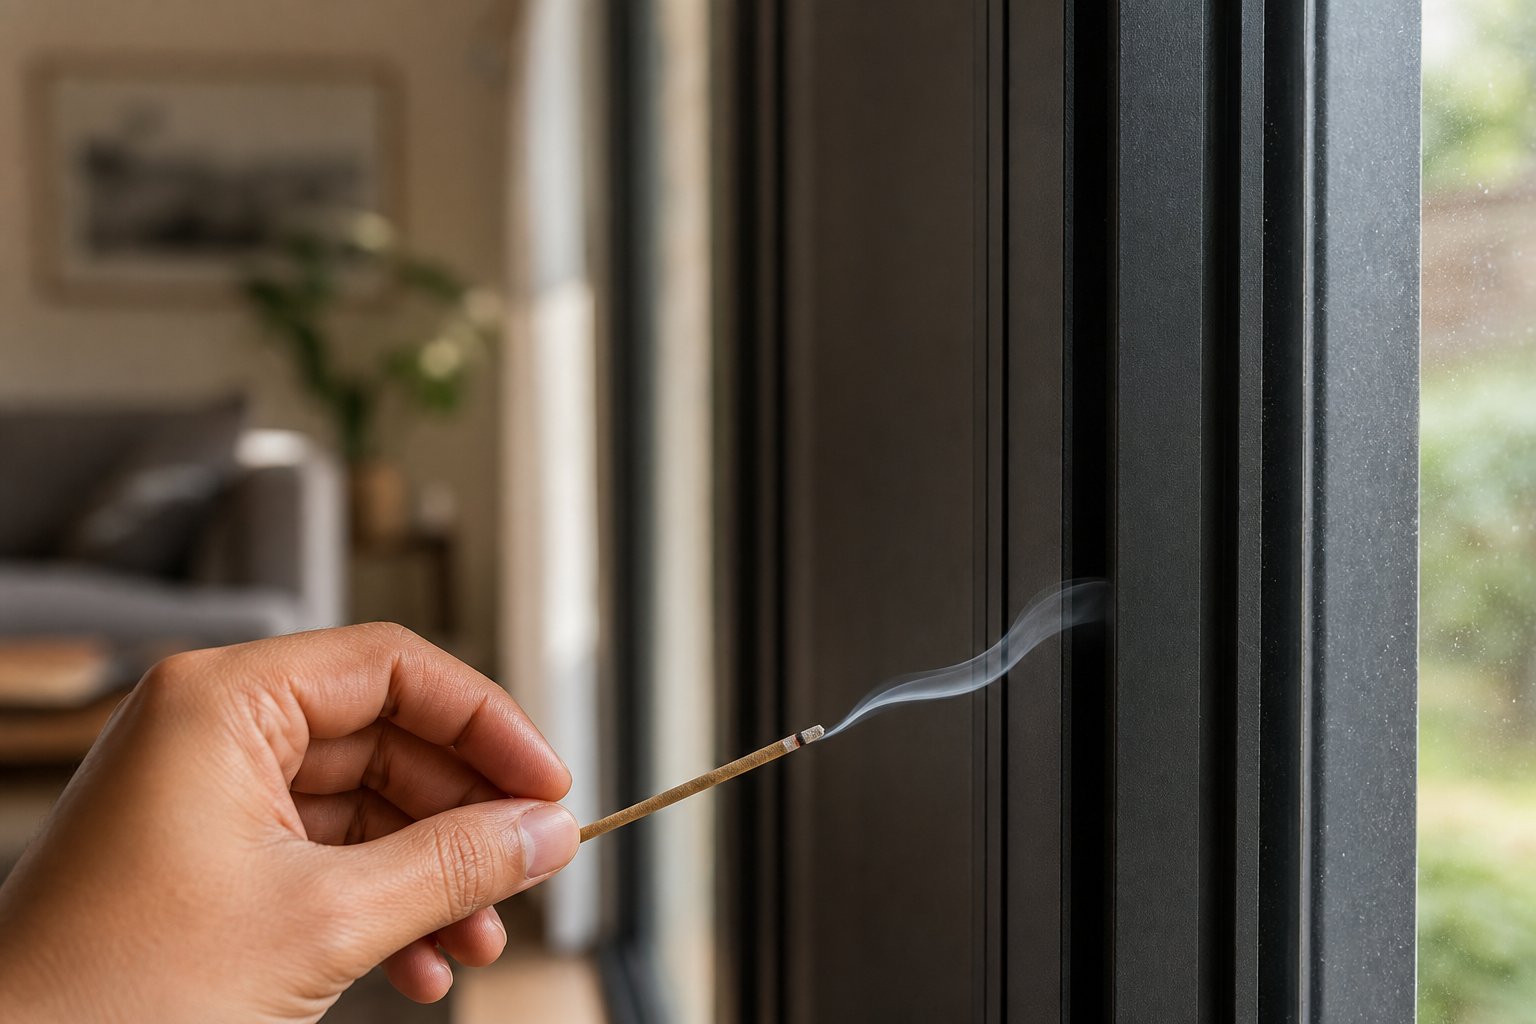
- Light an incense stick or a thin candle and hold it about 20 mm from the frame edge. Move it slowly along the full perimeter — top rail, both jambs, sill, and around any hardware cutouts. Wherever the smoke stream flickers, wavers sideways, or gets sucked toward the frame, you have found an active draught path. Mark each spot with a small piece of painter’s tape.
- Perform the paper-strip test on hinged or sliding sashes. Close the window on a single sheet of paper positioned between the sash and the frame. Try to pull the paper out. If it slides freely with no resistance, the compression seal at that point has failed — it is no longer pressing tightly enough to block airflow. Repeat this at each corner and at the midpoint of every side.
- Run a visual inspection under good light. Examine the rubber gaskets around the sash perimeter. Look for flattening (the seal has lost its elasticity and no longer springs back), cracking along the surface, or sections that have peeled away from the frame channel. A torch held at a low angle highlights these defects by casting shadows across the damage.
The best way to stop a draft from window frames is always to fix the weakest link first. These tests rank the severity of each leak point so you know where to begin.
Aluminium-Specific Failure Points to Check
Generic draught-proofing guides tell you to check around the window frame. Aluminium frames have three weak zones that timber and uPVC rarely share:
- Corner mitre joints. Aluminium frame sections are cut at 45 degrees and crimped or screwed together with sealant injected into the joint. Over years of thermal cycling, that sealant shrinks and cracks. Hold your incense stick directly over each corner — if the smoke deflects, the joint sealant has failed internally.
- Drainage slots without baffles. Aluminium windows use small weep slots in the sill track to let condensation and driven rain escape. Many older designs included a spring-loaded flap or internal baffle to prevent reverse airflow. Once these covers break or fall out, the drainage slot becomes an open channel for cold air. Check the exterior face of the sill for exposed rectangular slots with nothing behind them.
- Hardware mounting points. Hinges, winders, and lock mechanisms bolt through the aluminium profile. If the gasket around a fixing has deteriorated, air passes through the mounting hole. Test around each piece of hardware with the incense method.
Frame-to-Wall Junction Inspection
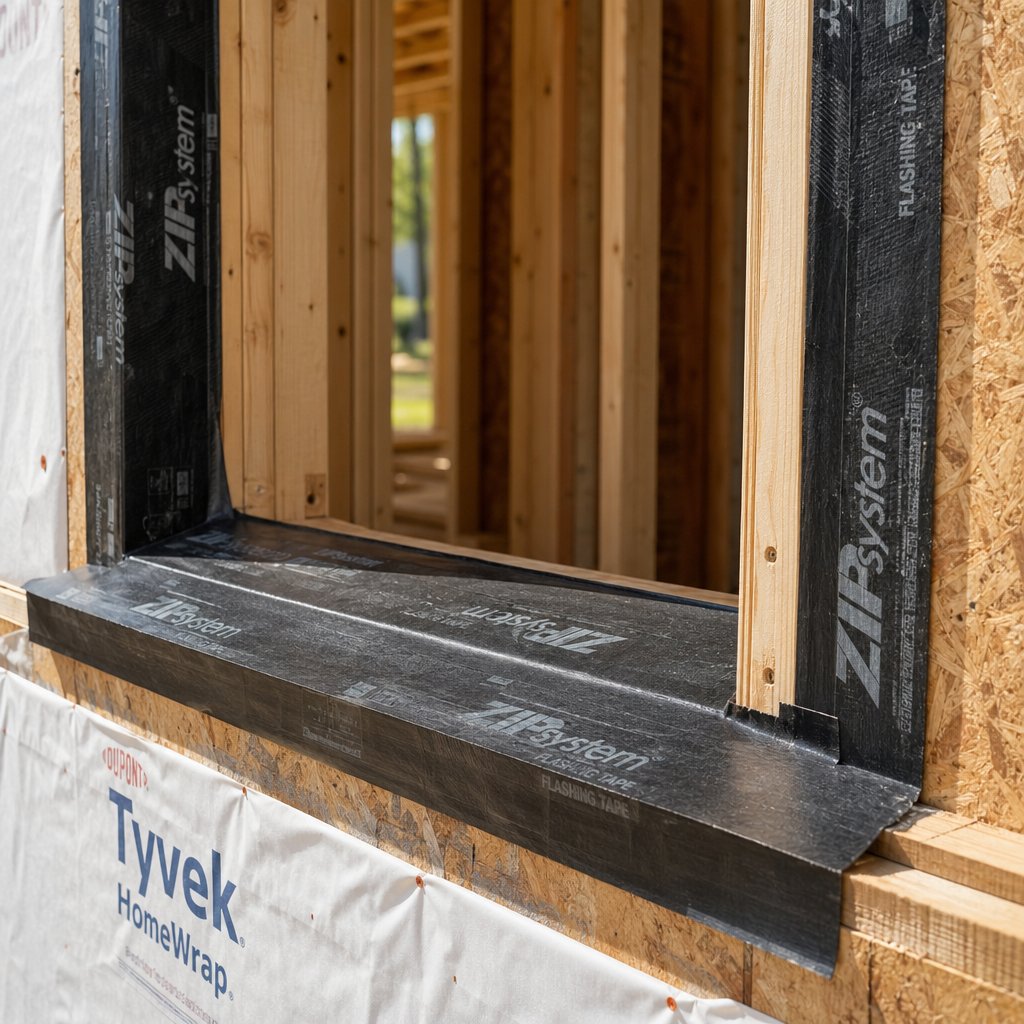
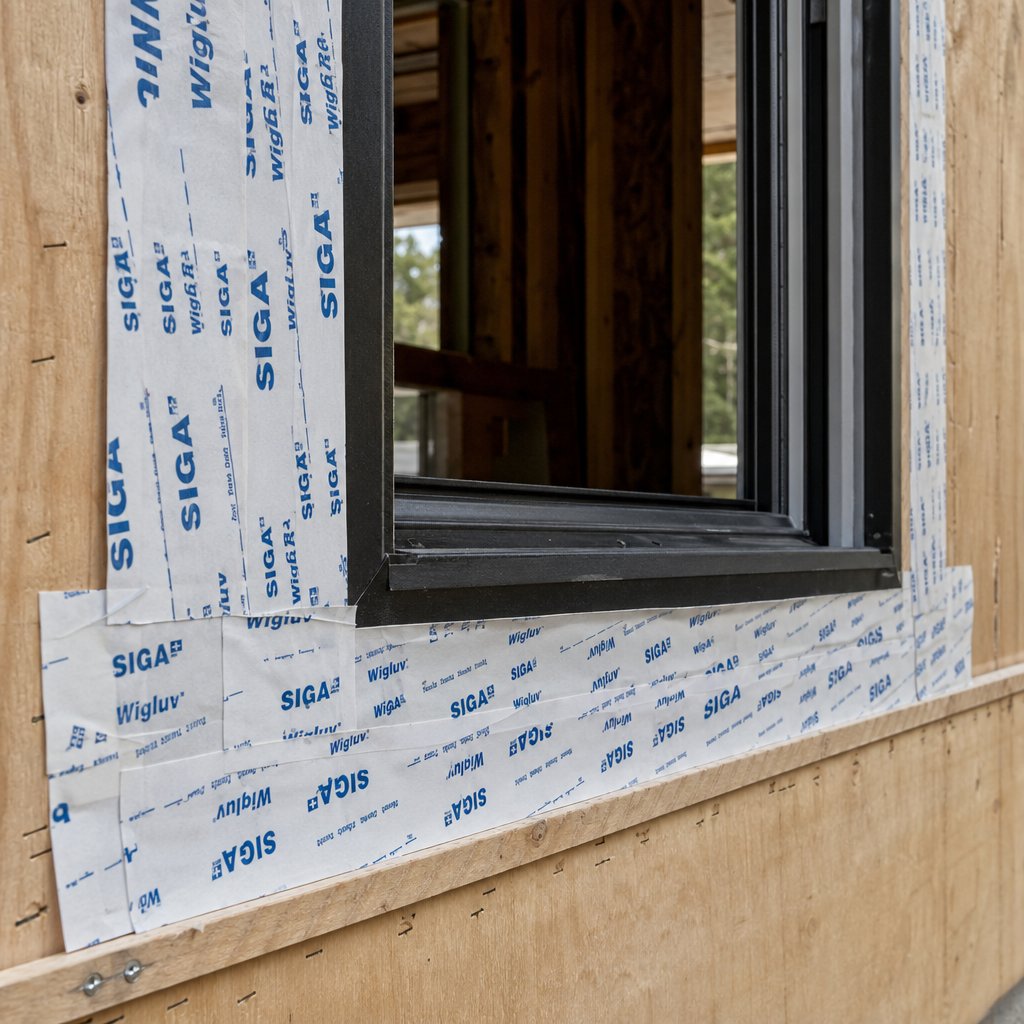
The joint where your aluminium frame meets the surrounding wall is sealed with exterior mastic — usually a polyurethane or silicone bead applied during installation. Over a decade or more, UV exposure and building movement cause this mastic to shrink, pull away from the frame, or crack along its length. In brick veneer homes common across Melbourne, Sydney, and Adelaide, slight settling of the brickwork can stretch this joint beyond the sealant’s capacity.
Run your incense stick along the internal reveal where the plaster meets the frame edge. If smoke moves toward the junction, air is entering between the frame and the wall rather than through the window seals themselves. This is a critical distinction: no amount of new rubber gasket on the sash will fix a draught that enters behind the frame. You will need to reseal the external mastic or inject expanding foam into the cavity — a different repair entirely.
Accurate diagnosis like this is how to seal draughty windows without wasting time and materials on areas that are not actually leaking. With your draught points identified and marked, the next consideration is which type of aluminium window you are dealing with — because a sliding sash, a casement, and an awning window each demand a different sealing approach.
Step 2 Match Your Window Type to the Right Approach
A sliding aluminium window and a casement aluminium window may sit in the same wall, but they seal in completely different ways. Sliding sashes ride along tracks with brush-style weatherstripping maintaining contact. Hinged sashes compress rubber gaskets against a fixed frame when latched shut. Treating both the same way — grabbing a generic roll of foam tape from the hardware store — almost guarantees one of them will still leak. The seal profile needs to suit the movement type, the gap dimensions, and the contact pressure your window hardware provides.
Sliding Aluminium Windows and Track Seals
Sliding windows are the most common aluminium type in Australian homes, particularly in older builds across Sydney, Brisbane, and Perth. Their primary draught path runs along the interlock — the vertical edge where the two sashes overlap — and along the top and bottom tracks where the sash meets the frame rail.
The correct seal for these paths is a wool pile weatherstrip (sometimes called brush pile). This consists of dense synthetic fibres woven into a backing strip that sits inside the track groove. Pile weatherstrip compresses gently as the sash slides past, maintaining continuous contact without creating excessive friction. For standard residential aluminium sliding windows, a pile height of 6–8 mm with 4P density provides the best balance between effective sealing and smooth operation. Pile that is too tall or too dense causes hard sliding complaints; pile that is too short leaves gaps for air to pass through.
Self-adhesive pile strip is available for retrofitting into grooves where the original weatherstrip has worn flat. The backing width must match your profile groove precisely — common sizes are 4.8 mm, 6.8 mm, and 7.5 mm. Even half a millimetre of mismatch causes loose installation or uneven compression.
Casement and Awning Window Seal Profiles
Casement windows (side-hinged, opening outward) and awning windows (top-hinged, opening outward from the bottom) both use a compression sealing system. When the sash closes and the lock engages, it presses the sash firmly against a continuous rubber gasket seated in the frame rebate. This direct compression is why hinged aluminium windows generally seal tighter than sliding types — the hardware forces the sash into the seal rather than relying on passive brush contact.
For casement and awning frames, the replacement seal is typically an EPDM rubber compression strip or a silicone gasket that matches the original profile shape. These sit in a routed channel around the full perimeter of the frame. Draught proofing a sash window of this type means replacing the entire perimeter gasket if even one section has gone flat — partial replacement creates uneven compression and new draught paths at the junction between old and new rubber.
Awning windows have one additional consideration: because they hinge at the top and open outward from the bottom, driven rain can pool along the lower seal edge. Drainage slots in the sill section must remain clear. A sash window draft excluder that blocks these drainage paths will solve the draught but create a water ingress problem during storms.
Louvre and Fixed-Pane Considerations
Louvre windows — common in Queensland homes for tropical ventilation — present the most challenging seal scenario. Each glass blade rotates independently, and the seal must work at the blade edge where it overlaps its neighbour. Blade-edge seals are thin vinyl or rubber strips that clip onto each louvre. Replacement requires removing individual blades, which is fiddly but straightforward with the right clip-on profile.
Fixed-pane aluminium windows with opening fanlights only need attention at the fanlight section. The fixed pane itself should not leak unless the glazing bead or frame-to-wall mastic has failed. Focus your draught-proofing effort on the operable fanlight — usually a small awning or hopper sash at the top — using the same compression seal approach described above.
The table below summarises the right approach for each window type:
| Window Type | Primary Draught Path | Recommended Seal Type | DIY Difficulty |
|---|---|---|---|
| Sliding | Interlock rail and top/bottom tracks | Wool pile weatherstrip (6–8 mm, 4P density) | Easy |
| Casement | Full sash perimeter where gasket compresses | EPDM or silicone compression strip | Moderate |
| Awning | Bottom sash edge and hinge-side seal | EPDM compression strip (maintain drainage) | Moderate |
| Louvre | Blade-to-blade overlap edges | Clip-on vinyl blade-edge seal | Moderate–Hard |
| Fixed pane with fanlight | Fanlight sash perimeter only | EPDM compression strip on fanlight | Easy |
Matching the seal type to your window’s movement mechanism is the difference between a repair that lasts years and one that peels off or jams the sash within weeks. With the right profile identified, the next decision is which specific material bonds reliably to powder-coated aluminium surfaces — because not all adhesives perform equally on smooth metal frames.
Step 3 Choose Seal Materials That Bond to Aluminium
Powder-coated aluminium frames are smooth, glossy, and surprisingly difficult for adhesives to grip. That roll of cheap foam draught tape from the hardware store might stick for a week or two, then slowly peel away as temperature changes stress the bond. The issue is not just the seal material — it is the adhesive backing. Choosing the right draft excluder for windows with aluminium frames means understanding why certain combinations fail and which ones hold firm through multiple seasons.
EPDM vs Silicone vs Foam on Aluminium
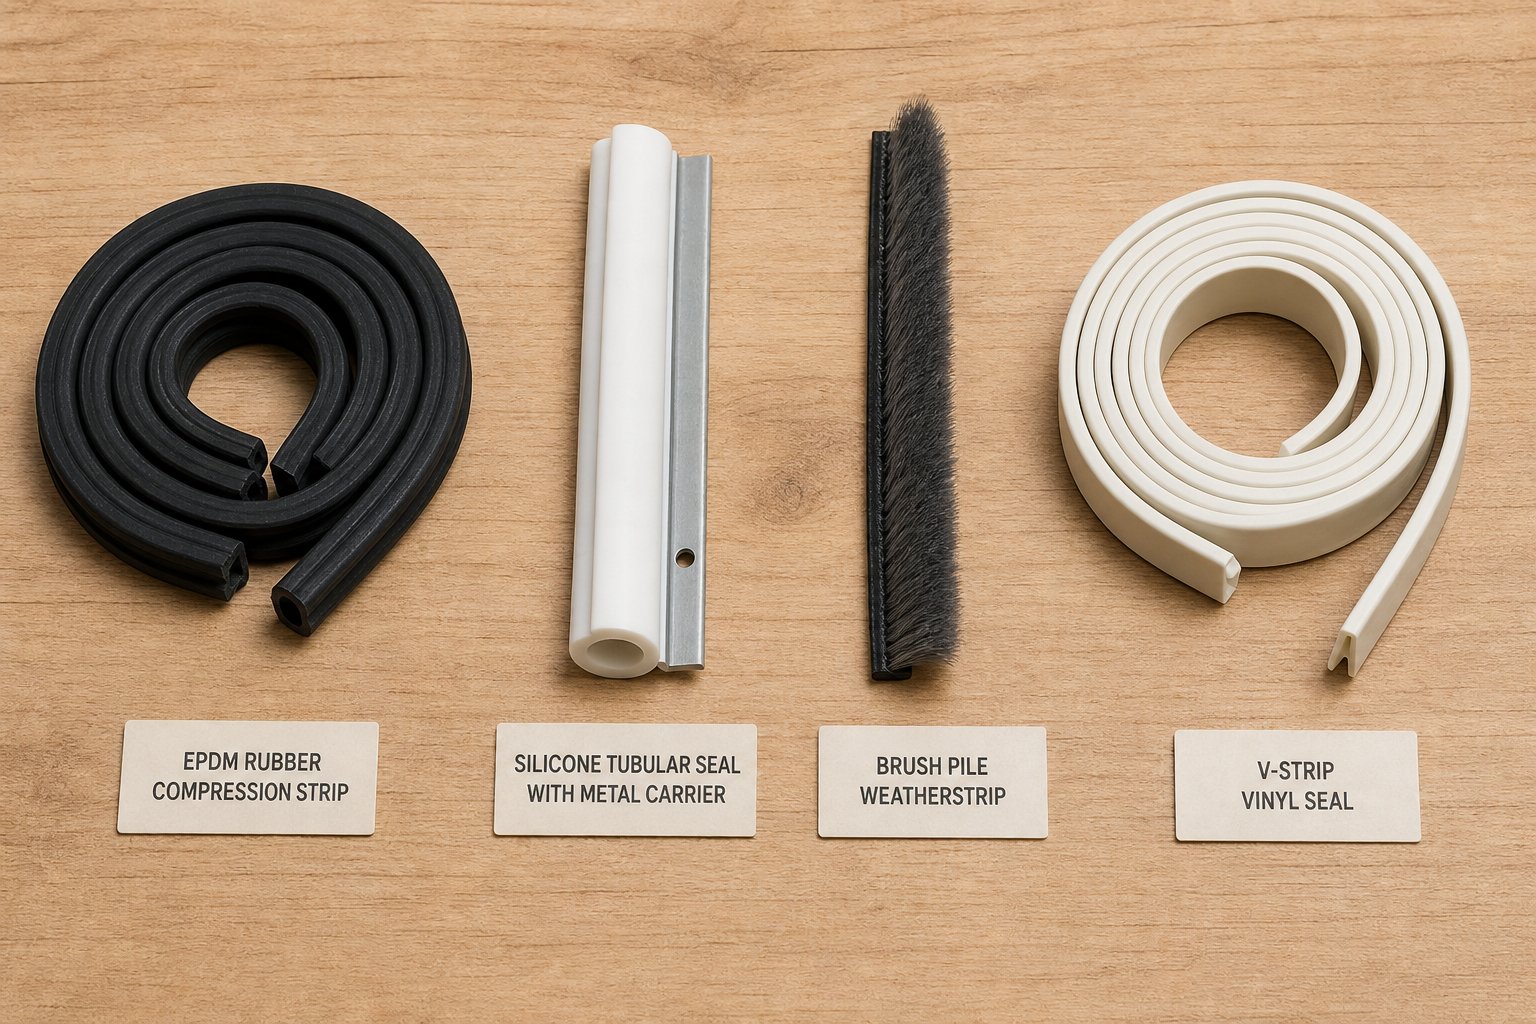
Three main seal materials dominate the DIY draught-proofing market. Each has a distinct performance profile on aluminium frames:
- EPDM rubber draught strip — Ethylene Propylene Diene Monomer rubber is the same compound used in factory-fitted window gaskets. It resists UV degradation, stays flexible across a wide temperature range, and maintains its compression recovery for years. EPDM seals suit casement and awning windows where consistent compression force is needed around the full sash perimeter. They are the closest material to a factory-original replacement.
- Silicone draught excluder — Silicone remains pliable in cold weather when other rubbers stiffen, making it a strong choice for homes in Canberra, Hobart, or highland regions where winter mornings drop below zero. Silicone also bonds well to smooth surfaces, including powder-coated aluminium. A tubular silicone seal attached to a metal carrier strip provides both effective draught blocking and reliable adhesion through mechanical fixing.
- Foam tape (polyurethane or PVC) — Inexpensive and easy to apply, but the least durable option. Open-cell foam degrades under UV exposure and compresses permanently within one to two seasons. On aluminium, its standard rubber-based adhesive struggles with the low surface energy of powder-coated finishes. Use foam only as a short-term fix on windows you plan to replace soon — it is not a lasting solution.
For most aluminium windows in Australian conditions — hot summers, UV exposure, and cool winters — EPDM or silicone will outperform foam tape by several years.
Adhesive Compatibility with Powder-Coated Frames
Powder-coated surfaces present a specific bonding challenge. The coating is hydrophobic and has low surface energy, meaning most standard pressure-sensitive adhesives cannot wet the surface properly to form a lasting bond. This is why generic foam tape peels off smooth aluminium within weeks — the adhesive literally cannot grip the finish.
What works on powder coat:
- Acrylic adhesive-backed seals — Acrylic pressure-sensitive adhesives are formulated to bond to low surface energy materials. Look for draught strips specifically labelled for metal or powder-coated surfaces. These cost slightly more than generic options but hold dramatically longer.
- Synthetic rubber adhesive (not natural rubber) — Modified synthetic rubber adhesives offer higher initial tack on smooth surfaces. They grab faster and resist peeling under thermal cycling better than natural rubber compounds.
- Mechanical fixing as a backup — Where adhesion alone is unreliable, some seal profiles include a rigid carrier strip that screws into the frame rebate. This eliminates adhesive dependency entirely. Silicone seals with aluminium or stainless steel carriers use small countersunk screws at 150 mm intervals to hold the strip permanently in place.
If you are committed to adhesive-only application, wipe the frame rebate with isopropyl alcohol first and apply a thin coat of adhesion promoter (plastic primer) to the bonding surface. This raises the surface energy of the powder coat and gives the adhesive something to lock onto. Allow the primer to flash off for five minutes before pressing the seal strip into position.
One more critical point: adhesive-backed seals require application above 10°C for proper bonding. In Melbourne, Adelaide, or anywhere with cold mornings, install your seals during the middle of the day when frame temperatures have risen. Applying a rubber draught strip to a cold aluminium surface in the early morning means the adhesive will never develop full bond strength — and you will find it lifting within a month.
Brush Pile and V-Strip for Sliding Tracks
Sliding aluminium windows need a different category of seal altogether. Compression strips would create too much friction against the moving sash, making the window difficult or impossible to slide. Two materials handle this interaction well:
- Brush pile (fin seal) — Dense polypropylene fibres woven into a backing strip that slots into the track groove. The fibres flex as the sash passes, maintaining gentle contact without binding. Fin seal weatherstrip with a plastic Mylar fin centred in the pile adds extra air-blocking performance for exposed or high-wind locations. Brush pile is extremely durable and suits the interlock rail, head track, and sill track on sliding windows.
- V-strip (tension seal) — A self-adhesive vinyl strip folded into a V-shape that presses against the sash edge when it closes. V-strip works best along the side channels of sliding windows where the sash parks in the closed position. It bridges small gaps through spring tension rather than compression, making it effective where the gap is not perfectly uniform. Surfaces must be flat and smooth for V-strip to perform well — a condition powder-coated aluminium naturally meets.
Both materials are invisible once installed inside the track, which matters for homes where visible foam strips along window edges look untidy. They also avoid the adhesive-to-powder-coat problem because brush pile typically press-fits into existing grooves, and V-strip relies on the fold tension rather than heavy adhesive bond strength to hold position.
Quick reference: use EPDM or silicone compression strips on hinged windows (casement, awning), brush pile or fin seal on sliding tracks, and V-strip where sash gaps are uneven. Avoid standard foam tape on powder-coated aluminium unless it is a temporary measure.
Selecting the right material is only half the equation. Even the best EPDM strip will fail prematurely if pressed onto a dirty, oxidised, or oil-contaminated frame surface. Proper preparation of the aluminium rebate before installation is what separates a seal that lasts five years from one that lifts within months.
Step 4 Prepare Your Aluminium Frames for New Seals
Skipping surface preparation is the single most common reason DIY draught proofing fails within months. A seal strip can only bond as well as the surface beneath it allows. Dust, oxidation, oils from fingers, and remnants of old rubber all act as release agents — they prevent the new adhesive from ever reaching the actual frame surface. Fifteen minutes of preparation work turns a three-month fix into a multi-year solution.
Cleaning the Frame Rebate Properly
The rebate — the recessed channel where your seal strip sits — collects years of grime that is invisible until you wipe it. Isopropyl alcohol or methylated spirits are the correct solvents for powder-coated aluminium. They dissolve oxidation films, body oils, and fine dust without damaging the coating. Avoid acetone or harsh thinners on powder coat, particularly in warm weather — strong solvents can soften the finish when the frame is heated by direct sun.
Wipe the full length of the rebate with a lint-free cloth dampened with methylated spirits, then follow with a clean dry cloth. Let the surface air-dry completely before applying anything. Residual moisture beneath adhesive creates bubbles that eventually lift the seal edge.
Removing Old Seals Without Damaging Powder Coat
Old rubber gaskets and adhesive residue need to come out cleanly. Use a plastic scraper or an old credit card — never a metal blade. Metal tools score the powder coat, creating micro-scratches that accelerate corrosion underneath and leave an uneven bonding surface. For stubborn adhesive residue, apply a citrus-based adhesive remover or a short burst from a hair dryer to soften the glue before scraping.
If the powder coat in the rebate has worn through to bare aluminium — common on older frames that have had multiple seal replacements — lightly sand with 400-grit wet-and-dry paper to remove surface oxidation, then apply a thin coat of adhesion promoter. This step is essential for window draft protection that lasts, because bare aluminium oxidises rapidly and oxide layers reject adhesive bonds.
Measuring and Cutting Seal Strips Accurately
Accurate measurements prevent gaps at corners and waste from over-ordering. Follow this preparation sequence to get your seal strips ready for installation:
- Measure the channel width and depth — use a digital calliper or a small steel rule to check the rebate groove dimensions at several points along each side. Aluminium frames can vary by half a millimetre between the top rail and the sill due to manufacturing tolerances or past damage.
- Measure the total perimeter length — run a flexible tape measure around the full seal channel, noting each side individually. Add 10 mm extra per length to allow for compression at mitre joints.
- Cut strips to length with mitre joins at corners — use sharp scissors or a utility knife to cut 45-degree angles where strips meet at corners. Butt joints leave gaps that draughts exploit. Press the mitred ends firmly together so fibres or rubber compress into a continuous seal with no visible break.
- Dry-fit each strip before peeling adhesive backing — lay the strip into the rebate without removing the release liner. Confirm the fit is snug, the length is correct, and the compression height is appropriate for your sash gap. Adjust cuts as needed before committing.
If you are learning how to use alien draft seal on windows or any similar adhesive-backed draught strip product, this dry-fit step is especially important. Once acrylic adhesive contacts powder-coated aluminium that has been properly cleaned and primed, repositioning is nearly impossible without damaging the strip.
With clean, primed surfaces and accurately cut seal strips ready to go, the actual installation becomes straightforward — pressing material into place rather than fighting adhesion problems or trimming on the fly.
Step 5 Install Draught-Proofing Strips and Sealants
Clean surfaces and pre-cut strips eliminate guesswork — the installation itself is a matter of placement, pressure, and checking your work as you go. Each window type follows a slightly different sequence, but the underlying principle stays the same: apply the seal in one continuous run, press it firmly, and verify the sash still operates smoothly before moving to the next section.
Installing Compression Seals on Hinged Windows
Casement and awning windows rely on compression between the sash and frame to block air. The window draught excluder strip sits in the frame rebate and gets squeezed when the sash latches closed. Getting the compression ratio right is critical — the seal should compress by roughly one-third of its original height when the window shuts. Too thick and the latch will not engage or the friction stay binds. Too thin and cold air slips past the flattened rubber.
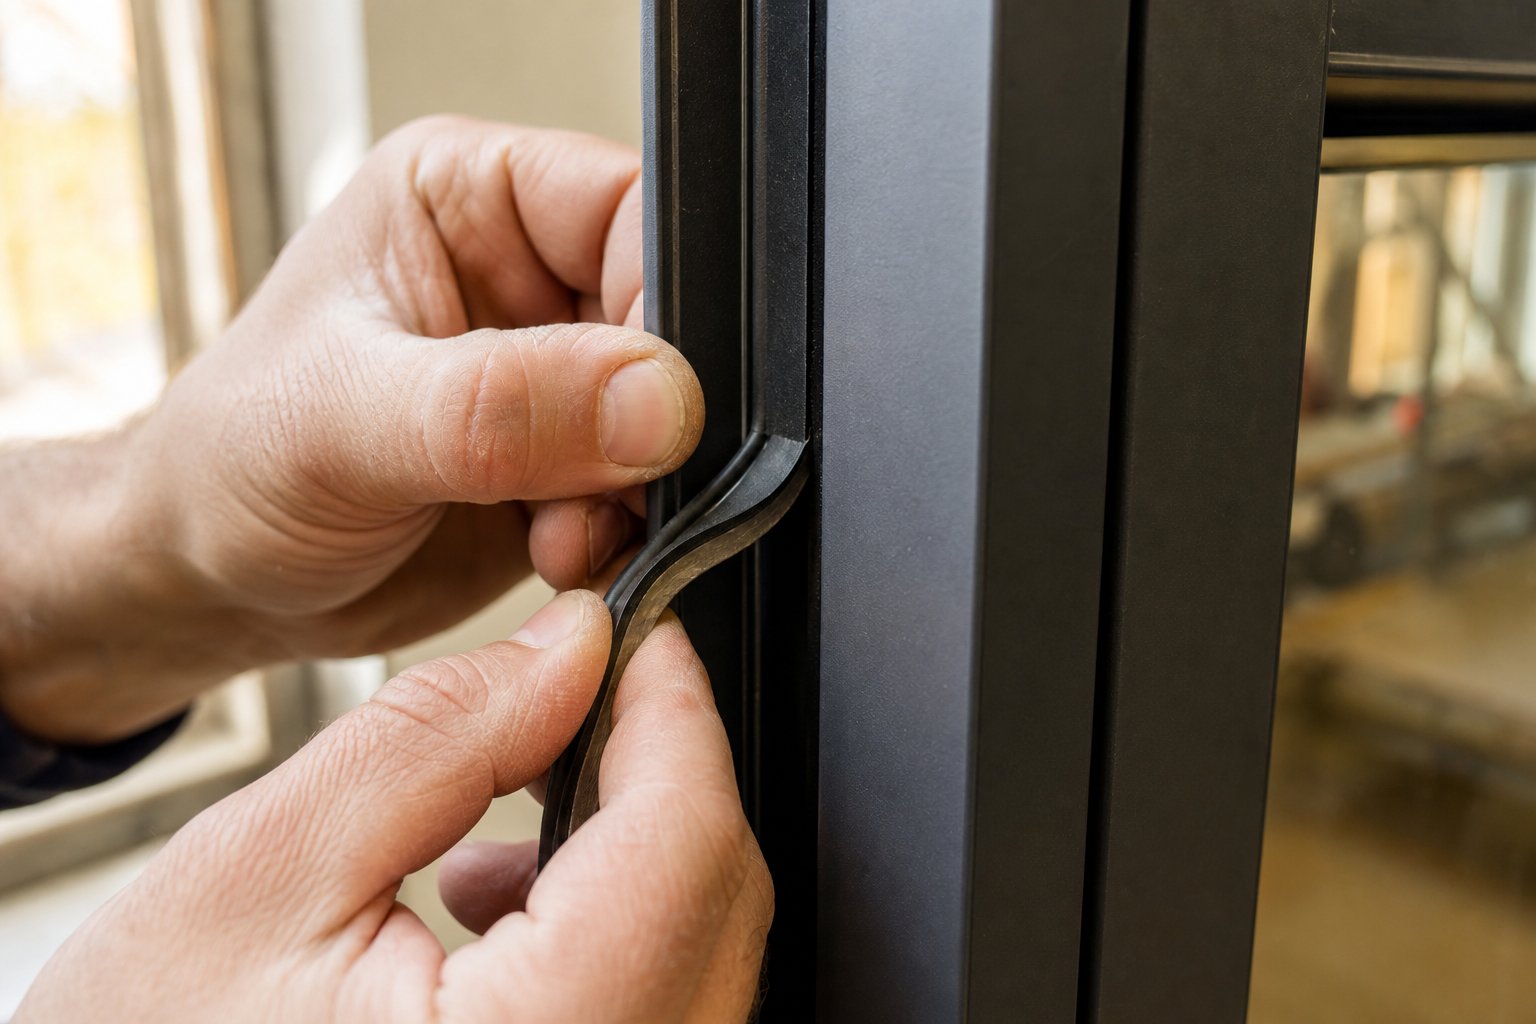
- Start at the top corner of the hinge side. Peel back approximately 100 mm of adhesive backing and press the seal firmly into the rebate, aligning it centrally in the channel. Do not peel the entire backing at once — it sticks to itself and creates wrinkles.
- Work continuously along each side, peeling backing progressively and pressing the strip into place with consistent thumb pressure. Avoid stretching the material. Stretched EPDM or silicone will contract over the following days and open gaps at corners.
- At each corner, press the mitre joint tightly together so the two angled ends meet flush. Apply a tiny drop of cyanoacrylate glue to bond the mitre faces if you want extra security against separation.
- Close the window slowly once each full side is installed. Check that the latch engages without excessive force. Run your hand along the closed sash edge — you should feel no cold air movement.
- If the latch requires noticeably more force, the seal profile is over-compressing. Swap to a strip with 1 mm less height rather than forcing the hardware, which stresses hinges and lock mechanisms over time.
Test the window operation after each section of seal is applied, not just at the end. Catching over-compression early — while only one side is installed — lets you peel back and adjust a single strip rather than removing the entire perimeter.
Fitting Track Seals on Sliding Windows
Sealing sliding windows demands a lighter touch. The sash must glide freely along its track, so compression-style strips are off the table. Instead, brush pile or adhesive-backed fin strip provides the air barrier without binding the sash movement.
- Open the sliding sash fully to expose the track grooves. Identify the channel where the original pile sat — it is a narrow slot running along the head rail, sill rail, and interlock stile.
- For slot-in pile weatherstrip, align the backing fin with the groove and press it in using a flat plastic tool or the back of a spoon. Start at one end and feed continuously to the other without cutting midway. The backing fin should sit firmly inside the groove with the pile fibres facing the sash surface. According to manufacturer installation guidance, forcing oversized backing into a narrow groove causes deformation and excessive friction.
- For adhesive-backed fin strip on frames without grooves, peel the backing and press the strip along the interlock rail where the two sashes overlap. Position it so the fin contacts the opposing sash face when both panels are closed. This acts as an effective window stopper for sliding windows without altering the track itself.
- Slide the sash back and forth several times. Movement should feel smooth with slight resistance — not stiff or jerky. If the sash drags, the pile density is too high or the compression space is insufficient. A properly installed standard pile outperforms an over-compressed upgraded option every time.
For older aluminium sliders common across Australian suburbs, replacing worn pile along all three contact lines — head, sill, and interlock — typically restores the factory-level seal. The total material cost for sealing sliding windows of standard residential size runs between $15 and $30 per window.
Resealing the Frame-to-Wall Junction
If your diagnosis revealed air entering behind the frame rather than through the sash seals, the fix is external mastic renewal. The original polyurethane or silicone bead between the aluminium frame and the surrounding wall has failed — cracked, shrunk, or pulled away from one surface.
- Remove the failed mastic completely. Use a sharp utility knife to cut along both edges, then pull the old bead out in strips. Scrape any residue from the aluminium face and the wall surface with a plastic scraper.
- Mask both sides of the joint with painter’s tape to keep a clean sealant line. Leave a gap of 6–10 mm between the tape edges — this defines your new bead width.
- Apply a bead of exterior-grade polyurethane sealant into the joint using a caulking gun. Polyurethane is preferred over silicone for frame-to-wall junctions because it bonds to both porous (brick, render) and non-porous (aluminium) surfaces, remains flexible, and is paintable. Fill the joint to roughly 6 mm depth.
- Tool the bead smooth with a wetted finger or a plastic jointing tool, pressing the sealant firmly into both surfaces. Remove the masking tape immediately while the sealant is still wet.
- Allow 24–48 hours curing time before testing. Rerun the incense stick test along the internal reveal to confirm air is no longer entering at the frame-to-wall boundary.
External mastic renewal is especially important for brick veneer homes across Melbourne, Sydney, and Adelaide where minor settling stretches original sealant beyond its elastic limit. A single afternoon spent resealing the perimeter junction can eliminate draughts that no amount of internal gasket work would solve.
Proper seal installation and mastic renewal address the vast majority of draught problems on aluminium windows. But seals can only do their job when the sash sits squarely in the frame — if hinges have dropped or locks no longer pull tight, gaps remain regardless of how fresh the rubber is.
Step 6 Fix Hardware Misalignment That Causes Gaps
A brand-new EPDM seal cannot compensate for a sash that hangs crooked in its frame. If one corner of the window sits 2 mm lower than it should, the compression strip on that side gets crushed flat while the opposite corner barely makes contact — leaving a draught path no seal material can bridge. Hardware misalignment is the hidden reason many homeowners replace seals repeatedly yet never fully stop drafts in windows that otherwise look perfectly fine.
Checking for Sash Drop and Frame Distortion
Sash drop is the most common alignment failure on aluminium casement and awning windows. Gravity gradually pulls the opening sash downward on its hinges, creating an uneven gap around the perimeter. Diagnosing it takes thirty seconds:
Close the window and examine the gap between the sash edge and the fixed frame on all four sides. A healthy window shows a uniform gap — typically 2–3 mm — all the way around. If the gap is visibly wider at the top corner on the lock side and tighter (or the sash is rubbing) at the bottom corner on the same side, the sash has dropped. You might also notice the latch requires extra force to engage because the lock tongue no longer aligns cleanly with its keep.
For sliding windows, the equivalent issue is one panel sitting lower than the other or dragging along the sill track. A door or window that scrapes at one end but has a visible gap at the other is riding unevenly on its bottom rollers.
Here is a checklist of hardware points to inspect before concluding that seals alone are responsible for your draught:
- Gap uniformity around the full sash perimeter (look for taper indicating drop)
- Friction stay arms — check for visible sag, worn pivot points, or loose fixing screws
- Espagnolette lock engagement — does the handle close smoothly or require force?
- Keep alignment — are the lock keeps (strike plates) still centred on the latch tongue?
- Hinge screws — have any pulled loose from the aluminium profile?
- Roller height on sliding sashes — does the panel sit level in the track?
Adjusting Hinges and Friction Stays
Most modern aluminium casement and awning windows use friction stay hinges with three-axis adjustment screws. These allow you to move the sash up or down, left or right, and in or out relative to the frame — all without removing the sash from the window. You will need an Allen key (usually 4 mm) or a Torx driver, depending on the hinge brand.
To correct sash drop, open the window fully and locate the adjustment screws on both the top and bottom friction stays. Turn the vertical adjustment screw clockwise in small increments — a quarter turn at a time — to raise the sash on the dropped side. Close the window after each adjustment and recheck the gap uniformity. The goal is an even perimeter gap that allows your compression seal to work at consistent pressure all the way around.
If your friction stays are older non-adjustable types with no visible Allen key screws, shimming is the alternative. Place thin plastic packers (0.5–1 mm) behind the hinge plate on the frame side to push the sash outward and correct its angle. Stainless steel or nylon shims work best on aluminium — avoid mild steel shims that corrode against the frame in humid or coastal conditions.
A practical reminder: only turn adjustment screws a quarter turn before testing. Over-adjustment in one direction often creates a new misalignment problem elsewhere. Patience with small increments produces better results than aggressive correction.
Realigning Locks and Keeps for Tight Closure
Even with hinges corrected, a draft in windows can persist if the locking mechanism does not pull the sash firmly into the seal. Espagnolette locks — the multi-point systems common on Australian aluminium casements — use several cams or mushroom-headed bolts that engage keeps (strike plates) screwed into the frame. If the sash has shifted over time, those cams no longer align with their keeps, reducing the pull-in force that compresses the seal.
Loosen the keep screws (usually Phillips head) and slide the keep up or down until it centres on the cam or roller when the handle is in the locked position. Retighten and test. The handle should close with moderate resistance — enough to confirm the seal is compressing, but not so much that you strain the mechanism. If the keeps have slotted screw holes, adjustment is simple. If they use fixed holes, you may need to re-drill slightly or use an elongated adapter plate.
For sliding aluminium windows, roller height adjustment restores the interlock seal contact. Each panel has two roller assemblies at the bottom corners with height-adjustment screws accessible from the face or edge of the panel. Turning clockwise typically raises the panel. Adjust each roller in quarter-turn increments until the panel rides level and the interlock stile meets the opposing frame rail evenly — this closes the vertical gap that allows draughts through the overlap zone.
Draught proofing windows and doors effectively often comes down to this mechanical step. Correct alignment restores the conditions your seals were designed to work in. With hardware squared away, the final stage is confirming the repair actually eliminated the draught — and setting up a simple maintenance routine so the problem does not creep back next winter.
Step 7 Verify Results and Maintain Seals Long-Term
Hardware realigned, new seals pressed into place, external mastic renewed — the physical work is done. But how do you know it actually worked? And more importantly, how do you keep those seals performing year after year rather than degrading back to square one? A quick verification test followed by a simple seasonal routine turns your draught-proofing effort into lasting comfort rather than a temporary patch.
Post-Installation Draught Testing
Pull out the same incense stick or candle you used during diagnosis. Close every window and door in the room except the one you repaired, switch on a bathroom exhaust fan to create slight negative pressure, and slowly trace the smoke along the full frame perimeter. This time, the smoke should drift steadily upward with no sideways flicker or pull toward the frame. Repeat at the corner joints, hardware mounting points, and the frame-to-wall junction — every spot you marked with painter’s tape earlier.
Run the paper-strip test again at each side and corner. The paper should grip firmly and resist pulling without tearing. If it still slides free at any point, that section of seal is under-compressed — either the strip profile is too thin or the hardware at that location needs further adjustment to pull the sash tighter against the gasket.
For sliding windows, close both panels fully and hold your hand along the interlock stile. You should feel no cold air movement where the sashes overlap. If draughts persist at the head or sill rail, the pile weatherstrip may need repositioning to sit slightly higher in its groove.
Seasonal Seal Maintenance Schedule
Draught excluders do not last forever, but proper care extends their life significantly. Rubber and silicone seals on aluminium windows typically last five to eight years in Australian conditions — longer if you keep them clean and free from abrasive grit. Regular cleaning and lubrication, carried out at least twice a year, prevents premature hardening and maintains the flexibility needed for effective compression.
Grit is the quiet enemy. Fine sand and dust settle in seal channels, and every time you open and close the window, those particles grind against the rubber surface like sandpaper. Coastal homes from Newcastle to the Gold Coast to Fremantle accumulate salt crystals that are even more abrasive. A damp cloth wiped along the seal and its channel twice a year removes this debris before it causes damage.
The table below outlines a practical maintenance schedule:
| Maintenance Task | Frequency | What to Look For |
|---|---|---|
| Wipe seal channels with a damp cloth | Twice a year (autumn and spring) | Grit, sand, salt deposits, or mould growth in the rebate |
| Inspect seal compression and flexibility | Once a year (before winter) | Flattening, permanent deformation, or failure to spring back when pressed |
| Check adhesive bond integrity | Once a year (after summer) | Edges lifting or peeling away from the frame surface, especially on sun-exposed sides |
| Lubricate rubber seals with silicone spray | Once a year (autumn) | Dryness, surface cracking, or stiffness when flexed by hand |
| Re-run incense or candle draught test | Once a year (early winter) | Smoke deflection at any point along the frame perimeter |
| Clean and vacuum sliding window tracks | Twice a year | Debris buildup restricting sash movement or compressing pile flat |
Timing matters. The pre-winter inspection catches problems while the weather is still mild enough to apply adhesive-backed replacements above the 10°C bonding threshold. The post-summer check catches heat damage — prolonged exposure to direct Australian sun accelerates adhesive breakdown on north- and west-facing windows.
Signs Your Seals Need Replacing
Even with diligent maintenance, seals eventually reach end of life. Knowing when to replace rather than persist with worn material saves you from chasing draughts that no amount of adjustment will fix. Look for these indicators:
- Visible flattening — the seal no longer returns to its original height after the window opens. Press it with your fingertip; healthy EPDM or silicone springs back immediately. Worn material stays compressed.
- Surface cracking — fine cracks running across the face of the rubber, especially on sun-exposed sections. Cracked seals lose their airtight surface and allow micro-leakage even when compressed.
- Loss of elasticity — the rubber feels hard or brittle rather than supple. Bend a section gently; if it resists flexing or feels stiff, UV and thermal cycling have degraded the polymer chains.
- Peeling edges on adhesive-backed strips — once an edge lifts, moisture and dust enter beneath the adhesive layer, accelerating further delamination. A lifting strip will not re-adhere reliably and should be replaced entirely.
- Draught return despite correct hardware alignment — if your locks and hinges are properly adjusted yet the incense test shows air movement, the seal itself has lost its ability to form an effective barrier.
Replacing individual strips before they fail completely is far easier than waiting until the entire perimeter degrades. If you know how to make a window draft stopper using the methods covered in this guide, swapping a single worn section takes fifteen minutes and a few dollars in material — a fraction of the effort involved in a full re-seal.
Consistent verification and seasonal upkeep close the loop on the entire draught-proofing process. But there comes a point with some older aluminium windows where maintenance alone cannot overcome fundamental frame limitations — corroded joints, single glazing with no thermal break, or hardware that has run out of adjustment range. Recognising that threshold early saves you from pouring effort into frames that have reached the end of their useful life.

When Replacement Beats Retrofit on Old Aluminium Windows
Some aluminium windows reach a point where fresh seals, adjusted hardware, and renewed mastic are just buying time. You fix one draught path and another opens within months. The frame itself has become the problem — not the consumable parts attached to it. Recognising this threshold early saves you from an expensive cycle of repairs that never quite deliver lasting comfort.
When Retrofit Draught Proofing Is Not Enough
Draught proofing works brilliantly on aluminium frames that are structurally sound and still hold correct geometry. It stops working when the frame or its core components have degraded beyond the point where replacement seals can compensate. If you have been trying to stop draughts from windows that keep leaking despite multiple repair attempts, run through the following indicators. Each one signals a deeper issue that seal strips alone cannot resolve.
- Visible corrosion at corner mitre joints — White powdery oxidation or pitting around corner crimps means the joint has lost structural integrity. Sealant injected into a corroded joint will not bond properly, and the gap continues to open as the aluminium deteriorates further. Coastal homes across Sydney’s Northern Beaches, Perth’s western suburbs, and Queensland’s coastline see this failure pattern most often due to salt air exposure.
- Single glazing with no thermal break — A non-thermally broken aluminium frame with single-pane glass achieves U-values of 6.0 W/m²K or worse. Even with perfect seals eliminating air leakage, heat still conducts directly through the frame and glass at a rate that makes winter comfort and energy efficiency nearly impossible to achieve. No amount of weatherstripping addresses radiant and conductive heat loss.
- Repeated seal failures within 12 months — If you replaced seals last autumn and they have already flattened, peeled, or cracked by the following winter, the problem is not the seal material. It is usually excessive thermal movement from a non-thermally broken frame, frame distortion that creates uneven compression, or a gap dimension that no standard seal profile can bridge reliably.
- Hardware that has run out of adjustment range — Friction stay hinges only offer 2–3 mm of vertical correction. Espagnolette keeps have limited slot travel. Roller assemblies on sliding windows max out their height range. Once you have used all available adjustment and the sash still does not sit square, the frame itself has likely distorted — a problem no hardware tweak can reverse.
- Condensation forming on the interior frame surface — Persistent condensation on the aluminium in winter indicates the interior face of the frame is reaching dew point. This is a hallmark of non-thermally broken profiles where the metal runs continuously from outside to inside. Seals stop air movement but do nothing to prevent surface condensation caused by thermal bridging.
- Glazing beads that no longer clip securely — If the aluminium lugs or clip channels that hold glazing beads in place have fatigued or cracked, the beads work loose repeatedly. Loose beads allow air around the glass perimeter, and there is no permanent repair short of replacing the frame section or the entire window unit.
If your window fails on more than three of the indicators above, replacement typically offers better long-term value than repeated seal repairs. Each failed indicator compounds the others — corroded corners accelerate seal wear, distorted frames defeat hardware adjustment, and single glazing ensures thermal discomfort regardless of airtightness.
This is not about giving up on draught proofing. It is about directing your budget where it actually delivers returns. A $50 seal replacement on a structurally sound frame pays for itself within a single winter of reduced heating costs. That same $50 spent on a frame with three or more of the issues above is money lost within months.
What Modern Thermally Broken Aluminium Windows Offer
The gap between an old non-thermally broken aluminium window and a current-generation thermally broken system is not incremental — it is a generational leap in performance. Understanding what modern frames deliver helps you weigh whether how to seal draft windows through retrofit still makes sense, or whether investing in replacement frames eliminates the problem at its source.
Modern thermally broken aluminium windows use a polyamide strip — typically 24 mm or wider — to physically separate the interior and exterior aluminium profiles. This thermal break slashes conductive heat transfer through the frame, keeping the interior surface warm enough to avoid condensation even on cold mornings. Combined with double or triple insulated glazing units filled with argon gas and coated with low-emissivity films, these systems achieve overall U-values of 1.5 W/m²K or better — a dramatic improvement over the 6.0+ W/m²K of a single-glazed non-thermally broken frame.
Beyond thermal performance, factory-engineered seal systems on modern windows are designed specifically for each profile. Multi-point compression seals sit in precisely routed channels with geometry matched to the sash closure force. There is no guessing about seal height, adhesive compatibility, or compression ratio — the manufacturer has engineered the interface so the seal works optimally from day one and holds performance for a decade or more without intervention.
For Australian homeowners weighing their options, thermally broken aluminium awning windows — such as the MEICHEN MC100 Awning Window — illustrate what this generation of window technology delivers: integrated thermal break profiles, double-glazing options with project-specific glass configurations, and factory-sealed performance designed to meet stringent U-value targets without relying on aftermarket draught strips. Systems like these represent the broader category of high-performance replacement windows now available in the Australian market through specialist suppliers.
The decision framework is practical rather than aspirational. If your existing aluminium frames are non-thermally broken, single-glazed, and showing multiple signs of degradation, the cost of repeated draught-proofing attempts — materials, time, and the ongoing discomfort between repairs — often exceeds the price difference between one more retrofit and a properly specified replacement window that eliminates draughts by design.
Key differences between retrofitting and replacing:
| Factor | Retrofit Draught Proofing | Modern Thermally Broken Replacement |
|---|---|---|
| Air leakage control | Addresses gaps with aftermarket seals | Factory-engineered multi-point seal system |
| Conductive heat loss through frame | Unchanged — metal still bridges inside to outside | Eliminated by polyamide thermal break |
| Glazing performance | Limited to existing single or basic double glass | Argon-filled IGU with low-E coating, U-value ~1.1–1.4 W/m²K |
| Condensation risk | Remains on non-thermally broken frames | Minimal — interior surface stays above dew point |
| Maintenance cycle | Seal inspection and replacement every 3–5 years | Minimal maintenance for 10+ years |
| Compliance with NCC energy requirements | Unlikely to meet current standards | Designed to meet or exceed NCC Section J |
None of this means draught proofing is wasted effort. For the millions of Australian homes with aluminium windows that are structurally solid — frames without corrosion, hardware with adjustment remaining, and profiles that simply need fresh rubber — the techniques covered in this guide deliver genuine, cost-effective results. How to stop draughts from windows is a question with practical answers at every budget level. The key is matching the intervention to the frame’s actual condition rather than forcing a temporary fix onto a window that has already told you, through repeated failures, that it needs something more permanent.
Frequently Asked Questions About Draught Proofing Aluminium Windows
1. Why do aluminium windows let in more draughts than timber or uPVC frames?
Aluminium conducts heat over 1,000 times faster than uPVC or timber, causing the metal to expand and contract significantly with temperature changes. This constant thermal cycling stresses rubber gaskets, adhesive seals, and mastic joints season after season, gradually degrading them until gaps form. Non-thermally broken aluminium frames experience even greater movement because the metal runs continuously from the cold exterior to the warm interior, accelerating seal wear at corner joints, perimeter gaskets, and frame-to-wall junctions.
2. What is the best seal material for powder-coated aluminium window frames?
EPDM rubber and silicone compression strips outperform standard foam tape on powder-coated aluminium. Foam tape uses rubber-based adhesive that struggles to bond with the low surface energy of powder coat and typically peels within weeks. EPDM provides UV stability and long-term compression recovery, while silicone stays flexible in cold weather. Both require acrylic or synthetic rubber adhesive backing specifically formulated for smooth metal surfaces. Applying an adhesion promoter before installation and ensuring the frame temperature is above 10 degrees Celsius further improves bond longevity.
3. How do I find exactly where draughts are entering my aluminium window?
Use a lit incense stick or thin candle held about 20 mm from the frame edge on a breezy day. Close all other windows and doors, then create slight negative pressure by running an exhaust fan. Move the smoke slowly along the full perimeter, corner joints, hardware mounting points, and the frame-to-wall junction. Wherever the smoke flickers or gets pulled sideways, mark that spot with painter’s tape. Complement this with the paper-strip test — close the window on a sheet of paper and try to pull it out. If it slides freely, the compression seal at that point has failed.
4. Can I draught proof sliding aluminium windows without making them hard to open?
Yes, by using wool pile weatherstrip or fin seal rather than compression strips. Pile weatherstrip consists of dense synthetic fibres that flex gently as the sash slides past, maintaining air contact without creating binding friction. For standard residential sliding windows, a pile height of 6 to 8 mm with 4P density balances effective sealing with smooth operation. The strip press-fits into existing track grooves along the head rail, sill rail, and interlock stile, making it an invisible upgrade that restores factory-level sealing for around $15 to $30 per window in materials.
5. When should I replace old aluminium windows instead of draught proofing them?
Replacement becomes the better investment when your frames show three or more of these signs: visible corrosion at corner mitre joints, single glazing with no thermal break achieving poor U-values above 6.0 W/m2K, repeated seal failures within 12 months, hardware that has exhausted its adjustment range, persistent interior condensation from thermal bridging, or glazing beads that no longer clip securely. Modern thermally broken aluminium windows with factory-engineered multi-point seals and double glazing achieve U-values around 1.5 W/m2K, eliminating draughts by design rather than relying on aftermarket repairs.
More Window & Door Guides