Why Mould Grows on Aluminium Window Frames
You spot dark specks creeping along the corner of your aluminium window frame, and your first instinct is to grab a cloth and start scrubbing. Fair enough. But before you clean mould from aluminium window frames, it pays to understand why it showed up in the first place. Mould on metal window frames catches many homeowners off guard — after all, does mould grow on metal? The short answer: not exactly on it, but very happily on top of it.
The real culprit isn’t the aluminium itself. It’s condensation, and aluminium’s physical properties make it especially good at creating the exact conditions mould loves.
How Thermal Bridging Creates Condensation on Aluminium
Aluminium conducts heat roughly 1,000 times more readily than timber or uPVC. Indicative thermal conductivity figures put aluminium at around 160–200 W/m·K, compared with just 0.10–0.15 W/m·K for softwood timber and 0.15–0.25 W/m·K for uPVC. That enormous gap means heat flows through an aluminium frame almost effortlessly.
During cooler months — particularly in southern Australian climates like Melbourne, Hobart, or the highlands — the interior surface of an aluminium frame can drop well below room temperature. When warm, humid indoor air meets that cold metal surface, the moisture in the air condenses into a thin water film directly on the frame. This process is called thermal bridging, and it’s the single biggest reason mould appears on aluminium windows more frequently than on timber or uPVC alternatives.
Timber and uPVC frames resist heat transfer, so their interior surfaces stay closer to room temperature. Aluminium without a thermal break simply can’t do that. The frame becomes a cold magnet for moisture, and that moisture is exactly what mould spores need to germinate and spread.
Why Mould Sits on the Surface Rather Than Penetrating
Here’s the good news buried inside the problem. Can mould grow on metal in the way it invades timber, eating into the grain and causing structural decay? No. Aluminium is non-porous, so mould cannot penetrate the surface or feed on the material itself. Instead, it colonises the thin film of moisture and the organic debris — household dust, pollen, skin cells, cooking grease — that quietly accumulates on frame surfaces over time. This layer of grime is the mould’s actual food source, and the condensation provides the water it needs to thrive.
Because mould on a metal surface remains a surface-level problem, removal is generally more straightforward than it would be on porous timber, where spores can embed deep into the wood fibres. A well-executed clean can strip the mould away completely. The catch? Without addressing the underlying condensation, that freshly cleaned frame will be damp again within hours, and recolonisation can begin in as little as 24 to 48 hours.
Mould on aluminium window frames is a condensation problem, not a material problem. The metal doesn’t harbour or feed the mould — it simply creates the cold, wet surface conditions that let mould flourish on accumulated dust and organic deposits. Cleaning alone treats the symptom; managing moisture addresses the cause.
This distinction matters more than most cleaning guides acknowledge. Black mould on metal frames will keep returning no matter how thoroughly you scrub if the condensation cycle continues unchecked. Effective treatment means pairing the right cleaning method with practical steps to reduce moisture at the frame surface — a combination this guide walks through in detail.
Of course, not every dark mark on your frames is actually mould. Aluminium can also develop oxidation staining and surface mildew, each requiring a completely different approach — and misidentifying the problem can lead to treatments that damage your frame finish rather than restore it.
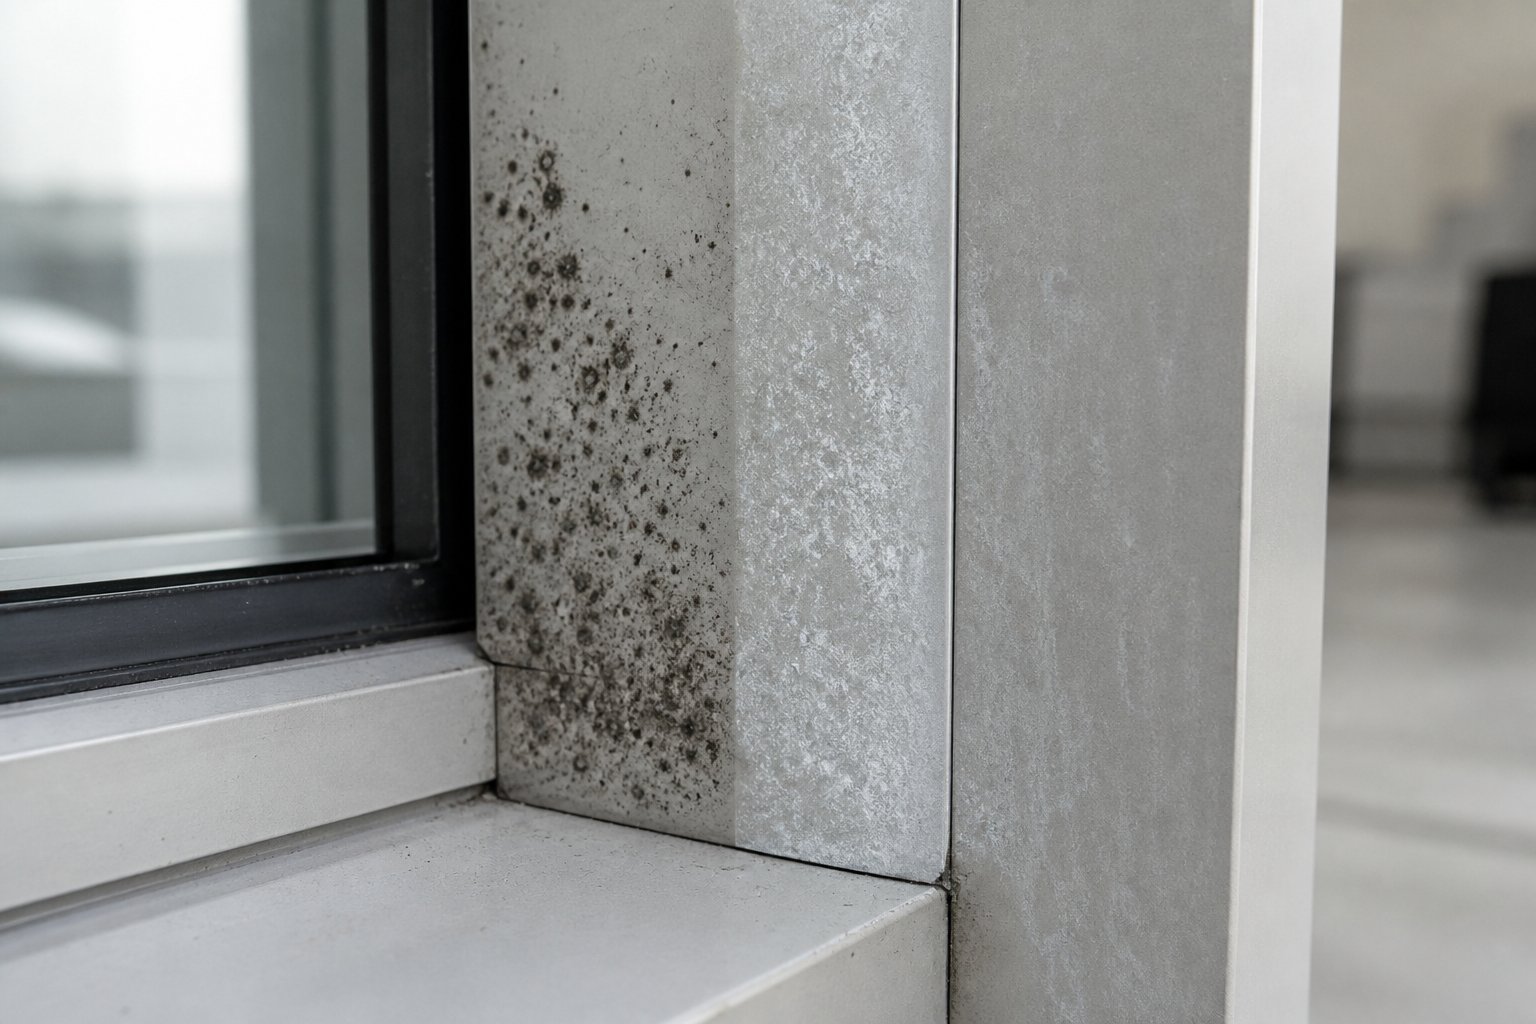
Identifying Mould vs Mildew vs Oxidation Staining
That dark patch on your aluminium frame could be one of three very different things — and reaching for the wrong cleaner before you identify the problem can leave you with a bigger mess than you started with. Black mould on windows, powdery mildew, and aluminium oxidation all look concerning, yet each calls for a distinct treatment. Mixing them up is one of the most common mistakes homeowners make.
Black Mould vs White or Grey Mildew on Frames
Black mould on windows typically appears as tight clusters of dark spots concentrated in frame corners, along rubber gasket joints, and inside drainage channels — anywhere moisture lingers longest. It has a slightly slimy or damp texture when fresh and often carries a musty, earthy smell that intensifies in poorly ventilated rooms. If you run a finger across it, the growth smears and leaves a dark streak on your skin.
Mildew on windows looks quite different. It tends to form as a powdery, grey-white coating spread across more exposed surfaces rather than hiding in joints. You might notice what resembles white mould on a window sill or along the flat face of a frame where dust settles. Mildew generally wipes away more easily than black mould and produces a milder, stale odour rather than the pungent dampness associated with heavier fungal growth. Both are biological, both thrive on moisture and organic debris — but mildew is typically a surface coloniser that responds quickly to a simple clean, while established mould on a window frame may need a more targeted approach.
Recognising Aluminium Oxidation Mistaken for Mould
Oxidation is the imposter in this lineup. When aluminium reacts with oxygen and moisture over time, it produces a chalky white residue or, on older uncoated frames, a darker grey discolouration that many homeowners mistake for mould. The critical difference? Oxidation is a chemical reaction with the metal itself, not biological growth. It won’t smear when you touch it, it carries no smell, and a damp cloth alone won’t shift it.
Applying mould treatments — particularly acidic cleaners — to oxidation can strip protective coatings and accelerate further corrosion. Equally, dismissing genuine black mould on windows as a cosmetic blemish means the underlying moisture problem goes unaddressed. A quick diagnostic test before you pick up any cleaning product saves time, money, and potentially your frame finish.
| Characteristic | Black Mould | Mildew | Aluminium Oxidation |
|---|---|---|---|
| Appearance | Dark black or green-black clustered spots | Powdery grey-white or light green patches | Chalky white residue or dull grey discolouration |
| Typical Location | Frame corners, seal joints, drainage channels | Flat exposed surfaces, window sills | Any exposed aluminium surface, especially uncoated areas |
| Smell | Strong musty, earthy odour | Mild stale smell | No odour |
| Wipe Test Result | Smears and leaves a dark residue on cloth | Wipes away as a dry powder | Does not transfer to cloth; remains on surface |
| Correct Treatment | Mould-specific cleaning (pH-neutral or mild antifungal solution) | Mild detergent wipe-down with thorough drying | Dedicated aluminium oxidation remover or professional refinishing |
Getting this identification step right determines everything that follows — the products you choose, the technique you use, and whether you risk damaging the frame’s finish in the process. With the problem correctly diagnosed, the next consideration is making sure you protect both yourself and the aluminium surface before any cleaning begins.
Safety Precautions Before You Start Cleaning
Mould removal sounds straightforward — spray, scrub, rinse. But when you’re working on aluminium frames, safety involves two layers most guides skip over. There’s the health risk from disturbing mould spores, and there’s the chemical risk from choosing products that react badly with aluminium or with each other. Is black mould around windows dangerous? It can be, particularly for people with asthma, allergies, or compromised immune systems. Even small patches release airborne spores the moment you touch them, and concentrated exposure in a poorly ventilated room can trigger respiratory irritation in otherwise healthy people.
Getting your protective gear and product choices right before you start means you won’t be scrambling mid-clean with mould particles already in the air.
Personal Protective Equipment for Mould Removal
Every mould cleaning session — even a quick wipe of a single frame corner — disturbs spores and sends them airborne. Proper protection isn’t overkill; it’s baseline common sense.
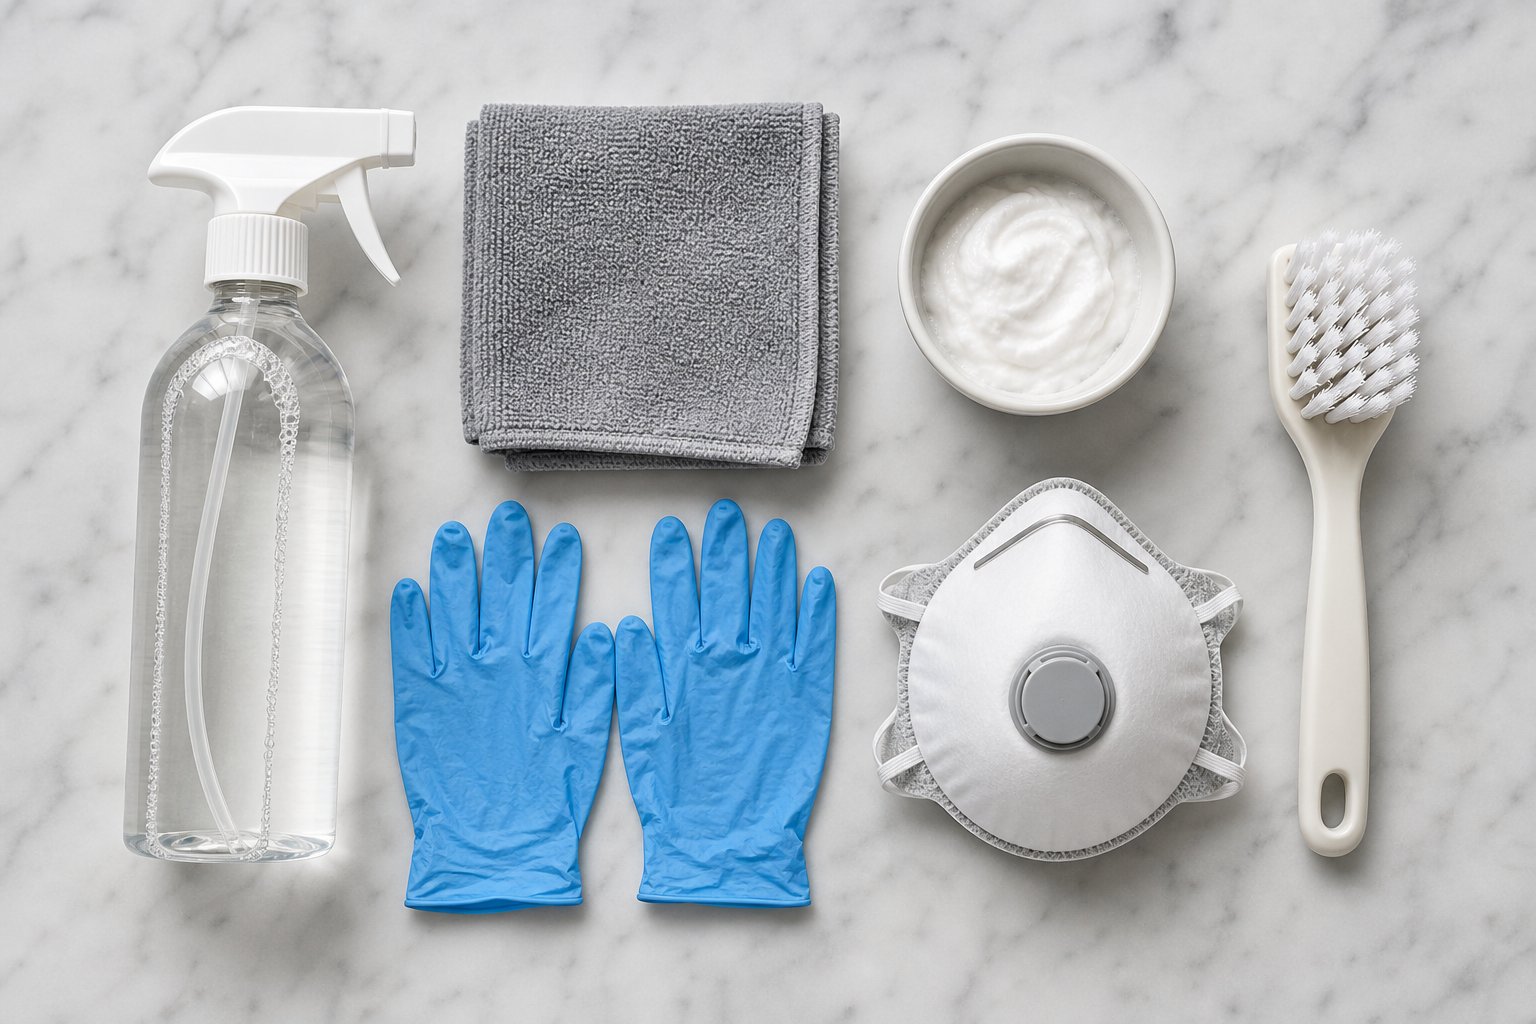
Wear a P2-rated respirator (the Australian equivalent of an N95 mask) to filter fine mould spores from inhaled air. Standard dust masks and cloth face coverings don’t provide adequate filtration for particles this small. Pair the respirator with safety glasses or sealed goggles to keep spores out of your eyes, and pull on nitrile or rubber gloves to prevent skin contact with both the mould and any cleaning solutions you’ll be using.
Ventilation matters, but it requires a considered approach. Open an adjacent window or door to create airflow that moves spores away from your breathing zone — ideally drawing air from behind you and out past the frame you’re cleaning. Avoid creating a cross-breeze that blows directly across the mouldy surface toward other rooms. Work from the top of the frame downward so dislodged spores and dirty runoff don’t contaminate areas you’ve already cleaned.
If you’re tackling multiple frames or dealing with heavy growth, consider laying a damp towel beneath the window to catch falling debris. Mould spores settle on soft furnishings and carpet easily, creating secondary contamination that’s harder to address later.
Chemical Combinations to Avoid on Aluminium
Here’s where cleaning aluminium frames diverges sharply from cleaning tile grout or a shower screen. Many common mould-killing products are actively harmful to aluminium finishes — and some combinations produce dangerous fumes regardless of what surface they’re applied to.
The Washington State Department of Health warns that mixing bleach with acids (including vinegar) produces chlorine gas, while combining bleach with ammonia-based cleaners releases toxic chloramine vapours. Both can cause serious respiratory injury even in small quantities. Since vinegar is a popular DIY mould remedy and bleach is the other go-to, the temptation to use both in the same session is real — and genuinely dangerous.
Beyond fume hazards, certain products damage aluminium itself. Frameworks Manufacturing advises never using caustic or acidic cleansers on aluminium finishes, regardless of dilution, as they can permanently damage both painted and anodised surfaces.
- Bleach + vinegar: Produces chlorine gas. Causes coughing, chest pain, breathing difficulties, and eye irritation. Never use sequentially on the same surface without thorough rinsing between applications.
- Bleach + ammonia-based cleaners: Releases chloramine vapours. Symptoms include nausea, shortness of breath, and potential pneumonia with prolonged exposure.
- Undiluted bleach on anodised aluminium: Strips the protective oxide layer, causing permanent discolouration and exposing raw metal to accelerated corrosion.
- Acidic cleaners (vinegar, citric acid, toilet cleaners) on raw aluminium: Causes pitting and etching of the metal surface that cannot be reversed without professional refinishing.
- Abrasive powders or steel wool on any aluminium finish: Scratches through powder coating or anodising, creating micro-damage where moisture and mould gain a foothold.
The safest starting point for how to clean black mould off windows with aluminium frames is a pH-neutral detergent or a diluted white vinegar solution (never combined with bleach). If you need something stronger, hydrogen peroxide at 3% concentration handles stubborn mould without attacking the metal. Keep contact time with any cleaning agent under one minute on the frame surface, rinse thoroughly, and never allow solutions to pool in frame joints where prolonged exposure can degrade seals and finishes.
Understanding how to remove black mould from windows safely is as much about protecting the frame as protecting yourself. With the right gear on and the wrong chemicals left under the sink, you’re ready to match your cleaning method to the severity of the mould you’re dealing with.
DIY Cleaning Methods Based on Mould Severity
Not every patch of mould on an aluminium frame needs the same level of intervention. A faint haze that appeared last week responds to a completely different treatment than the stubborn black growth that’s been building in your frame seals all winter. Reaching for the strongest cleaner straight away risks damaging the finish unnecessarily, while using a mild wipe-down on entrenched growth simply wastes your time.
The approach below sorts the problem into three tiers — light, established, and deep-set — so you can match the right method to the severity in front of you. Whichever tier applies, one rule is universal: every method ends with thorough drying. Mould can recolonise a damp surface within 24 to 48 hours, so leaving even a thin film of moisture behind undoes all your work.
Light Surface Mould — Mild Detergent Method
This is your starting point when you spot recent, superficial mould — small patches that have appeared in the last few weeks, covering only a limited area. The growth sits on the surface film of dust and moisture and hasn’t had time to establish itself deeply into gasket edges or drainage slots. A gentle clean with pH-neutral detergent is usually all it takes.
- Prepare your solution. Add a few drops of pH-neutral dish soap to a bucket of warm water. Avoid anything labelled “antibacterial” or “heavy-duty” — these often contain additives that can dull powder-coated finishes over time.
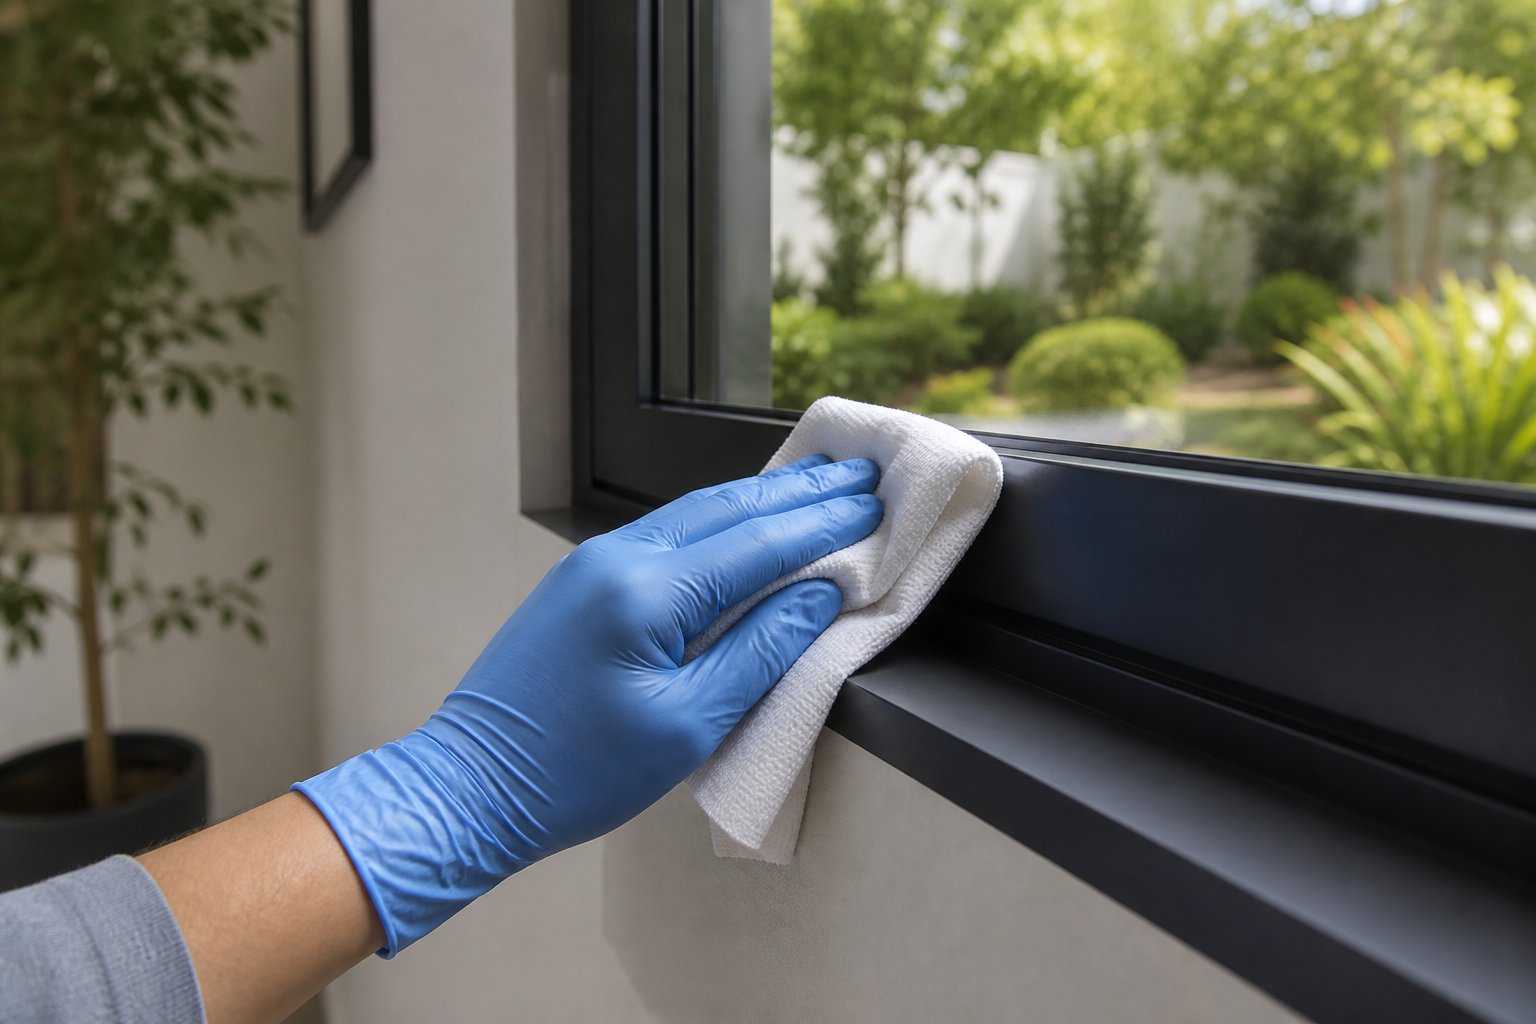
- Wipe the frame with a soft microfibre cloth. Dip the cloth in the soapy water, wring it out so it’s damp rather than dripping, and gently work over the mouldy area using small circular motions. Microfibre lifts spores and grime into the fabric rather than pushing them around the surface.
- Rinse the cloth frequently. Reintroducing dirty water spreads spores to clean sections. Swap to a fresh cloth or rinse thoroughly in a separate bucket of clean water between passes.
- Rinse the frame. Go over the cleaned area with a clean, damp cloth to remove all soap residue. Detergent left behind creates a sticky film that attracts new dust — and dust is the food source that invites mould back.
- Dry completely. Use a dry microfibre cloth to remove every trace of moisture from the frame, paying particular attention to the bottom rail where water naturally pools. If you can feel dampness, keep drying.
This mild method is often enough for how to clean mould from windows where the growth is recent and confined. It’s also the safest option for all aluminium finishes, since pH-neutral soap won’t react with powder coating, anodising, or raw metal.
Established Mould Growth — Targeted Treatment Method
Mould that has been sitting for several months or has spread across a larger area of the frame won’t budge with soap alone. The growth has had time to anchor into surface grime and may appear as dense clusters of dark spots across frame rails, sill tracks, and window sill edges. Cleaning window sills of mould at this stage calls for something with genuine antifungal action — and diluted white vinegar is the best balance between effectiveness and aluminium safety.
- Mix a 1:1 vinegar solution. Combine equal parts white vinegar and water in a spray bottle. This dilution is strong enough to kill the majority of common mould species while staying mild enough to protect most aluminium finishes. Avoid using undiluted vinegar, especially on anodised frames, as the higher acidity can discolour the surface.
- Spray the affected area generously. Coat all visible mould, ensuring the solution reaches into corners and along edges where growth tends to concentrate. Don’t let the solution run onto adjacent painted walls or timber reveals without wiping it up — vinegar can affect certain paint finishes.
- Let the solution sit for 10 to 15 minutes. This contact time allows the acetic acid to penetrate the mould structure and break it down. Resist the urge to scrub immediately; the vinegar needs time to do the heavy lifting.
- Scrub with a soft-bristle brush. Use a nylon-bristle brush or a non-scratch scrubbing pad to work the loosened mould off the frame. Keep the pressure gentle — you’re removing biological growth, not scouring a barbecue grill. Circular motions work well on flat surfaces; short back-and-forth strokes are better for grooves and channels.
- Tackle stubborn spots with a baking soda paste. If dark stains persist after scrubbing, mix baking soda with a small amount of water to form a thick paste. Apply it directly to the stubborn area, let it sit for five minutes, and scrub again. Baking soda provides very fine abrasion that lifts staining without scratching the frame finish — a far safer option than scouring pads or abrasive powders.
- Rinse thoroughly. Wipe down the entire treated area with a clean cloth dampened with plain water. Remove all vinegar and baking soda residue to prevent any long-term chemical interaction with the aluminium surface.
- Dry the frame completely. Go over every surface with a dry cloth. Check the bottom track and drainage slots for standing water and soak it up. If you’re working on a cold day and condensation is forming quickly, consider running a small fan or portable dehumidifier near the window for an hour after cleaning.
This method covers most situations where homeowners are searching for how to clean mold off windows that have developed noticeable, persistent growth. It’s effective, affordable, and — critically — it won’t wreck your frame finish the way bleach or harsh commercial products can.
Mould in Frame Joints and Rubber Seals
The trickiest mould to remove isn’t the growth you can see on flat frame surfaces — it’s the stuff hiding inside gasket grooves, drainage slots, and the junctions where frame sections meet. These tight spaces trap moisture, rarely get wiped during routine cleaning, and provide sheltered conditions where mould can thrive undisturbed. If you’ve been wondering how to get rid of mould on window seals specifically, this is the tier that addresses it.
- Clear debris from drainage channels first. Use a thin, blunt tool — a plastic spudger, a wooden skewer, or the back of a cotton bud — to gently remove any compacted dirt, paint flakes, or insect debris blocking the weep holes and drainage slots at the bottom of the frame. Blocked drainage keeps water sitting against seals, accelerating mould growth.
- Apply hydrogen peroxide (3% solution) to crevices. Pour the solution into a small spray bottle and direct it into the joints, gasket edges, and tight frame junctions where mould has taken hold. Hydrogen peroxide has antifungal properties that penetrate into tight spaces more effectively than vinegar, and at a 3% concentration it won’t damage aluminium or degrade rubber seals on contact.
- Let it sit for 10 to 15 minutes. Give the peroxide time to fizz through the mould structure. You’ll often see gentle bubbling as it reacts with organic material — that’s the solution doing its job.
- Scrub with a detail brush. An old toothbrush is ideal for this step. Work the bristles into gasket grooves, along seal edges, and around corner joints where mould hides. For very narrow slots, cut a microfibre cloth into thin strips and thread them through the gap, pulling back and forth to dislodge trapped growth.
- Rinse and inspect seals. Wipe the area clean with a damp cloth, then inspect the rubber gaskets closely. Look for cracking, shrinkage, peeling away from the frame, or permanent dark staining that doesn’t lift with cleaning. Degraded seals don’t just harbour mould — they compromise the window’s weather seal and thermal performance.
- Replace damaged seals if necessary. Rubber gaskets that have hardened, split, or pulled away from the frame channel can’t be restored by cleaning. Most aluminium window manufacturers supply replacement gasket strips, or a qualified window service technician can refit them. Continuing to clean mould from windows while leaving degraded seals in place is a losing battle — the damaged rubber creates exactly the kind of moisture trap that guarantees recurrence.
- Dry every crevice. Use a dry cloth wrapped around a thin tool to reach into tight spots and absorb all remaining moisture. In cold or humid conditions, leave the window slightly ajar for 15 to 20 minutes after cleaning to allow air movement to finish the drying process.
Across all three tiers, the pattern is the same: clean the mould, remove the residue, and then dry everything thoroughly. Where the methods differ is in the strength of the cleaning agent and the tools needed to reach the growth. Starting at the mildest tier and stepping up only if needed protects both your frame finish and your effort.
That said, the cleaning products safe for one type of aluminium finish may not suit another. Powder-coated, anodised, and raw aluminium each respond differently to even mild solutions — and getting that match wrong can leave visible damage that’s far harder to fix than the mould itself.
How to Remove Mould From Window Frames Without Damaging the Finish
Your aluminium window frames almost certainly have one of three surface finishes — and the mould cleaning method that’s perfectly safe for one can permanently wreck another. This is the detail most cleaning guides gloss over entirely. They’ll tell you to grab vinegar or baking soda, but they won’t ask what kind of aluminium you’re actually scrubbing. That omission can cost you a frame refinish that runs into hundreds of dollars.
Knowing how to clean window frames properly means identifying the finish first and choosing products accordingly. Here’s what to look for and what to avoid across each type.
Cleaning Powder-Coated Aluminium Frames
Powder coating is by far the most common finish on aluminium windows installed in Australian homes over the past two decades. It’s a baked-on polymer layer that gives the frame its colour — whether that’s a classic Monument grey, Surfmist white, or a bold custom shade. The coating is resilient under normal conditions, but it has specific vulnerabilities that matter when you’re trying to get rid of mould.
Strong alkaline solutions — including undiluted bicarbonate pastes left on too long — can soften and cloud the coating. Abrasive pads, steel wool, and scouring powders physically scratch through the polymer, exposing the raw aluminium underneath to moisture and accelerating future corrosion. Even some “multi-purpose” spray cleaners contain solvents aggressive enough to dull the finish on contact.
Stick to pH-neutral dish soap diluted in warm water, applied with a soft microfibre cloth. For established mould, the diluted vinegar method from the previous section works well on powder-coated surfaces — just keep contact time under 15 minutes and rinse thoroughly. Window Factory recommends a mild soap and warm water wash every three to six months as the baseline for maintaining powder-coated joinery, with more frequent cleaning in coastal or dusty environments.
If you spot a scratch or chip in the coating during your mould clean, address it promptly. Exposed aluminium beneath damaged powder coating is vulnerable to both oxidation and deeper mould accumulation in the raw surface texture.
Cleaning Anodised Aluminium Frames
Anodised frames have a thin, hard oxide layer created through an electrochemical process. This layer gives the aluminium enhanced corrosion resistance and a distinctive satin or metallic appearance — you’ll often see it on mid-century and architecturally specified windows. It’s tougher than powder coating against physical abrasion, but chemically, it’s more sensitive than many homeowners realise.
Acidic cleaners are the primary threat. Undiluted vinegar, citric acid-based products, and toilet or bathroom cleaners containing hydrochloric acid can strip or etch the anodised layer, leaving behind dull patches or permanent discolouration that no amount of polishing will fix. Bleach poses a similar risk — it attacks the oxide layer and can cause irreversible white spotting on darker anodised finishes.
For mould removal on anodised aluminium, mild soap and water is genuinely the safest option. If the mould doesn’t budge with detergent alone, a very dilute vinegar solution (one part vinegar to three parts water, rather than the standard 1:1) can be used cautiously — apply it, wait no more than five minutes, and rinse immediately. Hydrogen peroxide at 3% is the better escalation choice, as it breaks down mould without reacting with the anodised surface.
One situation catches homeowners out repeatedly: when the anodised layer has already been compromised — whether by age, previous harsh cleaning, or environmental damage — mould can appear to stain the surface permanently. Dark marks that survive a thorough clean aren’t necessarily residual mould; they may be discolouration within the damaged oxide layer itself. More aggressive cleaning at this point only makes things worse. This is a sign the finish needs professional restoration or re-anodising, not another round with a stronger chemical.
Cleaning Raw or Mill-Finish Aluminium
Raw aluminium — sometimes called mill finish — has no applied coating at all. It’s the natural state of the metal after extrusion, with a dull silver-grey appearance that may show faint tooling marks. You won’t find this on most modern Australian window installations, but it does turn up on older frames, industrial buildings, and some budget retrofit projects from the 1970s through 1990s.
Without a protective coating, raw aluminium forms its own thin natural oxide layer when exposed to air. This provides some corrosion resistance, but it’s far thinner and less durable than an engineered anodised finish. The upside for mould cleaning is that raw aluminium tolerates mild abrasives — a baking soda paste or a soft nylon brush — better than coated frames do. The downside is that acidic cleaners cause visible pitting and etching relatively quickly, and any disruption to the natural oxide layer invites accelerated oxidation.
Clean with a pH-neutral detergent or a baking soda paste, rinse thoroughly, and dry completely. After mould removal, consider applying a thin coat of automotive-grade carnauba wax or a dedicated aluminium sealant. This creates a sacrificial barrier that resists moisture adhesion and organic buildup — buying you significantly more time before mould returns. For older raw aluminium frames in coastal areas where salt exposure compounds the problem, this post-cleaning wax step shifts from optional to essential.
| Cleaning Product | Powder-Coated | Anodised | Raw / Mill-Finish |
|---|---|---|---|
| pH-neutral dish soap + water | ✔ Recommended — safe for routine and mould cleaning | ✔ Recommended — safest option for all mould severities | ✔ Recommended — gentle and effective for light mould |
| White vinegar (diluted 1:1) | ✔ Safe if contact time stays under 15 minutes; rinse promptly | ⚠ Use at weaker dilution (1:3) and limit contact to 5 minutes | ✘ Avoid — acidity causes pitting on unprotected aluminium |
| Hydrogen peroxide (3%) | ✔ Safe for crevices and stubborn mould; rinse after use | ✔ Preferred escalation option — no reaction with oxide layer | ✔ Safe in short applications; rinse and dry thoroughly |
| Baking soda paste | ⚠ Use sparingly — fine abrasion is low-risk but prolonged rubbing can dull gloss finishes | ⚠ Gentle use only — avoid aggressive scrubbing on satin finishes | ✔ Well tolerated — effective for lifting stains without chemical damage |
| Bleach (diluted or undiluted) | ✘ Avoid — can discolour and degrade the polymer coating | ✘ Avoid — strips the anodised oxide layer and causes white spotting | ✘ Avoid — accelerates corrosion on uncoated aluminium |
| Ammonia-based cleaners | ✘ Avoid — attacks the coating and can cause cloudiness | ✘ Avoid — damages the oxide layer over repeated use | ✘ Avoid — causes staining and surface degradation |
| Steel wool or abrasive pads | ✘ Never — scratches through powder coating permanently | ✘ Never — scores the anodised surface beyond repair | ✘ Avoid — leaves visible scratch marks and removes natural oxide |
| Acidic bathroom/toilet cleaners | ✘ Avoid — formulated for ceramics, far too harsh for coated aluminium | ✘ Avoid — rapidly etches and discolours the anodised finish | ✘ Avoid — causes pitting within minutes of contact |
If you’re unsure which finish your frames have, there’s a simple test. Powder-coated frames have a visible colour layer that feels slightly textured under a fingernail. Anodised aluminium retains a metallic look — you can see the metal’s character through the finish — and feels glassy-smooth. Raw aluminium has no obvious coating, appears dull silver-grey, and may show fine tooling lines or patches of chalky white oxidation.
Understanding how to get rid of mould on window frames without collateral damage to the finish is really about respecting these material differences. The mould itself is the same biological problem on all three surfaces — but the frame’s reaction to your cleaning products varies dramatically. Getting the match right means the frame looks better after cleaning, not worse.
Removing the mould, though, is only half the job. What you do in the minutes and days after cleaning determines how long that frame stays clean — and whether you’ll need to repeat the entire process next month or next year.
Protecting Your Frame Finish After Mould Removal
A freshly cleaned frame can look spotless and still be hours away from recolonisation if you skip what comes next. Mould spores are always present in indoor air — they only need moisture and a food source to start growing again. The window between cleaning and protection is where most homeowners lose ground, ending up treating black mould on window sills over and over in a frustrating cycle.
Two steps close that window: thorough drying and a protective treatment matched to your frame finish. Neither is complicated, but both need to happen before you walk away from the job.
Drying and Inspecting Frames After Mould Removal
Mould can re-establish on a damp aluminium surface within 24 to 48 hours. That means a frame you cleaned this morning can show fresh growth by tomorrow night if moisture remains. After you remove mould from a windowsill or frame, go over every surface with a dry microfibre cloth — not just the visible flat sections, but the bottom rail, drainage channels, and gasket edges where water hides.
While drying, inspect the rubber seals for cracking, shrinkage, or sections pulling away from the frame channel. Damaged seals trap moisture against the aluminium and create sheltered pockets where mould thrives undisturbed. Check that weep holes and drainage channels at the base of the frame are clear — blocked drainage keeps water pooling against seals and sill tracks, guaranteeing a quick return of the problem you just spent time solving.
If you’re working in cold or humid conditions where condensation reforms quickly, run a portable dehumidifier or a small fan near the window for an hour after cleaning. The goal is bone-dry surfaces before any protective product goes on.
Applying Protective Treatments to Aluminium Surfaces
Protection only works on a completely clean, dry surface. Applying wax or spray over residual mould — even traces invisible to the eye — traps the growth against the frame and can accelerate damage beneath the coating. Make sure you’ve genuinely finished the cleaning process before this step begins.
The right protective product depends on your frame’s finish and the specific component you’re treating. Each creates a barrier that reduces moisture adhesion, repels dust, or makes the surface inhospitable to biological growth — buying you months rather than weeks before you need to clean mould off window sills again.
- Powder-coated frames — automotive-grade carnauba or polymer wax: Creates a hydrophobic barrier that causes water to bead and roll off rather than forming the moisture film mould needs. Apply a thin coat with a soft cloth, buff to a light sheen, and reapply every 6 to 12 months (every 3 to 4 months in coastal or high-humidity areas).
- Anodised frames — silicone-free aluminium protectant: Look for products specifically labelled safe for anodised surfaces. These leave a thin, non-reactive film that resists dust adhesion without interfering with the oxide layer. Reapply every 6 months or after any deep clean.
- Raw or mill-finish aluminium — penetrating aluminium sealant or marine-grade wax: Uncoated metal benefits most from a sacrificial barrier. Marine-grade wax formulations designed for bare aluminium boat fittings work well on window frames too. Reapply every 3 to 6 months, or more frequently if the frame is exposed to salt air or persistent condensation.
- Rubber seals and hinges — silicone-based frame lubricant: Keeps gaskets supple, prevents cracking, and reduces the micro-gaps where moisture collects. Apply a thin film to all rubber seals and moving parts after cleaning. Reapply every 6 months or whenever seals feel dry or stiff.
- All finishes — anti-mould surface spray: Specialist anti-mould sprays deposit a biocidal film that inhibits spore germination on treated surfaces. Apply after waxing or sealing as a final layer. Most products remain effective for 3 to 6 months depending on humidity levels and how frequently the surface is wiped during routine cleaning.
Think of these treatments as extending the interval between deep cleans rather than eliminating the need for them entirely. A waxed, sealed frame in a well-ventilated room might stay mould-free for a full year. The same frame in a bathroom with poor extraction will still need attention — just far less often than an unprotected surface.
Protection buys time, but it doesn’t fix the underlying moisture source. For that, you need a prevention strategy that tackles condensation at its root — and a realistic maintenance schedule that keeps small problems from becoming large ones.

Prevention Strategies to Stop Mould Returning
Cleaning and protecting your frames handles what’s already there. But if the conditions that created the mould remain unchanged, you’ll be repeating the entire process every few months — and eventually, the cumulative wear from repeated cleaning starts to take its own toll on the finish. The real question isn’t just how to get rid of mould on windows. It’s how to make your frames an environment where mould struggles to establish itself in the first place.
That means tackling condensation at its source, building maintenance into your routine before problems become visible, and — in some cases — rethinking the frames themselves.
Managing Condensation on Aluminium Frames
Condensation is the single biggest cause of black mould on window sills in Australian homes, and aluminium’s thermal conductivity makes it worse than most frame materials. Reducing the moisture that settles on frame surfaces requires a combination of ventilation, humidity control, and sometimes mechanical intervention.
Does opening windows help with mould? Yes — but technique matters. Short bursts of cross-ventilation for five to ten minutes several times a day are far more effective than leaving a window cracked all night. A narrow opening in cold weather actually cools the frame surface further without flushing enough humid air out of the room, which can increase condensation rather than reduce it. Brief, deliberate ventilation exchanges the damp indoor air for drier outdoor air, then lets the room warm back up quickly.
Beyond window habits, target the moisture at its source. Run extractor fans during and for at least 20 minutes after cooking or showering — these two activities are responsible for the majority of excess indoor humidity. Avoid drying laundry indoors wherever possible; a single load of wet washing can release several litres of moisture into the air. In persistently damp rooms — bathrooms without windows, south-facing bedrooms, or basement-level living areas — a mechanical dehumidifier makes a measurable difference. Maintaining steady indoor heating also helps, since fluctuating temperatures cool frame surfaces rapidly and trigger condensation episodes that sporadic heating makes worse.
Trickle vents built into modern window frames provide continuous background ventilation without the security or weather exposure concerns of leaving windows open. If your existing frames lack trickle vents, aftermarket options can sometimes be retrofitted — though this depends on the frame profile and may require professional assessment.
Maintenance Schedules to Prevent Mould Recurrence
Consistent, low-effort maintenance catches mould before it becomes a deep-cleaning project. The schedule below is built around Australian seasonal patterns, with more frequent attention during the cooler, wetter months when condensation peaks in southern states and during the humid wet season across northern Queensland, the Top End, and coastal areas.
- Monthly — wipe down frames and sills. A quick pass with a damp microfibre cloth removes the dust, pollen, and organic film that mould feeds on. Dry the surface afterward. This single habit eliminates the food source before spores can colonise it.
- Quarterly — inspect seals and gaskets. Check rubber seals for cracking, shrinkage, or sections pulling away from the frame. Look for early signs of mould in gasket grooves and frame corners. Address any growth immediately with the mild detergent method rather than waiting for it to establish.
- Every six months — deep clean drainage channels. Clear weep holes and drainage slots of compacted dirt, insect debris, and any biological buildup. Blocked drainage traps water against seals and sill tracks, creating exactly the conditions mould needs. A wooden skewer or plastic spudger works well for this without scratching the aluminium.
- Annually — reapply protective treatments. Refresh wax, sealant, or anti-mould spray according to your frame finish type. In coastal or high-humidity environments, shift this to every six months. Lubricate hinges, locks, and sliding tracks with a silicone-based product at the same time.
Sticking to this calendar won’t guarantee you never see mould again — no schedule can override persistent condensation or a ventilation problem. But it dramatically reduces the severity and frequency of any recurrence, and it keeps your frame finish in the best possible condition year to year.
When Frame Upgrades Solve Recurring Mould
Sometimes the problem isn’t maintenance habits or ventilation — it’s the frames themselves. Older aluminium windows built without thermal breaks are essentially cold metal bridges between the outside air and your interior. No amount of wiping, spraying, or dehumidifying fully compensates for a frame that drops to near-outdoor temperatures every cold night. If you’ve addressed ventilation, kept up with cleaning, and still find yourself constantly figuring out how to get rid of mould around windows, the frame design is likely the root cause.
Modern thermally broken aluminium window systems insert an insulating barrier — typically a polyamide strip — between the inner and outer aluminium sections of the frame. This barrier dramatically reduces heat transfer, keeping the interior frame surface warmer and well above the dew point where condensation forms. The result is a frame that stays dry under the same indoor conditions that would leave an older single-profile frame dripping wet.
Improved gasket designs in current-generation frames also play a role. Better-engineered seals reduce the micro-gaps where moisture collects and mould hides, and integrated drainage systems move any incidental water away from seal faces rather than letting it pool. Combined with double or triple glazing, thermally broken aluminium frames effectively eliminate the condensation cycle that feeds mould growth — addressing the cause rather than managing the symptom.
For Australian homeowners exploring this upgrade path, MEICHEN’s aluminium window systems offer thermally broken frames with modern seal designs, custom sizing for residential and commercial projects, and performance specifications suited to Australian climate conditions. If your current frames are driving a recurring mould problem that cleaning alone can’t resolve, replacing them with a thermally efficient system is often more cost-effective over time than repeated remediation — and it solves the problem permanently rather than delaying it.
Prevention, though, has its limits. When mould keeps returning despite good ventilation, regular maintenance, and even modern frames, the issue may have moved beyond what surface-level strategies can address — pointing to deeper structural or building envelope problems that require professional investigation.
When Mould Signals a Bigger Problem Than Cleaning Can Fix
You’ve cleaned thoroughly, dried every surface, sealed the finish, upgraded your ventilation habits — and the mould is back within a week. At this point, the problem has outgrown anything a spray bottle and microfibre cloth can handle. Persistent black mould on window frames that returns rapidly after proper cleaning almost always points to an issue deeper than surface condensation: water ingress, failed flashing, cavity drainage failures, or systemic ventilation defects within the building envelope itself.
Recognising these warning signs early saves you from an exhausting cycle of remediation that never sticks — and from prolonged exposure to mould spores that can affect respiratory health over time.
Signs That Mould Indicates a Structural Issue
Surface condensation mould responds to cleaning and stays away for weeks or months when paired with decent moisture management. Structural moisture problems behave differently. The mould returns faster, spreads wider, and shows up in places that don’t match a simple condensation pattern.
If you’re seeing any of the following, stop cleaning and start investigating:
- Mould reappearing within days of a thorough clean — rapid recolonisation despite complete drying and protective treatment suggests a continuous moisture source beyond normal indoor humidity.
- Black mould in window sill tracks and on multiple frames simultaneously — isolated condensation tends to affect one or two problem windows. When every frame in a room or across an entire side of the house develops mould at once, the issue is likely systemic: inadequate mechanical ventilation, a missing vapour barrier, or failed wall cavity drainage.
- Visible water pooling in frame channels that isn’t condensation — water sitting in sill tracks or weeping from frame corners during rain indicates failed external seals, deteriorated flashing, or installation gaps allowing direct water ingress.
- Damp, discoloured, or bubbling walls adjacent to window frames — moisture staining or paint blistering on plasterboard around the window reveal points to water travelling through the wall cavity. Professional mould surveys frequently uncover extensive hidden damage behind walls that appeared from the outside as nothing more than a small patch of mould on a window frame.
- Mould growth behind window reveals or architraves — if pulling back trim reveals black mould on the rough opening or framing timber behind the window, moisture is entering the wall assembly itself. This is no longer a window surface problem.
- Musty odour persisting after cleaning — a lingering damp smell even when visible mould has been removed suggests concealed growth within the wall cavity or beneath the window installation.
These patterns distinguish a building performance failure from the everyday condensation that every aluminium frame experiences to some degree. Treating black mould on window sills caused by structural water ingress with surface cleaning is like mopping a floor while the tap is still running — the effort is real, but the outcome is temporary.
Professional Assessment and Long-Term Solutions
Knowing who to call depends on what you’re seeing. A building surveyor is the right starting point when you suspect water ingress, failed flashing, or cavity drainage issues — they can use moisture meters and thermal imaging to trace water pathways hidden inside walls. A mould remediation specialist handles situations where contamination has spread beyond accessible surfaces into wall cavities, insulation, or ceiling spaces, ensuring safe removal with proper containment. And a qualified window installer becomes the priority when the frames themselves are the weak link — degraded seals, missing thermal breaks, structural corrosion, or installation defects that no amount of cleaning or sealing can overcome.
For homeowners still searching for how to get rid of black mould around windows that keeps returning, the honest answer is often that the frames have reached the end of their effective service life. Older aluminium windows without thermal breaks create unavoidable condensation points. Frames with corroded profiles or hardened, shrunken gaskets can’t maintain weather seals regardless of how often you replace the rubber. In these cases, proactive replacement is a lower-cost strategy over time than repeated remediation that never resolves the underlying cause.
If your assessment confirms that moldy window frames stem from outdated frame technology rather than a broader building defect, the upgrade path is straightforward. Modern thermally broken aluminium systems eliminate the cold-surface condensation cycle, feature engineered gaskets that resist moisture trapping, and integrate effective drainage — directly addressing every mechanism that causes black mould in a window frame to keep recurring. MEICHEN’s aluminium window range provides Australian homeowners and project teams with custom-sized, thermally efficient systems designed for local climate conditions, offering a practical next step for anyone who’s moved past cleaning into replacement planning.
Mould on an aluminium frame is rarely the disaster it first appears — most cases respond well to the right cleaning method, proper drying, and sensible moisture management. But when the signs point to something deeper, acting on that information promptly protects both your home and your health far more effectively than another round with the spray bottle ever will.
Frequently Asked Questions About Cleaning Mould From Aluminium Window Frames
1. Can mould actually grow on aluminium window frames?
Mould cannot penetrate or feed on aluminium because the metal is non-porous. However, it readily colonises the thin film of condensation and organic debris — dust, pollen, skin cells, and cooking grease — that accumulates on frame surfaces. Aluminium’s high thermal conductivity creates cold spots through thermal bridging, causing warm indoor air to condense directly on the frame. This moisture layer provides the ideal conditions for mould spores to germinate and spread, making aluminium frames particularly prone to surface mould even though the metal itself is not the food source.
2. What is the safest cleaning solution for mould on aluminium window frames?
The safest starting point is a pH-neutral dish soap diluted in warm water, applied with a soft microfibre cloth. This works well for light, recent mould on all aluminium finishes — powder-coated, anodised, and raw. For more established growth, a 1:1 white vinegar and water solution is effective on powder-coated frames, though anodised surfaces need a weaker 1:3 dilution with shorter contact time. Hydrogen peroxide at 3% concentration is the safest escalation option across all finish types, particularly for mould in frame joints and rubber seals. Avoid bleach, ammonia-based cleaners, and acidic bathroom products, as these can permanently damage aluminium finishes.
3. How do I tell the difference between mould and oxidation on aluminium frames?
A simple wipe test reveals the difference. Mould smears when you run a finger or damp cloth across it, leaving a dark residue, and typically carries a musty odour. Aluminium oxidation appears as a chalky white residue or dull grey discolouration that does not transfer to a cloth, has no smell, and remains firmly on the surface. Misidentifying oxidation as mould and applying acidic mould treatments can strip protective coatings and accelerate corrosion. If the mark does not smear and has no odour, treat it as oxidation and use a dedicated aluminium oxidation remover instead.
4. Why does mould keep coming back on my aluminium windows after cleaning?
Mould returns because the underlying condensation cycle has not been addressed. Aluminium frames without thermal breaks conduct heat rapidly, causing interior surfaces to drop below dew point and attract moisture from warm indoor air. Without reducing this moisture, freshly cleaned frames can be recolonised within 24 to 48 hours. Effective long-term control combines improved ventilation — short bursts of cross-ventilation, extractor fans in wet rooms, and avoiding drying laundry indoors — with protective surface treatments and regular maintenance. If mould returns within days despite these measures, the frames may lack thermal breaks, or there may be a deeper structural moisture issue requiring professional assessment.
5. When should I replace mouldy aluminium window frames instead of cleaning them?
Consider replacement when mould reappears within days of thorough cleaning, appears on multiple frames simultaneously, or is accompanied by water pooling in frame channels, damp walls around reveals, or a persistent musty smell after remediation. These signs suggest water ingress, failed flashing, or frames that lack thermal breaks — issues cleaning cannot resolve. Modern thermally broken aluminium window systems, such as those offered by MEICHEN (meichenwindows.com.au/aluminium-windows/), feature insulating barriers between inner and outer frame sections, engineered gaskets, and integrated drainage that directly eliminate the condensation cycle driving recurring mould. Over time, replacement often costs less than repeated remediation on outdated frames.
More Window & Door Guides