Why Screw Holes in Aluminium Window Frames Need Proper Repair
A couple of leftover screw holes in your aluminium window frame might seem harmless. Maybe you pulled off a security screen that came with the house, shifted a blind bracket to a better position, or upgraded old lock hardware. Whatever the reason, those small openings deserve attention before they invite bigger headaches.
Common Reasons Screw Holes Appear in Window Frames
Most homeowners end up needing to fill screw holes in aluminium window frame sections after one of these situations:
- Security screen or screen door removal, leaving behind exposed mounting holes — a frequent scenario when figuring out how to cover drill holes on screen door frame areas
- Blind or curtain bracket relocation after a redesign or new window furnishings
- Latch or lock repositioning during a hardware upgrade
- Misdrilled pilot holes from DIY projects or previous tradespeople
- Old roller shutter or awning fittings that are no longer in use
If you need to repair a hole in a screen window frame or deal with leftover fixings from any of these jobs, the repair approach stays largely the same.
Why Unfilled Holes Cause Bigger Problems Over Time
Bare aluminium exposed inside an open screw hole reacts differently to the protected surface around it. Moisture finds its way in, pooling inside the frame’s hollow sections and accelerating corrosion from the inside out. In coastal Australian areas — think anywhere from the Gold Coast down to the Mornington Peninsula — salt-laden air makes this process significantly faster.
Beyond corrosion, unfilled holes compromise weatherproofing. Water ingress around window frames is a leading cause of wall damage in brick veneer and weatherboard homes. There is also a thermal performance cost: every unsealed penetration in the frame creates a tiny thermal bridge, undermining the energy efficiency your double glazing or thermally broken frame was designed to deliver.
This guide walks through exactly how to assess, prepare, fill, and finish screw holes so the repair lasts for years rather than popping out after a single summer. The right approach depends on hole size, location, and whether you need a cosmetic touch-up or a fully weatherproof seal.
Assessing Hole Size and Choosing the Right Repair Approach
Grabbing a tube of filler and packing it into every hole sounds straightforward, but the size of the opening and where it sits on the frame changes the game entirely. A 3mm screw hole on an interior track demands a different product and technique than a 10mm bracket hole on a weather-exposed exterior mullion. Getting this assessment right upfront saves you from redoing the job six months later.
Hole Size Categories and What They Mean for Repair
When repairing aluminium window frames, hole diameter is the first thing to measure. It determines which filler products will bond reliably and how much finishing work you will need afterward.
| Hole Size | Typical Cause | Recommended Method | Difficulty Level |
|---|---|---|---|
| Small (2–4mm) | Standard screw holes from locks, latches, or screen fixings | Two-part epoxy filler or metal-loaded epoxy putty | Easy — single fill, minimal sanding |
| Medium (5–8mm) | Bracket mounting holes, relocated hinges, or security screen bolts | Two-part epoxy built up in layers, or polyester body filler | Moderate — may need layered application |
| Large (9mm+ or elongated) | Damaged anchor points, over-drilled holes, or stripped-out fixings | Epoxy putty packed with aluminium mesh backing, or riveted patch plate | Advanced — structural consideration required |
Small holes are the most common scenario for anyone learning how to fill holes in aluminium. A single application of quality epoxy, sanded flush and touched up with paint, is usually all it takes. Medium holes need a bit more patience — filling in two thin layers prevents shrinkage and cracking during cure. Large or elongated damage may call for a backing material or a professional assessment, particularly if the frame’s structural profile has been compromised.
Cosmetic vs Weatherproof vs Structural Repair Goals
Your end goal shapes the product choice just as much as the hole size does. A purely cosmetic fill on an interior-facing frame — say, old blind bracket holes on a bedroom track — only needs to look tidy. A colour-matched filler sanded smooth and painted will do the job without any weather resistance requirements.
Exterior-facing repairs are a different story. Holes exposed to rain, UV radiation, and temperature swings between a 5°C winter morning and a 42°C summer afternoon need a filler that stays flexible enough to handle aluminium’s thermal expansion. Rigid products that cannot tolerate this movement will crack at the bond line within a season or two. For anyone working out how to fix holes in screen windows or external frames, choosing a filler rated for outdoor use and UV stability is non-negotiable.
Structural repairs — where the hole has weakened the frame profile or sits at a stress point like a hinge mounting area — go beyond simple filling. These situations may require an epoxy reinforced with aluminium mesh or a riveted patch to restore load-bearing capacity.
Identifying which category your repair falls into keeps you from under-engineering an exterior seal or over-complicating a simple interior touch-up. The materials and prep work required for each scenario differ considerably — and that is where the next step begins.
Essential Tools and Materials for the Job
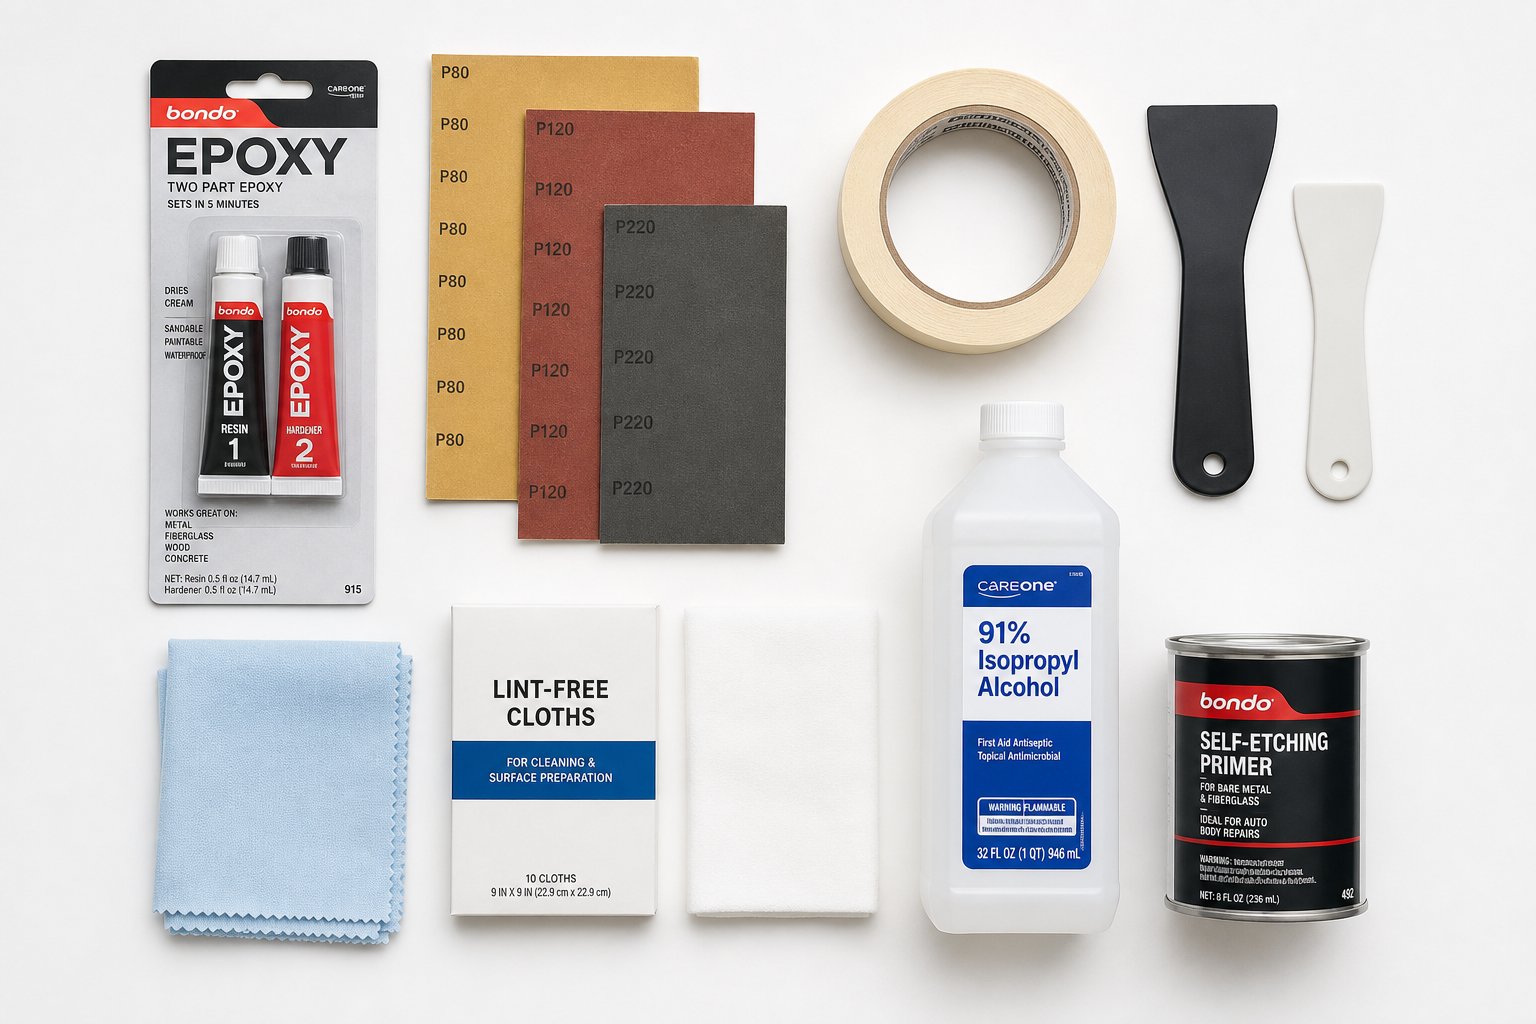
Having the right products laid out before you start means the repair flows quickly and each hole gets treated while prep surfaces are still fresh. The following checklist covers everything needed to fill screw holes in aluminium window frame sections — quantities are based on a typical job of four to eight holes.
Filler Products Suitable for Aluminium Frames
Not every filler bonds well to aluminium. Products designed for timber or plasterboard lack the adhesion chemistry needed for metal substrates. Stick with these proven options:
- Two-part epoxy filler (one 25–50mL cartridge or tube) — the go-to for weatherproof, permanent repairs on exterior frames. Mixes to a paste consistency and cures rock-hard.
- Metal-filled epoxy putty (one 112g stick) — an aluminium-reinforced two-part putty you knead by hand and press directly into holes. Waterproof once cured, sandable, and paintable. Ideal for holes up to 8mm.
- Polyester body filler (one small tin, approximately 250g) — a budget-friendly option for interior or sheltered areas. Sets fast but is less flexible than epoxy, so reserve it for frames not exposed to major temperature swings.
You may come across suggestions to use products like JB Plastic Weld, Flex Seal Clear, or butyl caulk. Plastic-bonding epoxies can work on composite trims but are not formulated for bare aluminium adhesion. Flexible sealants and spray coatings fill a gap visually, yet they lack the hardness needed to sand flush or accept paint for an invisible finish. They are better suited as temporary seals in hidden areas rather than permanent cosmetic repairs.
Surface Prep and Application Tools Checklist
Surface preparation accounts for most of the repair’s long-term success. Aluminium forms a thin oxide layer almost instantly when exposed — within as little as 15 minutes of being abraded — so having prep materials within arm’s reach keeps your workflow tight.
Surface prep materials:
- Isopropyl alcohol (IPA), 99% concentration (100mL is plenty) — for degreasing
- Lint-free cloths or paper towel (3–4 sheets)
- Fine-grit sandpaper, 220-grit and 400-grit (one quarter-sheet of each)
- Aluminium oxide abrasive pad or Scotch-Brite equivalent (one pad)
- General-purpose degreaser spray — for removing heavy grime before IPA wipe
Application tools:
- Small plastic spreaders or putty knives (2–3 disposable blades)
- Masking tape, 18mm width (one roll) — protects the frame finish around each hole
- Disposable mixing surface — a scrap of laminate, tile offcut, or purpose-made mixing pad
- Toothpick or fine skewer — for pressing filler into small 2–3mm holes
Finishing supplies:
- Etch primer or self-etching aerosol primer (one small can) — essential on bare aluminium before topcoat
- Colour-matched touch-up paint (one 15–50mL bottle or pen, matched to your frame’s powder-coat colour)
- Clear exterior sealant (a small tube) — for a final weatherproof bead over repairs on exposed frames
A note on products to avoid: Naval jelly and muriatic acid are popular rust removers for steel, but they are highly damaging to anodised aluminium. These acidic solutions attack the protective oxide layer and etch into the base metal, causing permanent discolouration and pitting. Alkaline-based heavy-duty cleaners carry the same risk. For aluminium frames, stick with pH-neutral degreasers and isopropyl alcohol — they clean effectively without compromising the surrounding finish.
With materials sorted and quantities matched to the job size, the next variable that determines whether filler holds or fails is how you prepare the aluminium surface itself — a step with its own set of rules unique to this metal.
Preparing the Aluminium Surface for a Lasting Bond
Filler that pops out after a few months almost always traces back to what happened — or did not happen — before it was applied. Aluminium is a uniquely demanding substrate. Unlike timber or steel, it forms a microscopically thin oxide layer within seconds of being exposed to air. This oxide skin is chemically stable and slippery, meaning adhesives and fillers struggle to grip it unless you actively disrupt it immediately before application. Research into aluminium adhesive performance confirms that proper surface preparation can increase bond shear strength by roughly 26.7% through improved mechanical interlocking alone.
The practical takeaway: you cannot skip or rush prep. Every step below serves a specific purpose in giving filler the best chance of a permanent hold.
Removing Old Sealant and Residue From the Hole
Screw holes left behind after removing hardware often carry traces of old silicone, adhesive foam, or construction sealant pressed into the threads. This residue acts as a release agent — filler bonds to the residue rather than the aluminium, and the whole plug lifts out under thermal stress.
For silicone residue, a dedicated silicone remover gel (available at most hardware stores) softens cured silicone so it peels away cleanly. Apply the gel, let it dwell for the time stated on the label — typically 15 to 30 minutes — then scrape out softened material with a plastic pick or the tip of a small flathead screwdriver.
Polyurethane adhesives like Gorilla Glue bond tenaciously to aluminium profiles. If you need to remove gorilla glue residue or similar expanding adhesive from inside a hole, carefully pare away raised material with a sharp blade, then soften remaining traces with isopropyl alcohol on a cotton bud. Acetone works faster on polyurethane but can dull powder-coat finishes, so keep it contained within the hole itself.
Avoid the temptation to reach for aggressive chemical strippers. A naval jelly rust remover or phosphoric acid product will dissolve ferrous corrosion on steel, but on aluminium it attacks the base metal and surrounding anodised finish, leaving you with a worse problem than the original hole.
Keying the Surface for Maximum Filler Adhesion
Once old residue is gone, the goal shifts to creating a surface profile that filler can mechanically lock into. Here is the full sequential process from clean-out to ready-to-fill:
- Degrease the hole and surrounding area — Dampen a lint-free cloth with 99% isopropyl alcohol and wipe the inside of the hole and approximately 10mm around its perimeter. This removes finger oils, atmospheric grime, and any chemical residue from the previous step.
- Abrade the inside of the hole — Roll a small piece of 220-grit sandpaper into a tight cylinder and twist it inside the hole two or three times. For holes too small to reach, wrap sandpaper around a toothpick. This disrupts the reformed oxide layer and creates micro-scratches for mechanical interlocking.
- Key the surrounding frame surface — Using a Scotch-Brite pad or aluminium oxide abrasive, lightly scuff a 5–10mm halo around the hole. Keep pressure light — you are creating a key, not grinding through the powder coat. This matters because filler that bridges slightly beyond the hole edge gains more surface grip.
- Wipe away dust — Use a fresh alcohol-dampened cloth to remove all sanding dust from inside the hole and the keyed area. Any trapped particles become weak points in the bond.
- Ensure the surface is completely dry — Allow the alcohol to flash off fully, typically 60 to 90 seconds in warm conditions. If you are working early morning or in a humid coastal environment, extend this to two or three minutes. Trapped moisture beneath filler causes adhesion failure and can generate white corrosion deposits over time.
Timing matters here. Aluminium’s oxide layer begins reforming immediately after abrasion, so aim to apply your filler within 15 minutes of completing these steps. If you get interrupted and the surface sits exposed for longer, a quick re-wipe with IPA and a light re-scuff restores the window of adhesion.
The difference between filler that holds permanently and filler that cracks loose after one hot summer often comes down to these five steps. With the surface properly keyed and clean, the next decision is which filling method and technique suits your specific repair priority — speed, durability, or an invisible finish.
Filling Methods Compared by Outcome Priority
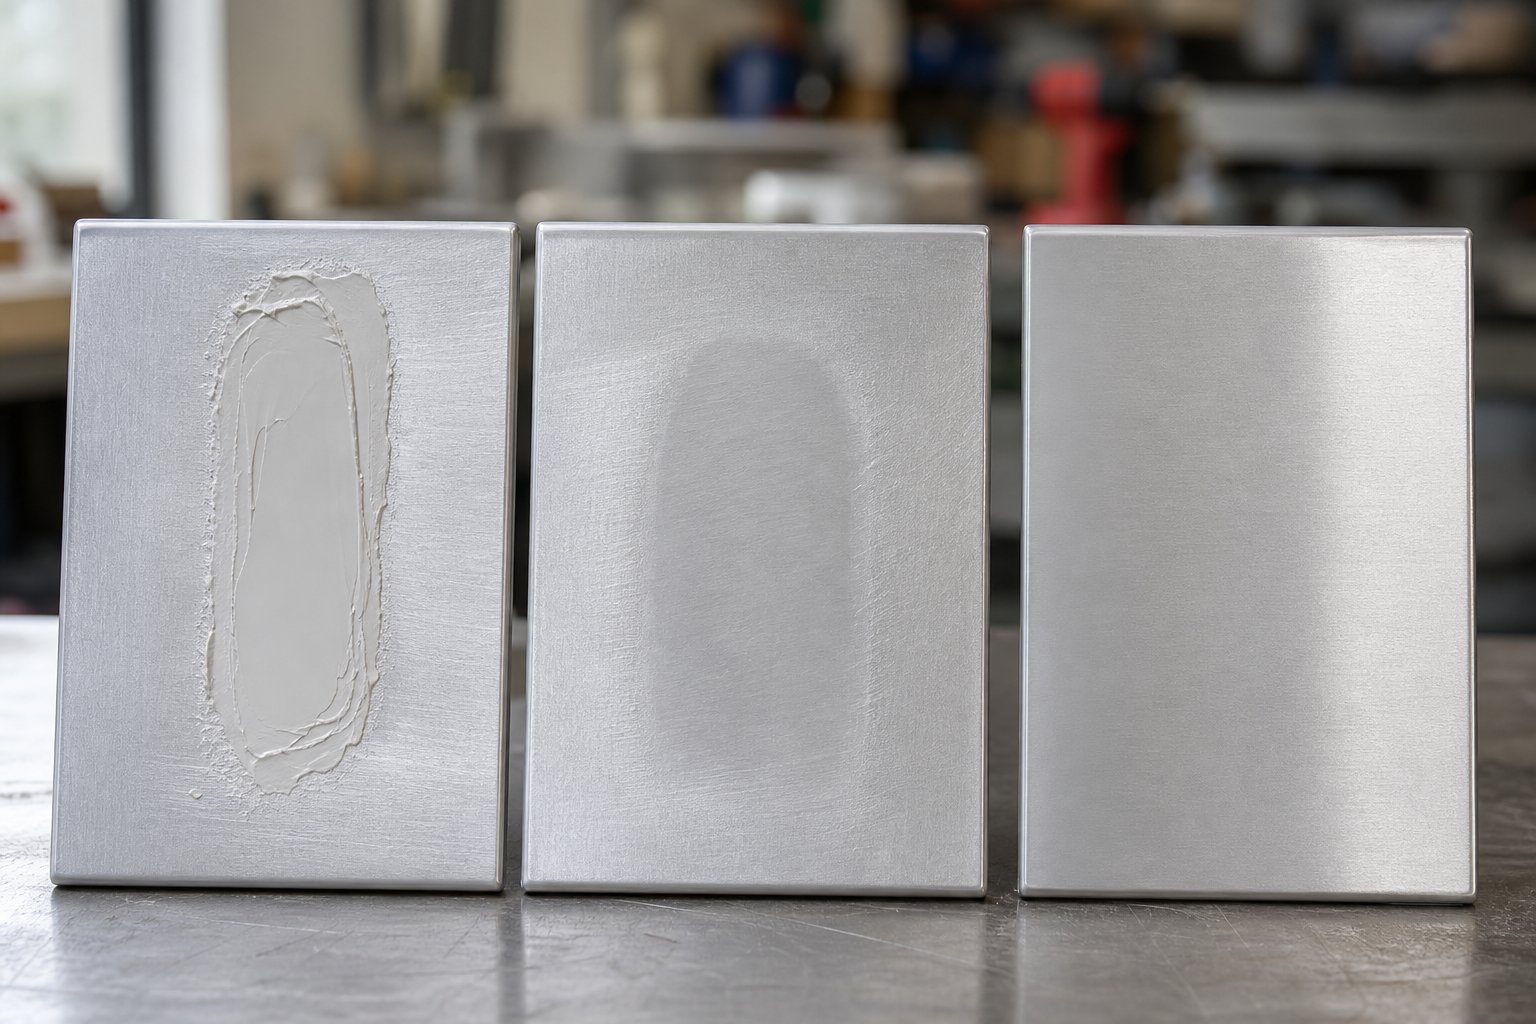
Four people can look at the same screw hole and want four different things from the repair. One wants it done for the lowest cost, another needs it to survive a decade of coastal weather, someone else wants zero visible evidence, and the last person just wants the gap sealed before it rains tonight. Each priority points to a different product and technique — and no single filler wins on every front.
Comparing Fillers by Durability and Finish Quality
Cheapest fix — polyester body filler: The same product used for automotive body repairs works on aluminium frames at a fraction of the cost of specialist metal epoxies. Mix a small amount with cream hardener, press it into the hole with a plastic spreader, and sand flush after 20 to 30 minutes. It cures fast and sands easily. The limitation? Polyester is relatively rigid and brittle once cured. On exterior frames that cycle through heat and cold, the bond line can crack within a year or two. It also absorbs moisture over time unless sealed with primer and paint, making it better suited to sheltered or interior applications. For anyone familiar with how to patch a hole in aluminum siding using automotive filler, the technique transfers directly to window frames — just keep in mind the UV and flex limitations.
Most durable fix — two-part metal-loaded epoxy: Aluminium-filled epoxy combines high adhesion strength with water resistance and moderate flexibility. You mix the two components (resin and hardener) at the ratio specified on the product label, apply with a spreader or by kneading and pressing putty-style products directly into the hole, and allow a full 24-hour cure. The aluminium particles within the mix improve thermal compatibility with the frame and add structural toughness. These products resist moisture, UV exposure, and vibration far better than polyester alternatives. They can even be drilled and tapped if you ever need to re-fix hardware to the same location. The trade-off is a longer working window — once mixed, you typically have 5 to 10 minutes before the epoxy starts to set, so you need holes prepped and ready to go.
Most invisible fix — colour-matched aluminium putty with professional finishing: Achieving a truly invisible repair requires both the right product and the right finishing technique. Metal-coloured epoxy putty gets you close to the base aluminium tone, but the real magic happens in the finishing: sanding through 220, 320, then 400-grit progressions, priming with a self-etching primer, and applying colour-matched paint that blends with the existing powder coat. Some touch-up paint suppliers in Australia can match your frame colour from a code stamped on the frame hardware or by chip sample. The result is seamless, but the effort and drying time between coats extends the job to two or three days. This approach is worth it for prominent frames at eye level — front-of-house sliding doors or picture windows where any blemish stands out.
Quickest fix — single-component sealant or caulk: When holes sit behind a fly screen, inside a frame track, or anywhere they will never be seen, a quality exterior-grade polyurethane sealant squeezed directly into the hole does the job in seconds. No mixing, no sanding, no painting. It stays flexible permanently, handles thermal movement well, and provides a watertight seal. The downside is obvious — sealant cannot be sanded flat or painted to match, so it only works where appearance does not matter. It also remains soft, which means it can pick up dirt over time and is not suitable if you plan to re-screw into the same hole later.
| Method | Cost | Durability | Finish Quality | Weather Resistance | Best For |
|---|---|---|---|---|---|
| Polyester body filler | Low (~$15–$25 per tin) | Moderate (2–5 years exterior, longer interior) | Good — sands smooth, accepts paint | Fair — needs sealing | Budget interior repairs, sheltered areas |
| Two-part metal-loaded epoxy | Medium (~$20–$45 per kit) | High (10+ years with proper prep) | Good — sands well, slightly coarser grain | Excellent — waterproof | Exterior frames, coastal homes, permanent repairs |
| Colour-matched putty + professional finish | Medium-High (~$40–$70 all materials) | High (matches epoxy base durability) | Excellent — invisible when painted | Excellent (with primer and topcoat) | Visible frames, front-of-house, resale prep |
| Polyurethane sealant | Low (~$10–$18 per tube) | High flexibility (10+ years) | Poor — cannot sand or paint to match | Excellent — permanently flexible seal | Hidden areas, behind screens, frame tracks |
The method used to patch holes in aluminum siding follows similar logic to window frame work — match the product to the exposure conditions and the visual standard required. A shed wall behind garden beds can tolerate a quick polyester fill; a front elevation at street level justifies the time investment of a colour-matched epoxy approach.
Why Welding Is Impractical for Most Frame Repairs
Welding aluminium is a legitimate fabrication technique — in a workshop, on an unglazed frame, with proper fixturing. On an installed residential window, it creates more problems than it solves. Aluminium window frames are typically 6063-T5 extrusions, a heat-treatable alloy that loses strength in the heat-affected zone when welded without post-weld heat treatment. The intense localised heat from TIG or MIG welding also destroys anodised and powder-coat finishes across a wide area surrounding the weld, creates a serious risk of cracking sealed double-glazed units from thermal shock, melts rubber gaskets and weather seals embedded in the frame profile, and warps thin-walled extrusions — particularly the slender mullion sections common in residential windows.
Even if a welder could access the hole cleanly (often impossible with the frame installed in a wall), the cosmetic damage to surrounding finishes and the cost of a qualified aluminium TIG welder making a site visit far exceeds what a $30 epoxy kit achieves in ten minutes. Fiberglass repair techniques used on boats or caravan shells sometimes come up in online discussions, but these are designed for composite substrates and lack the adhesion chemistry needed for bare aluminium extrusions.
For the vast majority of residential screw hole repairs, a cold-applied filler — chosen from the table above based on your priority — delivers a better outcome than any heat-based method. The real variable that separates a lasting repair from one that pops loose is the application technique itself.
Step-by-Step Repair Process for Residential Window Frames
With the right filler chosen and your surface prepped, the actual application is where technique makes or breaks the result. Small screw holes between 2mm and 5mm are by far the most common repair on Australian homes — leftover from screen fixings, blind brackets, or lock hardware. Two-part epoxy filler is the product that balances durability, finish quality, and weather resistance for these jobs. Here is exactly how to apply it for a repair that stays put.
Applying Filler to Small Screw Holes Step by Step
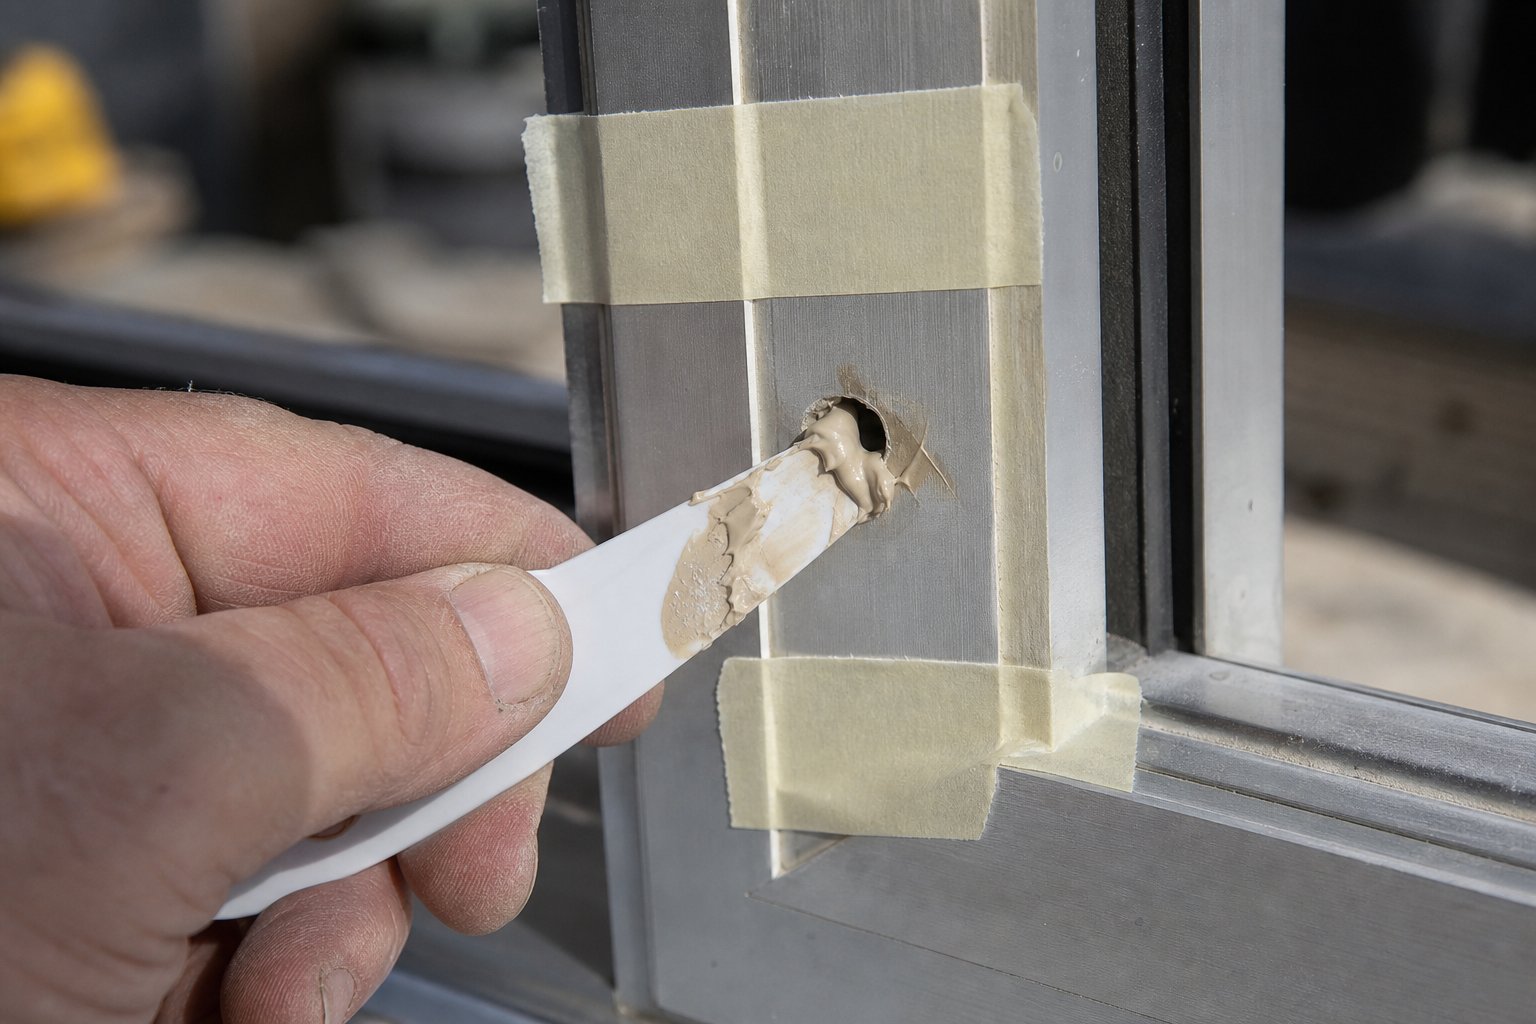
Before you mix anything, mask the area. Place a small square of 18mm masking tape over the hole, then pierce through the tape at the hole centre with a toothpick. This creates a clean boundary — any excess filler stays on the tape rather than smearing across the powder-coat finish. For frames with a textured or satin surface, this step saves significant clean-up effort.
- Mix the epoxy components — Dispense equal parts resin and hardener onto your mixing surface (unless the product specifies a different ratio — always check the label). Blend thoroughly for 30 to 60 seconds using a plastic spreader until the colour is completely uniform with no streaking. Incomplete mixing leaves soft spots that never fully cure.
- Load the hole from the back — For holes that pass through the frame wall, press filler firmly from the visible side using a toothpick or the corner of a small spreader. Push the material toward the back of the hole first to eliminate air pockets. Trapped air creates voids that weaken the plug and allow moisture in.
- Overfill slightly proud of the surface — Build the filler approximately 0.5mm above the surrounding frame face. Epoxy shrinks marginally during cure, and starting slightly proud ensures you have enough material to sand perfectly flush without dipping below the surface.
- Work in thin layers for deeper holes — If the frame wall is thicker than 3mm, apply filler in two passes rather than packing the hole in one go. Thick single fills cure unevenly, generating internal stress that can cause hairline cracks. Let the first layer firm up (around 30 to 45 minutes for most epoxies) before adding the second.
- Shape before full cure — Most two-part epoxies reach a firm but slightly pliable stage around 20 to 30 minutes after mixing. At this point, you can trim away gross excess with a sharp blade and smooth the surface with a damp fingertip. This reduces sanding time significantly and minimises the risk of scratching surrounding paintwork.
- Allow complete cure — Resist the urge to sand early. Full chemical crosslinking takes 12 to 24 hours at typical Australian room temperatures (18–25°C). Sanding before the epoxy is fully hard tears fibres from the surface rather than cutting cleanly, producing a rough, pitted finish instead of a smooth one.
Sanding and Finishing for an Invisible Repair
Once the filler is rock-hard, finishing transforms a visible plug into something undetectable under paint.
- Sand with 220-grit first — Wrap a small piece around your fingertip or a sanding block and work the proud filler down until it sits flush with the frame. Use light, even strokes and check progress frequently by running your finger across the repair. You should feel no ridge or lip at the edges.
- Refine with 400-grit — Switch to the finer paper and feather the sanded area into the surrounding surface. This removes any scratch marks left by the coarser grit and creates a smooth base for primer.
- Apply etch primer — A light mist of self-etching primer over the repair and the feathered halo chemically bonds to both the cured epoxy and any exposed aluminium. One thin coat is sufficient — heavy primer builds obscure fine detail and take longer to dry. Allow the primer to cure per the can’s instructions, typically 30 to 60 minutes.
- Apply colour-matched topcoat — Use a fine-tipped artist’s brush or a touch-up paint pen matched to your frame colour. Two thin coats with 20 minutes between them produce a more even finish than one thick application. Feather the paint edges slightly beyond the primed area to blend the repair into the existing finish.
Give the topcoat at least 48 hours to harden fully before cleaning or handling the frame aggressively. In humid coastal conditions, extend that to 72 hours for best results.
A clean, well-executed repair handled this way should be virtually invisible and structurally sound for years. That said, certain missteps during the process — some of them surprisingly common — can undermine all this effort and leave you peeling out failed filler within months.
Common Mistakes That Cause Filler to Fail on Aluminium
Even with the right product in hand, a handful of avoidable errors account for the majority of failed repairs. Filler that cracks, lifts, or discolours within months nearly always traces back to one of the mistakes below — and most of them happen before the filler even touches the frame.
Surface Prep Failures That Guarantee Poor Adhesion
Aluminium’s self-healing oxide layer is both a blessing and a curse. It protects the metal from deep corrosion, but it also creates a slippery barrier that resists bonding. Skip the preparation steps or rush them, and you are essentially gluing filler to dust.
- Applying filler to a greasy or contaminated surface — Finger oils, residual silicone, and atmospheric grime act as release agents. Filler bonds to the contaminant film rather than the metal, and the entire plug lifts out under stress. Epoxy adhesion research confirms that degreasing must happen immediately before application, not the night before.
- Filling over a reformed oxide layer without re-abrading — If you prepped the hole an hour ago but got distracted, the oxide film has already reformed. Without a fresh scuff and IPA wipe, filler sits on top of that chemically inert skin instead of mechanically locking into raw aluminium.
- Skipping primer before painting the cured repair — Paint applied directly over sanded epoxy or polyester filler peels within weeks on exterior frames. Self-etching primer provides the chemical bridge between cured filler and topcoat that bare adhesion cannot.
- Overfilling and then sanding too aggressively — Packing a massive dome of filler over a 3mm hole and then grinding it back with coarse 80-grit paper generates heat, tears filler fibres, and scores the surrounding powder coat. A controlled 0.5mm overfill sanded gently with 220-grit produces a far better result.
- Using automotive products not rated for exterior UV exposure — Polyester body fillers designed for panels that will receive full paint systems can degrade and chalk when left exposed to direct sunlight. On a window frame where the repair might only get a thin touch-up coat, UV breaks down unprotected polyester within a season or two, turning it powdery and yellow.
Thermal Expansion and Why Rigid Fillers Crack
This is the mistake that catches people off guard. Aluminium has a linear thermal expansion coefficient of roughly 23 x 10⁻⁶ per degree Celsius — considerably higher than steel and dramatically higher than most cured filler resins. A one-metre aluminium frame section can grow and shrink by nearly 1mm across the temperature range of a typical Australian year (from 5°C winter mornings to 45°C-plus surface temperatures in direct summer sun).
That movement concentrates stress at the bond line between filler and metal. A purely rigid filler — one with zero flex — cannot absorb this repeated micro-movement. Over dozens of thermal cycles, a hairline crack develops at the interface. Moisture wicks in, corrosion starts beneath the filler, and eventually the plug pops free entirely.
The solution is choosing fillers with slight flexibility or at least some elongation tolerance. Two-part epoxies formulated for metal bonding typically include toughening agents that allow micro-flex without cracking. Standard polyester body fillers and pure rigid resin mixes lack this property, which is why they perform reasonably indoors (where temperature variation is mild) but fail on sun-exposed exterior frames.
Temperature and Weather Requirements for Application
Environmental conditions during application and cure matter just as much as surface prep. Working outside those parameters introduces defects that only show up weeks later.
- Minimum temperature — Most two-part epoxies and polyester fillers require a substrate and ambient temperature of at least 15°C for proper chemical crosslinking. Manufacturer guidance for polyester fillers specifies application between 15°C and 32°C. Below that range, the cure stalls, leaving filler soft, poorly bonded, and prone to absorbing moisture.
- Humidity limits — Relative humidity above 80% slows solvent flash-off from primers and paints, and can leave an invisible moisture film on the aluminium surface that compromises adhesion. Coastal mornings and post-rain conditions in subtropical Queensland or humid Sydney summers are common culprits. Wait until humidity drops below 70% or work in the warmer part of the afternoon when surfaces have dried out.
- Avoid direct sun during cure — While warmth speeds curing, direct sunlight on a dark-coloured frame can push surface temperatures well past 50°C. This causes the outer skin of the filler to cure rapidly while the interior remains soft, creating differential shrinkage. The result is an uneven surface, internal stress, and sometimes visible cracking as the interior eventually catches up. Work in shade, or tackle the repair in the early morning before the sun hits the frame directly.
- Damp or wet conditions — Applying filler to a hole that still holds morning dew, rainwater, or condensation traps moisture beneath the repair. Over time, that trapped water generates white aluminium oxide deposits (a powdery white corrosion) that push the filler away from the frame wall.
Getting these environmental factors right is straightforward in practice — choose a dry, mild day with the frame in shade, and your filler will cure evenly and bond permanently. Ignore them, and even the most expensive epoxy will let you down before the first year is out. The real test of any repair comes not on the day you finish it, but across the seasons that follow.

Long-Term Maintenance and Knowing When to Replace the Frame
A properly executed repair can last a decade or more, but aluminium frames live through relentless UV exposure, thermal cycling, coastal salt air, and driving rain year after year. Checking your filled holes periodically — and knowing when patching no longer makes financial sense — keeps you ahead of problems rather than reacting to failures.
Inspecting and Maintaining Repaired Holes Over Time
Set a reminder to inspect repaired areas every six months, ideally at the start of autumn and again in spring. You are looking for three things:
- Hairline cracks at the filler edge — Run a fingernail across the bond line between filler and frame. A catching sensation or visible crack means thermal movement has started breaking the seal. Catch it early and a thin bead of flexible exterior sealant over the crack restores the weatherproof barrier without a full redo.
- Paint chalking or fading — UV degrades touch-up paint faster than factory powder coat. If the repaired spot looks lighter or powdery compared to the surrounding frame, lightly sand with 400-grit and apply a fresh topcoat to maintain protection over the filler beneath.
- Moisture staining or white corrosion deposits — Powdery white residue around a filled hole indicates water is reaching bare aluminium beneath the repair. This requires removing the failed filler, treating the corrosion, and re-filling from scratch.
Structured maintenance guidelines for aluminium systems recommend reapplying sealants every five to ten years and conducting a full condition assessment annually for exposed elements. The same principle applies to filled screw holes — they are small sealed penetrations that deserve the same attention as window gaskets or drainage weep holes.
When Frame Replacement Makes More Sense Than Repair
One or two filled holes on an otherwise healthy frame is routine maintenance. But there is a tipping point where continued patching becomes false economy. Consider replacement when your frames show multiple signs of systemic decline:
- Widespread surface pitting beyond isolated screw holes — indicating the anodised or powder-coat layer has failed across the profile
- Failed perimeter seals causing condensation between glass panes or visible fogging
- Noticeable drafts or thermal bridging that increase heating and cooling costs
- Multiple previous repairs already cracking or discolouring, suggesting the substrate itself can no longer hold filler reliably
- Hardware mounting points stripped out, with no solid metal left to anchor replacement fixings
Aluminium window frames generally last 30 to 45 years with regular maintenance. Once frames in that age bracket start accumulating failures, investing in modern replacements delivers better long-term value than another round of epoxy and paint.
If the cost of repairing multiple holes, resealing failed gaskets, and repainting degraded sections approaches 40 to 50 percent of a new window’s supply-and-install price, replacement almost always wins on a per-year-of-service basis.
Modern aluminium window systems have evolved considerably from the non-thermally broken frames common in Australian homes built before the early 2000s. Current-generation frames feature thermally broken profiles with polyamide barriers, factory-applied powder-coat finishes rated for decades of UV and salt exposure, and integrated hardware mounting points engineered into the extrusion itself — eliminating the need to drill through the visible face of the frame. These design improvements mean fewer penetrations, better weather seals, and significantly reduced maintenance over the frame’s lifespan.
If your inspection reveals frames beyond economical repair, researching current options is a practical next step. MEICHEN’s aluminium windows page provides a useful starting point for understanding the window types, custom colour options, and performance specifications available for Australian residential and commercial projects — particularly helpful when comparing what modern systems offer against the aging frames you are patching today.
FAQs About Filling Screw Holes in Aluminium Window Frames
1. What is the best filler for screw holes in aluminium window frames?
Two-part metal-loaded epoxy is the top choice for permanent exterior repairs. It bonds strongly to aluminium, resists moisture and UV, and can be sanded flush and painted to match your frame colour. For interior or hidden areas, polyester body filler offers a budget-friendly alternative, while polyurethane sealant works well for concealed holes where appearance is not a concern. The key factor is matching the product to the exposure conditions — exterior frames need fillers with slight flexibility to handle aluminium’s thermal expansion.
2. How do you prepare aluminium before filling screw holes?
Start by removing any old sealant or adhesive residue using a silicone remover or isopropyl alcohol. Next, abrade the inside of the hole with 220-grit sandpaper rolled into a cylinder, then lightly scuff a 5-10mm area around the hole with a Scotch-Brite pad. Wipe everything clean with 99% isopropyl alcohol and allow the surface to dry completely. Apply filler within 15 minutes of prepping, as aluminium’s oxide layer reforms almost immediately and reduces adhesion if left too long.
3. Why does filler keep popping out of my aluminium window frame?
The most common causes are inadequate surface preparation and using overly rigid fillers. Aluminium expands and contracts significantly with temperature changes — roughly 23 x 10⁻⁶ per degree Celsius. A rigid filler that cannot flex with this movement cracks at the bond line over repeated thermal cycles. Other culprits include applying filler over greasy or oxidised surfaces, working in damp or cold conditions below 15°C, and skipping the degreasing step. Choosing a two-part epoxy with toughening agents and preparing the surface properly solves the problem for most homeowners.
4. Can you use silicone to fill screw holes in aluminium frames?
Silicone sealant creates a flexible, waterproof seal but cannot be sanded smooth or painted to match your frame colour. It remains permanently soft, attracts dust, and looks obvious on visible frame sections. Silicone works as a quick temporary seal for holes hidden behind fly screens or inside frame tracks, but for any visible repair, a two-part epoxy filler sanded flush and finished with colour-matched paint produces a far superior result that blends invisibly with the surrounding frame.
5. When should you replace aluminium window frames instead of repairing holes?
Replacement becomes more cost-effective when repair costs approach 40 to 50 percent of a new window’s supply-and-install price. Warning signs include widespread surface pitting, failed perimeter seals causing condensation between glass panes, multiple previous repairs already cracking, stripped-out hardware mounting points, and noticeable drafts. Aluminium frames typically last 30 to 45 years, so frames nearing that age with accumulating issues generally warrant upgrading to modern thermally broken systems with integrated hardware mounting points and factory-applied powder-coat finishes rated for decades of exposure.
More Window & Door Guides