What Aluminium Window Refurbishment Really Means
Aluminium window refurbishment is not a quick fix for a sticky latch or a fresh lick of paint over chalky frames. It is a system-level restoration that treats your windows as interconnected assemblies — frames, glazing, hardware, seals, and drainage channels all addressed together so the whole unit performs as intended. A single failed seal might seem minor on its own, but left in isolation it accelerates corrosion, allows moisture into the cavity, and compromises the thermal envelope. Refurbishment tackles root causes rather than symptoms.
Simple repair patches one fault. Refurbishment brings the entire window back to a cohesive standard — cleaning and treating frame surfaces, replacing degraded weatherstripping, upgrading or re-bedding glass units, fitting new operational hardware, and clearing blocked weep holes that cause water pooling. The result can restore performance to near-new levels at a fraction of the cost of ripping everything out and starting fresh.
What Aluminium Window Refurbishment Actually Involves
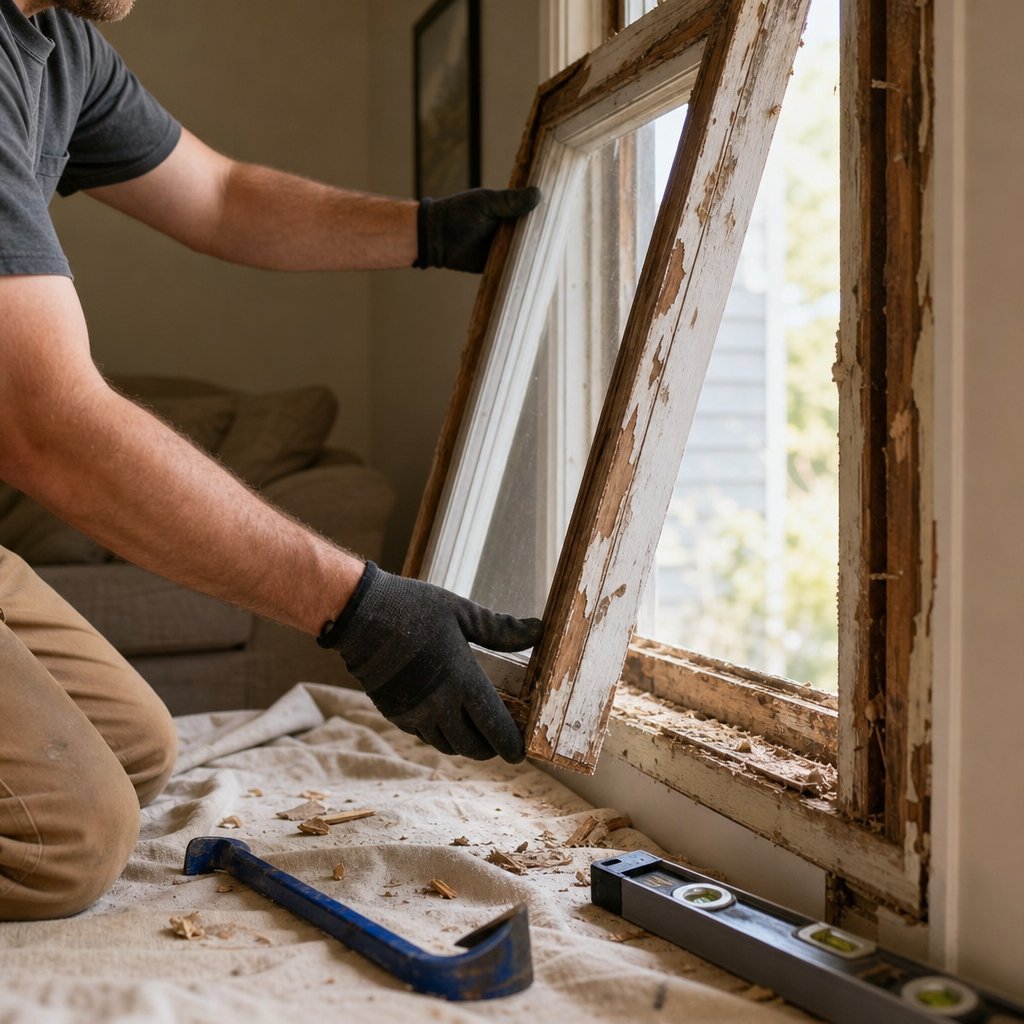
So what does aluminium window refurbishment involve in practice? Think of it as working through every layer of the window system: stripping and refinishing the aluminium profile, assessing glazing condition, testing each hinge and lock mechanism, replacing perimeter gaskets, and verifying that drainage paths remain clear. Whether you are a homeowner weighing up a weekend DIY project, someone hiring a specialist, or a property manager scoping works across an entire building, the underlying logic is the same — treat the window as a whole, not a collection of unrelated parts.
Who Benefits From Refurbishment Over Replacement
The benefits of refurbishing aluminium windows apply broadly. Homeowners preserve character and avoid the disruption of full frame removal. Property managers extend asset life across dozens or hundreds of openings without blowing capital budgets. And for anyone asking whether aluminium window restoration vs replacement makes more sense financially, industry comparisons consistently show restoration running at 30 to 50 percent of replacement cost when frames remain structurally sound.
The Environmental Case for Restoring Existing Frames
There is a compelling sustainability argument here too. Manufacturing a single new aluminium window frame generates roughly 161 kg of CO2 equivalent — more than timber or uPVC alternatives. Recycling recovers much of the material, but it still demands significant energy to remelt and re-extrude profiles.
Aluminium is infinitely recyclable without losing its properties, yet refurbishing existing frames sidesteps the energy cost of remelting and manufacturing entirely — delivering the lowest-carbon outcome available.
This guide covers everything you need to make a confident decision: identifying your finish type, choosing the right refurbishment level, selecting correct tools and materials, avoiding costly mistakes, upgrading thermal performance, and planning a realistic budget. The goal is practical, honest information — whether you end up doing the work yourself or briefing a professional to do it for you.
The starting point for any refurbishment project, though, is a clear-eyed assessment of what you are actually working with — and whether your frames are candidates for restoration or genuinely past saving.
Deciding Between Refurbishment and Full Replacement
A chalky surface or stiff lock does not condemn a frame. But a warped profile or deep structural pitting might. The aluminium window refurbishment or replacement decision hinges on what is actually happening beneath the cosmetic layer — and honest assessment here saves you from either over-investing in a dying frame or needlessly scrapping one that has decades of life left.
Assessing Frame Condition and Structural Integrity
Start with a hands-on aluminium window frame condition assessment. Run your fingertip along the profile edges and corners. Surface oxidation — that powdery white residue — is cosmetic and treatable. What you are looking for are deeper problems: pitting that has eaten into the wall thickness of the extrusion, hairline cracks at corner welds, or visible warping where the frame no longer sits square in the opening.
Check frame alignment by measuring diagonals. A difference of more than 3 mm suggests structural movement that may compromise seal performance even after refurbishment. Inspect screw ports and hinge fixings for stripped threads or enlarged holes — signs the aluminium has fatigued around stress points. If hardware anchors no longer grip, the frame cannot reliably support new components.
Climate plays a significant role here. Coastal properties across Sydney’s Northern Beaches, Queensland’s Gold Coast, or Perth’s western suburbs face accelerated deterioration from airborne salt. As finishing specialists note, chloride ions from ocean spray can overwhelm protective oxide layers within weeks on exposed aluminium, leading to pitting that compromises structural integrity over time. High-UV inland areas and tropical regions with persistent humidity shift the refurbish-or-replace threshold earlier than temperate, sheltered locations.
When Refurbishment Makes Financial Sense
Refurbishment delivers its strongest return when the frame remains structurally true but everything around it has degraded — faded or peeling finish, hardened seals, worn hardware, and fogged glazing units. In these cases, you are restoring components that were always designed to be serviceable while keeping the most expensive element (the frame itself) in place.
Heritage and architectural value also weigh in. Period homes, mid-century designs, and buildings with council heritage overlays may require retention of original frames. Refurbishment satisfies both the regulatory constraint and the performance need simultaneously.
Red Flags That Indicate Full Replacement Is Necessary
How to tell if aluminium windows need replacing rather than restoring? Watch for these indicators:
- Deep pitting covering more than 20 percent of the profile surface
- Cracked or separated corner joints that cannot be re-welded cleanly
- Frame profiles too narrow to accept modern double-glazed IGUs when a thermal upgrade is essential
- Persistent water ingress traceable to frame distortion rather than failed seals
- Corrosion at concealed internal drainage channels that cannot be accessed for repair
The comparison below maps out when to refurbish vs replace aluminium windows across the factors that matter most:
| Factor | Refurbishment | Full Replacement |
|---|---|---|
| Cost range | 30 – 50% of replacement cost | Full outlay for new system supply and install |
| Typical timeline | 1 – 3 days per window (depending on level) | Half to full day per window plus lead time for manufacturing |
| Energy performance outcome | Moderate improvement (new seals, possible reglazing) | Maximum improvement (thermally broken frames, IGUs) |
| Disruption level | Low to moderate — frames stay in the opening | High — removal affects internal linings and external cladding |
| Best suited when | Frames structurally sound, cosmetically degraded or seal/hardware failure | Frames warped, deeply corroded, or incompatible with required glazing upgrades |
In short, if the skeleton is solid, refurbishment makes compelling sense. If the skeleton is compromised, no amount of new paint or fresh seals will deliver lasting performance — and replacement becomes the more cost-effective path over the window’s remaining service life.
Whichever direction the assessment points, the next critical variable is understanding exactly what finish currently protects your frames — because the restoration approach for painted, anodised, and powder-coated aluminium differs substantially.
Understanding Your Aluminium Frame Finish Type
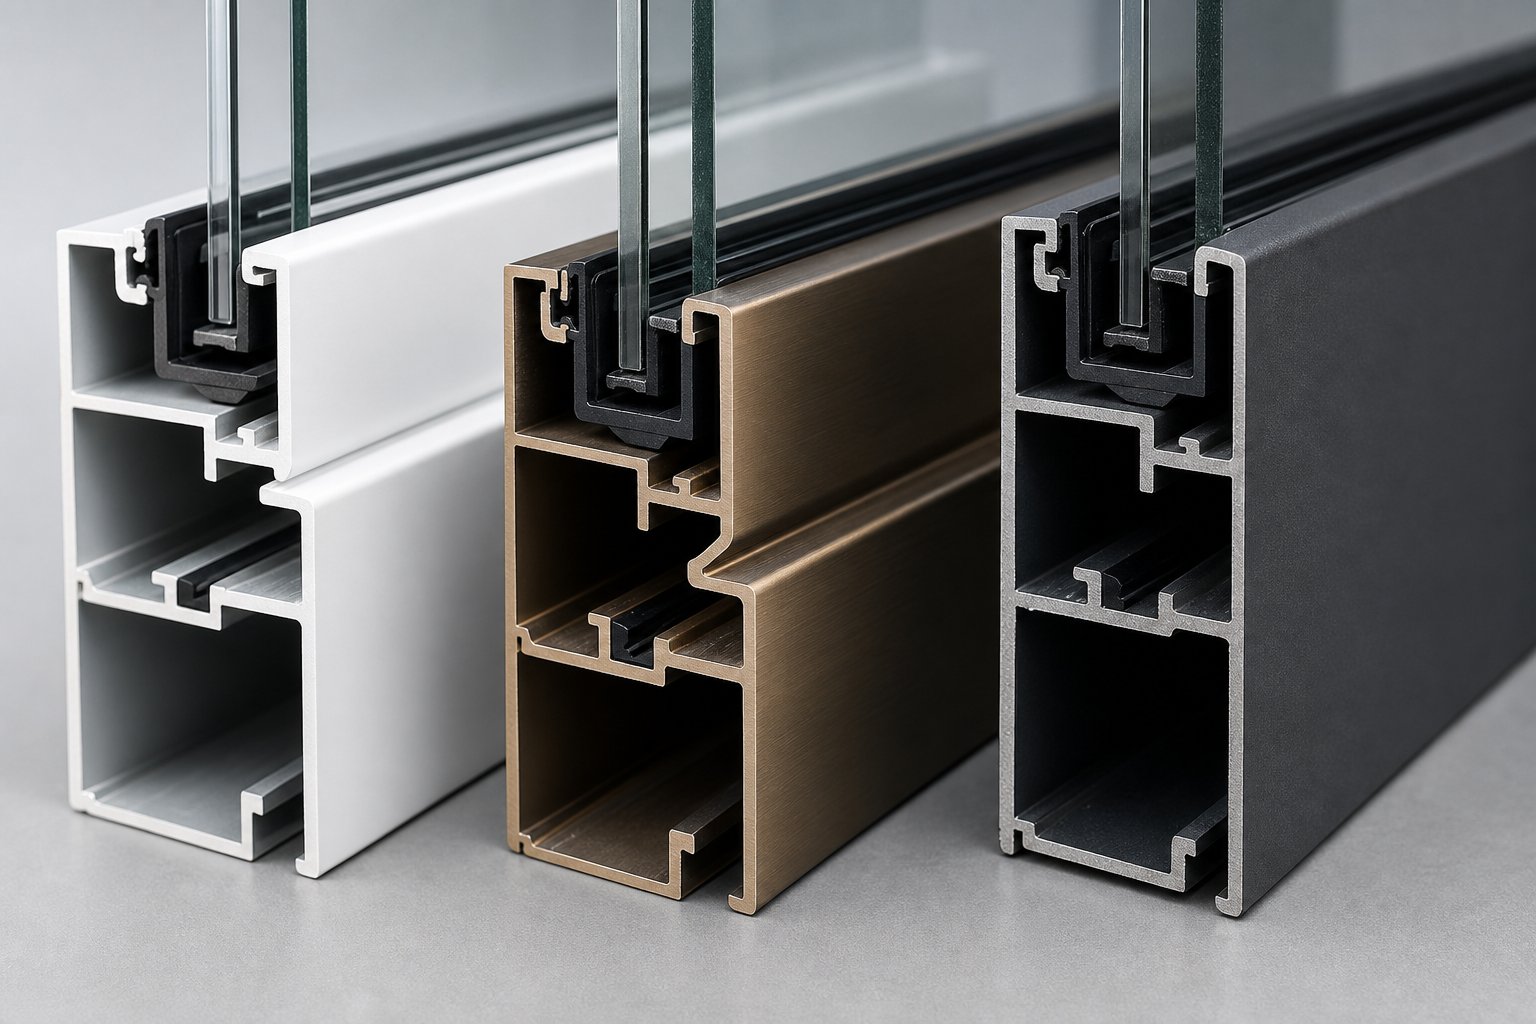
Not all aluminium surfaces respond to the same treatment. A technique that works beautifully on painted frames can destroy an anodised finish, and an approach suited to anodised profiles will fail on powder coating. Before you pick up a sander or open a tin of primer, you need to identify what coating system is already on your frames — because the aluminium window frame coating options for restoration depend entirely on this starting point.
Australian homes built from the 1960s onward feature all three primary finish types, often mixed across different eras of renovation. Here is how to identify aluminium window finish type by visual and tactile inspection:
- Painted aluminium: Shows brush marks or slight orange-peel texture under close inspection. When it fails, paint peels or flakes away from the surface in sheets, revealing bare grey metal underneath. Colour sits on top of the metal rather than appearing integral to it.
- Anodised aluminium: Has a distinctive metallic sheen with a slightly translucent quality — you can sense depth in the colour rather than it sitting as a flat film. Common tones are natural silver, bronze, and champagne. The finish cannot be scratched off with a fingernail because the oxide layer is integral to the metal itself. When degraded, it appears chalky or stained rather than peeling.
- Powder-coated aluminium: Presents a uniform, slightly thicker film (typically 60 to 125 microns) with a consistent texture — either smooth gloss, satin, or a fine textured finish. It does not show brush marks. When damaged, it chips cleanly rather than peeling in layers. Colours are completely opaque with no metallic translucency unless metallic pigments were intentionally added.
Refurbishing Painted Aluminium Frames
Painted frames are the most DIY-accessible of the three. The coating is a separate film bonded to the metal surface, meaning it can be stripped, the substrate re-prepared, and a new system applied without specialist equipment.
Start by removing failing paint. Chemical strippers formulated for aluminium work well on thicker build-ups — avoid standard methylene chloride strippers that can react aggressively with the alloy. For lighter coatings, an orbital sander with 180 to 220 grit abrasive paper removes old paint efficiently without gouging the soft aluminium beneath. Scotch-brite pads handle corners and detailed mouldings where sanding discs cannot reach.
The best paint for aluminium window frames starts with the right primer. Standard metal primers designed for steel will not bond reliably to aluminium’s naturally occurring oxide layer. You need either a self-etching primer (which chemically bites into the aluminium surface) or a dedicated aluminium etch primer applied to clean, bare metal. Once primed, high-quality acrylic latex or oil-based metal topcoats provide durable finishes. For Australian conditions — particularly in high-UV areas across Queensland and Western Australia — choose topcoats with UV-stabilised resins to prevent premature chalking.
Working With Anodised Aluminium Surfaces
Refurbishing anodised aluminium window frames requires a different mindset. The anodic layer is not a coating applied on top of the metal — it is an electrochemically grown oxide that forms part of the aluminium itself. You cannot sand it off and reapply it onsite. This is the critical distinction that catches many DIYers off guard.
The good news is that anodised finishes are remarkably resilient. What often looks like failure is actually surface dirt and atmospheric staining accumulated over decades. A thorough clean with mild detergent and a non-abrasive pad can renew the appearance without any re-coating — effectively exposing fresh anodised surface beneath the grime. This “renewable” quality is one of anodising’s underrated advantages.
When the anodised layer has genuinely deteriorated — showing white powdery patches, visible pitting, or colour loss — you have two options. The first is professional re-anodising, which requires removing the frames from the building and sending them to a specialist facility with electrolytic tanks. This restores the original finish but involves significant logistics and cost. The second, more practical option for most residential projects, is applying a specialised topcoat system formulated for adhesion over anodised surfaces. These coatings bond to the existing oxide layer without requiring full removal, effectively converting the frame to a painted system going forward.
Powder-Coated Frame Restoration Options
Repainting powder coated aluminium windows sits somewhere between the other two finishes in complexity. The original powder coating was applied as a dry powder, electrostatically charged, then oven-cured at temperatures around 180 to 200 degrees Celsius. That curing process creates an extremely tough, cross-linked film — which is great for durability but means you cannot simply replicate it in the field.
For frames with minor surface wear — light scratches, small chips, or localised fading — the practical approach is to abrade the existing coating with fine-grit paper (320 to 400 grit) to create a mechanical key, then apply a compatible liquid topcoat. This “abrade and overcoat” method works well when the existing powder coat is still firmly bonded across most of its surface. Two-pack polyurethane or acrylic topcoats are common choices for this approach.
Where the powder coating has failed more extensively — peeling, widespread cracking, or delamination — full stripping back to bare aluminium becomes necessary. Chemical strippers rated for thermoset coatings or professional media blasting can achieve this, followed by the same priming and recoating process used for painted frames. Be aware that stripping powder coat is considerably more labour-intensive than stripping conventional paint due to the film’s hardness and thickness.
For property owners wanting the most durable outcome from a refurbishment, modern finishing alternatives offer a genuine upgrade over whatever the original system provided. Electrostatic painting applies liquid coatings using an electrostatic charge, producing a factory-quality finish onsite without needing oven curing. PVDF (polyvinylidene fluoride) coatings represent the highest-performance option — formulated with at least 70 percent fluoropolymer resin, they deliver exceptional UV resistance, colour retention, and chemical durability that outperforms standard acrylics or polyesters by a wide margin. While PVDF is typically a factory-applied system, specialist refurbishment contractors can apply two-pack PVDF formulations in the field for frames that warrant premium protection, particularly in harsh coastal or tropical environments.
Knowing your finish type — and the restoration pathway each requires — sets the foundation for scoping the right level of work. A lightly weathered anodised frame might need nothing more than a deep clean, while a failing powder coat could demand a full strip-and-recoat. That range of possibilities is exactly what the next section breaks into structured refurbishment levels, helping you match scope to condition and budget.
Three Levels of Refurbishment Explained
Not every window demands the same depth of work. A frame with mild surface chalking and slightly stiff hardware needs a fundamentally different scope than one with cracked welds, failed glazing, and twenty years of coastal salt embedded in every crevice. The aluminium window refurbishment scope of work should match actual condition — anything less wastes money on under-treating real problems, and anything more wastes money on unnecessary intervention.
The three levels below give you a structured way to think about what your windows actually need. Most residential projects land squarely in Level 2, where frames are still structurally sound but cosmetically tired with degraded seals and worn hardware. Heritage properties and commercial buildings — where longevity expectations stretch to 30-plus years and compliance requirements apply — more commonly warrant a Level 3 approach.
Cosmetic Refresh for Lightly Worn Windows
This is the entry point — a DIY aluminium window cosmetic refresh that addresses surface-level deterioration without stripping finishes or replacing components wholesale. The work involves thoroughly cleaning frames and tracks of accumulated grime, treating isolated oxidation spots with a mild acidic cleaner or aluminium restorer, touching up paint chips with a colour-matched coating, and lubricating all hinges, locks, and sliding tracks with a dry PTFE or silicone-based lubricant.
A cosmetic refresh suits windows that still operate smoothly and seal adequately but look tired. It is entirely DIY-friendly and can be completed in under two hours per window with basic household tools. The limitation is longevity — you are maintaining rather than restoring, so expect to repeat the process every two to three years as surface wear continues.
Moderate Refurbishment for Aging Frames
Level 2 is where genuine restoration begins. Here, the existing finish is stripped back using chemical strippers or mechanical abrasion, all oxidation is treated across the full frame surface, minor damage such as shallow dents and scratches is filled and feathered smooth, and a complete new coating system — etch primer followed by a durable topcoat — is applied. Every seal and weatherstrip is replaced, and drainage channels are cleared and tested.
This level addresses the full aluminium window frame restoration process without requiring structural metalwork. Frames stay in the opening throughout, keeping disruption manageable. A competent DIYer with the right materials can handle moderate refurbishment, though the surface preparation demands patience — as restoration specialists emphasise, skipping prep is the single fastest path to coating failure within months. Expect to spend a full day per window, sometimes stretching to two days for larger or more intricate frames.
Full Refurbishment as a Replacement Alternative
Level 3 treats the window as if it were being rebuilt in place. Frames are stripped entirely to bare aluminium — often using media blasting for thoroughness — and any structural damage is repaired through welding or section replacement. All hardware is replaced with new components, glazing units are upgraded (potentially from single to double-glazed IGUs where the profile allows), and a professional-grade finish system such as two-pack polyurethane or electrostatic coating is applied. Full perimeter resealing and weatherproofing completes the job.
This is professional territory. The skill requirements — aluminium welding, precision glazing fitment, spray application — place it beyond most DIY capabilities. But the results rival new window performance at a meaningfully lower cost, while preserving embodied energy and avoiding the extensive building fabric disruption that full replacement demands.
| Dimension | Level 1 — Cosmetic Refresh | Level 2 — Moderate Refurbishment | Level 3 — Full Refurbishment |
|---|---|---|---|
| Typical scope | Clean, spot-treat oxidation, touch-up paint, lubricate hardware | Strip finish, treat all oxidation, repair minor damage, new coating system, replace all seals | Strip to bare metal, structural repairs/welding, replace all hardware, upgrade glazing, professional finish, full resealing |
| Timeline per window | 1 – 2 hours | 1 – 2 days | 2 – 4 days |
| Skill level required | DIY-friendly | Competent DIYer or tradesperson | Professional (specialist contractor) |
| Expected longevity | 2 – 3 years before repeat maintenance | 7 – 10 years with quality materials | 15 – 20+ years |
| Relative cost | Low (materials only) | Moderate (materials plus possible labour) | High (but 50 – 70% of full replacement) |
Choosing a level is not just about budget — it is about matching intervention depth to the window’s actual condition and the performance standard you need to achieve. A Level 1 refresh on frames that genuinely require Level 2 work simply delays inevitable failure and doubles your total spend over time.
Regardless of which level applies, the quality of your outcome depends heavily on using the right materials and tools for each stage — particularly when it comes to primer compatibility, abrasive selection, and sealant chemistry, where wrong choices lead to rapid and expensive failure.
Essential Tools and Materials You Need
Getting materials wrong on aluminium is not a minor inconvenience — it is often the difference between a finish that holds for a decade and one that peels within months. Every item on your workbench needs to be compatible with non-ferrous metal chemistry, and several common workshop staples will actively sabotage your results if you reach for them out of habit. Here is what you actually need for each stage, and why each item earns its place.
Surface Preparation Tools and Their Purpose
Preparation accounts for roughly 80 percent of long-term coating success. The tools needed for aluminium window refurbishment at this stage focus on removing old coatings, neutralising oxidation, and creating a surface profile that primers can grip without introducing contaminants.
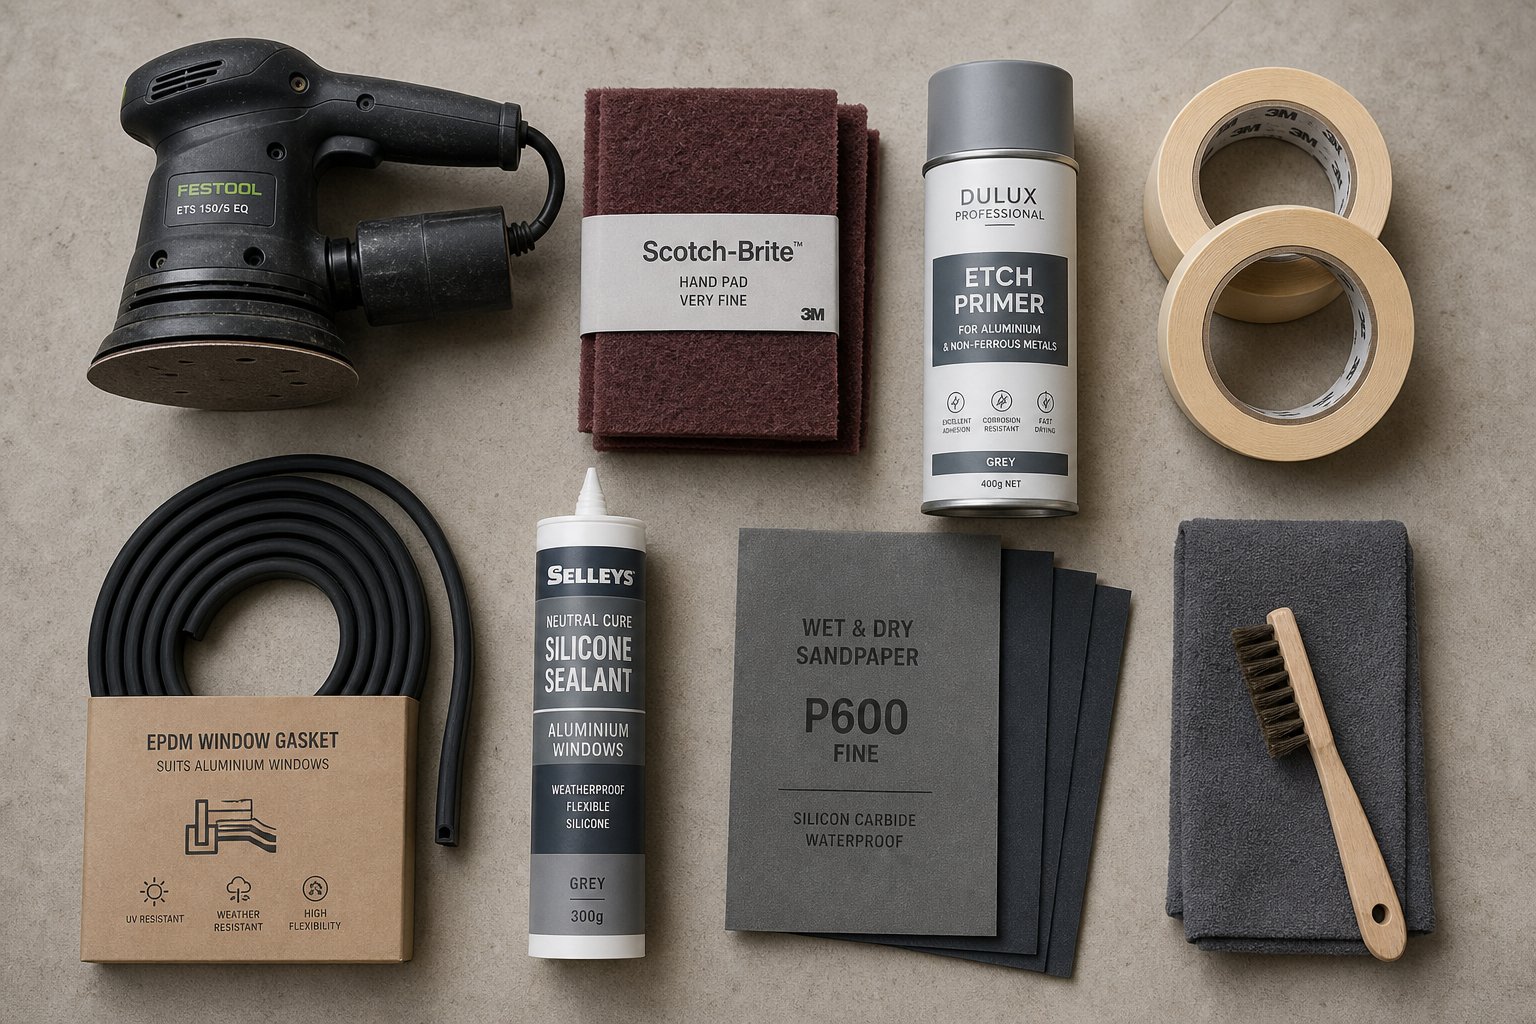
- Orbital sander (150 mm random orbit): Removes old paint and powder coat efficiently without the linear scratches a belt sander leaves behind. Use 180 to 220 grit discs — coarser grits gouge soft aluminium and create marks visible through topcoats.
- Chemical paint stripper formulated for aluminium: Essential for thick or multi-layer coatings. Avoid methylene chloride formulations that react aggressively with aluminium alloys. Gel-type strippers cling to vertical frame surfaces better than liquid versions.
- Scotch-brite pads (maroon, ultra-fine): Ideal for scuffing corners, rebates, and complex profile geometry where sanding discs cannot reach. They create mechanical tooth without removing meaningful material.
- Aluminium etching solution (phosphoric acid based): Dissolves the invisible oxide layer that forms within seconds on bare aluminium. Without this step, primers cannot form a true chemical bond regardless of how well you have sanded.
- Quality masking materials (painters tape and plastic sheeting): Protect glass, weatherstripping, and surrounding wall surfaces from chemical strippers and primer overspray. Use adhesive-backed masking film for large glass areas — it is faster and less prone to lifting than taped plastic.
One critical rule: never use steel wool or wire brushes on aluminium. Ferrous particles embed in the softer aluminium surface and trigger galvanic corrosion — tiny rust spots that bleed through fresh paint and undermine adhesion from within. Use only stainless steel brushes or synthetic abrasives.
Primers and Coatings Matched to Aluminium
Choosing the best primer for aluminium window frames means understanding the distinction between etch primer vs self-etching primer for aluminium — two terms that sound interchangeable but describe different products.
A self-etching primer contains mild acids (typically phosphoric) that chemically bite into the aluminium surface while simultaneously depositing a protective coating in a single step. It is available in aerosol cans, making it accessible for DIY projects. Best suited to bare aluminium in residential and moderate-exposure settings.
A two-part etch primer (sometimes called a wash primer or epoxy primer) is a professional-grade system requiring precise mixing of resin and hardener. It forms a harder, more chemically resistant bond and delivers superior moisture protection — the non-negotiable choice for coastal properties or frames exposed to persistent humidity. Its durability advantage is significant: two-part epoxy achieves maximum adhesion ratings where self-etching aerosols score slightly lower.
Never apply standard ferrous-metal primers (including most off-the-shelf rust converters) to aluminium. These are formulated to react with iron oxide — a substance that does not exist on aluminium — and will fail to bond within weeks.
For topcoats, 100 percent acrylic exterior paint or urethane-modified enamel provides the flexibility needed to accommodate aluminium’s thermal expansion without cracking. In high-UV regions across Queensland and Western Australia, specify UV-stabilised formulations to prevent chalking.
Sealing and Weatherproofing Materials
Replacing seals and weatherstripping is often the single highest-impact intervention during refurbishment. The aluminium window weatherstripping replacement materials you choose must maintain elasticity across temperature extremes while resisting UV degradation year after year.
- EPDM gaskets: The standard for glazing and frame perimeter seals. EPDM (Ethylene Propylene Diene Monomer) maintains flexibility across a wide temperature range and resists ozone, UV, and moisture. For coastal Australian properties, specify EPDM with enhanced UV and salt-exposure stabilisers — standard compounds harden faster in marine environments.
- Silicone weatherstripping (multi-fin type): Outperforms older single-blade compression seals by providing multiple contact points that maintain an air barrier even as frames shift slightly under wind pressure or thermal movement.
- Neutral-cure silicone sealant: The correct aluminium compatible sealant for windows at perimeter frame-to-wall junctions. Neutral-cure formulations will not corrode aluminium or stain powder-coated surfaces — unlike acetic-cure (vinegar-smell) silicones, which can attack both.
- Polyurethane sealant: Better suited to joints requiring paintability or higher movement tolerance (frame-to-masonry junctions on brick veneer homes, for instance). Less UV-stable than silicone when left exposed, so paint over it or use it in concealed locations.
- Backer rod (closed-cell foam): Controls sealant depth in wider gaps. Without it, sealant bonds three-sided rather than two-sided, restricting flexibility and leading to premature cohesive failure.
For hardware replacement — hinges, friction stays, locking mechanisms — source components with austenitic stainless steel fasteners throughout. Carbon steel screws in contact with aluminium create a galvanic cell in the presence of moisture, corroding the fastener and staining the frame. This is particularly aggressive in coastal zones where salt accelerates the electrochemical reaction. The small cost premium for stainless is trivial compared to the call-back cost of failed fittings.
Most of these materials are available through specialty coatings distributors or well-stocked trade suppliers such as Bunnings Trade or dedicated window hardware stockists. Professional-grade EPDM gaskets and multi-fin weatherstripping often need to be ordered through the original system manufacturer or an aluminium window parts specialist to ensure the correct profile dimensions.
Having the right materials on the bench eliminates one major source of failure. The other — technique — is where most projects actually come unstuck, and the mistakes tend to follow predictable patterns worth understanding before you start.
Common Mistakes That Destroy Your Results
Every aluminium window refurbishment mistake to avoid shares a common thread: it feels like a shortcut in the moment and costs double to fix later. The errors below are ranked from most frequent to least frequent based on what causes the majority of rework on Australian residential projects. Understanding why paint peels off aluminium window frames — and why hardware fails prematurely — means you can sidestep these traps before committing time and materials to a job that unravels within months.
Primer and Paint Compatibility Failures
- Using a standard metal primer instead of aluminium-specific etch primer. This is the single most common aluminium window restoration error. General-purpose metal primers are formulated to react with iron oxide on steel surfaces. Aluminium does not form iron oxide — it forms aluminium oxide, a completely different chemistry. The result is a primer that sits on the surface without forming a true bond. Within weeks, the topcoat lifts in sheets, particularly around edges and corners where thermal movement is greatest. The fix is straightforward: always use a self-etching primer or a two-part etch primer designed specifically for non-ferrous metal, applied to properly prepared bare aluminium.
- Painting over damaged seals rather than replacing them. It looks neater for a week. Then moisture finds its way behind the painted seal, sits against the frame unseen, and accelerates corrosion in the one spot you cannot inspect without pulling things apart. If a seal has hardened, cracked, or lost compression, it gets replaced — no exceptions. Paint cannot restore elasticity.
- Choosing a topcoat without UV stabilisation. In high-UV regions across Queensland, Western Australia, and inland NSW, standard acrylic topcoats without UV-resistant resins begin chalking within months of application. The surface turns powdery, adhesion weakens, and the entire system degrades from the outside in. Specify coatings labelled for exterior metal use with explicit UV-stabiliser content.
Oxidation Treatment Errors
- Failing to treat oxidation before applying new coatings. That white powdery residue is active aluminium oxide. Coating over it traps a chemically unstable layer between your primer and the sound metal beneath. As painting specialists note, this hidden corrosion continues working under the fresh finish, eventually causing bubbling, flaking, and far more extensive damage than existed before the refurbishment began. Proper aluminium window oxidation treatment before painting means mechanically removing all white residue with fine abrasives, then chemically etching the exposed surface to dissolve the invisible oxide film that reforms within seconds.
- Neglecting to neutralise salt deposits in coastal environments. Standard cleaning removes visible grime, but chloride ions from salt spray embed in surface pores and remain active even after the frame looks clean. Applying coatings over salt-contaminated aluminium leads to rapid under-film corrosion — blistering and pitting that appears within weeks on properties near the coastline. A dedicated salt-neutralising wash (diluted white vinegar or a proprietary chloride remover) must follow cleaning and precede any primer application on coastal projects.
Hardware and Reassembly Pitfalls
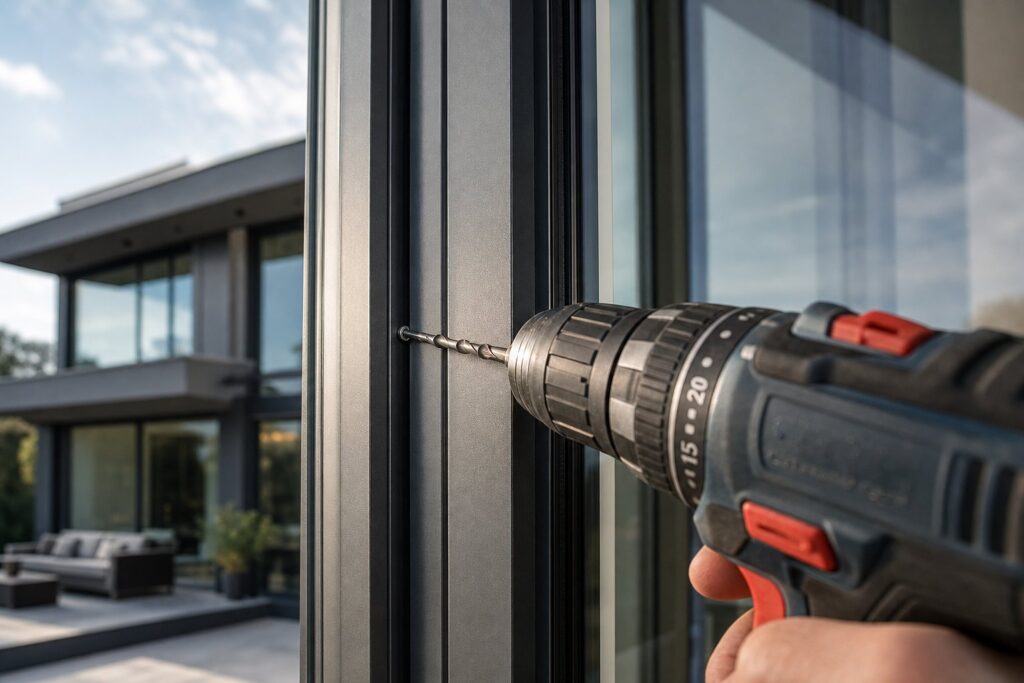
- Over-tightening hardware on aged frames. Aluminium that has weathered decades of thermal cycling and UV exposure becomes more brittle at stress points — particularly around screw ports and hinge fixings. Over-tightening screws cracks the surrounding profile, strips thread engagement, or deforms the mounting area so badly that replacement hardware cannot achieve a secure fix. Use a hand screwdriver rather than a power driver, tighten to firm resistance without forcing past it, and always use original-specification fasteners matched to existing thread dimensions.
- Removing weatherstripping without having correct replacements on hand. Gasket profiles are not universal. Strip the old seals out before sourcing replacements and you leave the window completely unprotected against weather — sometimes for weeks while you track down the correct profile from a specialist supplier. Always identify and order replacement gaskets before you begin disassembly. Bring a short cut section of the old seal as a sample when sourcing new stock.
- Neglecting to protect glass during chemical stripping. Alkaline paint strippers attack glass surfaces, leaving permanent etching and cloudiness that no amount of polishing will remove. Acid-based strippers can damage low-E coatings on modern glazing. Masking glass thoroughly — with adhesive film rather than loosely draped plastic — must happen before any chemical touches the frame. The cost of replacement glazing far exceeds the few minutes saved by skipping protection.
Most of these common aluminium window restoration errors compound each other. Skip salt neutralisation and your primer fails. Use the wrong primer and your topcoat lifts. Over-tighten hardware into a frame weakened by untreated corrosion and the whole assembly starts coming apart at the fixings. Each step protects the next.
Getting the preparation and application sequence right preserves what you have. But refurbishment also opens a window — quite literally — to improve what was never adequate in the first place: the thermal and weatherproofing performance that original designs from the 1970s through 1990s rarely prioritised.
Upgrading Thermal Performance During Refurbishment
Older aluminium windows were engineered for durability and low maintenance — thermal efficiency barely registered as a design concern. Frames from the 1970s through the early 2000s typically feature single glazing, no thermal break, and basic compression seals that hardened years ago. The result is a window that conducts heat freely in both directions: letting warmth escape in winter and pouring solar gain into living spaces through summer. Refurbishment gives you a rare chance to address all of this without ripping frames out of the wall — improving energy efficiency of old aluminium windows while they remain in place.
Before investing in upgrades, though, you need to confirm your windows actually have failed weatherproofing rather than just cosmetic wear. These indicators signal the thermal envelope has broken down:
- Noticeable draughts around closed sashes, particularly on windy days
- Condensation forming between panes on double-glazed units (seal failure)
- Condensation pooling on internal glass surfaces (poor insulation value)
- Water ingress around frame perimeters during rain
- Rattling sashes that no longer sit snugly in their tracks
- Visible daylight gaps at sash-to-frame junctions when windows are closed
If several of these sound familiar, surface-level cosmetic work will not solve the underlying comfort problem. The upgrades below target root causes.
Glazing Upgrades Within Existing Frames
Upgrading aluminium windows to double glazing is the single largest thermal improvement available during refurbishment — but it hinges on whether your existing frame profiles have enough depth to accept an insulated glass unit (IGU). A standard IGU requires approximately 20 to 24 mm of glazing rebate depth, and many older aluminium frames were designed around 4 to 6 mm single panes. The mismatch is the primary constraint.
Where profiles are deep enough — common in commercial-grade frames and some heavier residential systems from the 1980s onward — the original single pane can be removed, glazing beads replaced with deeper versions, and a sealed IGU installed with new EPDM compression gaskets and appropriate packing. This delivers a meaningful reduction in heat transfer through the glass area, which typically represents 70 to 80 percent of the total window surface.
For frames with shallower rebates, slim-profile IGUs (14 to 16 mm total thickness) offer a compromise. These use thinner glass panes and a narrower cavity, sacrificing some thermal performance compared to a full-depth unit but still representing a substantial upgrade over single glazing. Adding a low-E coating to one pane surface within the IGU further improves performance by reflecting radiant heat — keeping warmth inside during winter and reducing solar heat gain in summer. As retrofit glazing specialists note, the IGU thickness is often restricted by the original frame, which can limit the practical performance uplift compared to a purpose-built double-glazed system.
Applying aftermarket low-E films to existing single glazing is a lower-cost alternative where IGU retrofit is not physically possible. These films reduce radiant heat transfer without changing the glass unit itself, though their performance falls well short of a true sealed IGU with factory-applied coatings.
Improving Frame Thermal Performance
Glass upgrades address only part of the equation. The aluminium frame itself conducts heat roughly 1,000 times more readily than timber — which is why old aluminium windows often show condensation streaming down the frame long before it appears on the glass. Adding thermal break to existing aluminium windows tackles this directly.
Thermal break inserts are strips of low-conductivity material (typically polyamide or rigid polyurethane) fitted between the interior and exterior faces of the aluminium profile. In new window manufacturing, these are integrated during extrusion. Retrofitting them into existing frames is more complex — it requires routing channels into the profile to accept the insulating strip, then mechanically locking it in place. This is specialist work, and not all frame geometries accommodate it cleanly.
Where full thermal break insertion is impractical, alternative strategies can still reduce frame conductance:
- Applying insulating tape or thermal isolator pads between the frame and surrounding wall structure to reduce conductive bridging at the perimeter
- Fitting internal sub-frames or reveals in timber or composite materials that separate the cold aluminium from the room-side surface
- Using foam-backed architrave trims at the frame-to-wall junction to interrupt the thermal path
None of these fully replicate the performance of a factory-engineered thermally broken frame, but they can meaningfully reduce the cold-bridging effect and limit condensation on internal frame surfaces — a practical improvement for homes where full replacement is not on the table.
Sealing and Weatherstripping Replacement
Even with upgraded glazing, a window leaking air around its perimeter will underperform badly. Original compression seals on aluminium windows — typically single-blade rubber or felt-backed gaskets — lose elasticity over time and no longer compress enough to close the gap between sash and frame. Exploring aluminium window weatherstripping upgrade options reveals several modern alternatives that dramatically outperform what was originally fitted.
Multi-fin silicone weatherstripping provides multiple flexible contact points rather than relying on a single compression blade. This design maintains an effective air seal even as frames experience minor thermal movement or wind deflection. For sliding windows and doors, fin seal weatherstripping — pile strips with a plastic Mylar fin centred in the pile — offers excellent durability and sealing in aluminium tracks specifically.
Magnetic weatherstripping, which functions similarly to a refrigerator gasket seal, represents the highest-performing option for hinged sashes. It creates a virtually airtight closure when the window is latched. Tension seal strips (V-shaped self-stick vinyl or springy bronze) work well inside double-hung window tracks, pressing against the sides of the channel to block draughts invisibly.
Beyond sash seals, two other sealing tasks complete the weatherproofing picture during refurbishment:
Perimeter frame-to-wall resealing. The junction between your window frame and the surrounding wall is typically sealed with a bead of sealant applied at installation — often decades ago. This sealant cracks, shrinks, and loses adhesion over time. Raking out the old material and applying fresh neutral-cure silicone or polyurethane sealant (with closed-cell backer rod for correct joint geometry) restores the weather barrier at this critical transition point.
Clearing blocked weep holes. Every aluminium window has small drainage slots at the bottom of the frame designed to channel water that penetrates the outer seal back to the exterior. Paint build-up, dirt, and insect debris commonly block these openings over years. Blocked weep holes trap water inside the frame cavity, accelerating hidden corrosion and potentially allowing water to overflow into the wall structure. A simple pipe cleaner or thin wire run through each weep slot during refurbishment prevents this.
Taken together — upgraded glazing, reduced frame conductance, and modern sealing — these thermal improvements can transform an old aluminium window from a major energy liability into a reasonably performing assembly. The gains are most dramatic in homes where the original windows were single-glazed with no thermal break, which describes a significant proportion of Australian housing stock built before 2005.
There are limits, however. Some older profiles simply cannot accept double-glazed units at any thickness. Frames with extensive internal corrosion may not reliably support the additional weight of an IGU. And even with retrofitted thermal breaks, the frame performance of a modified 1980s extrusion will not match a modern system engineered from the ground up with integrated thermal barriers. For homeowners who reach this ceiling during refurbishment assessment, exploring purpose-designed thermally broken aluminium window systems with factory-integrated performance features becomes the logical next step — delivering the full thermal, acoustic, and weatherproofing performance that retrofitting cannot always achieve.
Performance upgrades add undeniable value, but they also add cost. Understanding where thermal improvements fit within a realistic budget — and at what point the investment tips toward favouring new windows entirely — requires a clear-eyed look at the numbers.
Budgeting and Planning Your Aluminium Window Refurbishment Project
Thermal upgrades, new seals, and fresh coatings all sound compelling — until you tally the numbers and wonder whether the project still makes financial sense. How much does aluminium window restoration cost in practice? The honest answer is that it varies enormously depending on a handful of key variables, and getting clarity on those variables early prevents budget blowouts and halfway-through regret.
Key Cost Variables in Refurbishment Projects
Your aluminium window refurbishment cost estimate hinges on five primary factors working together: the number of openings, the refurbishment level each requires, whether glazing upgrades are included in scope, DIY versus professional labour, and the quality tier of materials selected. A cosmetic refresh using off-the-shelf products from Bunnings costs a fraction of a professional Level 3 restoration with two-pack coatings and IGU retrofits.
The table below frames these cost categories by their typical proportion of total project spend — useful for budgeting for aluminium window refurbishment project planning without relying on dollar figures that shift with market conditions and location.
| Cost Category | Typical Proportion of Total Cost | Notes |
|---|---|---|
| Labour (professional) | 40 – 55% | Largest single variable. DIY eliminates this but demands significant time investment. |
| Coatings and primers | 10 – 15% | Higher for premium systems (PVDF, two-pack polyurethane). Lower for standard acrylics. |
| Glazing upgrades (IGUs) | 15 – 25% | Only applies if upgrading to double glazing. Omitted from Level 1 and most Level 2 scopes. |
| Seals, weatherstripping, and hardware | 10 – 15% | Multi-fin and magnetic weatherstripping costs more than basic compression seals but lasts longer. |
| Surface preparation materials | 5 – 10% | Strippers, abrasives, etch solutions, masking — modest per unit but adds up across many openings. |
| Hidden and contingency costs | 5 – 15% | Temporary weatherproofing, hazardous material disposal, unforeseen structural repairs. |
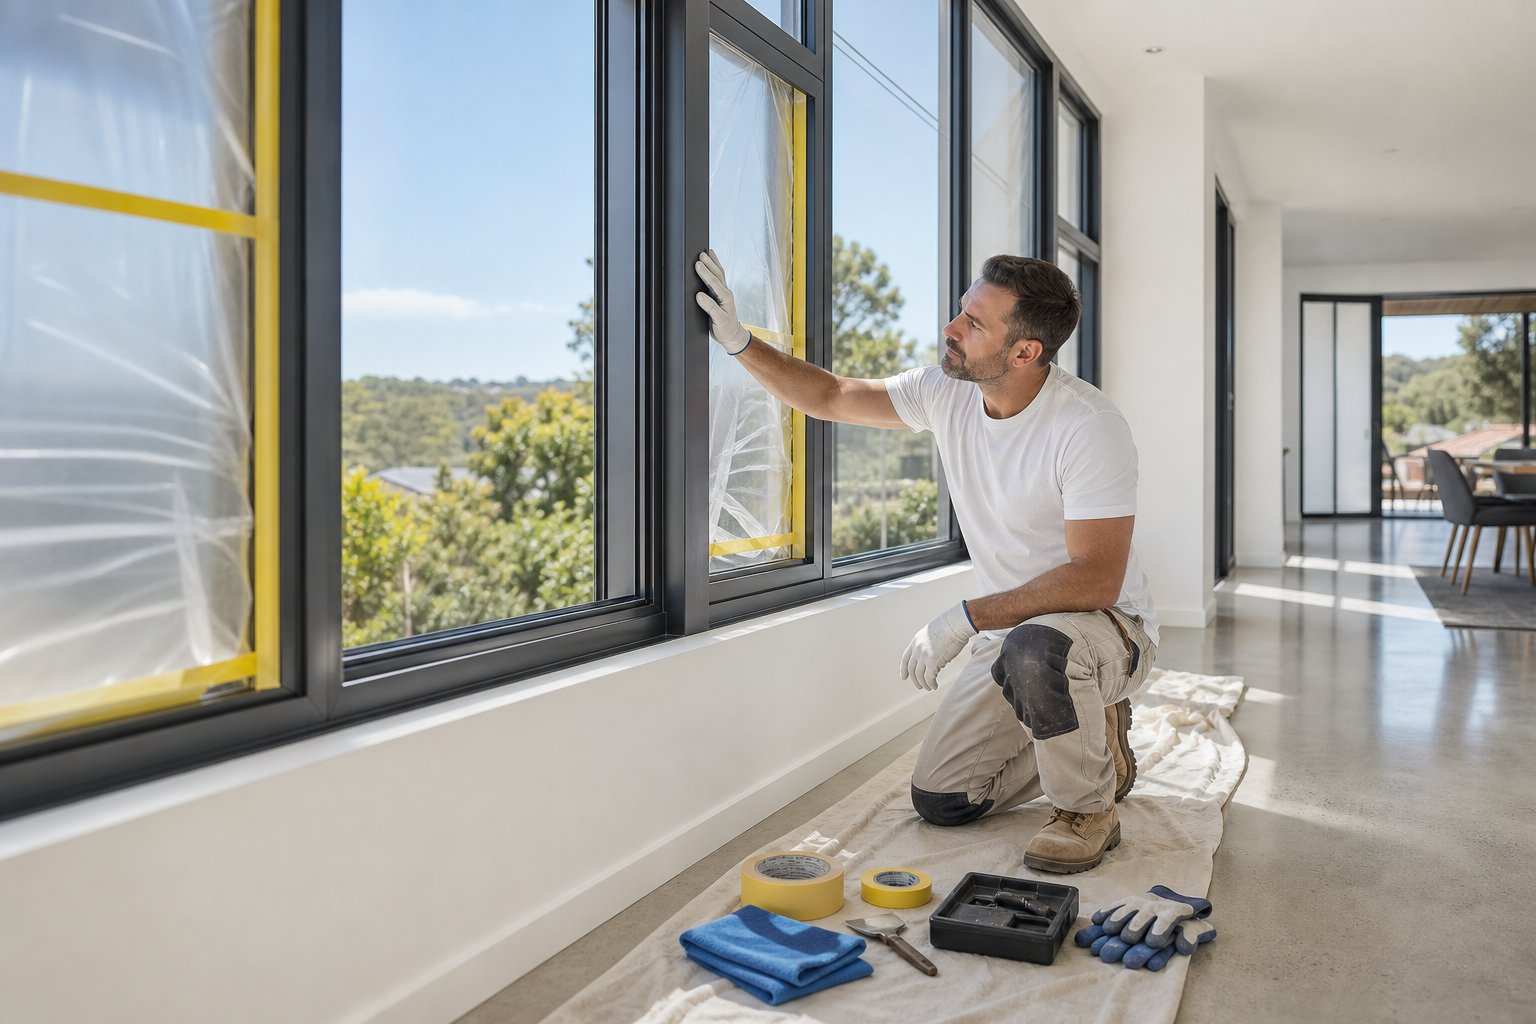
Those hidden costs deserve attention. Frames on pre-1980s homes may carry lead-based paint requiring licensed removal and disposal under Australian workplace health and safety regulations — a cost rarely anticipated in initial estimates. Temporary weatherproofing (plastic sheeting, foam seals) keeps your home habitable while frames are stripped and curing, adding modest material costs but protecting against weather damage during the project window. And structural repairs — cracked welds, corroded drainage channels — only reveal themselves once old coatings come off, which is why a contingency allowance of at least 10 percent belongs in every budget.
Getting Accurate Professional Quotes
A few professional aluminium window refurbishment quote tips save considerable frustration. First, insist on a written scope of work that specifies the refurbishment level for each window, the coating system to be applied (product names, not just “repaint”), which seals and hardware will be replaced, and whether glazing upgrades are included or excluded. A detailed scope document protects both parties by eliminating ambiguity about what the quoted price actually covers.
Request itemised pricing rather than a single lump sum. This lets you compare quotes meaningfully — one contractor’s lower headline figure might exclude seal replacement or use inferior single-pack coatings where another includes premium materials throughout. Ask specifically about:
- What surface preparation method will be used (chemical strip, mechanical abrasion, or media blasting)
- How many coats of primer and topcoat are included
- Whether disposal of hazardous materials is covered in the price
- What warranty period applies to both materials and workmanship
- How weather delays or unforeseen repairs will be handled commercially
Get at least three quotes from specialists who focus on aluminium restoration rather than general painters or glaziers. A contractor experienced in this specific work will assess frame condition more accurately, reducing the chance of scope creep once the project begins.
Making the Investment Decision
At some point, refurbishment costs approach a threshold where the numbers start favouring new windows. This crossover typically occurs when frames require Level 3 work plus glazing upgrades plus significant structural repairs — stacking costs until the total reaches 70 to 85 percent of replacement pricing. At that level, you are paying near-replacement money for a restored frame that still carries the thermal limitations of its original profile geometry.
The calculus shifts further when energy performance matters. A fully refurbished frame with retrofitted thermal breaks and slim IGUs will outperform its original specification significantly, but it still cannot match a modern system engineered from scratch with integrated polyamide thermal barriers, argon-filled cavities, and optimised seal geometry. For homeowners whose cost analysis reveals that full refurbishment approaches new-window pricing, exploring current thermally broken aluminium window systems with factory-integrated performance features provides a genuine comparison point — helping you determine whether the last 15 to 30 percent of additional spend buys meaningfully better performance and longevity.
The right answer is not always the same answer. A structurally sound frame needing Level 2 work remains a clear candidate for refurbishment — the economics are compelling and the performance uplift is real. But when the budget stretches into Level 3 territory with extensive extras, running the numbers honestly against purpose-built alternatives ensures you invest where the return is greatest.
Frequently Asked Questions About Aluminium Window Refurbishment
1. Is aluminium window refurbishment worth it compared to full replacement?
For frames that remain structurally sound — no deep pitting, warping, or cracked corner joints — refurbishment typically costs 30 to 50 percent of full replacement while restoring performance to near-new levels. It also preserves embodied energy and avoids the disruption of removing frames from wall openings. The investment becomes less compelling when frames need extensive structural repairs, as costs can climb to 70 to 85 percent of replacement pricing, at which point modern thermally broken systems with factory-integrated performance features may offer better long-term value.
2. How long does aluminium window refurbishment last?
Longevity depends on the refurbishment level and material quality. A cosmetic refresh (Level 1) using basic touch-up products lasts two to three years before repeat maintenance is needed. Moderate refurbishment (Level 2) with proper etch primer, quality topcoats, and new seals delivers seven to ten years of performance. Full professional refurbishment (Level 3) with two-pack coatings, upgraded glazing, and new hardware can last 15 to 20 years or more — particularly when appropriate materials are specified for local conditions such as coastal salt exposure or high UV.
3. Can you convert old aluminium windows to double glazing without replacing them?
It depends on the frame profile depth. A standard insulated glass unit (IGU) requires approximately 20 to 24 mm of glazing rebate depth, and many older frames were designed for 4 to 6 mm single panes. Heavier residential and commercial-grade frames from the 1980s onward often have sufficient depth for retrofit. For shallower profiles, slim IGUs (14 to 16 mm total thickness) offer a compromise. Where neither option fits, aftermarket low-E films provide a lower-cost alternative with more modest thermal gains. A glazing specialist can measure your rebates and confirm feasibility before committing to the upgrade.
4. What primer should I use on aluminium window frames?
Never use standard metal primers designed for steel — they are formulated to react with iron oxide and will not bond to aluminium. For DIY residential projects in moderate conditions, a self-etching primer containing phosphoric acid provides a single-step chemical bite and protective coating. For coastal properties or frames exposed to persistent humidity, a two-part etch primer (epoxy-based) delivers superior adhesion and moisture resistance. In both cases, the aluminium surface must be clean, free of oxidation, and chemically etched immediately before primer application for the bond to form properly.
5. How do I know if my aluminium windows need refurbishment or just cleaning?
Surface oxidation (white powdery residue) and general grime often look worse than they are — a thorough clean with mild detergent may be all that is needed, especially on anodised frames. Refurbishment becomes necessary when you observe peeling or flaking coatings, hardened seals that no longer compress, draughts around closed sashes, condensation between double-glazed panes, stiff or failing hardware, or water ingress during rain. A hands-on assessment checking frame alignment (diagonals within 3 mm), screw port integrity, and seal condition will clarify whether cleaning suffices or deeper restoration work is required.
More Window & Door Guides