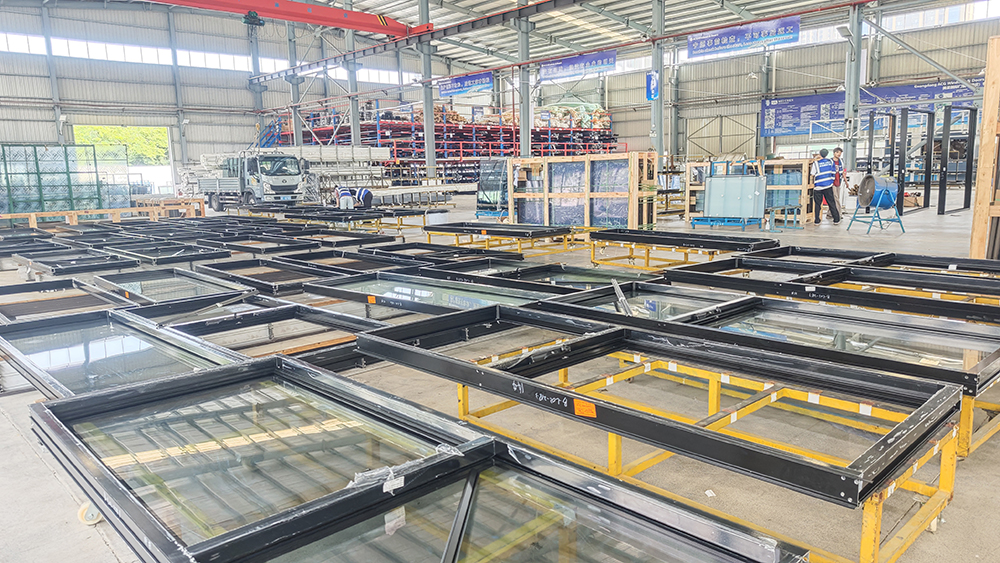
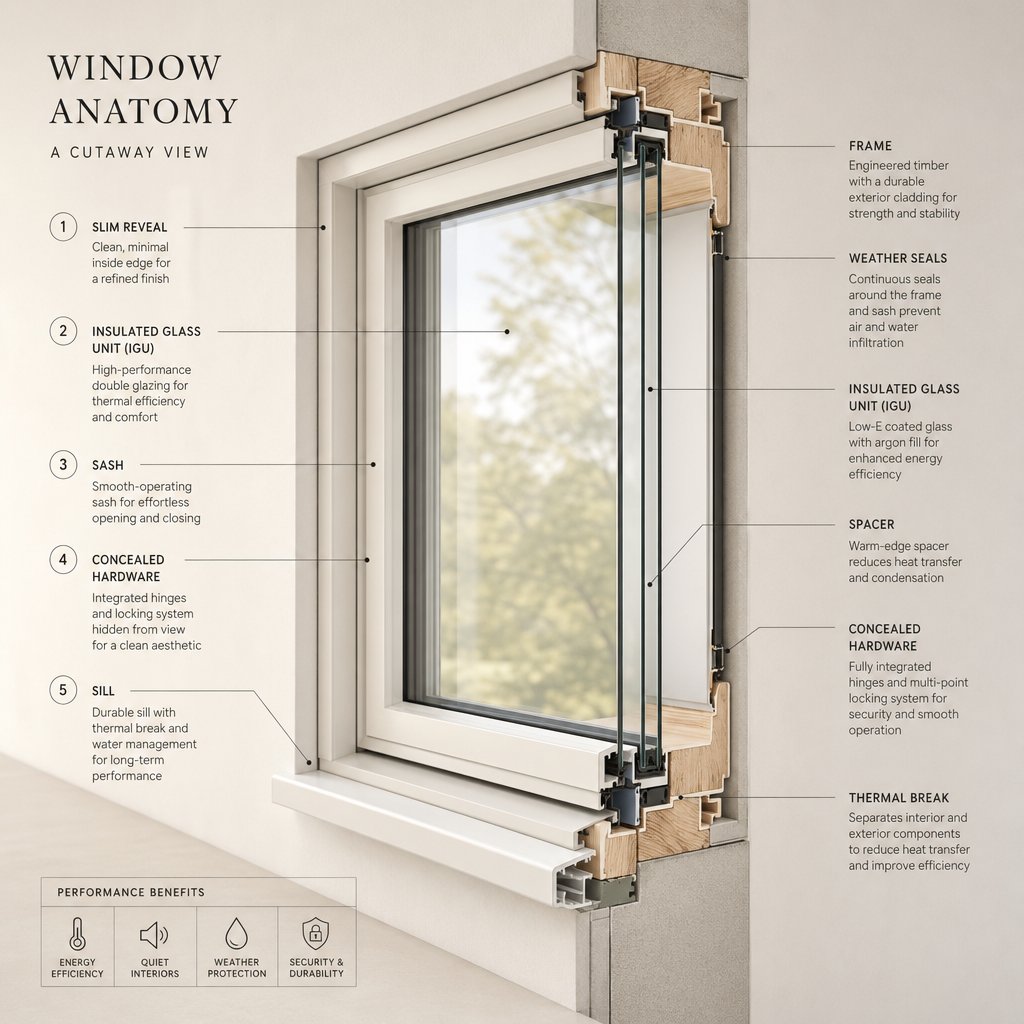
What Is Aluminium Door and Window Fabrication
Most people use the words “manufacturing” and “fabrication” interchangeably. In the aluminium fenestration industry, they mean different things. Manufacturing covers the entire supply chain, from smelting raw bauxite to extruding profiles. Fabrication is narrower and more precise — it is the stage where those extruded profiles become a finished product you can actually install in a wall.
What Fabrication Means in the Aluminium Window Industry
Aluminium window fabrication is the process of converting extruded aluminium profiles into complete, ready-to-install window and door units through cutting, machining, joining, hardware fitting, glazing, and quality testing.
So how are aluminium windows made at a practical level? A fabricator receives lengths of pre-shaped aluminium extrusion — hollow profiles designed with specific chambers, grooves, and channels. These profiles are then cut to size, machined for drainage and hardware, joined at the corners, fitted with seals and locking mechanisms, glazed, and inspected. Each step demands precision measured in fractions of a millimetre. The aluminium door and window manufacturing process is a sequence of interdependent operations where a mistake at any stage compromises the finished unit.
Why Fabrication Quality Determines Product Performance
Understanding aluminium fenestration fabrication matters because it directly shapes the three outcomes every buyer cares about: weather resistance, security, and energy efficiency. A poorly crimped corner joint lets water in. Inaccurate machining means hardware binds or fails under load. Gaps as small as 0.5 mm between seal and frame can degrade a window’s thermal performance enough to affect its WERS rating. The fabrication stage is where design intent either becomes real-world performance or falls short of it.
For builders, architects, and homeowners specifying aluminium windows and doors in Australia, knowing what separates competent fabrication from careless assembly is the difference between a product that performs for decades and one that develops issues within years. The details of that process — from profile selection through to final inspection — reveal exactly where quality is won or lost.
Profile Selection and Material Preparation
Every fabricated aluminium window or door begins life as a length of extruded profile — and the choice of which profile system to use is the first decision that locks in performance limits. Get this wrong, and no amount of skilled assembly downstream can compensate. Profile selection determines structural capacity, thermal efficiency, glazing options, and hardware compatibility before a single cut is made.
Profile System Selection and Specification
Aluminium extrusion profiles for doors and windows are produced by forcing heated aluminium alloy (typically 6063-T5 or 6063-T6) through precision-engineered steel dies under enormous hydraulic pressure. The die’s opening defines the exact cross-sectional geometry of the profile — its chambers, channels, gasket grooves, and hardware pockets. Different window and door types require fundamentally different cross-sections. A sliding door track profile looks nothing like a casement frame section, even though both start as the same raw alloy.
Fabricators don’t design profiles from scratch for each project. They work within established profile systems offered by extrusion suppliers, selecting a series that matches the project’s performance requirements. The differences between series come down to several measurable characteristics:
- Structural requirements — Frame depth and wall thickness determine how much wind load and glass weight the profile can handle. Deeper profiles (56–71 mm) suit large-format openings; shallower sections work for standard residential sizes.
- Thermal performance targets — Wider thermal break cavities and additional air chambers improve insulation values. A profile with a 39 mm thermal break delivers significantly better U-values than one with a 20 mm break.
- Glazing weight capacity — Triple-glazed units weigh considerably more than double-glazed equivalents. The profile must accommodate both the thickness of the sealed unit and the load it places on hinges and friction stays.
- Hardware compatibility — Lock keeps, hinge screws, and espagnolette mechanisms require specific routing depths and screw-boss positions. Not every hardware brand fits every profile series.
Choosing the wrong profile system creates problems that surface months after installation — windows that deflect under wind pressure, frames that can’t achieve the thermal ratings needed for NCC compliance, or hardware that loosens because screw bosses are undersized for the load.
How Thermal Break Technology Affects the Fabrication Workflow
Aluminium conducts heat roughly 1,000 times more effectively than timber. Without intervention, an aluminium frame acts as a thermal bridge, transferring heat straight through the wall. Thermally broken aluminium profiles for windows solve this by splitting the frame into two separate aluminium sections — interior and exterior — connected by an insulating barrier rather than continuous metal.
Two methods dominate. The polyamide strip system mechanically crimps rigid polyamide strips between inner and outer aluminium sections. The process involves knurling small teeth (0.15–0.30 mm) into the aluminium pocket, inserting the polyamide strip, then applying over 590 kg of crimping pressure through staged rollers to lock the assembly together. The alternative — pour and debridge — fills a channel with liquid polyurethane that hardens before the connecting aluminium bridge is mechanically removed.
For fabricators, thermally broken profiles behave differently during cutting and machining. The composite structure means saw blades must cut through aluminium, polyamide, and aluminium again in a single pass without delamination. CNC machining parameters need adjustment to avoid cracking the thermal break material. These profiles also respond differently to crimping at corners — the polyamide strip must align precisely across the joint to maintain the thermal barrier’s continuity. Any gap in the break at a corner becomes a cold bridge that defeats the purpose of the system.
Material Inspection Before Cutting
Before profiles reach the cutting saw, competent fabricators run incoming material checks. Profiles arrive in 5–6.5 metre lengths, and each batch needs verification against the specification. This means checking wall thickness with calibrated micrometres, confirming profile geometry against cross-sectional drawings, inspecting for surface defects like die lines or handling damage, and verifying that thermal break strips are properly seated along the full length.
Dimensional tolerances at this stage follow standards like those referenced in ASTM B221 — wall thickness accuracy of ±0.15–0.25 mm, straightness within 1 mm per metre, and angular deviation under ±2 degrees. Profiles that fall outside these tolerances get rejected before they consume machining time and labour. It’s a simple quality gate, but skipping it means dimensional errors compound through every subsequent fabrication step — and by the time a finished window fails its air-tightness test, the root cause is buried in a profile that should never have been cut.
Cutting and CNC Machining Processes
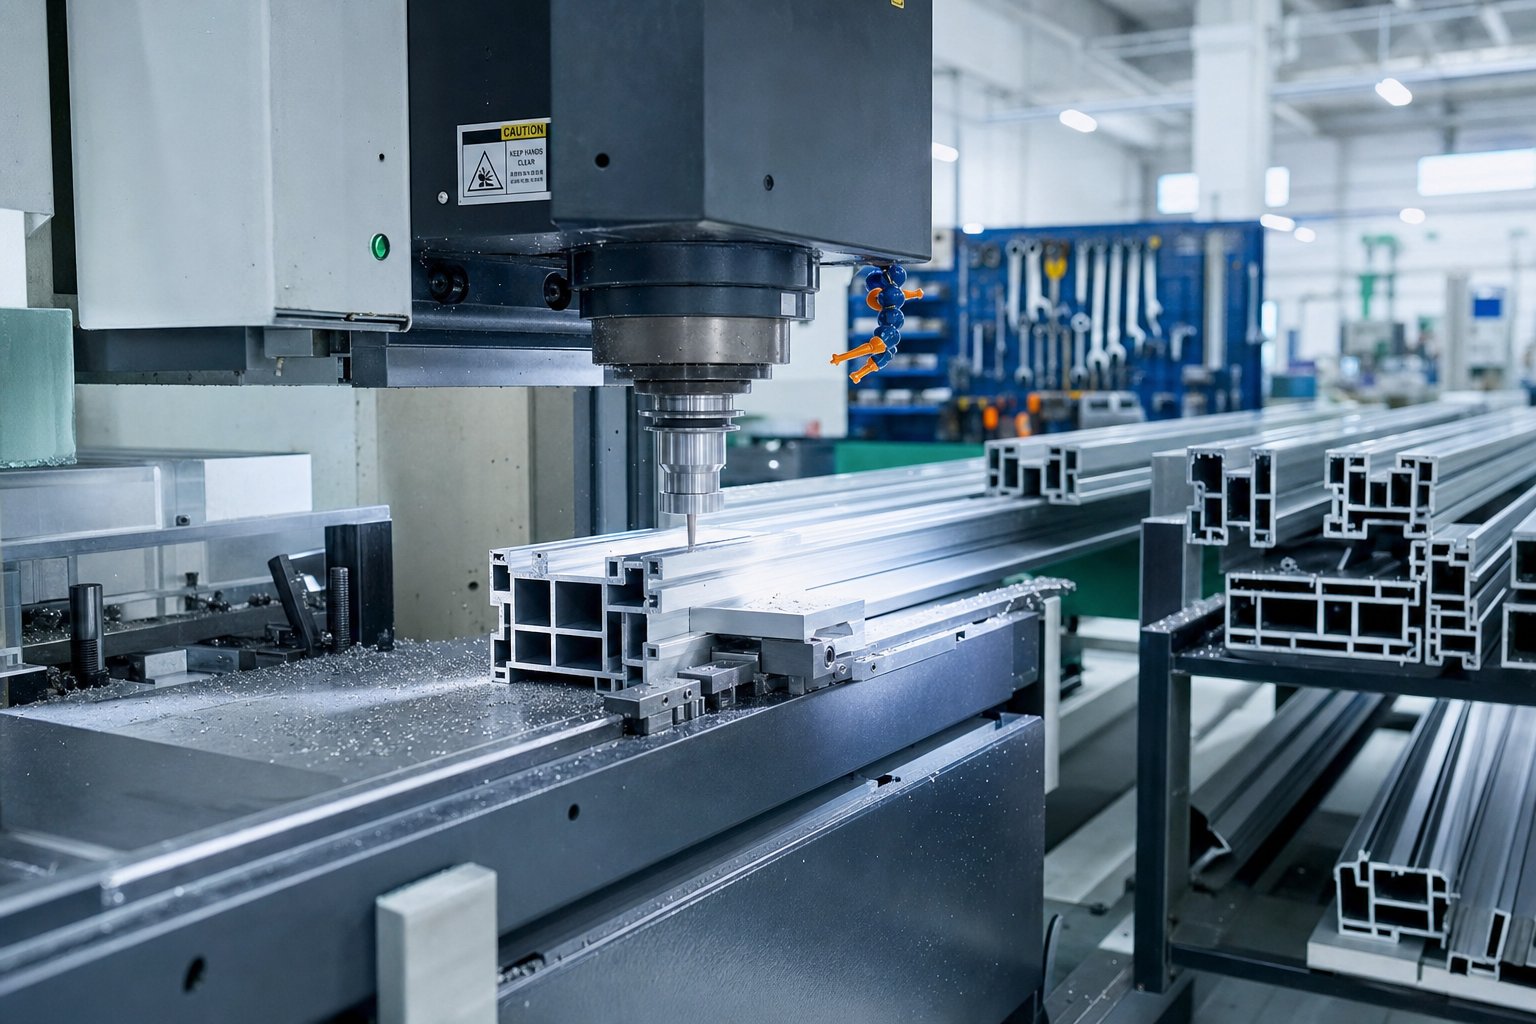
Profiles that pass incoming inspection move to the cutting bay — the point where raw material starts becoming a window. This stage defines dimensional accuracy for every operation that follows. A cut that’s 0.5 mm too short or half a degree off-angle creates a corner gap no amount of crimping pressure can fully close. The aluminium window cutting process explained in simple terms comes down to two core operations: cutting profiles to exact lengths at precise angles, then machining them with all the holes, slots, and channels needed for hardware, drainage, and assembly.
CNC Cutting for Precision and Consistency
Modern fabrication shops use CNC-controlled double-head saws that cut both ends of a profile simultaneously. The operator loads a length of extrusion, inputs the job parameters (or the machine pulls them directly from production software), and the saw delivers two perfectly angled cuts in a single cycle. Aluminium profile cutting angles for windows depend on the corner joining method specified. Frames destined for crimped or welded corners receive 45-degree mitre cuts so two pieces meet to form a 90-degree corner. Profiles joined with mechanical cleats get straight 90-degree cuts instead, with the cleat bridging the butt joint internally.
CNC saws hold angular tolerances within ±0.1 degrees and length tolerances within ±0.2 mm across production runs of hundreds of identical pieces. That level of repeatability matters because even small deviations accumulate — four corners each 0.3 mm out of tolerance can produce a frame that’s visibly racked or fails its weather seal compression test. Programmable length stops and automatic blade feed also reduce material waste by optimising how profiles are nested across standard 6-metre lengths.
Machining Operations and Drainage Slot Placement
Cut profiles then move to CNC machining centres — multi-axis machines that perform routing, drilling, milling, and slotting in a single automated pass. A CNC machining centre reads the programmed job file and executes every operation the profile needs: hinge screw holes, espagnolette lock routing, ventilation channels, keep pockets, and drainage slots. One load, one cycle, every hole in exactly the right position relative to every other hole.
Drainage slots in aluminium windows deserve specific attention because they’re small, easy to overlook, and critical to long-term performance. These slots — typically 5 mm x 20 mm or 6 mm x 25 mm — are machined into the bottom rail of the outer frame to allow any water that enters the rebate cavity to drain outward rather than pooling inside the frame. Their placement follows a consistent logic: one slot near each corner (within 100 mm of the internal corner) and additional slots at roughly 600 mm intervals along longer spans. Ventilation slots in the top rail serve a related purpose, equalising air pressure across the glazing cavity to prevent wind-driven rain from being forced past the weather seals.
CNC machining for aluminium window fabrication eliminates the risk of a missed drainage hole or a slot punched in the wrong chamber — errors that only reveal themselves months later when water stains appear on an internal sill or condensation builds between sealed unit panes.
Manual vs Automated Fabrication Methods
Not every fabrication shop runs full CNC lines. Smaller operations still use manual or semi-automatic methods — hand-operated single-head saws, pillar drills, and template-guided copy routers. These setups work, and they cost far less to establish. The trade-off sits squarely in consistency and throughput.
A skilled operator using manual equipment can produce accurate work on any individual piece. The challenge is maintaining that accuracy across a full day’s production, across different operators, and across weeks of repetitive work. Fatigue, distraction, and minor measurement drift introduce variability that CNC systems simply don’t experience. For a project requiring 80 identical windows, the difference between CNC vs manual aluminium fabrication methods shows up in reject rates, rework time, and the uniformity of the finished product.
| Dimension | CNC Fabrication | Manual Fabrication |
|---|---|---|
| Precision tolerance | ±0.1 mm cutting, ±0.2 mm machining | ±0.5–1.0 mm (operator-dependent) |
| Production speed | High — multiple operations in a single pass | Moderate — each operation performed separately |
| Consistency across runs | Identical output regardless of batch size | Varies with operator skill and fatigue |
| Setup cost | Higher capital investment, lower per-unit cost at volume | Lower capital outlay, higher per-unit labour cost |
For Australian fabricators serving commercial projects or large residential developments, CNC capability is effectively a baseline requirement. The volumes, tolerances, and compliance documentation expected on these jobs make manual methods impractical. Smaller custom fabricators handling one-off residential work may still operate profitably with semi-automatic equipment — but even at that scale, CNC machining centres are increasingly common as entry-level models become more accessible.
Precision at the cutting and machining stage sets the ceiling for everything downstream. Corners can only join cleanly if the cuts feeding them are accurate. Hardware can only function correctly if its mounting holes land in the right positions. That dependency chain is why the next stage — corner joining — either confirms or exposes the quality of every cut and machined slot that preceded it.
Corner Joining Methods and Structural Integrity
A window frame is only as strong as its weakest corner. Every other fabrication step — cutting, machining, hardware fitting — feeds into this single operation. How aluminium window corners are joined determines whether a frame holds its shape under wind load, resists water ingress over decades, and maintains the tight seal compression that thermal and acoustic performance depend on. It’s also the step where the difference between a premium product and a mediocre one becomes physically measurable.
Three primary aluminium window corner joining methods dominate the industry, each suited to different performance requirements, budgets, and aesthetic expectations.
Mechanical Crimping and How It Works
Mechanical crimping for aluminium windows is the most widely used joining method in residential fabrication across Australia. The process is a cold-joining technique — no heat, no filler material, just controlled deformation of metal under immense pressure.
Here’s the sequence: a fabricator slides a specialised aluminium corner cleat into the internal chambers of two 45-degree mitre-cut profiles. The assembled corner is placed into the V-shaped bed of a corner crimping machine, where pneumatic clamps lock the profiles flat and square against reference plates. Two hydraulic heads then drive steel crimping knives into the outer walls of the aluminium, deforming the metal into the notches of the internal cleat. Both sides press simultaneously — generating between 30 kN and 100 kN of force — to ensure the mitre closes without shifting.
A well-calibrated press produces a hairline mitre joint in under 10 seconds. The result is a permanent mechanical bond that resists the thermal expansion and contraction aluminium undergoes in Australian conditions, from sub-zero alpine mornings to 45-degree western Sydney summers. The crimping knives leave small indentations on the profile face, but on standard residential windows these are barely visible once installed.
The failure mode to watch for: corners joined with insufficient pressure or misaligned knives can loosen over time. Daily operation — opening, closing, wind cycling — gradually works a weak crimp apart, creating gaps at the mitre joint. Water finds those gaps. Filiform corrosion — thread-like filaments that creep beneath the powder coating from exposed cut edges — is a direct consequence of poorly sealed corner joints, particularly in warm, humid, or coastal environments common across much of Australia.
Welded Corners for Seamless Finish
When comparing welded corners vs crimped corners in aluminium fabrication, the distinction is immediately visible. Welded construction eliminates the mitre line entirely. Profiles are cut, welded using friction welding or TIG welding, then ground smooth to create a seamless, continuous surface before the frame is powder coated as a complete assembly.
This approach delivers three advantages that crimping cannot match. First, structural strength — a welded joint creates a continuous metal connection rather than relying on a mechanical interlock. For oversized frames, fabricators often add concealed stainless-steel brackets inside the glazing cavity to complement the weld’s strength. Second, aesthetics — there are no visible cut lines, no shadow lines from slight misalignment, and no exposed raw aluminium edges at the joint. On dark finishes especially, this difference is stark. Third, corrosion resistance — because there are no exposed mitre cuts, there’s no entry point for moisture to reach raw aluminium. The frame is painted after assembly, providing complete coverage across every surface including the joint itself.
The trade-off is cost and production time. Welded frames must be finished individually rather than as linear profile lengths, which increases finishing costs substantially. The welding and grinding labour adds further expense. This method suits premium residential projects and architectural applications where the seamless steel-window aesthetic justifies the price premium — but it’s not the standard approach for volume residential work.
Corner Cleat Systems for Heavy-Duty Applications
Corner cleat systems for aluminium doors take a different approach entirely. Instead of mitre-cut profiles meeting at 45 degrees, profiles are cut at 90-degree butt joints and connected by heavy-duty internal corner cleats secured with machine screws. The cleat bridges the joint internally while screws provide a mechanical fixing that can be tightened or adjusted.
This method appears most often in commercial applications — large shopfront doors, heavy-duty entrance systems, and oversized sliding panels where the frame depth and weight make crimping impractical. Screw-fixed cleats allow for disassembly if a profile section is damaged, which matters on commercial projects where replacing an entire welded frame would be prohibitively expensive. The visible butt joint is less aesthetically refined than a mitred corner, but in commercial contexts where aluminium frames are often concealed behind cover caps or structural mullions, this rarely matters.
The structural performance of screw-fixed cleats depends heavily on the cleat material, screw gauge, and the number of fixing points. Under-specified fixings in a heavy commercial door will work loose under repeated operation — a failure mode that manifests as rattling, air leakage, and eventually visible frame distortion.
| Characteristic | Mechanical Crimping | Welded Corners | Screw-Fixed Corner Cleats |
|---|---|---|---|
| Joint strength | High — permanent cold-formed bond | Very high — continuous metal connection | Moderate to high — dependent on fixing specification |
| Aesthetics | Hairline mitre joint visible on close inspection | Seamless — no visible joint line | Visible butt joint, often concealed by cover caps |
| Corrosion resistance | Exposed cut edges require sealing in coastal zones | Excellent — no exposed cuts, full paint coverage | Exposed cuts at joint; sealing recommended |
| Cost | Standard — fastest production method | Premium — significant labour and finishing cost increase | Moderate — more labour than crimping, less than welding |
| Typical application | Residential casement, awning, and sliding windows | Premium residential, architectural feature windows | Commercial doors, shopfronts, heavy-duty sliding systems |
| Repairability | Non-reversible — frame must be replaced if joint fails | Non-reversible | Reversible — individual sections can be replaced |
Regardless of method, corner joint quality hinges on two things: the precision of the cuts feeding into the joint, and the care taken during assembly. A perfectly crimped corner still fails if the mitre cuts were 0.3 degrees off-angle. A welded joint still cracks if the profiles weren’t properly supported during welding. The joining method sets the ceiling for structural performance — but the fabricator’s skill and equipment determine how close to that ceiling the finished product actually lands.
Corner integrity also has a direct relationship with hardware performance. Multi-point locking systems, friction stays, and hinge mechanisms all transfer load through the frame. If a corner joint flexes under that load, hardware alignment shifts, locking points miss their keeps, and the window’s security rating degrades. That connection between structural joints and hardware function is precisely why the next stage of fabrication — integrating locks, hinges, and stays — demands the same level of precision as the corner press itself.
Hardware Integration and Fitting During Aluminium Window Fabrication
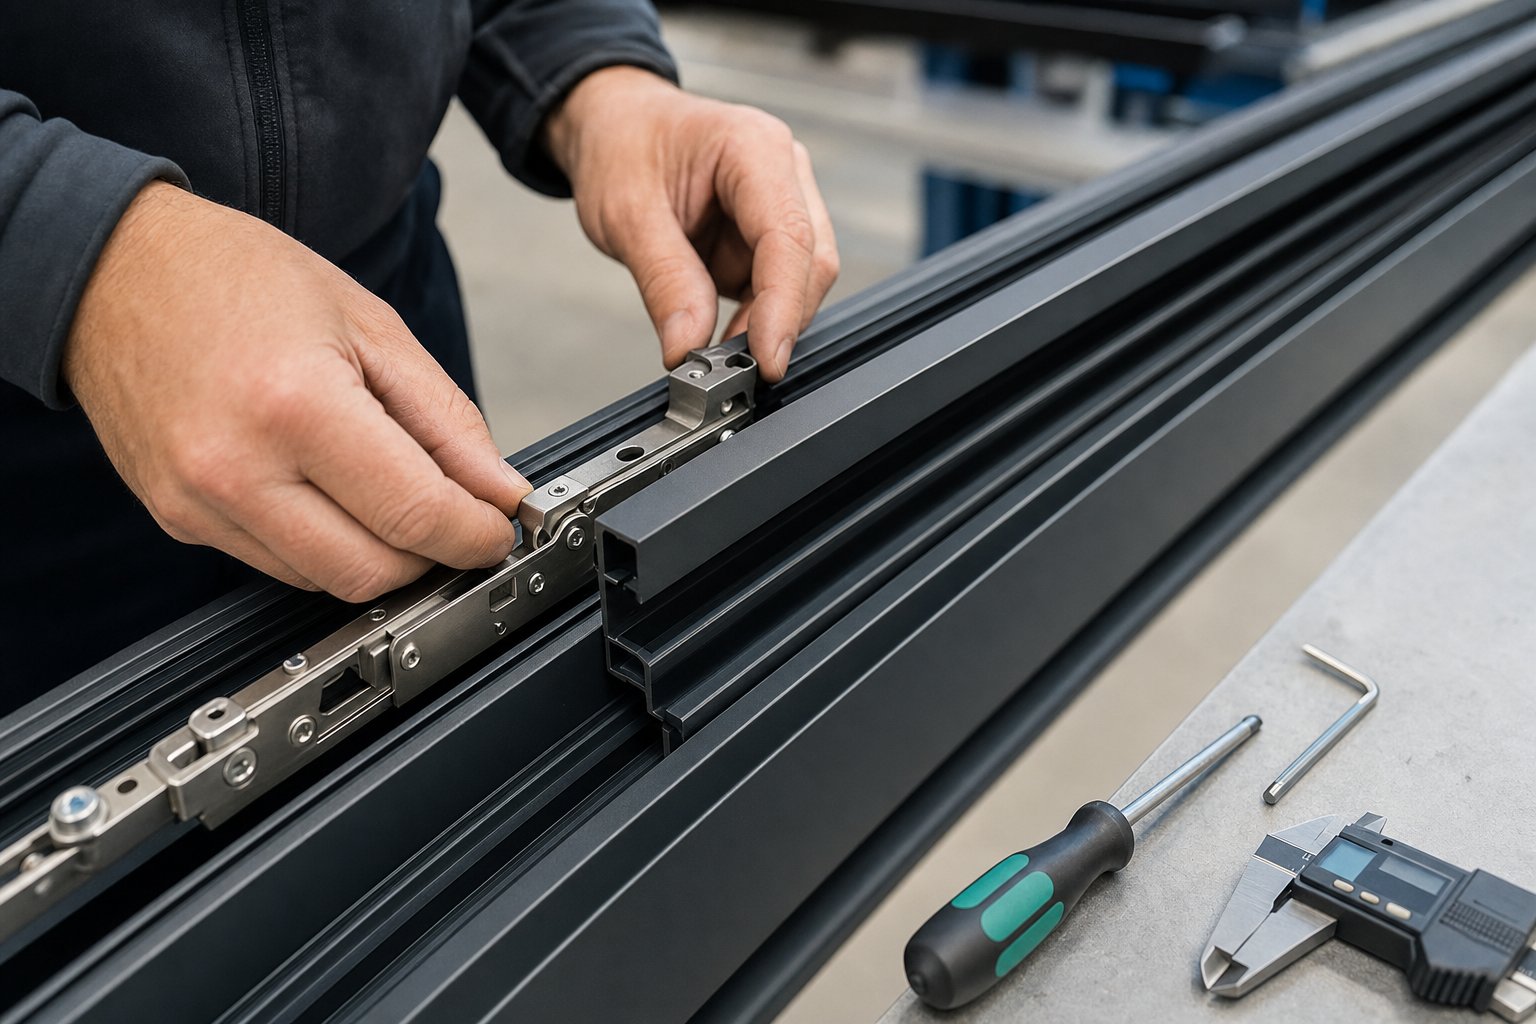
Hardware isn’t bolted on as an afterthought. In competent fabrication, every hinge, lock, handle, and roller is fitted in the workshop under controlled conditions — not on a scaffolded building site with dust blowing through the opening. Aluminium window hardware installation during fabrication ensures that each component is positioned with the precision the profile system demands, tested for smooth operation, and adjusted before the unit ever leaves the factory floor.
This distinction matters more than most buyers realise. A multi-point lock fitted on-site relies on the installer measuring, drilling, and routing in real time — often working overhead, in poor light, or against a deadline. The same lock fitted during fabrication benefits from CNC-machined pockets, jig-guided screw positions, and the ability to test engagement with the frame sitting flat on a bench. The result is hardware that works correctly from day one and continues working for years.
Routing and Drilling for Lock Systems
Multi-point locking system fitting for aluminium doors begins with the espagnolette mechanism — a central gearbox connected to vertical rods that engage multiple locking points along the frame’s height. The sash profile requires a precisely routed pocket to house the gearbox, typically 16–22 mm deep depending on the hardware brand, with additional routing for the faceplate to sit flush with the profile surface.
The corresponding keeps — the metal receivers that the locking hooks, rollers, or mushroom cams engage with — must be machined into the outer frame at positions that align exactly with the sash-mounted lock points when the window is closed. Even 2 mm of vertical misalignment between a hook and its keep means the lock either binds during operation or fails to engage fully, compromising the window’s security rating. CNC machining centres handle this by working from a single datum point, ensuring that sash and frame components share identical reference geometry regardless of which machine or operator produced them.
Drainage and hardware routing often share the same profile faces, so fabricators must sequence operations carefully. A drainage slot machined too close to a lock keep weakens the surrounding material. Production software manages these spatial conflicts automatically, flagging clashes before cutting begins.
Hinge and Friction Stay Installation
Friction stay installation on aluminium windows requires matching the hinge to both the window’s weight and its opening geometry. A friction stay hinge uses a sliding track mechanism that controls the sash’s outward movement while supporting its full weight at any opening angle. Selecting the wrong size — say a 12-inch stay on a sash that needs a 16-inch unit — leads to sash drop, excessive stress on the track, and premature failure of the riveted joints within the hinge assembly.
Hinge screw positions are drilled during CNC machining, not by hand on the assembly bench. The screw boss locations within the profile’s internal chambers dictate exactly where fixings can land. Drilling into the wrong chamber — or missing the screw boss entirely — means the screw grips only thin-wall aluminium rather than a reinforced boss, and the hinge will pull free under repeated load. For heavy double-glazed sashes common in Australian residential projects, stainless steel friction stays (typically SUS304 grade) are standard because they resist corrosion in coastal and humid environments while providing the structural strength needed for sash weights exceeding 20 kg.
Top-hung and side-hung windows use different hinge geometries, and the fabricator must orient the stay correctly relative to the profile’s weatherseal grooves. An incorrectly oriented friction stay can interfere with seal compression when the window closes, creating an air leakage path that degrades both thermal and acoustic performance.
Hardware Compatibility Across Profile Systems
Not every lock fits every profile. Hardware compatibility across aluminium window profiles is one of the most common sources of field failures — and it’s almost always a specification error rather than a fabrication defect. Each profile system has specific eurogroove dimensions, screw boss positions, and faceplate widths. A lock gearbox designed for a 20 mm eurogroove won’t seat properly in a profile machined with a 16 mm groove. The handle spindle height relative to the gearbox centre varies between hardware brands, meaning a handle specified for one system may not align with the lock mechanism in another.
Bi-fold doors amplify these compatibility challenges significantly. Beyond standard locks and hinges, bi-fold fabrication involves top and bottom track systems, pivot hardware at the jamb panel, intermediate panel connections with D-handles, flush bolts for securing stacked panels, and guide rollers that must align with track channels to sub-millimetre accuracy. Each panel in a bi-fold set carries different hardware depending on its position — the lead panel, intermediate panels, and jamb panel all have distinct fitting requirements. Specifying hardware for a five-panel bi-fold door is an order of magnitude more complex than a standard casement window.
The critical hardware integration checkpoints during fabrication include:
- Lock gearbox pocket depth and faceplate routing verified against hardware specification sheets
- Keep positions on the frame cross-checked against corresponding lock points on the sash
- Friction stay size confirmed against actual sash weight (including glazing unit)
- Hinge screw positions aligned with internal screw bosses — not just wall material
- Handle spindle height matched to gearbox centre for smooth operation
- Bi-fold track alignment tested across full travel before panels are glazed
- All moving hardware cycled multiple times to confirm smooth engagement and disengagement
Skipping any of these checks pushes problems downstream to the installation team — who then face the choice of forcing ill-fitting hardware, returning units to the factory, or improvising fixes on-site that void warranties and compromise performance. The cost of getting hardware integration right during fabrication is a fraction of the cost of fixing it after the window is installed three storeys up on a building facade.
Hardware determines how a window feels to use every single day. But the component that occupies the largest surface area — and carries the greatest weight — is the glass itself. How glazing units interact with the fabricated frame introduces its own set of engineering constraints that shape profile choice, hardware selection, and assembly sequence in ways most specification guides overlook.
Glazing Integration and Product Type Variations
Glass accounts for roughly 80% of a window’s visible surface area — and in many cases, more than half its total weight. The sealed glazing unit isn’t just something that slots in at the end of fabrication. Its thickness, weight, and thermal characteristics influence decisions made at the very beginning of the process: which profile series to specify, what hinge capacity to select, and how the frame’s drainage and ventilation system must perform. Understanding how glass weight affects aluminium window fabrication reveals why this stage demands as much engineering attention as the frame itself.
How Glazing Unit Thickness Affects Profile Design
A standard double-glazed sealed unit — two panes of glass separated by one gas-filled cavity — typically measures around 20–28 mm in total thickness. Step up to triple glazing, and that figure jumps to 36–44 mm, with a corresponding weight increase of 30–50% depending on glass specification. That difference isn’t cosmetic. It drives fundamental profile geometry decisions.
The profile’s glazing rebate — the recessed channel that receives the sealed unit — must be deep enough to accommodate the unit’s full thickness plus glazing beads, packers, and weatherseals. A profile designed for 24 mm double-glazed units simply cannot accept a 44 mm triple-glazed unit without modification. Fabricators working on projects that specify triple glazing need profiles with deeper rebates, wider bead engagement, and often additional internal chambers to maintain structural rigidity despite the increased depth.
Weight compounds the challenge. A 1200 mm x 1500 mm double-glazed unit using standard 4 mm float glass weighs approximately 30 kg. The same dimensions in triple glazing push past 45 kg. That additional mass loads the frame differently — particularly at the bottom rail, where the glass sits on packers, and at the hinge side, where friction stays must support the sash at every opening angle. Fabricators must confirm that the specified friction stays can handle the actual sash weight including glazing, not just the frame weight alone. Under-specifying here leads to sash drop within months of installation — a common callback issue on projects where glazing upgrades were made late in the specification process without revisiting hardware selections.
Bead Systems and Glazing Methods
Double glazing unit installation in aluminium frames follows a precise sequence that balances load distribution, weatherproofing, and long-term serviceability. The glazing bead — a snap-fit or screw-fixed aluminium section — secures the sealed unit within the rebate after installation. Aluminium window glazing bead systems vary between profile manufacturers, but they share common principles: the bead must compress a weatherseal against the glass face to prevent water and air ingress, it must be removable for future glass replacement, and it must sit flush with the frame profile for clean aesthetics.
The glazing sequence itself is methodical:
- Unit inspection — Check the sealed unit for edge seal damage, spacer bar alignment, and correct dimensions before handling. A unit with a compromised edge seal will fail regardless of how well it’s installed.
- Frame preparation — Confirm the rebate is clean, drainage slots are unobstructed, and setting blocks (bottom packers) are positioned correctly. Setting blocks sit at quarter points from each corner on fixed frames, or directly beneath the hinge and lock stile on opening sashes.
- Unit placement — Lower the sealed unit onto the setting blocks, ensuring even contact across both packers. The unit should not rest directly on the aluminium frame at any point.
- Location and distance packers — Insert location packers at the sides to centre the unit within the rebate and prevent lateral movement. Distance packers maintain a consistent gap between the glass edge and the aluminium rebate face, allowing for thermal expansion of both materials.
- Toe-and-heel packing — On opening sashes, diagonal packing (toe and heel) transfers the sash weight through the glass into the frame at specific points, preventing the sash from dropping or racking over time.
- Bead fitting — Snap or press glazing beads into position, starting with the shorter beads (top and bottom) before fitting the longer side beads. Confirm that the integral weatherseal compresses evenly against the glass face along the full length.
- Final check — Verify that the unit sits square, beads are fully engaged, no packers are visible, and drainage paths remain clear.
Packer placement isn’t arbitrary. Incorrect packing — spacing too wide, blocks positioned off the quarter points, or missing toe-and-heel packers on opening sashes — allows the glass to shift within the frame. Over time, this movement breaks the seal compression, introduces rattles, and can even crack the sealed unit’s edge seal, leading to internal condensation between panes that no repair can fix.
Fabrication Variations Across Window and Door Types
The fabrication differences between casement vs sliding aluminium windows extend well beyond hardware selection. Each window and door type presents distinct challenges in frame geometry, seal configuration, and structural loading that fabricators must address during assembly.
Casement and awning windows are the most straightforward to fabricate. The sash is hinged on one side (casement) or at the top (awning), swings outward, and relies on friction stays to control movement. Fabrication complexity is moderate — standard crimped corners, single-point or multi-point locking, and a continuous compression seal around the sash perimeter. The primary variable is sash weight, which dictates stay size and hinge specification.
Sliding windows and doors introduce track systems, rollers, and interlocking meeting stiles that casements don’t require. The bottom track profile must be machined to accept roller carriages that carry the full panel weight — often exceeding 80 kg on large sliding doors. Weathersealing relies on brush seals and interlocking profiles rather than compression gaskets, which means fabrication tolerances on meeting stile alignment are tighter. A sliding panel that’s 1 mm out of parallel across its height will bind at one end and leak air at the other.
Bi-fold doors represent the highest fabrication complexity in residential aluminium work. Each panel connects to adjacent panels via hinges, runs on a top or bottom track (or both), and must fold in a precise sequence without binding. The lead panel carries different hardware from intermediate panels. Threshold drainage must handle water across the full opening width without a raised track that creates a trip hazard. Fabricators typically assemble and test the complete bi-fold set as a unit before dispatch — running every panel through its full travel to confirm alignment, smooth folding action, and correct locking engagement at both the open and closed positions.
Tilt-and-turn windows use dual-function hardware that allows the sash to tilt inward from the top for ventilation or swing inward from the side for cleaning. This requires a specific hardware channel routed around the full sash perimeter — a continuous eurogroove that accepts the tilt-and-turn mechanism’s locking points at multiple positions. The profile must accommodate both the pivot hardware at the bottom corners and the restraint arms at the top, making it one of the more demanding configurations for CNC machining setup.
Pivot windows rotate on a central or offset axis, meaning the frame must support the sash weight at two pivot points rather than distributing it along a hinge edge. The pivot hardware mounts into reinforced sections of the head and sill profiles, and the frame’s weatherseal must accommodate the sash rotating through its full arc without catching or compressing unevenly. Fabrication requires precise pivot point positioning — even 2–3 mm of offset produces a sash that binds at one point in its rotation.
Each of these product types shares the same raw material — extruded aluminium profiles — but the fabrication workflow, machining programs, hardware integration, and quality checks differ substantially between them. A fabricator tooled and experienced for casement windows isn’t automatically equipped to produce high-quality bi-fold doors or tilt-and-turn systems. The profile system, machinery, and technical knowledge required for each product type represent distinct capabilities that buyers should verify before committing to a fabrication partner.
Producing a well-assembled unit is only half the story, though. Without rigorous testing at each stage, fabrication defects remain hidden until the product is installed and exposed to real weather — at which point the cost of correction multiplies dramatically. That reality is why quality control during fabrication deserves the same scrutiny as the assembly process itself.
Quality Control and Performance Testing
A fabricated aluminium window can look perfect on the assembly bench and still fail within its first winter. Hairline gaps invisible to the naked eye let water track into wall cavities. Corner joints that feel solid under hand pressure flex under sustained wind load. Drainage slots machined 3 mm off-position trap water instead of releasing it. These aren’t hypothetical scenarios — they’re the kinds of defects that only systematic quality control catches before a product leaves the factory.
Aluminium window fabrication quality control standards exist precisely because visual inspection alone cannot verify performance. The gap between “looks right” and “performs to specification” is where testing protocols earn their place in the production workflow.
Measurement Tolerances and Dimensional Checks
Fabrication tolerances for aluminium doors and windows are tighter than most buyers expect. The European standard EN 12020-2 — widely referenced for architectural aluminium profiles — specifies dimensional accuracy 50% tighter than the general extrusion standard EN 755-9. In practice, this means cut lengths must hold within ±0.5 mm, machining positions within ±0.2 mm of their programmed coordinates, and angular cuts within ±0.1 degrees. These aren’t aspirational figures. They’re the baseline that separates a window capable of meeting AS 2047 performance requirements from one that falls short under test conditions.
Dimensional checks happen at multiple points, not just at final inspection. A competent fabrication workflow includes verification gates at each stage where errors would compound if left uncorrected:
- Post-cutting — Profile lengths measured with calibrated digital callipers against the cut list. Angular accuracy confirmed with precision protractors or digital angle gauges. Reject any piece outside ±0.5 mm on length or ±0.1 degrees on angle.
- Post-machining — Hole positions, slot dimensions, and routing depths checked against the CNC program’s datum points. First-off inspection on each batch run, then random sampling at defined intervals (typically every 20th piece or every new setup).
- Post-corner joining — Frame squareness verified by measuring diagonals. A frame is square when both diagonals match within 1 mm. Overall height and width confirmed against the order specification.
- Post-hardware fitting — Lock engagement tested across all points. Friction stays cycled through full travel. Handle operation confirmed smooth with no binding.
- Post-glazing — Bead engagement checked for full seating. Packer positions verified. Seal compression confirmed visually and by feel along the full perimeter.
- Final inspection — Complete unit checked for surface defects, correct labelling, and compliance with the project specification. Operation tested one final time before protective wrapping.
Skipping any of these gates doesn’t save time — it shifts the cost of correction downstream, where it multiplies. A 0.5 mm cutting error caught at the saw costs seconds to remake. The same error discovered after the frame is crimped, hardware-fitted, and glazed costs an entire unit.
Corner Strength and Water Penetration Testing
Corner joints receive dedicated testing because they’re the frame’s structural weak point. Destructive corner testing — where sample joints are loaded to failure in a hydraulic press — establishes the baseline strength for a given profile-and-cleat combination. Fabricators running production batches typically test corners from the first and last units of each run, plus random samples from mid-production. The joint must withstand a minimum load (specified by the profile system supplier, often 2.5–4.0 kN depending on frame depth) without separation or visible deformation.
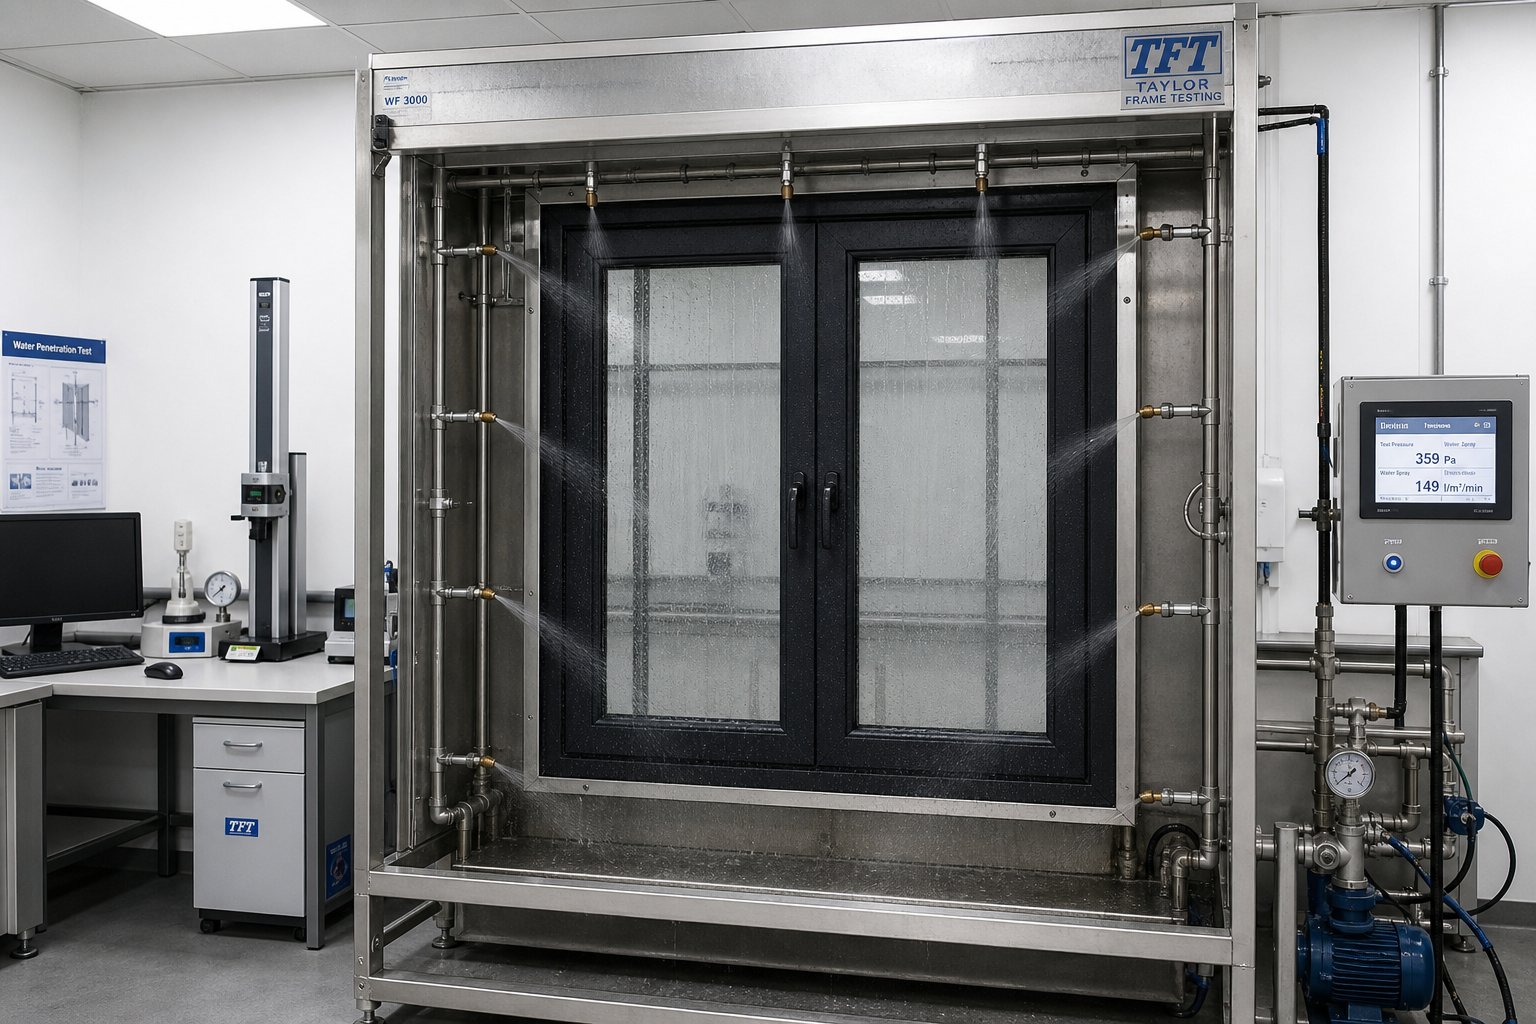
Water penetration testing for aluminium windows follows the methodology outlined in AS 2047, Australia’s primary standard for windows and external glazed doors. The test subjects a completed window assembly to a specified static air pressure difference while water is sprayed uniformly across the external face at a rate of 3.4 litres per square metre per minute. The window must resist water penetration at the pressure rating it’s been classified for — ranging from 150 Pa for sheltered low-rise applications up to 600 Pa or higher for exposed high-rise or coastal installations.
Air infiltration testing works on a similar principle. The assembled window is sealed into a test chamber, a pressure differential is applied, and the volume of air passing through the closed window is measured. AS 2047 sets maximum allowable air infiltration rates that directly affect the window’s energy performance classification. A window that leaks air beyond the threshold cannot achieve the WERS ratings specified for the project — regardless of how good its glass or thermal break might be.
These tests reveal fabrication defects that no amount of visual inspection can detect: a corner joint with micro-gaps in its seal, a drainage slot that’s been partially blocked by a crimping burr, or a weatherseal that’s been nicked during glazing and no longer compresses evenly. Water penetration testing aluminium windows is the definitive proof that every preceding fabrication step was executed correctly.
How Fabrication Precision Affects Energy Ratings
The connection between fabrication quality and energy performance is direct and measurable. A window’s U-value — its rate of heat transfer — depends on three things: the glass specification, the frame’s thermal break performance, and the air-tightness of the assembled unit. Fabrication controls the third factor entirely and influences the second.
Consider a thermally broken aluminium frame with a polyamide strip rated to deliver a frame U-value of 3.5 W/m²K. If the corner joints don’t maintain thermal break continuity — if the polyamide strip is misaligned or compressed at the mitre — the actual frame U-value at those corners degrades. Four compromised corners on a standard window can shift the overall U-value enough to drop the unit below its target NatHERS contribution. For projects chasing 7-star or higher energy ratings under the National Construction Code, that margin matters.
Fabrication tolerances aren’t just manufacturing specifications — they’re the physical mechanism through which a window either meets or fails its rated energy, weather, and structural performance under AS 2047 and the National Construction Code.
Air leakage compounds the problem. Even small gaps — 0.3 mm along a seal line — allow convective heat transfer that bypasses the thermal break entirely. In heating-dominated climates like Melbourne or Hobart, air leakage through poorly fabricated frames can account for a significant portion of a home’s total heat loss through its fenestration. In cooling-dominated climates like Darwin or Cairns, the same leakage paths allow humid outside air to infiltrate, increasing cooling loads and condensation risk.
How fabrication quality affects window energy ratings comes down to this: the best glass and the most advanced thermal break technology deliver their rated performance only when the frame holding them is assembled within specification. A fabricator who consistently holds tight tolerances, tests corner integrity, and verifies seal compression produces windows that perform as designed. One who doesn’t produces windows that test well on paper but underperform in the wall — and the homeowner pays the difference in energy bills for the life of the building.
Quality control confirms that a fabricated unit is ready to perform. But performance in the field also depends on what happens between the last inspection and the moment the window is fixed into an opening — a sequence of finishing, protection, and logistics steps that most fabrication guides never mention.
Post-Assembly Finishing and Delivery Preparation
A window that passes its final quality inspection still isn’t ready for site. Between the assembly bench and the building opening sits a chain of finishing, protection, and logistics steps that determine whether a well-fabricated product actually arrives in a condition fit for installation. Most guides on the fabrication of aluminium doors and windows stop at assembly — as if the process ends when the last bead clicks into place. In practice, what happens next is just as consequential for project outcomes.
Surface Finishing and Protective Packaging
The aluminium window powder coating and finishing process can occur at two different points depending on the fabrication method. For crimped frames, profiles are typically powder coated or anodised as raw lengths before cutting and assembly — meaning the finished colour is already applied when the fabricator receives the material. The cut edges and crimp marks at corners expose raw aluminium that must be touched up with colour-matched paint to prevent corrosion, particularly in coastal Australian environments where salt air accelerates oxidation.
Welded frames follow the opposite sequence. Because welding and grinding alter the surface, these frames are finished after assembly. The entire unit goes through pretreatment, priming, and powder coating as a complete assembly, producing seamless colour coverage across joints — one of the key aesthetic advantages of welded construction.
Regardless of finishing method, every completed unit needs protective packaging before it leaves the factory. Powder-coated aluminium scratches easily during transport, and dark colours like matt black or charcoal show damage far more readily than lighter finishes. The post-assembly preparation for aluminium windows follows a defined sequence designed to prevent exactly those problems:
- Surface inspection — Final visual check for powder coat defects, scratches, or touch-up areas missed during assembly.
- Protective film application — Self-adhesive film applied to all exposed aluminium faces and glass surfaces. This film stays on through transport, site storage, and installation, only removed at final clean.
- Corner and edge protection — Foam corner guards or cardboard edge protectors fitted to vulnerable points where frames contact each other during stacking and transit.
- Unit labelling — Each window and door marked with a unique identifier tied to the project schedule — typically referencing the elevation drawing, room name, or grid reference so installers can match units to openings without guesswork.
- Accessory packaging — Loose items like handles, key cylinders, cover caps, and fixing screws bagged, labelled, and either attached to the relevant unit or packed in a clearly identified accessory box.
- Packing and load planning — Units arranged on stillages or A-frames in delivery sequence, heaviest at the bottom, with separation between frames to prevent contact damage during transit.
Skipping any of these steps creates problems that only surface on site. Missing labels mean installers waste hours matching windows to openings. Inadequate corner protection results in chipped powder coat that requires on-site touch-up or replacement. Loose accessories packed in a single unsorted box — rather than matched to individual units — generate delays and missing-part claims that erode project timelines.
Installation Preparation and Site Delivery Planning
Installation preparation for fabricated aluminium doors goes beyond wrapping and labelling. Fabricators handling project work typically pre-fit components that would otherwise slow down on-site installation. Sub-sills — the aluminium or PVC base sections that sit beneath the window frame and project past the building face to shed water — are often pre-attached or supplied pre-cut to length with fixing holes already drilled. Fixing lugs, the metal brackets that anchor the frame into the structural opening, are screwed into position during fabrication so the installer can fix directly to the substrate without measuring and drilling lug positions on a scaffold.
Installation documentation accompanies every delivery. This includes fixing instructions specific to the profile system, recommended sealant types and joint dimensions, glazing maintenance notes, and hardware operation guides. For projects governed by AS 2047 compliance, fabricators also supply test certificates, structural calculations, and energy performance documentation that the builder needs for certification sign-off.
Aluminium window delivery and logistics planning on multi-stage construction projects adds another layer. Windows scheduled for a 14-storey apartment building can’t arrive in a single shipment and sit on-site for months — they need to be delivered in sequences that match the construction programme, floor by floor. This means the fabricator coordinates production scheduling, packaging order, and transport timing against the builder’s installation programme. Getting this wrong means either windows sitting exposed on-site collecting damage, or installers standing idle because the units for their current floor haven’t arrived yet.
This is where the fabrication lifecycle reveals its true scope. It doesn’t start at the cutting saw and end at the crimping press. It runs from initial profile system selection and material calculation through to the moment a labelled, protected, documented product arrives on the correct floor of the correct building on the correct day. A full-service fabrication partner — like MEICHEN, which supports projects from drawings and schedules through manufacturing coordination, quality control, and delivery planning — manages these stages as a single integrated workflow rather than treating post-assembly logistics as someone else’s problem.
The difference between a fabricator who stops at assembly and one who manages the complete chain shows up in project outcomes: fewer site delays, fewer damage claims, fewer missing components, and fewer costly return trips. For builders and developers running tight programmes, that operational reliability matters as much as the window’s technical performance — and it starts with understanding what to look for when choosing a fabrication partner.
How to Evaluate and Choose an Aluminium Window Fabrication Partner
Knowing how a window is fabricated is useful. Knowing how to assess whether a fabricator is doing it well is what actually protects your project. The gap between a competent aluminium door fabrication partner and an underperforming one rarely shows up in a brochure — it shows up in site delays, warranty claims, and windows that underperform their rated specifications within a few years of installation.
The aluminium window fabricator evaluation criteria that matter most aren’t always the ones buyers think to ask about. Price per unit and lead time get plenty of attention. The factors below tend to separate fabricators who deliver consistent quality from those who deliver occasional problems.
Key Criteria for Evaluating a Fabricator
When assessing how to choose an aluminium window fabricator for a residential or commercial project, work through these capabilities in order of impact:
- Full-lifecycle project support — Can the fabricator engage from the drawing and schedule stage, or do they only quote once you hand them a finalised specification? Fabricators who review architectural drawings, analyse window schedules, and recommend profile systems before production begins catch specification errors that would otherwise become expensive site problems. This early involvement — covering material calculation, system selection, and buildability review — is the single strongest indicator of a project-capable partner versus a cut-and-assemble shop.
- Equipment capability — CNC cutting and machining centres are the baseline for consistent quality at any meaningful volume. Ask what machines they run, what tolerances they hold, and whether they perform first-off inspection on each production batch. A fabricator still relying entirely on manual methods for project work introduces variability that compounds across hundreds of units.
- Quality management systems — Look for documented processes, not just verbal assurances. ISO 9001 certification or equivalent quality frameworks indicate systematic control. Ask to see their inspection checklists, reject rates, and how they handle non-conformances. Consistency across orders matters more than one perfect sample.
- Testing facilities — Does the fabricator conduct or commission water penetration, air infiltration, and structural testing to AS 2047? Can they supply test evidence and compliance documentation for certification? Fabricators without access to testing — either in-house or through third-party labs — cannot verify that their products meet the performance ratings they claim.
- Profile system partnerships — Established relationships with reputable extrusion suppliers (and access to their technical support) mean the fabricator works within proven systems rather than improvising with generic profiles. Ask which systems they’re accredited to fabricate and whether they receive technical training from the system supplier.
- Logistics and delivery coordination — For multi-dwelling or commercial projects, the fabricator’s ability to sequence production, package by delivery drop, and coordinate with your construction programme directly affects your site efficiency.
What Full Project Support Looks Like
A full project support aluminium window manufacturer doesn’t wait for a purchase order to add value. Their involvement typically begins with reviewing architectural drawings and window schedules to identify potential issues — oversized panels that exceed hardware limits, profile selections that won’t achieve the required energy ratings, or opening configurations that create unnecessary fabrication complexity and cost.
From there, a capable partner handles system recommendations matched to performance targets, material take-offs and cost modelling, manufacturing coordination across staged deliveries, quality control documentation for builder certification, and logistics planning aligned to the construction programme. This scope transforms the fabricator from a supplier into a project partner — someone accountable for outcomes rather than just units shipped.
MEICHEN’s services illustrate this model in practice, covering the full workflow from drawings and schedules through system recommendations, manufacturing coordination, quality control, and delivery planning. For builders, developers, and architects seeking a fabrication partner with genuine project capability rather than just production capacity, that integrated approach is worth evaluating against the criteria above.
Ultimately, the right fabrication partner is one whose process — from early-stage specification support through to labelled, protected units arriving on the correct floor on the correct day — matches the complexity of your project. Ask the hard questions before you commit, and the fabrication quality will take care of itself.
FAQs About Aluminium Door and Window Fabrication
1. What is the difference between aluminium window fabrication and manufacturing?
Manufacturing covers the entire supply chain from smelting raw bauxite to extruding profiles. Fabrication is a specific downstream stage where extruded aluminium profiles are converted into finished, ready-to-install window and door units through cutting, machining, corner joining, hardware fitting, glazing, and quality testing. When evaluating a supplier, understanding this distinction helps you assess whether they control the fabrication quality that directly determines weather resistance, security, and energy performance in the finished product.
2. How are corners joined in aluminium window frames?
Three primary methods are used. Mechanical crimping uses hydraulic pressure to deform aluminium around internal corner cleats — the standard for residential windows. Welded corners (friction or TIG welding) produce seamless joints ground smooth before powder coating, suited to premium architectural projects. Screw-fixed corner cleats connect butt-jointed profiles for heavy commercial doors where disassembly and repair may be needed. Each method offers different trade-offs in strength, aesthetics, corrosion resistance, and cost, and the right choice depends on the application and performance requirements.
3. Why does CNC machining matter in aluminium window fabrication?
CNC machining centres cut profiles within ±0.1 degree angular tolerance and ±0.2 mm length accuracy, then perform all routing, drilling, and slotting for hardware, drainage, and ventilation in a single automated pass. This precision ensures corner joints close cleanly, hardware lands in correct positions relative to internal screw bosses, and drainage slots are placed in the right chambers. Manual methods introduce operator-dependent variability that compounds across production runs, increasing reject rates and rework — particularly problematic on projects requiring dozens or hundreds of identical units.
4. How does fabrication quality affect a window’s energy rating?
A window’s energy performance depends on glass specification, thermal break continuity, and air-tightness of the assembled unit. Fabrication directly controls air-tightness and influences thermal break performance at corners. Gaps as small as 0.3 mm along seal lines allow convective heat transfer that bypasses the thermal break. Misaligned polyamide strips at corner joints create cold bridges. These fabrication defects can shift U-values enough to drop a window below its target NatHERS contribution, meaning the building fails to meet NCC energy requirements regardless of how good the glass specification is.
5. What should I look for when choosing an aluminium window fabrication partner in Australia?
Prioritise fabricators offering full-lifecycle project support — those who engage from the drawing and schedule review stage, not just at the purchase order. Key evaluation criteria include CNC equipment capability, documented quality management systems, access to AS 2047 testing facilities, established profile system partnerships, and logistics coordination for staged deliveries. A project-capable partner like MEICHEN covers the workflow from drawings and system recommendations through manufacturing coordination, quality control, and delivery planning, reducing site delays and specification errors that drive costly rework.
More Window & Door Guides