Why Aluminium Window Tracks Need Special Cleaning Care
Most guides on how to clean window tracks treat every frame material the same. Grab some bleach, scrub hard, move on. That advice can wreck aluminium. Unlike timber or uPVC, aluminium is a reactive metal. It forms a thin oxide layer almost immediately when exposed to air, and while that layer offers some natural protection, the wrong cleaning product or tool can strip it away, trigger pitting, or spark galvanic corrosion where dissimilar metals meet.
Steel wool, alkaline cleaners, and ammonia-based sprays all cause real damage to aluminium surfaces. The white chalky residue you sometimes notice on older window tracks? That’s oxidation already at work. Scrubbing it with abrasive pads only accelerates the problem.
What Makes Aluminium Tracks Different from Other Materials
Aluminium’s reactivity is the key difference. Acidic or highly alkaline substances eat into its protective oxide film, while abrasive tools leave micro-scratches that become corrosion entry points. Steel particles left behind by wire brushes can bond with the aluminium surface and create galvanic corrosion cells—two metals in contact, slowly destroying each other in the presence of moisture. Cleaning window tracks made from this material demands pH-neutral products, soft tools, and a method designed specifically around its chemistry.
How Neglected Tracks Affect Window Performance and Air Quality
Dirty window tracks aren’t just unsightly. Compacted grit grinds against rubber seals every time a panel slides, causing micro-tears that lead to drafts and water intrusion. Debris blocks the small weep holes meant to drain rainwater, and pooling moisture feeds mould colonies that spread along windows sills and into frame cavities. The result is compromised indoor air quality, sticky operation, and repair bills that dwarf the cost of routine maintenance.
Dirty aluminium tracks don’t just look bad—they cause rollers to grind, seals to fail, and drainage to back up, leading to costly repairs that proper cleaning prevents entirely.
This guide focuses exclusively on aluminium track systems. Every product recommendation, technique, and caution ahead is tailored to protect the specific finish and chemistry of aluminium—starting with knowing exactly which tools belong in your kit and which ones to keep far away.
Essential Tools and Safe Cleaning Products for Aluminium
Picking the right window track cleaner matters more than technique when you’re working with aluminium. A perfectly executed scrubbing method still damages the surface if the product or tool reacts badly with the metal. Before you start, you need a clear picture of what’s safe and what causes harm.
Tools That Protect Your Aluminium Finish
The best window track cleaning tools for aluminium share one trait: they’re non-abrasive. Soft materials glide over the oxide layer without scratching it, while narrow profiles reach into the tight channels where grime compacts. A good window sill cleaning brush with soft nylon bristles handles the flat track surface, and an old toothbrush or detail brush gets into corners where rollers sit.
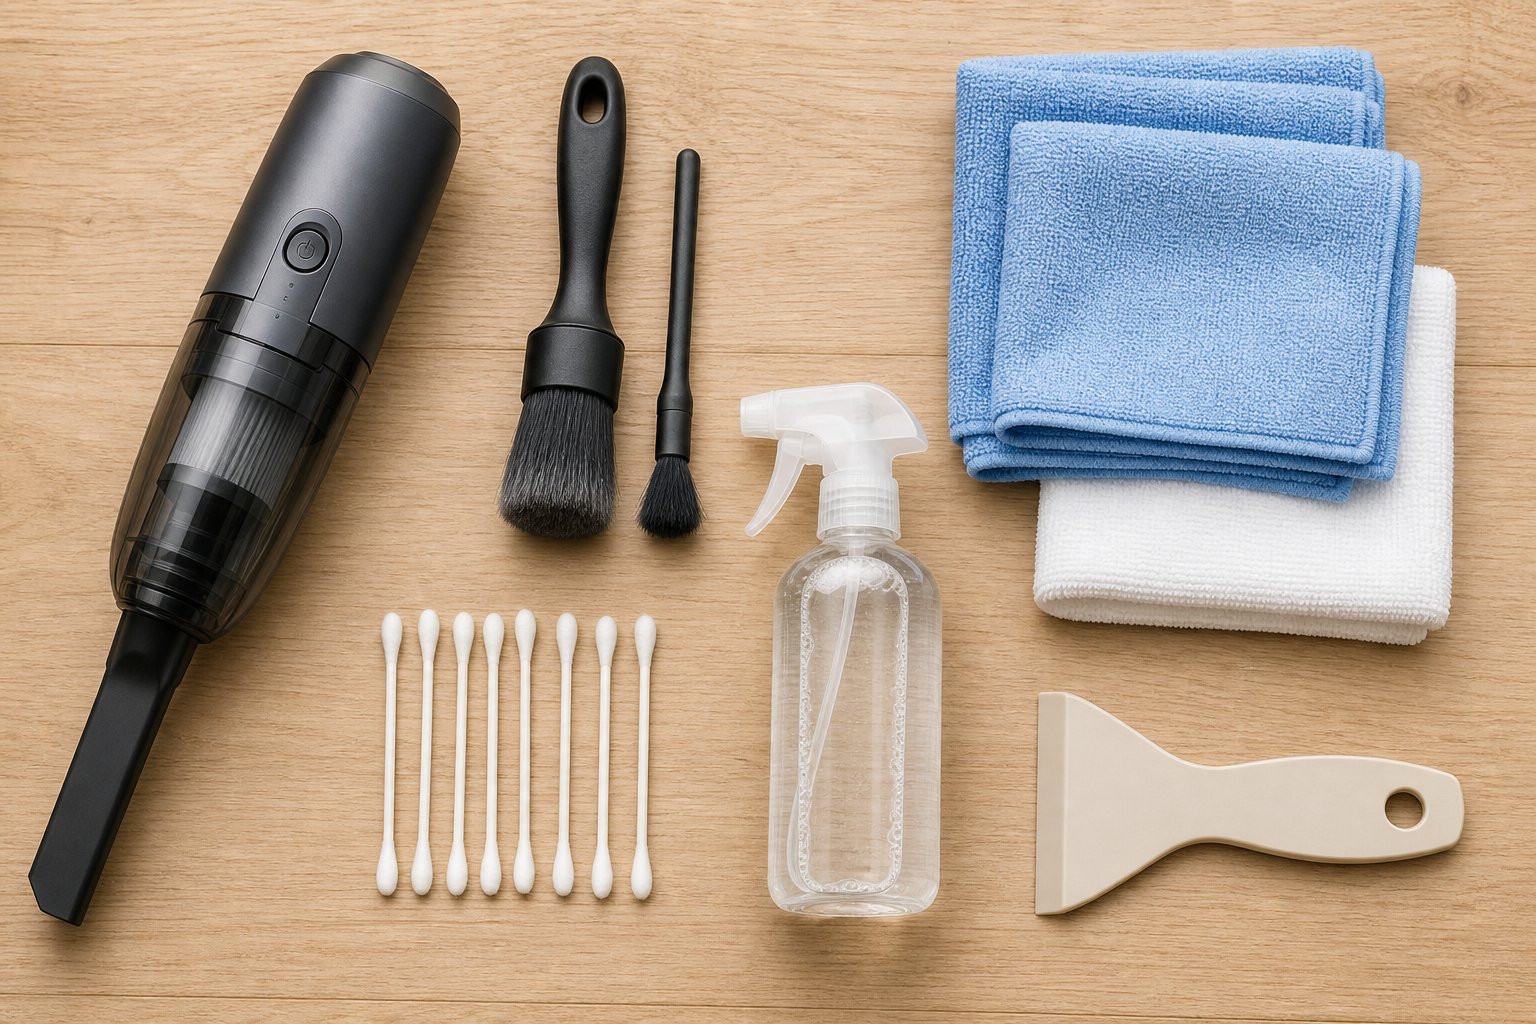
Here’s your essential toolkit for cleaning aluminium window tracks:
- Vacuum cleaner with a crevice attachment for removing loose dust and debris
- Soft-bristle detail brush or old toothbrush for scrubbing track channels
- Microfibre cloths for wiping and drying surfaces
- Spray bottle for applying diluted cleaning solutions evenly
- Cotton buds for clearing weep holes and tight drainage channels
- Plastic scraper for lifting compacted debris without scratching metal
A dedicated frame cleaning tool with a narrow profile can reach the full depth of multi-channel sliding tracks. If you don’t have one, a firm brush for cleaning window tracks wrapped in microfibre cloth achieves a similar result.
Cleaning Products That Damage Aluminium and Why
Alkaline cleaners with a pH above 9 dissolve aluminium’s protective oxide film and can etch the raw metal underneath. Bleach causes rapid surface pitting. Ammonia-based window frame cleaners leave dark stains and accelerate corrosion. Steel wool embeds iron particles into the aluminium, creating galvanic corrosion cells that spread over time. Even abrasive cream cleansers leave micro-scratches where moisture settles and oxidation takes hold.
Safe alternatives work just as effectively without the damage. Diluted white vinegar (one part vinegar to three parts water) cuts through mineral deposits and light grime. Baking soda paste tackles stubborn buildup with gentle mechanical action. pH-neutral detergent handles everyday dirt. The table below breaks down common products so you can check your cupboard before starting.
| Product/Tool | Safe for Aluminium? | Notes |
|---|---|---|
| White vinegar (diluted) | Yes | Use 1:3 ratio with water. Rinse within 10 minutes to prevent etching. |
| Baking soda paste | Yes | Gentle abrasive action. Mix with water to form a thick paste for stubborn grime. |
| pH-neutral soap | Yes | Safest everyday option. No risk to oxide layer or coatings. |
| Nylon brushes | Yes | Soft bristles clean without scratching. Ideal window track cleaning tool. |
| Bleach | No | Causes pitting and discolouration on aluminium surfaces. |
| Ammonia cleaners | No | Reacts with aluminium, leaving dark stains and promoting corrosion. |
| Steel wool | No | Embeds iron particles that trigger galvanic corrosion. |
| Abrasive pads | No | Scratches the oxide layer, exposing raw metal to moisture and accelerating decay. |
When in doubt, check the pH. Any product between pH 6 and 9 is generally safe for aluminium. Anything outside that range risks damaging the surface, regardless of what the label claims about being suitable for “all metals.”
With the right toolkit assembled and the harmful products set aside, the actual cleaning process becomes straightforward. Regular light maintenance keeps tracks smooth without ever needing to reach for aggressive solutions.
The 10-Minute Routine Maintenance Method
Knowing how to keep window tracks clean long-term comes down to one principle: little and often beats rare and aggressive. A quick routine performed regularly prevents the compacted grime that forces you into heavy scrubbing sessions—the kind that risks scratching aluminium finishes. The best way to clean window tracks isn’t a single heroic effort. It’s a simple habit that takes less time than brewing a cup of tea.
Four Steps to a Quick Weekly Track Clean
This method works as fortnightly preventive care between deeper seasonal cleans. All you need is your crevice vacuum attachment, a microfibre cloth, pH-neutral soap, and a silicone-based lubricant.
- Vacuum loose debris. Run your vacuum’s crevice attachment along every channel in the track. Move slowly so it picks up fine dust, pollen, and grit that settles between cleans. This single step removes most of the material that eventually compacts into stubborn buildup.
- Wipe with a damp microfibre cloth. Dampen the cloth with water and a small drop of pH-neutral soap. Fold it narrow enough to reach into the track grooves and wipe along the full length. This lifts the sticky film that vacuuming alone misses.
- Dry the tracks completely. Switch to a dry microfibre cloth and wipe every surface until no moisture remains. Aluminium channels trap water in corners, and standing moisture feeds both oxidation and mould growth.
- Apply a thin silicone lubricant. Spray a light coat of dry silicone lubricant along the track surface where the rollers travel. A silicone spray is ideal for sliding windows because it reduces friction without attracting dust the way oil-based products do.
Slide the window back and forth a few times to distribute the lubricant evenly. That’s it—you’ve just completed the fastest way to clean tracks and keep them operating smoothly.
Why Routine Maintenance Prevents Costly Repairs
Every time grit sits in a track channel, it acts like sandpaper against rubber seals and roller wheels. Fortnightly cleaning removes that grit before damage accumulates. Skipping maintenance for months creates compacted layers that require aggressive scrubbing or professional intervention. The real cost isn’t the cleaning service—it’s the premature seal replacement, roller wear, and drainage blockages that neglect causes.
Consistent 10-minute maintenance every two weeks eliminates the need for aggressive scrubbing that can scratch aluminium finishes. Prevention is always cheaper than repair.
Of course, even the best routine can’t undo months or years of existing neglect. Tracks already packed with compacted dirt, staining, or visible discolouration need a more thorough approach—one that safely lifts deep grime without damaging the aluminium underneath.
Deep Cleaning Aluminium Window Tracks Step by Step
Heavy buildup demands more than a quick wipe. When grime has compacted into the channels, discolouration has set in, or the window barely slides, you need a full deep-cleaning process. This cleaning window tracks hack uses two kitchen-cupboard ingredients—baking soda and white vinegar—to lift stubborn dirt without harsh chemicals that damage aluminium. The method is simple, but timing matters. Here’s the complete window track cleaning sequence from start to finish.
Preparing Your Tracks and Removing Window Sashes
Full access to the track channels makes deep cleaning dramatically easier. If your sliding windows allow it, removing the sash panels first exposes every groove, corner, and roller channel that normally hides beneath the frame.
How do you clean window tracks properly if the sash stays in place? You can work around it, but you’ll miss compacted debris trapped directly beneath the rollers. Removing the sash avoids that compromise.
To remove a window sash safely, follow this process:
- Unlatch the window handle so the sash moves freely.
- Check the top head track for anti-lift blocks or safety clips. Run your finger along the channel and remove any clips you find before proceeding.
- Place one hand on each side of the aluminium sash frame and gently lift it upward into the top head track as far as it will go.
- Once lifted fully, angle the bottom of the sash toward yourself to clear the bottom sill track.
- Lay the sash flat on a stable padded surface or stand it upright where it won’t tip.
Never force a sash that won’t lift. Resistance usually means a safety block is still in place. Larger panels may need two people—aluminium sashes are lighter than timber, but a wide panel can still be awkward to manoeuvre alone.
The Vinegar and Baking Soda Deep-Clean Process
With the tracks fully exposed, this is the best way to clean window sills and tracks that have accumulated months of compacted grit and grime. The foaming reaction between baking soda and vinegar does the heavy lifting, breaking the bond between dirt and the aluminium surface so you scrub less aggressively.
- Vacuum all loose debris. Use your crevice attachment along every channel, including the roller grooves and drainage slots. Remove as much dry material as possible before introducing any moisture.
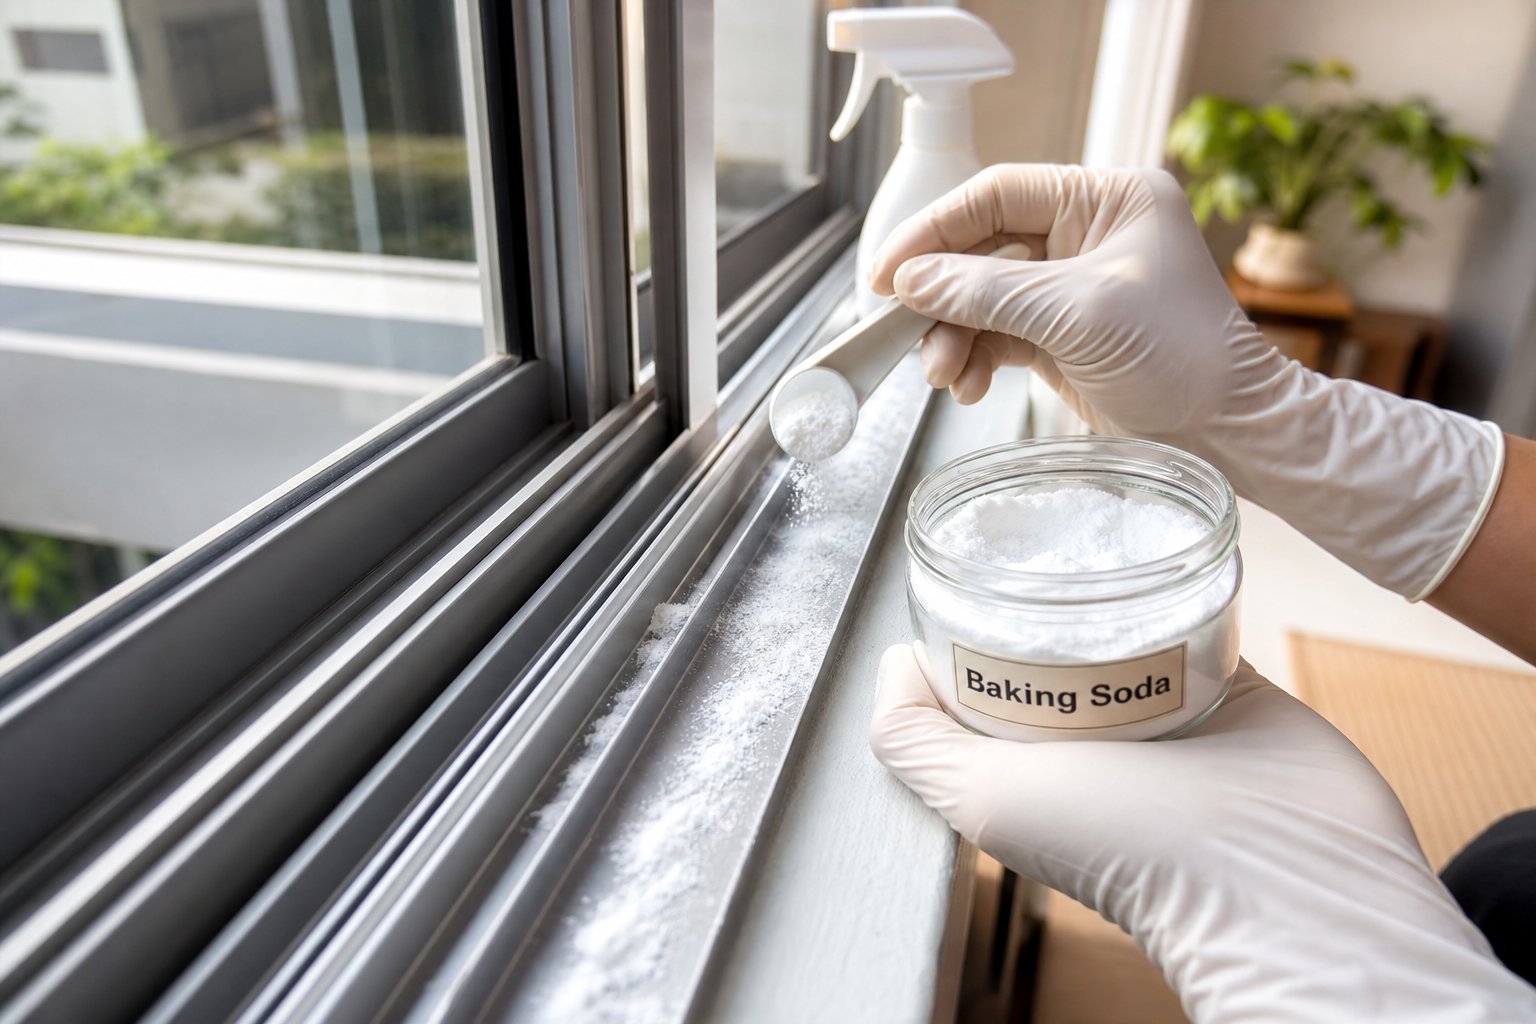
- Sprinkle baking soda generously along the track channels. Focus on the corners, the areas beneath where the rollers sit, and anywhere you can see dark staining or compacted buildup.
- Spray diluted white vinegar over the baking soda. Use a one-to-three ratio of vinegar to water in a spray bottle. The mixture will fizz immediately—that foaming reaction is what loosens compacted dirt from the aluminium surface.
- Let it sit for 5 to 10 minutes. The foam needs time to penetrate hardened layers. Don’t walk away and forget it, though. On aluminium, timing is critical.
- Scrub with a soft-bristle brush following the track direction. Work along the channel rather than across it. For tight corners and roller channels, switch to cotton buds or a small detail brush.
- Wipe clean with a damp microfibre cloth. Rinse and repeat until no residue remains. You may need several passes for heavily soiled tracks.
- Dry every surface completely. Use a fresh dry cloth to remove all moisture from the channels. Aluminium tracks trap water in corners, and any remaining dampness feeds future oxidation and mould growth.
Never leave vinegar solution sitting on aluminium for more than 10 minutes, and always rinse thoroughly. Diluted vinegar is safe for brief contact, but prolonged exposure or undiluted vinegar can etch the surface and damage protective coatings.
The brief mild-acid exposure from properly diluted vinegar won’t harm aluminium’s oxide layer. The risk comes from leaving it too long or using it at full strength. If you’re working on multiple tracks, clean one at a time rather than applying vinegar to all of them simultaneously—this keeps you in control of contact time.
Finishing with Lubrication for Smooth Operation
Cleaning alone doesn’t restore smooth sliding action. Once tracks are clean and completely dry, apply a thin layer of silicone-based lubricant along the surfaces where rollers make contact. Spray lightly and spread it with a cloth if needed—you want a fine film, not a puddle. Silicone lubricant reduces friction without attracting dust particles the way petroleum-based products do.
If the sash was removed, reinstall it by reversing the removal process: lift the panel into the top head track, push it up as far as it goes, then gently lower the bottom into the sill channel. Slide it back and forth several times to distribute the lubricant evenly across the track surface.
This deep-clean method handles the visible grime, but one critical maintenance task often gets overlooked entirely: the tiny drainage weep holes built into the bottom of aluminium tracks. If those are blocked, clean tracks still won’t stop water from pooling—and pooling water is where corrosion and mould take hold.
Cleaning Weep Holes and Drainage Channels
Spotless track channels still end up with standing water if the drainage system itself is blocked. Every aluminium sliding window has small openings—weep holes—designed to move water out of the frame. They’re easy to miss and rarely mentioned in cleaning guides, yet a single blocked weep hole can undo all the work you’ve just done by letting moisture sit exactly where corrosion starts.
What Weep Holes Do and Where to Find Them
Weep holes are small slots or rectangular openings located at the bottom of the exterior window frame. Their job is simple: provide a pathway for any rainwater that enters the track channels to drain safely to the outside. Without them, water accumulates inside the frame and eventually damages framing, insulation, and surrounding wall materials.
You’ll typically find exterior weep holes by looking at the bottom rail of the outer track from the outside of your home. They appear as flat slots, sometimes partially hidden by small plastic flap covers that keep insects out while still allowing water to exit. Interior weep holes sit inside the window track itself—sometimes visible in the frame, sometimes hidden beneath the track channel. Opening the window and checking along the base of the rail is the easiest way to spot them. If no holes are visible externally, previous painters may have accidentally sealed them with paint overspray or caulk.
Clogs form gradually. Fine dust settles in the narrow channel, insect debris or cobwebs block the exterior opening, mould grows inside the damp passage, and paint overspray from renovation work seals the gap entirely. Any of these is enough to stop drainage.
Watch for these signs that your weep holes need attention:
- Standing water remaining in the track channels after rain
- Water stains appearing on interior sills below the window
- A musty or damp smell near closed windows
- Visible mould growth inside the track channels or along the frame base
Any one of these symptoms points to a drainage issue rather than a dirty track surface. Window rail cleaning alone won’t solve it—you need to clear the channel that moves water out of the system entirely.
How to Clear Blocked Drainage Channels
Clearing weep holes is straightforward once you know where they are. You’ll need a pipe cleaner or thin wire, a small cup of water, and a few minutes per window. Think of this as the window gap clean that prevents serious damage from trapped moisture.
- Locate all weep holes. Check both the exterior frame base and the interior track. Note any that appear visibly blocked with debris, paint, or caulk residue.
- Dislodge surface debris. Use a thin wire, crochet hook, or the end of a pipe cleaner to gently clear material from the opening. Work carefully—try to pull debris outward rather than pushing it deeper into the channel.
- Brush clean the interior channel. Push a pipe cleaner or straw brush into the weep hole from the exterior side, pulling it back and forth to dislodge anything lodged inside. If you can access the interior weep hole as well, repeat from that side. You can also use compressed air blown from the interior opening to push stubborn blockages outward.
- Flush and test. Pour a small glass of water into the interior track channel. Watch the exterior weep hole—water should begin dripping out within seconds. If it doesn’t, repeat the brushing step with a slightly firmer tool or try accessing from the opposite direction.
- Clear external covers. If your weep holes have small plastic flap covers, lift them and remove any collected debris underneath. These covers prevent insects from entering but can trap leaf fragments and dust against the opening.
For weep holes sealed by paint or caulk, gently score around the edges with a plastic scraper or utility knife before attempting to clear the passage. A window railing cleaner or harsh solvent isn’t needed here—mechanical removal works best without risking chemical damage to the aluminium frame.
Building experts recommend checking weep hole drainage at least twice a year—ideally before the wet season arrives and again as autumn debris accumulates. In Australian coastal areas where salt air accelerates corrosion, quarterly checks make sense. A blocked weep hole that goes unnoticed for months allows water to sit against aluminium surfaces continuously, and standing moisture is what drives oxidation, pitting, and mould colonisation deep into the frame.
Functional drainage keeps your tracks dry between rains. But what happens when moisture has already caused visible damage—mould spreading through channels, white powdery oxidation coating the surface, or dark pitting that won’t wipe away? Those problems require targeted treatment beyond standard cleaning.
Removing Mould, Oxidation, and Stubborn Buildup
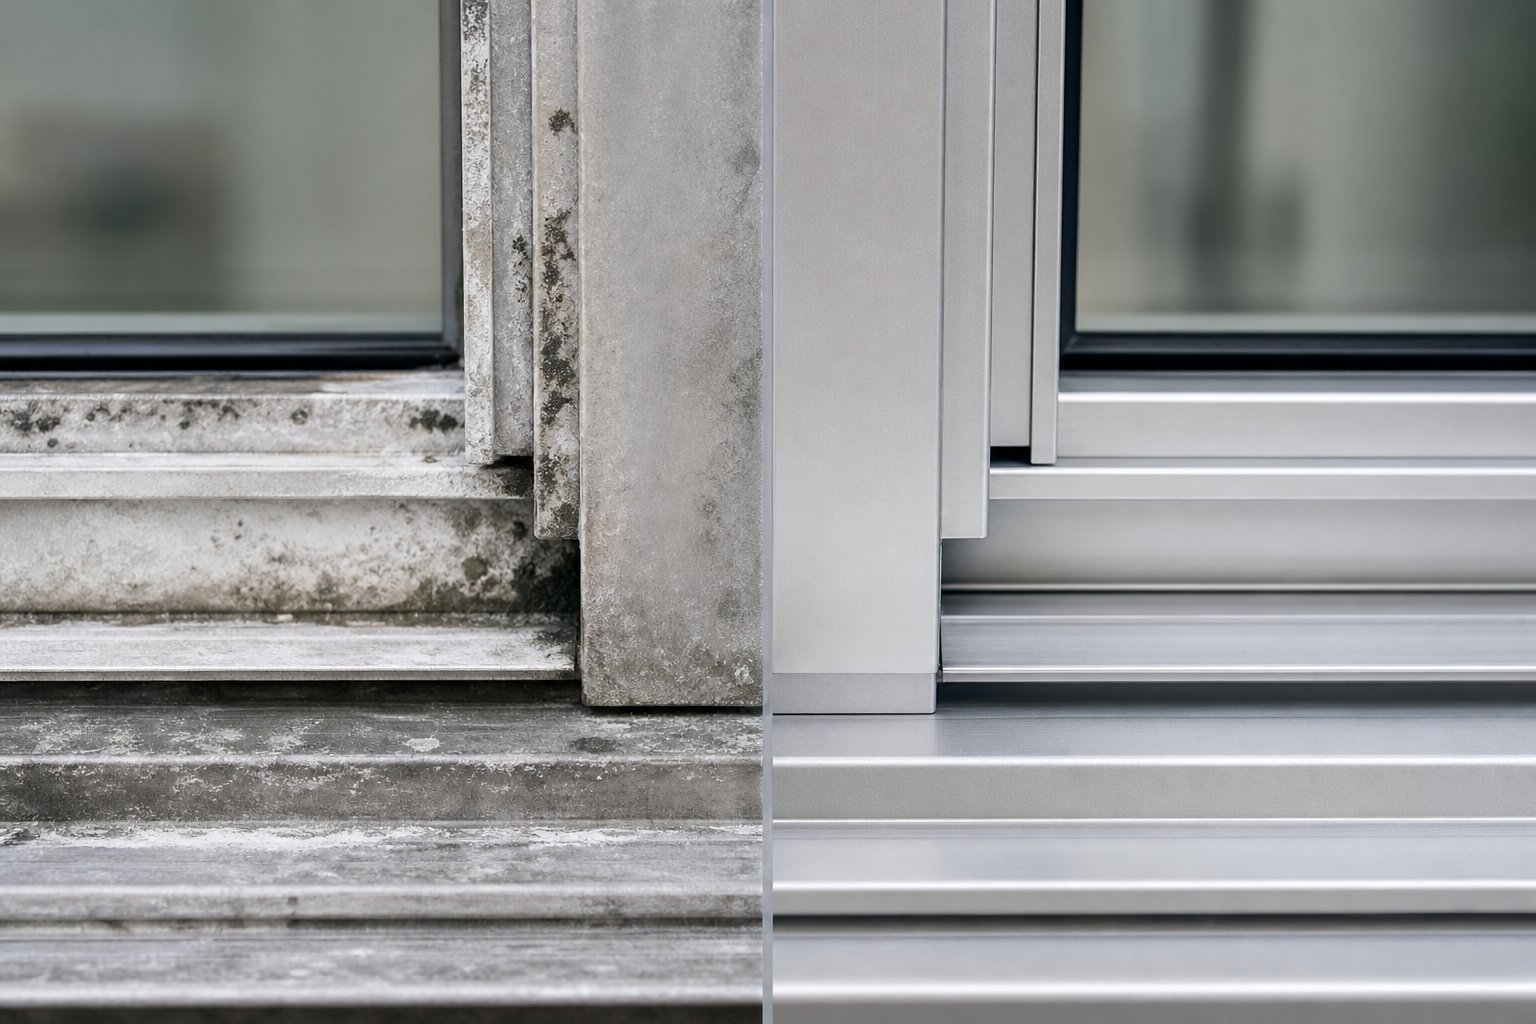
Three problems crop up repeatedly on aluminium window tracks, and each one looks different, behaves differently, and demands its own treatment. Black mould spreading through damp channels. A chalky white powder dusting the track surface. Dark irregular pits that no amount of scrubbing removes. Treating them all with the same product—or worse, reaching for bleach—causes more harm than the original problem.
Safely Removing Mould Without Damaging Aluminium
Aluminium tracks are particularly prone to mould for a simple reason: their channel design traps moisture, and organic dust settling into those channels provides the food source mould needs to colonise. If you’ve ever wondered how to clean mold on window sills and tracks without causing surface damage, the answer is definitely not bleach. Bleach pits aluminium on contact and destroys protective coatings, leaving the metal more vulnerable than before.
Instead, use 3% hydrogen peroxide—the same brown bottle from the pharmacy. Hydrogen peroxide breaks down mould’s protein structure without reacting aggressively with aluminium surfaces. Spray undiluted 3% hydrogen peroxide directly onto the affected area and let it sit for about 10 minutes until the bubbling stops. Scrub gently with a soft-bristle brush, rinse with clean water, and dry thoroughly.
For lighter contamination or ongoing prevention, a tea tree oil solution works well: mix one teaspoon of tea tree oil into one cup of water in a spray bottle. Spray it onto the mouldy area, leave it for 15 minutes, then wipe clean. Tea tree oil has natural antifungal properties and won’t damage aluminium finishes.
How do you clean mold off window sills that have heavy black staining? Combine hydrogen peroxide with baking soda into a paste for more stubborn patches. Apply the paste, let it sit for up to 30 minutes, then scrub and rinse. This approach handles cleaning black mold on window sills and track channels without the etching or pitting that chlorine-based products cause.
How to clean moldy window sills effectively comes down to one rule: kill the mould without killing the aluminium. Hydrogen peroxide and tea tree oil both achieve that balance. Cleaning mildew from window sills follows the same process—mildew is simply an earlier stage of the same fungal growth.
Treating White Oxidation and Preventing Pitting
That white powdery residue coating your tracks isn’t dirt—it’s aluminium oxide. The metal is literally reacting with oxygen and moisture in the air. On aluminium window tracks, oxidation appears as a chalky film that makes surfaces feel rough and gritty. It’s not structurally dangerous in its early stage, but it builds up over time, interferes with roller movement, and looks increasingly neglected.
To remove light oxidation, dampen a fine nylon pad (never steel wool) and apply a small amount of pH-neutral cleaner. Work in the direction of the track channel using gentle pressure. The nylon pad provides enough mechanical action to lift the oxide layer without scratching the underlying metal. Rinse, dry completely, and apply a thin wax or silicone sealant to slow future oxidation. Aluminium-specific cleaners maintain a balanced pH that preserves both the base metal and any protective treatments on its surface.
Galvanic corrosion is a different problem entirely—and a more serious one. It occurs when a dissimilar metal, typically a carbon steel screw or bracket, sits in direct contact with the aluminium frame in the presence of moisture. The two metals create an electrochemical reaction that eats into the aluminium, producing dark irregular pits around the contact point. You might notice moss growing in window tracks or dark staining around hardware fixings as early signs.
Galvanic corrosion between carbon steel fasteners and aluminium frames can degrade fasteners to the point of failure within months in aggressive coastal environments. The pitting itself is irreversible—once metal is eaten away, it’s gone. However, you can halt the damage by removing the corrosion source (replace carbon steel screws with austenitic stainless steel), cleaning the area gently with a pH-neutral solution, and sealing the pitted surface with an aluminium-compatible primer or wax to exclude moisture.
How to clean mould off window sills permanently requires addressing the moisture source alongside the mould itself. Otherwise you’re treating the symptom while the cause persists. The table below summarises all three problems, their causes, safe treatments, and prevention strategies.
| Problem | Cause | Safe Treatment | Prevention |
|---|---|---|---|
| Mould growth | Trapped moisture combined with organic dust in track channels | 3% hydrogen peroxide spray or tea tree oil solution (1 tsp per cup of water). Scrub with soft brush after 10-15 minutes. | Ensure weep holes are clear. Dry tracks after rain. Apply tea tree oil solution monthly as a preventive antifungal. |
| White oxidation | Aluminium reacting with oxygen and moisture over time | Fine nylon pad with pH-neutral cleaner, working along track direction. Rinse and dry completely. | Keep tracks dry. Apply silicone sealant or wax after cleaning. Maintain routine maintenance schedule. |
| Galvanic corrosion (pitting) | Contact between dissimilar metals (e.g., carbon steel screws in aluminium frames) in the presence of moisture | Remove the dissimilar metal fastener. Clean area with pH-neutral solution. Seal with aluminium-compatible primer or wax. Pitting itself is irreversible. | Use only austenitic stainless steel fasteners in aluminium frames. Inspect hardware annually for signs of corrosion. |
Cleaning mold from window sills and track channels is manageable once you know which product matches which problem. The critical takeaway: bleach, ammonia, and abrasive pads are never the answer on aluminium, regardless of how stubborn the staining appears. Gentle chemistry and the right technique preserve the metal while eliminating the problem.
These treatments assume you know what type of aluminium finish your tracks have. But the right method for a powder-coated surface differs significantly from what works on an anodised or raw aluminium track—a distinction most homeowners never consider until they’ve already caused damage.
How to Clean Aluminium Window Frames by Finish Type
Not all aluminium tracks are created equal. The cleaning method that safely restores one type of finish can ruin another, and most homeowners have no idea which type they’re dealing with. Your tracks are either powder-coated, anodised, or—in older installations—raw aluminium. Each finish protects the metal differently, reacts differently to chemicals, and demands its own approach to window frame cleaning.
Identifying Your Track Finish Type
Powder-coated aluminium has a smooth, uniform colour that feels like painted plastic. It’s available in virtually any shade and typically has a slight texture when you run your fingernail across it. If you can see a tiny chip exposing bare silver metal underneath, it’s powder-coated. According to Cherwell Windows, powder coating is a dry polymer applied electrostatically and baked on—essentially a painted skin that sits on top of the metal rather than becoming part of it.
Anodised aluminium looks distinctly metallic. It has a satin sheen that shifts subtly in the light, and it feels harder to the touch than powder coating. Colours are limited to metallic tones—silver, bronze, champagne, and dark grey or black. The key difference is structural: anodising thickens aluminium’s natural oxide layer through an electrochemical process, creating protection that’s integral to the metal itself. It won’t peel or flake because there’s nothing sitting on top to separate.
Raw aluminium is uncommon in modern Australian window systems but shows up in older homes and budget installations. It has a dull silver appearance that quickly develops a chalky white film—that’s oxidation forming without any protective treatment to slow it down.
Cleaning Methods for Each Aluminium Finish
How do you clean aluminum window frames without causing finish-specific damage? Match the method to the coating. Powder-coated tracks can’t tolerate solvents, abrasive pads, or anything that chips the polymer layer—once breached, moisture reaches bare metal and corrosion spreads beneath the coating where you can’t see it. Stick to soft microfibre cloths and mild soapy water. If you’re choosing an aluminum window frame cleaner from the hardware store, confirm it’s solvent-free and pH-neutral before using it on powder-coated surfaces.
Anodised tracks handle more mechanical cleaning because their oxide layer is extremely hard—comparable to sapphire in surface hardness. However, alkaline cleaners with a pH above 9 dissolve the anodic layer entirely. How do I clean aluminium window frames with an anodised finish? Use pH-neutral detergent and a nylon brush. Avoid anything marketed as a “heavy-duty degreaser” unless you’ve verified its pH first.
Raw aluminium needs the gentlest touch of all. It oxidises rapidly when its surface is disturbed, so cleaning window frames of this type means minimal mechanical action—soft cloth, very dilute soap, and immediate drying. Any aluminum window frame cleaner with acidic or alkaline properties will accelerate degradation on unprotected surfaces.
| Finish Type | Identification | Safe Cleaners | Avoid |
|---|---|---|---|
| Powder-coated | Uniform colour, slight texture, chips reveal bare metal underneath | pH-neutral soap and water, soft microfibre cloth, gentle sponge | Solvents, abrasive pads, stiff brushes, alkaline or acidic cleaners |
| Anodised | Metallic satin sheen, limited colour range (silver, bronze, black), hard surface that won’t chip | pH-neutral detergent, nylon brush, diluted vinegar (brief contact only) | Alkaline cleaners (pH above 9), abrasive cream cleansers, steel wool |
| Raw aluminium | Dull silver appearance, chalky white oxidation forming visibly, no colour or sheen | Very dilute pH-neutral soap, soft cloth, immediate and thorough drying | All acidic and alkaline products, abrasive tools, prolonged moisture contact |
If you’re unsure how to clean window frames in your home, start with the safest option: a soft cloth dampened with plain soapy water. That combination won’t damage any aluminium finish. You can always step up to more targeted products once you’ve confirmed what you’re working with—but you can’t undo damage from the wrong cleaner applied to the wrong surface.
Knowing your finish type also informs how often you need to clean. Powder-coated surfaces in harsh environments degrade faster than anodised ones, which means cleaning frequency should reflect not just your climate but the specific protection your tracks have—a factor that shapes the entire maintenance calendar.

Seasonal Maintenance Schedule by Climate
Your cleaning frequency shouldn’t follow a one-size-fits-all calendar. A window track in beachside Byron Bay faces entirely different threats than one in suburban Melbourne or tropical Cairns. The environment outside your window determines how fast grime accumulates, what type of contamination dominates, and how quickly neglect escalates into damage. Getting this schedule right means you clean often enough to prevent problems without wasting time on unnecessary sessions.
Cleaning Frequency by Climate and Location
Four broad environments cover most Australian homes, each creating distinct challenges for aluminium track maintenance. Coastal properties deal with salt-laden air that accelerates corrosion—salt spray breaks down aluminium’s protective oxide layer and drives pitting if left unchecked. High-humidity zones promote mould and moisture damage. Urban and dusty locations see rapid particulate buildup that grinds against seals. Temperate inland areas get the lightest load, though seasonal debris still demands attention.
Use this table to find your baseline schedule for how to clean window sills and tracks based on where you live:
| Environment | Routine Clean Frequency | Deep Clean Frequency | Key Risks |
|---|---|---|---|
| Coastal (within 5 km of ocean) | Every 2-4 weeks | Every 2-3 months | Salt corrosion, accelerated oxidation, pitting from salt deposits sitting in track channels |
| High-humidity / Tropical | Every 2 weeks (wet season), monthly (dry season) | Every 3 months | Mould colonisation, condensation pooling, seal degradation from constant moisture |
| Urban / Dusty | Monthly | Every 4-6 months | Fine particulate compaction, gritty residue grinding seals and rollers, blocked weep holes |
| Temperate / Rural | Every 6-8 weeks | Every 6-12 months | Seasonal pollen and leaf debris, spider webs blocking drainage, occasional oxidation |
These are starting points. If your windows face the prevailing weather direction—cop the brunt of sea breezes, dust storms, or driving rain—increase frequency by one step. A south-facing window in a sheltered courtyard needs less attention than a north-west facing track exposed to afternoon sun and coastal wind.
Cleaning window sills and tracks in coastal environments deserves special emphasis. Properties within 500 metres of the ocean should rinse tracks with fresh water weekly, even if a full clean isn’t due. This simple rinse prevents salt crystals from crystallising in channels between proper maintenance sessions. The best way to clean window sills in these zones involves a quick wipe-down with a damp cloth after rinsing—just enough to remove the salt film before it bonds with the aluminium surface.
Seasonal Transition Maintenance Priorities
Two periods in the year cause the most track contamination regardless of climate: autumn leaf fall and spring pollen season. Leaves, seed pods, and organic debris blow into open track channels during autumn, blocking drainage and providing food for mould once the wetter months arrive. Spring delivers fine pollen that mixes with morning condensation and bakes into a sticky film under summer heat.
Frame and sill cleaning at these transitions catches the worst contamination before it compacts. A deep clean at the start of autumn clears summer dust and prepares drainage channels for heavier rain. Another at the end of spring removes pollen buildup and lets you inspect seals before they face peak UV exposure over summer. Window sill cleaning at these two key moments effectively halves the contamination load your tracks carry year-round.
Think of it this way: if you only clean windowsill tracks twice a year, time those sessions at the autumn and spring transitions. You’ll prevent more problems than someone who cleans randomly in the middle of winter and summer when contamination rates are actually lower.
Climate also interacts with your track’s finish type. Powder-coated tracks in tropical Queensland degrade faster under constant UV and humidity than anodised tracks in the same location. Coastal environments attack all finishes more aggressively, meaning that even well-protected surfaces need more frequent attention to clean window sills and maintain the integrity of their protective layers.
Well-designed aluminium sliding window systems reduce this maintenance burden significantly. Properly engineered drainage channels move water out faster, quality seals resist UV and moisture degradation longer, and precision-machined tracks accumulate less debris in the first place. The difference between a budget track system and an engineered one shows up in how often you need to intervene. For readers researching or specifying new aluminium sliding windows—particularly for project-based installations—the MEICHEN MA100 Sliding Window features a 2-track aluminium design with integrated drainage and seal systems built for long-term performance. Its engineering reflects the kind of system design that minimises ongoing track maintenance demands.
A solid seasonal schedule keeps your tracks functional year after year. But what happens when you’ve followed the routine, completed a thorough clean, and the window still won’t glide properly? Sticky tracks after cleaning, grinding sounds, or panels that jump off their rails point to problems that go beyond dirt—issues that need diagnosis rather than another round with the vacuum.
Troubleshooting Common Problems After Cleaning
You’ve vacuumed, scrubbed, rinsed, and lubricated—yet the window still drags, grinds, or refuses to cooperate. Frustrating, but not unusual. Persistent problems after a thorough clean signal that something beyond dirt is at play. The issue might be chemical residue you can’t see, mechanical wear inside the roller assembly, or structural deformation in the track itself. Diagnosing the real cause saves you from repeating the same clean over and over while the underlying problem quietly worsens.
Why Tracks Feel Sticky or Gritty After Cleaning
A freshly cleaned track that still feels tacky usually comes down to one of two causes: cleaning product residue that wasn’t fully rinsed, or roller bearings that have deteriorated internally.
Soap-based cleaners leave a thin film if you don’t rinse thoroughly with plain water after scrubbing. That film attracts airborne dust within hours, recreating the sticky sensation even though the original dirt in window sill channels is gone. Vinegar residue does the same if not wiped clean—it dries as a faint acidic film that grabs particles from the air.
The fix is simple: dampen a clean microfibre cloth with plain water (no soap, no vinegar) and wipe the entire track surface again. Follow immediately with a dry cloth. Run your finger along the channel—it should feel smooth and clean with no drag. If stickiness persists after this rinse pass, the problem isn’t residue. It’s mechanical.
Damaged roller bearings create a gritty resistance that mimics dirty tracks. Fine metal particles shed from worn bearings settle into the track channel, producing a sandpaper-like texture no amount of cleaning removes permanently. Lift the window sash slightly and spin each roller with your finger. Smooth, free-spinning wheels indicate healthy bearings. Any grinding, catching, or wobble points to internal damage that requires roller replacement rather than another cleaning session.
Fixing Windows That Won’t Slide or Jump Off Track
Several mechanical issues cause sliding resistance or derailment that cleaning can’t fix. Use this diagnostic checklist to identify what’s happening with your window:
- Sticky or heavy sliding action — Cleaning window seals that have swollen, perished, or shifted out of their channel creates drag against the sash. Inspect the weatherstripping along the frame edges. If it’s compressed flat, cracked, or bulging beyond its groove, it’s adding friction that no window sealant cleaner or lubricant resolves. Replacement weatherstrip is the only permanent fix.
- Window slides unevenly or catches at certain points — Run a straightedge along the track channel. Any visible bow, dent, or rise indicates track deformation. Even a slight bend from impact or settling forces the rollers to climb over the obstruction. Minor dents can sometimes be carefully straightened with a flat drift and rubber mallet, but significant deformation means the track section needs replacing.
- Grinding or squeaking sounds during operation — Dry roller axles squeak. Damaged roller wheels grind. Apply silicone lubricant directly to the roller mechanism (not just the track surface) and test again. If the noise persists, the wheels themselves are cracked, flat-spotted, or have lost their bearings. Roller carriages are replaceable components on most aluminium sliding windows—source the correct size from your window manufacturer or a hardware supplier.
- Window has jumped off the track entirely — This happens when anti-lift blocks are missing, roller height is incorrectly adjusted, or the track guides have worn down. Check the adjustment screws on the roller carriage (usually accessible through holes in the bottom of the sash frame). Turning these screws raises or lowers the sash relative to the track. If the guides are visibly worn or the sash lifts freely out of the channel without resistance, the track system’s retention mechanism has failed.
- Dirt reappears within days on inside window sills and tracks — Rapid re-contamination after cleaning usually means seals have failed and are letting outside air, dust, and moisture in around the frame. Dirty window sills that keep recurring despite regular cleaning point to a sealing problem rather than an inadequate cleaning routine. Inspect the perimeter seal between frame and wall, and check whether weatherstripping along the sash is still making proper contact.
For grinding rollers specifically, a window seal cleaner won’t help—the issue is inside the roller mechanism, not on the track surface. Remove the sash, flip it to access the roller carriages, and inspect the wheels directly. Replacement rollers typically cost between $15 and $40 AUD per pair and are a straightforward DIY job on most aluminium sliding windows.
When Repair Stops Making Sense and Replacement Is Smarter
Individual component failures—a worn roller, a perished seal, a single blocked weep hole—are worth repairing. But when multiple systems fail simultaneously, the economics shift. Track deformation combined with corroded drainage channels, failed weatherstripping, and seized rollers indicates a window system that has reached the end of its serviceable life.
Consider replacement over repair when:
- Track corrosion has progressed beyond surface oxidation into structural pitting
- Roller carriages no longer sit securely in deformed track channels
- Weatherstripping channels have warped and can’t retain new seals properly
- Drainage weep holes are corroded shut rather than simply blocked with debris
- The window requires force to operate even after full servicing of all components
At this point, repeated cleaning and part replacement becomes a cycle of diminishing returns. The track system itself—not its individual components—has degraded beyond what maintenance can restore. Visible frame damage, persistent drafts, and difficulty operating windows are among the clearest indicators that the system has reached end of life.
For homeowners, builders, or developers evaluating aluminium sliding window replacements with engineered track systems designed for longevity, the MEICHEN MA100 Sliding Window offers a 2-track aluminium system with integrated drainage, quality seal retention, and precision-machined track channels built for project-based supply. Its design addresses the exact failure points discussed above—proper roller engagement, effective water management, and durable weatherstripping retention—reducing the likelihood of the cascading maintenance issues that push older systems toward premature replacement.
The difference between a track problem worth solving and one worth walking away from comes down to whether the failure is localised or systemic. A single worn roller is a twenty-dollar fix. A track system where corrosion, deformation, and seal failure have compounded over years is telling you something: it’s time for a fresh start with engineering that won’t put you back in the same position a few years down the road.
Frequently Asked Questions About Cleaning Aluminium Window Tracks
1. What is the best homemade cleaner for aluminium window tracks?
A combination of baking soda and diluted white vinegar (one part vinegar to three parts water) is the most effective homemade solution for aluminium tracks. Sprinkle baking soda into the track channels, spray the diluted vinegar over it, and let the foaming reaction lift compacted grime for 5 to 10 minutes. Always rinse thoroughly afterwards, as prolonged vinegar contact can etch aluminium surfaces. For routine maintenance between deep cleans, a damp microfibre cloth with a few drops of pH-neutral dish soap handles everyday dust and film without any risk to the metal’s protective oxide layer.
2. Can you use bleach or ammonia to clean aluminium window tracks?
No. Bleach causes rapid pitting and discolouration on aluminium surfaces, while ammonia-based cleaners react with the metal to produce dark stains and accelerate corrosion. Both products strip or damage aluminium’s natural protective oxide film, leaving the raw metal exposed to moisture and further degradation. Safe alternatives include 3% hydrogen peroxide for mould removal, diluted white vinegar for mineral deposits, and pH-neutral detergent for general cleaning. Always check that any commercial cleaner falls between pH 6 and pH 9 before applying it to aluminium.
3. How often should you clean aluminium window tracks?
Cleaning frequency depends on your local environment. Coastal properties within 5 km of the ocean need routine cleaning every 2 to 4 weeks due to salt air accelerating corrosion. High-humidity or tropical locations require fortnightly attention during wet season to prevent mould colonisation. Urban or dusty areas benefit from monthly maintenance to stop particulate compaction against seals and rollers. Temperate inland homes can manage with cleaning every 6 to 8 weeks. Regardless of location, deep cleaning at autumn and spring transitions catches the heaviest seasonal debris before it compacts.
4. Why does my aluminium window still stick after cleaning the tracks?
Persistent sticking after a thorough clean usually indicates a mechanical issue rather than remaining dirt. Common causes include cleaning product residue that was not fully rinsed (leaving a tacky film that attracts dust), damaged roller bearings shedding fine metal particles into the channel, swollen or perished weatherstripping creating drag against the sash, or minor track deformation forcing rollers over a high spot. Lift the sash and spin each roller by hand — grinding, catching, or wobble points to internal bearing damage requiring roller replacement rather than additional cleaning.
5. What are weep holes in aluminium window tracks and how do you clean them?
Weep holes are small slots or rectangular openings at the bottom of the exterior window frame designed to drain rainwater that enters the track channels. They clog over time with dust, insect debris, mould growth, or paint overspray from renovations. To clear them, insert a pipe cleaner or thin wire into the opening from the exterior side and gently dislodge blockages. Then pour a small glass of water into the interior track and confirm it drains outside within seconds. Check weep holes at least twice yearly — before wet season and after autumn leaf fall — to prevent water pooling that drives corrosion and mould growth inside the frame.
More Window & Door Guides