What Are Aluminium Window Vents and Why They Matter
That slim slot along the top of your window frame is doing more work than you might think. If you have ever wondered what is a trickle vent, the answer is refreshingly simple — yet the impact on your home’s health is anything but trivial.
What Are Aluminium Window Vents
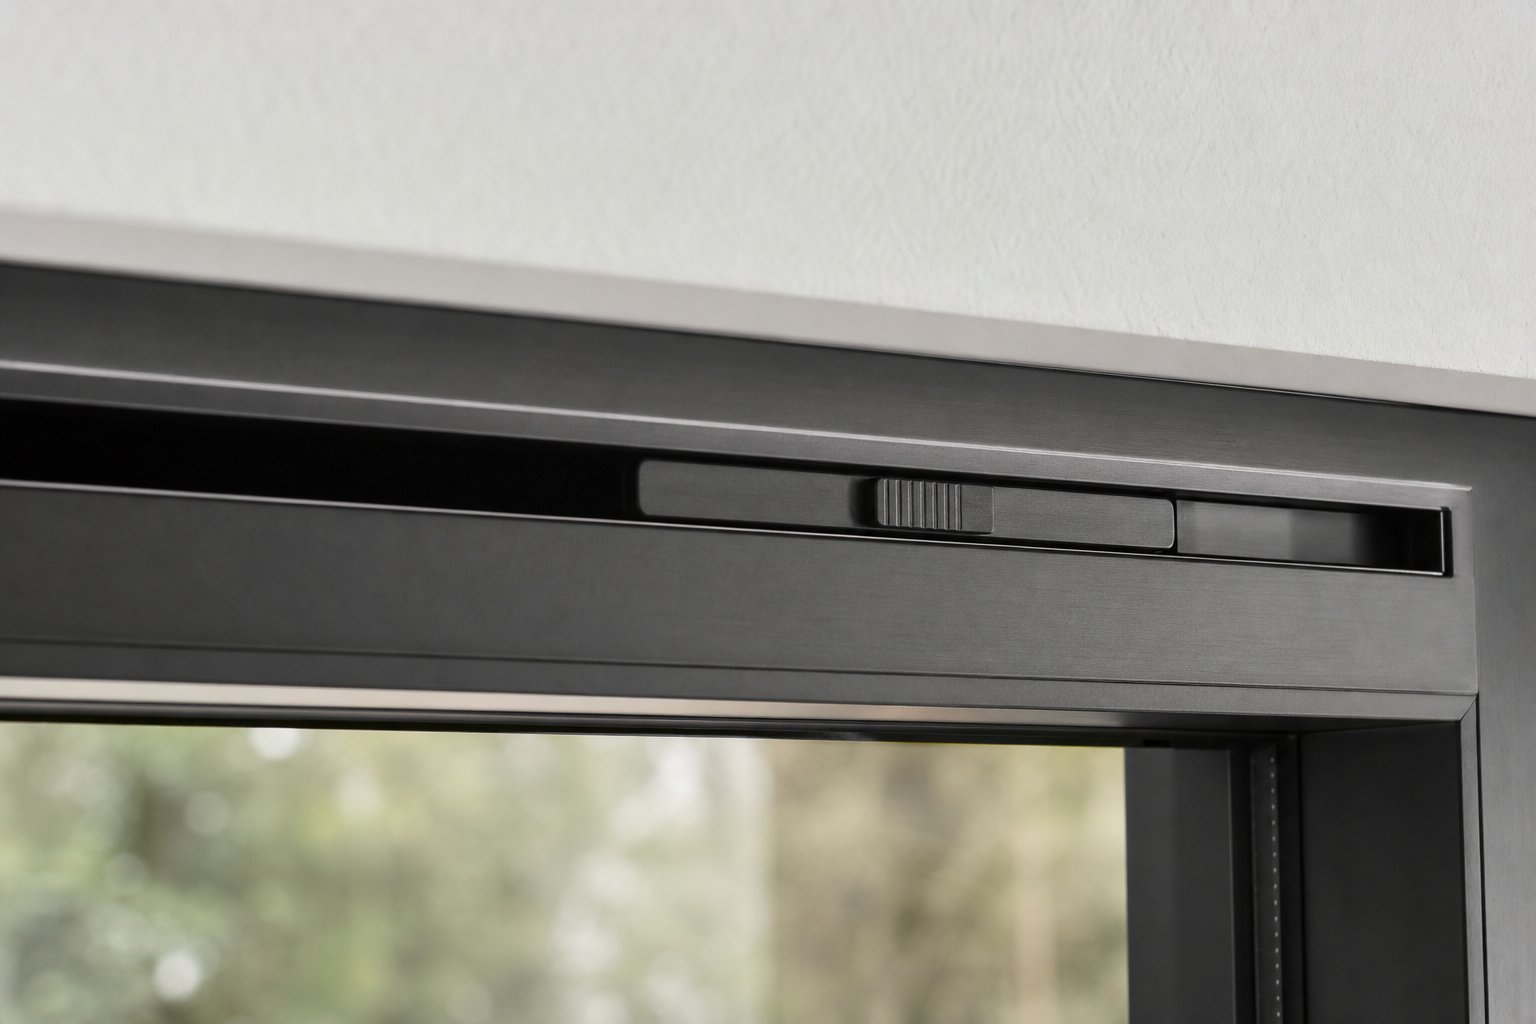
Aluminium window vents (commonly called trickle vents) are small, controllable openings integrated into an aluminium window frame that allow a steady flow of fresh air into a room even when the window is fully closed. They provide passive background ventilation without using any energy.
Put simply, these narrow slots sit at the head of the frame and let stale indoor air escape while drawing fresh air in — quietly, constantly, and without creating a noticeable draught. Most feature a sliding or flap mechanism so you can open or close them as conditions change. Unlike mechanical ventilation systems such as MVHR or MEV units that rely on fans, ducts, and electricity, aluminium window vents operate entirely through natural pressure differences. No power consumption, no maintenance schedules, no moving mechanical parts. They are the most straightforward path to continuous air exchange in a sealed home.
Why Background Ventilation Matters in Modern Homes
Australian homes have become remarkably airtight. High-performance double glazing, thermally broken aluminium frames, and improved insulation all help meet NatHERS energy targets — but that same tight envelope traps moisture, CO2, and indoor pollutants with nowhere to go. Cooking steam, shower humidity, and even the moisture we exhale while sleeping accumulate in rooms that lack a controlled air path to the outside.
The consequences show up fast: condensation streaming down glass on winter mornings, mould creeping into corners, and a stuffy indoor atmosphere that no amount of air freshener can fix. Background ventilation for windows solves this by maintaining a low-level air exchange that dilutes moisture and pollutants before they become problems — without forcing you to leave windows wide open and sacrifice security or thermal comfort.
Under the National Construction Code (NCC), habitable rooms require a means of natural ventilation. Trickle vents provide one of the simplest compliant solutions, particularly in bedrooms and living areas where opening a window overnight is impractical. This guide covers aluminium window vents explained from first principles through to selection, installation, and troubleshooting — everything product catalogues leave out.
Types of Aluminium Window Vents Compared
Knowing that your home needs background ventilation is one thing. Choosing the right vent for a slim aluminium profile is another challenge entirely. Not all window trickle vents are built the same way, and the differences go well beyond appearance — position on the frame, airflow capacity, and acoustic behaviour all shift depending on the design you select.
Five main types of window vents suit aluminium frames. Each occupies a different location within the window assembly, which affects both installation method and performance characteristics.
Trickle Vents and Slot Vents
The classic trickle vent is a narrow slot routed through the head of the window frame, covered by an internal flap or slider and an external canopy. On aluminium frames, these are typically factory-machined into the top rail of the opening sash or the outer frame itself. A controllable internal hit-and-miss cover lets you regulate airflow or close the vent entirely during extreme weather. Slot vents are the most common type found in Australian residential projects because they balance cost, performance, and visual discretion. Their slim profile suits the clean lines of aluminium without adding bulk.
Over-Frame and Glazed-In Vents
Over-frame vents aluminium installers frequently recommend sit above the window frame rather than inside it, mounted between the head of the frame and the structural opening. Because they do not require any machining through the aluminium profile, they are a popular retrofit option for existing windows that were originally installed without ventilation. They do add a few millimetres of height to the overall assembly, so head clearance matters during specification.
Glazed-in vents take the opposite approach. They are incorporated into the sealed glass unit itself — a narrow ventilator strip positioned at the top edge of the double-glazed panel. This keeps the aluminium frame completely unmodified, delivering the sleekest possible appearance. The trade-off is that glazed-in vents must be specified at the point of manufacture; you cannot add them to an existing window after installation.
Acoustic and Rebate Vents
For homes near busy roads, rail corridors, or flight paths, standard trickle vents windows rely on may allow too much external noise through the opening. Acoustic vents solve this with internal baffles and sound-absorbing linings that attenuate noise while still permitting adequate airflow. They tend to be physically deeper than standard slot vents, which can influence frame depth requirements on slimline aluminium systems.
Rebate vents sit within the rebate (the step between sash and frame where weatherseals are housed). They are virtually invisible when the window is closed, making them an attractive option for minimalist architectural designs. However, their concealed position limits equivalent area, so they work best in rooms with modest ventilation demands or as a supplement to other ventilation strategies.
| Type | Position on Frame | Typical EA Range | Best Suited For | Noise Attenuation |
|---|---|---|---|---|
| Trickle vent (slot) | Head of sash or outer frame | 2,500–5,000 mm² | General residential rooms | Low |
| Over-frame vent | Above frame, between head and lintel | 2,500–5,000 mm² | Retrofit to existing aluminium windows | Low to moderate |
| Glazed-in vent | Within the sealed glass unit | 2,500–4,000 mm² | New-build projects prioritising aesthetics | Low |
| Rebate vent | Within sash-to-frame rebate | 1,600–2,500 mm² | Minimalist designs, supplementary ventilation | Low |
| Acoustic vent | Head of frame (deeper housing) | 2,500–4,000 mm² | Noise-sensitive locations (roads, rail, airports) | High (up to 42 dB reduction) |
Equivalent area (EA) is the metric that determines whether a vent meets regulatory ventilation requirements for a given room — a concept that shapes every specification decision from room type to product selection.
How Passive Ventilation Works Through Window Vents
A trickle vent has no fan, no motor, and no power supply — yet fresh air still moves through it. So how do trickle vents work without any mechanical assistance? The answer lies in two natural forces that act on every building, every day: wind pressure and the buoyancy of warm air. Understanding these forces helps explain why vent sizing matters and why a correctly specified vent delivers reliable air exchange even on calm days.
Wind-Driven Pressure and Airflow
Picture wind hitting the front wall of your home. That impact compresses air molecules against the surface, creating a zone of positive pressure on the windward side. Meanwhile, as airflow separates around the building’s edges and roof, it generates suction on the sheltered leeward face — a region of negative pressure. The difference between these two pressures is the driving force that pushes outdoor air through any opening connecting one side to the other.
Trickle air vents for windows sit directly in this pressure field. When the vent on the windward facade is open, higher-pressure outdoor air is pushed through the narrow slot into the room. Stale indoor air then finds its way out through openings on the opposite or leeward side of the building, completing the circuit. The greater the wind speed, the larger the pressure differential and the faster air moves through the vent. Even a light breeze of 2–3 m/s generates enough pressure difference to maintain meaningful air exchange through a standard trickle vent.
Surrounding buildings, fences, and vegetation all influence how wind reaches your windows. A home on an exposed coastal site in Western Australia will experience stronger wind-driven ventilation than an identical home tucked between neighbouring properties in a Melbourne suburb. This is why the same vent can perform differently depending on site context — a point that matters during specification.
Stack Effect Ventilation in Buildings
Wind is not always reliable, particularly on still summer evenings or during calm winter nights. Fortunately, a second mechanism operates independently: the stack effect, sometimes called the chimney effect. It works because warm air is less dense than cool air and naturally rises.
Inside a heated home, warm indoor air is buoyant relative to the cooler air outside. That buoyancy creates a slight positive pressure at higher points in the building and a slight negative pressure at lower points. The result is a vertical circulation pattern — warm air escapes through upper openings (including trickle vents on upper-storey windows), and cooler, denser outdoor air is drawn in through lower openings to replace it. The taller the building, the greater the vertical distance between inlet and outlet, and the stronger this buoyancy-driven pressure becomes.
For a typical double-storey Australian home, even a modest indoor-outdoor temperature difference of 10°C produces enough stack pressure to drive continuous passive ventilation through windows — pulling fresh air in at ground level and exhausting stale, moisture-laden air from upper rooms. This is precisely why bedrooms on an upper floor benefit so strongly from trickle ventilation windows positioned at the frame head: they sit at the natural exhaust point of the stack.
How Vent Size Controls Air Exchange Rates
Both wind and buoyancy create the pressure difference, but the vent itself controls how much air actually flows. A larger equivalent area allows more air through for any given pressure. A smaller vent restricts flow. Think of it like a garden hose nozzle — the same water pressure delivers a trickle or a stream depending on how far you open the valve.
Several factors interact to determine the actual airflow rate through any passive vent at a given moment:
- Vent equivalent area (EA) — the effective open area of the ventilator, accounting for internal obstructions and baffles that reduce the free path for air
- Internal-external temperature difference — a larger gap means more buoyancy and a stronger stack effect driving airflow vertically through the building
- Wind speed and direction — higher wind speeds create greater pressure differentials across the building envelope, increasing flow through windward vents
- Building height — taller buildings develop greater stack pressures between lower inlets and upper outlets, boosting buoyancy-driven ventilation
In practice, wind and stack pressures work together. On a breezy winter day with a warm interior, both mechanisms reinforce each other and airflow is at its highest. On a still, mild evening when indoor and outdoor temperatures are nearly equal, flow drops to its minimum. Good vent specification accounts for the worst case — calm conditions with minimal temperature difference — to guarantee a baseline of fresh air even when nature offers the least assistance.
This relationship between pressure, vent area, and airflow is exactly what building regulations attempt to codify when they set minimum equivalent area requirements for different rooms and dwelling types.
Building Regulations and Equivalent Area Explained
Vent manufacturers list equivalent area figures on every product datasheet, yet many homeowners and even some builders treat those numbers as abstract jargon. They are not. Equivalent area is the single metric that determines whether a trickle vent delivers enough airflow to satisfy building code requirements for a given room — and getting it wrong means either inadequate ventilation or unnecessary expense.
Understanding Equivalent Area for Ventilation
Equivalent area (EA) measures the aerodynamic performance of a ventilator, not simply the physical size of the opening. A trickle vent with a 10 mm wide slot machined across a 600 mm frame might have a gross open area of 6,000 mm², but internal baffles, weathershields, insect mesh, and acoustic linings all restrict the air that actually passes through. EA accounts for those obstructions. It tells you how much air the vent can move under a standardised pressure difference — essentially, how the vent performs in the real world rather than on paper.
Think of it this way: two vents can look identical from the outside yet deliver very different trickle vent equivalent area values because of what happens internally. A basic slot vent with minimal obstruction might achieve 4,000 mm² EA from a relatively compact opening, while an acoustic vent with labyrinth baffles may need a physically larger housing to deliver the same effective airflow. This is why specifiers cannot simply measure the slot and assume compliance — the tested EA value on the product certification is what counts.
How Room Type Affects Vent Sizing
Not every room in a home needs the same volume of background ventilation. A bathroom generating steam from daily showers has different demands than a seldom-used spare bedroom. Building codes — including Australia’s National Construction Code (NCC) and the ventilation provisions referenced within it — recognise this by linking minimum ventilation rates to room function, floor area, and the number of occupants a dwelling is designed to accommodate.
Wet rooms such as kitchens, bathrooms, and laundries typically require higher ventilation rates because they produce concentrated moisture loads. Habitable rooms like bedrooms and living areas still need consistent background air exchange, but the rate per square metre is generally lower. Open-plan layouts that combine kitchen and living spaces introduce additional complexity, as the ventilation provision must serve the combined moisture and pollutant load of both zones.
Occupancy matters too. A one-bedroom apartment housing one or two people generates far less metabolic moisture and CO2 than a four-bedroom family home with six occupants. Building regulations scale their requirements accordingly — larger dwellings with more bedrooms typically demand a greater total equivalent area distributed across multiple trickle vents for windows throughout the home. The number of ventilators and their combined EA must satisfy minimum thresholds that reflect the dwelling’s capacity, not just its floor plan.
Connecting Regulations to Product Selection
Bridging the gap between a code requirement stated in square millimetres and an actual product sitting in a supplier’s catalogue involves a clear sequence of decisions. The process is straightforward once you understand the logic:
- Identify the room type — determine whether each space is classified as a habitable room (bedroom, living room, study) or a wet room (kitchen, bathroom, laundry), as ventilation rates differ for each category.
- Determine the required ventilation rate — consult the relevant NCC provisions or your building certifier’s guidance to establish the minimum background ventilation needed for that room type and dwelling size.
- Calculate total equivalent area needed — convert the required ventilation rate into a total EA figure. This may be specified directly in the code, or your certifier can confirm the target based on the dwelling’s overall ventilation strategy.
- Select vent products that meet or exceed the requirement — match the calculated EA to available trickle vent products compatible with your aluminium window profiles, ensuring the combined EA of all vents in a room satisfies the minimum threshold.
One critical point that catches people out: building regulations trickle vents requirements apply at the point of window installation, not later. Regulatory guidance makes clear that a homeowner cannot sign a disclaimer deferring ventilation to a future date — the work must comply at completion. This means ventilation should be part of the window specification conversation from day one, not an afterthought raised at the compliance inspection stage.
The practical takeaway is simple. Before choosing a trickle vent or asking your supplier to quote, know what EA your rooms actually need. That number drives every downstream decision — from which vent type fits your aluminium profile to whether a single vent per window is sufficient or whether you need multiple units working together to reach the target. Getting this step right avoids both under-ventilated rooms and the unnecessary cost of over-specifying vents that deliver more airflow than the space requires.
With the regulatory logic clear, the next question becomes physical: which vent types actually fit your specific aluminium window style, and what happens when a slim modern profile leaves limited space for ventilation hardware?

Compatibility With Different Aluminium Window Profiles
Every aluminium window style presents its own geometry — and that geometry dictates which window air vents can physically fit, where they can sit, and how effectively they perform. A vent that works perfectly on a casement frame may be entirely impractical on a sliding window. Getting this match wrong leads to compromised airflow, water ingress, or an installation that simply cannot achieve code-compliant equivalent area.
Vent Options by Window Style
Aluminium casement window vents are the most straightforward to specify. The hinged sash of a casement window has a broad head rail with enough depth for a standard trickle vent slot to be factory-machined directly into the frame. Both canopy-style slot vents and over-frame units work here, giving specifiers flexibility between factory-fitted and retrofit approaches.
Tilt-and-turn windows introduce a complication. The dual-action hardware occupies significant space within the frame rebate, and the sash must seal against weatherstripping in two operating modes. Vents are typically mounted in the outer frame head rather than the sash itself, keeping clear of the tilt mechanism. Over-frame vents are a common solution, sitting above the frame entirely and avoiding any interference with the complex espagnolette locking system.
Trickle vents for sliding windows present the tightest constraints. Sliding sashes run on tracks within a relatively shallow head channel, and any vent mounted in the sliding panel would move with the sash — creating alignment issues with the external canopy. The practical solution is to mount vents in the fixed outer frame above the track channel, or to specify glazed-in vents within the fixed pane where no sash movement occurs.
Awning windows (common across Australian homes for weather protection) share similar geometry to casements, so head-mounted trickle vents integrate well. Fixed windows, by definition, never open — making them prime candidates for glazed-in vents that provide background ventilation through an otherwise sealed panel.
| Window Type | Compatible Vent Types | Typical Mounting Position | Key Considerations |
|---|---|---|---|
| Casement | Slot trickle, over-frame, rebate | Head of sash or outer frame | Most versatile; suits factory-fitted or retrofit |
| Sliding | Over-frame, glazed-in | Fixed outer frame head or within fixed glazing | Avoid sash-mounted vents; track clearance critical |
| Tilt-and-turn | Over-frame, slot (outer frame only) | Above frame or in fixed outer frame head | Must clear dual-action hardware and espagnolette |
| Awning | Slot trickle, over-frame | Head of sash or outer frame | Similar to casement; check hinge clearance |
| Fixed | Glazed-in, over-frame | Within sealed unit or above frame | Glazed-in specified at manufacture only |
Frame Depth and Profile Constraints
Aluminium window profiles are engineered to minimise sightlines — that is their chief aesthetic advantage. But slimmer frames leave less material to machine a vent slot through. A typical residential aluminium frame depth ranges from 45 mm to 72 mm, compared to 60 mm to 80 mm or more on uPVC systems. That difference of even 15 mm can determine whether a particular trickle vent window product physically fits within the available cross-section.
Frame depth also governs how much internal chamber space exists for thermal break material and weatherseals. A vent machined into a shallow profile competes for the same space as drainage channels, gasket grooves, and hardware mounting points. Deeper profile systems — those in the 56–72 mm range — generally accommodate standard vent housings without requiring bespoke modifications. Shallower profiles may be limited to rebate vents or glazed-in solutions that do not rely on machining through the frame at all.
This is precisely why vent specification should happen during the window design phase, not after frames are ordered. Profile selection and ventilation strategy are interdependent decisions.
Thermal Bridging Considerations for Aluminium
Aluminium conducts heat roughly 1,000 times more readily than uPVC. This thermal conductivity is managed in modern window frames through polyamide thermal breaks — insulating barriers that separate the interior and exterior aluminium sections. But every time you machine an opening through the frame for a trickle vent, you risk creating a localised thermal bridge where cold can bypass the break and reach interior surfaces.
If that bridge forms, the interior face of the frame around the vent drops below dew point on cold mornings, and condensation appears exactly where you installed ventilation to prevent it. The irony is real and the problem is avoidable — provided the vent is designed for thermally broken aluminium systems.
Quality trickle vents for aluminium frames incorporate their own insulating elements: plastic or nylon vent bodies that span the thermal break zone without conducting heat through it. The vent canopy on the exterior and the controllable flap on the interior remain thermally separated. Cheaper products that use a continuous aluminium or metal housing bridging both frame sections will undo the thermal performance your window was engineered to deliver.
For specifiers working with high-performance thermally broken profiles — particularly those with 35–39 mm wide polyamide breaks — it pays to confirm that the chosen vent product has been tested and approved for use with that specific profile system. Manufacturers who control both the window extrusion and the vent integration can ensure the thermal break remains uncompromised. This is where working with a specialist aluminium window supplier matters most. Companies like MEICHEN offer project-ready custom window configurations where ventilation can be specified alongside frame type and performance requirements, ensuring compatibility between vent, profile, and thermal break from the outset.
The physical fit between vent and frame is only half the installation picture. Aluminium’s material properties also demand specific tools, techniques, and precautions during fitting — particularly when retrofitting vents to windows that were not originally designed for them.
Installing Vents in Aluminium Window Frames
Aluminium is not timber, and it is not uPVC. The material is harder, the frame walls are thinner, and the consequences of a sloppy cut are far less forgiving. A misplaced hole in a timber frame can be filled and repainted. A botched slot through an aluminium profile may compromise its structural integrity, break a thermal bridge, or leave metal swarf embedded in weatherseals where it causes long-term corrosion. Getting the installation right — or better yet, specifying vents before the window is even manufactured — avoids all of these risks.
Factory-Fitted Versus Retrofit Installation
The cleanest approach is always factory fitting. When a window trickle vent is specified during the design phase, the manufacturer machines the slot using CNC-controlled routers that cut to exact tolerances, deburr edges automatically, and position the opening precisely relative to the thermal break. Drainage channels are integrated, canopy fixings are pre-drilled, and the vent body arrives pre-fitted and sealed before the window leaves the factory. No site work, no swarf, no risk of misalignment.
Factory fitting is standard practice on new-build projects and major renovations where windows are ordered to specification. It adds negligible cost to the overall window price while eliminating the skill-dependent variables that make on-site fitting unpredictable.
Retrofit trickle vent installation becomes necessary when existing aluminium windows lack ventilation and full replacement is not justified — a common scenario in Australian homes built before current NCC ventilation provisions were tightened. Retrofitting is entirely feasible, but it demands more care, better tools, and a clear understanding of the frame’s internal anatomy.
Tools and Preparation for Aluminium Frames
Standard wood bits and multipurpose drill bits have no place here. Aluminium requires high-speed steel (HSS) or cobalt drill bits designed for metal. HSS bits maintain sharpness through aluminium’s harder surface, while cobalt variants offer superior heat resistance for thicker sections or extended cuts. A sharp bit is non-negotiable — dull edges generate excessive heat, cause the aluminium to bind and grab, and produce ragged holes that weaken the surrounding material.
Beyond drill bits, a successful retrofit trickle window vents installation calls for:
- A centre punch to create a starting indent and prevent the bit from wandering on the smooth aluminium surface
- Cutting lubricant or light machine oil to cool the bit and reduce friction during drilling
- Masking tape along the cutting line to protect the powder-coated finish from scratches
- A vacuum or compressed air for immediate swarf removal — aluminium filings left inside the frame can block drainage channels or scratch seals
- Clamps or a secure prop to stabilise the sash if working on a hinged or removable panel
Before any tool touches the frame, you need to know what lies behind the surface. Aluminium window profiles contain internal chambers, reinforcement ribs, thermal break zones, and hardware channels. Drilling blindly risks puncturing a polyamide thermal break or hitting a concealed espagnolette rod. Check the manufacturer’s profile drawings if available, or use a depth gauge to confirm chamber positions before committing to a cut.
Step-by-Step Fitting Principles
Every frame is different, and specific vent products come with their own fixing instructions. However, the general sequence for how to fit trickle vents aluminium frames follows a consistent logic:
- Measure and mark — position the vent centrally along the frame head, using the vent body as a template. Mark pilot hole locations and the slot outline with a fine permanent marker on masking tape.
- Check for thermal breaks and internal hardware clearance — confirm that the proposed slot position does not intersect the polyamide thermal break, drainage slots, or any concealed locking hardware. Adjust position if necessary.
- Drill pilot holes with appropriate HSS or cobalt bits — start with a smaller pilot hole (2–3 mm) at moderate speed (around 1,500 RPM) before stepping up to the final diameter. Apply cutting lubricant and let the bit do the work rather than forcing pressure.
- Cut the ventilation slot — depending on the vent type, connect pilot holes with a jigsaw fitted with a fine-tooth metal blade, or use a plunge router with an aluminium-rated bit. Keep speeds controlled to prevent heat build-up.
- Clear all swarf immediately — vacuum metal filings from both inside and outside the frame. Even tiny particles can scratch weatherseals, block drainage, or cause galvanic corrosion if trapped against dissimilar metals.
- Deburr and protect cut edges — file any sharp edges smooth and apply a corrosion-inhibiting primer or touch-up paint to exposed raw aluminium. This prevents oxidation from developing at the cut.
- Test-fit the vent body — slide the internal vent unit into position without fixing permanently. Confirm alignment, check that the controllable flap operates freely, and verify that the external canopy sits flush.
- Seal and fix permanently — apply a bead of neutral-cure silicone (never acidic cure, which attacks aluminium) around the vent perimeter, then screw-fix the body and canopy using stainless steel fasteners to avoid galvanic corrosion between dissimilar metals.
For situations where frame depth is too shallow for a machined slot — common with older slimline profiles — a glazed-in vent offers an alternative path. This approach bypasses the frame entirely by replacing the existing sealed unit with a slightly shorter panel and fitting a ventilator strip into the freed space at the top of the glass rebate. No frame cutting required.
Regardless of method, always test the completed installation by running water across the external canopy with the vent closed. Confirm that drainage paths function and no water tracks inward. A five-minute water test catches seal failures that would otherwise appear months later during a storm.
Common Mistakes to Avoid
Even experienced installers trip up on aluminium-specific details. These errors crop up repeatedly:
- Drilling through the thermal break — destroying the insulating barrier creates a cold bridge that causes the very condensation the vent was installed to prevent
- Using excessive drill speed — too many RPM overheats the aluminium, causes the bit to grab, and can distort thin frame walls
- Neglecting swarf removal — metal filings left inside the frame migrate into drainage channels and gaskets, causing blockages and premature seal degradation
- Using steel screws in aluminium — steel-to-aluminium contact creates galvanic corrosion in the presence of moisture; always use stainless steel or aluminium fasteners
- Applying acidic silicone sealant — acetoxy-cure silicone releases acetic acid that attacks aluminium; only neutral-cure products are safe for these frames
- Skipping the water test — assuming the seal is good without verification invites hidden water ingress that damages internal reveals and plasterwork over time
The physical installation determines whether a vent performs as intended or becomes a source of new problems. But even a perfectly fitted vent can fall short if external noise passes through unchecked — a concern that grows louder the closer a home sits to traffic, rail lines, or flight corridors.

Acoustic Performance and Noise Control
A standard trickle vent is, by design, a hole through your building envelope. It exists to let air pass — and sound travels through air. For a home on a quiet suburban street, that trade-off barely registers. But position that same vent facing a four-lane arterial road in western Sydney, a rail corridor in Melbourne’s inner suburbs, or beneath a flight path near Brisbane Airport, and the acoustic penalty becomes impossible to ignore.
How Standard Vents Affect Sound Insulation
Modern thermally broken aluminium windows with double glazing can achieve sound reduction values of 30–38 dB across the glazed area. That performance means nothing if a standard open trickle vent sitting above the glass provides an unobstructed path for airborne noise. Sound waves follow the path of least resistance, and a 5,000 mm² slot cut through the frame head is precisely that path.
The effect is disproportionate to the vent’s small size. A window might occupy 1.5 m² of wall area, yet the tiny ventilation opening can reduce the overall facade sound insulation by 5–10 dB compared to the same window with the vent sealed shut. In acoustic terms, a 10 dB reduction represents a perceived doubling of loudness — the difference between a room that feels peaceful and one where traffic hum is a constant companion. Closing the vent restores acoustic performance, but it also eliminates the background ventilation the building code requires. That tension — fresh air versus quiet — is exactly why acoustic trickle vents for windows were developed.
Acoustic Vent Design Principles
Sound reducing window vents solve the problem by forcing sound waves to lose energy before reaching the interior, while still allowing air to flow freely through the unit. They achieve this through three core design strategies working in combination.
The first is a labyrinth air path. Instead of offering a straight-through slot, acoustic vents route air through multiple turns and chambers within the vent body. Air navigates the bends easily — it is a fluid that flows around obstacles. Sound waves, however, lose energy at every change of direction. Each turn reflects a portion of the sound energy back toward the exterior rather than allowing it to propagate inward. The more turns, the greater the attenuation.
The second is sound-absorbing linings. The internal surfaces of the chambers are lined with materials that absorb acoustic energy rather than reflecting it. As sound waves bounce between the walls of the labyrinth, these linings convert acoustic energy into negligible heat through friction within the material’s fibrous or cellular structure. The effect is cumulative — the longer the internal path and the more absorptive surface area the sound encounters, the quieter the air stream becomes by the time it exits into the room.
The third is baffled chambers and dual attenuator systems. Higher-performance acoustic vents incorporate a separated canopy on the exterior that acts as a dual attenuator system — the external canopy attenuates incoming sound before it even reaches the internal vent body, which then provides a second stage of noise reduction. This two-stage approach allows the vent to achieve substantially higher Dn,e,w ratings (the standardised single-number metric for a ventilator’s sound insulation performance) without sacrificing equivalent area.
Acoustic performance and equivalent area are fundamentally in tension. A larger opening delivers more airflow but transmits more noise. Acoustic vent design exists to break that trade-off — using labyrinth paths, absorptive linings, and dual attenuator systems to maintain adequate EA while pushing sound reduction values above 35 dB.
The performance metric to look for is the Dn,e,w value, expressed in decibels. A standard trickle vent without acoustic treatment might achieve a Dn,e,w of 25–30 dB. A dedicated acoustic vent delivering comparable airflow can reach 37–44 dB — a meaningful improvement that keeps interior noise levels within the 30–35 dB range recommended for habitable rooms and restful sleep.
When to Specify Acoustic Vents
Not every project needs noise control window ventilation. A home on a quiet cul-de-sac with no nearby traffic, rail, or industrial noise sources will perform perfectly well with standard trickle vents. Acoustic vents cost more, are physically deeper (which can constrain slim aluminium profiles), and add complexity to specification. They should be specified deliberately, based on the actual noise environment rather than as a precautionary default.
Consider acoustic vents in these scenarios:
- Properties within 50–100 metres of roads carrying significant traffic volumes, particularly where night-time noise disrupts sleep
- Homes adjacent to rail corridors where both rolling noise and vibration affect the building envelope
- Dwellings beneath airport flight paths or near helicopter landing sites
- Urban infill developments surrounded by commercial activity, hospitality venues, or entertainment precincts
- Multi-storey apartment buildings in mixed-use zones where ground-floor retail or hospitality generates upward noise
- Bedrooms and living areas where occupants have heightened sensitivity to noise intrusion — shift workers sleeping during the day, home offices requiring concentration, or nurseries
In Australia, local council development applications for residential projects near noise sources often require an acoustic assessment as part of the approval process. That assessment defines the noise attenuation the building envelope must achieve, and the vent specification must demonstrate compliance with those targets. Selecting an acoustic vent with a tested Dn,e,w value that satisfies the acoustic report’s requirements avoids costly redesigns after construction begins.
The key is matching the vent’s attenuation to the specific noise frequencies present at the site. Road traffic noise is dominated by low-to-mid frequencies (tyre roar, engine rumble), while aircraft noise tends toward broader-spectrum sound. Manufacturers publish frequency response charts showing how their vents perform across the 100 Hz to 5,000 Hz range — these charts reveal far more than the single Dn,e,w number alone, and they help specifiers match vent performance to the actual noise signature of the environment.
Acoustic performance is rarely the only concern driving vent selection. Most projects juggle noise, airflow, aesthetics, and a handful of practical issues that only surface once the vent is in service — condensation around the opening, draughts on windy nights, or a slider that jams shut after a season of dust accumulation.
Troubleshooting Common Vent Problems
Most aluminium window vents perform quietly in the background for years without a second thought. But when something goes wrong — water dripping through a slot during a storm, cold air streaming across your pillow at 2 am, or condensation pooling along the very device meant to prevent it — the frustration is immediate. These issues are common, and they are almost always fixable once you identify the actual cause rather than guessing at symptoms.
Condensation and Draught Problems
Trickle vent condensation problems typically trace back to one of two causes: a thermal bridge at the vent location, or a vent that has been closed when it should remain open. If moisture forms directly on the vent body or the frame immediately surrounding it, the likely culprit is heat conducting through a metal vent housing that lacks adequate thermal separation. Cold external air chills the vent’s interior face below dew point, and moisture from warm room air condenses on that surface. The fix involves confirming whether the installed vent incorporates a thermal break between its internal and external components — if it does not, replacement with a thermally broken unit is the long-term solution.
Condensation appearing on the glass below a closed vent is a different story. That moisture is forming because warm moist indoor air is hitting the cold glass surface with no ventilation path to carry the humidity away. The vent is doing nothing wrong — it is simply shut. Opening it restores the background airflow that dilutes indoor humidity before it reaches the dew point on cold surfaces.
Excessive draughts draw the opposite complaint. A trickle vent draught fix depends on whether the airflow is genuinely coming through the vent or through failed weatherseals elsewhere on the frame. Run your hand directly across the vent slot — if the cold stream originates there, the vent may lack an adequate internal baffle, or conditions are unusually windy. Most quality vents include a hit-and-miss slider that lets you partially close the opening during storms without sealing it completely. Reducing the slot to half-open cuts airflow significantly while maintaining some ventilation. If the draught persists with the vent fully closed, the seals within the vent body have likely failed or debris is preventing full closure.
Noise and Water Ingress Solutions
Noise passing through standard vents is a design limitation, not a defect. If traffic or neighbourhood noise has increased since your windows were installed — a new development nearby, heavier road use, or a changed flight path — the vent opening that was adequate before may now transmit unacceptable sound levels. The solution is upgrading to acoustic vent units with labyrinth air paths, not sealing the vent permanently.
Water ingress during driving rain is more concerning and usually points to a blocked or damaged external canopy. The canopy’s job is to deflect rain away from the vent slot while still allowing air to enter from below. If the canopy is cracked, warped, or its drainage weep holes are blocked with dirt and debris, water tracks inward rather than draining away. Inspect the external canopy for damage, clear any blockages from drainage slots, and confirm that sealant around the canopy edge has not cracked or pulled away from the aluminium frame. In coastal areas of Australia where wind-driven rain is severe, upgrading to a canopy with a deeper overhang or a pressure-equalised rain defence may be warranted.
Maintenance and When to Use Blanking Plates
Routine maintenance is minimal, but ignoring it entirely invites the problems described above. A simple twice-yearly routine keeps vents functioning properly:
- Clean the vent slot — open the internal flap and use a thin brush, pipe cleaner, or vacuum nozzle to clear accumulated dust, cobwebs, and insect debris from the opening. Blockages reduce effective airflow well below the rated equivalent area.
- Check external canopy drainage — inspect weep holes and drainage channels for obstructions. Coastal properties may accumulate salt residue that narrows these paths over time.
- Lubricate moving parts — sliders and hit-and-miss flaps can stiffen, especially on aluminium frames where fine oxidation or paint overspray binds moving surfaces. A light application of silicone spray (never petroleum-based lubricant) restores smooth operation.
- Inspect seals — the gaskets between vent body and frame deteriorate over decades. Look for compression set, cracking, or sections pulling away from their channel. Replace degraded seals before they allow uncontrolled air or water passage.
Stuck or jammed vent sliders are a frequent complaint that usually resolves with cleaning and lubrication. Dust and grime pack into the slider channel over months, increasing friction until the mechanism locks in place. Gentle cleaning with a stiff nylon brush followed by silicone spray almost always frees the action without needing replacement parts.
| Problem | Likely Cause | Recommended Fix |
|---|---|---|
| Condensation on vent body | Thermal bridge — metal vent housing without thermal break | Replace with thermally broken vent unit |
| Condensation on glass below vent | Vent closed; indoor humidity has no escape path | Open the vent to restore background airflow |
| Excessive draught | Vent fully open in high wind; or failed internal seals | Partially close slider; replace seals if draught persists when closed |
| Noise ingress | Standard vent lacks acoustic treatment | Upgrade to acoustic vent with labyrinth baffles |
| Water ingress during rain | Blocked or damaged external canopy; failed perimeter sealant | Clear canopy drainage; replace cracked sealant or damaged canopy |
| Slider jammed shut | Dust and oxidation buildup in slider channel | Clean channel with nylon brush; apply silicone spray |
A word on trickle vent blanking plates: these are solid covers that seal the vent opening permanently. They are sometimes installed by homeowners frustrated with draughts or noise, and occasionally by builders completing projects where the owner requests removal of ventilation. Use them cautiously. A blanking plate eliminates the ventilation function the vent was designed to provide, and in a well-sealed modern home, removing background airflow invites the moisture and air quality problems that triggered the vent requirement in the first place. If you find yourself reaching for a blanking plate, it is worth first addressing the underlying issue — whether that is a draught caused by failed seals, noise that an acoustic upgrade would resolve, or water ingress from a blocked canopy. Sealing the vent is a last resort, not a first response.
With common problems diagnosed and maintenance habits established, the remaining question is how to pull all of these considerations together — acoustic needs, compatibility, regulations, and practical performance — into a coherent selection decision for your specific project.

Choosing the Right Vents for Your Project
Selecting aluminium window vents is not a single decision — it is a chain of interconnected choices where each link affects the next. Equivalent area requirements shape which products are viable. Profile compatibility narrows the field further. Acoustic demands, colour preferences, and budget realities then determine the final specification. Tackle these decisions in the wrong order, and you end up retrofitting a compromise rather than installing a solution.
Key Selection Criteria at a Glance
Every project is different, but the selection logic follows the same sequence regardless of whether you are building a new home in coastal Queensland or upgrading windows in a Melbourne weatherboard. Use this aluminium window vent selection guide as a working checklist before contacting suppliers or placing orders:
- Required equivalent area — confirm the minimum EA your rooms need under NCC provisions. This is the non-negotiable starting point that eliminates products too small to achieve compliance.
- Window profile compatibility — match the vent type to your frame style (casement, sliding, tilt-and-turn, awning, or fixed) and confirm that your profile depth accommodates the vent housing without compromising thermal breaks or hardware channels.
- Acoustic requirements — determine whether the site’s noise environment demands acoustic vents with tested Dn,e,w values, or whether standard slot vents provide adequate comfort. Reference any acoustic report attached to your development application.
- Aesthetic preferences — decide whether visible slot vents, discreet over-frame units, or fully concealed glazed-in options best suit the architectural intent. Confirm that the chosen vent can be powder-coated to match your frame colour — most quality aluminium vents accept the same coating systems as the window profiles themselves.
- Factory-fitted or retrofit — new builds and full replacements should always specify factory-fitted vents for precision, warranty coverage, and thermal break integrity. Retrofit is a valid path for existing windows, but factor in the additional labour cost and the skill required to cut aluminium on site.
- Budget — standard trickle vents represent a small fraction of overall window cost. Acoustic units and easy glaze trickle vents that integrate within the sealed unit carry a premium, but that cost is modest compared to remedial work if condensation or noise problems surface later.
- Climate and exposure — coastal properties in salt-air zones need vents with marine-grade finishes or stainless steel fixings. Homes in tropical northern Australia face higher humidity loads and may benefit from larger EA values to maintain adequate air exchange during calm, humid conditions.
Working through this list in sequence prevents the common mistake of choosing a vent for its appearance and then discovering it cannot deliver the EA your certifier requires, or that it physically will not fit the profile you have already ordered.
Specifying Ventilation Early in Your Window Project
The single most effective step you can take is to raise ventilation at the same point you discuss frame style, glass type, and hardware finishes. Treating vents as an afterthought — something to sort out once the windows arrive on site — creates unnecessary constraints. By that stage, the profile is locked in, the glass is cut, and the only option left may be an over-frame unit that adds visual bulk you never wanted.
Specifying early means your window manufacturer can select a profile system with adequate head depth, machine vent slots during fabrication, integrate drainage paths correctly, and powder-coat the vent body in the same batch as the frames. The result is a seamless finish where the vent looks like part of the window rather than something bolted on after the fact. It also means your building certifier can sign off ventilation compliance at the same inspection as the window installation — no return visits, no remedial work, no delays to occupancy.
For projects involving mm windows and doors across multiple rooms and floor levels, early specification also allows the ventilation strategy to be considered holistically. Upper-storey bedrooms might rely on stack-effect exhaust through head-mounted vents, while ground-floor living areas on the windward facade could use smaller EA units because wind-driven pressure already provides generous airflow. A coordinated approach delivers better indoor air quality with fewer and more discreet vent units than a room-by-room calculation done in isolation.
Working With Your Window Supplier
How to choose trickle vents ultimately comes down to the quality of the conversation between you and your supplier. A good aluminium window company does more than sell frames — they understand the interplay between profile geometry, thermal performance, ventilation compliance, and site conditions. They can recommend which vent types suit their specific extrusion systems, confirm tested EA values, and advise whether acoustic or standard units are appropriate for your location.
Ask your supplier these questions before signing off on a specification:
- Which vent products have been tested and approved for use with your specific profile system?
- Does the vent maintain thermal break integrity, and is there test data confirming no condensation risk at the vent-frame junction?
- Can the vent body be powder-coated to match my chosen frame colour, including dual-colour options for different internal and external finishes?
- What is the tested EA of each vent option, and how many units per room will satisfy the NCC background ventilation requirement for my dwelling type?
- Are acoustic-rated options available within the same profile range if my site assessment identifies noise concerns?
A specialist aluminium window supplier who offers integrated ventilation solutions removes the guesswork from this process. Rather than sourcing vents separately and hoping they fit, you get a system where frame, glass, hardware, and ventilation are engineered as a single package. MEICHEN’s aluminium windows range is one example of this integrated approach — their project-ready configurations allow ventilation to be specified alongside frame type, colour, glazing performance, and custom sizing, ensuring every component works together from manufacture through to installation.
The payoff for getting this decision right extends well beyond passing a compliance inspection. A well-chosen vent controls condensation through winter, maintains air quality through summer, stays quiet on windy nights, and looks like it belongs on the frame rather than fighting against it. That is the difference between a ventilation solution and a ventilation compromise — and it starts with asking the right questions before a single piece of aluminium is cut.
Frequently Asked Questions About Aluminium Window Vents
1. Do trickle vents cause draughts in aluminium windows?
Quality aluminium window trickle vents are designed to provide gentle background airflow rather than a noticeable draught. Most feature a hit-and-miss slider that lets you partially close the opening during windy conditions. If you experience excessive draughts with the vent fully closed, the internal seals may have degraded and need replacement. Positioning also matters — vents mounted at the frame head direct incoming air toward the ceiling where it mixes with warm room air before descending, minimising any cold stream at occupant level.
2. Can you add trickle vents to existing aluminium windows?
Yes, retrofit installation is possible on most existing aluminium window frames. Over-frame vents mount above the frame without any machining and are the simplest retrofit option. Alternatively, a slot can be cut through the frame head using HSS or cobalt drill bits and a fine-tooth metal jigsaw, though this requires careful attention to thermal break placement and internal hardware clearance. For slim profiles where frame cutting is impractical, glazed-in vents replace the existing sealed glass unit with a slightly shorter panel and a ventilator strip — no frame modification needed.
3. What size trickle vent do I need for my room?
Vent sizing is determined by the equivalent area (EA) required under National Construction Code provisions for your specific room type and dwelling size. Wet rooms like kitchens and bathrooms generally need higher ventilation rates than bedrooms or living areas. The total EA required also scales with the number of bedrooms in the dwelling, reflecting expected occupancy. Your building certifier can confirm the exact EA target for each room, and you then select vent products whose combined EA meets or exceeds that figure. A typical habitable room in a standard dwelling might need 2,500 to 5,000 mm² of equivalent area.
4. Are aluminium window vents required by Australian building regulations?
The National Construction Code requires habitable rooms to have a means of natural ventilation. While openable windows can satisfy this requirement, trickle vents provide continuous background ventilation even when windows are closed and locked — making them particularly valuable for bedrooms at night, security-conscious ground-floor rooms, and noise-affected facades where opening windows is impractical. Your building certifier will determine whether trickle vents are necessary based on your dwelling’s overall ventilation strategy, room types, and any mechanical systems already specified.
5. How do acoustic trickle vents reduce noise while still allowing airflow?
Acoustic trickle vents use a labyrinth air path inside the vent body that forces sound waves to change direction multiple times, losing energy at each turn. The internal chamber surfaces are lined with sound-absorbing materials that convert acoustic energy into negligible heat. Higher-performance models add a dual attenuator system where the external canopy provides a first stage of noise reduction before air reaches the internal vent body for a second stage. This design allows tested sound reduction values of 37 to 44 dB while maintaining adequate equivalent area for ventilation compliance — suitable for homes near busy roads, rail corridors, or flight paths.
More Window & Door Guides