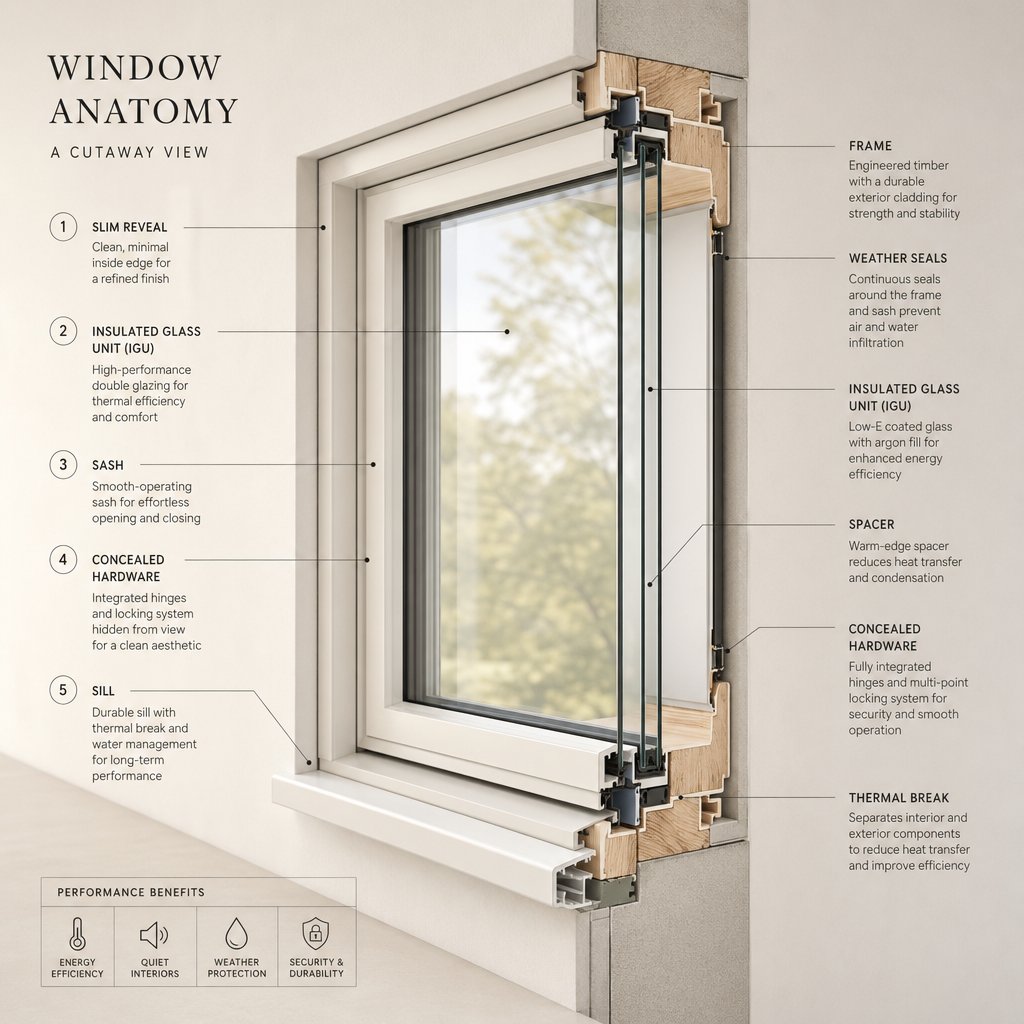
What Is Aluminium Window Joinery
Most people use the words “frame” and “joinery” interchangeably. They shouldn’t. A frame is a single component — the visible border around your glass. Aluminium window joinery is the entire engineered system that makes a window perform.
Aluminium window joinery refers to the complete assembly of extruded aluminium profiles, precision corner connections, integrated hardware, drainage channels, and weatherseals — all fabricated and joined together to form a structurally sound, weathertight window unit.
That distinction matters whether you’re a homeowner comparing quotes, an architect writing specifications, or a builder fitting units on site. The quality of window joinery — the methods used to cut, connect, seal, and reinforce each profile section — determines how well a window resists water, air, wind load, and time itself. Two aluminium window frames can look identical on the surface yet differ enormously in how their corners are joined, how their seals maintain continuity, and how their drainage performs under pressure.
What Aluminium Window Joinery Actually Means
Think of it this way: joinery is the craft and engineering behind how individual lengths of aluminium profile become a finished, functioning window. It encompasses cutting angles, corner reinforcement, hardware pocket integration, and the continuity of rubber or brush seals at every junction. In French-speaking markets, the discipline is known as menuiserie aluminium — a term that captures the same idea of skilled assembly rather than simple material supply. The concept is universal even if the terminology shifts between regions.
Why Aluminium Dominates Modern Window Systems
Aluminium earned its position as the dominant commercial — and increasingly residential — window material for a few straightforward reasons. Its strength-to-weight ratio allows slimmer profiles and larger spans than timber or uPVC can manage. It holds its shape across temperature extremes without warping, swelling, or becoming brittle. It resists corrosion naturally and accepts protective finishes that extend service life well beyond 40 years. And at end of life, aluminium is 100% recyclable, requiring only around 5% of the energy needed to produce virgin material.
These properties make windows in aluminium suitable for everything from high-rise curtain walls to residential casement and sliding configurations — a versatility no other single material matches. The growing demand for larger glazed openings in Australian homes has only accelerated the shift toward aluminium joinery in the residential sector.
This article traces the full lifecycle of aluminium window joinery: from raw billet through extrusion and fabrication, across system types and thermal performance, into specification decisions, surface finishes, and long-term care. Each stage reveals where quality is built in — or where it quietly falls short.
How Aluminium Window Profiles Are Extruded
Every aluminium window starts as a solid cylindrical log of metal — called a billet — that bears no resemblance to the intricate hollow shapes it will become. The extrusion process bridges that gap, transforming raw aluminum window frame material into precisely engineered aluminium profiles ready for fabrication into finished joinery.
From Aluminium Billet to Window Profile
Extrusion works on a simple principle: heat the metal until it’s malleable, then force it through a shaped steel die under enormous hydraulic pressure. The die’s opening dictates the exact cross-sectional geometry of the profile that emerges — every chamber, channel, and slot defined in a single pass. Here’s how the sequence unfolds:
- Billet heating — Aluminium logs are pre-heated to approximately 400–500°C, making the metal soft enough to flow without melting.
- Die pressing — A hydraulic ram pushes the heated billet through the precision-machined steel die, producing a continuous length of shaped profile.
- Cooling — The extruded profile is quenched with water or forced air immediately after exiting the die, locking in the desired crystalline structure.
- Stretching — Mechanical stretchers pull the cooled length straight, relieving internal stresses and correcting any minor distortion.
- Cutting — Profiles are sawn to standard lengths for transport and further fabrication.
- Heat treatment (ageing) — Controlled furnace cycles develop final hardness and tensile strength properties.
- Surface treatment — Profiles receive powdercoating, anodising, or other finishes before dispatch.
The entire process produces aluminium window profiles in continuous lengths, each one dimensionally consistent along its full run — a manufacturing advantage that gives aluminium joinery its trademark precision.
Alloy Selection: Why 6063 and 6060 Lead the Field
Not all aluminium alloys suit window applications. The 6063-T5 alloy dominates the industry because it balances three competing demands: it flows smoothly through complex die geometries, it accepts anodising and powdercoating beautifully, and it delivers tensile strength above 157 MPa — comfortably exceeding the threshold for residential wind loads. The closely related 6060 alloy serves lighter-duty or purely decorative components where strength requirements are lower. For high-rise or extreme-span applications, 6061 alloy provides roughly 50% greater tensile strength, though its coarser grain makes it less ideal for fine architectural finishes.
How Profile Geometry Determines Performance
What makes an extruded aluminum window frame more than just a shaped piece of metal is the engineering embedded in its cross-section. Look at any quality window profile in cross-section and you’ll see multiple hollow chambers — not one solid block. These chambers add structural rigidity without proportional weight gain, giving slender aluminium window profiles the stiffness to span large openings.
Beyond structural chambers, profile geometry incorporates purpose-designed features: drainage channels that route water to the exterior, screw ports for hardware mounting, and narrow slots sized to grip EPDM or silicone weatherseals securely. Each element is resolved at the die-design stage, meaning a profile’s performance ceiling — its structural capacity, thermal break accommodation, glazing thickness range, and hardware compatibility — is largely set before fabrication even begins.
Profile wall thickness and chamber configuration differ between residential and commercial aluminum window frame extrusions. Residential profiles typically use 1.2 mm walls with simpler two- or three-chamber layouts, while commercial window profiles feature 1.4–1.6 mm walls and more complex multi-chamber geometries engineered for greater spans, heavier glazing units, and higher wind-load resistance. These differences aren’t visible in the finished product, but they define what each system can safely achieve once installed.
Profile geometry also sets the stage for what happens next in the manufacturing chain — the methods used to cut and join those profiles at their corners, where engineering precision either holds or fails.
Corner Jointing and Fabrication Methods Explained
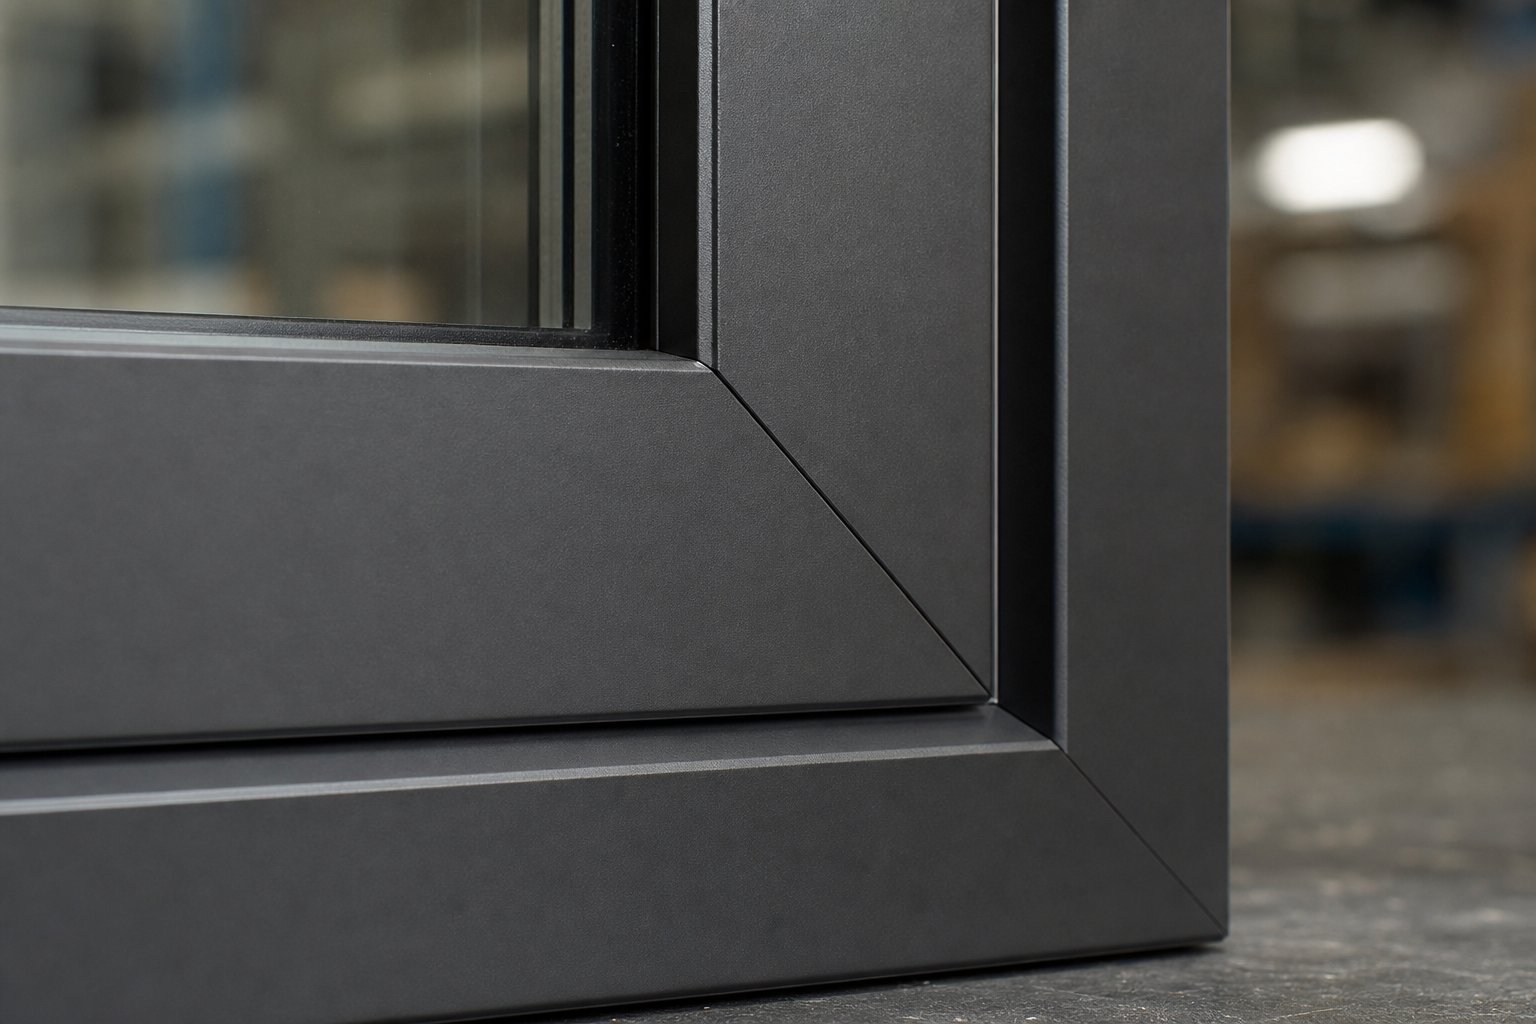
A profile’s cross-section might be flawless, but the window lives or dies at its corners. This is where aluminium window framing transitions from raw extrusion into actual joinery — the craft of cutting, aligning, and permanently connecting profile sections so the finished aluminium window frame behaves as a single structural unit rather than four pieces leaning on each other. Four primary methods dominate the industry, each with distinct trade-offs in strength, weather resistance, aesthetics, and serviceability.
Mitred Crimping vs Welded Corners
The most common approach in residential aluminium frame windows is the mitred and crimped joint. Profiles are cut at 45 degrees, an internal corner cleat (typically 3–5 mm thick aluminium) is inserted into the profile cavities at the junction, and a press crimps the outer walls inward to lock everything together mechanically. It’s fast, cost-effective, and produces a clean mitre line. The limitation? Over years of thermal cycling and operational stress, crimped joints can loosen marginally, and the exposed cut edges at the mitre are vulnerable to filiform corrosion — thread-like oxidation that creeps beneath the coating in warm, humid environments like coastal Australia.
Mitred and welded joints sit at the opposite end of the spectrum. Profiles are cut at 45 degrees, welded together, then ground back to a perfectly flush surface before the entire assembled frame is powder coated. The result is seamless — no visible cut lines, no exposed raw aluminium at the corners, and no pathway for moisture ingress. Structural strength is superior because the weld creates a continuous metal bond. The trade-off is cost: welding and grinding are labour-intensive, and finishing assembled frames rather than linear lengths increases coating expense substantially. Welded construction is most often specified for high-end architectural projects where aesthetics and longevity justify the premium.
Mechanical Assembly and Screw-Port Systems
Commercial curtain wall systems and many large-format sliding configurations use screw-port mechanical assembly. Instead of mitred corners, profiles are cut square and joined using concealed machine screws driven into pre-formed screw bosses within the extrusion. This method allows on-site assembly and disassembly — useful when transporting large frames through restricted access points like lifts or narrow corridors. The joints are strong in shear and tension, though they rely on sealants and gaskets rather than material fusion for water resistance.
Cleated or spigot joints occupy a niche role in specific system designs. A spigot — an internal sleeve or tongue — slides into both profile ends at the junction, secured with pins and sealed with injected polyurethane adhesive. This approach delivers excellent tightness and stability, particularly when combined with high-quality corner sealant rated for weather resistance. It suits situations where both on-site flexibility and strong sealing are required.
Why Corner Quality Defines Window Longevity
Regardless of method, corners are the most common failure point in poorly fabricated windows. Three problems converge at every junction: structural load concentration, weatherseal discontinuity, and exposed material edges.
Corner cleats and internal brackets distribute racking forces across a broader area — without them, daily operation and wind loads gradually work the joint loose. Structural adhesives (hydrolysis-resistant polyurethane formulations are the current benchmark) bond the cleat to the profile walls, adding rigidity and blocking the micro-gaps where water infiltrates.
Weatherseal continuity deserves equal attention. Rubber or EPDM seals run along straight profile lengths easily enough, but at corners they must be welded, mitred, or formed into moulded corner pieces to maintain an unbroken barrier. Cheap fabrication simply butts seal ends together, leaving a gap that leaks under wind-driven rain. Quality aluminium window components incorporate factory-vulcanised corner seals or continuous-loop gaskets that eliminate this weak point entirely.
When assessing any aluminium window frame — whether for a new build, renovation, or commercial fit-out — the corner tells you more about overall quality than any other single detail. A tight, sealed, properly reinforced corner means the fabricator understood that joinery is not merely assembly; it’s engineering durability into every junction.
| Method | Strength | Weather Resistance | Appearance | Typical Application | Repairability |
|---|---|---|---|---|---|
| Mitred & Crimped | Good — mechanical lock via cleat and crimp | Moderate — relies on sealant at exposed mitre edges | Clean mitre line visible at corners | Residential casement, awning, and sliding windows | Difficult — crimps are permanent deformations |
| Mitred & Welded | Excellent — continuous metal bond | Excellent — no exposed edges, full coating coverage | Seamless, flush finish with no visible joint | High-end architectural, coastal, and oversized frames | Very difficult — requires professional re-welding |
| Screw-Port Mechanical | Very good — high shear and tensile capacity | Good — depends on gaskets and sealant quality | Square-cut junctions, concealed fasteners | Commercial curtain wall, large sliding systems | Good — can be disassembled and reassembled |
| Cleated / Spigot with Adhesive | Very good — adhesive reinforces mechanical lock | Very good — injected sealant fills capillary gaps | Mitre or butt joint, minimal visible line | System-specific designs requiring site assembly flexibility | Moderate — adhesive bonds are semi-permanent |
The method specified for your project should match its exposure conditions, performance expectations, and budget. Coastal projects in Queensland or Western Australia, for example, benefit enormously from welded construction or adhesive-sealed joints that eliminate corrosion pathways — while a standard suburban residential build might be perfectly well served by a quality crimped joint with factory-applied edge protection. What matters most is that corners receive the attention they deserve, because no amount of premium profiling compensates for a joint that fails.
Types of Aluminium Window Joinery Systems
Corner jointing methods give a window its structural integrity, but it’s the system type — the operating configuration — that determines how that window actually functions in a building. Each aluminium window design demands its own profile geometry, hardware integration, and sealing strategy. A casement and a sliding window might share the same alloy and finish, yet their internal profiles look nothing alike because they solve fundamentally different problems.
Hinged Systems — Casement, Awning, and Tilt-and-Turn
Casement windows swing outward on side-mounted hinges (or friction stays in Australia) and deliver the best combination of unobstructed ventilation and weathertight sealing when closed. The sash compresses against EPDM gaskets as it locks, creating a reliable barrier even under high wind-driven rain pressure. Aluminium framed windows in casement configuration suit almost any room orientation and can be specified as side-hung or top-hung depending on ventilation goals and safety requirements.
Awning windows hinge at the top and open outward at the base. Their geometry naturally sheds rain away from the opening, making them the go-to choice for wet climates and exposed facades where you still want airflow during showers. Profile sections for awning systems are closely related to casement profiles but require reinforced top rails to carry the sash weight at the hinge point.
Tilt-and-turn systems offer dual-mode operation: tilt inward at the top for secure background ventilation, or turn fully inward like a side-hung casement for cleaning access and maximum airflow. They’re the most hardware-intensive aluminium window design, requiring multi-point locking mechanisms and precision-machined hinge assemblies that demand tighter fabrication tolerances from the joinery. Popular in multi-storey apartments where external access for cleaning isn’t practical.
Sliding and Stacking Systems
Sliding windows move horizontally along top and bottom tracks, using roller carriages that bear the panel’s full weight. This changes the profile engineering significantly — sill rails must incorporate deep roller tracks, interlocking meeting stiles, and drainage channels to handle water that collects in the horizontal track. Aluminum framed windows in sliding configurations suit wide openings where projecting sashes would obstruct balconies, walkways, or outdoor living areas.
Double-hung windows operate vertically, with both upper and lower sashes sliding within the frame channel. They’re less common in Australian aluminium joinery than in timber, but modern spiral-balance and constant-force hardware has made them viable in aluminium for heritage-style renovations and streetscape-controlled projects. Profile weight needs to remain relatively low to keep the balance mechanism smooth over thousands of cycles.
Specialty Types — Bifold, Pivot, and Louvre
Bifold systems fold multiple panels against each other to stack at one or both ends of the opening, creating near-full apertures between indoor and outdoor spaces. Each panel runs on overhead or floor-mounted track with paired hinges at every fold point — a configuration that demands heavier-duty aluminium profiles and precise alignment across the full span. Slimline aluminium windows in bifold format remain popular for Australian living areas because they maximise the glass-to-frame ratio while still achieving large opening widths.
Pivot windows rotate around a central vertical or horizontal axis, offering dramatic architectural statements and excellent ventilation. Profile geometry must accommodate concealed pivot hardware and allow the sash to rotate freely without fouling the frame. They’re specified less often but deliver a striking visual effect in contemporary residential and commercial projects.
Louvre windows use multiple horizontal glass blades set within an aluminium carrier frame, each blade pivoting simultaneously to control airflow. They excel in tropical regions — northern Queensland, the Northern Territory — where maximum cross-ventilation is the priority. The joinery consideration here is the blade-retention clip and pivot mechanism rather than traditional corner joints.
Fixed-lite windows don’t open at all. They exist purely to admit light and frame views, which makes them the simplest from a hardware perspective but also the most demanding structurally — without an operable sash to share load, the frame alone carries all wind and glazing weight. Slimline aluminium windows perform best in fixed configurations because the absence of operating hardware allows the narrowest possible sightlines, maximising glass area.
System choice ripples through every subsequent decision. It dictates profile depth, hardware compatibility, maximum opening size, achievable weather ratings, and even the corner-joining method used during fabrication. The table below summarises how the main system types compare across the performance factors that matter most during specification.
| System Type | Best For | Maximum Span (general range) | Ventilation Rating | Weather Resistance |
|---|---|---|---|---|
| Casement (side-hung) | General rooms, bedrooms, living areas | 600–1200 mm wide per sash | Excellent — full opening area | Excellent — compression seal |
| Awning (top-hung) | Wet climates, bathrooms, exposed facades | 600–1500 mm wide | Good — partial opening | Excellent — rain deflection geometry |
| Tilt-and-Turn | High-rise, apartments, secure ventilation | 800–1400 mm wide per sash | Excellent in turn mode | Excellent — multi-point locking |
| Sliding | Wide openings, balconies, compact spaces | Up to 3000 mm+ per panel | Moderate — 50% max opening | Good — depends on interlock design |
| Double-Hung | Heritage facades, streetscape control | 600–1200 mm wide | Good — top and bottom airflow | Good — relies on brush/pile seals |
| Bifold | Indoor-outdoor connection, entertaining | Up to 6000 mm+ total span | Excellent — near-full opening | Moderate — multiple seal points |
| Pivot | Architectural feature, large openings | 1200–2400 mm wide | Good — large airflow area | Moderate — seal geometry is complex |
| Louvre | Tropical ventilation, utility areas | 600–1500 mm wide | Excellent — adjustable blade angle | Low-moderate — gaps between blades |
| Fixed-Lite | Views, light, non-ventilated areas | Up to 3000 mm+ with structural profiles | None — non-operable | Excellent — fully sealed unit |
Sliding systems require heavier rail profiles and more robust roller assemblies to support panel weight across wide spans, while casement and fixed-lite configurations increasingly favour slimline profiles that push the glass-to-frame ratio as high as possible. That push toward thinner sightlines is reshaping aluminium window design across the Australian market — but thinner profiles only work when the thermal performance engineering behind them keeps pace. And that depends on what sits between the inner and outer aluminium halves of the frame.
Thermal Break Technology and Energy Performance
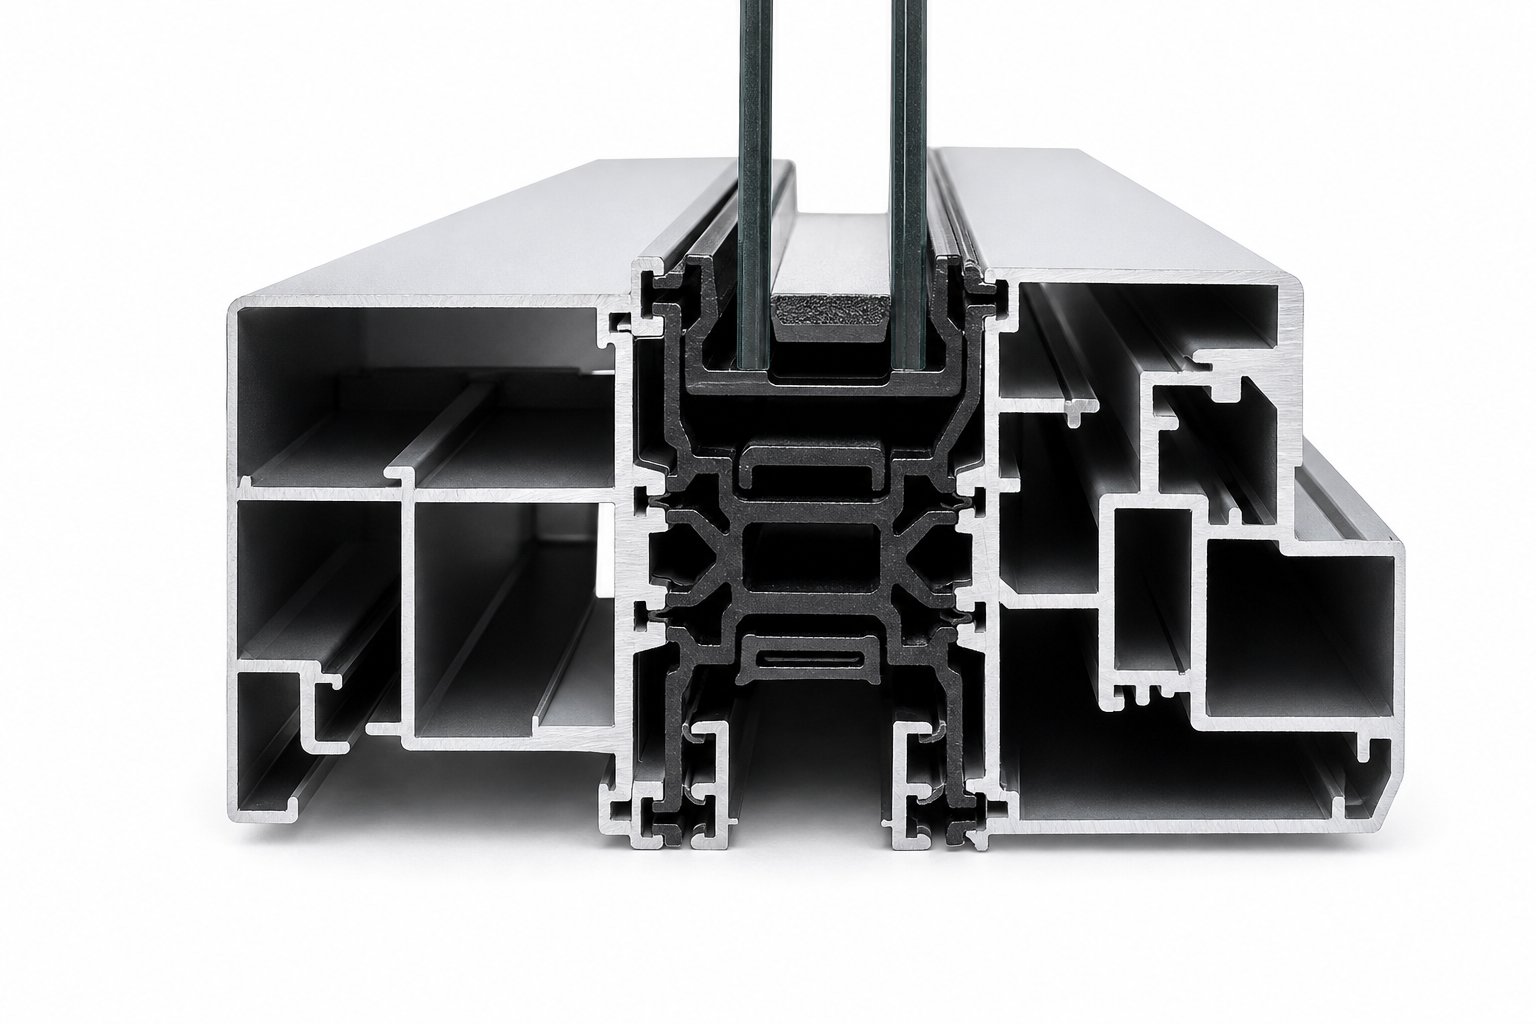
What sits between those inner and outer aluminium halves is a strip of engineered polymer — and it changes everything about how a glass aluminium frame manages heat. Without it, aluminium’s thermal conductivity of 160 W/m·K turns your window frame into a highway for energy loss, conducting heat roughly 1,000 times faster than PVC and 5,000 times faster than timber. That’s the thermal bridge problem: a continuous path of metal connecting the conditioned interior directly to whatever temperature exists outside.
For decades, this single property earned aluminium a reputation as “cold joinery.” Touch an older, non-thermally-broken frame on a winter morning and you’d feel exactly how efficiently it pulled warmth from your home. Condensation would form on the interior surface, drip onto sills, and over time encourage mould growth. That era is over — but the reputation lingers longer than the problem itself.
How Polyamide Thermal Breaks Work
A thermally broken profile is not one piece of aluminium. It’s two — an exterior section and an interior section — joined by a structural insulating barrier, typically polyamide 66 (PA66) reinforced with glass fibre. This polyamide strip has a thermal conductivity of just 0.3 W/m·K — over 500 times lower than the aluminium it separates. Heat trying to cross from inside to outside hits this barrier and stalls.
Manufacturing the connection is precise. The aluminium profile is extruded as two separate pieces with machined channels along their edges. Polyamide strips slot into those channels, then a knurling or crimping process mechanically locks polymer to metal, creating a composite that behaves as a single structural unit while functioning as two thermally independent zones.
An alternative method — pour-and-debridge — fills a channel between the two aluminium halves with liquid polyurethane resin, allows it to cure, then machines away a connecting bridge of aluminium to leave the insulating core in place. Both approaches achieve the same goal: splitting a conductive frame into thermally isolated halves.
When this thermal break is paired with aluminum double glazing — argon-filled insulating glass units with low-emissivity coatings — the entire aluminium glazed window system performs as a coordinated thermal envelope rather than a weak point in the building fabric.
Evaluating Thermal Break Quality and U-Values
Thermal break depth is one of the most reliable indicators of a system’s energy performance. Wider breaks yield greater thermal separation, lower frame U-values, and improved condensation resistance — making it the first specification to check when comparing aluminium window systems.
The numbers tell the story clearly. A standard aluminium frame without any thermal break delivers a frame U-value (Uf) of approximately 5.0–7.0 W/m²·K — essentially offering no meaningful insulation. Insert a 24 mm polyamide thermal break and that figure drops to 1.8–2.5 W/m²·K. Premium profiles with 34 mm or wider breaks, combined with foam-insulated chambers, push performance to 0.8–1.2 W/m²·K — territory that matches or exceeds high-performance timber frames.
Quality varies considerably between systems. Key differences to evaluate include:
- Reinforcement — Glass-fibre reinforced PA66 maintains structural rigidity under load and thermal cycling. Unreinforced polyamide strips can creep over time, particularly in larger commercial spans.
- Strip width — Ranging from around 15 mm in basic systems to 50 mm or more in high-performance residential profiles. Each additional millimetre extends the thermal path heat must travel.
- Chamber count — Some thermal break designs incorporate multiple chambers within the polyamide strip itself, trapping pockets of still air for added insulation.
- Foam inserts — Premium systems inject expanding foam into the aluminium profile chambers adjacent to the thermal break, further suppressing convective heat movement within the frame.
For the Australian market, the National Construction Code (NCC) and the Window Energy Rating Scheme (WERS) establish minimum performance thresholds that vary by climate zone. In cooler southern regions — Melbourne, Hobart, Canberra — the thermal demands on aluminum double glazed windows are substantial, and systems with deeper thermal breaks become essential rather than optional. In tropical and subtropical zones, the same technology works in reverse, preventing external heat from conducting inward and overwhelming cooling systems.
Condensation resistance deserves separate mention. When the interior surface of a frame stays cold enough to drop below the room’s dew point, moisture forms. A well-engineered thermal break keeps the interior aluminium section warm — above 15°C even when exterior temperatures are near freezing — eliminating the condensation that plagued older non-broken systems. For homeowners, this means no more wiping down frames each morning. For builders, it means fewer callback claims related to mould and water damage around window openings.
Modern thermally broken aluminium has closed the energy gap that once separated it from timber and uPVC. The material’s historical weakness has been engineered into a non-issue — but the thermal break is only one layer of the performance equation. Choosing the right overall profile system for a specific building, climate, and aesthetic goal requires weighing several additional factors against each other.
Choosing the Right Aluminium Joinery Profile
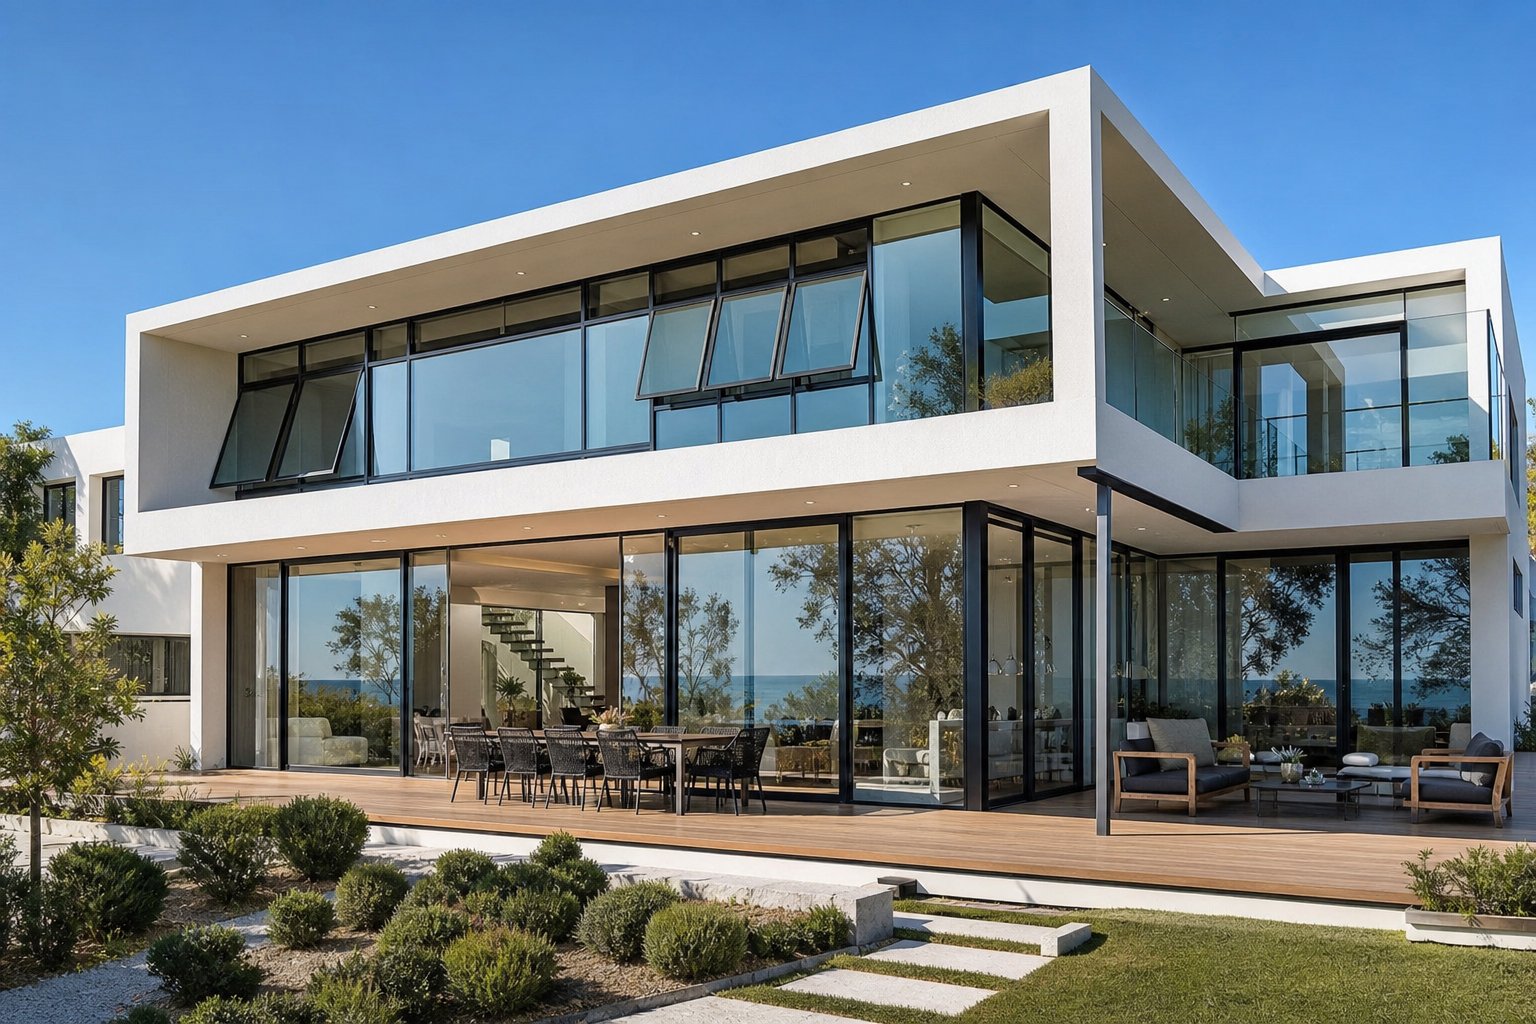
Thermal break depth sets the energy performance ceiling — but no single specification exists in isolation. Selecting the right aluminium system for a project means weighing multiple competing demands simultaneously: structural, environmental, acoustic, and visual. Get that balance wrong and you either overspend on capacity you don’t need, or under-specify and face warranty issues within the first few years.
The profile selection process works best when treated as a structured elimination exercise. Start with the non-negotiable constraints imposed by your site and climate, then refine based on performance targets and design intent. Here are the key decision factors, roughly ordered by their ability to narrow your options fastest:
- Building location and exposure — Coastal sites (within 1 km of the high-tide mark), industrial zones, and high-pollution corridors demand enhanced powdercoat durability and improved drainage detailing.
- Wind-load requirements — Building height, terrain category, and regional wind speed directly determine minimum profile depth and wall thickness under AS 2047.
- Thermal zone compliance — NCC climate zone classifications set minimum U-value thresholds, dictating thermal break depth and glazing type.
- Opening type and span — Larger sashes and wider sliding panels need heavier-duty profiles with greater moment of inertia to resist deflection.
- Acoustic performance — Profile depth determines maximum glazing unit thickness, which in turn controls sound transmission class (STC) ratings.
- Aesthetic goals — Slimline versus standard sightlines, flush or stepped frames, and dual-colour finish requirements all influence which aluminium system families are viable.
Matching Profiles to Climate and Location
A project in beachside Byron Bay faces completely different pressures than one in suburban Canberra. Coastal exposure accelerates corrosion — even on aluminium — through salt-laden air that attacks coating interfaces and finds its way into drainage channels. Profiles specified for these environments require super-durable powdercoat systems rated for severe marine conditions, along with enhanced drainage paths that flush salt residue before it accumulates. Stainless steel hardware fasteners and sacrificial drainage gaskets become essential rather than optional upgrades.
In cyclone-rated regions — northern Queensland, the NT, and parts of coastal WA — wind loads escalate dramatically. The design wind pressure that a window must resist under AS/NZS 1170.2 can exceed 3 kPa in these areas, pushing profile requirements well beyond standard residential specifications. Multi-storey buildings face compounding pressure regardless of geographic location: every additional storey increases elevation-related wind speed, and buildings over three storeys in exposed terrain often require project-specific wind engineering reports to determine the exact pressures their aluminium doors and windows must withstand.
For bushfire-prone areas, BAL (Bushfire Attack Level) ratings impose additional constraints on glazing type and frame configuration. At BAL-40 and BAL-FZ, non-combustible framing materials like aluminium become mandatory rather than merely preferred — making the aluminium system choice less about material selection and more about which certified profile assemblies carry the necessary tested BAL rating.
Residential vs Commercial Grade Systems
The distinction between residential aluminium windows and commercial aluminium windows isn’t just about size — it’s about how far apart the performance goalposts sit. Residential-grade profiles typically feature wall thicknesses of 1.2–1.4 mm, simpler two- or three-chamber geometries, and hardware rated for domestic-frequency operation (around 10,000–20,000 cycles). They’re tested to AS 2047 for residential classifications, handling moderate wind loads and standard opening sizes comfortably.
Commercial-grade systems step up substantially. Wall thicknesses reach 1.6 mm or more. Multi-chamber profiles with complex internal geometries handle higher structural loads and accept heavier glazing units. Hardware is rated for 50,000+ cycles. Testing targets commercial wind classifications and may extend to specific performance grades — the Australian equivalent of international AW (architectural window) ratings that assess air infiltration, water penetration, and structural loading under higher pressures.
The practical question for many projects falls in a grey zone. A three-storey coastal home with 2400 mm awning windows and high exposure doesn’t fit neatly into either category. Bespoke aluminium windows — custom-configured from commercial-grade profile libraries but fabricated to residential aesthetic standards — often provide the best solution for these boundary cases. This is where specification expertise matters most: choosing the lightest, most cost-effective aluminium system that still meets every engineering and compliance requirement without excess.
Suppliers like MEICHEN offer consultation across both residential and commercial applications, providing custom aluminium windows configured from appropriate system families to address project-specific performance requirements. That kind of guided profile matching saves architects and builders from both under-specification risk and unnecessary over-engineering cost.
Reading Technical Specifications Like a Professional
Profile data sheets can look impenetrable at first glance, but architects and specifiers need to focus on a handful of critical values. The most important line items when comparing architectural aluminum windows include:
Moment of inertia (Ix, Iy) — Expressed in mm⁴ or cm⁴, this tells you how resistant the profile is to bending under load. Higher values mean the frame deflects less under wind pressure. Compare this figure against the deflection limit (typically span/200 for serviceability) at your project’s design wind pressure.
Frame U-value (Uf) — Covered in detail in the thermal break section. Ensure you’re comparing like-for-like: some manufacturers quote centre-of-frame values while others report overall frame values that include thermal bridging at junctions.
Maximum glazing unit thickness — Profile rebate depth determines whether you can fit a 20 mm, 24 mm, or 28 mm+ insulating glass unit. Acoustic-rated glazing with laminated panes often requires deeper rebates than standard double glazing.
Water penetration resistance — Tested per AS 2047, expressed in Pascals. A residential window might achieve 200 Pa. Commercial aluminum window details often specify 450–600 Pa or higher for exposed high-rise applications.
Air infiltration rate — Lower is better. Quality joinery systems achieve rates well below 1.5 L/s/m² at standard test pressure.
Certifications to look for include compliance with AS 2047 (complete window testing), AS 1288 (glazing selection and installation), and where applicable, BAL compliance certification and NatHERS-modelled WERS ratings. These aren’t marketing claims — they’re independently tested performance benchmarks that separate specified-and-proven systems from assumptions based on profile dimensions alone.
Getting specification right at this stage protects everyone downstream. The builder installs with confidence that the product meets code. The homeowner receives a window that performs as promised. And the architect avoids the callback that begins with condensation on frames or water pooling on sills — problems that almost always trace back to a profile selection mismatch rather than a fabrication defect. What happens after that selection is locked in — the surface finish applied to the chosen profile — determines how the window weathers its environment for the next several decades.
Surface Finishes and Long-Term Durability
Profile selection determines structural performance. Surface finish determines how that performance holds up against sun, salt, rain, and time. The coating on your aluminium frames for windows isn’t decorative veneer — it’s the primary defence layer between the metal substrate and everything Australia’s climate throws at it. Choose well and the finish outlasts the mortgage. Choose poorly, or skip proper specification entirely, and you’re looking at chalking, fading, or corrosion within a decade.
Unlike timber, aluminium cannot be sanded back and repainted on site with a brush and a weekend’s effort. The finish applied during manufacturing is, for practical purposes, permanent. That makes colour and coating selection at the specification stage a commitment — one that needs to account for orientation, exposure, streetscape controls, and interior design intent all at once.
Powdercoating, Anodising, and Sublimation Compared
Three main finish categories dominate the Australian aluminium joinery market, each suited to different environments and aesthetic goals.
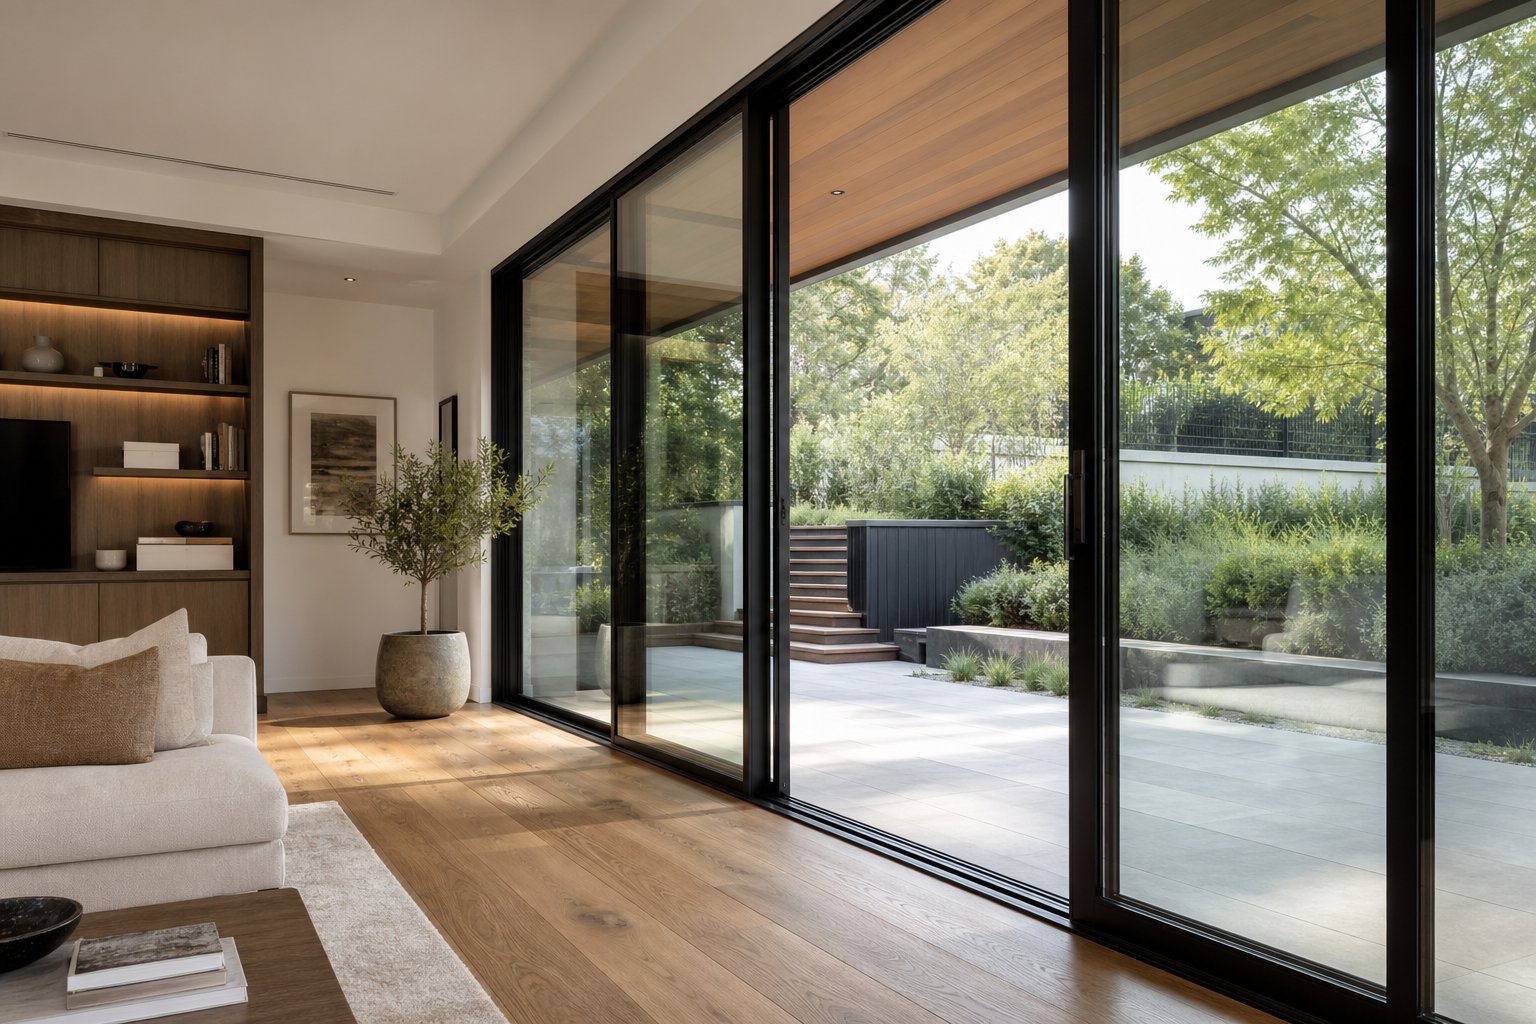
Powdercoating is the most common choice for both residential and commercial applications. A dry polymer powder is electrostatically applied to the pre-treated aluminium surface, then cured at approximately 200°C to form a tough, uniform film typically 60–80 microns thick. The colour range is virtually unlimited — from classic monument black and surfmist through to bold architectural tones — and textured or matte finishes are readily available. Black aluminium windows remain among the most specified options for contemporary Australian homes, delivering a sharp contrast against light-rendered facades and maximising the visual depth of glazed openings. Dual-colour powdercoating allows different colours on interior and exterior faces of the same profile, satisfying both streetscape requirements and internal colour schemes simultaneously.
Anodising is an electrolytic process that converts the aluminium surface itself into a hard oxide layer, typically 15–25 microns thick for architectural applications. Rather than sitting on top of the metal like a coating, the anodised layer becomes part of it — which is why it can’t chip or peel. The finish has a distinctive translucent, metallic depth that powdercoating cannot replicate. Bronze aluminium windows finished with anodising carry a warmth and visual richness particularly suited to mid-century, brutalist, or natural-material architectural palettes. Colour options are more limited than powdercoating — natural silver, bronze tones, dark grey, and black are the main palette — but the abrasion resistance is exceptional, with surface hardness reaching 300–400 Vickers.
Sublimation (wood-grain transfer) applies a printed pattern — typically timber grain — onto a powdercoated base layer using heat and vacuum pressure. The result mimics timber’s visual warmth while retaining aluminium’s structural and maintenance advantages. It’s increasingly popular for heritage-overlay zones and Queenslander renovations where council requires a timber appearance on street-facing elevations but homeowners want the longevity of durable aluminium windows without the ongoing painting cycle.
Raw mill finish — untreated aluminium straight from extrusion — is almost never used in architectural window applications. It oxidises within weeks, develops an uneven grey patina, and lacks the corrosion resistance that any exposed building element requires in Australian conditions. You’ll occasionally see it specified for concealed structural mullions inside curtain wall cavities, but never on visible joinery.
Finish Durability in Harsh Environments
The gap between a finish that lasts 10 years and one that lasts 30+ comes down to two factors: pre-treatment quality and coating specification grade.
Pre-treatment prepares the aluminium surface for adhesion. The process typically involves degreasing, etching, and applying a conversion coating (chromate or non-chromate) that creates a molecular bond between metal and finish. In coastal and industrial environments — anywhere within a few kilometres of the ocean, or near heavy traffic corridors — chrome phosphate conversion coatings remain the most proven pre-treatment for long-term durability. Without proper pre-treatment, even premium coatings can delaminate when salt and moisture find their way beneath the film.
Coating thickness and certification grade matter equally. The internationally recognised Qualicoat certification system for powdercoating and Qualanod certification for anodising set minimum standards for service life, UV resistance, colour retention, and seal integrity. In Australia, look for:
- Qualicoat Class 1 — Standard durability, suitable for mild inland environments with moderate UV exposure.
- Qualicoat Class 2 — Enhanced durability with thicker coatings (minimum 60 microns) and tighter colour-retention tolerances, specified for coastal, industrial, and high-UV environments.
- Qualanod Class AA15 / AA20 / AA25 — Architectural anodising grades where the number indicates minimum oxide thickness in microns. AA20 and above are recommended for exposed exterior applications; AA25 for severe coastal zones.
For projects within 500 metres of the surf zone — think Bondi, the Gold Coast, or Cottesloe — specifiers should insist on Class 2 powdercoating with enhanced marine pre-treatment, or Class I architectural anodising at minimum 20 microns thickness. The additional cost at specification stage is modest compared to the expense of strip-and-recoat remediation down the track.
| Finish Type | Durability | Colour Range | Cost Level | Best Environment | Maintenance Needs |
|---|---|---|---|---|---|
| Powdercoating (standard) | 15–20+ years to first maintenance | Virtually unlimited — RAL, custom colours, textures | Low–Medium | Inland residential, moderate exposure | Annual wash with mild detergent; inspect for chips |
| Powdercoating (Class 2 / super-durable) | 25–30+ years colour retention | Full RAL range, including metallic and textured | Medium | Coastal, industrial, high-UV environments | 6-monthly wash in salt zones; minimal other intervention |
| Anodising (architectural, 20+ microns) | 30–40+ years; does not peel or chip | Limited — silver, bronze, grey, black | Medium–High | High-traffic, coastal, heritage, abrasion-prone areas | Annual wash; avoid alkaline cleaners |
| Sublimation (wood-grain transfer) | 15–20 years depending on UV exposure | Timber-look patterns — oak, cedar, walnut, etc. | Medium–High | Heritage zones, sheltered facades, moderate exposure | Annual wash; avoid abrasive contact |
| Raw mill finish | Oxidises within weeks; no protective value | None — natural aluminium grey only | Lowest | Concealed structural elements only | Not suitable for exposed applications |
Dual-colour finishing deserves a specific mention for the Australian residential market. Many projects — particularly in streetscape-controlled suburbs or developments with body-corporate guidelines — require a specific exterior colour (often monument, dune, or woodland grey) while homeowners prefer a lighter interior shade that matches their cabinetry or wall tones. Modern dual-colour powdercoating applies different colours to the interior and exterior faces of the same profile in a single production run, eliminating the need for compromise in either direction.
Ultimately, the finish you specify today is the finish you live with for decades. It protects the joinery, defines the building’s visual character, and — when chosen with proper attention to exposure and certification grade — eliminates a maintenance burden that timber owners never escape. That said, even the most durable aluminium windows still require some care. How much, how often, and what exactly that maintenance involves depends on the finish type, the environment, and how well the system was installed in the first place.
Installation Expectations and Ongoing Maintenance
“Low maintenance” appears in nearly every aluminium window supplier’s marketing. What rarely follows is a concrete explanation of what that maintenance actually involves, how often, and what happens if you skip it. The reality sits between zero effort and constant fussing — a handful of simple tasks, performed at the right intervals, that protect the engineering built into your joinery for decades rather than letting it slowly degrade into stiff handles, weeping corners, and tired-looking frames.
Cleaning and Hardware Care Schedule
Frame cleaning is straightforward. A soft microfibre cloth, warm water, and a mild pH-neutral detergent — ordinary dish soap works — is all you need. Wipe down all visible surfaces, paying particular attention to horizontal bottom rails where grime and moisture settle. Rinse with clean water and dry with a separate cloth. The entire routine takes about ten minutes per window.
What you avoid matters as much as what you use. Abrasive scouring powders, ammonia-based cleaners, and bleach can all dull or damage powdercoated and anodised finishes. Pressure washers directed at seals and gaskets force water past the very barriers designed to keep it out. And petroleum-based lubricants like WD-40 attract dust into mechanisms, eventually gumming up the hardware they were meant to free.
For hinges, friction stays, locking points, and rollers, a light application of dry PTFE-based or silicone-based lubricant keeps everything moving smoothly. Spray onto metal-to-metal contact points, operate the window several times to distribute, and wipe away any excess immediately. This simple step prevents the grinding, stiff operation that most people assume means their windows are “wearing out” when the real culprit is neglected hardware.
Here’s a practical schedule, ordered from most to least frequent:
- After major weather events — Check tracks for accumulated debris; rinse coastal salt spray from frames with fresh water.
- Every 3 months (coastal or high-pollution sites) — Full frame wash and track clearance to prevent salt or particulate build-up from attacking the finish.
- Every 6 months (standard environments) — Frame and glass cleaning, track vacuuming, and drainage slot inspection.
- Annually — Hardware lubrication, weatherseal inspection, and a visual check of all corner joints and sealant lines.
- Every 3–5 years — Detailed assessment of seal compression and gasket condition; replace any sections showing cracking, flattening, or shrinkage.
Coastal properties — anywhere within a few kilometres of the waterline — should shift the entire schedule one tier more frequent. Salt-laden air is invisible but relentless, and a fine layer of salt accumulating on frame surfaces over months can slowly degrade even well-specified finishes if left unattended.
Weatherseal and Drainage Maintenance
EPDM and silicone weatherseals are the unsung workhorses of any aluminium window system. They compress each time the sash closes, forming the airtight and watertight barrier that keeps weather out and conditioned air in. Over time — typically 10–15 years depending on UV exposure and cycling frequency — these seals lose their elasticity. They flatten, crack, or shrink away from corners.
Inspection is simple: run a finger along the gasket perimeter. It should feel soft and springy with no visible splits or deformation. If a section has pulled away from a corner or feels permanently compressed, replacement restores original thermal and acoustic performance. Most quality aluminium windows manufacturers design their gasket channels for easy clip-in replacement without removing the entire sash — a deliberate engineering choice that keeps long-term servicing practical.
Drainage channels deserve equal attention. Every aluminium window frame incorporates small weep slots on the exterior face of the sill rail. These allow any water that enters the track system to escape outward rather than pooling internally. Blocked weep holes — clogged with dust, paint, insect debris, or leaves — are the most common cause of water appearing inside a frame that previously never leaked. Clear them with a thin piece of plastic or a small nylon brush during each inspection cycle.
Surface degradation differs between finish types. Anodised frames develop a dull haze or mild discolouration when their oxide layer begins to weather — this is surface fogging rather than structural failure, and it responds well to non-abrasive chemical cleaning with citric or oxalic acid solutions followed by a clear protective wax. Powdercoated surfaces exhibit chalking instead — a fine, dusty residue on the surface as UV slowly breaks down the top layer of the polymer film. Regular washing removes chalk before it accumulates, and Class 2 super-durable coatings resist it far longer than standard formulations.
What to Expect During Professional Installation
Maintenance protects the joinery long-term, but that protection starts at installation. A poorly fitted window — regardless of how premium its profiles and finishes are — will leak, rattle, or bind within months. Understanding what correct installation looks like helps homeowners and builders hold installation teams to the right standard.
The opening must be checked before the first frame goes in. Sills should be level, jambs plumb, and the rough opening within tolerance so the frame isn’t forced into position. Proper shim packs achieve alignment without distorting the frame — because a distorted frame means gaskets don’t compress evenly, hardware binds, and corners bear unequal loads that accelerate joint fatigue.
Flashing integration follows a three-layer principle: an external weather-resistive membrane lapped to shed water outward, a middle zone of insulation and compressible seal filling the frame-to-wall gap, and an internal airtight seal on the room side. Sill flashing is critical — it must extend and detail correctly so water drains out, never pools behind the frame or flows back toward the wall cavity. Sealant selection matters too: it needs to accommodate building movement, bond to the powdercoated or anodised surface, and resist UV degradation for the life of the installation.
Fixings must anchor into structural substrate — not just cladding layers — at correct centres to resist design wind loads without creating thermal bridges through the frame’s insulating break. Non-metallic isolation shims prevent direct metal-to-metal contact between the aluminium frame and steel lintels or masonry anchors.
Quality aluminium window systems — such as those available through MEICHEN’s aluminium window range — are engineered with accessible drainage channels and replaceable components that simplify long-term maintenance. Consulting a specialist aluminium window company ensures you receive system-specific care guidance matched to your installed product, along with installation support documentation that keeps site teams aligned with the manufacturer’s tested performance assumptions.
The effort required to maintain aluminium joinery is genuinely minimal — but it isn’t zero. A twice-yearly commitment of less than an hour protects an investment designed to last 40 years or more. Skip the routine and you won’t notice the decline immediately. You’ll notice it in year eight, when handles stiffen, seals weep, and the finish that once looked sharp begins to tell a story of quiet neglect. The windows themselves are built to outlast that neglect — but they perform best when you meet them halfway.
Frequently Asked Questions About Aluminium Window Joinery
1. What is the difference between aluminium window joinery and aluminium window framing?
Aluminium window framing refers to the visible border around the glass — a single component. Aluminium window joinery encompasses the entire engineered system: extruded profiles, precision corner connections, hardware integration, drainage channels, and weatherseals all fabricated and joined to form a structurally sound, weathertight unit. Joinery includes the craft and engineering behind how profile lengths are cut, connected, sealed, and reinforced into a finished window. The quality of joinery — particularly at corners — determines long-term water resistance, air tightness, and structural durability.
2. How long do aluminium window frames last in Australian conditions?
Well-specified aluminium window joinery with appropriate surface finishes typically lasts 40 years or more in Australian conditions. Longevity depends heavily on finish quality and maintenance frequency. Powdercoated frames with Qualicoat Class 2 certification retain colour for 25–30 years, while architectural anodising can exceed 40 years without peeling or chipping. Coastal properties require enhanced marine-grade finishes and more frequent cleaning (every 3 months) to prevent salt-related degradation. Regular hardware lubrication, drainage channel clearing, and weatherseal inspection every 1–5 years keeps the system performing at its engineered capacity throughout its service life.
3. Are thermally broken aluminium windows worth the extra cost in Australia?
Yes, particularly in southern climate zones (Melbourne, Hobart, Canberra) where NCC thermal requirements are stringent. Thermally broken profiles use polyamide PA66 strips to separate interior and exterior aluminium halves, reducing frame U-values from 5.0–7.0 W/m²·K (non-broken) down to 1.8–2.5 W/m²·K with standard breaks, or 0.8–1.2 W/m²·K with premium wide breaks. This eliminates condensation on interior frame surfaces, reduces energy bills, and meets compliance requirements without switching to alternative materials. In tropical zones, the same technology prevents external heat from conducting inward. Suppliers like MEICHEN offer thermally broken aluminium window systems across their residential and commercial ranges.
4. What is the best corner joining method for aluminium windows?
The best method depends on project exposure, budget, and performance requirements. Mitred and crimped joints suit standard residential builds — they are cost-effective and produce clean aesthetics. Mitred and welded joints offer superior strength and weather resistance with seamless corners, making them ideal for coastal or high-end architectural projects. Screw-port mechanical assembly works best for commercial curtain walls and large sliding systems where site assembly flexibility is needed. Cleated or spigot joints with structural adhesive provide strong sealing for system-specific designs. For coastal Australian properties, welded or adhesive-sealed joints eliminate corrosion pathways at exposed mitre edges.
5. How do I maintain aluminium windows in a coastal environment?
Coastal aluminium windows require a stepped-up maintenance routine. Rinse frames with fresh water after major storms to remove salt spray immediately. Every 3 months, perform a full frame wash using mild pH-neutral detergent and a soft cloth, clear drainage weep holes of debris, and vacuum tracks. Annually, lubricate hinges and locking points with dry PTFE or silicone-based lubricant (never petroleum-based products), inspect weatherseals for cracking, and check corner sealant integrity. Avoid abrasive cleaners and pressure washers near seals. Specify Qualicoat Class 2 powdercoating or Qualanod AA20+ anodising at purchase to ensure the finish withstands salt-laden air long-term.
More Window & Door Guides