What Aluminium Window Renovation Really Means
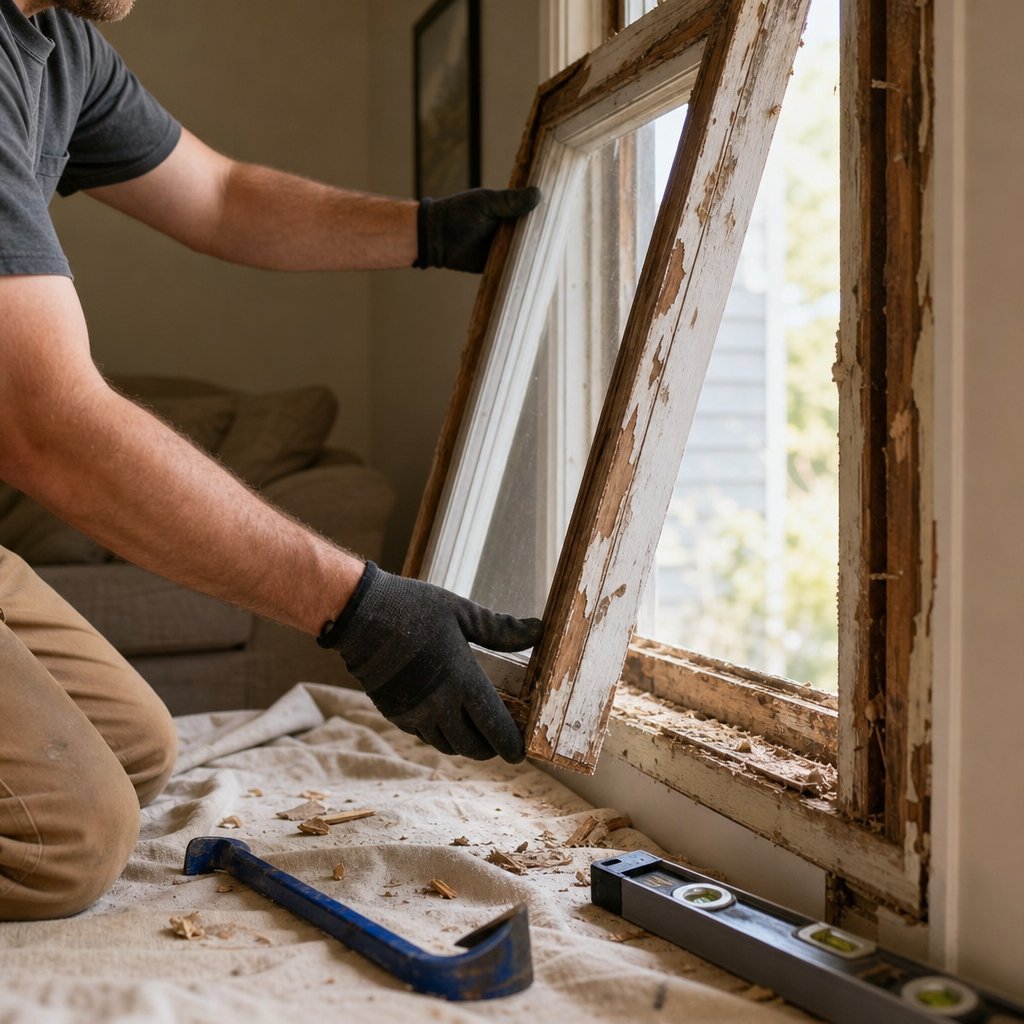
Aluminium window renovation is the process of restoring, repairing, and upgrading existing aluminium window systems to extend their functional life — without ripping the entire unit out of the wall. It covers everything from replacing worn hardware and renewing perished seals to upgrading glazing and refinishing corroded frames. Done properly, it transforms drafty, stiff, or tired-looking old aluminium windows into high-performing assets that can serve a home or building for decades longer.
Across Australia, countless houses built from the 1950s through the 1970s still sit behind their original aluminium frames. Many of those frames were engineered from heavy-duty extruded alloys that remain structurally sound, even if the weatherstripping has crumbled, the locks barely catch, or the single-glazed panes rattle in a southerly wind. For these buildings, full replacement is not always necessary — and it is rarely the most cost-effective first move.
This guide bridges the gap between quick-fix repair tips and specialist preservation manuals. It is built for homeowners weighing up a weekend project, building managers responsible for ageing multi-unit stock, and small-scale developers looking to add value without blowing the budget on brand-new windows throughout.
What Aluminium Window Renovation Means in Practice
Renovation sits between two simpler options. A basic repair fixes one broken part — a snapped crank handle, a torn piece of pile seal, a cracked pane. Full replacement removes the entire window unit, frame and all, and installs something new in the opening. Renovation is broader and more deliberate. It typically involves a combination of hardware replacement, weatherstrip and seal renewal, glass upgrades (such as moving from single to double glazing where the frame depth allows), surface treatment of corroded or oxidised aluminium, and thermal performance improvements. The goal is to bring old metal windows back to — or close to — the standard of a modern system, while preserving the existing frame and avoiding the cost and disruption of a full swap.
Who This Guide Is For
Some readers here are confident with a drill, a tube of sealant, and a Saturday morning. Others would rather hire a qualified tradesperson but want to understand the scope of work, ask the right questions, and avoid being oversold on unnecessary replacement. Both groups will find practical, step-by-step guidance throughout this article, from identifying whether old aluminium windows are worth saving through to budgeting, thermal upgrades, and post-renovation maintenance.
Many old aluminium windows were engineered from robust alloys designed to last 40 to 50 years or more. In most cases, the frame itself is not the problem — it is the seals, hardware, and glazing that have reached the end of their service life. Renovation unlocks the remaining lifespan already built into the metal.
Knowing exactly what condition your frames are in — and what era they belong to — shapes every renovation decision that follows.
A Brief History of Aluminium Windows in Residential Construction
That era stamp on your aluminium frames is not just a historical curiosity — it directly shapes what parts you can source, which renovation techniques will work, and whether the frames justify the effort at all. Aluminium’s journey into residential windows stretches back further than most homeowners realise, and understanding that timeline gives you a genuine advantage before you pick up a single tool.
Aluminium was first extracted from ore in 1825, but cost-effective production techniques did not emerge until around 1889. The earliest architectural applications appeared in transportation — bus windows, railroad cars, and trolleys from 1912 onward. By the 1930s, aluminium windows were turning up in commercial buildings, often designed to mimic the look of their wood or steel predecessors. The real residential story, though, begins after World War II, when housing demand exploded and aluminium offered builders exactly what they needed: a lightweight, corrosion-resistant, low-maintenance framing material that could be mass-produced at competitive cost.
The Post-War Aluminium Window Boom
Australia’s post-war building surge mirrored what happened across much of the Western world. Returning servicemen needed homes, governments pushed suburban expansion, and builders sought materials that were fast to install and easy to maintain. Aluminium ticked every box.
Homes built during the 1940s and into the 1950s typically received heavy-duty extruded aluminium frames — often casement or crank-out styles with robust alloy profiles roughly 2.4 mm thick. These 1940s windows and 1950s windows were remarkably durable. The alloys used (commonly 6063-T5 or similar) were chosen for structural integrity and weather resistance, not thermal performance. These frames lacked any form of thermal break, but they were built to last. If your house dates to this period, the bones of those old aluminium windows may still be perfectly sound beneath decades of grime and oxidation.
The 1960s brought a shift in both aesthetics and economics. Thinner aluminium profiles became viable as extrusion technology improved, and sliding window designs gained popularity — particularly horizontal sliders suited to the long, low rooflines of mid-century Australian homes. 1960s windows tended to use lighter-gauge aluminium than their predecessors, which makes frame condition more variable today. Some are holding up beautifully; others show noticeable wear along tracks and meeting rails.
By the 1970s, aluminium dominated Australian residential construction. This decade saw the rise of 1970s aluminum windows in a wider range of configurations, including combination storm window systems in cooler climate zones. Builders favoured sliding windows and louvre-style aluminium frames for their affordability and ease of installation. While 1970s combination aluminum storm window parts can still be sourced through specialist suppliers, the lighter-gauge frames from this era require closer inspection before committing to a full renovation.
Why Window Era Matters for Renovation
Identifying when your windows were manufactured is not a matter of nostalgia — it is a practical first step. The decade of installation tells you three things that directly affect your renovation plan:
- Alloy composition and frame thickness. Earlier frames (1940s–1950s) used heavier extrusions that hold up better over time. Later frames (1960s–1970s) used thinner profiles that may have more wear.
- Hardware availability. Crank operators, torque bars, and specific latch styles from the 1950s can still be found through specialist window parts distributors and architectural salvage dealers, though sourcing takes more effort than a trip to the local hardware store. Parts for 1970s sliding windows tend to be somewhat easier to locate.
- Appropriate renovation techniques. A 1950s casement window with a worm-gear crank operator needs a completely different approach than a 1970s horizontal slider with roller assemblies and pile weatherstripping.
The table below offers a quick-reference comparison to help you place your windows and gauge what you are working with.
| Decade | Common Window Styles | Typical Frame Condition Today | Renovation Viability |
|---|---|---|---|
| 1940s | Heavy-duty casement, awning, crank-out | Generally excellent — thick alloy profiles with surface oxidation but minimal structural degradation | High — frames are often worth full renovation including reglazing and hardware rebuild |
| 1950s | Casement, awning, early double-hung aluminium | Good to excellent — robust extrusions; weatherstripping and crank mechanisms are common failure points | High — parts are still available through specialist suppliers; frames reward thorough restoration |
| 1960s | Horizontal sliding, thinner-profile casement, picture windows | Variable — thinner profiles mean some frames show track wear or minor distortion; others remain sound | Moderate to high — assess frame gauge and track condition before committing; sliding hardware is generally replaceable |
| 1970s | Sliding, louvre, combination storm systems | Variable — lighter-gauge frames may show more wear; roller assemblies and seals commonly need replacement | Moderate — renovation is viable if frames are straight and structurally intact; replacement may be more practical for heavily worn units |
A 1950s crank-out awning window in a Sydney brick veneer home and a 1970s slider in a Perth fibro cottage are both aluminium — but they demand entirely different renovation strategies. Getting the era right upfront saves you from ordering the wrong parts, applying the wrong techniques, or investing in frames that might not justify the effort.
Of course, knowing the age and type of your windows only tells half the story. The other half is understanding exactly what condition they are in right now — and which signs of wear actually matter.
Signs Your Aluminium Windows Need Renovation
A window can look tired and still have decades of life left in its frame. Equally, a window that appears fine at a glance might be haemorrhaging energy through invisible seal failures. The difference between a worthwhile renovation and a wasted weekend comes down to one thing: an honest condition assessment before any work begins.
Most homeowners spot problems only after they become impossible to ignore — a puddle on the sill after rain, a curtain billowing next to a closed window, or an energy bill that climbs without explanation. By that point, several issues have usually been compounding for years. A systematic check lets you catch deterioration early, prioritise the work that matters most, and avoid spending money on frames that genuinely are past saving.
Visible Corrosion and Surface Degradation
Aluminium does corrode — just not the way steel does. There is no flaky orange rust. Instead, aluminium corrosion takes subtler forms that are easy to misread if you do not know what you are looking at.
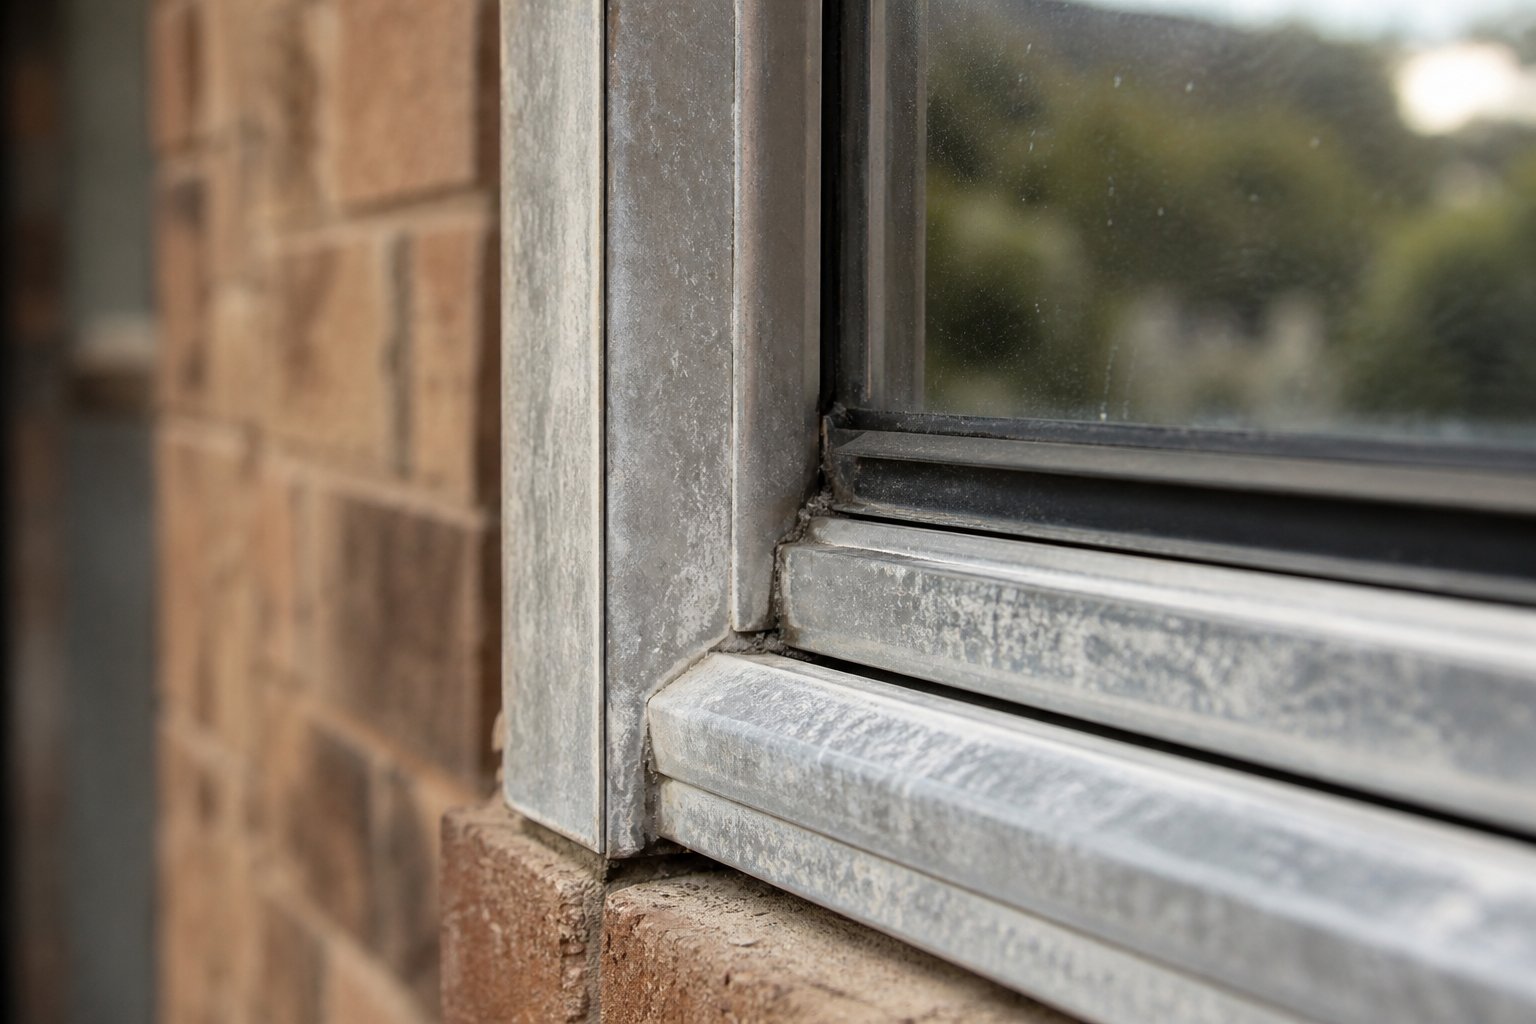
The most common type on old aluminum window frames is atmospheric corrosion, which shows up as a white or greyish powdery residue on the surface. That powder is aluminium oxide, and here is the counterintuitive part: it actually protects the metal underneath. Unlike iron rust, which keeps eating deeper into the material, aluminium oxide forms a thin, stable layer that bonds tightly to the surface and slows further degradation. If the only thing wrong with your frames is a chalky white film, the structural metal beneath is almost certainly fine. This is a cosmetic issue, and it is one of the easiest problems to address during renovation.
Pitting corrosion is a different story. It appears as small holes or craters scattered across the frame surface, most commonly on homes in coastal areas or near industrial zones. Chloride salts in sea spray and airborne pollutants attack the oxide layer at weak points, creating localised pits that gradually deepen. Shallow, scattered pitting across old metal window frames is usually manageable — you can sand, treat, and refinish the surface. Deep, concentrated pitting that you can catch a fingernail in warrants a closer look, because it may compromise the frame’s wall thickness in spots.
Galvanic corrosion is the third type to watch for, and it catches people off guard. It occurs wherever aluminium sits in direct contact with a dissimilar metal — steel screws in an aluminium frame, copper flashing touching the window head, or brass fittings mounted against the sash. In the presence of moisture, an electrochemical reaction eats into the aluminium, often aggressively, right at the junction point. Australian coastal homes cop this especially hard because salt-laden moisture accelerates the process. Look for accelerated white buildup, pitting, or visible material loss around screws, brackets, and any point where two different metals meet.
The key distinction is this: surface oxidation and light pitting are cosmetic problems that renovation handles well. Severe pitting that penetrates deep into the profile, or galvanic damage that has eaten through a significant portion of the frame wall, may push a window into replacement territory. But do not assume that any visible window corrosion means the frame is beyond saving — more often than not, it is not.
Operational Failures and Seal Breakdown
Corrosion you can see. Seal failures and hardware wear reveal themselves through how the window behaves — or refuses to.
Drafts around closed windows are the single most common complaint, and they almost always point to failed weatherstripping. The original pile seal or compression strip that once filled the gap between sash and frame breaks down over decades of UV exposure, thermal cycling, and simple friction from opening and closing. In Australia’s climate, where summer heat bakes seals and winter cold contracts them, even quality weatherstripping rarely lasts beyond 15 to 20 years. Hold your hand near the edges of a closed window on a breezy day — any detectable air movement tells you the seal has given up.
Difficulty opening or closing is the next red flag. On sliding windows, worn roller assemblies or bent tracks create friction that makes sashes drag or stick. On casement and crank-out models, corroded hinge pins or stripped operator gears produce that familiar grinding resistance. In many cases, the frame itself is perfectly straight — it is worn hardware forcing the sash out of alignment. However, if the frame has actually distorted or twisted (check by measuring diagonals across the opening), the problem is structural and harder to fix.
Condensation between double-glazed panes signals something else entirely. That trapped fog means the seal around the insulated glass unit (IGU) has failed, allowing the insulating gas to escape and moist air to enter. The glass may look permanently cloudy or show milky streaks and mineral deposits that no amount of cleaning will shift. A failed IGU seal does not necessarily condemn the whole window — the glass unit can often be replaced within the existing frame — but it does mean the glazing has lost a significant portion of its insulating value.
Visible gaps between frame and wall suggest a different issue: structural movement or settling in the building itself. Over decades, brick veneer walls shift, timber framing shrinks, and original sealant perishes. If daylight is visible around the frame perimeter with the window closed, moisture and air are finding their way in through the surround rather than the window unit itself. This is typically addressed with fresh flashing and sealant during renovation — provided the frame has not been racked out of square by the movement.
When Deterioration Signals Urgency
Not every sign of wear demands immediate action. A slightly stiff crank handle or a thin line of surface oxidation can wait until you are ready to tackle a broader renovation. But certain combinations of symptoms point to problems that worsen rapidly if left unaddressed.
Run through this quick self-assessment checklist on each window. Any single item is typically repairable on its own. Three or more on the same window suggest it is time to act — either with a thorough renovation or, in the worst cases, a serious conversation about replacement.
- Rattling in wind — loose glazing, failed putty, or worn sash retention indicating the glass is no longer held securely
- Visible daylight around closed sashes — gaps in the seal or frame distortion allowing air and water passage
- Water intrusion during rain — failed weatherstripping, blocked drainage slots, or compromised frame-to-wall seals letting moisture inside
- Lock mechanisms that no longer engage — worn latch hardware or sash misalignment preventing the window from securing properly, which also compromises the seal compression needed to block drafts
- Glass that feels loose in the frame — deteriorated glazing tape, hardened putty, or missing glazing beads that leave panes unsupported and vulnerable to dislodgement in strong winds
The critical thing to remember is that most of these issues are individually fixable. A rattling pane needs reglazing, not a new window. A lock that misses its strike plate often just needs a new keeper or a sash adjustment. Jumping straight to full replacement before understanding what is actually wrong is the most expensive mistake homeowners make with old aluminium windows — and it is entirely avoidable with a clear-eyed assessment first.
The real question, once you know exactly what is deteriorating and how badly, is whether renovation remains the smarter investment or whether the accumulated damage tips the scales toward starting fresh.
Renovate or Replace
This is the decision that separates a smart renovation from an expensive regret. You have assessed your windows, identified what is worn and what is holding up, and now you need to commit to a direction: pour effort into restoring what is already there, or cut your losses and start fresh with aluminium window frame replacement. Both paths can be the right one — the trick is matching the decision to your specific situation rather than defaulting to whichever option a salesperson or a mate down the road happens to recommend.
There is no universal answer. A 1950s casement with surface oxidation and tired weatherstripping is a completely different proposition from a 1970s slider with deep pitting and a bent track that no longer holds the sash straight. The condition assessment you completed in the previous section gives you the raw data. What follows is the framework for turning that data into a clear, confident choice.
Factors That Favour Renovation Over Replacement
Renovation earns its keep when the frame itself is still structurally sound and the problems are concentrated in consumable components — seals, hardware, glazing, and surface finish. Several specific scenarios tilt the balance firmly toward restoring what you have.
Sound frames with cosmetic issues only. If your assessment revealed surface oxidation, chalky residue, or light pitting but no structural compromise, the underlying alloy has plenty of life remaining. Stripping, treating, and refinishing these frames costs a fraction of replacing aluminium windows entirely and delivers a result that can look nearly as good as new.
Heritage or conservation overlays. Properties in heritage conservation areas across Australian states often face council restrictions on altering or removing original window joinery. Development application requirements may mandate like-for-like restoration, making renovation not just the cheaper option but the only compliant one. Check with your local council before assuming you can swap frames freely.
Budget constraints. Full aluminium windows replacement across an entire house is a significant outlay. Renovation lets you spread the investment, tackling the worst-performing windows first and working through the rest over time. For a building manager overseeing a multi-unit block, this staged approach can be the difference between getting approval for the work and having the project shelved indefinitely.
High-quality original alloy. Heavy-duty frames from the 1940s and 1950s were built from extrusions that many modern budget-range windows cannot match in raw material quality. Discarding that alloy and replacing it with a lighter-gauge system does not always represent a genuine upgrade — especially if the new windows lack thermally broken profiles.
Between full renovation and full replacement sits a practical middle ground worth considering: aluminium retrofit windows. This approach keeps the existing outer frame in place while replacing the movable sashes, glazing, and hardware with modern components. It delivers much of the performance uplift of a new window — improved seals, better glass, updated hardware — without the cost and disruption of tearing out the entire unit. Where the outer frame is in good condition but the sashes and seals are past their useful life, a retrofit can be the sweet spot.
Factors That Point Toward Full Replacement
Renovation has its limits, and recognising those limits honestly is just as important as understanding its potential. Certain conditions make replacing aluminium windows the more practical — and sometimes the only sensible — path forward.
Severe structural corrosion. When pitting or galvanic corrosion has penetrated deep enough to compromise the frame’s wall thickness, no amount of surface treatment will restore structural integrity. If you can push a screwdriver tip into the aluminium at corroded points, or if sections flex under moderate hand pressure, the frame has lost the material it needs to do its job.
Frames distorted beyond adjustment. Buildings settle. Frames twist. A small amount of racking can often be compensated for with hardware adjustments and creative shimming. But when diagonals differ by more than a few millimetres and sashes can no longer be made to close evenly, the frame has moved past what renovation can practically correct. As renovation specialists note, accumulated deformation from settlement or structural loads directly impacts the fit and sealing performance of any new components installed within the existing frame.
Single glazing in climate zones that demand thermal performance. If your home sits in a climate zone where NCC energy efficiency requirements are stringent — think the cooler regions of Victoria, Tasmania, or the ACT — and your existing frames lack the depth to accept double-glazed insulated glass units, renovation may deliver incremental improvement but still fall well short of compliance. In these situations, modern thermally broken systems with factory-integrated double or triple glazing offer a step-change in performance that retrofitting simply cannot replicate.
Renovation costs approaching replacement costs. This is the tipping point that catches people by surprise. If a window needs new hardware, fresh weatherstripping, reglazing, surface refinishing, and structural repair to corroded sections, the accumulated cost can creep uncomfortably close to what a quality replacement unit would run. At that point, you are paying renovation prices for a result that still cannot match a new system’s warranty, thermal performance, or expected lifespan. Be honest with the numbers.
A Practical Decision Matrix
The table below distils the key assessment criteria into a structured framework. Run each of your windows through it and let the pattern guide your decision. Most windows will cluster clearly in one column; any that scatter across all three deserve a professional opinion before you commit.
| Assessment Criteria | Renovate | Consider Retrofit | Replace |
|---|---|---|---|
| Frame structural integrity | Frame is straight, rigid, and dimensionally sound | Outer frame is sound but sashes are worn, warped, or poorly sealed | Frame is twisted, flexing, or dimensionally compromised |
| Corrosion severity | Surface oxidation or light, scattered pitting only | Moderate pitting on sashes; outer frame corrosion is superficial | Deep pitting penetrating frame walls; galvanic damage at structural joints |
| Thermal performance needs | Adequate for your climate zone with upgraded weatherstripping and secondary glazing | Frame depth accommodates double glazing in new sashes; improvement is meaningful | NCC compliance or comfort demands require thermally broken frames and high-performance IGUs |
| Heritage or regulatory constraints | Heritage overlay requires retention of original frames and profiles | Council permits new sashes within existing frames as an acceptable compromise | No heritage restrictions; or heritage advice supports sympathetic modern replacement |
| Budget range | Limited budget; staged renovation across multiple windows is preferred | Moderate budget; willing to invest more per window for a bigger performance uplift | Budget supports full aluminium window frame replacement with modern systems |
| Aesthetic goals | Existing frame style suits the building; a refinished original look is desirable | Sash update with modern hardware refreshes the look without changing the overall profile | Complete style change desired, or existing frames look dated beyond what refinishing can fix |
An honest run through this matrix takes ten minutes per window and can save thousands of dollars in misdirected effort. If renovation is the clear winner, you move forward knowing the frame justifies the investment. If replacement is the answer, you avoid sinking money into a system that will underperform regardless. And if retrofit sits in the sweet spot, you get the best of both approaches — modern performance without full demolition.
Whichever column your windows land in, the next critical step is understanding how renovation techniques differ across window types. A casement with a worm-gear crank operator and a horizontal slider with roller assemblies demand entirely different approaches — and getting the method wrong is the fastest way to turn a sound decision into a botched result.
Renovation Techniques for Every Window Type
A renovation plan that treats every aluminium window the same way is a plan that is going to hit problems fast. The corroded hinge on a 1950s casement window and the worn roller assembly on a 1970s slider share almost nothing in common except the metal around them. Each window type has its own failure patterns, its own replacement parts ecosystem, and its own sequence of steps. Getting the technique right for your specific window type is what separates a renovation that lasts from one that falls apart within a season.
Casement and Crank-Out Window Renovation
Old style crank out windows are among the most satisfying to renovate — partly because the mechanism is elegant in its simplicity, and partly because the heavy-gauge frames from the 1940s and 1950s are often in far better shape than they look. The challenge is almost always in the hardware rather than the frame itself.
The crank operator is the heart of these windows. Aluminium crank windows from the mid-century era typically used worm-gear operators that translate the turning motion of the handle into a push-pull action on the sash arm. Over decades, the gear teeth wear down, the shaft splines strip, and the whole mechanism stiffens until the handle either spins uselessly or barely moves at all. Start your assessment here. Remove the crank handle and inspect the shaft — if the splines are rounded off, you may be able to file a flat spot on the operator shaft and use a longer setscrew as a temporary fix. For a permanent solution, replace the entire crank operator. Snap a photo of the existing unit, email it to a specialist window parts supplier, and they can match a replacement even if you cannot find a model number stamped anywhere on the original.
Beyond the operator, 1950s crank windows and 1950s casement windows commonly suffer from corroded hinge pins and sagging hinge arms. A heavy sash hanging on worn hinges drags against the frame at the lower corner opposite the hinge side, creating resistance and damaging the weatherstrip. Replacing the hinge arms at both the top and bottom of the window typically eliminates the drag entirely. If the original screw holes have stripped out in the aluminium frame, pack them with an epoxy filler, let it cure, then re-drill pilot holes offset slightly from the originals before fastening the new hinges.
Sash alignment is the final piece. Once the operator and hinges are renewed, close the window and check that the sash sits squarely and centrally in the frame. If it is rubbing on one side, the hinge channel position on the jamb can usually be shifted by a couple of millimetres — loosen the channel, fill the old screw holes, reposition, and refasten. This small adjustment can transform a window that has fought you for years into one that glides shut with a single smooth turn of the crank.
Sliding and Double-Hung Window Renovation
Sliding aluminium windows dominated Australian housing from the 1960s onward, and their renovation follows a completely different logic. There is no crank mechanism to fuss with. Instead, the typical failure points are worn roller assemblies, bent or debris-clogged tracks, and deteriorated pile weatherstripping in the sash channels.
Rollers cop the worst of it. Every time the window opens or closes, those small wheels bear the full weight of the sash against the bottom track. Over years, the rollers develop flat spots, crack, or seize up entirely. The symptoms are hard to miss: the window sticks, squeaks, or grinds when you try to slide it. If the rollers have worn unevenly, the sash may also sit crooked in the frame, creating gaps at one corner while binding at the other.
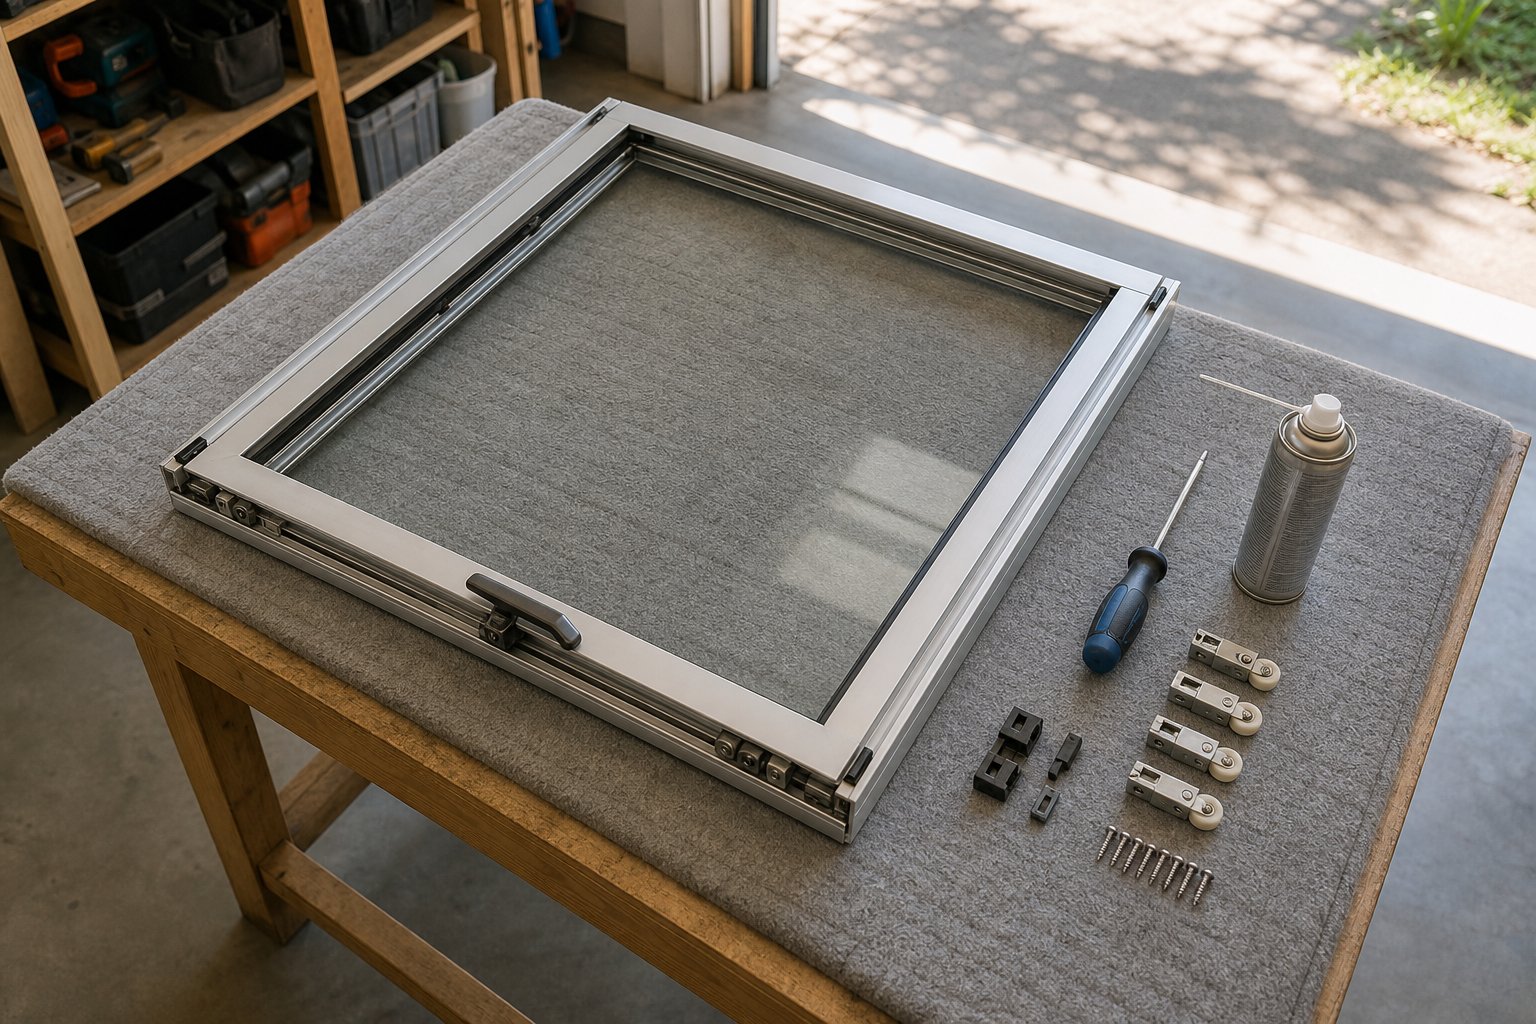
Replacing rollers is one of the more accessible DIY renovation tasks. Lift the sash vertically out of the track (some designs require you to first remove a head stop or anti-lift block at the top), then lay it flat on a padded surface. The roller assemblies sit at the base of each side of the sash, usually held by one or two screws. Remove the old rollers, measure their diameter and width carefully, and source replacements that match. Nylon rollers suit most residential applications — they are quieter than steel and resist corrosion in coastal environments. Seat the new rollers, tighten the screws snugly without overdoing it, and before reinstalling the sash, clean the bottom track thoroughly. A vacuum followed by a wipe-down with a damp cloth clears the built-up grit that accelerates roller wear. A light application of silicone-based lubricant on the track — never a greasy oil, which attracts more dust — sets everything up for smooth operation.
Pile weatherstripping in the sash channels deserves attention at the same time. That fuzzy strip running along the vertical edges of the sash frame compresses against the outer frame to block drafts. After 20-plus years, it flattens, hardens, or pulls away from the channel entirely. Replacement pile seal is sold by the metre at most hardware stores and slides into the existing groove once the old strip is pulled free. Renewing this single component can eliminate an astonishing amount of air leakage.
Fixed and Specialty Window Renovation
Fixed-pane windows lack moving parts, which simplifies the renovation scope considerably — but does not eliminate it. The focus shifts to reglazing, seal replacement, and frame refinishing.
Glazing putty or tape that has hardened and cracked over decades allows the glass to shift in the frame, rattle in wind, and admit water around the edges. Removing old putty carefully, cleaning the rebate, and applying fresh glazing tape or a compatible sealant secures the glass properly and restores the weather seal. Where the frame depth permits, this is also the opportunity to upgrade from single glazing to a slim-profile double-glazed insulated glass unit — a change that has a dramatic impact on both thermal and acoustic performance.
Old metal casement windows in commercial buildings, multi-unit residential blocks, and older institutional structures sometimes require a more specialised approach. Larger or heavier sashes may need professional handling for safe removal, and heritage restoration specialists note that original window furniture — handles, stays, and latches — should be preserved and reused wherever possible, particularly in listed buildings or conservation areas where council requirements may apply. If putty and glazing need to come out, existing glass should be carefully cleaned and reinstated rather than automatically discarded.
To keep the scope clear, here is a summary of the primary renovation focus for each window type:
- Crank-out windows — crank operator rebuild or replacement, hinge arm renewal, sash realignment, and weatherstrip replacement
- Sliding windows — roller assembly replacement, track cleaning and repair, pile weatherstripping renewal, and anti-lift block adjustment
- Casement windows (non-crank) — hinge and friction stay replacement, latch and keeper adjustment, weatherstrip renewal
- Fixed windows — reglazing with fresh putty or glazing tape, seal replacement around the frame perimeter, and surface refinishing
A safety note worth emphasising: before removing any hardware from old metal casement windows or crank-out sashes, always secure the sash so it cannot swing open or fall. A heavy aluminium sash with glass is both unwieldy and dangerous if it drops unexpectedly. Use a temporary prop or have a second person hold the sash steady while you disconnect hinge arms or operators. Wear gloves — aged aluminium edges can be surprisingly sharp — and safety glasses whenever you are working above your head or removing old glazing putty that may flake unpredictably.
Matching the right technique to the right window type gets the mechanical side of renovation sorted. But for many homeowners, the real motivation is not just windows that open and close properly — it is windows that actually keep the heat out in summer and the warmth in during winter. That brings us to the thermal performance upgrades that can turn a restored aluminium frame from merely functional into genuinely efficient.
Thermal Performance Upgrades That Actually Work
Aluminium is light, strong, and virtually immune to rot — but it conducts heat roughly 1,000 times more efficiently than timber. That property, so useful in a saucepan, is a serious liability in a window frame. In older aluminium windows without thermal breaks, the frame acts as a direct bridge between outside air and your living space. Summer heat pours in through the metal; winter warmth bleeds straight out. The phenomenon is called thermal bridging, and it is the single biggest energy penalty old aluminium storm windows impose on a home. Reference data from insulation performance studies shows that non-thermally broken single-pane aluminium windows can record U-values above 1.0 W/m²K — placing them squarely in the “poor” performance bracket.
The good news is that several practical upgrades can dramatically reduce that heat transfer without requiring you to rip the frames out entirely. The key is understanding which measures deliver genuine results and which ones simply are not feasible on an existing frame.
Retrofitting Thermal Breaks and Weatherstripping
A thermal break is an insulating barrier — typically a strip of glass-reinforced polyamide — sandwiched between the interior and exterior halves of an aluminium profile. It physically separates the two metal faces so heat cannot conduct straight through. In modern aluminium windows fabrication, these breaks are engineered into the extrusion during manufacturing, with widths ranging from around 15 mm in standard systems to 35 mm in premium multi-chamber profiles.
Here is the honest reality: retrofitting a true thermal break into an existing mid-century frame is generally not feasible. The process requires splitting and reconnecting the aluminium profile around the insulating strip — something that can only be done during extrusion or in a highly controlled factory setting. Attempting it on an installed window risks compromising structural integrity and voiding any remaining confidence in the frame’s performance.
That does not mean thermal improvement is off the table. Secondary measures can close a surprising amount of the gap, and the single highest-impact upgrade is one of the simplest: weatherstrip replacement.
Degraded original seals are responsible for a disproportionate share of energy loss in old aluminium windows. Replacing them with modern compression seals, fin seals, or foam-backed weatherstrips restores the air barrier between sash and frame. The cost per window is modest, the installation is well within DIY range for most window types, and the improvement is immediate — both in comfort and in reduced HVAC load. Insulation specialists note that sealing air leaks should always be the first step, because even the best glazing upgrade underperforms if unchecked drafts are streaming around the frame edges.
For operable windows — sliders, casements, and awnings — prioritise the contact surfaces where the sash meets the frame. For fixed panes, focus on the perimeter junction between the frame and the surrounding wall, using high-adhesion, flexible sealant (silicone or polyurethane) that can accommodate aluminium’s thermal expansion and contraction without cracking.
Glazing Upgrades for Better Insulation
Once the air leaks are sealed, the next lever is the glass itself. Original single glazing transmits heat almost as freely as the frame does, and upgrading the glazing is where the most significant thermal gains live.
Three main options exist, each with a different balance of performance and cost:
- Replacing single glazing with a double-glazed insulated glass unit (IGU). If the existing frame has sufficient rebate depth — typically at least 18–20 mm — a sealed IGU with a low-emissivity (low-E) coating and argon gas fill can slot in where the original single pane sat. This is the most effective single upgrade, cutting heat transfer through the glass by roughly half compared to plain single glazing. It does require careful measurement and professional fitting to ensure the frame can carry the additional weight and thickness without stressing the hardware.
- Adding secondary glazing on the interior side. Secondary glazing installs a separate panel — glass or optical-grade acrylic — inside the existing window reveal, creating a substantial insulating air gap between the original pane and the new panel. This approach works with virtually any frame type, including aluminium sliders and old metal casement windows where modifying the original frame for an IGU is impractical. It also delivers strong acoustic benefits, making it a popular choice for homes on busy roads or under flight paths. In Australian strata and heritage contexts where external window alterations are restricted, secondary glazing is often the only compliant thermal upgrade available.
- Applying low-emissivity window film. Adhesive low-E films applied to the interior face of existing glass reflect a portion of infrared energy back into the room during winter and reduce solar heat gain in summer. Performance is more modest than IGUs or secondary glazing, but the cost is low, installation is straightforward, and the film is effectively invisible once applied. It is a sensible interim measure for homeowners who plan a more comprehensive upgrade later but want an immediate improvement.
Each option suits a different budget and a different level of ambition. Weatherstrip renewal plus low-E film is a weekend project that delivers noticeable comfort gains for a few hundred dollars across multiple windows. Secondary glazing sits in the mid-range — a meaningful investment with strong returns in both thermal and acoustic performance. A full IGU upgrade within existing frames pushes into professional-installation territory but delivers the closest thing to modern window performance without touching the frame itself.
When Modern Aluminium Systems Make More Sense
There is a ceiling to what retrofitting can achieve, and it is important to acknowledge it plainly. You can seal every gap, upgrade the glass, add secondary panels, and still end up with a window whose overall thermal performance trails a current-generation thermally broken system by a wide margin. The frame itself remains a thermal bridge, and no amount of peripheral improvement changes that fundamental physics.
Today’s aluminium window systems are engineered with factory-integrated thermal breaks, dual compression seals, and compatibility with high-performance double or triple glazing — a significant leap from mid-century designs that were never intended to manage energy transfer through the frame.
For buildings where thermal performance is a primary concern — whether driven by NCC energy efficiency requirements, NatHERS ratings targets, or simply the desire for year-round comfort in Australia’s climate extremes — modern thermally broken aluminium frames deliver results that extensive retrofitting cannot replicate. New construction aluminium windows with integrated thermal breaks can achieve U-values below 2.0 W/m²K for the full window assembly, a level that even the most comprehensively upgraded mid-century frame struggles to approach.
This does not mean every old window should be replaced. The decision matrix from earlier in this article still applies. But for homeowners and project teams who have worked through that assessment and landed firmly in the replacement column, exploring current aluminium systems is the logical next step. MEICHEN’s aluminium window range, for example, offers thermally broken profiles across a full suite of window types — casement, awning, sliding, and fixed — with custom sizing and commercial aluminium window details suited to both residential renovations and larger-scale projects. It is worth reviewing what a purpose-built modern system can deliver before committing to a retrofit programme that may fall short of your performance goals.
Thermal upgrades address the invisible side of window performance — the energy you save, the drafts you eliminate, the condensation you prevent. But there is another dimension to aluminium window renovation that homeowners often care about just as much: how the windows actually look. Surface restoration and aesthetic transformation can be every bit as dramatic as the thermal gains, and the process is more accessible than most people expect.
Surface Restoration and Aesthetic Transformation
A window can function perfectly — smooth hardware, tight seals, decent glazing — and still drag down the look of an entire facade. Chalky white oxidation, faded mill-finish aluminium, chipped paint over old touch-up jobs: these cosmetic issues are often the first thing visitors, buyers, or tenants notice. The flip side is encouraging. Surface restoration is the most visually dramatic part of repairing aluminium window frames, and it does not demand specialist equipment or a professional budget. With the right preparation sequence, decades-old frames can look close to new in a single weekend.
Cleaning and Preparing Oxidised Aluminium
Preparation accounts for roughly 80 per cent of the outcome. Skip it, and even the best paint will peel within a couple of seasons. Rush it, and you end up with adhesion failure that looks worse than the original oxidation.
Start by washing the frames thoroughly with a non-abrasive detergent — ordinary dishwashing liquid in warm water works well — and a soft-bristle brush. The goal is to remove surface grime, cobwebs, insect residue, and loose dirt without scratching the metal. Rinse completely with clean water and let the frames dry.
Heavy oxidation — that stubborn white or grey chalky layer — needs more than soap. An aluminium-safe etching solution, typically phosphoric acid based, dissolves the oxide layer and creates a micro-rough surface that gives primer something to grip. Apply the solution according to the manufacturer’s directions, work it across the frame with a fine Scotch-Brite pad or 220-grit sandpaper, and rinse thoroughly. For lighter oxidation, the abrasive pad alone — without chemical etching — may be sufficient.
Safety matters here, and it is worth stating plainly. Chemical etchants and even fine aluminium dust are irritants. Wear nitrile gloves, safety glasses, and work in a well-ventilated area — outdoors is ideal. If you are using spray-on etching products, a basic respirator rated for acid mists adds a layer of protection that costs very little. Mask off glass, weatherstripping, and surrounding wall surfaces with quality painter’s tape and plastic sheeting before you begin any chemical or abrasive work. That ten minutes of masking saves hours of cleanup.
Once the frames are clean, etched, and bone dry, give them a final wipe with a tack cloth or a rag lightly dampened with isopropyl alcohol. Any residual dust, oil, or fingerprint left on the surface at this stage becomes a weak point under the primer.
Priming and Painting Aluminium Frames
Aluminium can absolutely be painted — but it demands a primer engineered for non-ferrous metal. Standard wood or steel primers will not chemically bond with the aluminium surface, and failure is virtually guaranteed within a year or two. Two primer types dominate for this job:
- Self-etching primer — contains mild acids that bite into the aluminium while simultaneously laying down a bonding coat. Available in aerosol cans, making it convenient for DIY projects. One coat is typically sufficient. Best suited to residential frames in low-to-moderate exposure environments.
- Two-part epoxy primer — a resin-and-hardener system that cures into an extremely hard, moisture-resistant layer. It requires careful mixing and has a limited working time once combined, but delivers superior adhesion and corrosion resistance. This is the stronger choice for coastal Australian homes where salt spray tests the finish relentlessly.
Apply primer in thin, even passes. Thick coats invite runs, extend drying times, and can crack as the aluminium expands and contracts through daily temperature swings. Allow the primer to cure fully — check the manufacturer’s recoat window carefully, because missing that timing means sanding the primer before you can topcoat.
For the finish coats, choose a 100 per cent exterior-grade acrylic or urethane-modified paint. These formulations flex with the metal’s thermal cycling instead of cracking, and quality products include UV stabilisers that resist the intense Australian sun. Two topcoats are standard: the first builds coverage, the second locks in colour depth and your chosen sheen — satin for a subtle finish, semi-gloss for something that catches light and cleans easily. Allow full curing time between coats, which can range from four to 24 hours depending on temperature and humidity.
Colour selection is more than cosmetic preference. Darker colours absorb more heat, increasing thermal expansion stress on the frame and potentially accelerating paint degradation in sun-blasted north- and west-facing positions. Lighter shades reflect more solar energy and tend to hold their finish longer in exposed locations. If you want a dark frame colour on old style aluminium windows that cop full afternoon sun, the epoxy primer and a premium UV-resistant topcoat become non-negotiable.
For those after a truly factory-quality result, professional powder coating is available. The process involves removing the frames from the openings, stripping them back to bare metal, applying electrostatically charged powder, and curing the coating in an oven. The result is extremely durable — significantly outlasting brush-or-spray paint — but the cost, logistics of frame removal, and temporary loss of window function make it a bigger undertaking. It is best reserved for high-visibility windows or situations where the frames are already being removed for other renovation work.
Restoring and Replacing Hardware
Fresh paint on the frame means little if the handle is tarnished, the lock jiggles uselessly, or the window stay has seized solid. Hardware is the tactile interface — the part you touch every time you open, close, or secure the window — and worn fittings undermine both function and the sense of quality that a good surface finish creates.
Sourcing old aluminum window parts is easier than most homeowners assume, though it rarely involves a trip to the local hardware store. Specialist suppliers — both online and through architectural salvage dealers — carry extensive catalogues of handles, operators, locks, hinges, stays, and weatherstripping spanning decades of production. Photograph your existing hardware, note any model numbers stamped into the metal, and measure critical dimensions (shaft diameter, screw spacing, arm length) before you start searching. A clear photo emailed to a specialist supplier often gets a match faster than scrolling through catalogues yourself.
When exact period-correct replacements are unavailable — and for some older old metal frame windows, they genuinely are not — modern replacement hardware can often be adapted to fit. Current-production casement stays, locking handles, and friction hinges follow standardised mounting patterns that overlap with many mid-century configurations. Minor modifications — redrilling a screw hole a few millimetres, fitting a spacer plate behind a handle — can bridge the gap between an old frame and a new fitting. The result may not be a museum-grade restoration, but for a family home it delivers reliable daily operation and a clean look that complements your freshly refinished frames.
If you are renovating windows in a heritage-listed property or a conservation area, check council requirements before swapping original hardware for modern equivalents. Some heritage overlays require retention of period fittings, or at minimum, replacement with historically sympathetic alternatives.
The complete surface restoration sequence, from start to finish:
- Clean frames — wash with non-abrasive detergent, rinse, and dry thoroughly
- Treat corrosion — apply etching solution to heavy oxidation; use fine abrasive pads on lighter buildup
- Sand lightly — scuff the entire surface with 220-grit sandpaper to create a mechanical key for primer adhesion
- Apply etching primer — one coat of self-etching primer or two coats of two-part epoxy, depending on exposure conditions
- Apply two topcoats — exterior-grade acrylic or urethane-modified paint, allowing full cure time between coats
- Reinstall or replace hardware — fit restored original fittings or adapted modern replacements; lubricate moving parts before final assembly
Following this sequence with patience — particularly during the preparation and curing stages — produces a finish that can hold up for eight to twelve years in a moderate Australian climate, and longer if maintained with periodic cleaning and touch-ups. That kind of longevity brings us to the practical question underpinning every renovation project: what does all of this actually cost, and how do you budget for it without unpleasant surprises halfway through?
Budgeting for Aluminium Window Renovation
Every renovation conversation eventually lands on the same question: how much is this going to cost? The honest answer is that aluminium window repair costs vary enormously — a simple weatherstrip swap on a ground-floor slider bears no resemblance, financially, to a full hardware rebuild, reglaze, and refinish on a bank of upper-storey casement windows. Rather than quoting a single dollar figure that might be wildly wrong for your situation, the smarter approach is understanding exactly which variables push the budget up or down, so you can estimate accurately before committing a cent.
What Drives Renovation Costs Up or Down
Five factors account for almost all the variation in aluminium window repair pricing across Australian projects.
Scope of work is the biggest lever. Replacing a set of worn rollers on a sliding window is a fraction of the cost of a full renovation that includes reglazing, surface refinishing, hardware replacement, and weatherstrip renewal on the same unit. Define the scope window by window, based on the condition assessment covered earlier in this article, and you avoid the trap of budgeting for a blanket approach when some windows need far less work than others.
Number of windows matters — but not always in the way you might expect. Tradespeople typically offer lower per-window pricing on larger jobs because mobilisation, setup, and travel costs are spread across more units. A single aluminium window frame repair in isolation can attract a minimum call-out fee that makes it disproportionately expensive compared to the same task bundled into a five- or ten-window project.
Accessibility is the hidden cost multiplier. Ground-floor windows that you can reach from a step ladder carry minimal access costs. Upper-storey aluminium window repairs on a double-storey home may require scaffolding, elevated work platforms, or specialised safety equipment — all of which add meaningfully to the bill and introduce regulatory obligations under Australian work-health-and-safety requirements for working at height.
DIY versus professional labour creates the most obvious cost split. Doing the work yourself eliminates the labour charge — which often represents 40 to 60 per cent of a professional quote — but introduces tool costs, time investment, and the risk that a mistake ends up costing more to correct than the professional fee would have been in the first place.
Geographic location rounds out the picture. Labour rates in Sydney and Melbourne tend to run higher than in regional centres. Coastal locations may require more corrosion-resistant materials. Remote areas can face delivery surcharges on parts and glazing. Factor your location into every estimate you build or receive.
DIY vs Professional Renovation Costs
Choosing between doing the work yourself and hiring a tradesperson is rarely an all-or-nothing decision. Most homeowners find a hybrid approach practical: handle the straightforward tasks personally and bring in a professional for anything involving glazing removal, working at height, or structural modifications. Installation and renovation specialists consistently note that professional work reduces rework risk and typically includes a warranty — protections that DIY cannot replicate.
The table below maps common renovation tasks against their DIY feasibility and the primary components that drive cost, so you can decide where your time and money are best directed.
| Renovation Task | DIY Feasibility | Primary Cost Components |
|---|---|---|
| Weatherstrip replacement | Easy — minimal tools, widely available materials | Pile seal or compression strip (sold by the metre); basic hand tools |
| Hardware repair or replacement | Moderate — requires correct part identification and careful fitting | Replacement operators, rollers, hinges, or locks; specialist supplier sourcing; fasteners |
| Reglazing (single to double glazing) | Professional recommended — glass handling, precise measurement, and seal integrity are critical | Insulated glass unit (IGU) supply; glazing tape or sealant; professional labour for safe handling and fitting |
| Surface refinishing (clean, prime, paint) | Moderate — achievable with patience, but preparation is time-intensive | Etching solution, primer, topcoat paint; masking materials; abrasive pads or sandpaper |
| Thermal upgrades (secondary glazing or film) | Easy to moderate — film is straightforward; secondary glazing panels benefit from precise measurement | Low-E film or secondary glazing panel supply; mounting hardware; professional measurement for custom panels |
A realistic DIY budget should also account for one-off tool purchases — a quality caulking gun, a set of fine abrasive pads, a rivet tool for certain hardware fittings — that add upfront cost but serve you across multiple windows and future maintenance cycles. Professional quotes, on the other hand, typically bundle materials, labour, cleanup, and often disposal of old components into a single figure, making comparison easier but requiring you to read the itemised breakdown carefully.
Getting Accurate Quotes and Avoiding Surprises
If you are hiring a tradesperson for any part of the work, the quality of the quote you receive determines how well the budget holds. A vague lump-sum number on the back of a business card is not a quote — it is a guess dressed up as a commitment.
Industry guidance on comparing window quotes recommends requesting fully itemised estimates that separate materials, labour, access equipment, and disposal. This transparency matters because it lets you compare like with like when you collect multiple quotes — and you should collect at least three. A quote that looks cheaper overall might bury higher labour rates behind discounted materials, or exclude disposal of old glazing and hardware that another quote includes.
Specific questions worth asking every tradesperson who quotes on aluminium window repairs:
- Per-window or project pricing? Per-window rates make it easy to scale the project up or down. Project pricing may include a discount for volume but locks you into a larger commitment.
- What is included in disposal? Old glass, perished seals, and corroded hardware all need to go somewhere. Confirm whether removal and responsible disposal are part of the quoted price or an additional charge.
- Are access costs itemised separately? If scaffolding or an elevated work platform is needed, you want that line item visible so you can explore alternatives — such as staging the work to do all upper-storey windows in a single scaffold hire period rather than paying for multiple setups.
- What warranty applies? Professional aluminium window repairs should come with a workmanship warranty. Ask for specifics: duration, what it covers, and whether it transfers if you sell the property.
- Is there a schedule for the work? Renovation tasks like painting and sealing are weather-dependent. A tradesperson who quotes without discussing timing may not have factored in the curing conditions that affect finish quality.
One final budgeting consideration that homeowners often overlook: renovation is not a one-and-done expense in the way that full replacement can be. A quality renovation extends window life by many years, but it does carry ongoing maintenance obligations — periodic cleaning, weatherstrip checks, paint touch-ups, hardware lubrication. Factor a modest annual maintenance allowance into your long-term cost comparison when weighing renovation against replacement. The upfront saving from renovation is real and often substantial, but it earns its full value only when backed by consistent upkeep.
With a clear budget framework in place and realistic quotes in hand, the remaining piece is timing — when to schedule the work, what to tackle first, and how to protect the investment once the renovation is complete.
Planning Your Next Steps and Protecting Your Investment
A solid budget and a clear scope of work put you in a strong position — but launching into the project at the wrong time of year can undermine even the best-prepared aluminium window renovation. Exterior tasks like painting, sealing, and reglazing are surprisingly sensitive to weather conditions, and getting the timing right is the difference between a finish that lasts a decade and one that peels before the first winter.
Best Timing and Seasonal Considerations
Exterior paint and sealant need specific conditions to cure properly. Most quality exterior acrylic and urethane paints require an ambient temperature between roughly 10°C and 30°C, with relative humidity below 85 per cent. Below 10°C, the resin particles in latex-based coatings struggle to fuse into a continuous film — a process called coalescence — leaving you with a finish that is porous, weak, and prone to cracking. Above 30°C, paint dries too fast on the surface before bonding to the substrate, trapping solvents underneath and causing blistering. Exterior painting specialists note that fresh coatings also need at least four to six hours of dry weather after application to develop adequate water resistance, with full curing taking up to two weeks.
For most of Australia, that translates into a practical exterior renovation window from early autumn through late spring — roughly March to November in temperate zones like Sydney, Melbourne, and Adelaide. Tropical regions in northern Queensland and the NT are best tackled during the dry season (May to October), when humidity drops to workable levels and afternoon storms are less likely to catch wet paint.
Interior tasks are far less weather-dependent. Hardware replacement, secondary glazing installation, weatherstrip renewal, and track cleaning can all happen in cooler or wetter months when exterior work is impractical. Structuring your project this way — interior work during winter, exterior refinishing and reglazing during stable mild weather — keeps momentum going year-round without gambling on conditions that could compromise the result.
One detail worth noting: morning dew and overnight condensation on aluminium frames can cause adhesion failure if you start painting too early in the day. Even on a clear, mild morning, wait until the frames are visibly dry and warm to the touch before applying primer or topcoat. Following the shade around the building — painting sun-exposed walls in the morning before they overheat, and tackling shaded walls through the middle of the day — is a technique professionals use to stay within the optimal temperature band on every surface.
Post-Renovation Maintenance Schedule
Renovation is an investment, not a finish line. The restored seals, fresh paint, renewed hardware, and upgraded glazing you have just paid for — in time, money, or both — will only deliver their full lifespan if backed by consistent, low-effort upkeep. Skip maintenance, and deterioration accelerates: finishes dull, tracks clog, seals compress permanently, and you end up back where you started far sooner than necessary.
Build the following routine into your household calendar and treat it as non-negotiable:
- Inspect weatherstripping and seals every six months. Run your hand along the sash edges with the window closed. Any detectable draft means the seal has compressed or pulled away and needs attention. Catching a failing strip early is a five-minute fix; ignoring it leads to months of energy loss and eventual water intrusion.
- Clean frames and tracks quarterly. A soft cloth with warm water and mild detergent removes the grime, salt residue, and airborne dust that accelerate oxidation and jam sliding mechanisms. Coastal properties — anywhere within a few kilometres of the shoreline — benefit from monthly cleaning to prevent salt buildup from attacking the finish. Vacuum tracks to clear debris before wiping them down.
- Lubricate all moving hardware annually. Crank operators, friction stays, hinges, rollers, and lock mechanisms all perform better and last longer with a light application of silicone-based lubricant. Avoid petroleum-based oils on tracks — they attract grit and create a grinding paste that wears rollers faster.
- Touch up paint or finish as needed. Inspect painted frames each spring for chips, scratches, or early signs of chalking. Spot-treat exposed areas with a light sand, a dab of etching primer, and a matching topcoat before the bare metal has a chance to oxidise. Small touch-ups take minutes; a full repaint takes a weekend.
- Check glazing seals annually. Look for cracked or separating glazing tape around fixed and operable panes. Press gently on each pane — any movement or rattling suggests the seal or glazing bead needs replacement. On double-glazed units, watch for fogging between panes, which signals seal failure inside the IGU.
This routine adds up to a few hours across an entire year. In return, it protects the renovation investment and can extend the effective life of restored aluminium windows by a decade or more beyond what neglected frames would deliver.
Choosing the Right Path Forward
You have worked through condition assessment, decision matrix, type-specific techniques, thermal options, surface restoration, and budgeting. Three clear paths sit in front of you — and each one is valid depending on where your windows landed in that earlier analysis.
DIY renovation suits homeowners who are comfortable with hand tools, patient with preparation, and working on accessible ground-floor windows that need weatherstrip renewal, hardware replacement, track cleaning, or surface refinishing. The cost savings are real, and the satisfaction of bringing an old aluminium window back to life with your own hands is hard to beat. Start with the worst-performing window, refine your technique, and work through the rest at whatever pace your weekends allow.
Professional renovation is the practical choice for complex jobs — reglazing with insulated glass units, multi-storey access, large numbers of windows, or heritage-listed properties where aluminium window repairs need to meet council requirements. Search for tradespeople experienced specifically in aluminium window repairs near your area, request itemised quotes from at least three, and use the budgeting framework from the previous section to compare them with confidence. A good specialist will assess each window individually rather than recommending a blanket approach.
Modern replacement makes sense when the decision matrix pointed clearly toward new systems — severe structural corrosion, frames distorted beyond adjustment, or thermal performance demands that retrofitting cannot meet. For readers on this path, the transition is smoothest when you work with a manufacturer that offers a comprehensive range of aluminium window types, custom sizing to fit existing openings, and performance specifications aligned with current NCC and WERS requirements. MEICHEN’s aluminium windows page is a useful starting point — it covers modern thermally broken profiles across casement, awning, sliding, and fixed configurations, with options tailored to Australian residential and commercial projects. Exploring what current-generation systems offer helps you set realistic expectations for performance, lead times, and budget before engaging an installer.
Whichever path you take, the underlying principle is the same: an informed decision, made with clear eyes and realistic numbers, always outperforms a rushed one. Old aluminium windows that deserve renovation should get it — thoroughly, correctly, and with ongoing care. And windows that have genuinely reached the end of their useful life deserve a replacement that performs at the standard today’s building science makes possible. Either way, you are turning drafty old frames into assets — and that is the whole point.
Frequently Asked Questions About Aluminium Window Renovation
1. Is it worth renovating old aluminium windows or should I replace them?
It depends on the condition of your frames. If the aluminium is structurally sound with only surface oxidation, worn seals, or tired hardware, renovation is typically the more cost-effective choice and can extend the window’s life by decades. Heavy-duty frames from the 1940s and 1950s are especially good candidates. However, if corrosion has penetrated deep into the frame walls, the profile has twisted beyond adjustment, or you need high thermal performance that only thermally broken systems can deliver, replacement becomes the smarter investment. Running each window through a structured decision matrix — assessing frame integrity, corrosion severity, thermal needs, heritage constraints, and budget — gives you a clear, window-by-window answer rather than a blanket decision.
2. How do I know if my aluminium window frames are too corroded to save?
Surface oxidation — the white, chalky residue common on old aluminium — is purely cosmetic and actually protects the metal underneath. Light, scattered pitting is also manageable through sanding, treating, and refinishing. The warning signs that a frame may be beyond renovation include deep pitting where you can catch a fingernail, galvanic corrosion at joints where aluminium contacts dissimilar metals like steel screws or copper flashing, and sections of the frame that flex under moderate hand pressure. If a screwdriver tip can press into the corroded aluminium, the wall thickness has been compromised and structural integrity is at risk. In these cases, professional assessment is worthwhile before committing to either renovation or replacement.
3. Can you improve the thermal performance of old aluminium windows without replacing them?
Yes, several upgrades make a meaningful difference. Replacing degraded weatherstripping with modern compression or fin seals is the single highest-impact change, as failed seals are responsible for a disproportionate share of energy loss. Beyond that, you can upgrade single glazing to double-glazed insulated glass units if the frame depth allows, install secondary glazing panels on the interior side for both thermal and acoustic benefits, or apply low-emissivity window film as a lower-cost interim measure. True thermal breaks cannot be retrofitted into existing frames — they must be integrated during manufacturing — so the frame itself will always remain a thermal bridge. For buildings where maximum thermal performance is essential, modern thermally broken aluminium systems offer a step-change that retrofitting cannot replicate.
4. How much does it cost to renovate aluminium windows in Australia?
Costs vary significantly based on five key factors: scope of work per window, the total number of windows, accessibility (ground floor versus upper storeys requiring scaffolding), whether you do the work yourself or hire a professional, and your geographic location. A straightforward weatherstrip replacement on a ground-floor slider is a modest expense, while a full renovation involving reglazing, hardware rebuild, and surface refinishing on upper-storey casement windows costs considerably more. DIY saves on labour — which can represent 40 to 60 per cent of a professional quote — but carries risk of rework. When obtaining quotes from tradespeople, request itemised estimates, collect at least three, and confirm whether disposal of old materials and access equipment are included in the price.
5. What is the best time of year to renovate aluminium windows in Australia?
Exterior tasks like painting, sealing, and reglazing need mild, dry conditions to cure properly — ambient temperatures between roughly 10°C and 30°C with humidity below 85 per cent. For most of temperate Australia (Sydney, Melbourne, Adelaide), the practical window runs from early autumn through late spring, roughly March to November. In tropical regions like northern Queensland, target the dry season from May to October. Interior tasks such as hardware replacement, weatherstrip renewal, and secondary glazing installation can be done year-round regardless of weather. Planning interior work for winter and exterior refinishing for stable mild weather keeps your project moving without compromising quality.
More Window & Door Guides