Why Your Aluminium Window Stopped Sliding Smoothly
Your sliding window is stuck, and you are standing there applying shoulder pressure to a pane of glass. Not ideal. A sliding aluminum window should glide with minimal effort, so when it refuses to budge, something specific has gone wrong. The fix depends entirely on what that something is.
Why Most Quick Fixes Fail
Most homeowners reach for a can of lubricant the moment their window is stuck. It works for a day, maybe a week, then the problem returns. The reason is simple: lubricant treats friction, not the cause of friction. Spraying silicone over a bent track or a seized roller is like putting a bandage on a broken bone. You might mask the symptom temporarily, but the underlying issue keeps getting worse. A broken sliding window that needed roller replacement six months ago now needs a full track rebuild because the damaged rollers have been grinding metal against metal the entire time.
The Three-Stage Approach to a Lasting Fix
This guide follows a diagnostic-first framework designed to solve the problem once rather than repeatedly. The three stages are:
- Diagnose the specific failure using observable symptoms.
- Fix the root cause with the appropriate level of repair.
- Prevent recurrence through targeted maintenance.
Nearly every aluminium sliding window that stops moving smoothly traces back to one of these five root causes:
- Debris buildup compacting in the track channel
- Roller failure from flat spots, cracking, or seized bearings
- Track damage including bends, dents, or corrosion pitting
- Frame misalignment caused by house settling or structural movement
- Aluminium-specific issues like oxidation, galvanic corrosion, or thermal expansion
Some of these take five minutes to resolve. Others call for professional help. The sections ahead will walk you through identifying exactly which category your window falls into, applying the correct repair, and keeping the problem from coming back.
Diagnose the Exact Problem Before You Fix Anything
Grabbing tools before you know what is actually wrong is how a simple sliding window stuck situation turns into a weekend-long ordeal. Different symptoms point to completely different failures, and misdiagnosing the cause often makes things worse. Spending two minutes observing how the window behaves tells you more than twenty minutes of random tinkering.
Mapping Symptoms to Root Causes
Pay attention to exactly how the window misbehaves. Does it judder? Grind? Refuse to move at all? Each behaviour signals a specific mechanical or environmental issue. Use this table to match what you are experiencing with the most likely cause:
| Symptom | Probable Cause | Urgency |
|---|---|---|
| Window judders or jerks during movement | Damaged or flat-spotted rollers | Moderate — worsens with continued use |
| Sticks on one side only | Frame misalignment or house settling | Moderate to high — may indicate structural shift |
| Sticks in summer but slides fine in winter | Thermal expansion of aluminium frame | Low — seasonal and predictable |
| Grinding or scraping noise when moving | Debris compacted in track or oxidation buildup | Moderate — debris accelerates track wear |
| Window doesn’t close all the way | Worn rollers sitting unevenly or bent track section | High — compromises security and weathersealing |
| Completely immovable, no movement at all | Paint or sealant bonding sash to frame, or severely bent track | High — do not force |
| Rattling or shaking in the frame | Loose or worn roller carriage, degraded track channel | Low to moderate — early warning sign |
If your windows are hard to open and close only at certain times of year, thermal expansion is your prime suspect. If the window jamming happens regardless of temperature and gets progressively worse, you are likely dealing with a mechanical component that is failing.
How to Inspect Rollers and Tracks
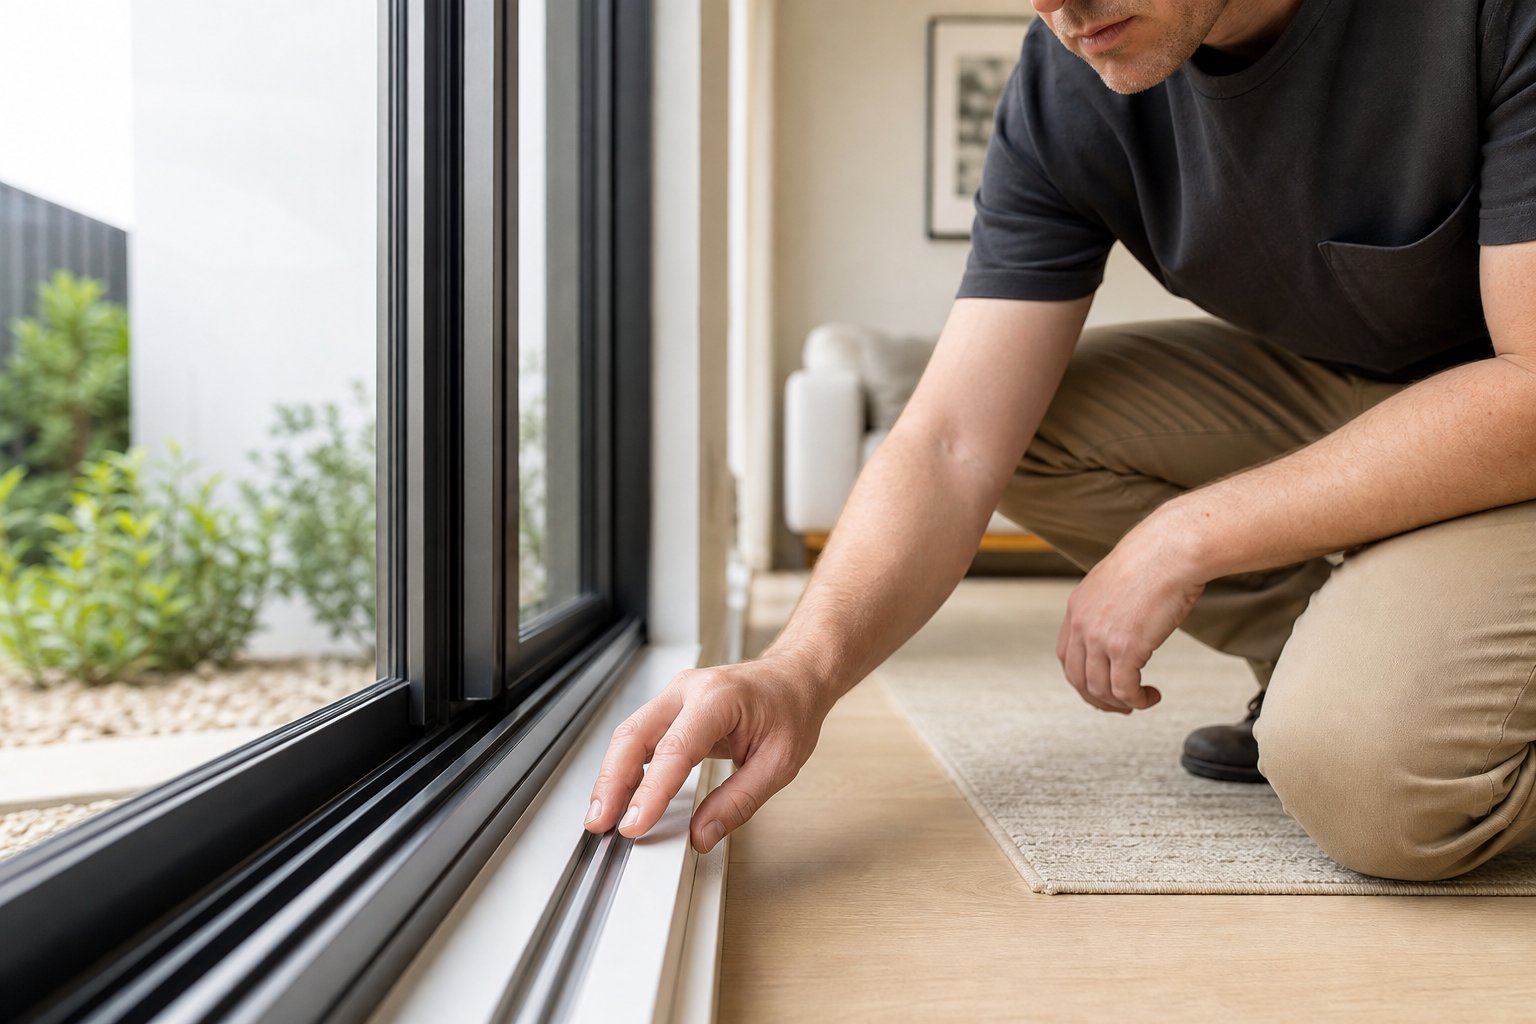
Start with the track. Crouch down and look along its length at eye level. A healthy track is straight, smooth, and free of buildup. A damaged one shows visible dents, a lip bent inward, or a rough powdery texture from oxidation. Run your finger along the channel — grit or a gummy residue confirms contamination.
For the rollers, you will need to look at the bottom edge of the sash. On most aluminium sliding windows, the roller housing is partially visible from below. Signs of failure include:
- Flat spots on the wheel (the roller no longer spins freely)
- Cracked or chipped wheel edges
- The wheel does not rotate at all when you spin it with a finger (seized bearing)
- Visible rust or corrosion around the axle
Most rollers are designed to last between 10 and 20 years depending on usage and environmental conditions. Coastal homes across Sydney, the Gold Coast, and Perth’s western suburbs often see accelerated wear from salt air and fine sand working into the mechanism.
Mechanical Failure vs Paint and Sealant Bonding
This distinction matters because the fix is entirely different. Mechanical failure — worn rollers, bent tracks, misaligned frames — involves physical component degradation. The window still has some movement, even if it is rough, uneven, or noisy. You can usually feel the sash trying to engage with the track.
Paint or sealant bonding is a chemical problem. During renovations or repainting, overspray or excess sealant can glue the sash directly to the frame. The giveaway: the window has zero movement in any direction, and you can often see a thin line of paint bridging the gap between the sash and the frame edge. There is no grinding, no jerking — just complete rigidity.
Forcing a paint-bonded window open with brute strength risks cracking the glass or bending the frame permanently. The correct approach involves carefully scoring the bond line first, which the repair section ahead covers in detail. For mechanical failures, the repair path depends on which component has degraded and how far gone it is — something that becomes much clearer once you understand the aluminium-specific issues that accelerate these problems.
Aluminium-Specific Issues That Cause Windows to Stick
Generic sliding window troubleshooting guides tend to lump all frame materials together, but aluminium behaves differently from timber and uPVC in ways that directly affect whether your aluminum windows sliding smoothly is a short-lived or permanent fix. The material’s chemistry, thermal properties, and rigidity each introduce failure modes you simply will not encounter with other frame types.
Oxidation and Corrosion on Aluminium Tracks
Aluminium does not rust in the traditional sense, but it does oxidise. When the protective finish on an aluminum sliding window track breaks down, the exposed metal reacts with oxygen and moisture to form a chalky, whitish layer. This oxidation layer creates a rough, high-friction surface that progressively resists sash movement. In coastal areas — think Newcastle, the Sunshine Coast, or Fremantle — salt air accelerates this process dramatically, turning a minor surface issue into a track that feels like sandpaper within a couple of seasons.
Galvanic corrosion is a less obvious but equally destructive problem. It occurs when aluminium comes into contact with a dissimilar metal in the presence of moisture. Carbon steel screws, copper flashing, or even brass hardware fastened directly to the frame can trigger a chemical reaction that causes pitting, swelling, and material degradation at the contact point. On sliding windows, this typically shows up as localised bumps or rough patches in the track channel — spots where the sash catches every time it passes over. The fix for repairing aluminium window frames affected by galvanic corrosion starts with removing the offending fastener and replacing it with austenitic stainless steel, which is far less reactive against aluminium.
Thermal Expansion and Seasonal Binding
Aluminium has a relatively high coefficient of thermal expansion. On a north- or west-facing wall receiving hours of direct Australian sun, the frame can expand enough to tighten tolerances between the sash and track to a point where movement becomes difficult or impossible. The telltale sign: your window binds on hot afternoons but slides freely again in the cool of the morning.
This is not a defect — it is physics. However, it becomes a real problem when tolerances were already tight due to minor misalignment or debris buildup. Thermal expansion compounds existing issues rather than creating them from scratch. Homes in Perth, Adelaide, and inland Queensland where summer surface temperatures on aluminium frames can exceed 60 degrees Celsius see this most frequently.
Powder coating failure adds another layer. When the factory-applied finish cracks, peels, or blisters from prolonged UV exposure, two things happen simultaneously. First, flakes of loose coating accumulate in the track channel as physical obstructions. Second, the newly exposed aluminium oxidises faster without its protective barrier, roughening the surface underneath. Aluminum window frame repair in this scenario involves stripping the failed coating, treating the oxidation, and recoating — a job that ranges from moderate DIY to professional depending on severity.
How Structural Movement Warps Aluminium Frames
Every house moves. Foundations settle, timber subfloors shift with moisture cycles, and concrete slabs can heave slightly over decades. Timber window frames accommodate minor structural movement because wood flexes. uPVC has some give as well. Aluminium does not. It is rigid, and even a shift of one or two millimetres in the surrounding wall structure can throw the frame out of square enough to create binding along the full length of the track.
The symptom is distinctive: the window sticks progressively more from one end to the other, rather than catching at a single point. You might also notice a gap appearing at one corner of the frame while the opposite corner looks compressed. This kind of misalignment cannot be fixed with lubrication or track cleaning — it requires physical realignment of the frame using shims, or in severe cases, professional reinstallation. The difference between a track-level repair and a structural one shapes whether your next step is a fifteen-minute job or a call to a qualified installer.
Quick Fixes You Can Do in Under 15 Minutes
If your diagnosis points to debris buildup, dry friction, or a paint seal rather than a broken roller or warped frame, you are likely looking at a fix that takes less than a quarter of an hour. These solutions require nothing more than basic household items and a bit of patience. The goal is to get your window moving again without introducing new problems in the process.
Clearing Debris from the Track Channel
Compacted dirt is the single most common reason an aluminium sliding window resists movement. Dust, sand, pet hair, and insect remains accumulate in the track channel over months, eventually forming a dense layer that physically blocks the rollers from travelling freely. Australian homes near building sites, unsealed roads, or sandy coastal areas are especially prone to rapid buildup.
Here is how to fix a sliding window track clogged with debris:
- Use a vacuum cleaner with a crevice nozzle to remove loose dirt from the full length of the track. Work slowly so the suction picks up fine particles settled in the channel corners.
- Take a stiff-bristled brush — an old toothbrush works well for narrow tracks — and scrub along the channel to dislodge any compacted grime the vacuum missed. Focus on the corners and the edges where the rollers ride.
- Wipe the track with a damp cloth to collect remaining residue. Avoid flooding the track with water, as excess moisture can pool behind weatherseals and promote oxidation.
- Dry the channel thoroughly with a clean towel before attempting to slide the window.
In many cases, this alone is enough to slide open a window that has been resisting for weeks. If the sash moves more freely but still feels gritty, the next step — proper lubrication — will smooth things out.
Choosing and Applying the Right Lubricant
Not all lubricants suit aluminium window tracks. WD-40 is the product most people grab first, but it is a poor long-term choice for this application. WD-40 is primarily a water displacer and solvent rather than a true lubricant. It evaporates quickly and leaves behind an oily residue that attracts dust and grime, effectively recreating the debris problem you just solved. Oil-based products share the same drawback — they act as a magnet for airborne particles.
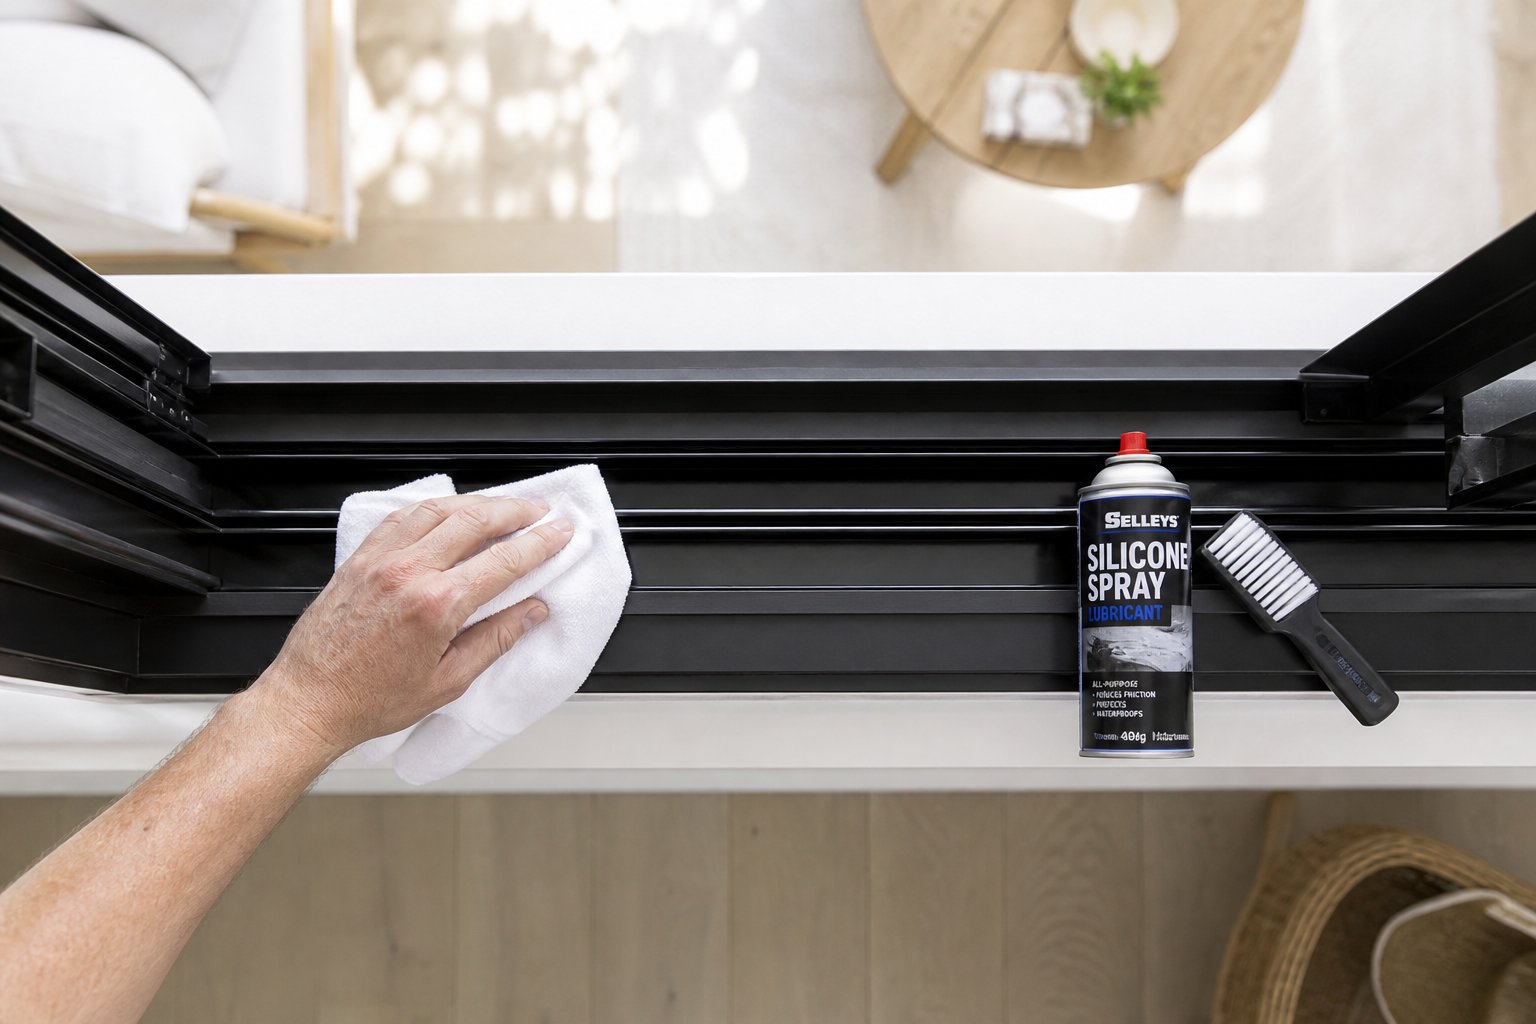
Silicone-based spray is the better option for aluminium sliding windows. It provides long-lasting lubrication without attracting dust, and it will not degrade the rubber weatherseals that keep your window airtight and water-resistant. This matters in every Australian climate zone, from Darwin’s humidity to Melbourne’s driving rain.
Apply it correctly and you will notice how much easier it is to make windows slide:
- Spray the silicone lubricant onto a clean cloth rather than directly into the track. Direct spraying causes overspray on glass that leaves smears and can be surprisingly difficult to remove.
- Wipe the lubricated cloth along the full length of both track channels, ensuring an even coat. Pay extra attention to any areas where you noticed oxidation or roughness during your earlier inspection.
- Apply a light second coat to the top track as well — this is where the sash header rides and where friction often goes unnoticed.
- Slide the window back and forth several times to distribute the silicone evenly across the roller path.
A single application of quality silicone spray typically lasts three to six months depending on your environment. Homes in dusty inland areas or near busy roads may need reapplication quarterly.
Breaking a Paint or Sealant Seal Safely
If your window has zero movement — not stiff, not gritty, but completely locked in place — and you can see a thin line of paint or sealant bridging the sash to the frame, the issue is a chemical bond rather than a mechanical one. This is common after renovations, repaints, or where a builder has applied sealant too liberally around the frame perimeter.
Forcing a paint-bonded window with brute strength is dangerous. The glass panel can crack, the aluminium frame can bend permanently, and you risk injuring yourself. Instead, follow this approach to how to open a sliding window sealed by paint:
- Run a sharp utility knife along the joint line between the sash and the frame. Score firmly but steadily, keeping the blade flat against the frame edge to avoid gouging the aluminium. You may need two or three passes to cut through thicker paint layers.
- Repeat the scoring process along the top edge and any vertical edges where the sash meets the fixed frame or the opposite sash panel.
- Once all bonded edges are scored, apply gentle sideways pressure to the sash using both hands placed at mid-height. Do not push from one corner — even pressure prevents the frame from racking.
- If the sash remains stuck after scoring, tap a thin putty knife into the scored line at several points to physically separate the paint film. Work gradually around the perimeter rather than prying aggressively at one spot.
- Once the sash breaks free, slide it open fully and clean any remaining paint fragments from the track before they compact into new obstructions.
A word on safety: always wear eye protection when scoring dried paint, as small chips can flick upward. If the glass panel shows any existing cracks or chips, stop and call a professional — applying pressure to a compromised pane risks it shattering. Never use a hammer or mallet directly on the glass or frame edge.
These three techniques resolve the majority of surface-level issues that prevent an aluminium window from sliding. But if the sash still resists after a clean track, fresh lubrication, and no paint seal, the problem runs deeper — worn rollers or a damaged track that requires the sash to come out of the frame entirely.
Intermediate Repairs for Rollers and Tracks
A clean track and fresh silicone will not help if the rollers themselves are shot or the track is physically deformed. These problems require you to remove the sash, inspect the components up close, and either replace or repair what has failed. Set aside 30 to 60 minutes, gather the tools below, and work on a calm day with someone nearby to help manage the weight of the glass panel.
- Phillips and flat-head screwdrivers
- Tape measure
- Pliers or needle-nose pliers
- Small block of hardwood (approximately 50 mm x 100 mm)
- Rubber mallet or standard hammer
- Soft drop cloth or old towel
- Replacement rollers (if needed — measure before purchasing)
- Plastic shims in assorted thicknesses
How to Remove the Sliding Sash Safely
Understanding how to remove sliding windows without damage is the foundation of any window slider repair. Most aluminium sliding sashes are held in place by gravity and the frame’s upper channel rather than by screws or clips. The removal process is straightforward, but carelessness with a heavy glass panel can turn a minor repair into an expensive disaster.
- Unlock the sash and slide it to the centre of the frame where you have the most working room.
- Check the head (top) channel for anti-lift blocks — small plastic or metal pieces screwed into the upper track that prevent the sash from being lifted out during normal use. If present, remove the screws holding them in place and set them aside.
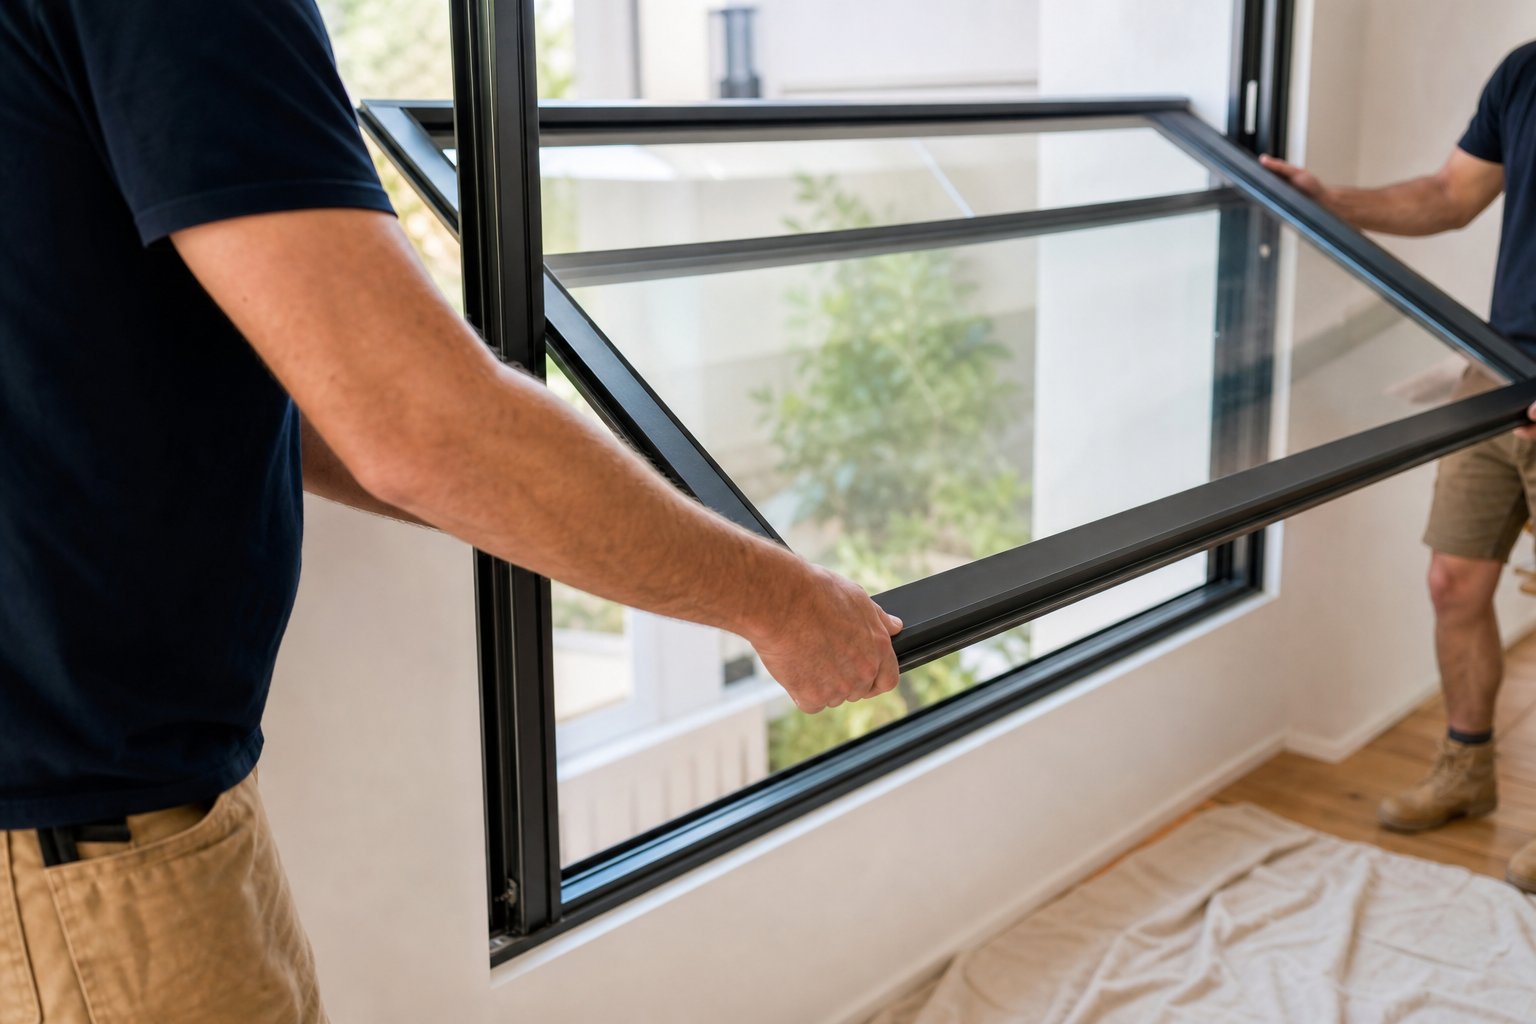
- Grip the sash firmly on both vertical edges. Lift it straight up into the head channel. Most frames provide 10 to 15 mm of clearance above the sash for exactly this purpose.
- Once the bottom rail clears the lower track, swing the base of the sash toward you and angle it out of the frame.
- Lower the sash carefully and rest it on a drop cloth or towel laid on the floor, leaning it against a wall at a gentle angle. Never lay a glass panel flat on a hard surface.
A critical safety point: aluminium sliding sashes with double glazing can weigh 20 kg or more. Have a second person support one side during removal, especially for wider panels. If the glass shows any cracks, do not attempt removal yourself — the pane could fail under the flex of being angled out. Call a glazier.
Replacing Worn or Damaged Rollers
With the sash out of the frame and resting securely, flip it so you can access the bottom rail. The roller housings sit in routed cavities at each end of the lower rail, typically held by one or two screws. This is where you repair a sliding window at its most common failure point.
Inspect each roller carefully. A healthy roller spins freely on its axle with minimal resistance. Here is what failure looks like:
- Flat spots: The wheel no longer rolls smoothly — you can feel a rhythmic bump as you rotate it with your finger. This causes the juddering symptom during operation.
- Cracked or chipped wheels: Visible fractures in nylon rollers or pitting on steel ones. The wheel may wobble on its axle.
- Seized bearings: The wheel does not rotate at all. Corrosion or compacted debris has locked the internal bearing solid, meaning the roller drags rather than rolls.
To replace rollers, remove the screws or clips securing the housing and pull the assembly out from the bottom of the rail. Before buying replacements, measure three dimensions: the wheel diameter, the housing width, and the overall length of the carriage. Take the old roller to your local hardware store or window supplier for an exact match — rollers are not universal, and even a millimetre difference in housing width means the new part will not seat properly.
Aluminium windows use two broad categories of roller carriage. Adjustable rollers include a screw mechanism that raises or lowers the wheel height, letting you fine-tune the sash position relative to the track and the locking hardware. Non-adjustable carriages are fixed height — simpler and cheaper, but they offer no compensation for minor track wear or frame settling over time. If your original rollers are non-adjustable and you have been fighting alignment issues, upgrading to adjustable replacements during this repair is worthwhile. They cost only marginally more and give you a tuning option for years to come.
Seat the new roller housing into the cavity, secure the screws, and repeat on the opposite end.
Straightening and Repairing Bent Tracks
A bent or dented track creates a physical obstacle that no roller — old or new — can pass smoothly. Minor bends from impact (a furniture leg, a dropped tool) can often be corrected in place without removing the track itself.
Place your hardwood block flat against the bent section of the track channel, positioned so it covers the deformed area evenly. Tap the block firmly with a rubber mallet or hammer, applying force gradually. The wood distributes the impact across a broader area rather than concentrating it on a single point, which prevents creating a new dent while straightening the old one. Work in small increments, checking your progress between strikes by running your finger along the channel. You are aiming for a smooth, consistent profile — perfection is not required, just the removal of any lip or bump that catches the roller.
Window track repair has limits, though. If the track shows multiple dents along its length, deep corrosion pitting, or a section that has been bent and re-bent repeatedly, the metal is likely work-hardened and brittle. Continuing to hammer it risks cracking the extrusion. At this stage, track replacement becomes the only reliable path forward — a job that typically means removing the entire frame assembly.
For minor frame misalignment caused by settling (the sash binds progressively tighter toward one end), plastic shims inserted between the frame and the surrounding wall structure can bring things back into square. Loosen the frame fixings at the tight corner, slide shims behind the jamb until the gap is even across the full height, then retighten. Recheck sash operation before putting tools away.
Knowing how to put a sliding window back in frame from inside is simply the removal process in reverse: angle the base of the sash into the lower track, push the top up into the head channel, then lower it onto the rollers. Refit any anti-lift blocks you removed earlier and test the slide across the full travel. If you installed adjustable rollers, now is the time to fine-tune the height — turn the adjustment screw with a Phillips head until the sash sits level and the lock engages cleanly.
These intermediate steps let you repair sliding windows at the component level without calling a tradesperson for every issue. Still, not every situation is DIY-appropriate. Climate, location, and the age of your window system all affect how quickly certain failures return — and how aggressively you should schedule maintenance to stay ahead of them.
How Your Climate Accelerates Sliding Window Problems
Where you live shapes how your aluminium windows fail. A home in Cairns faces completely different stresses than one in Hobart or Alice Springs, and the maintenance schedule that keeps windows moving in one climate zone will fall short in another. Understanding your local conditions helps you target maintenance where it actually matters — and avoid throwing effort at problems your environment does not create.
Coastal and Salt Air Environments
Salt is the single most aggressive enemy of sliding aluminum windows in exposed locations. Breaking waves send chloride-laden aerosols inland, and significant airborne chloride deposits have been recorded more than 80 kilometres from the shoreline. For homes along the Gold Coast, Sydney’s eastern suburbs, Perth’s coastal belt, or anywhere within direct sight of the ocean, salt exposure is constant rather than occasional.
Here is what salt air does to your window tracks and hardware:
- Accelerated pitting corrosion: Chloride ions overwhelm aluminium’s natural oxide layer within weeks on unfinished or damaged surfaces, creating rough pits that physically catch the rollers as they pass.
- Salt crystal accumulation: As moisture evaporates from the track channel, it leaves behind crystallised salt deposits. These abrasive crystals grind against rollers and track surfaces, accelerating wear on both components simultaneously.
- Seal and hardware degradation: Rubber weatherseals harden faster in saline environments, while steel fasteners and roller axles corrode at rates several times higher than inland equivalents.
Sliding bathroom windows in coastal homes cop an especially harsh combination — internal humidity from showers pushing condensation into the track at the same time external salt air attacks the frame’s outer surfaces. Stainless steel rollers become essential rather than optional in these locations, as standard steel rollers can rust quickly where condensation collects in tracks, eventually seizing entirely.
Hot, Cold, and Humid Climate Challenges
Salt is not the only environmental force working against your window’s operation. Each climate type introduces its own primary failure pathway.
Humid subtropical zones — Brisbane, the NSW mid-north coast, and tropical Queensland — create conditions where moisture never fully leaves the track channel. Condensation builds on cooler aluminium surfaces overnight, promoting mould growth that forms a tacky, organic residue across the track. This residue increases rolling friction gradually, making the window hard to open and close in a way that creeps up so slowly many homeowners do not notice until the sash barely moves. Constant moisture also accelerates degradation of window seals, meaning even a sash that slides can lose its weather tightness over time.
Hot and arid climates — inland NSW, South Australia, and much of Western Australia beyond the coast — bring a different set of problems. Fine dust and sand accumulate in tracks far faster than in sheltered urban environments. A single dust storm can deposit enough abrasive material in the track channel to make a window feel like it is grinding through gravel. Thermal cycling adds mechanical stress: daily swings of 20 degrees or more cause repeated expansion and contraction of the aluminium frame and track, which fatigues roller bearings and loosens housing screws over months and years.
Cold climates — Tasmania, highland Victoria, the ACT, and alpine regions — introduce ice as a binding agent. Overnight condensation or windblown rain that settles in the track channel freezes on contact with the cold aluminium surface, physically locking the sash in place. The danger here is not just immobility — it is the homeowner who forces the window open against ice and destroys the roller wheels in the process. A seized roller from ice damage looks identical to one from corrosion, but it happens in a single aggressive attempt rather than over months of gradual wear.
Adjusting Maintenance Frequency to Your Climate
A maintenance schedule built for Melbourne’s temperate conditions will leave a Townsville home with seized tracks within a year. The table below maps climate type to its dominant failure mode and the minimum maintenance interval needed to stay ahead of problems:
| Climate Type | Australian Examples | Primary Failure Mode | Recommended Maintenance Interval |
|---|---|---|---|
| Coastal (salt air exposure) | Gold Coast, Wollongong, Fremantle, Sunshine Coast | Pitting corrosion and salt crystal abrasion in tracks | Every 4–6 weeks (rinse and wipe tracks) |
| Humid subtropical | Brisbane, Cairns, Darwin, Coffs Harbour | Mould buildup creating sticky residue; seal degradation | Every 6–8 weeks (clean and dry tracks; inspect seals) |
| Hot and arid | Alice Springs, Broken Hill, inland WA, Adelaide in summer | Dust/sand compaction; thermal cycling stress on rollers | Every 4–6 weeks during hot months (vacuum tracks; check roller tightness) |
| Temperate | Melbourne, Sydney (western suburbs), Canberra lowlands | General debris accumulation; moderate oxidation | Every 3 months (standard clean and lubricate) |
| Cold / alpine | Hobart, highland VIC, Snowy Mountains, ACT in winter | Ice formation binding sash; condensation-driven corrosion | Monthly during winter (dry tracks before nightfall; lubricate with silicone) |
These intervals represent the minimum to prevent progressive damage. If you are already noticing early symptoms — a window that is slightly harder to move than it was a month ago, a faint grinding sound, or visible residue in the track — your climate has already outpaced your current routine. Bringing the schedule forward by a few weeks and sticking to it consistently is far cheaper than replacing rollers or tracks once they have been ground down beyond use.
Climate dictates which failure mode hits first, but it also influences the decision about whether a repair makes long-term economic sense — or whether the window system itself has reached a point where replacement is the smarter investment.
DIY or Professional Help and When to Replace
Knowing how to repair a sliding window is one thing. Knowing whether you should is another. Some aluminium window repair jobs are straightforward enough for anyone with a screwdriver and a free half-hour. Others involve structural risk, heavy glass panels, or warranty implications that make professional involvement the only sensible path. Getting this call wrong can cost more than the repair itself — either through injury, further damage, or voiding weathersealing guarantees on relatively new installations.
Cost and Time Expectations for DIY Repairs
The table below lays out common sliding window repair scenarios, what they typically cost in parts, how long they take, and whether they fall within comfortable DIY territory or warrant calling a tradesperson.
| Issue | Estimated Parts Cost (AUD) | Time Required | Difficulty | DIY or Professional? |
|---|---|---|---|---|
| Debris removal and track cleaning | $0 (household items) | 5–15 minutes | Easy | Always DIY |
| Silicone lubrication | $10–$20 | 5–10 minutes | Easy | Always DIY |
| Breaking a paint or sealant seal | $0–$10 | 10–15 minutes | Easy | DIY with care |
| Roller replacement | $30–$80 per pair | 30–60 minutes | Moderate | DIY if comfortable removing sash |
| Minor track straightening | $0 (wood block and mallet) | 15–30 minutes | Moderate | DIY for isolated dents |
| Track replacement | $80–$200+ (supply only) | 2–4 hours | High | Professional recommended |
| Frame realignment (shims) | $10–$30 | 30–60 minutes | Moderate to high | DIY for minor shifts; professional for anything beyond 3 mm |
| Full frame removal and reinstallation | $300–$600+ (labour-intensive) | Half day | High | Professional only |
| Structural misalignment repair | Varies widely | Varies | Specialist | Professional only — involves building envelope |
For context, professional sliding glass window repair service calls in Australia typically range from $250 to $550 AUD including labour and standard parts. Proprietary aluminium roller assemblies can push parts costs alone to $100–$180 if your window uses non-standard hardware. Factor in the cost of a second visit if you damage something attempting a repair beyond your skill level — that often doubles the final bill compared to calling a professional from the start.
Safety Thresholds That Require a Professional
Cost and complexity aside, certain situations carry physical risk that makes DIY aluminium window repair genuinely dangerous. If any of the following apply, stop and call a qualified window technician or glazier:
- Windows above ground floor: Removing a sash at height introduces fall risk for both you and the glass panel. A dropped double-glazed sash from a first-floor window can weigh over 25 kg and shatter on impact below.
- Large or heavy panels: Any sash wider than 1.5 metres or heavier than 20 kg needs at minimum two people. Solo attempts risk the panel slipping during the lift-out and cracking under its own weight as it flexes.
- Cracked glass present: A pane with an existing crack or chip can fail catastrophically when subjected to the flexing that occurs during sash removal. The stress of angling the panel out of the frame concentrates force at the crack tip — exactly the condition that causes sudden fracture.
- Signs of structural damage: Visible wall cracking near the window frame, doors that have started sticking simultaneously, or uneven floor levels near the window all suggest foundation movement. This is building-envelope territory, not a window repair. Shimming the frame without addressing the underlying structural cause is a temporary patch at best.
- Warranty considerations: If your windows are less than 10 years old and still under manufacturer warranty, DIY disassembly may void coverage for weathersealing and hardware. Check your warranty documentation before removing any sash from a relatively new installation.
When Replacement Makes More Sense Than Repair
There comes a point where continued aluminium window repair stops being economical. Pouring money into a window system that will need another fix in twelve months is not maintenance — it is a slow-motion replacement paid for in frustrating instalments.
Replacement typically becomes the smarter investment when several of these conditions overlap:
- The window has single glazing with no option to retrofit insulated glass units. Energy loss through single-glazed aluminium frames is substantial, particularly in climate zones where NatHERS ratings demand higher thermal performance from the building envelope.
- The track has been straightened or repaired more than once. Work-hardened aluminium becomes brittle after repeated bending, and a track that has been hammered back into shape multiple times will crack or deform again far more easily. New rollers installed on a pitted or bent track typically fail within one to two years because the damaged surface grinds them down prematurely.
- Weatherseals have degraded beyond replacement. Older aluminium frames used seal profiles that are no longer manufactured. If aftermarket seals do not fit the original channel, air and water infiltration cannot be resolved without replacing the entire frame.
- The frame shows widespread oxidation or galvanic corrosion damage. Localised oxidation can be treated and recoated, but when pitting extends across multiple sections of the track and frame, the structural integrity of the extrusion is compromised.
- Cumulative repair costs approach 50 to 60 percent of new window supply and installation. At that threshold, you are paying nearly the same amount for an aging system with no warranty versus a new one with 10 or more years of coverage.
Older aluminium windows — particularly those installed before thermally broken frame technology became standard in Australia — often reach this crossover point around the 25- to 30-year mark. The frames may still look solid from the outside, but internally the rollers, seals, tracks, and protective coatings have all exceeded their service life.
Whether your outcome is a weekend repair or a decision to invest in new windows, the factor that determines how soon you face this choice again is maintenance. A structured preventive schedule — tailored to your specific climate zone and window system — is what separates homeowners who fix their windows once from those who fight the same battle every season.

Preventive Maintenance Schedule to Keep Windows Sliding
Fixing a stuck window once is satisfying. Fixing the same window every six months is not. The difference between those two outcomes comes down to a structured maintenance routine that catches early-stage failures before they become the grinding, binding problems covered in previous sections. A window that slides freely today will keep doing so for years — provided you give it ten minutes of attention at the right intervals.
Monthly and Quarterly Maintenance Tasks
Frequent, lightweight checks prevent small issues from compounding into expensive repairs. The time investment is minimal — five minutes monthly, fifteen to twenty minutes quarterly — but the payoff in uninterrupted window operation is significant.
- Monthly — Visual track inspection: Crouch down and look along both track channels for visible debris, leaf matter, or insect buildup. Run your finger along the channel to feel for grit or sticky residue. If anything is present, vacuum the track with a crevice nozzle and wipe clean with a dry cloth.
- Monthly — Operation check: Slide each window open and closed once through its full travel. Note any new resistance, unusual noise, or points where the sash hesitates. A window that felt smooth last month but now has a slight catch is telling you something has changed — and catching it now means a two-minute clean rather than a roller replacement later.
- Quarterly — Full track cleaning: Vacuum both channels thoroughly, scrub with a stiff-bristled brush to dislodge compacted material from corners, and wipe with a damp cloth. Dry completely before proceeding.
- Quarterly — Silicone lubrication: Apply a light coat of silicone-based spray via a cloth to both the lower and upper track channels. This is how to make windows slide easier without attracting the dust that oil-based products draw in. Work the sash back and forth to distribute the lubricant evenly.
- Quarterly — Roller performance check: With the window sliding, listen and feel for juddering, flat spots, or uneven resistance. A window that slides smoothly at the start of its travel but catches toward one end signals a roller beginning to wear unevenly or a localised track issue developing.
- Quarterly — Weatherseal inspection: Run your eye along the perimeter seals where the sash meets the frame. Look for cracking, compression set (the seal stays flattened rather than springing back), or sections pulling away from the channel. Degraded seals reduce energy efficiency and allow water and dust into the track channel, accelerating every other failure mode.
Annual Deep Maintenance Checklist
Once a year — ideally in autumn before winter rains or summer dust storms compound any existing issues — schedule a deeper service that requires removing the sash.
- Sash removal and roller cleaning: Lift each sliding sash out of the frame following the process described in the intermediate repairs section. With the sash out, spin each roller by hand. It should rotate freely with no catching or resistance. Clean any compacted debris from around the wheel and axle using a stiff brush and a small amount of silicone spray directly on the bearing.
- Track condition assessment: With the sash removed, inspect the full length of each track at eye level. Look for developing dents, oxidation roughness, or pitting that was hidden beneath the rollers during quarterly checks. Early-stage oxidation — a slightly chalky feel rather than visible white powder — is your signal to apply a protective wax or silicone-based sealant to the track surface before the damage progresses.
- Frame alignment check: Measure the diagonal distances within the frame opening (corner to corner both ways). If the measurements differ by more than 2–3 mm, the frame has shifted and may need shimming. Small shifts caught annually are simple corrections; shifts left unaddressed for years become professional-level rebuilds.
- Hardware tightening: Check all visible screws on the roller housings, lock mechanisms, and anti-lift blocks. Thermal cycling and vibration loosen fasteners gradually over twelve months. A quick tighten prevents rattling, keeps the window slide aligned, and ensures locks engage cleanly.
Homes that follow this annual routine consistently report window slides that remain smooth for 15 to 20 years before any component replacement is needed. Skip it, and rollers, tracks, and seals typically begin failing around the 8- to 10-year mark — particularly in coastal or high-dust environments where contaminants accelerate wear between services.
How Quality Track Design Reduces Long-Term Issues
Maintenance frequency is not purely about homeowner discipline. The engineering quality of the window system itself determines how quickly problems develop between services. Poorly designed tracks with shallow channels accumulate debris faster, cheap roller bearings seize sooner, and thin-walled extrusions dent from minimal impact. A well-engineered system gives you wider tolerances and more forgiving intervals between maintenance tasks.
Key design features that reduce long-term burden include precision-machined track profiles with deeper drainage channels, sealed roller bearings that resist contamination, and dual-track configurations that distribute sash weight more evenly — reducing point-loading stress on individual rollers. Adjustable roller carriages also extend service life by letting you compensate for minor track wear without replacing components.
Modern aluminium sliding window systems designed for the Australian market increasingly incorporate these features as standard. MEICHEN’s MA100 Sliding Window, for example, uses a precision-engineered dual-track configuration with quality roller assemblies designed to reduce the maintenance burden for homeowners and project builders. Systems built around these principles give you longer intervals between service tasks and more consistent window sliding performance across their lifespan — particularly valuable for multi-unit developments or harder-to-access installations like upper-storey balcony windows where frequent maintenance is impractical.
Investing in quality upfront does not eliminate maintenance, but it does shift the equation from reactive repairs to simple preventive care — and that is the difference between a window system that serves you for decades and one that fights you every few months.
Your Action Plan for a Smooth Sliding Window
Prevention keeps things running. But if you have landed on this page with a window that is already stuck, the path forward is clear — and it does not involve brute force or a random can of spray.
Your Three-Step Action Plan
Every aluminium sliding window problem resolves faster when you follow the diagnostic-first sequence rather than guessing at fixes:
- Identify the root cause. Use the symptom table from the diagnostic section to match what your window is doing — juddering, grinding, binding seasonally, or completely immovable — to the specific component or condition responsible. Skip this step and you waste time fixing the wrong thing.
- Apply the correct level of repair. Debris and dry tracks get a 15-minute clean and lubricate. Worn rollers and minor track damage get an intermediate repair with sash removal. Structural shifts, severe corrosion, or safety concerns get a professional call. Match the fix to the failure — nothing more, nothing less.
- Implement preventive maintenance. Tailor your schedule to your climate zone. Monthly visual checks, quarterly lubrication, and an annual deep service keep every component within its operating tolerance. This is what stops the problem from cycling back.
Stop treating symptoms. Diagnose the specific failure, fix that failure at the appropriate level, and maintain your window system on a schedule matched to your environment. That single shift in approach is the difference between solving the problem once and fighting it indefinitely.
One critical reminder: aluminium-specific issues demand aluminium-specific solutions. Oxidation requires surface treatment and protective recoating — not the sanding approach suited to timber. Thermal expansion binding needs tolerance adjustment, not the shaving or planing you would apply to a swollen wooden sash. Generic advice written for vinyl or timber frames often accelerates damage on aluminium systems rather than resolving it.
Choosing the Right Replacement Sliding Window
If your diagnostic outcome points toward sliding window replacement rather than repair — the track is beyond saving, seals are obsolete, or cumulative repair costs have crossed the economic threshold — the features you prioritise in a new system determine how many years pass before you face these issues again.
When evaluating how to replace a sliding window system that has reached end of life, focus on these engineering fundamentals:
- Track quality: Deep-channel, precision-machined tracks resist debris accumulation and provide consistent roller contact across the full travel length.
- Roller engineering: Sealed bearings, adjustable carriages, and corrosion-resistant materials extend service life dramatically in Australian conditions.
- Double glazing: Insulated glass units improve thermal performance, reduce condensation in the track channel, and meet current NatHERS requirements for energy efficiency.
- Application-specific design: Balcony windows need weather resistance and security hardware. Bathroom windows need ventilation options with privacy glass. A system that lets you configure locks, seals, and glass type to each opening delivers better long-term results than a one-size approach.
For homeowners, builders, and architects looking to fit aluminium windows as part of a broader project — whether a renovation, new build, or multi-unit development — choosing a system designed for project-based supply simplifies coordination. MEICHEN’s MA100 Sliding Window system offers configurable dual tracks, locks, seals, and glazing options suited to this kind of specification work, giving you a single product platform that adapts across different openings and applications rather than piecing together components from multiple sources.
Whether you are learning how to replace sliding windows across an entire home or simply replacing one failed unit, the decision criteria remain the same: track design, roller quality, seal integrity, and compliance with Australian standards. Get those right, pair them with the preventive maintenance schedule outlined above, and your next set of aluminium sliding windows will reward you with years of effortless operation.
Frequently Asked Questions About Aluminium Windows Not Sliding
1. Why is my aluminium sliding window so hard to open?
The most common reasons an aluminium sliding window becomes hard to open are compacted debris in the track channel, worn or seized rollers, oxidation buildup on the aluminium track surface, or thermal expansion during hot weather. A quick diagnostic check involves looking at how the window misbehaves: grinding noises suggest debris or oxidation, juddering indicates damaged rollers, and seasonal stiffness points to thermal expansion. Start by vacuuming the track and applying silicone-based lubricant. If the problem persists, the rollers likely need inspection or replacement, which involves removing the sash from the frame.
2. What is the best lubricant for aluminium window tracks?
Silicone-based spray is the best lubricant for aluminium window tracks. Unlike WD-40 or oil-based products, silicone spray does not attract dust or degrade rubber weatherseals. Apply it by spraying onto a clean cloth first, then wiping along the full length of both the upper and lower track channels. Avoid spraying directly into the track to prevent overspray on glass. A single application typically lasts three to six months in temperate climates, though homes in dusty inland areas or coastal environments may need reapplication every four to six weeks.
3. How do I know if my sliding window rollers need replacing?
Check for these signs of roller failure: the window judders or jerks during movement (flat-spotted wheels), the roller does not spin freely when you rotate it by hand (seized bearing), or you can see visible cracks, chips, or corrosion on the wheel. Healthy rollers spin smoothly with minimal resistance. Most aluminium window rollers last 10 to 20 years depending on usage and environmental conditions, but coastal homes or those in high-dust areas often see accelerated wear. Replacement involves removing the sash, unscrewing the roller housing from the bottom rail, and fitting a correctly sized new assembly.
4. Can I fix a stuck aluminium window myself or do I need a professional?
It depends on the root cause. Debris removal, lubrication, and breaking a paint seal are straightforward DIY tasks taking under 15 minutes. Roller replacement is a moderate DIY job if you are comfortable lifting the sash out of the frame, typically taking 30 to 60 minutes. However, call a professional for windows above ground floor, panels heavier than 20 kg, any window with cracked glass, track replacement requiring full frame removal, or structural misalignment caused by house settling. Also consider professional help if your windows are under warranty, as DIY disassembly may void coverage.
5. How often should I maintain my aluminium sliding windows to prevent them sticking?
Maintenance frequency depends on your climate zone. Coastal homes in areas like the Gold Coast or Fremantle need track cleaning every four to six weeks due to salt crystal accumulation. Humid subtropical regions like Brisbane require cleaning every six to eight weeks to prevent mould buildup. Temperate areas like Melbourne can manage with quarterly cleaning and lubrication. All homes should perform an annual deep service that includes sash removal, roller inspection, track condition assessment, and hardware tightening. Consistent preventive maintenance extends window lifespan to 15-20 years before component replacement is needed.
More Window & Door Guides