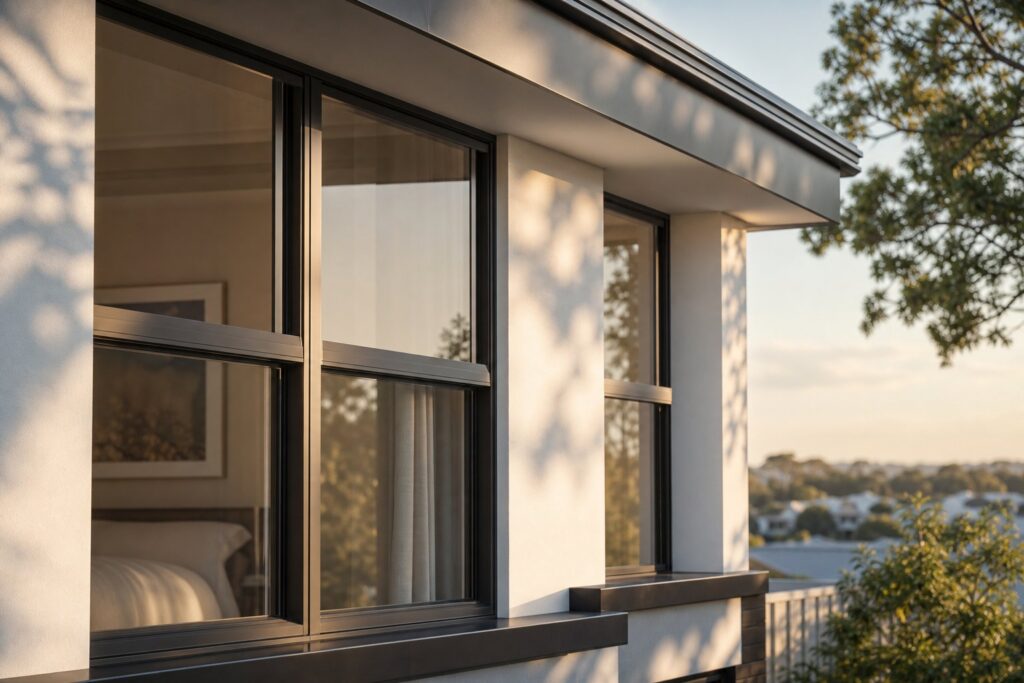
Why Aluminium Windows Rattle and Why Generic Fixes Fall Short
Most rattling window guides lump every frame material together, as though timber, uPVC, and aluminium all misbehave for the same reasons. They don’t. If you’ve tried stuffing foam tape into your aluminium sash and the window rattling returned within a few weeks, that generic advice is exactly why. To properly fix rattling aluminium windows, you need solutions built around how aluminium actually behaves.
Why Aluminium Windows Deserve Their Own Repair Guide
A rattling window is easy to dismiss as a minor annoyance — especially when it only flares up on gusty nights. But with aluminium frames, the noise is telling you something more serious.
Rattling in aluminium windows is rarely just a noise issue. It almost always signals air infiltration, thermal energy loss, and seal degradation happening at the same time. Fixing the rattle fixes all three.
That overlap is precisely why this guide exists. From diagnostic methods and type-specific repairs to gasket replacement, environmental triggers, and preventive maintenance, every recommendation ahead applies specifically to aluminium systems — sliding, casement, awning, and louvre alike.
What Makes Aluminium Frames Different From Timber and uPVC
Aluminium conducts heat roughly 1,000 times more readily than uPVC. That thermal conductivity drives pronounced expansion and contraction cycles as temperatures shift between day and night or across seasons. Over months and years, these micro-movements gradually loosen hardware, open gaps in gaskets, and create the play that lets rattling windows keep you awake.
Timber swells and shrinks with moisture. uPVC creeps slowly under sustained load. Aluminium does neither — it responds almost instantly to temperature, and its dimensional changes stress specific components like friction stays, glazing beads, and locking keeps in ways the other materials simply don’t. Oxidation and corrosion compound the problem further, particularly in coastal parts of Australia where salt air accelerates hardware degradation.
So the motivation here is twofold: eliminate the noise and restore the thermal and acoustic seal your aluminium windows were designed to provide. Every fix that follows targets both outcomes simultaneously — because with aluminium, they’re inseparable.
Aluminium-Specific Causes Behind Window Rattling
A loose window that chatters against its frame every time the wind picks up might seem like a single problem. It isn’t. Aluminium systems develop rattles through several distinct failure paths — and each one demands a different repair. Applying the wrong fix to the wrong cause is the fastest way to end up back where you started, wide awake at two in the morning listening to the same noise.
Here are the six primary aluminium-specific causes behind window rattling, each tied directly to the material properties and hardware designs unique to these frames:
- Thermal expansion and contraction — cyclical gap formation loosening hardware and seals
- Oxidation and corrosion — surface degradation weakening frame integrity and fixings
- Glazing bead loosening — clip or snap-fit beads losing compression against the glass
- Worn EPDM rubber gaskets — perished or compressed seals no longer cushioning the pane
- Hardware wear in friction stays and locking mechanisms — developing play in moving parts
- Fastener thread stripping — screws losing grip in soft aluminium profiles over repeated adjustment cycles
Understanding which of these is driving your particular rattle determines everything that follows. Misdiagnose the cause, and the rattling comes back — often worse than before because the real culprit kept degrading while you were chasing the wrong one.
Thermal Expansion and How It Loosens Aluminium Components
Aluminium’s thermal conductivity sits at around 205 W/m·K — roughly 1,000 times higher than uPVC and several hundred times higher than timber. That conductivity means aluminium frames respond to temperature changes almost immediately, expanding in summer heat and contracting through cold winter nights. The dimensional shifts are small in absolute terms (a one-metre aluminium section expands approximately 0.023 mm per degree Celsius), but over a full frame perimeter across a 30- to 40-degree seasonal temperature swing, the cumulative movement becomes significant.
This constant cycling doesn’t just open temporary gaps. It works on every mechanical connection in the frame. Screw fixings gradually lose torque. Friction stay pivot points develop micro-play. Glazing beads that were snug at installation slowly back off their channels. Over several years of Australian summers and winters, these tiny incremental loosening events compound — and eventually, a window that sealed perfectly on day one becomes a window loose enough to vibrate audibly whenever a breeze hits.
The effect is most pronounced on dark-coloured aluminium frames, which absorb more solar radiation and experience greater temperature extremes than lighter finishes. North- and west-facing elevations cop the worst of it, particularly in regions like Western Sydney or inland Queensland where daytime summer temperatures regularly exceed 40°C before dropping sharply overnight.
Corrosion and Oxidation in Aluminium Frames
Aluminium forms a natural oxide layer almost instantly when exposed to air, and under normal conditions that layer provides reliable self-protection. But “normal conditions” has limits. Coastal properties across much of Australia — from the Gold Coast down through Sydney’s Northern Beaches to the Mornington Peninsula — sit within the salt-spray zone where airborne chloride ions attack that protective oxide layer aggressively. Significant chloride deposits have been found more than 80 kilometres from the shore, meaning you don’t need an ocean view to have a salt-corrosion problem.
Pitting corrosion is the first visible sign. It appears as small white or grey spots on the frame surface, often concentrated around screw heads, drainage slots, and anywhere moisture pools. Left unchecked, pitting spreads beneath powder-coated or anodised finishes and weakens the aluminium at critical fixing points. Hardware screws lose their bite in corroded profiles, locking keeps no longer pull tight against their strikes, and the aluminium window frame loose enough to rattle has often been corroding quietly for years before the noise starts.
Galvanic corrosion compounds the issue. When dissimilar metals — stainless steel screws in aluminium profiles, or steel reinforcement plates behind hardware — sit in contact with moisture and salt, an electrochemical reaction accelerates degradation at the junction. In humid coastal and tropical environments across Northern Queensland and the Northern Territory, this process runs year-round.
Hardware Wear in Friction Stays and Locking Mechanisms
Aluminium window hardware is engineered for thousands of operating cycles, but it doesn’t last forever. Friction stays — the scissor-like arms that hold casement and awning sashes open — rely on controlled resistance at their pivot points. As those pivots wear, the sash develops lateral and vertical play within the outer frame. Even a fraction of a millimetre of slack is enough for wind pressure to set the sash vibrating.
Espagnolette locks, the multi-point locking systems common on modern casement windows, use a rotating spindle to drive locking cams into keeper strikes around the sash perimeter. Wear in the spindle mechanism, or keeper strikes that have shifted due to thermal cycling, reduces compression between the sash and frame. The result is a loose window that no longer pulls firmly against its gaskets when locked.
Cockspur handles on older aluminium windows are even more susceptible. These single-point latches provide compression at one location only, so any wear or misalignment leaves the rest of the sash free to move. Shoot-bolt mechanisms in taller casement sashes can also develop play, particularly at the top bolt where gravity and repeated slamming take their toll. And pressure-adjustment screws — the small grub screws found in some aluminium friction stay systems — slowly back out under vibration if not periodically checked and re-tightened.
Glazing beads present a separate but related failure mode. In aluminium systems, the glass pane sits in the sash frame and is held in place by snap-fit or screw-fixed aluminium beads. Between the glass and the bead sits an EPDM rubber gasket that cushions the pane and prevents vibration. When that gasket compresses permanently, hardens from UV exposure, or cracks from age, the glass gains room to move within the sash. The pane itself becomes the rattle source — buzzing or tapping against the bead with every gust.
Each of these causes produces a subtly different sound and responds to a different repair. The thermal expansion issue creates intermittent rattling that worsens in extreme weather. Corrosion-driven looseness tends to be progressive and location-specific. Hardware wear produces rattles tied to sash movement or wind loading. And glazing gasket failure generates a higher-pitched vibration centred on the glass. Telling them apart is the first step toward a lasting fix — and that diagnostic process is exactly where the next section picks up.
How to Diagnose the Exact Source of Rattling
Knowing that six different causes can trigger rattling in aluminium windows is useful — but standing in front of a noisy window at midnight, you need something more practical. You need a way to pinpoint exactly where the movement is happening so you can target the right repair, not just throw fixes at the problem and hope one sticks.
Every rattle in an aluminium window originates from one of four locations. The glass pane is vibrating within the sash. The sash itself is shifting within the outer frame. A piece of hardware — a handle, a stay arm, a lock keep — is loose and chattering. Or the entire frame assembly is moving against the wall it’s fixed to. Each source produces a different sound, responds to different pressure, and calls for a completely different repair. Here’s how to isolate yours.
Is the Glass Pane or the Sash Rattling
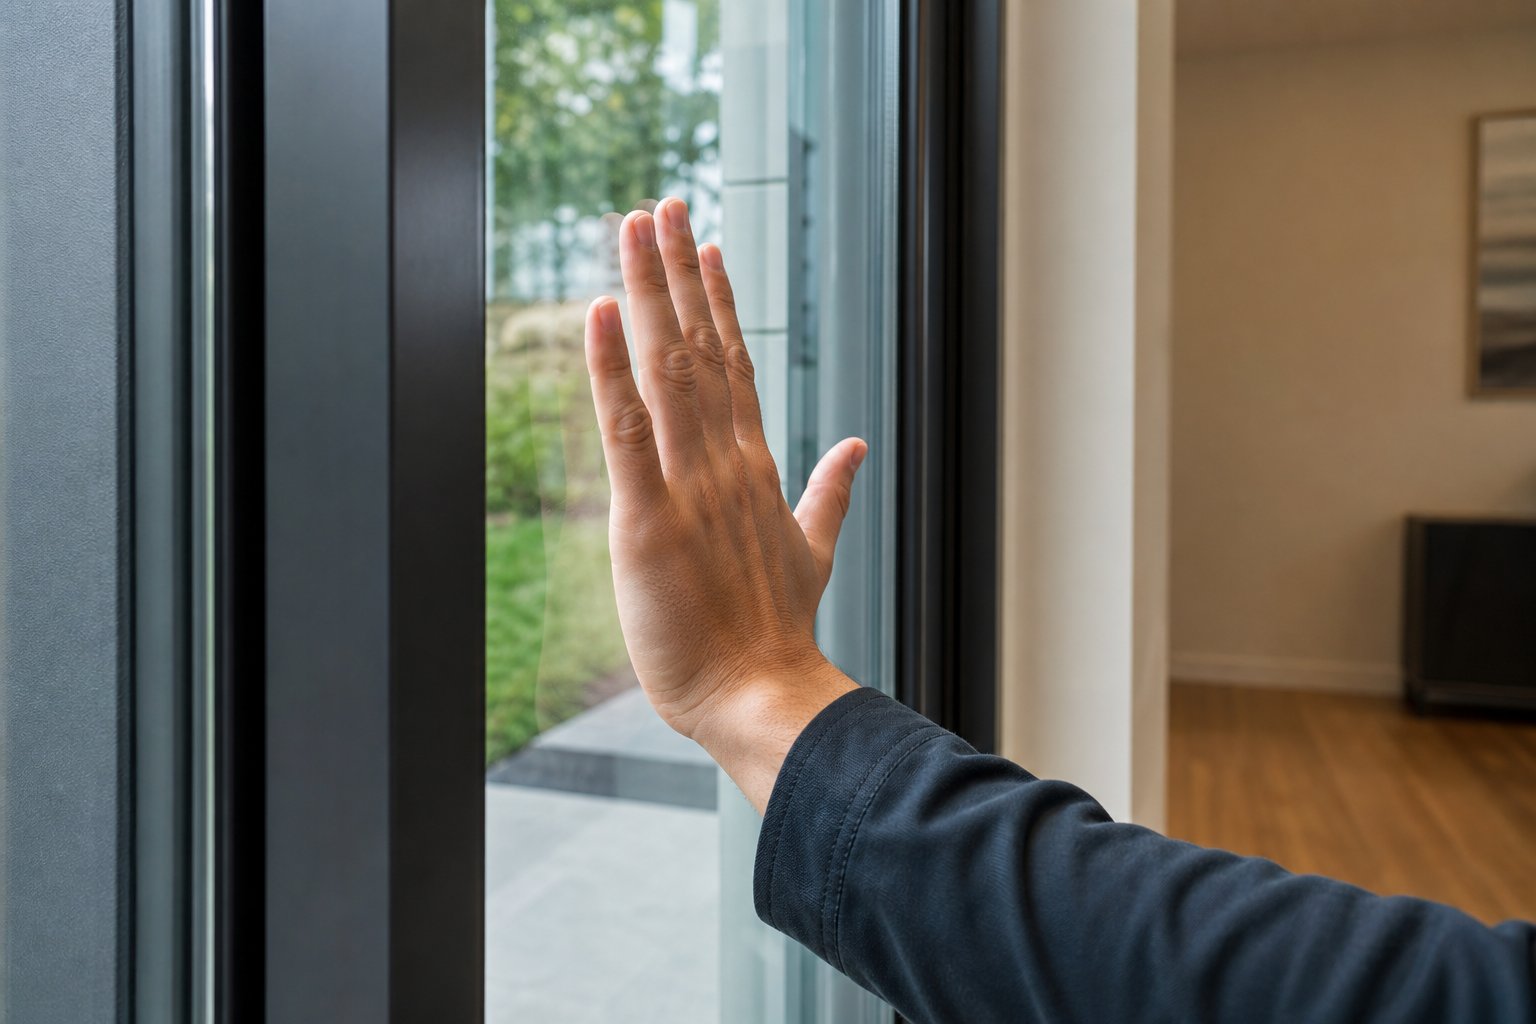
Start at the glass. Place your palm flat against the centre of the pane and press firmly while the window rattles — or simulate wind load by having someone push and release the glass gently from outside. If the noise stops or changes noticeably when you hold the glass, you’ve likely found a pane vibrating inside the sash. This points to degraded EPDM gaskets or loosened glazing beads, the higher-pitched buzz mentioned earlier.
If pressing the glass makes no difference, move to the sash. Grip the sash firmly at two diagonal corners — top left and bottom right, then switch — and try to rock it. Any movement you can feel between the sash and the outer frame tells you the window rattling originates at the sash-to-frame junction. Worn friction stays, weak espagnolette lock compression, or tired weatherstripping are the usual suspects here. On sliding aluminium windows, grab the sash and push it laterally toward the fixed pane; looseness in the interlock or worn pile strips will reveal themselves immediately.
Testing Hardware and Frame-to-Wall Connections
Hardware can rattle independently of both glass and sash. Friction stay arms with worn pivots will tap against the frame when wind buffets the window. Cockspur handles with loose fixing screws chatter on their mounting plates. Even espagnolette lock spindles develop enough internal play to produce a metallic ticking sound under vibration.
Test each hardware component individually. Hold the friction stay arm firmly — does the noise change? Grip the handle and lock mechanism — does the rattle dampen? Work your way around every fitting on the sash. This is a process of elimination, and patience matters more than tools at this stage.
Finally, check the frame-to-wall connection. Press firmly against the outer frame itself (not the sash) at each corner and along each jamb. If the frame flexes or shifts against the wall, the fixings anchoring it into the brickwork, timber stud, or steel lintel may have loosened. This is less common than the other three sources but more serious — it can indicate structural movement, corroded masonry anchors, or failed sealant around the frame perimeter. In older Australian homes, particularly weatherboard and fibro-clad houses where original aluminium windows were installed decades ago, frame-to-wall looseness often coincides with age-related settling.
Nighttime Vibration and Wind-Pressure Diagnosis
If you’ve ever wondered why you hear a vibrating sound outside your window at night but barely notice it during the day, the answer isn’t that the problem gets worse after dark. Your ears simply have less competing noise to filter it through. Ambient daytime sounds — traffic, appliances, conversation — mask rattles that become impossible to ignore once the house goes quiet.
Wind behaviour shifts at night too. Evening and early-morning winds tend to be gustier and more turbulent in many Australian coastal and suburban areas as land-surface temperatures drop and localised pressure patterns change. A window vibrating in wind doesn’t need a gale; even moderate gusts can exploit small gaps between the sash, frame, or glass and set the window chattering. Pressure differentials across a building amplify the effect — wind pushing on the windward face creates positive pressure, while the leeward side experiences suction. If your home has windows on opposite walls, one window may rattle from direct wind load while another rattles from the internal-to-external pressure difference pulling the sash outward.
To diagnose nighttime window rattling at night effectively, follow this sequence when conditions are still enough for you to work methodically:
- Close all interior doors to isolate the room and reduce pressure effects from other openings in the house.
- Press your palm flat against the glass pane and hold for 10–15 seconds. Note whether the rattle stops, changes pitch, or continues unaffected.
- Grip the sash at two diagonal corners and apply gentle inward pressure. If the rattle stops, the sash is moving within the outer frame.
- Hold each hardware component individually — friction stays, handles, lock keeps, shoot bolts — dampening one at a time to see which one silences the noise.
- Press firmly against the outer frame at each fixing point around the perimeter. Any flex or movement here indicates a frame-to-wall problem.
- Run a thin strip of paper around the sash-to-frame junction with the window locked. Pull gently — if the paper slides out freely at any point, there’s a gap large enough to allow air movement and vibration.
This six-step sequence moves from the simplest and most common source — glass pane vibration — through to the least common but most consequential: structural frame movement. Most homeowners find their answer within the first three steps. The paper test at the end doubles as a draught diagnostic, confirming the energy-efficiency connection: the same gap letting your window rattle is letting conditioned air escape.
With the rattle source identified, the logical next move is matching it to a targeted repair — and because aluminium sliding, casement, awning, and louvre windows each use different hardware, seals, and operating mechanisms, the right fix depends not just on where the rattle originates, but on which window type you’re working with.
Targeted Fixes for Every Aluminium Window Type
Sliding windows and casement windows share an aluminium frame, but almost nothing else. Their hardware differs. Their seal configurations differ. The way they fail — and therefore the way you fix rattling aluminium windows of each type — differs entirely. A roller adjustment that silences a sliding sash does nothing for an awning window with a worn winder mechanism, and tightening friction stays on a casement won’t help a louvre with loose blade clips. Getting the repair right starts with matching the fix to the window.
Fixing Rattling in Sliding Aluminium Windows
Sliding aluminium windows are the most common type in Australian homes, and their rattle sources are usually mechanical and track-related. Three components deserve immediate attention.
Worn pile weatherstripping is the first place to look. Those fuzzy mohair strips running along the tracks and interlocks cushion the sash against the frame and block air movement. Over years of use, pile strips flatten, fray, and lose their resilience. Once they can no longer maintain contact pressure, the sash gains enough lateral play to vibrate in the wind. Replacement pile strip is inexpensive and available from most hardware stores — pull the old strip from its channel with needle-nose pliers and press the new one in, matching the fin width to the existing channel groove.
If your window is squeaking when rolling up or down rather than rattling, the rollers are the likely culprit. Squeaking and grinding almost always indicate dry, misaligned, or worn-out rollers inside the bottom rail of the sash. Most aluminium sliding window rollers feature an adjustment screw accessible from the face or underside of the sash rail. Turning this screw raises or lowers the sash height within the track. A quarter-turn at a time is sufficient — over-adjustment lifts the sash out of interlock alignment and can actually introduce new rattles. If adjusting doesn’t help and the rollers feel gritty or jammed, full replacement is straightforward: remove the sash from the track, unscrew the roller housing, and fit a compatible replacement matched by diameter and housing width.
Interlock wear is the third common issue. The interlock — the overlapping profile where the sliding sash meets the fixed pane — relies on pile strips and precise sash height to maintain a snug fit. A sash sitting too low in the track (from collapsed rollers) or too high (from over-adjustment) won’t engage the interlock tightly, leaving room for the sash to vibrate against the fixed panel. Adjust the roller height until the interlock profiles mesh cleanly and the sash locks without forcing.
Casement and Awning Window Adjustments
Casement and awning windows hinge outward rather than sliding laterally, so their rattle sources centre on stays, hinges, and locking compression rather than tracks and rollers.
On casement windows, the friction stay is the critical component. These scissor-arm mechanisms hold the sash in position and control how far it opens. When friction stay pivot points wear, the sash develops play that allows it to shift within the frame under wind load. Most quality friction stays feature a tension-adjustment screw at the pivot — tightening it increases resistance and takes up slack. If the stays are too far gone, replacement is the better option; stays are rated by sash weight and stack height, so match the specification to your window.
Hinge pin wear creates similar symptoms. The pins that connect stay arms to the sash and frame can elongate their mounting holes over thousands of opening cycles, producing vertical play. You can sometimes tighten this by fitting slightly larger-diameter screws into the existing holes, but if the aluminium around the fixing point is wallowed out, you may need to re-tap the hole or use a backing plate to distribute load.
The espagnolette lock ties everything together. This multi-point system pulls the sash firmly against its perimeter gaskets when the handle is turned. If the lock cams no longer align with their keeper strikes — a common result of thermal cycling shifting the sash position relative to the frame — the sash won’t compress fully, and that gap becomes a rattle source. Loosen the keeper strikes, shift them until the cams engage with firm resistance, and re-tighten. You should feel the sash pull noticeably toward the frame as you operate the handle through its final throw.
For anyone wondering how to keep a top-hung sash from sliding down, the answer sits in those same friction stays. A casement or awning sash that creeps downward when opened has stays with insufficient friction tension. Tighten the adjustment screw incrementally — test after each turn — until the sash holds its position at any opening angle without drifting.
Awning windows share many of these components but add a winder mechanism into the mix. Chain winders or crank winders that develop internal play allow the sash to move even when the winder is fully closed. If the winder handle feels loose or the sash doesn’t pull tight against the frame at the end of its travel, the winder’s internal gears or chain links may be worn. Lubricate the mechanism first with a silicone-based spray — this alone can resolve squeaking sounds during operation. If the play persists, the winder unit typically needs replacement as a complete assembly. Hinge bracket loosening on awning sashes is also worth checking; the brackets take the full weight of the sash, and screws working loose in aluminium profiles under that load is a slow but common failure.
Louvre Window Blade Tension and Pivot Repairs
Louvre (or jalousie) windows present a unique rattle challenge. Each glass blade is held by clips at either end and rotates on a pivot pin. With a dozen or more blades per window, there are many potential rattle points.
The blade clips — small metal or plastic brackets that grip each glass louvre — lose tension over time. When a clip loosens, the blade it holds vibrates independently at a frequency determined by its length and the wind speed. The fix is methodical: work through each blade, checking clip tension by gently trying to rock the glass. Tighten any loose clips or replace cracked plastic clips with metal equivalents. Pivot pins that have worn their housing holes can sometimes be shimmed with a thin wrap of PTFE tape around the pin to restore a snug fit — a low-cost repair that eliminates play without replacing the entire louvre mechanism.
For persistent rattling across multiple blades, check the operating handle linkage that connects all blades. Wear in this linkage rod allows blades to sit at slightly different angles rather than sealing uniformly against each other, creating gaps for wind to exploit.
The table below maps common symptoms to their likely causes and the appropriate fix for each window type — a quick-reference summary you can consult before picking up a screwdriver.
| Window Type | Symptom | Likely Cause | Fix |
|---|---|---|---|
| Sliding | Lateral sash movement, vibration against fixed pane | Worn pile weatherstripping or interlock disengagement | Replace pile strips; adjust roller height to re-engage interlock |
| Sliding | Squeaking or grinding when opening/closing | Dry, misaligned, or worn rollers | Lubricate or replace rollers; adjust roller height screw |
| Casement | Sash shifts or taps within frame when windy | Worn friction stay pivots or espagnolette lock misalignment | Tighten friction stay tension screw; realign keeper strikes |
| Casement | Sash creeps downward when opened | Insufficient friction stay tension | Incrementally tighten the stay adjustment screw |
| Awning | Sash rattles despite winder being fully closed | Winder mechanism internal wear or hinge bracket loosening | Lubricate winder; replace if play persists; re-tighten hinge brackets |
| Awning | Squeaking during operation | Dry winder gears or perished gaskets | Apply silicone lubricant to winder and gasket contact points |
| Louvre | Individual blade buzzing or tapping | Loose blade clip or worn pivot pin | Tighten or replace blade clips; shim pivot pins with PTFE tape |
| Louvre | Multiple blades rattling, uneven closure | Worn operating linkage rod | Inspect and replace linkage rod or adjust blade angle uniformity |
Matching symptoms to window type gets you to the right repair faster — but actually performing these adjustments well requires knowing the tools involved, the correct sequence of steps, and the pitfalls specific to working with aluminium profiles. The procedural detail for the most common hands-on fixes comes next.
Step-by-Step Hardware Adjustments and Frame Repairs
Identifying the right repair for your window type is half the job. The other half is getting your hands on the correct tools and following a sequence that won’t damage the soft aluminium profiles you’re working with. The three repairs below cover the vast majority of rattling causes in aluminium windows — friction stay adjustment, glazing bead re-securing, and lock hardware tightening. Each procedure starts with what you’ll need and walks through the process in order.
Tools and Materials You Will Need
Before you start, gather everything in one place. Hunting for a missing Allen key halfway through an aluminium window friction stay adjustment means leaving a partially disassembled window exposed to the elements.
- Allen key set (metric, 2.5 mm to 6 mm — most friction stays and espagnolette locks use 4 mm)
- Phillips-head and flat-head screwdrivers (multiple sizes)
- Torx bit set (T15 and T20 are common in modern aluminium hardware)
- Plastic or nylon pry tool — for removing glazing beads without scratching the frame
- Glazing packers (assorted thicknesses from 1 mm to 6 mm)
- Silicone-based lubricant (never petroleum-based products like WD-40, which attract dust and degrade rubber seals)
- Rubber mallet — for tapping glazing beads back into position
- EPDM gasket or wedge gasket (if existing gaskets are damaged — match the cross-section profile to your frame)
- Masking tape and a marker — for labelling bead positions and keeper strike locations
- Safety glasses and gloves — essential whenever working near glass
A quick note on safety: if the window is above ground level, work from inside wherever possible. Leaning out of an upper-storey opening to adjust external hardware is a serious fall risk. For anything you can’t safely reach from inside, engage a professional or use appropriate scaffolding.
Adjusting Friction Stays and Pressure Screws
This is the single most effective repair for how to stop windows from rattling on casement and awning types. Friction stays control sash position and compression, and even a small amount of wear at their pivot points lets the sash shift enough to vibrate under wind pressure. Here’s the procedure:
- Open the window fully so both friction stay arms are extended and accessible. Support the sash if it tends to drop — a helper holding the sash weight makes this much easier on larger windows.
- Locate the tension-adjustment screw on each stay. It’s typically a small grub screw at the main pivot point, accessible with a 4 mm Allen key. Some older stays use a slotted screw instead.
- Tighten the adjustment screw a quarter-turn clockwise on both stays equally. Uneven tension across the two stays will cause the sash to sit crooked in the frame and introduce new gaps.
- Close the window and engage the lock. Check for play by gripping the sash and attempting to rock it. If movement remains, open the window and add another quarter-turn to each stay.
- Test the operating feel. The window should open and close with smooth, even resistance — not so tight that it’s difficult to move, but firm enough that the sash holds its position at any angle without creeping.
- Check for pressure-adjustment screws on the frame. Some aluminium systems include small grub screws along the hinge side of the outer frame that push against the sash when tightened, reducing the gap. Turn these in small increments (an eighth-turn at a time) and test the lock engagement after each adjustment.
The critical mistake to avoid here is over-tightening. Aluminium is softer than steel, and the screw threads in these profiles will strip if forced. Once you feel firm resistance, stop. A stripped thread turns a simple adjustment into a component replacement.
Re-Securing Glazing Beads and Lock Hardware
When the glass pane itself is the rattle source — identified during diagnosis by the noise stopping when you press your palm against the glass — the glazing beads or the packers behind them need attention. This repair is also how to fix a rattling window where the gaskets are still in decent condition but the glass has simply loosened within the sash.
- Identify the bead configuration. Aluminium glazing beads are either snap-fit (pressed into a channel and held by friction) or screw-fixed. Look for small screws at each corner or along the bead length. Mark each bead’s position with masking tape — short beads go in first during reassembly, and mixing up their locations can create fit problems.
- Remove the beads carefully, starting with the shortest one (usually the top bead on a fixed pane, or a side bead on a sash). Slide a plastic pry tool into the seam between the bead and the frame, then lever gently. Avoid metal tools — they’ll gouge the powder-coated or anodised surface.
- Inspect the glazing packers. These small plastic blocks sit between the glass edge and the frame, transferring the glass weight correctly and preventing the pane from shifting. Packers should be positioned using the toe-and-heel method — on the bottom corner of the hinge side and the top corner of the handle side for standard casement sashes, reversing this pattern on adjacent leaves. If packers have shifted, cracked, or fallen out, replace them with the correct thickness to hold the glass centred in the rebate.
- Secure packers in place with a small dab of silicone sealant to prevent future movement. Allow the silicone to tack off before re-fitting beads.
- Check the EPDM gasket between the glass face and the bead. If it’s hardened, cracked, or permanently compressed flat, it’s no longer cushioning the pane effectively. Replacement gaskets must match the original cross-section profile — take a short sample to your local glazing supplier to ensure the right fit.
- Refit the beads by pressing them firmly back into the channel, starting with the short beads and finishing with the long ones. A rubber mallet with light taps helps seat snap-fit beads fully. For screw-fixed beads, tighten screws to finger-tight plus a quarter-turn — no more.
The espagnolette lock and cockspur handle adjustment follows a similar philosophy of small, measured changes. If the espagnolette lock’s keeper strikes no longer align with the locking cams — the sash doesn’t compress firmly when you turn the handle — loosen the keeper strike screws, shift the strike plate inward by 1–2 mm so the cam engages with noticeable resistance, and re-tighten. You should feel the sash pull firmly against the frame gaskets through the last 10–15 degrees of handle rotation. On older windows with cockspur handles, check that the cockspur wedge contacts the frame striker plate squarely. A bent or worn cockspur can be shimmed with a thin metal plate behind the striker, or replaced entirely if the wedge is rounded off.
One distinction worth flagging: older aluminium windows — the single-channel, non-thermally-broken frames installed in many Australian homes from the 1970s through the 1990s — use relatively simple hardware with exposed fixings and basic gaskets. Adjustments are visible and accessible. Modern thermally broken aluminium systems are a different proposition altogether. Multi-chamber profiles with concealed hinges, integrated gasket channels, and recessed lock hardware require more careful disassembly and often use proprietary components. If you’re working on a recent thermally broken installation, check the manufacturer’s documentation before removing any beads or adjusting concealed hardware — the approach that works perfectly on a 1980s single-glazed frame can damage a contemporary system if applied without understanding the different construction.
These three repairs — stay adjustment, bead re-securing, and lock realignment — resolve the mechanical causes of most aluminium window rattling. But mechanical fixes only hold if the seals and gaskets behind them are doing their job. Perished rubber and flattened pile strips undermine even perfectly adjusted hardware, which is why the condition of your weatherstripping and gaskets deserves its own close look.
Replacing Weatherstripping and Gaskets in Aluminium Frames
Perfectly adjusted friction stays and properly aligned lock hardware still can’t stop a rattle if the rubber between metal and glass has given up. Seals and gaskets are the compliant layer that takes up manufacturing tolerances, absorbs vibration, and blocks the air movement that turns a minor gap into an audible problem. In aluminium window systems, these seals work harder than in any other frame material — aluminium’s rigidity means there’s no flex in the frame itself, so the gasket alone must accommodate every dimensional change, every gust of wind pressure, and every thermal expansion cycle. When it fails, nothing else compensates.
Aluminium window seal replacement is one of the most cost-effective repairs available, yet it’s routinely overlooked. Most rattling guides jump straight to hardware adjustments and skip the seals entirely. That’s a mistake. A fresh gasket in the correct profile can eliminate both the rattle and the draught in a single fix — often in under 30 minutes per window.
Types of Seals and Gaskets in Aluminium Frames
Not all aluminium window seals are the same, and fitting the wrong type creates problems as bad as fitting none at all. Four distinct seal types appear across Australian aluminium window systems, each designed for a specific location and function within the frame.
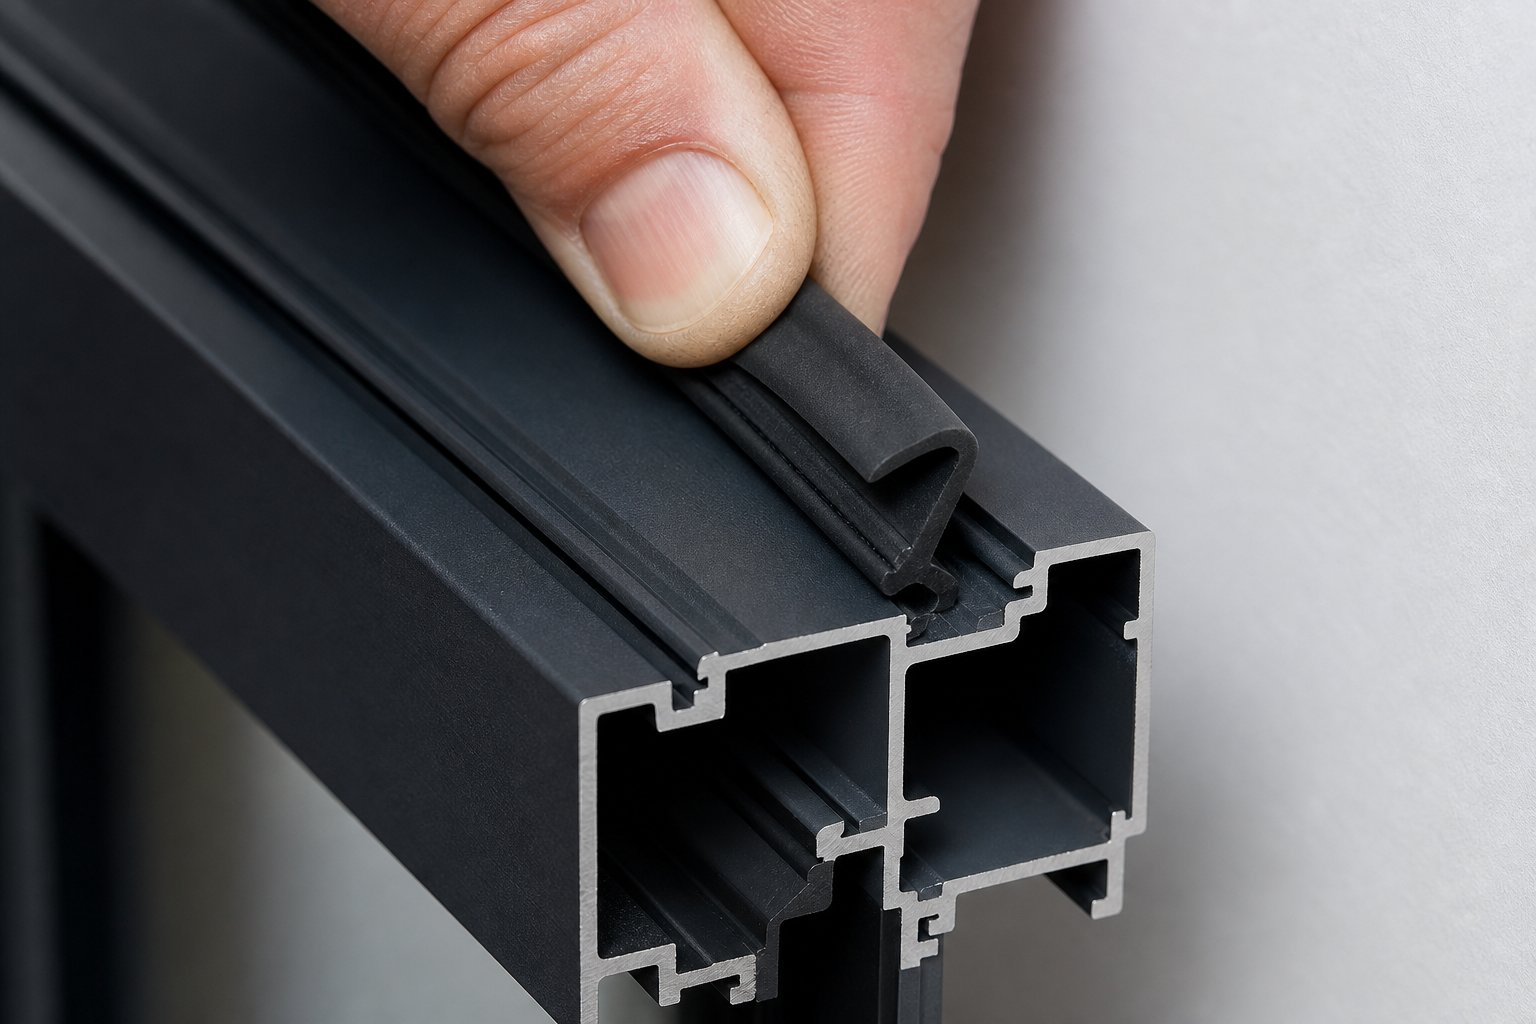
EPDM rubber gaskets are the workhorses. Made from ethylene propylene diene monomer, these synthetic rubber profiles sit in channels around the sash perimeter, between the glass and the glazing bead, and at the junction between the sash and the outer frame. EPDM offers high resistance to UV rays, temperature extremes, and cleaning products, which makes it the standard choice for outdoor exposure across Australian climates. You’ll recognise EPDM gaskets by their black or dark grey colour and firm-but-flexible feel. They come in dozens of cross-section profiles — wedge, bulb, flipper lip, and channel types — each matched to a specific groove geometry in the aluminium extrusion.
Mohair pile strips are the fuzzy ribbons running along sliding window tracks and interlocks. A polypropylene or nylon fibre pile is bonded to a flat carrier strip, which sits in a narrow fin-slot channel. Pile strips allow the sash to slide while maintaining light contact pressure that blocks dust, insects, and moderate air movement. They don’t provide the same compression seal as EPDM, but in sliding windows they’re essential — no other seal type permits the movement that sliding operation demands.
Compression seals (sometimes called foam compression seals) are softer and more compressible than solid EPDM. They’re typically made from closed-cell EPDM sponge or silicone sponge rubber and sit where the sash presses against the outer frame when closed. Their job is to deform under locking pressure and spring back when the window opens, maintaining an airtight barrier across the full perimeter. You’ll find them on casement, awning, and some fixed-panel aluminium windows.
Bubble gaskets feature a hollow, tubular cross-section — a thin-walled rubber tube attached to a rigid fin or foot that locks into the frame channel. The hollow profile compresses easily under low closing force, which makes bubble gaskets common on lighter sashes and residential-grade aluminium frames where minimal handle effort is desirable. They’re effective when new but are the first seal type to show fatigue, because the thin walls of the bubble collapse permanently under sustained compression over time.
How to Remove and Replace EPDM Gaskets and Pile Strips
Every gasket type degrades differently, and recognising the failure mode tells you whether cleaning and lubricating is enough or whether full window gasket replacement is the only real solution.
EPDM rubber hardens and cracks as UV radiation breaks down its polymer chains. When the rubber becomes inflexible, it no longer compresses to seal gaps — and you’ll see visible surface cracking, a whitish discolouration, or sections that have pulled away from corners where the gasket was originally mitred or bent. Pile strips degrade differently: the fibres mat down, break off, or accumulate grit that prevents them from springing back. Compression seals lose their memory — the sponge rubber takes a permanent set in its compressed shape and no longer rebounds when the window is opened. Bubble gaskets simply flatten, the hollow tube collapsing under years of locking pressure until it’s effectively a thin strip offering minimal resistance.
If your windows squeak when you open or close them, that’s often a sign of dry or perished gaskets creating friction against the glass or sash edges rather than compressing smoothly. A silicone-based lubricant applied along the gasket surface provides temporary relief and confirms the diagnosis — if the squeak disappears after lubrication, the gasket is the source. Use this as a stopgap while you source replacement seals, but don’t treat it as a permanent fix. Lubricant masks degradation; it doesn’t reverse it.
The replacement procedure itself is straightforward, but precision matters more than speed:
- Remove the old gasket. Start at a corner or joint and pull the seal from its channel using your fingers or a flat-head screwdriver wrapped in masking tape to avoid scratching the aluminium. For glazing gaskets, you’ll need to remove the glazing beads first (as detailed in the previous section). Pull steadily and try to extract the gasket in one continuous length — this gives you an intact cross-section sample for matching the replacement.
- Clean the channel thoroughly. Brush out debris, old adhesive residue, and any corrosion deposits using a stiff nylon brush. Wipe the channel with isopropyl alcohol on a lint-free cloth and allow it to dry completely. Installing with dirt or moisture reduces grip and service life of the new seal.
- Measure the channel dimensions. Note the width and depth of the groove, plus the thickness of the glass or the gap the seal must bridge. These three measurements determine the correct replacement profile. A seal that’s too narrow won’t grip the channel; one that’s too wide won’t seat fully and will be pulled out during operation.
- Fit the new gasket from one end without stretching. Start at the top centre of the frame and work around each corner, pressing the gasket’s fin or foot firmly into the channel. The critical rule: keep the gasket relaxed. Stretching it during installation means it will shrink back over the following days and leave gaps at corners — exactly the problem you’re trying to eliminate. If anything, leave it fractionally long and trim the overlap at the finishing point with a sharp blade for a clean butt joint.
- Test the seal. Close the window and engage the lock. The sash should meet firm, even resistance around the full perimeter. Run the paper-strip test — slide a strip of paper between the sash and frame at multiple points. Consistent, moderate resistance to pulling the paper out confirms a uniform seal.
For pile strip replacement on sliding windows, the process is simpler. Pull the old strip from its fin-slot channel, cut the new strip to length (matching the fin width precisely to the channel — common sizes are 4.8 mm, 5.0 mm, 6.0 mm, and 6.7 mm fins), and press the new strip into the slot. Check that the pile fibres make gentle contact with the sash without impeding smooth sliding movement.
Choosing the Right Replacement Seal Profile
This is where most DIY aluminium window weatherstripping projects succeed or fail. The cross-section of the replacement gasket must match the channel geometry in your specific aluminium extrusion — and aluminium window manufacturers each use slightly different profile dimensions. A gasket that looks roughly right but is 0.5 mm too narrow in the foot will slide out of the channel within weeks.
Take a 50–100 mm sample of the old gasket to your local glazing supplier or aluminium window specialist. Matching the profile visually and dimensionally against their stock is far more reliable than measuring the channel yourself and trying to interpret catalogue cross-sections online. If the original gasket has disintegrated beyond recognition, measure the channel width, channel depth, and the gap the seal needs to bridge, then bring those measurements along with a photo of the channel itself.
For EPDM gaskets, confirm the Shore A hardness is appropriate for your application. Softer gaskets (around 40–50 Shore A) compress more easily and suit lighter sashes, while firmer compounds (60–70 Shore A) are better for larger, heavier sashes that need greater resistance. Your supplier can advise based on the window type and sash size.
Buy 10–15% more gasket length than your measured perimeter requires. This accounts for corner waste, any fitting errors, and the slight excess you should leave at the butt joint rather than cutting short.
| Gasket Type | Typical Location | Signs of Failure | Expected Service Life |
|---|---|---|---|
| EPDM rubber gasket | Sash-to-frame perimeter; glass-to-glazing bead | Cracking, hardening, white discolouration, pulling away from corners | 8–15 years (varies with UV exposure and climate) |
| Mohair pile strip | Sliding window tracks; interlock junctions | Matted or missing fibres, grit accumulation, flattened pile height | 5–8 years (shorter in dusty or sandy environments) |
| Compression seal (sponge EPDM) | Casement and awning sash-to-frame contact face | Permanent compression set — seal stays flat when window is open; no spring-back | 6–10 years |
| Bubble gasket | Lighter residential casement and fixed-panel frames | Collapsed hollow section; thin, flattened appearance; loss of cushioning resistance | 5–8 years |
Fresh gaskets restore the compliant barrier between sash and frame that hardware adjustments alone can’t replicate. But seals don’t degrade in isolation — temperature swings, salt air, and seasonal wind patterns all accelerate the process. Understanding those environmental triggers explains why the same window can rattle fiercely in July and fall silent in October, and why timing your repairs strategically can make the difference between a fix that lasts and one that fails within a season.
Seasonal and Environmental Factors That Worsen Aluminium Window Rattling
A window that sits quietly through autumn can turn into a persistent noise problem the moment winter arrives — or disappear completely once spring takes hold. That inconsistency isn’t random. Aluminium’s physical properties make these frames uniquely sensitive to seasonal shifts, and certain environments push degradation far faster than others. Knowing when and why your windows rattle in wind helps you time repairs for maximum effectiveness rather than chasing symptoms during the worst possible conditions.
Cold Weather Contraction and Hot Weather Expansion Effects
Aluminium’s coefficient of thermal expansion sits at roughly 23 × 10⁻⁶ per degree Celsius — nearly twice that of steel and dramatically higher than the timber or masonry surrounding most Australian window openings. During a cold snap in Melbourne or Canberra, where overnight temperatures can dip below 5°C before climbing past 15°C by midday, an aluminium frame contracts and expands through that swing every single day. Over the frame’s full perimeter, these movements open and close micro-gaps at hardware fixings, gasket channels, and glazing bead junctions in a daily rhythm.
Winter is when aluminium window rattling in cold weather becomes most obvious. The frame contracts away from gaskets and keeper strikes, creating play that wasn’t present during milder months. Sashes that locked firmly in March now sit fractionally loose in July — not enough to see, but enough for wind to exploit. If your windows rattle when windy conditions coincide with cold nights, thermal contraction is almost certainly amplifying whatever mechanical looseness already exists.
Summer brings the opposite problem. Frames expand into their gaskets and hardware, potentially overtightening some junctions while stressing others. Dark-coloured aluminium on north- and west-facing walls in Perth, Adelaide, or inland Queensland can reach surface temperatures above 70°C in direct sun. That level of thermal loading accelerates gasket compression set — the rubber deforms permanently under the combined pressure of expansion and heat — and loosens screw fixings as the aluminium around them softens slightly. The damage done during a hot summer reveals itself the following winter when those now-weakened components can no longer hold tight during contraction.
Humidity plays a subtler role. EPDM rubber gaskets perform best within a moderate humidity range. Prolonged dry conditions — common through inland Australian summers — accelerate UV-driven hardening and cracking in exposed gaskets. Conversely, sustained tropical humidity in Northern Queensland and the Top End keeps rubber supple but promotes mould growth in gasket channels and accelerates corrosion at metal-to-metal junctions. Neither extreme is kind to the seals tasked with keeping your windows rattle-free.
Coastal Corrosion and High-Rise Wind Pressure Challenges
Geography matters as much as season. Two environments push aluminium window degradation into overdrive: coastal zones and high-rise buildings. In many Australian cities — Sydney, Brisbane, the Gold Coast, Perth — these conditions overlap.
Salt-laden air is relentless. Airborne chloride ions from ocean spray create a corrosive brine wherever they settle on aluminium surfaces, attacking protective anodised or powder-coated finishes and accelerating pitting at hardware fixings, drainage slots, and screw heads. Properties within a few hundred metres of the shoreline — from Bondi and Manly through to Fremantle and the Sunshine Coast — experience measurable salt deposition almost daily under onshore winds. But the effect extends well inland; homes several kilometres from the coast can still show salt-related hardware degradation, especially in areas with persistent sea breezes.
This corrosion doesn’t just weaken the frame’s structural integrity. It directly causes rattling by degrading the fixings that hold hardware tight. Screw threads pit and lose grip. Lock keeper strikes corrode and no longer engage cams cleanly. Friction stay pivots develop rough spots that accelerate wear. The progressive looseness builds quietly over years until the first strong wind of the season makes it audible.
High-rise buildings introduce a different physics. Wind speed increases with elevation, and the pressure differentials across a tall building create alternating cycles of positive pressure on the windward face and suction on the leeward side. Windows on upper storeys experience significantly greater wind loading than identical windows at ground level — and the pressure reverses as wind direction shifts, repeatedly flexing seals and stressing hardware in both directions. In apartment buildings across Sydney’s CBD, Melbourne’s Docklands, or the Gold Coast’s high-rise corridor, these pressure cycles can loosen components faster than in a single-storey suburban home experiencing the same wind event at ground level.
Older homes with original aluminium windows face a compounding challenge. Frames installed in the 1970s, 1980s, or 1990s — common across brick veneer and weatherboard construction throughout Australia’s eastern seaboard — are experiencing age-related degradation across all components simultaneously. Gaskets are perished, hardware is worn, screw threads are weakened by decades of thermal cycling, and the frames themselves may show corrosion at critical fixing points. In these systems, a single trigger like a winter cold snap or a coastal storm doesn’t create the rattle — it simply reveals failure that’s been building across every component at once.
If your aluminium windows rattle, they’re also leaking. The same gaps that allow sash vibration permit conditioned air to escape and outside air to infiltrate — rattling is an audible indicator that your window’s thermal performance has degraded. Every rattle you hear has an energy cost attached to it.
Research from the University of Illinois Chicago’s Built Environment and Infrastructure Laboratory has found that windows are a significant contributor to overall building air leakage, with cracked seals and loose joints playing a major role in heating and cooling energy loss. While that research examined conditions in a different climate, the underlying physics applies universally: air leakage through degraded window seals drives up energy consumption regardless of whether you’re heating in a Canberra winter or cooling in a Darwin wet season. The financial incentive to fix rattling aluminium windows extends well beyond comfort — it directly reduces your energy bills by restoring the air barrier those seals were designed to maintain.
This dual motivation — silence and efficiency — gives you a practical reason to act promptly. But it also suggests when to act. Major repairs and gasket replacements are best timed for mild weather — late autumn or early spring in most of southern Australia — when the aluminium sits at a relatively neutral expansion state. Fitting new gaskets during a 35°C summer day means the frame is expanded, and those same gaskets may be too loose once winter contraction arrives. Conversely, replacing seals during a cold snap risks fitting them too tightly for summer conditions. A temperate day around 18–22°C gives you the best chance of a year-round fit.
Seasonal and environmental awareness doesn’t just explain why your windows misbehave at certain times — it shapes the maintenance schedule that prevents rattling from returning in the first place. A structured, proactive approach to hardware lubrication, gasket inspection, and drainage clearing, timed to the conditions your specific location throws at your windows, keeps every component functioning within its designed tolerances rather than chasing failures after the noise starts.
Preventive Maintenance to Stop Rattling Before It Starts
Reactive repairs fix today’s rattle. Preventive aluminium window maintenance stops next year’s. The difference between the two approaches — chasing noise versus preventing it — often comes down to a couple of half-hour sessions each year that keep every component within its working tolerances. Aluminium windows reward this consistency more than any other frame material, precisely because the thermal cycling, hardware wear, and gasket degradation described throughout this guide are all progressive. Catch them early and the fix is trivial. Let them compound, and a cascade of failures turns a simple adjustment into a full hardware overhaul.
Knowing how to maintain aluminium windows properly means understanding the relationship between components. A friction stay that loses a fraction of its tension increases load on the espagnolette lock, which in turn over-compresses the gasket on one side while under-compressing it on the other. That uneven pressure accelerates localised gasket fatigue, which introduces air gaps that let wind vibrate the sash. One overlooked component drags its neighbours toward failure. Regular maintenance breaks that chain at the first link.
Biannual Aluminium Window Maintenance Checklist
Two thorough inspections a year — one in early autumn before cold-weather contraction sets in, and one in mid-spring as temperatures stabilise — cover the critical window between seasonal extremes. The following schedule structures those sessions into manageable tasks with realistic time commitments.
| Task | Frequency | Tools Needed | Time Per Window |
|---|---|---|---|
| Clean frame surfaces with pH-neutral detergent and soft cloth | Biannual (spring and autumn) | Microfibre cloth, mild detergent, bucket | 5 minutes |
| Lubricate friction stays, hinges, and locking mechanisms | Biannual | Dry PTFE or silicone-based spray lubricant, clean rag | 3–5 minutes |
| Inspect EPDM gaskets and compression seals for cracking or set | Biannual | Visual inspection; paper-strip draught test | 3 minutes |
| Clear drainage slots (weep holes) of debris | Biannual and after storms | Stiff nylon brush or pipe cleaner, water for flush-test | 2–3 minutes |
| Check glazing bead tightness — gently press each bead | Biannual | Fingers or plastic pry tool for testing only | 2 minutes |
| Inspect frame-to-wall sealant for cracking or separation | Annual (autumn) | Visual inspection; torch for shadowed areas | 2 minutes |
| Test lock compression — lock window and attempt to rock sash | Biannual | Hands only | 1 minute |
| Vacuum sliding window tracks and wipe clean | Biannual (more often in dusty areas) | Vacuum with crevice tool, damp cloth | 3 minutes |
| Inspect pile weatherstripping on sliding windows for wear | Annual (autumn) | Visual and touch — check fibre resilience | 2 minutes |
| Rinse frames with fresh water (coastal properties only) | Monthly or after salt-spray events | Garden hose or spray bottle | 2 minutes |
Total time per window hovers around 20–30 minutes per session. For a typical three-bedroom home with eight to twelve aluminium windows, that’s a morning’s work twice a year — a modest investment against the cost of replacement hardware or professional call-outs.
Lubrication and Hardware Inspection Best Practices
Aluminium window lubrication is the single highest-impact maintenance task relative to its effort. A light application of silicone-based or dry PTFE lubricant on friction stay pivots, hinge pins, espagnolette lock spindles, and locking cam faces keeps metal-to-metal contact smooth and prevents the stiffening that forces components out of alignment during normal operation.
The process is simple: spray a small amount of lubricant directly onto each moving contact point, operate the window several times to distribute it through the mechanism, then wipe away any excess with a clean rag. That last step matters — residual lubricant on exposed surfaces attracts dust and grit that works its way into the very joints you’re trying to protect.
Petroleum-based products like WD-40 should be avoided entirely. While useful as a penetrating solvent for seized bolts, petroleum-based sprays attract airborne particulates, leave a gummy residue as they evaporate, and can degrade EPDM rubber gaskets on contact. Silicone and PTFE lubricants remain clean, repel dust, and are chemically inert against the rubber seals sitting millimetres away from the hardware you’re treating.
While lubricating, use the opportunity to feel for play in each mechanism. A friction stay pivot that moves laterally when you grip the arm needs tension adjustment now — before it becomes a rattle source. A locking cam that doesn’t engage its keeper with firm resistance needs realigning before the gap it leaves behind accelerates gasket compression set on the opposite side of the sash. Early detection during routine aluminium window maintenance turns what would become a noisy, draughty problem into a 30-second tweak.
Drainage and Seal Integrity Checks
Every aluminium window frame contains weep holes — small slots along the exterior bottom rail that allow rainwater to drain from inside the frame. When these drainage openings clog with dirt, dead insects, or paint overspray, water pools inside the frame channel. That standing water accelerates corrosion at fixings and hardware mounting points, degrades the base of EPDM gaskets sitting in the channel, and can eventually cause water ingress into the wall cavity below. Clearing weep holes takes seconds with a stiff nylon brush or pipe cleaner — push debris outward from the interior side, then flush with water to confirm free drainage.
Seal integrity checks round out the inspection. Run your fingers along the full perimeter gasket feeling for hard, cracked, or permanently compressed sections. Pay particular attention to corners where gaskets are mitred or bent at sharp angles — these are stress points where failure begins. A paper-strip test (sliding a strip of paper between the closed sash and frame, then pulling gently) confirms whether the seal is providing uniform resistance. Consistent moderate drag at every test point means the seal is doing its job. Paper slipping freely at any location flags a section that needs attention before winter winds turn it into a rattle point.
Frame-to-wall sealant — the flexible bead of silicone or polyurethane around the outer perimeter where the aluminium frame meets the brickwork, render, or cladding — deserves an annual glance as well. Cracked or separated sealant here doesn’t just cause rattling at the frame junction; it allows water penetration into the wall behind the frame, promoting concealed corrosion of fixings and potentially compromising the window’s structural attachment over time.
Well-engineered aluminium window systems designed with accessible hardware and replaceable gasket profiles make this entire maintenance routine straightforward. Systems built to documented compliance standards — such as those detailed on MEICHEN’s Compliance and Certifications page — incorporate features like clearly accessible adjustment screws, standard gasket channels that accept readily available replacement profiles, and hardware rated for the environmental conditions specified during design. For specifiers and builders selecting aluminium systems at the project outset, choosing a system with clear performance documentation and maintainable components pays dividends across the window’s entire service life, not just on installation day.
Consistent maintenance keeps aluminium windows operating within the tolerances they were manufactured to. But when a window has already moved beyond those tolerances — when gaskets are gone, hardware is corroded through, or the frame itself shows structural compromise — maintenance alone can’t restore performance. Recognising that threshold, and knowing when professional assessment or full replacement becomes the practical choice, prevents wasted effort on windows that have genuinely reached end of life.
When Rattling Signals a Bigger Problem Worth Professional Attention
There’s a clear line between a rattle you can fix with a quarter-turn of an Allen key and a rattle that’s telling you the window itself is failing. Everything covered in this guide so far — friction stay adjustments, gasket replacement, glazing bead re-securing, lock realignment — assumes the underlying frame and fixings are still structurally sound. Sometimes they aren’t. The rattle persists not because you missed a step, but because the damage has moved beyond what DIY repairs can address.
Knowing where that line sits saves you from pouring time and money into a window that needs professional intervention — or outright replacement. A rattling window professional repair assessment isn’t an admission of defeat. It’s the rational response when the symptoms point to something deeper than worn gaskets and loose hardware.
Warning Signs That Rattling Indicates a Safety Concern
Not every rattle is equal. Some indicate a comfort issue — annoying, certainly, but not dangerous. Others point to compromised structural integrity, water damage behind the wall, or glazing that could fail under pressure. The following red flags warrant a qualified assessment rather than another round of adjustments:
- Visible frame deflection — if the aluminium frame bows, twists, or gaps visibly when you press against it, the profile may have weakened from sustained corrosion or was undersized for the opening during original installation. Deflection under normal wind load is a structural concern, not a maintenance item.
- Corroded fixings that no longer hold — screws that spin freely in the aluminium without gripping, or hardware mounting points where the surrounding metal has pitted through, cannot be restored with larger screws or thread-locking compound. The host material is compromised.
- Water ingress around the frame-to-wall junction — staining, bubbling paint, damp plaster, or visible moisture tracking down the wall below the window indicates that water is bypassing the frame seal and entering the wall cavity. This goes well beyond rattling — it risks concealed timber rot in the framing, corrosion of wall ties in brick veneer construction, and mould growth within the wall assembly.
- Failed insulated glass unit (IGU) seals — persistent fogging or condensation between the panes of a double-glazed unit means the perimeter seal has broken down. The insulating gas fill has escaped, thermal performance has dropped significantly, and the unit is no longer performing to its rated specification.
- Rattling that persists after all DIY adjustments — if you’ve worked through the diagnostic sequence, adjusted hardware, replaced gaskets, re-packed glazing beads, and the sash still moves under wind load, the issue likely sits in a component you can’t access without specialised tools or replacement parts sourced directly from the system manufacturer.
- High-rise curtain wall or commercial glazing systems — aluminium curtain wall systems on apartment buildings and commercial facades use structural silicone bonds, pressure-equalised drainage cavities, and engineered mullion connections that are fundamentally different from residential window hardware. Rattling in these systems can indicate failed structural silicone, gasket blowout from wind-pressure cycling, or mullion deflection under load. These are not DIY situations — they require facade engineers or specialist glazing contractors with the equipment and expertise to work safely at height.
Any single item on that list justifies a professional inspection. Two or more appearing together — corroded fixings plus water ingress, for instance — typically signals systemic failure rather than isolated component wear.
When Repair Is No Longer Cost-Effective
The aluminium window repair or replace decision comes down to a practical calculation, and sentiment rarely tips the scales. Older single-glazed aluminium windows — the non-thermally-broken frames installed across millions of Australian homes from the 1970s through the early 2000s — present a particular challenge. These frames were built to the standards of their era, which didn’t require thermal breaks, didn’t prioritise acoustic performance, and used hardware and gasket systems that may no longer be commercially available.
Replacing gaskets on a 40-year-old frame is only worthwhile if the hardware is still functional, the frame is straight, the fixings are solid, and the single-glazed glass meets your performance expectations. In practice, a frame that old is usually degraded across multiple components simultaneously. You replace the gaskets, then discover the friction stays can’t hold tension. You fit new stays, then find the screw holes are wallowed out. Each repair reveals the next failure. At some point, the accumulated cost of parts and labour exceeds the price of a modern thermally broken replacement that arrives with fresh gaskets, new hardware, double glazing, and a warranty.
Thermally broken aluminium systems represent a generational leap in performance. The polyamide thermal break within the frame reduces heat transfer by up to 60% compared to a continuous aluminium profile, which directly addresses the condensation, energy loss, and thermal cycling stresses that cause so many of the problems covered in this guide. Modern multi-chamber profiles also accommodate thicker EPDM gaskets, concealed drainage systems, and hardware engineered for tens of thousands of operating cycles. The very factors that make old aluminium windows rattle — poor thermal performance, basic hardware, thin gaskets — are systematically designed out of current systems.
As a rough guide, if repair costs on existing aluminium windows approach 40–50% of the installed price of a modern replacement, replacement is almost always the better investment. You gain improved thermal and acoustic performance, contemporary weather resistance, and a fresh service-life clock on every component — rather than patching a system that will need the next repair within a few years.
Choosing Aluminium Window Systems Built for Long-Term Performance
When replacement is the right call — whether for a single window that’s reached end of life or a whole-house upgrade during renovation — the specification decisions made upfront determine whether the new windows will still be rattle-free a decade from now. The same failure modes this guide has dissected in ageing frames can reappear in new installations if the system isn’t properly specified for its environment.
For Australian projects, that means selecting aluminium systems rated and tested against the conditions they’ll actually face. Energy efficiency under NatHERS modelling. Weather resistance appropriate to the local wind region and terrain category under AS 2047. Acoustic performance suited to the site’s noise environment. Corrosion resistance matched to the distance from the coastline. And durability across hardware, gaskets, and frame finishes that reflects realistic maintenance intervals rather than laboratory ideals.
Architects, builders, and specifiers evaluating aluminium window and door systems for Australian projects benefit from reviewing documented compliance data alongside design catalogues. Performance claims mean little without the testing and certification evidence to support them. MEICHEN’s Compliance and Certifications page provides that documentation — covering energy efficiency, weather resistance, sound performance, and durability standards — giving professionals a clear basis for specification decisions that prioritise long-term performance over short-term cost. Systems specified with verified performance data from the outset are systems designed to resist the very degradation pathways that lead to rattling, draughts, and premature failure.
Whether you’ve tightened a friction stay, replaced a gasket, or decided that your old frames have earned their retirement, the thread running through every section of this guide is the same: aluminium windows rattle for specific, diagnosable reasons, and each reason has a targeted response. Generic fixes fall short because they ignore the material science. Aluminium-specific repairs succeed because they don’t. Address the right cause, use the right method for your window type, maintain the result — and the noise stops.
Frequently Asked Questions About Fixing Rattling Aluminium Windows
1. Why do aluminium windows rattle more than timber or uPVC windows?
Aluminium conducts heat roughly 1,000 times more readily than uPVC, which causes the frame to expand and contract noticeably with temperature changes. These constant micro-movements gradually loosen hardware, open gaps in gaskets, and create play between the sash and frame. Unlike timber, which swells with moisture, or uPVC, which creeps slowly under load, aluminium responds almost instantly to temperature shifts. This stresses friction stays, glazing beads, and locking keeps in ways unique to the material. In coastal Australian environments, salt-air corrosion further accelerates hardware degradation, compounding the problem over time.
2. Why do I hear a vibrating sound outside my window at night?
Nighttime window vibration is not caused by conditions worsening after dark. Ambient daytime sounds such as traffic, appliances, and conversation mask rattles that become clearly audible once the house goes quiet. Additionally, evening and early-morning winds in many Australian coastal and suburban areas tend to be gustier as land-surface temperatures drop and localised pressure patterns change. Even moderate gusts can exploit small gaps between the sash, frame, or glass. Pressure differentials across a building — wind pushing on the windward face while suction pulls at the leeward side — can also set windows chattering without strong sustained wind.
3. How do I stop my aluminium windows from rattling in the wind?
Start by diagnosing the exact rattle source using a systematic approach: press your palm against the glass to check for pane vibration, grip the sash at diagonal corners to test for sash-to-frame movement, then test each hardware component individually. Once identified, apply the targeted fix. For sliding windows, replace worn pile weatherstripping and adjust roller height. For casement and awning windows, tighten friction stay tension screws and realign espagnolette lock keeper strikes. Replace any perished EPDM gaskets with profiles matching the original cross-section. Well-specified aluminium systems built to verified compliance standards — such as those documented on MEICHEN’s Compliance and Certifications page — use accessible adjustment hardware and replaceable gaskets that simplify these repairs.
4. How often should I maintain my aluminium windows to prevent rattling?
A biannual maintenance schedule — once in early autumn and once in mid-spring — covers the critical periods between seasonal temperature extremes. Each session should include lubricating friction stays and locking mechanisms with silicone-based or dry PTFE lubricant, inspecting gaskets for cracking or compression set, clearing drainage weep holes of debris, checking glazing bead tightness, and testing lock compression by attempting to rock the closed sash. Coastal properties should also rinse frames with fresh water monthly to remove salt deposits. Total time per window sits around 20 to 30 minutes per session, making it a manageable investment that prevents the cascading component failures leading to persistent rattling.
5. When should I replace rattling aluminium windows instead of repairing them?
Replacement becomes the practical choice when repair costs approach 40 to 50 percent of the installed price of a modern thermally broken system. Key warning signs that push past the repair threshold include visible frame deflection under normal wind load, corroded fixings that no longer grip the aluminium, water ingress around the frame-to-wall junction, failed double-glazed unit seals, and rattling that persists after all DIY adjustments have been completed. Older single-glazed, non-thermally-broken frames from the 1970s through the 1990s often degrade across multiple components simultaneously, making sequential repairs increasingly uneconomical compared to modern replacements with fresh gaskets, new hardware, and verified performance ratings.
More Window & Door Guides