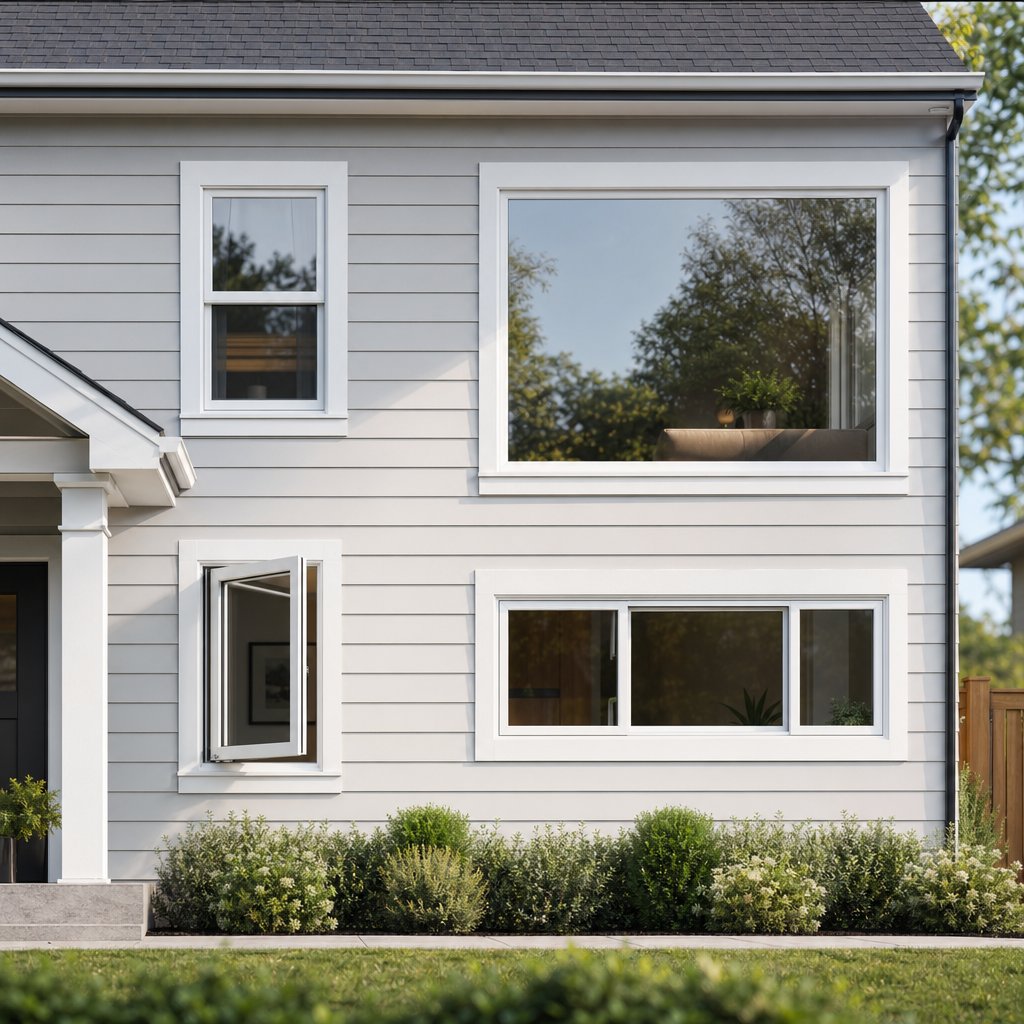
What Are Aluminium Sliding Window Sections
Defining Aluminium Sliding Window Sections
In everyday conversation, people use the word “section” loosely — a section of a window, a section of a wall. In the aluminium joinery trade, it means something far more specific. A window section refers to the precise cross-sectional shape of an extruded aluminium profile: the exact geometry you would see if you sliced through a frame member and looked at its end face.
Aluminium sliding window sections are the extruded cross-sectional profiles — manufactured from 6000-series aluminium alloys — that form the structural and functional components of a sliding window assembly, including outer frames, sash rails, interlock mullions, and glazing beads.
Each aluminium section in a sliding window system has a purpose-designed shape. The sill profile incorporates drainage channels. The interlock profile allows panels to overlap and seal. The head profile houses roller tracks. These aren’t interchangeable; they’re engineered to connect with one another in a single, cohesive assembly. Understanding that distinction separates informed specification from guesswork.
Why Section Knowledge Matters for Specifiers
For fabricators, architects, builders, and homeowners investing in windows in aluminium, section knowledge directly affects project outcomes. Choosing the wrong aluminium window profiles leads to poor weather sealing, structural inadequacy under wind loads, or hardware incompatibility — problems that become expensive to fix once frames are installed.
The industry classifies aluminium profiles using a system of series numbers (indicating frame width), weight-per-metre values (linking directly to material cost), and wall thickness grades (determining structural capacity). A 100-series profile, for instance, has a different frame depth and load-bearing capacity than a 60-series. These classifications form the language that manufacturers, suppliers, and specifiers use to communicate — and they’ll be unpacked in detail throughout this guide.
Grasping how these numbers translate into real performance is what turns a catalogue full of abstract data into a practical selection tool — particularly when each component profile within an assembly needs to work together as a system.
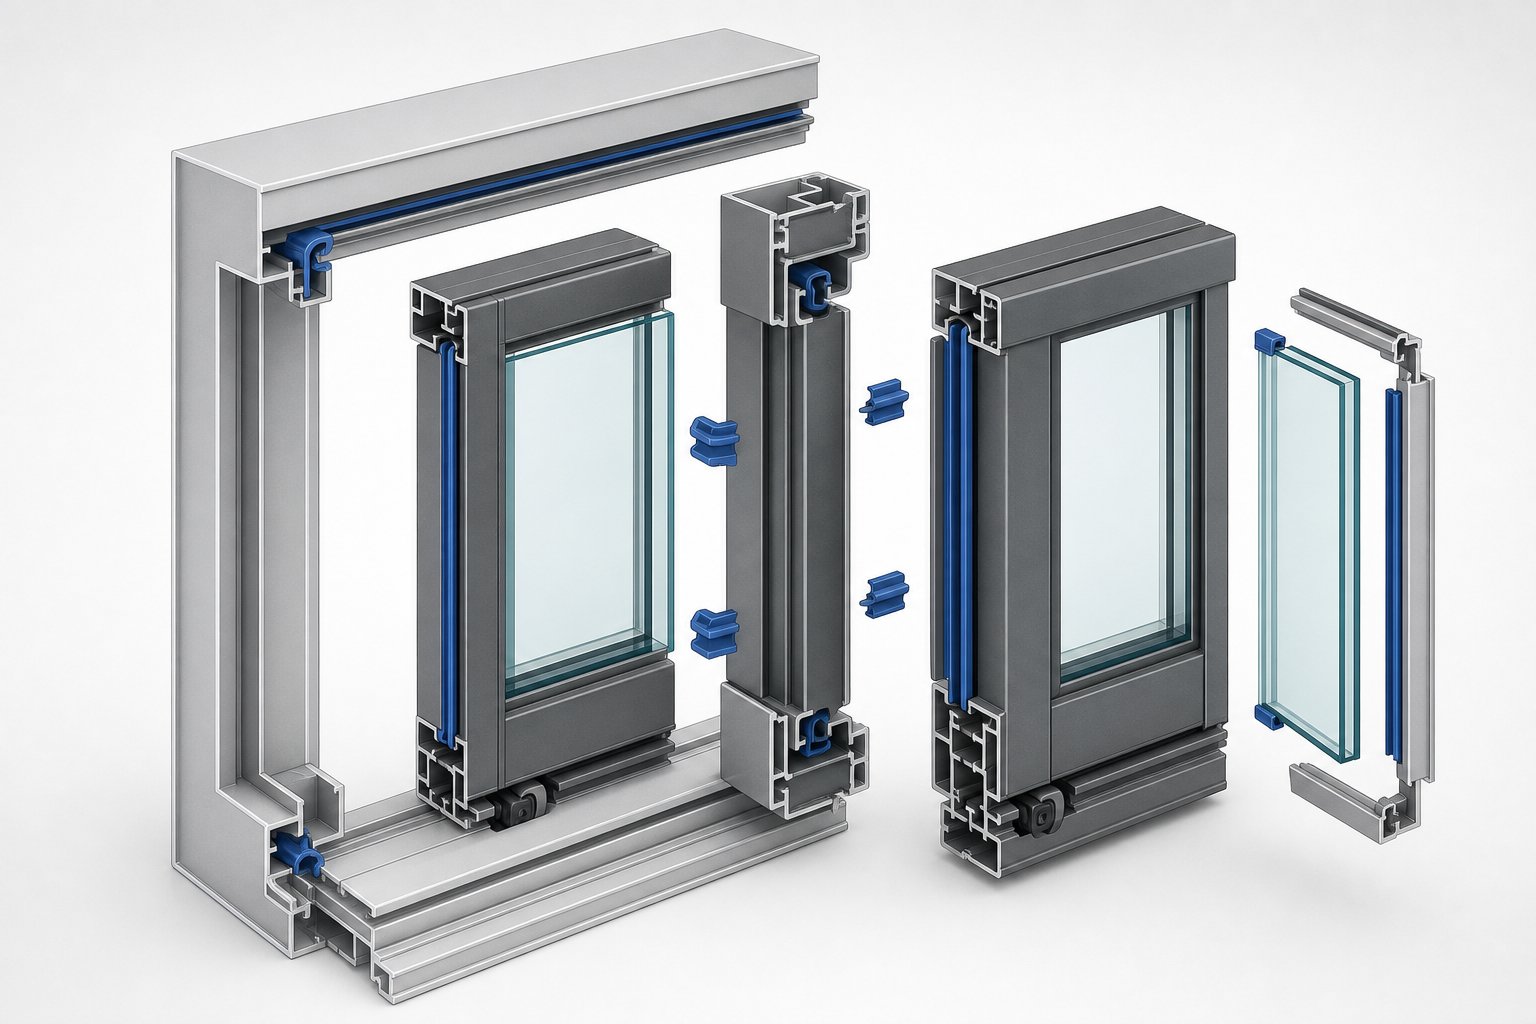
Anatomy of an Aluminium Sliding Window Section Assembly
A sliding window looks simple from the outside — two panels, one slides. But cut through any part of that assembly and you’ll find a carefully shaped aluminium profile doing a very specific job. Each component has its own extruded section geometry, and those individual shapes are designed to interlock, seal, and support one another as a unified system. Knowing what each piece does (and how it connects to its neighbours) is the difference between a window that performs for decades and one that leaks, rattles, or jams within a few years.
Outer Frame Profiles and Their Functions
The outer frame is the fixed perimeter that gets anchored into the wall opening. It consists of four distinct aluminium window profiles: the head, the sill, and two jambs. While they share a family resemblance within any given series, each has a unique cross-sectional shape tailored to its role.
- Head (top frame): The upper horizontal section houses the top track or guide channel that the sliding sash runs along. Its profile geometry includes a recessed rail and, in many systems, integrated anti-lift blocks or stops that prevent the panel from being dislodged upward. The head section also provides the clearance needed for sash removal during maintenance.
- Sill (bottom frame): The lower horizontal section carries the full weight of the sliding panels via the roller track. Its profile is the most complex of the outer frame members — it incorporates raised rails for rollers to travel on, recessed drainage channels that direct water to external weep holes, and stepped surfaces to manage wind-driven rain. A well-designed sill section balances smooth roller movement with effective water management.
- Jambs (side frames): The two vertical members close off the left and right edges of the assembly. Their profiles include channels for weather seals, recesses for lock keepers, and in some systems, guide fins that steady the sash during operation. Proper jamb alignment is critical for smooth sliding and effective locking.
Together, these four profiles create a rigid perimeter that resists wind loads and thermal movement while providing precisely machined tracks and seal grooves for the moving parts within.
Sash Frame and Interlock Section Anatomy
Sitting inside the outer frame, the sash is the movable panel — the part you actually push open. It has its own set of aluminium window frames: top rail, bottom rail, and two stiles (vertical edges). The bottom rail houses the rollers that ride along the sill track. The top rail slots into the head guide. The stiles carry the lock hardware on one side and the interlock profile on the other.
The interlock mullion deserves special attention. This is the vertical section where the sliding panel overlaps with either a fixed panel or a second sliding panel when the window is closed. Its profile is specifically shaped to create a labyrinth-style overlap — fins and grooves that nest together to block air infiltration, water penetration, and forced entry. Mr Windows Australia notes that most window locks engage with or around the interlock mullion, making it central to both security and weatherproofing.
In a typical aluminum window frame assembly, the interlock section also accommodates brush seals or fin seals that compress when panels close, creating a continuous barrier against draughts. The geometry has to be precise — too tight and the panels bind; too loose and air whistles through.
Glazing Beads and Seal Channels
Glass doesn’t sit directly against aluminium. It’s held in place by glazing beads — slim, snap-fit profiles that press the glass into the sash frame and lock it securely. These beads have a specific cross-section designed to clip into machined channels within the sash rails and stiles. Their profile incorporates a wedge-shaped toe that snaps into a groove, plus a flat face that presses against a rubber gasket to cushion and seal the glass edge.
The weather seals themselves come in several forms across the assembly:
- Compression gaskets between glass and glazing bead, preventing moisture from reaching the glass edge
- Brush seals (pile weatherstrip) fitted into interlock sections and head/sill tracks, blocking air and dust without adding friction
- Fin seals at panel overlaps, deflecting wind-driven rain
- Foam or rubber perimeter seals between the outer frame and the building structure, preventing water ingress at the installation interface
Every one of these seals slots into a channel that’s been purpose-designed within the aluminium profile. The seal channel width, depth, and shape vary between manufacturers and series — which is exactly why mixing sliding window parts from different systems almost never works. An aluminum frame window only performs as intended when every profile in the assembly belongs to the same family.
Each component discussed here — from the sill’s drainage geometry to the interlock mullion’s labyrinth fins — is defined by specific dimensions: frame depth, wall thickness, and track width. Those numbers determine what size glass the sash can hold, how many panels can stack, and what wind pressures the assembly can resist.
Standard Dimensions and Track Configurations
Those individual profile shapes — sills, interlocks, glazing beads — all exist within a dimensional framework that determines the overall system capacity. The frame depth of your aluminium sliding window section dictates how many sliding window tracks it can accommodate, which in turn controls how many panels fit the assembly and how wide you can open it. Getting these numbers right is where section selection becomes genuinely practical.
Understanding 2-Track, 3-Track, and 4-Track Systems
The aluminium window track count refers to the number of parallel rails machined into the sill and head profiles. Each window track carries one panel — so a 2-track system holds two panels (one fixed, one sliding), a 3-track system holds three, and a 4-track system holds four. The relationship is straightforward, but the implications for ventilation and usable opening width are significant.
A 2-track sliding window opens to roughly 50 per cent of the total frame width. One panel slides behind the other, giving you half the opening for airflow. A 3-track system allows two panels to slide simultaneously, opening approximately two-thirds of the width — a meaningful gain for living rooms or balcony-facing walls where cross-ventilation matters. A 4-track configuration pushes this further, accommodating very wide spans where three or four panels can stack to one or both sides.
Each additional track adds depth to the window rail profile. A 2-track frame might sit at around 70–100 mm deep, while a 4-track system can exceed 150 mm. That extra depth needs sufficient wall thickness at the reveal to accommodate it — something worth confirming early in the design stage, particularly in renovations where existing openings may be shallow.
| Track Configuration | Typical Frame Depth | Maximum Panel Count | Approximate Openable Width | Common Applications |
|---|---|---|---|---|
| 2-Track | 70–100 mm | 2 panels | ~50% of frame width | Bedrooms, kitchens, standard residential openings |
| 3-Track | 100–130 mm | 3 panels | ~66% of frame width | Living rooms, balconies, wider residential and light commercial openings |
| 4-Track | 130–160 mm+ | 4 panels | ~75% of frame width | Large commercial openings, expansive residential spans, stacking panel systems |
Keep in mind that some track sliding window systems dedicate one track to a flyscreen or security mesh panel rather than glazing. A 3-track frame might carry two glass panels and one mesh panel, effectively giving you a 2-panel glazed window with integrated insect protection — a configuration particularly popular across coastal and subtropical Australian homes.
Frame Depth and Wall Thickness Specifications
Frame depth is the front-to-back measurement of the outer frame section. It determines not only how many tracks fit within the profile but also how much structural material surrounds each window slide track. Deeper frames generally offer greater moment of inertia, meaning they resist bending under wind pressure more effectively.
For residential applications in low-to-moderate wind zones, frame depths between 70 mm and 100 mm handle most standard openings comfortably. Commercial and high-rise projects typically demand 100 mm or deeper sections to cope with increased wind loads and heavier glazing configurations.
Wall thickness — the actual thickness of the aluminium extrusion walls within the profile — is equally critical. Australian Standard AS 2047 governs structural performance requirements, and the aluminum window track profiles used in certified systems must meet minimum thickness grades to achieve the required wind resistance ratings. Common wall thickness values range from 1.2 mm for light-duty residential profiles up to 2.0 mm or more for heavy-duty commercial sections.
Thicker walls add weight per metre (and therefore material cost), but they also increase the profile’s resistance to deflection under load. In practical terms, a window spanning 2.5 metres or more in a high wind zone will likely need the thicker-walled section to maintain acceptable deflection limits under design wind pressures — a calculation where the section’s moment of inertia data from the manufacturer’s catalogue becomes essential.
These dimensional relationships — track count driving frame depth, wall thickness driving structural capacity — form the quantitative backbone of every section selection decision. But raw numbers from a catalogue only become useful when you know how to read them.
How to Read Aluminium Sliding Window Section Catalogs
An aluminum sections catalogue from an extrusion manufacturer is dense with numbers — profile IDs, weights, inertia values, dimensional sketches — but surprisingly light on guidance about what to actually do with that data. Bridging that gap is where specifiers, fabricators, and even well-researched homeowners gain a genuine edge. Here’s how to decode the information and connect it to practical decisions.
Decoding Series Numbers and Section IDs
Most manufacturers organise their window profiles into series, identified by a number that typically corresponds to the frame depth in millimetres. A “100 Series” sliding window system has an outer frame depth of approximately 100 mm; a “70 Series” sits at around 70 mm. The series number tells you the scale of the system before you look at a single drawing.
Within each series, individual components receive their own section ID — often a three- or four-digit number (like 1001, 1002, 1003) that identifies a specific profile shape. Section 1001 might be the outer frame sill. Section 1002 might be the matching head. Section 1003 might be the interlock mullion. These IDs allow fabricators to order the exact extruded aluminum window frame components they need without confusion.
Each section window detail page in the catalogue shows a cross-sectional drawing at scale, annotated with critical dimensions: overall height, width, wall thickness, internal chamber layout, and the positions of seal grooves and screw ports. Treat the drawing as the single source of truth — it tells you whether a profile will physically fit your assembly.
Using Weight-Per-Metre Data for Cost Estimation
Every catalogue entry lists the profile’s weight per metre (kg/m). This figure is calculated from the cross-sectional area multiplied by aluminium’s density (approximately 2.7 g/cm³), as noted in Ya Ji Aluminum’s profile sizing guide. It’s not just a specification footnote — it’s your fastest path to material cost estimation.
The formula is simple: multiply the weight per metre by the current price per kilogram for the relevant alloy and finish, then multiply by the total lineal metres required. A heavier section costs more per running metre, which means every gram in the profile geometry adds up across a multi-window project. This calculation helps you compare the real cost difference between a standard-duty and heavy-duty option before committing.
Moment of inertia values (Ix and Iy, listed in cm⁴) appear alongside weight data in most technical catalogues. These numbers quantify how resistant a profile is to bending — Ix for deflection under wind load perpendicular to the glass, Iy for lateral stiffness. When engineers check whether a profile is structurally adequate for a given span and wind zone, they compare its moment of inertia against the minimum value required by AS 2047 calculations. A profile might be affordable per metre but structurally insufficient for a wide opening — inertia data catches that mismatch early.
Matching Components Within a Series
Every aluminum window frame extrusion in a catalogue belongs to a family. The interlock, sill, head, jamb, and glazing bead within a single series are dimensionally coordinated — their seal grooves align, their track geometries match, and their wall thicknesses are proportional. Mixing components from different series almost always fails because even small dimensional mismatches break the weather seal or prevent hardware engagement.
When evaluating aluminum window extrusions suppliers, confirm that a complete set of components is available within their catalogue for your chosen series. A supplier offering only partial ranges forces you to improvise with non-matching profiles — a recipe for performance failures. Here’s a step-by-step approach for reading any catalogue entry effectively:
- Identify the series number to confirm frame depth suits your track count and opening requirements.
- Locate the specific section IDs for every component in your assembly — outer frame, sash frame, interlock, and glazing bead.
- Check the cross-sectional drawing for each section, verifying seal groove positions, screw port locations, and chamber layout.
- Record the weight per metre for each profile and calculate total material cost across the project’s lineal requirements.
- Confirm the moment of inertia (Ix) meets or exceeds the minimum structural requirement for your span and wind zone classification.
- Verify that all selected sections share the same series and that the manufacturer confirms their mutual compatibility — particularly at interlock and track junctions.
Catalog data becomes a genuine selection tool when you read it in sequence rather than picking numbers in isolation. Weight tells you cost. Inertia tells you structural capacity. Section IDs tell you compatibility. Together, they reveal whether a given system meets your project’s demands — or whether you need to step up to something heavier.
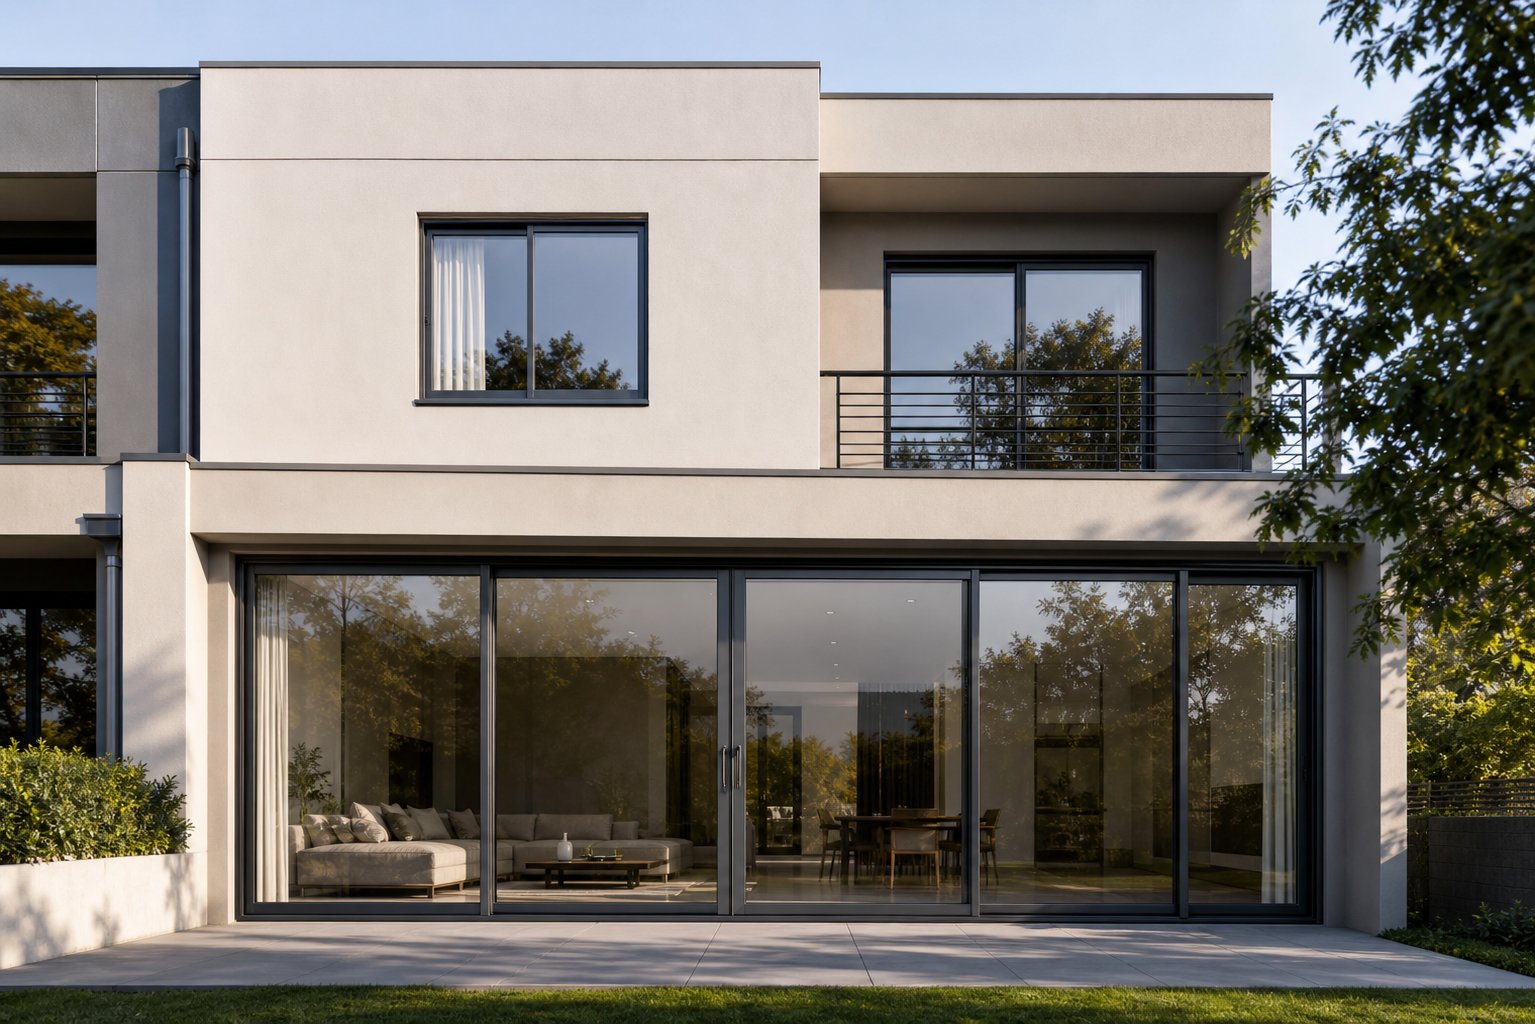
Standard Duty vs Heavy-Duty Sliding Window Sections
Stepping up to something heavier isn’t just about spending more per metre — it’s about matching the sliding window frame to the actual forces it will face over its lifespan. The aluminium extrusion industry draws a clear line between standard-duty and heavy-duty section profiles, and choosing the wrong side of that line creates problems no amount of good installation can fix.
What Makes a Section Heavy-Duty
The difference comes down to material volume and geometry. Heavy-duty sections use thicker extrusion walls (typically 1.6 mm to 2.0 mm or above, compared to 1.2 mm to 1.4 mm for standard profiles), deeper overall frame dimensions, and internal chamber layouts designed to resist greater bending forces. These profiles weigh more per metre because they contain more aluminium — and that extra mass translates directly into higher moment of inertia values and greater load capacity.
Roller hardware is the other critical distinction. Heavy-duty sliding window aluminium systems accommodate larger-diameter tandem rollers — often 25 mm to 30 mm wheels versus 18 mm to 22 mm in standard profiles. Bigger rollers spread panel weight over a wider track contact area, reducing wear and maintaining smooth operation even with panels weighing 80 kg or more. The interlock sections on heavy-duty profiles are also deeper, with more aggressive fin overlap for improved wind resistance and security.
Zhengji Windows notes that commercial aluminium sliding windows often use larger glass panels than residential units, requiring stronger rollers, stable tracks, and sash profiles that maintain alignment over time. When rollers are underspecified, the sash may sag, affecting sealing, locking, and user experience — a common failure mode in projects where standard sections are stretched beyond their intended capacity.
Matching Section Duty Rating to Application Requirements
Choosing between standard and heavy-duty isn’t arbitrary — it’s driven by five measurable factors: panel size, glazing weight, wind load zone, usage frequency, and floor height. A single-glazed panel in a bedroom at ground level places fundamentally different demands on the sliding window frame than a double-glazed unit on a tenth-storey balcony facing prevailing winds.
Glazing weight is often the deciding factor. A standard 6 mm single-glazed panel weighs roughly 15 kg/m², while a double-glazed unit (two panes plus spacer and gas fill) can reach 25–30 kg/m². Triple glazing pushes higher still. Once total panel weight exceeds approximately 60 kg, most standard-duty roller systems begin to strain — and the profile walls may deflect beyond acceptable limits under combined dead load and wind pressure.
For architectural aluminium windows in high-rise or exposed coastal applications, Accend Aluminium and Glass highlights that commercial applications typically require profiles ranging from 2.0 mm to 3.0 mm wall thickness. Wind pressure increases significantly with height and exposure, meaning aluminium slider windows on upper storeys must handle design pressures that would be irrelevant at ground level in a sheltered suburban street.
| Attribute | Standard-Duty Sections | Heavy-Duty Sections |
|---|---|---|
| Wall Thickness | 1.2–1.4 mm | 1.6–2.0 mm+ |
| Frame Depth | 70–100 mm | 100–150 mm+ |
| Roller Diameter | 18–22 mm | 25–30 mm (tandem) |
| Maximum Panel Weight | ~40–60 kg | ~80–150 kg+ |
| Suited Floor Height | Ground to 3 storeys | 4+ storeys, exposed elevations |
| Typical Use Cases | Standard residential bedrooms, kitchens, low-rise apartments | High-rise apartments, commercial facades, large-span openings, cyclone zones |
Usage frequency also matters in ways specifiers sometimes overlook. A window that slides open and shut a dozen times daily — in a school corridor or hotel room, for instance — subjects its rollers and interlocks to far more wear cycles than a rarely-opened bedroom window. Heavy-duty aluminium sliding windows with commercial-grade roller assemblies are designed for exactly this kind of sustained, repetitive operation.
The cost difference between standard and heavy-duty sections is real — heavier profiles use more raw material and require beefier hardware — but it’s modest compared to the cost of replacing a failed system. Where commercial aluminium window details demand verified performance under high wind loads, heavy glazing, or frequent use, the heavy-duty section pays for itself in longevity and reliability. Where conditions are mild and panels are modest, standard-duty profiles deliver excellent performance at lower material cost without compromise.
The question of structural adequacy rarely exists in isolation, though. In many projects, energy performance requirements run alongside load considerations — and that’s where the choice between thermal break and non-thermal break section geometries adds another layer to the selection process.
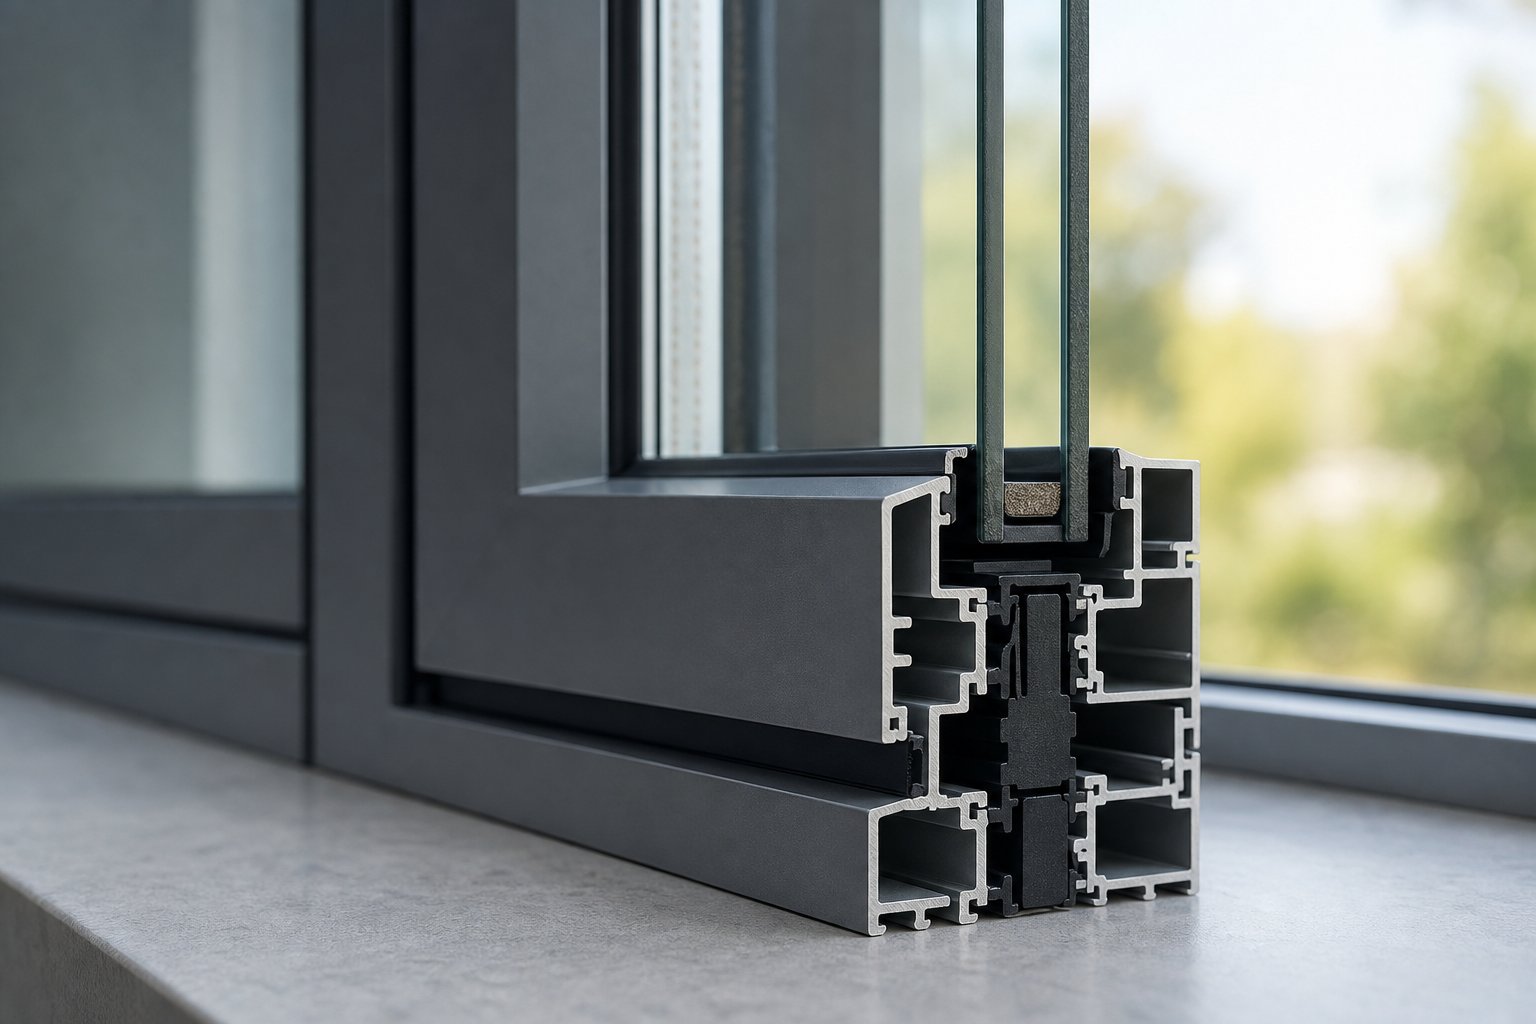
Thermal Break vs Non-Thermal Break Section Profiles
Aluminium conducts heat roughly 1,000 times faster than uPVC. In a standard (non-thermal break) glass aluminium frame, that conductivity creates an uninterrupted thermal bridge — heat flows freely between the exterior and interior faces of the profile. For much of Australia’s climate range, that unchecked conductivity undermines both occupant comfort and NCC energy compliance. Thermal break technology solves the problem by physically splitting the section into two separate aluminium faces joined by a low-conductivity barrier.
How Thermal Break Profiles Differ in Geometry
Two manufacturing methods dominate the market. The most common uses pre-extruded strips of glass fibre–reinforced polyamide (PA66 GF25), mechanically crimped into knurled channels on each aluminium face. The alternative — polyurethane pour-and-debridge — fills a cavity between the two aluminium halves with liquid thermoset polyurethane, which cures in place before the connecting bridge is machined away. Both methods achieve the same goal: eliminating metal-to-metal contact across the section’s depth.
The geometric consequence is immediately visible in any cross-sectional drawing. A standard aluminium sliding window section is a single continuous extrusion — relatively shallow and simple. A thermal break version of the same system is essentially two extrusions bonded by a non-metallic strip, making the overall glazing profiles deeper and more complex. Where a non-thermal break sliding section might sit at 70–100 mm deep, a thermally broken equivalent often ranges from 90 mm to 130 mm or more. The internal chamber count also increases, because each aluminium face needs its own structural web layout independent of the other.
That added depth and complexity matters for wall reveal dimensions, frame weight, and hardware accommodation. Thermal break aluminium glazed window systems are heavier per lineal metre — not just because of extra aluminium, but because the polyamide strip and deeper chambers add material. Rollers, locks, and handles must be specified to suit the deeper sash profiles.
Energy Performance and Section Selection
The performance gap between thermal break and non-thermal break sections is substantial. Standard aluminium frames typically produce frame U-values (Uf) of 3.5–7.0 W/m²K — effectively non-compliant with energy codes in most regulated markets. Introducing a 20–35 mm polyamide strip drops that figure to approximately 1.4–2.5 W/m²K, while wider strips (40 mm+) or poured polyurethane systems can push below 1.0 W/m²K.
The wider the thermal break strip within the section, the longer the thermal path between exterior and interior aluminium faces — and the lower the frame’s U-value. Section depth and thermal performance are directly linked: deeper glazing profiles accommodate wider breaks, delivering measurably better insulation.
For aluminium double glazed windows in Australian projects, the thermal break decision maps closely to NCC climate zones. In Zone 1 (Darwin, Cairns) and Zone 2 (Brisbane, Perth north), SHGC control through glass selection often matters more than frame U-value, and non-thermal break sections may still achieve compliance. But from Zone 4 (Sydney, Adelaide) southward — particularly in Zones 6, 7, and 8 (Melbourne, Tasmania, alpine regions) — frame U-value targets tighten considerably, and aluminium double glazing paired with a thermally broken frame becomes effectively necessary for NatHERS 7-star compliance under NCC 2025.
The practical question isn’t whether thermal break technology works — it clearly does. It’s whether the added section depth, weight, and cost are justified for your specific climate zone, orientation, and performance target. In temperate and cool southern Australian climates, thermally broken aluminium glass sections paired with Low-E double or triple glazing deliver whole-window Uw values between 1.0 and 2.0 W/m²K — comfortably within compliance range. In tropical northern zones where cooling loads dominate, the investment in thermal break profiles may yield less return than spending the same budget on superior solar control glazing.
That climate-zone logic feeds directly into a broader selection framework — one that weighs thermal performance alongside opening size, wind zone, glazing weight, and budget to arrive at the right section for each specific project.
Selecting the Right Section for Your Project
Climate zone narrows your thermal break decision, but it’s only one variable in a larger equation. The correct aluminium sliding window section for any given opening depends on at least five factors working together — and skipping even one can leave you with a profile that’s either overkill for the budget or inadequate for the load.
Step-by-Step Section Selection Framework
Rather than picking a section that looks right in a catalogue, work through the variables in sequence. Each step eliminates options until you’re left with a shortlist that genuinely fits your project conditions.
- Measure the opening and determine track count. Width and height define whether you need a 2-track, 3-track, or 4-track system. Wider openings demanding greater ventilation push toward 3- or 4-track configurations, which require deeper frame sections. For standard residential aluminium windows — bedrooms, kitchens, compact balcony doors — a 2-track system typically covers the brief.
- Identify your wind zone classification. AS 2047 assigns wind classifications (N1 through N6 for non-cyclonic, C1 through C4 for cyclonic regions). Higher classifications demand profiles with greater moment of inertia. A window facing prevailing winds on an exposed coastal elevation in northern Queensland needs a fundamentally different section than one sheltered at ground level in suburban Melbourne.
- Confirm glazing type and calculate panel weight. Single glazing, double glazing, laminated, or triple — each adds weight. Multiply glass area by the glazing weight per square metre, then check that figure against the section’s maximum panel weight rating and roller capacity. If you’re specifying aluminium double glazed windows, factor in the heavier insulated glass unit early.
- Assess usage frequency and project type. A sliding window in a hotel corridor or school building cycles dozens of times daily. High-frequency use demands heavier-duty rollers and more robust interlock geometry — which only certain sections accommodate. For custom aluminium windows in commercial fit-outs, err toward the heavier profile even if panel weight alone doesn’t demand it.
- Cross-check structural adequacy against span. Pull the moment of inertia (Ix) from the catalogue for your shortlisted sections. Compare it against the minimum value required for your span and wind classification. If the standard-duty section falls short, step up to the heavy-duty option within the same series.
- Balance cost against performance. Heavier sections cost more per lineal metre — they use more aluminium. Calculate the total material cost difference across all openings in the project. If the premium is modest relative to total window cost, the structural margin is worth having. If it’s substantial and the standard section technically passes, the lighter profile is the rational choice.
For readers evaluating 2-track options for residential or project-based applications, MEICHEN’s MA100 2-track sliding window system offers a practical reference point — a project-ready aluminium sliding window section system designed for supply to builders, developers, and architects working on multi-unit or single-dwelling projects.
Balancing Performance and Budget in Section Choice
The temptation is to over-specify — pick the heaviest section available and eliminate all risk. But aluminium window supplies carry real material cost, and unnecessary weight adds expense without adding performance where it isn’t needed. A ground-floor bedroom window in a sheltered wind zone doesn’t benefit from a section rated for high-rise cyclone exposure.
Conversely, underspecifying to save a few dollars per metre is a false economy. A profile that deflects beyond limits under design wind pressure will compromise seals, stress locks, and eventually fail structurally. Reputable aluminium windows manufacturers publish clear span tables and load ratings — use them. If data feels ambiguous or your project sits at the boundary between duty ratings, consult the aluminium windows company supplying the sections directly. Most suppliers with genuine technical capability will confirm suitability for specific span and wind combinations without hesitation.
The decision framework above works for bespoke aluminium windows and standard aluminium window frame kits alike. Whether you’re specifying a single opening or coordinating sections across a 50-unit development, the logic remains the same: measure, classify, calculate, and verify — then select the lightest section that comfortably exceeds every requirement.
A sound selection process avoids the most expensive mistakes. But even experienced specifiers trip over a handful of recurring errors that no framework can fully prevent without awareness of what typically goes wrong.
Common Mistakes in Aluminium Sliding Window Section Selection
Knowing how to select the right window frame section doesn’t guarantee a clean outcome if you fall into traps that catch even experienced professionals. Some errors show up immediately — panels that won’t slide or locks that don’t engage. Others hide for months before manifesting as leaks, rattles, or structural distress. Here are the mistakes that appear most frequently in the field, along with practical ways to avoid each one.
Undersizing Sections for Large Openings
This is the single most common failure. A specifier chooses a standard-duty profile because it’s lighter and cheaper, then pairs it with a panel that exceeds the section’s rated span or weight capacity. The result is excessive deflection under wind load — the frame bows inward, breaking the seal line and stressing hardware fixings. Over time, rollers wear prematurely and the sash binds or drops.
The fix is straightforward: always cross-check the profile’s moment of inertia against the required minimum for the actual span and wind classification. If a 2.4 m wide panel in an exposed wind zone needs an Ix value the standard section can’t deliver, step up to the heavy-duty option within the same aluminium system. No amount of skilled fabrication compensates for insufficient structural section.
Ignoring Thermal Expansion and Series Compatibility
Aluminium expands at approximately 23 micrometres per metre per degree Celsius — roughly twice the rate of steel. On a long horizontal run of 4 metres or more, temperature swings between a cold winter morning and full afternoon sun can produce movement of 2–3 mm. If the frame is rigidly fixed at both ends without expansion allowance, the profile bows, interlocks bind, and seals gap. Dark-coloured frames in direct sun are particularly vulnerable because surface temperatures can climb well above ambient.
Mismatching aluminium window frame parts from different series is the other reliability killer in this category. Each manufacturer’s alu systems are dimensionally coordinated — seal grooves, track widths, and interlock geometries are designed to work together within a single family. Combining a sash from one series with an outer frame from another typically results in seal misalignment, air leakage, and hardware that won’t lock properly. Always confirm that every component shares the same series ID before ordering.
- Using light-duty sections for oversized or heavy panels: Verify span, panel weight, and wind classification against the manufacturer’s rated limits. Upgrade the section before fabrication, not after installation.
- Ignoring thermal expansion in long runs: Incorporate expansion joints or slotted fixings at intervals recommended by the profile manufacturer — typically every 3–4 metres in exposed locations.
- Mismatching components across different series: Order all aluminum window frame parts — sill, head, jamb, interlock, and glazing bead — from the same series catalogue. Cross-series substitution voids weatherproofing assumptions.
- Neglecting drainage channels in sill sections: Every sill profile includes weep slots and internal drainage paths. Blocked or poorly positioned weeps trap water inside the track, leading to corrosion, mould, and eventual leakage into the wall cavity. Confirm weep hole placement, keep drainage channels clear of sealant during installation, and verify that external drainage paths fall away from the building.
- Specifying incompatible hardware for the track profile: Rollers, locks, and keeps are designed for specific replacement window tracks and interlock depths. A roller assembly intended for a 22 mm track rail won’t seat correctly in a 28 mm heavy-duty channel — and vice versa. Match all parts for sliding windows to the exact track geometry in your chosen section, not to generic off-the-shelf components.
Most of these errors share a root cause: treating individual parts as interchangeable rather than recognising that every aluminium sliding window section assembly functions as a coordinated system. Each profile, seal, and hardware component relies on the dimensional precision of its neighbours. Change one variable without adjusting the rest, and something eventually fails.
That systems-level thinking extends beyond structural and mechanical fit. Even the surface finish applied to a profile adds physical thickness — and if that’s not accounted for, tolerances tighten in ways that affect how the whole assembly operates.
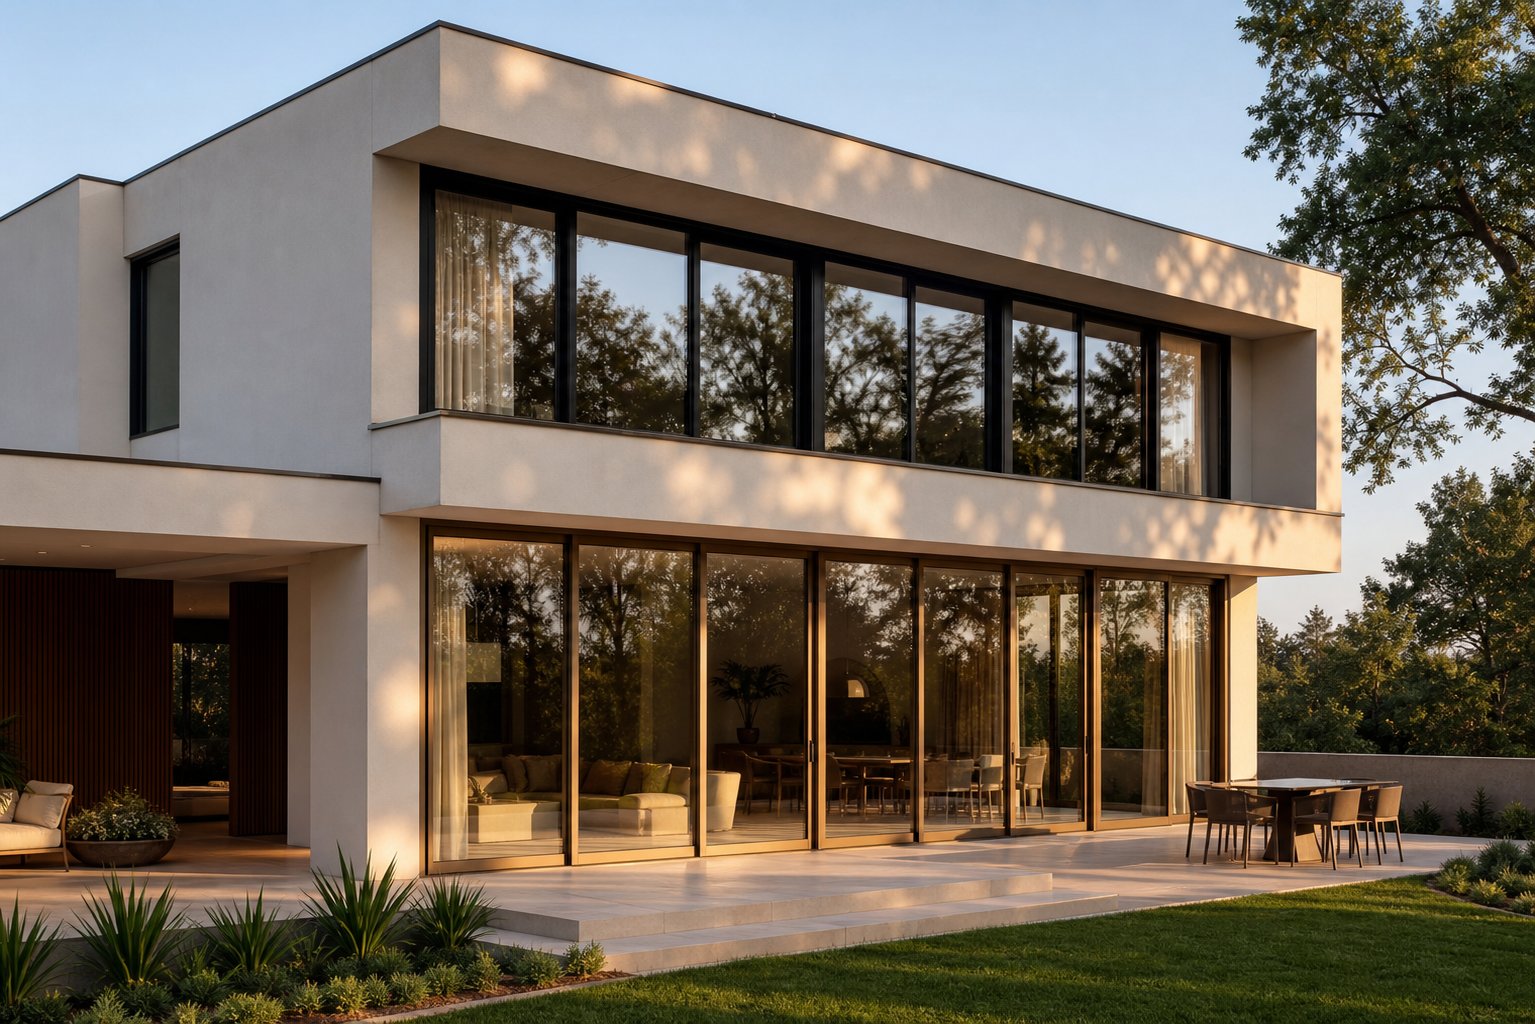
Surface Finishes and Their Impact on Section Profiles
A powder coat or anodised layer isn’t just cosmetic. It physically adds material to the surface of the profile — and in a sliding window system where sash sections must glide within track channels at tight clearances, even fractions of a millimetre matter. The finish you specify changes the effective dimensions of every component in the assembly, influencing fitment, roller travel, and seal compression in ways that aren’t always obvious until the window is built.
How Coating Thickness Affects Section Tolerances
Each finishing method deposits a different film thickness onto the aluminium surface. That thickness builds outward from the base profile, effectively increasing external dimensions and decreasing internal channel widths. In a sliding window track where tolerances between the sash and frame are already tight, the wrong coating build-up can cause binding, excessive friction, or compromised seal engagement.
Here’s how the main finish types compare in dimensional impact:
- Anodising (architectural grade): Builds a hard aluminium oxide layer of 15–25 micrometres (0.015–0.025 mm). Roughly half the oxide layer penetrates into the substrate and half grows outward, so the net dimensional change is minimal — typically under 15 micrometres per face. This thin build preserves tight fits and is why anodising is preferred for slimline aluminium windows where track tolerances are especially narrow.
- Powder coating (single coat): Adds 60–120 micrometres (0.06–0.12 mm) per coated surface. That’s roughly four to eight times thicker than an anodised film. On a sash stile that slides within a track channel, this can reduce available clearance by 0.12–0.24 mm across opposing faces — enough to turn a free-sliding panel into one that drags or binds if the base profile wasn’t designed with coating allowance built in.
- Wood-grain sublimation: Applied over a powder-coated base, so total film build matches or slightly exceeds standard powder coating thickness. The sublimation transfer itself adds negligible thickness, but the prerequisite powder layer carries the same dimensional implications.
- Mill finish (raw): No coating applied. The profile retains its extruded dimensions exactly as manufactured. Mill finish is rarely used in finished aluminium framed windows due to poor corrosion resistance, but it serves as the dimensional baseline for comparison.
Profile manufacturers design their section geometries knowing that a finish will be applied. Window and door profiles produced to EN 12020-2 tolerance standards — the tighter of the two common European extrusion norms — account for coating build-up in their channel and track dimensions. The key takeaway: if you change the specified finish after ordering profiles (say, switching from anodised to powder coated), the effective clearances change too. Always confirm that the profile series was dimensioned for your intended coating method.
Choosing Finishes for Durability and Aesthetics
Beyond tolerances, finish selection shapes how the window looks, performs in its environment, and ages over time. Australian conditions — high UV exposure, salt-laden coastal air, extreme temperature cycling — test coatings harder than most temperate climates. The right choice depends on location, orientation, and aluminium window design intent.
- Anodising: Produces a natural metallic appearance with satin, champagne, or bronze tones. The oxide layer is inorganic and UV-stable, meaning it won’t chalk or fade the way some organic coatings can. Bronze aluminium windows with anodised finishes have long been popular in Australian residential and commercial projects for their understated warmth and excellent corrosion resistance when properly sealed. Maintenance is minimal — neutral pH cleaning is all that’s needed. However, the colour range is limited compared to powder coating, and deep saturated hues are difficult to achieve.
- Powder coating: Opens the full RAL and custom colour spectrum. Matt black finishes dominate contemporary aluminum window design — black aluminium windows have become the default for modern facades, pairing sharp contrast against light render or timber cladding. The coating offers excellent edge coverage on complex profile geometries and can be formulated with super-durable polyester resins for UV resistance in harsh Australian conditions. The trade-off is susceptibility to chipping under sharp impact and the dimensional build-up discussed above.
- Wood-grain sublimation: Transfers a photographic timber pattern onto the powder-coated surface using heat and vacuum. The result is aluminium that visually mimics hardwood — useful for heritage overlays or Queenslander renovations where timber aesthetics are expected but aluminium’s durability is preferred. Sublimated finishes perform well against UV and moisture but can look artificial up close on very wide flat sections.
- Mill finish: Uncoated aluminium straight from extrusion. It oxidises naturally over time, developing a dull grey patina. Suitable only for temporary installations or profiles destined for further processing. Not appropriate for durable aluminium windows in any permanent application, particularly in coastal or industrial atmospheres where unprotected aluminium pits and corrodes.
For projects along Australia’s coastline — from the Gold Coast down to the Mornington Peninsula — salt spray resistance is non-negotiable. Super-durable polyester powder coatings with proper chromate-free pretreatment perform well in these environments, as do well-sealed architectural anodised finishes of 20 micrometres or thicker. Aluminium black windows in marine zones should specify marine-grade powder systems tested to extended salt-spray exposure rather than standard interior-grade coatings that degrade within a few years.
Colour choice also carries a thermal consideration. Dark finishes — particularly matt black and deep bronze — absorb significantly more solar radiation than lighter colours. On an aluminium profile exposed to full western sun, surface temperatures on dark sections can reach 80°C or higher. This amplifies thermal expansion (the same issue discussed in the previous chapter), making expansion allowances and seal flexibility even more critical on dark-finished aluminium framed windows in sun-exposed orientations.
For builders, developers, and architects specifying sections with specific finish combinations for multi-unit or project-based supply, MEICHEN’s MA100 sliding window system offers customisable finish options across their aluminium sliding window sections — a useful reference for those evaluating both section geometry and coating availability from a single supplier.
Ultimately, finish selection isn’t a standalone decision. It interacts with section tolerances, track clearances, thermal behaviour, and long-term maintenance demands. Specifying it early — alongside the structural and dimensional decisions covered throughout this guide — ensures the complete assembly works as a coordinated system from day one.
Frequently Asked Questions About Aluminium Sliding Window Sections
1. What does ‘section’ mean in aluminium sliding windows?
In the aluminium joinery trade, a section refers to the precise cross-sectional shape of an extruded aluminium profile — the geometry visible if you sliced through a frame member and viewed its end face. Each section in a sliding window system (sill, head, jamb, interlock, glazing bead) has a purpose-designed shape that enables it to perform a specific structural or sealing function within the assembly. These profiles are manufactured from 6000-series aluminium alloys and classified by series numbers, weight-per-metre values, and wall thickness grades.
2. How do I choose between a 2-track and 3-track aluminium sliding window?
The choice depends on opening width, ventilation needs, and available wall depth. A 2-track system holds two panels and opens to roughly 50% of the frame width — suited to bedrooms, kitchens, and standard residential openings with frame depths around 70–100 mm. A 3-track system accommodates three panels, opens approximately 66% of the width, and requires a deeper frame (100–130 mm). If maximising airflow across living areas or wide balcony openings is a priority and your wall reveal can accommodate the extra depth, 3-track offers a meaningful ventilation advantage. Some 3-track systems also dedicate one track to a flyscreen panel.
3. What is the difference between standard-duty and heavy-duty aluminium window sections?
Heavy-duty sections feature thicker extrusion walls (1.6–2.0 mm+ versus 1.2–1.4 mm for standard), deeper frame dimensions, and larger roller hardware (25–30 mm diameter versus 18–22 mm). They support panel weights of 80–150 kg or more, compared to 40–60 kg for standard profiles. Heavy-duty sections are specified for high-rise buildings, large-span openings, double or triple-glazed panels, cyclone zones, and high-frequency commercial use. Standard-duty profiles suit ground-level residential windows with single or lightweight double glazing in sheltered wind zones.
4. Do surface finishes affect aluminium sliding window section dimensions?
Yes. Powder coating adds 60–120 micrometres per coated surface, which can reduce track clearances by 0.12–0.24 mm across opposing sash faces — enough to cause binding if the base profile wasn’t designed with coating allowance. Anodising has minimal dimensional impact (under 15 micrometres net change per face) because roughly half the oxide layer penetrates into the substrate. Profile manufacturers typically design section geometries for a specific finish method, so switching from anodised to powder coated after ordering may compromise fitment within track channels.
5. When should I specify thermal break aluminium sliding window sections?
Thermal break sections are most justified in NCC climate zones 4 through 8 (Sydney, Adelaide, Melbourne, Tasmania, and alpine regions) where frame U-value targets are stringent and NatHERS 7-star compliance under NCC 2025 effectively requires thermally broken frames paired with double or triple glazing. In tropical northern zones (1 and 2), cooling loads dominate and solar control glazing selection often delivers better return than investing in thermal break profiles. Thermal break sections are deeper (90–130 mm+), heavier, and more costly than standard profiles, so the decision should align with your specific climate zone, energy targets, and budget.
More Window & Door Guides