What Is an Aluminium Window Fly Screen Frame
Not every mesh tacked over a window qualifies as a proper fly screen. Stick-on strips, magnetic curtains, and loose netting draped across an opening might slow a few bugs down, but they lack the structural integrity to seal an opening reliably season after season. An aluminium window fly screen frame is a different proposition entirely.
Definition and Core Purpose
An aluminium window fly screen frame is a rigid, purpose-built perimeter structure made from extruded or roll-formed aluminium profiles, designed to hold tensioned mesh securely across a window opening. It mounts into or against the window system using springs, clips, or dedicated tracks, creating a permanent insect barrier that preserves full airflow and outward visibility.
The screen frame does two jobs simultaneously. It keeps mosquitoes, flies, and other pests out of your living space, and it holds the mesh taut enough to maintain clear sightlines and unobstructed ventilation. Without a proper frame, mesh sags, tears at the edges, and leaves gaps that insects exploit within weeks. A quality aluminium window screen frame eliminates those problems by giving the mesh a stable, dimensionally accurate border that stays true over years of use.
Why Aluminium Dominates Fly Screen Framing
Three material properties explain why aluminium is the go-to choice for screen frames across Australia and globally. First, it is genuinely lightweight, making screens easy to remove, clean, and reinstall without strain. Second, aluminium forms a natural oxide layer that resists corrosion without additional treatment, a significant advantage in humid or coastal climates. Third, it is dimensionally stable. Unlike timber that swells and shrinks with moisture changes, or vinyl that softens in summer heat, an aluminium screen frame holds its shape through temperature extremes and seasonal cycling.
These qualities combine to make aluminium screens a practical long-term investment rather than a consumable you replace every few years. The material is also fully recyclable at end of life, adding a sustainability edge over plastic alternatives that degrade under UV and end up in landfill.
This guide covers everything from frame anatomy and profile types through to measuring, installation, and maintenance, so you can pick the right aluminium window screen, fit it properly, and forget about it for years to come.
Anatomy of a Fly Screen Frame
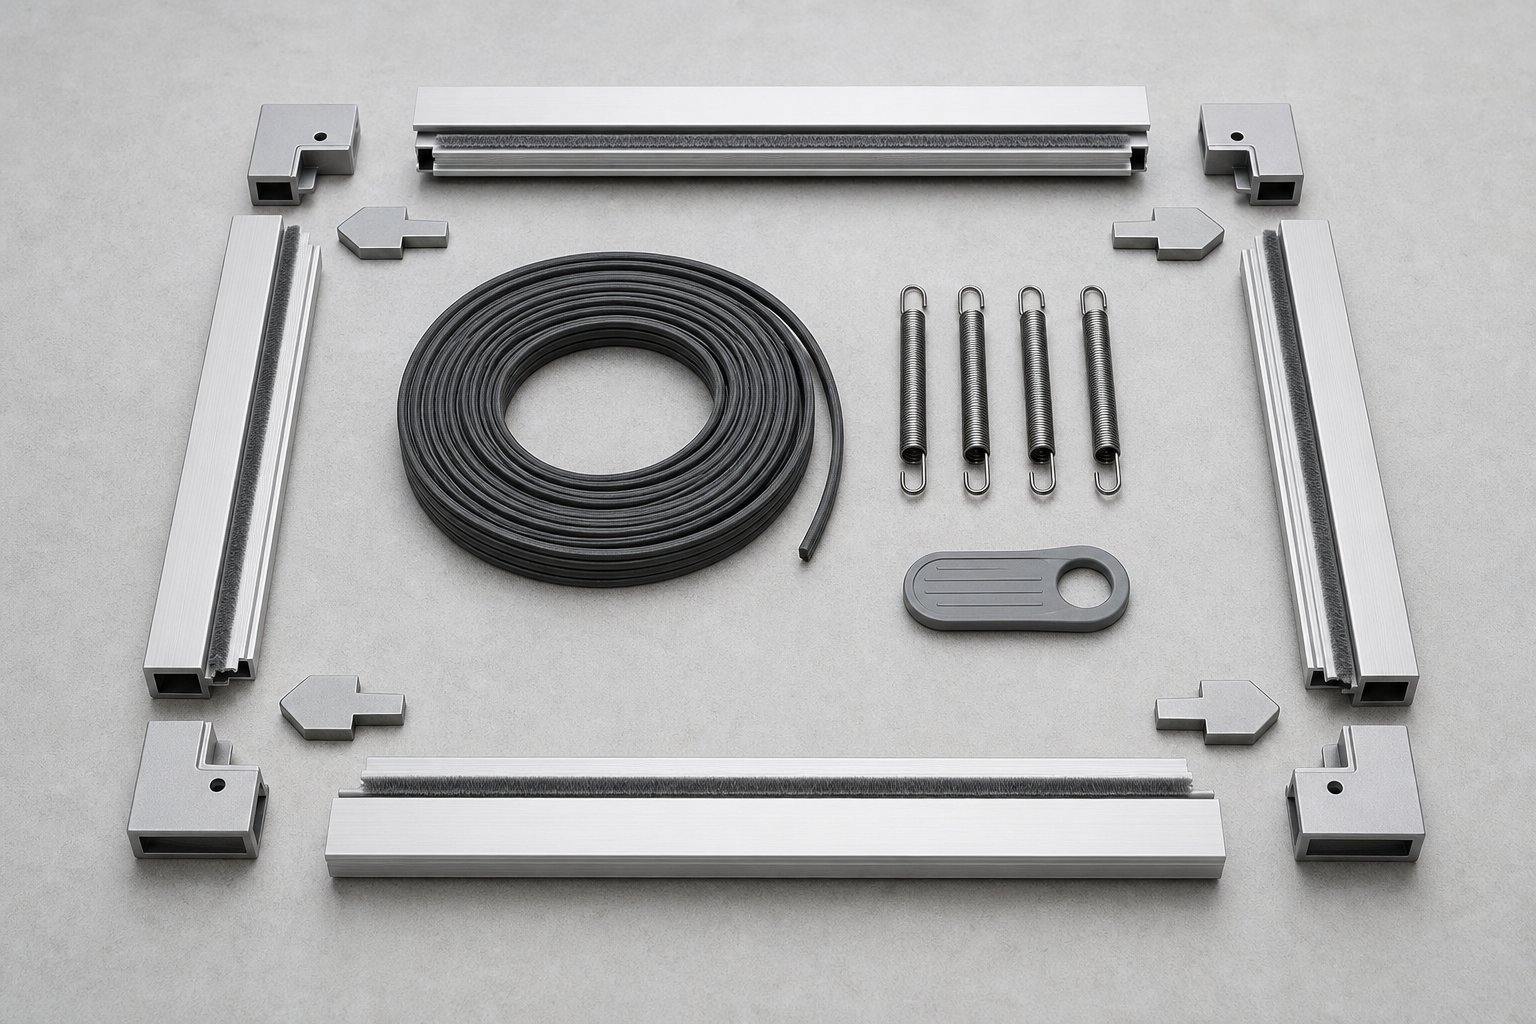
A fly screen looks deceptively simple from across the room — just a rectangle of mesh sitting in your window. But pick one up, and you will notice every element has a specific job. Understanding these parts helps when you are ordering a replacement screen frame, troubleshooting a rattle, or building a screen from a kit. Here is what makes up a typical aluminium screen frame, piece by piece.
- Top rail — the horizontal profile running across the top of the frame, providing rigidity and anchoring the mesh along the upper edge.
- Bottom rail — mirrors the top rail but often incorporates a slightly different profile to accept springs, clips, or a weep slot for drainage.
- Stiles — the two vertical side members that connect the top and bottom rails, giving the frame its height and structural depth.
- Corner joints — internal keys or crimped connections (mitre-cut at 45 degrees or butt-joined at 90 degrees) that lock rails and stiles together into a rigid rectangle.
- Spline channel — a continuous groove running around the inner face of all four frame members, designed to accept a rubber or foam spline that wedges the mesh in place.
- Tension springs — small coil springs housed in the top corners (or sometimes the bottom) that compress when you insert the screen and push outward against the window track to hold it firm.
- Clips or pins — alternative retention hardware used on fixed or hinged screen frames for windows where spring tension is not practical.
- Pull tabs — small plastic or metal tabs riveted to the bottom rail, giving you a finger grip to compress the springs and lift the screen out for cleaning.
Rails, Stiles, and Corner Joints
Rails and stiles form the outer skeleton. On most residential screen frames, they are cut from the same extruded aluminium profile — a channel shape roughly 7 mm to 10 mm wide with a built-in spline groove on one face. Corner joints bind these four pieces into a rectangle. Mitre-cut corners with internal aluminium keys give a clean 45-degree seam, while butt joints using plastic or metal corner inserts are faster to assemble and common in DIY kits. Either method produces a solid frame for screen mesh retention, provided the joints are seated fully and square.
Spline Channels and Mesh Retention
The window screen channel — that narrow groove you can feel running around the inside edge of the frame — is where all the mesh-holding magic happens. A flexible rubber or foam spline is rolled into the channel on top of the mesh, trapping the fabric firmly in place. The channel width (typically 3.5 mm to 6.5 mm in Australia) dictates which spline diameter you need. Too thin, and the mesh pulls free in wind; too thick, and the spline will not seat properly. This spline-in-channel system lets you re-mesh an existing frame without replacing the aluminium itself, making the window screen and frame combination a long-lasting, serviceable unit.
Springs, Clips, and Pull Tabs
Removable screens rely on tension springs to stay put. When you push the screen into the window track, the springs compress and then push outward, creating friction that holds the frame steady against wind and vibration. Pull tabs on the bottom rail let you compress those springs inward and release the frame for removal. Fixed or hinged screen frames for windows skip springs entirely, using screw-fixed clips, turn buttons, or pin-and-socket hardware instead. Regardless of the retention method, the goal is the same: keep the screen and frame assembly snug in the opening without rattling, while still allowing access when you need to clean the glass or replace the mesh.
Each of these components is available individually, which means a damaged corner key or worn spline does not force you to buy an entirely new unit. That modularity is one reason aluminium screen frames remain popular with DIYers across Australia — repair what is broken, leave the rest alone.
Roll-Formed vs Extruded Aluminium Profiles
The aluminium profile in your fly screen frame arrived at its shape through one of two manufacturing processes. Both start with raw aluminium, but they produce frames with noticeably different characteristics in strength, precision, and longevity. Knowing the difference helps you understand why two screen frames aluminum can look similar on the shelf yet perform very differently over a decade of use.
How Roll-Formed Profiles Are Made
Roll-forming starts with a flat strip of aluminium sheet. That strip feeds through a series of roller pairs, each set bending it a little further until the flat metal gradually takes on the desired channel shape. Think of it like folding a piece of paper into a trough, one crease at a time, except the “paper” is aluminium and the “creases” are formed by hardened steel rollers at speed.
The process is fast and uses less raw material per metre of profile. That translates directly into lower cost at the hardware store. However, roll-formed profiles have thinner walls — typically 0.5 mm to 0.8 mm — and the bending process limits how complex the cross-section can be. You get a simple channel with a spline groove, and that is about it. For lightweight, budget-friendly fly screens on standard windows that do not cop heavy wind loads, roll-formed frames do the job. They are the window screen framing material you will find in most off-the-shelf replacement kits across Australia.
Extruded Profiles and Why They Last Longer
Extrusion takes a fundamentally different approach. A heated aluminium billet — brought to around 400–520 °C until malleable — is forced under enormous hydraulic pressure through a precision-machined steel die. The die’s opening determines the exact cross-sectional shape of the emerging profile, and that shape can be far more intricate than anything roll-forming achieves.
Because the aluminium fills the entire die cavity, extruded profiles have consistent wall thickness, tighter dimensional tolerances, and the ability to incorporate complex features — deeper spline channels, integrated mounting flanges, or hollow internal chambers that add rigidity without extra weight. Wall thickness on an extruded aluminum screen frame typically ranges from 0.8 mm to 1.2 mm for residential fly screens, with heavier commercial profiles going thicker still.
The key advantage is durability. As manufacturing specialists note, the finished extruded product has greater strength and durability than a roll-formed product because it uses more material in the fabrication process. For fly screen frames, that extra rigidity means less bowing across wide openings, better corner joint retention, and a longer service life before the frame needs replacement. If you are investing in aluminum framing for screens on a coastal property or large window, extrusion is the profile type worth specifying.
Wall Thickness and What It Means for You
Specifications like “0.6 mm wall” or “1.0 mm wall” can feel abstract until you hold both profiles side by side. Here is what those numbers mean in everyday terms:
- Frame rigidity — Thicker walls resist flexing. A 1.0 mm extruded profile spanning a 1200 mm opening stays straight, while a 0.5 mm roll-formed profile across the same span may bow inward under wind pressure or when you press on the mesh.
- Corner joint strength — Corner keys grip better in thicker aluminium. Thin-walled frames are more prone to loosening at the joints over time, especially if the screen is removed and refitted regularly.
- Lifespan — Thicker aluminium tolerates more surface wear, minor impacts, and repeated spline replacement without deforming. An extruded frame can realistically last 20–30 years; a thin roll-formed frame may need replacing after 8–12 years in exposed conditions.
For most homeowners, the decision boils down to context. A small bathroom window that rarely gets touched? Roll-formed is fine. A large living room opening facing the prevailing wind in a coastal suburb? Spend the extra on an extruded aluminum screen frame and forget about it for decades.
| Attribute | Roll-Formed | Extruded |
|---|---|---|
| Manufacturing method | Flat strip bent through roller pairs | Heated billet forced through a precision die |
| Typical wall thickness | 0.5–0.8 mm | 0.8–1.2 mm (residential); thicker for commercial |
| Cross-section complexity | Simple channels only | Complex shapes, hollow chambers, integrated flanges |
| Dimensional tolerance | Moderate (±0.3–0.5 mm) | Tight (±0.1–0.3 mm) |
| Relative cost | Lower | Higher |
| Durability and lifespan | Moderate (8–12 years in exposed conditions) | High (20–30 years typical) |
| Best application | Budget replacements, small or sheltered windows | Large openings, coastal homes, long-term installations |
The aluminum window screen frame material you choose sets the ceiling on how long the entire assembly will last. Mesh can be replaced cheaply, but a bowed or loose frame means starting from scratch. Investing in the right profile type upfront — matched to your window size, exposure, and how long you plan to stay in the home — is the simplest way to avoid repeat purchases down the track.
Types of Aluminium Fly Screen Frame Profiles
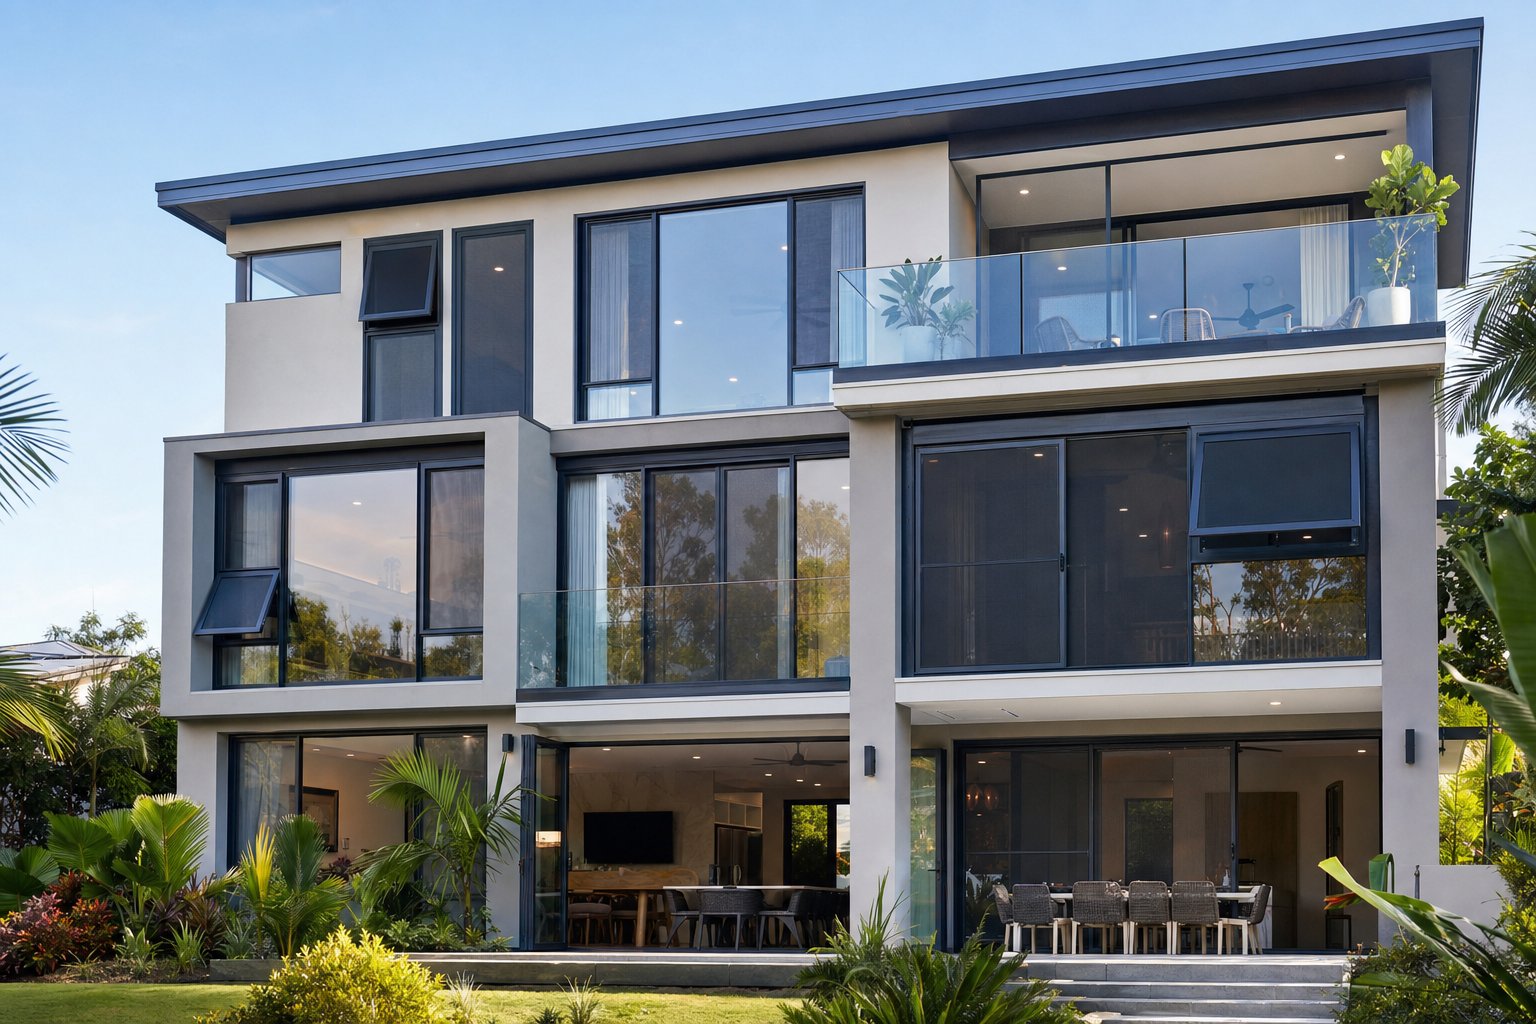
Choosing the right profile type is just as important as picking the right material. A perfectly extruded aluminium frame is useless if it cannot physically mount to your window or conflicts with how the sash opens. Five main profile categories cover the full range of residential window screen frames, and each one pairs with specific window styles and attachment methods.
Fixed and Sliding Frame Profiles
Fixed frames are the simplest design. A rigid aluminium rectangle, mesh tensioned across it with a spline, and spring-loaded corners or turn clips holding it in the window reveal. You push the screen in, the springs compress against the track, and it stays put until you pull it out for cleaning. Fixed framed window screens suit any window where the sash opens outward or upward — awning windows, picture windows, and outward-opening casements — because the screen sits on the interior side and never interferes with the sash movement.
Sliding profiles take that same rigid frame and mount it on a dedicated track so it can glide horizontally or vertically. Double-hung windows use vertical sliding window screens that run in a parallel channel beside the sash, while horizontal slider windows use a screen that tracks left or right. The frame edges typically feature a pile seal — a strip of fine bristle — to block gaps between the screen and the track without creating friction that makes sliding difficult. For households with double-hung or horizontal sliding windows, this is the most common configuration across Australian homes.
Hinged and Retractable Frame Profiles
Hinged fly screen frames swing open on one or more small pin hinges, letting you access the window handle without removing the entire screen. They are the go-to choice for casement windows that open via a crank or lever handle on the inside. A magnetic latch or spring catch holds the hinged frame closed during normal use, while a simple push or lift releases it when you need to operate the window.
Retractable (roll-up) profiles work differently again. The mesh rolls into a compact aluminium cassette housing at the top or side of the window frame. When you need the screen, you pull it down or across; when you want an unobstructed view, it retracts and virtually disappears. As retractable screen specialists note, this style blends right into the window frame and is especially well suited to awning and casement windows where a permanent fixed frame would block access to the sash. They are also popular for large openings — bi-fold door reveals, wide servery windows — where storing a full-size rigid frame would be impractical.
Magnetic Frames and Temporary Solutions
Not everyone owns their home, and not every window justifies a permanent installation. Magnetic fly screen frames use a flexible aluminium or PVC-coated strip bonded with magnetic tape that adheres to a steel or magnetic strip stuck around the window reveal. No screws, no tracks, no modification to the existing joinery. They peel off cleanly when you move out or when the season changes.
The trade-off is durability. Magnetic window screens with frame strips lack the rigidity of a spring-loaded or track-mounted unit, making them prone to peeling in strong wind or losing adhesion over time. They serve renters and short-term situations well but are not a long-term substitute for properly mounted aluminum screens for windows in permanent residences.
Matching Profile Type to Your Window Style
The table below maps common Australian window styles to the frame profile that integrates best with their opening mechanism and hardware.
| Window Style | Recommended Frame Profile | Attachment Method |
|---|---|---|
| Casement (side-hung, opens outward) | Hinged or retractable | Pin hinges with magnetic catch, or cassette-mounted with guide tracks |
| Double-hung (vertical sliding sashes) | Sliding (vertical) or fixed | Channel track with pile seal, or spring-loaded into reveal |
| Horizontal slider | Sliding (horizontal) | Channel track with pile seal |
| Awning (top-hung, opens outward) | Fixed or retractable | Spring-loaded clips into interior reveal, or top-mounted cassette |
| Picture / fixed glass | Fixed | Spring-loaded or screw-fixed clips |
| Bi-fold or large opening | Retractable (horizontal) | Side-mounted cassette with top and bottom guide tracks |
Getting the match right matters because the frame profile must integrate precisely with the host window’s channel depth, hardware clearance, and sash travel. Aluminium fly screen windows perform best when the window system itself is designed with fly screen accommodation in mind. Purpose-built aluminium window systems — such as those from MEICHEN — are engineered with dedicated fly screen tracks, compatible hardware clearances, and pre-calculated channel depths across their casement, sliding, and awning ranges. That kind of system-level design removes the guesswork from frame selection and ensures aluminum framed window screens sit flush, seal properly, and operate without binding.
Where the window and screen are designed as a unified system rather than mismatched aftermarket parts, you avoid the common frustrations: screens that rattle in the track, frames too deep for the reveal, or hinged units that foul on the window crank. Specifying window screens with frames that are purpose-matched to the host window is the single most reliable path to a fit-and-forget result.
Aluminium Compared to Other Frame Materials
Profile type determines how the screen mounts, but window screen frame material determines how long it lasts. Aluminium is the dominant choice in Australia, yet fiberglass, vinyl, wood, and steel all have their advocates. An honest comparison helps you decide whether the aluminium screen frame premium is justified for your situation — or whether an alternative makes more sense.
Aluminium vs Fiberglass and Vinyl Frames
Fiberglass-framed screens are rare in Australia but common in parts of North America. The material is lightweight and corrosion-proof, but it lacks structural rigidity in larger sizes and becomes brittle under prolonged UV exposure — a serious concern given Australian sun intensity. You will not find many fiberglass frame options at local suppliers, and sourcing replacement parts can be difficult.
Vinyl (PVC) frames sit at the budget end of the spectrum. They resist corrosion entirely, will not conduct electricity, and cost less per metre than aluminium. The downsides show up over time. Vinyl softens in summer heat and becomes brittle in cold, meaning frames in exposed positions can warp, crack, or discolour within 8–12 years. In contrast, a quality aluminium screen frame holds its shape through decades of temperature cycling without degradation. Vinyl is also difficult to recycle in practice — most councils do not accept PVC screen frames in kerbside recycling, and the material degrades with each reprocessing cycle.
Aluminium vs Wood and Steel Frames
A wood screen frame appeals on aesthetic grounds, particularly in heritage homes or Queenslanders where timber joinery is part of the character. Practically, though, timber demands regular sealing or painting to prevent moisture damage, and it swells and shrinks with humidity changes. That dimensional instability can make screens difficult to remove or create gaps that defeat the purpose of insect protection. Termite risk in many Australian regions adds another maintenance burden.
Steel provides exceptional strength — a metal screen frame in heavy-gauge steel is virtually impossible to force through, which is why steel dominates the security screen market. But standard mild steel rusts aggressively unless galvanised or powder-coated, and even coated steel can corrode at cut edges or scratches in coastal environments. Stainless steel solves the corrosion issue but at three to five times the cost of aluminium. For general insect screening rather than security applications, metal window screens in aluminium strike the best balance between strength, corrosion resistance, and affordability.
Sustainability and Recyclability
This is where aluminium pulls decisively ahead. Roughly 75% of all aluminium ever produced remains in active use, and recycling it requires only about 5% of the energy needed for primary production. An old aluminium frame tossed in the scrap bin comes back as new aluminium — endlessly, without losing strength or quality. By contrast, vinyl degrades with each recycling attempt and typically ends its life in landfill. Wood is biodegradable but often treated with chemicals that complicate disposal. Steel is recyclable but heavier to transport and more energy-intensive to reprocess than aluminium.
For Australian homeowners weighing up alu screens against the alternatives, the sustainability calculation is straightforward: aluminium lasts longer in service, recycles completely at end of life, and avoids the UV-driven degradation that sends plastic frames to landfill prematurely. Even metal screen mesh for windows — aluminium woven wire rather than fiberglass cloth — shares this recyclability advantage, making an all-aluminium screen assembly (metallic screen frame plus aluminium mesh) one of the most circular products you can install in a home.
That said, aluminium is not without trade-offs. Upfront cost runs 15–30% higher than vinyl for equivalent frame profiles. And if an aluminium frame contacts dissimilar metals — steel screws, copper flashings — galvanic corrosion can develop at the junction point. Using stainless steel fasteners or nylon isolation washers eliminates this risk entirely.
| Attribute | Aluminium | Fiberglass | Vinyl (PVC) | Wood | Steel |
|---|---|---|---|---|---|
| Durability | High — no warping, UV-stable | Moderate — brittle under prolonged UV | Low to moderate — softens in heat, cracks in cold | Moderate — requires sealing; swells and shrinks | High — extremely strong; corrosion risk if uncoated |
| Relative cost (supply only) | Medium | Medium-low | Low | Medium-high | High (stainless) / Medium (mild) |
| Weight | Light | Very light | Light | Medium-heavy | Heavy |
| UV resistance | Excellent | Poor to moderate | Poor — discolours and embrittles | Requires protective coating | N/A (metal does not degrade from UV) |
| Corrosion resistance | Very good (natural oxide layer; anodise or powder coat for coastal) | Excellent (non-metallic) | Excellent (non-metallic) | Poor without treatment | Poor (mild) / Excellent (stainless) |
| Recyclability | Fully recyclable, infinite cycles | Limited | Technically recyclable but rarely accepted; degrades | Biodegradable but chemical treatments complicate disposal | Fully recyclable |
| Typical lifespan | 20–30 years | 10–15 years | 8–12 years (exposed); 15 years (sheltered) | 10–20 years with maintenance | 15–25 years (coated mild); 40+ years (stainless) |
| Best climate scenario | All Australian climates; powder coat or anodise for coastal | Sheltered, mild climates | Temperate inland areas with low UV | Dry inland climates; heritage applications | Security applications; inland or with marine-grade coating |
The comparison makes clear that no single material wins on every front. But for most Australian homes — where UV intensity is high, temperatures swing widely, and longevity matters — aluminium delivers the strongest all-round package. The slightly higher buy-in pays for itself through decades of zero-maintenance service and genuine end-of-life recyclability, a combination no other window screen frame material can match across the board.
Alloy Grades, Coatings, and Weather Resistance
Product listings for aluminum screen frames are packed with codes and jargon — “6063-T5”, “anodised”, “marine-grade powder coat” — that mean nothing unless you know how to decode them. These specifications directly affect how your frame handles sun, salt, and decades of weather exposure, so they are worth understanding before you buy.
Common Aluminium Alloy Grades Explained
Most aluminum window screen frames are made from one of two alloy families in the 6000 series: 6063 or 6061. Both use silicon and magnesium as their primary alloying elements, but they are tuned for different priorities.
6063-T5 is the workhorse alloy for fly screen framing and window profiles generally. The “6063” designates its chemical composition, while “T5” indicates it has been artificially aged after extrusion to improve hardness. This alloy offers excellent formability, a smooth surface finish, and strong corrosion resistance — exactly what you want in a visible architectural profile. It extrudes cleanly into complex cross-sections, accepts anodising beautifully, and provides more than enough strength for residential aluminum screen framing.
6061-T6 is the stronger sibling, with higher tensile and yield strength thanks to additional copper in the alloy mix. The T6 temper means it has been solution heat-treated and artificially aged — a more intensive process that boosts hardness significantly. You will find 6061-T6 in security screen frames or commercial applications where impact resistance matters more than surface aesthetics. For standard insect screening, 6063-T5 remains the better choice because it is easier to extrude into fine detail, finishes more consistently, and costs less to manufacture into aluminum frames for screens.
In practical terms, if a product page lists 6063-T5, you are getting the industry-standard alloy optimised for fly screen and window framing. If it lists 6061-T6, the frame is built for heavier-duty applications. Both resist corrosion well in their raw state, but surface coatings determine how long that protection lasts in harsh environments.
Anodising vs Powder Coating
Raw aluminium straight from the die — known as mill finish — already has a thin natural oxide layer that prevents rapid corrosion. But in Australian conditions, especially near the coast or in high-UV environments, mill finish is not enough for long-term performance. Two surface treatments dominate the market for aluminum frame screen products:
Anodising is an electrochemical process that thickens the natural oxide layer on the aluminium surface. The frame is submerged in an electrolyte bath, and an electric current grows a hard, transparent oxide coating that becomes part of the metal rather than sitting on top of it. As manufacturing specialists explain, this oxide layer will not peel or flake because it is integral to the aluminium itself. It preserves a metallic look, maintains tight tolerances, and offers excellent wear resistance. A black aluminium screen with an anodised finish retains its dark tone without the risk of chipping that paint-based coatings carry.
Powder coating applies an electrostatically charged dry powder to the frame, which is then cured in an oven to form a tough, uniform film. The result is a thicker protective layer (typically 60–80 microns for standard exterior use) with a vast palette of colour options, textures, and gloss levels. A black window screen frame finished in powder coat achieves a rich, even tone that hides minor handling marks. Powder coating is the more common finish for residential aluminum framed screens across inland Australia because it is cost-effective, durable, and available in virtually any colour to match existing window joinery.
- Mill finish (raw) — untreated aluminium with only its natural oxide film; suitable for temporary or budget applications in dry, sheltered positions. Not recommended for long-term exterior exposure.
- Standard anodising (10–25 microns) — electrochemically grown oxide layer; excellent abrasion resistance and metallic aesthetic; ideal for inland areas with moderate weather exposure.
- Marine-grade anodising (25+ microns) — thicker anodic layer for superior salt-spray resistance; essential within 5 km of the coastline where salt air accelerates corrosion.
- Standard powder coating (60–80 microns) — cured thermoset film; broad colour range; strong UV and chip resistance; suits most inland and suburban environments across Australia.
- Marine-grade powder coating (80–120+ microns) — thicker, high-durability polyester or PVDF-based coating rated for coastal exposure; resists salt spray, chalking, and colour fade in harsh beachside conditions.
Choosing Coatings for Your Climate
Climate is the deciding factor. If your home sits in a temperate inland suburb — say, western Sydney, Melbourne’s outer east, or Adelaide’s foothills — standard powder coating handles decades of sun, rain, and temperature swings without issue. The coating thickness is enough to resist UV degradation and minor abrasion, and its colour-matching flexibility lets you blend aluminum screen frames seamlessly with existing window hardware.
Move within a few kilometres of the coast, and the calculation shifts. Salt-laden air attacks coatings relentlessly, and standard 60-micron powder coat can break down within a few years on directly exposed surfaces. Coastal properties — anywhere from the Gold Coast to Perth’s beachside suburbs to northern Queensland — benefit from either marine-grade anodising or a thicker marine-rated powder coat (80+ microns). Homes within 500 metres of breaking surf should specify the heaviest protection available: 100–120+ micron coatings or PVDF-based systems rated to withstand thousands of hours of salt-spray testing.
For tropical northern regions where humidity stays high year-round, the combination of moisture and UV is aggressive. Marine-grade finishes are recommended even if the property is several kilometres inland, because persistent humidity keeps surfaces damp longer and accelerates any coating weakness.
Whichever coating you choose, confirm that hardware — springs, corner keys, screws — is compatible with the frame’s alloy. Stainless steel fasteners (Grade 316 for coastal, Grade 304 for inland) prevent galvanic corrosion at contact points and protect the investment you have made in quality aluminium and coatings. Getting the alloy and finish right means the frame handles the weather; the next step is making sure it fits the opening.
How to Measure Your Windows for Fly Screen Frames
A frame made from the right alloy and finished in the right coating will last decades — but only if it actually fits the opening. Measuring for a replacement window screen frame is straightforward, yet small errors compound fast. A screen window frame that is 3 mm too wide will not slide into the track, and one that is 5 mm too narrow leaves a gap insects treat as an open invitation. Accurate measurements eliminate both problems before you order.
Tools You Need Before Measuring
Gather these before you start:
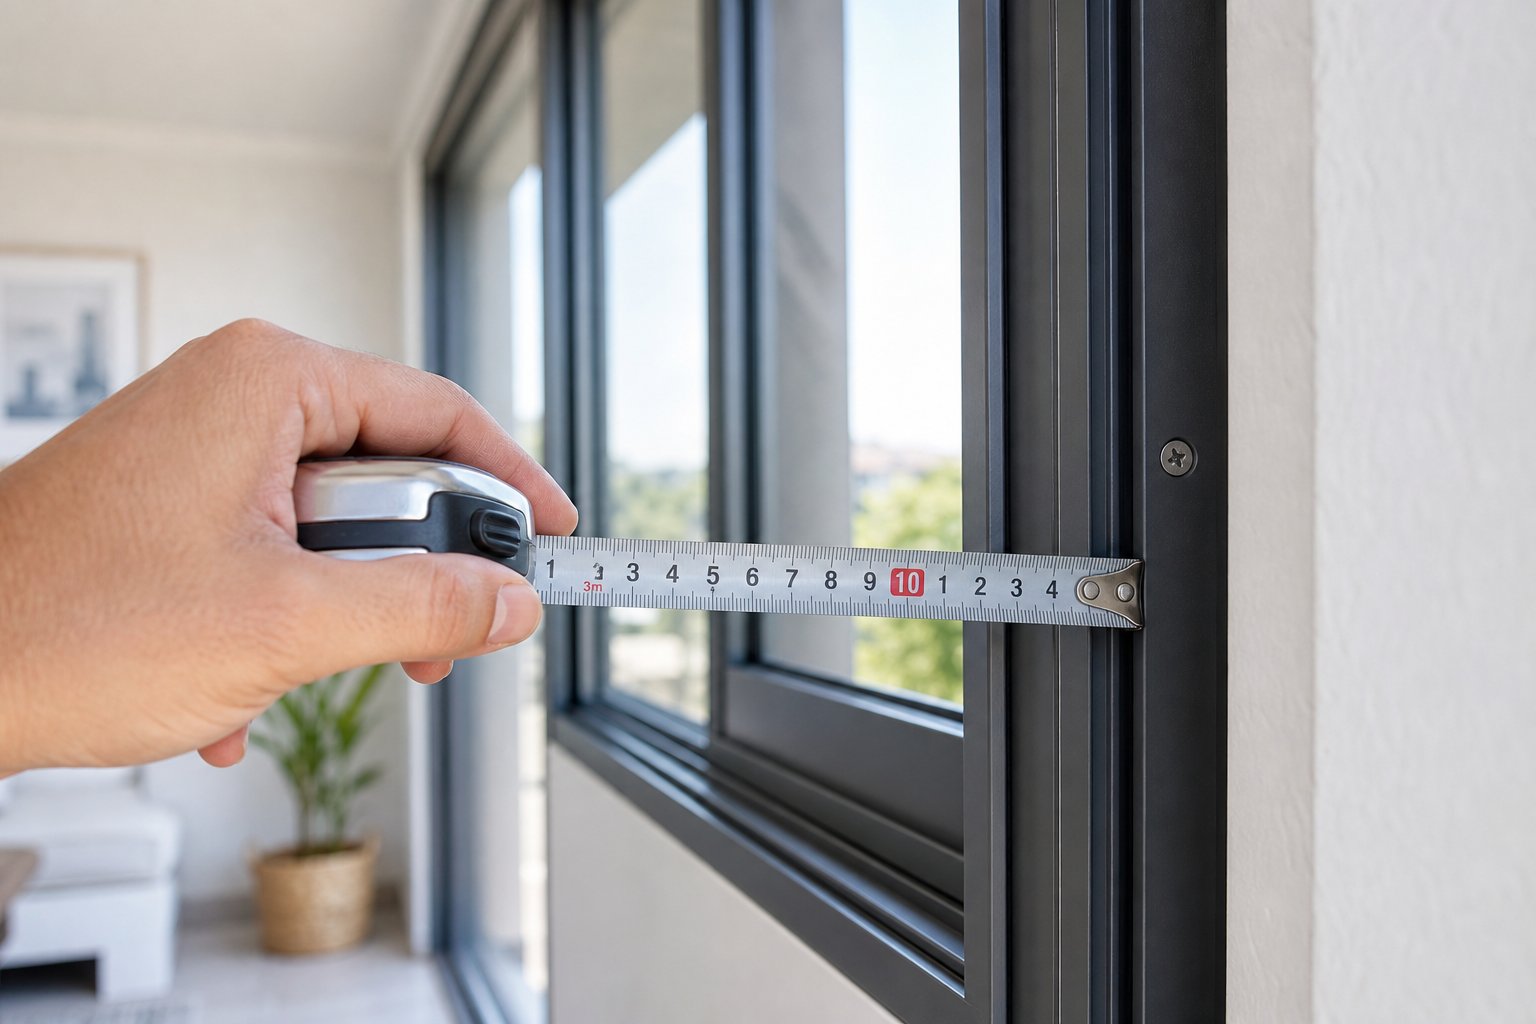
- Metal tape measure (5 m minimum) — rigid steel stays straight across wide openings. Avoid cloth tapes, which stretch and give false readings.
- Notepad and pencil — record every measurement immediately, labelled clearly (width top, width middle, width bottom, etc.).
- Small flat-head screwdriver or putty knife — useful for clearing paint or debris from channels so you measure the actual recess, not the obstruction.
- Combination square or spirit level — to check whether the opening is truly rectangular.
With different window screen frame types available — fixed, sliding, hinged — the measuring approach varies slightly, but the core principle is the same: measure the space the frame must occupy, not the glass or the sash.
Measuring Width, Height, and Depth Correctly
Whether you are measuring for a new window mesh screen frame or sizing a replacement to fit an existing track, follow these steps in order:
- Identify whether you need an inside-mount or face-fix measurement. Inside-mount screens sit within the window reveal or channel. Face-fixed screens attach to the face of the surrounding frame. Confusing the two is one of the most common mistakes — an inside-mount dimension used for a face-fix order produces a screen that is too small to cover the opening.
- Measure the width at three points: across the top of the opening, across the middle, and across the bottom. Record all three figures in millimetres. Use the smallest measurement as your ordering width — this guarantees the frame passes through the narrowest point without jamming.
- Measure the height at three points: left side, centre, and right side. Again, record all three and use the smallest figure as your ordering height.
- Measure the channel depth (for inside-mount screens). Insert your tape or a small ruler into the screen channel at the top of the window. Measure the depth of the recess where the frame will sit. This tells you the maximum frame thickness that will fit without protruding. Standard residential channels in Australian aluminium windows are typically 7–10 mm deep.
- Note the window screen frame with lip dimension. Many double-hung and sliding windows have a small lip or ridge at the base of the screen channel. Measure from behind this lip to the inside of the opposite channel — that is the true available space. Missing the lip overstates your usable width or height and results in a frame that cannot seat properly.
- Calculate clearance allowance. For spring-loaded screens, subtract 2–3 mm from your smallest width measurement to allow the springs to compress and release smoothly. For sliding screens in a channel track, the frame typically needs 1.5–2 mm clearance each side to glide without binding.
Measure at three points for every dimension — top, middle, and bottom for width; left, centre, and right for height. Australian homes settle over time, and timber or brick reveals can shift enough to make an opening 4–6 mm out of square. Using the smallest measurement at each dimension catches this irregularity before it ruins your order.
Checking for Square and Accounting for Tolerances
A windows screen frame is built as a precise rectangle. If your window opening is not rectangular, the frame will either bind in one corner or leave a visible gap in another. To check for square, measure both diagonals of the opening (top-left corner to bottom-right, and top-right corner to bottom-left). If the two diagonal measurements differ by more than 3 mm, the opening is noticeably out of square.
In that case, ordering based on the smallest width and smallest height still works — the screen will fit — but you may see a slightly uneven margin on one side. For openings that are significantly racked, a custom-made window screen with frame cut to trapezoidal dimensions is available from specialist suppliers, though this adds to cost and lead time.
A few pitfalls trip up even experienced DIYers:
- Painted-shut channels — layers of paint can reduce a channel’s usable depth by 1–2 mm. Scrape paint from the channel before measuring so you capture true dimensions, not an artificially shallow reading.
- Confusing nominal and actual frame size — some suppliers list the window net frame size as the overall outer dimension of the screen, while others list the visible mesh area. Confirm which convention the supplier uses before placing an order.
- Forgetting spline allowance — the mesh wraps over the frame edge and into the spline channel, consuming roughly 10–15 mm per side. This does not affect the frame’s outer dimensions, but it matters if you are cutting your own mesh from a roll — always add at least 50 mm extra to both width and height to give yourself enough material to work with during installation.
With accurate measurements recorded and squared checked, you have everything needed to order or cut a frame that drops into the opening cleanly on the first attempt — no forcing, no filing, no return trips to the supplier.
Step-by-Step DIY Installation
Measurements in hand, the practical work begins. Whether you are building a replacement screen frame from loose components or assembling a pre-cut screen frame kit for windows, the process follows the same sequence. A patient first attempt typically takes one to two hours per screen; the second goes much faster.
Before cutting anything, gather your tools and lay them out on a flat, stable surface — a workbench, trestle table, or even a clean section of garage floor covered with an old towel to prevent scratches.
- Hacksaw or mitre saw with a fine-tooth blade (32 TPI) — for cutting aluminium frame rails to length
- Mitre box — keeps cuts straight and square if you are using a hand hacksaw
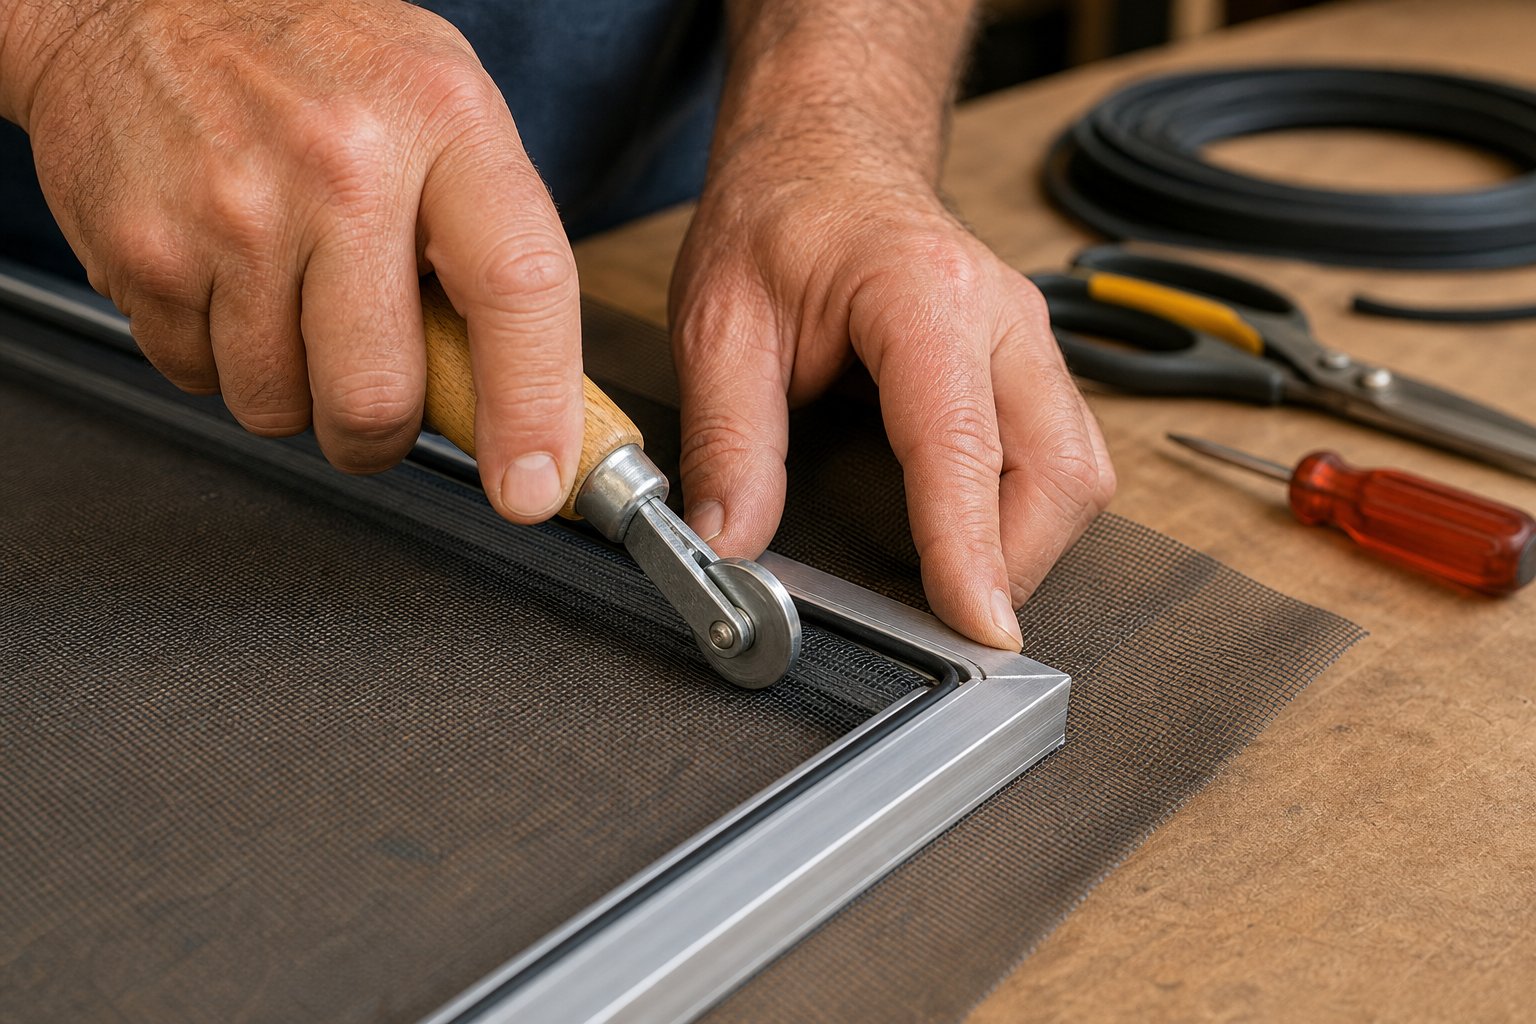
- Spline roller — the dual-ended tool that presses mesh and spline into the channel
- Utility knife — for trimming excess mesh cleanly
- Flat-head screwdriver — for prying spline if you need to re-do a section, and for seating corner keys
- Tape measure — to confirm cut lengths before committing
- Fine flat file or deburring tool — removes sharp edges from cut ends
- Safety glasses and work gloves — aluminium shavings are sharp; protect your eyes and hands
Cutting and Assembling the Frame
If you purchased an aluminum screen frame kit with pre-cut rails, skip straight to assembly. Otherwise, here is how to cut window screen frame rails from bulk lengths:
- Unbox and inspect all components. Confirm you have enough rail length, the correct number of corner keys, springs or clips, and pull tabs. Check the spline diameter matches your frame’s channel width — take a short test piece and press it into the groove with your thumb. It should fit firmly without forcing.
- Mark your cut lengths on the aluminium rail. Transfer the measurements you recorded earlier, remembering to subtract the depth of both corner keys from each rail piece (typically 10–12 mm per end). A common mistake is cutting rails to the full frame dimension without accounting for the corner inserts, which makes the assembled screen with frame oversized.
- Secure the rail in a mitre box and cut with steady, even strokes. Let the fine-tooth blade do the work — forcing the cut creates a rough, angled edge. This is the core skill in how to cut screen frame rails neatly.
- Deburr both ends of every cut piece. Run a flat file or deburring tool across the cut face and around the inside edge. Sharp burrs prevent corner keys from seating fully and can slice your fingers during assembly.
- Insert corner keys into the rail ends and press the frame together. Most screen frame kits use internal L-shaped aluminium or plastic corner keys that slide into the hollow channel of each rail end. Press firmly until the joint is tight with no visible gap. Check for square by measuring both diagonals — they should match within 1–2 mm.
- Install tension springs and pull tabs. Slide springs into the top corners (or designated spring channels) and clip pull tabs onto the bottom rail before you lay mesh, as these sit beneath the spline.
Installing Mesh with a Spline Roller
With the frame assembled and squared, you are ready to install the mesh — the step that transforms a bare replacement screen frame into a functional insect barrier.
- Lay mesh over the frame. Unroll your screen mesh across the assembled frame, leaving roughly 25–30 mm of excess overhanging each edge. Align the mesh so its weave runs parallel to the frame rails; angled mesh creates uneven tension and visible distortion.
- Begin rolling spline into the channel along one short side. Use the concave wheel of the spline roller to press the rubber spline into the groove, trapping the mesh beneath it. Start at a corner and work toward the opposite corner of the same rail. Keep gentle outward tension on the mesh with your free hand to prevent slack forming ahead of the roller.
- Move to the opposite short side. Pull the mesh taut across the frame — firm but not guitar-string tight — and roll the spline in along the second short rail. Working opposite sides first, as installation guides recommend, distributes tension evenly and prevents the frame from bowing.
- Spline the two long sides. Repeat the process on both stiles, maintaining even tension as you go. If wrinkles appear, pull the spline back out of that section, re-tension the mesh, and re-roll. Getting this right now saves frustration later.
- Trim excess mesh. Run a sharp utility knife along the outer edge of the spline channel, cutting away the overhanging mesh. Keep the blade angled slightly outward to avoid nicking the spline itself.
A note on spline diameter: it must match the channel width of your frame. Too thin (say, 3.5 mm spline in a 5 mm channel) and the mesh will pull loose in the first strong breeze. Too thick, and the spline will not seat fully, leaving it raised above the channel where it can catch on the window track. Most Australian hardware stores stock spline in 0.5 mm increments; bring a short sample of your channel to match if you are unsure.
Fitting the Screen into Your Window
- Position the screen at the window opening. Angle the top of the frame into the upper channel first, compressing the tension springs as you push upward. Then swing the bottom into the lower track and release. The springs push outward, locking the screen firmly into the reveal.
- Check the fit. The frame should sit flush without rattling. If it is too tight to slide in, lightly file a millimetre from the side rails rather than forcing. If it is too loose and rattles, the springs may need replacing with a slightly longer pair.
- Test removal and re-fitting. Pull the screen out using the pull tabs to confirm the springs release smoothly. Replacing aluminum screen frames later becomes far easier when you have verified this action works cleanly from day one.
The whole process — from opening a screen frame kit to a fitted, tensioned screen — rewards patience over speed. Take your time squaring the frame and tensioning the mesh evenly, and you end up with a screen that looks factory-made and stays tight for years. Rushing the spline step is where most DIY wrinkles and sags originate.
A well-built screen needs almost no attention day to day. But “almost no attention” is not the same as “none” — and knowing when to clean, re-tension, or eventually replace the mesh keeps your fly screen performing across its full lifespan.
Maintenance, Longevity, and Choosing a Screen-Ready Window System
How long do window screens last? For aluminium frames with quality mesh, the answer sits comfortably between 10 and 15 years under normal Australian conditions — and the frame itself often outlasts two or three mesh replacements if you treat it right. A few minutes of care each year keeps the assembly performing well beyond that baseline.
Cleaning and Inspecting Frames Annually
Once a year — spring is ideal, before insect season ramps up — remove each screen and give it a proper look-over. Mix a small amount of mild dishwashing liquid in a bucket of warm water, lay the screen flat on a soft surface, and scrub gently with a soft-bristle brush. Rinse with a low-pressure hose and let it dry completely before refitting. Avoid high-pressure water, which can push mesh out of the spline channel.
While the screen is out, check three things:
- Corner joints — grip diagonally opposite corners and twist gently. If the frame racks or the joints feel loose, the corner keys may need re-seating or replacing.
- Spline condition — run your finger along the spline channel. Rubber spline that has gone hard, cracked, or shrunken no longer holds mesh firmly and should be replaced.
- Powder coat or anodised finish — look for chips, scratches, or chalking. Small chips on powder-coated frames can be touched up with a colour-matched paint pen before corrosion starts beneath the damaged area.
When to Re-Mesh vs Replace the Entire Frame
Not every problem demands a full aluminium window screen replacement. The decision is simpler than most people think. If the frame is straight and corners are tight, a re-mesh — pulling old spline and mesh, rolling in fresh material — restores the screen to like-new condition at a fraction of the cost. Sagging, small tears, and discoloured mesh all fall into the re-mesh category.
A full window screen replacement with frame becomes necessary when the aluminium itself is compromised: bowed rails, corners that separate by hand, or visible corrosion eating through the profile. A warped frame cannot hold mesh flat, and no amount of new spline will fix a rectangle that is no longer rectangular. At that point, a complete screen and frame replacement is the practical path forward.
Signs that point toward replacement rather than repair:
- Frame bows visibly when you press lightly on the mesh centre
- Corners pull apart without tools
- Springs no longer hold the screen in the track
- Multiple re-meshes have widened the spline channel beyond standard spline sizes
Integrating Fly Screens With a Quality Window System
Replacement screens for aluminium windows fit best and last longest when the host window was designed with screen integration from the start. Retrofitting screens into windows that lack dedicated channels means relying on generic clips, adhesive-mounted tracks, or spring tension alone — all of which compromise longevity and fit over time.
Purpose-engineered aluminium window systems address this by incorporating fly screen tracks, matched hardware clearances, and pre-calculated channel depths into the window design itself. Systems like those from MEICHEN build screen accommodation into their casement, sliding, and awning window ranges from the factory floor, so replacement screen windows with frames drop in perfectly years later without adaptation or guesswork.
For homeowners planning renovations, builders specifying for new builds, or architects detailing window schedules, thinking at the system level — window and screen as a matched pair — eliminates the long-term maintenance headaches that come from mismatched aftermarket combinations. Exploring integrated aluminium window solutions at meichenwindows.com.au/aluminium-windows/ is a practical starting point for planning screen-ready installations that genuinely deliver on the “fit and forget” promise.
Frequently Asked Questions About Aluminium Window Fly Screen Frames
1. How long does an aluminium window fly screen frame last?
An aluminium fly screen frame typically lasts 20 to 30 years when made from extruded profiles with appropriate coatings. The mesh itself may need replacing every 10 to 15 years, but the aluminium frame outlasts multiple mesh replacements provided corner joints stay tight and the finish remains intact. Coastal properties using marine-grade anodising or thicker powder coatings achieve the upper end of this range, while budget roll-formed frames in exposed conditions may need replacement after 8 to 12 years.
2. What is the difference between roll-formed and extruded aluminium screen frames?
Roll-formed frames are made by bending flat aluminium strip through rollers, producing thinner walls (0.5 to 0.8 mm) suited to budget replacements and small windows. Extruded frames are created by forcing heated aluminium through a precision die, resulting in thicker walls (0.8 to 1.2 mm), tighter tolerances, and complex cross-sections. Extruded profiles resist bowing across wide openings and hold corner joints more securely, making them the better long-term investment for large windows or coastal homes.
3. Can I replace the mesh on my aluminium fly screen without buying a new frame?
Yes, provided the frame is straight and the corner joints remain tight. The spline-in-channel system used on aluminium frames is designed for re-meshing. You remove the old rubber spline, pull out the worn mesh, lay fresh mesh over the frame, and roll new spline into the channel with a spline roller. This restores the screen to like-new condition at a fraction of full replacement cost. Only replace the entire frame if the aluminium is bowed, corroded through, or corners separate by hand.
4. Which aluminium alloy grade is best for fly screen frames in coastal areas?
6063-T5 is the industry-standard alloy for residential fly screen frames across all Australian climates, including coastal zones. The alloy itself resists corrosion well, but the surface coating matters most near the coast. Specify marine-grade anodising (25+ microns) or marine-rated powder coating (80 to 120+ microns) for properties within 5 km of the shoreline. Homes within 500 metres of breaking surf should use the heaviest available coating paired with Grade 316 stainless steel fasteners to prevent galvanic corrosion at contact points.
5. How do I measure my window correctly for a replacement fly screen frame?
Measure the width at three points (top, middle, bottom) and the height at three points (left, centre, right), recording all figures in millimetres. Use the smallest measurement in each dimension as your ordering size to ensure the frame fits the narrowest point. Measure channel depth to confirm maximum frame thickness, and check for square by comparing diagonal measurements. For spring-loaded screens, subtract 2 to 3 mm from the smallest width to allow spring compression. Always clear paint from channels before measuring to capture true dimensions.
More Window & Door Guides