What Aluminium Window Glass Replacement Actually Involves
Aluminium window glass replacement is the process of removing damaged, failed, or underperforming glass from an existing aluminium frame and installing a new pane — without replacing the frame itself. For Australian homeowners and property managers, it represents a practical middle ground between living with compromised windows and the expense of full unit replacement.
The process sounds straightforward, yet it trips people up constantly. That’s because replacing glass in an aluminium frame isn’t a single procedure — it varies depending on your frame type, glazing system, glass specification, and local compliance requirements under AS 1288 and the National Construction Code. Getting the physical swap right is only one piece of the puzzle.
When Replacement Becomes Necessary
Glass doesn’t fail without reason. The most common triggers that push homeowners to replace glass in an aluminium window include:
- Visible cracks or chips from impact or thermal stress
- Failed seals in double-glazed units, causing internal fogging or condensation between panes
- Energy efficiency upgrades — swapping single-pane glass for low-E or double-glazed units
- Storm damage, particularly in coastal or cyclone-prone regions
- Compliance upgrades where safety glass is now required (wet areas, low-level glazing)
Each of these scenarios demands a slightly different approach to measurement, glass specification, and installation method. Treating them all the same is where problems begin.
Most failed DIY aluminium window glass replacements don’t fail at the physical installation stage. They fail because the homeowner skipped the assessment phase — wrong glass type ordered, incorrect measurements taken, or a glazing system misidentified before any tools came out.
What This Guide Covers That Others Miss
Most online guides jump straight to prying out glazing beads. This one doesn’t. Instead, it walks you through the full journey: identifying your frame and glazing system, understanding safety glass obligations, measuring correctly for the rebate (not the visible glass area), executing the replacement by frame type, troubleshooting mid-job problems, and verifying the finished result. It’s a decision-first approach designed to help you assess your situation honestly before committing to a method — or deciding a professional is the smarter call.

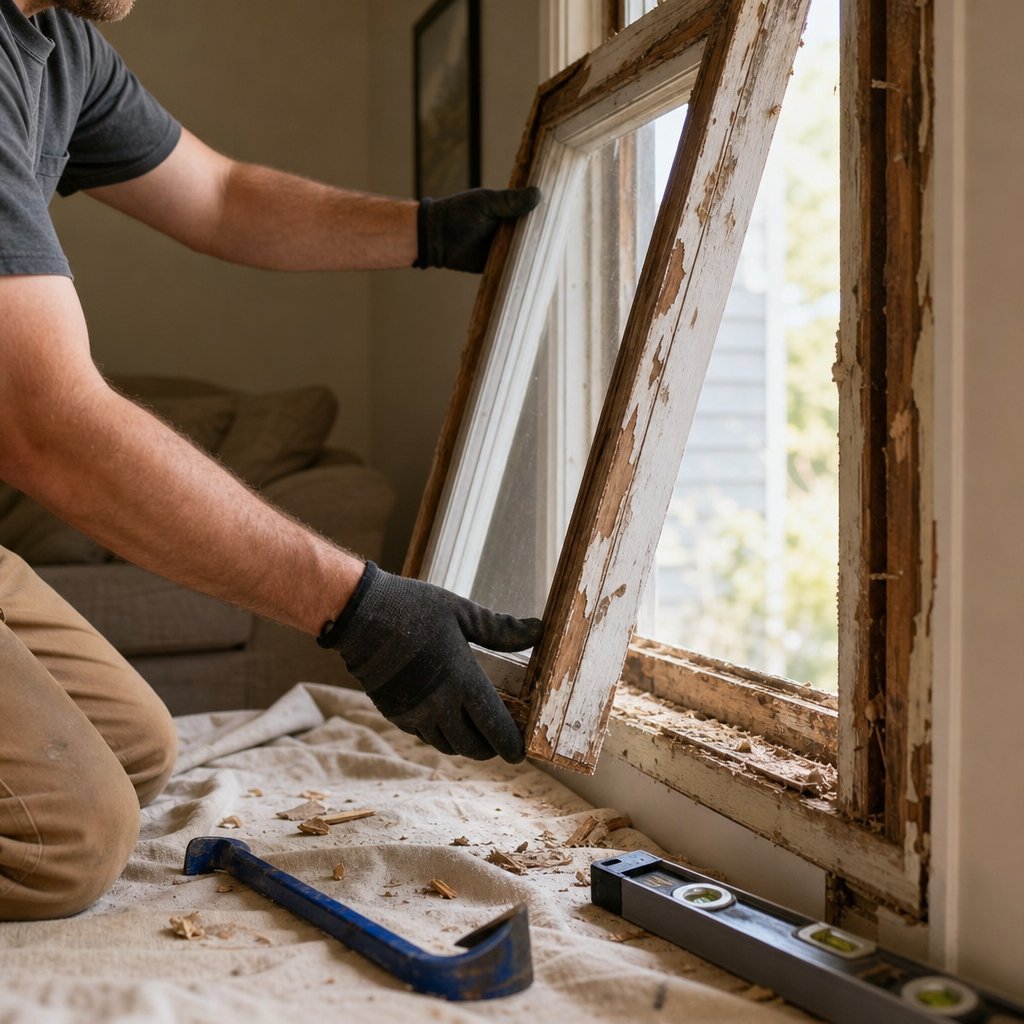
Assess Your Situation Before You Start
Grabbing a putty knife and going at your window frame is tempting — especially when you’re staring at a cracked pane every morning. But figuring out how to replace glass in an aluminium window frame starts well before any tools leave the drawer. Four quick assessments will tell you exactly what you’re dealing with and whether the job suits your skill level.
Identify Your Aluminium Frame Type
Not all aluminium windows behave the same way during glass replacement. The frame type dictates how you access the glazing, whether the sash removes from the opening, and how much physical effort the job demands. Australian homes typically feature one of four configurations:
- Sliding windows — one or more sashes travel horizontally along a track. The sash usually lifts out, giving you bench-level access to the glazing beads from the interior face.
- Casement windows — hinged on one side and operated by a winder or friction stay. You’ll work on the sash while it’s still attached or after removing it from the hinges.
- Awning windows — hinged at the top, opening outward from the bottom. The sash weight becomes a factor because it hangs at an angle during removal.
- Fixed windows — no operable sash at all. Glazing beads must be accessed from inside the frame without the convenience of removing anything from the opening.
Each type presents a different path to the glass. The table below maps frame type against the variables that matter most when you’re deciding whether to tackle the job yourself.
| Frame Type | Typical Glazing Method | Difficulty Level | DIY Suitability |
|---|---|---|---|
| Sliding | Snap-in bead (dry glazed) | Low to moderate | Good — sash removes easily for bench work |
| Casement | Snap-in bead or wet seal | Moderate | Fair — friction stays complicate sash removal |
| Awning | Snap-in bead or wet seal | Moderate to high | Fair — sash weight requires a second pair of hands |
| Fixed | Wet seal or internal bead | Moderate to high | Challenging — no sash removal, limited access angles |
Assess DIY Feasibility for Your Situation
Skill level matters, but so does context. A ground-floor sliding window with snap-in beads is a genuine weekend project. A second-storey fixed pane wet-sealed into its frame is a different proposition entirely. Before committing to aluminium window frame glass replacement as a DIY task, run through these practical questions:
- Can you safely reach the window without scaffolding or an extension ladder?
- Is the glass small enough for one person to handle, or will you need suction cups and a helper?
- Does the frame use dry glazing (snap-in beads) or wet sealant? Dry systems are far more forgiving for first-timers.
- Is the replacement pane standard float glass, or does your situation require toughened or laminated safety glass with certification?
If you answered “no” or “unsure” to more than one of those, professional help likely saves you time and money over a botched attempt. There’s no shame in that — even experienced renovators call in glaziers for large panes or complex access situations.
Safety Glass and Building Code Considerations
Here’s where many DIY attempts run into trouble they didn’t anticipate. Under AS 1288 (Glass in Buildings — Selection and Installation), certain window positions in Australian homes legally require safety glass — either toughened or laminated. You can’t simply replace broken glass in an aluminium window with whatever pane is cheapest at the hardware store if the location triggers a compliance obligation.
Safety glass is mandatory in these common residential scenarios:
- Glazing with a finished sill height less than 800 mm above floor level
- Glass in or adjacent to doors (within 500 mm of a doorway)
- Wet areas — bathrooms, laundries, and any space containing a shower, bath, or spa
- Glass adjacent to stairways and landings
- Any pane that forms part of a balustrade or barrier
If your window falls into one of these categories, the replacement glass must carry a permanent safety mark (typically a stamp in the corner identifying it as Grade A safety glass to AS/NZS 2208). Ordering standard annealed glass for a position that requires toughened glass doesn’t just risk injury — it creates a compliance issue that can surface during property sales or insurance claims.
For windows in bushfire-prone areas rated BAL-29 or above, additional glazing requirements under AS 3959 may apply, potentially mandating toughened glass even where AS 1288 alone wouldn’t require it.
Getting these assessments right before you order glass or pick up a tool is what separates a smooth replacement from an expensive do-over. The next critical distinction — one that shapes your entire removal and reinstallation approach — is understanding exactly which glazing system holds your current pane in place.
Identifying Your Glazing System and What It Means
Every aluminium window holds its glass in place using one of two fundamental methods — and the one your window uses determines everything about how the replacement unfolds. Get this identification wrong, and you’ll either damage a frame that didn’t need cutting or waste hours trying to pry out a bead that’s actually bonded with sealant. A quick visual inspection of the frame edges tells you which camp your window falls into.
How Snap-In Glazing Beads Work
Dry glazing is the more common system in modern Australian aluminium windows. A snap-in glazing bead for windows is essentially a separate aluminium or PVC extrusion that clips mechanically into a channel on the interior face of the frame. It holds the glass firmly against a rubber gasket or glazing tape on the opposite side, creating compression that seals out air and water without any liquid sealant.
In drop-in glazing systems, the glass sits in a four-sided pocket with glazing tape applied to the frame, and a pressure cap or bead snaps over the top to lock everything together. The bead provides approximately 25% compression on the tape beneath it, forming a tight seal purely through mechanical pressure.
Visual cues that confirm snap-in glazing on your aluminium window:
- A visible seam or joint line running along the interior perimeter of the frame where the bead meets the main extrusion
- A slight lip or edge you can catch with a fingernail — this is where the bead clips into the frame channel
- Uniform appearance on all four sides, with the bead profile looking identical at the top, bottom, and sides
- No visible silicone, putty, or caulk between the glass edge and the frame
- A rubber gasket or foam tape visible in the gap between the glass surface and the bead
If your window uses this system, you’re looking at a non-destructive removal process. The bead pops out, the glass lifts free, and the new pane drops back in — no cutting, no resealing, no curing time.
Recognizing Wet-Sealed Glazing
Wet glazing takes a different approach. Instead of a mechanical clip holding the glass, a liquid sealant — typically silicone or, in older windows, linseed oil putty — bonds the glass directly to the frame. The sealant cures to form both the structural hold and the weather seal in one application.
Visual cues that indicate wet-sealed glazing:
- A smooth, continuous bead of silicone or putty visible where the glass meets the frame — often with a slightly uneven or hand-tooled finish
- No distinct separation line between a removable bead and the main frame profile
- Sealant that appears to bridge the gap between glass and aluminium, sometimes with minor cracking or discolouration from age
- On older windows, a hardened putty compound (often painted over) angled against the glass at roughly 45 degrees
- No rubber gasket visible — the sealant itself performs the cushioning and sealing role
Some aluminium windows use a hybrid approach: a mechanical bead on the exterior combined with a silicone heel or toe bead on the interior for added weather protection. If you spot both a clip-in profile and a sealant line, you’re dealing with this combination system — treat it as wet glazing for removal purposes, since you’ll need to cut through the sealant before the bead releases cleanly.
What Your Glazing Type Means for Replacement
The practical difference between these two systems comes down to reversibility and time.
With snap-in glazing for windows, removal is essentially non-destructive. You lever the bead out of its channel using a stiff putty knife or a dedicated bead removal tool, extract the old glass, clean the rebate, position setting blocks, drop in the new pane, and snap the bead back. The gaskets and tape can often be reused if they’re in good condition. Total active working time on a standard sliding window might be 20 to 30 minutes once the sash is on a flat surface.
Wet-sealed systems demand more patience. You’ll need to score along both sides of the sealant with a sharp utility knife, carefully separate the bond without gouging the aluminium, scrape residual silicone from the rebate, and then reapply fresh sealant after the new glass is positioned. Silicone needs 24 hours to fully cure before the window faces weather exposure, so you’re working around a waiting period that dry glazing simply doesn’t impose.
Neither system is inherently better — they serve different design priorities. But knowing which one you’re working with before you pick up a tool prevents the single most common mistake in DIY aluminium window glass replacement: applying the wrong removal technique and damaging a frame that was perfectly reusable.
With your glazing system identified, the next step that makes or breaks the job is measurement — specifically, measuring the glass rebate rather than the visible pane area, and understanding why those two numbers are never the same.
How to Replace Window Glass in an Aluminium Frame
Incorrect measurements are the single biggest reason DIY aluminium window glass replacements fail. Not broken beads, not cracked frames — wrong numbers on the order form. The glass arrives 3 mm too wide and won’t seat into the rebate, or it comes undersized and rattles against the gaskets without forming a proper seal. Either outcome means a reorder, more waiting, and double the cost in cut glass you can’t return.
The mistake nearly everyone makes? Measuring the visible glass area — the part you can see from inside the room — rather than the full rebate dimension that the pane actually occupies within the frame channel.
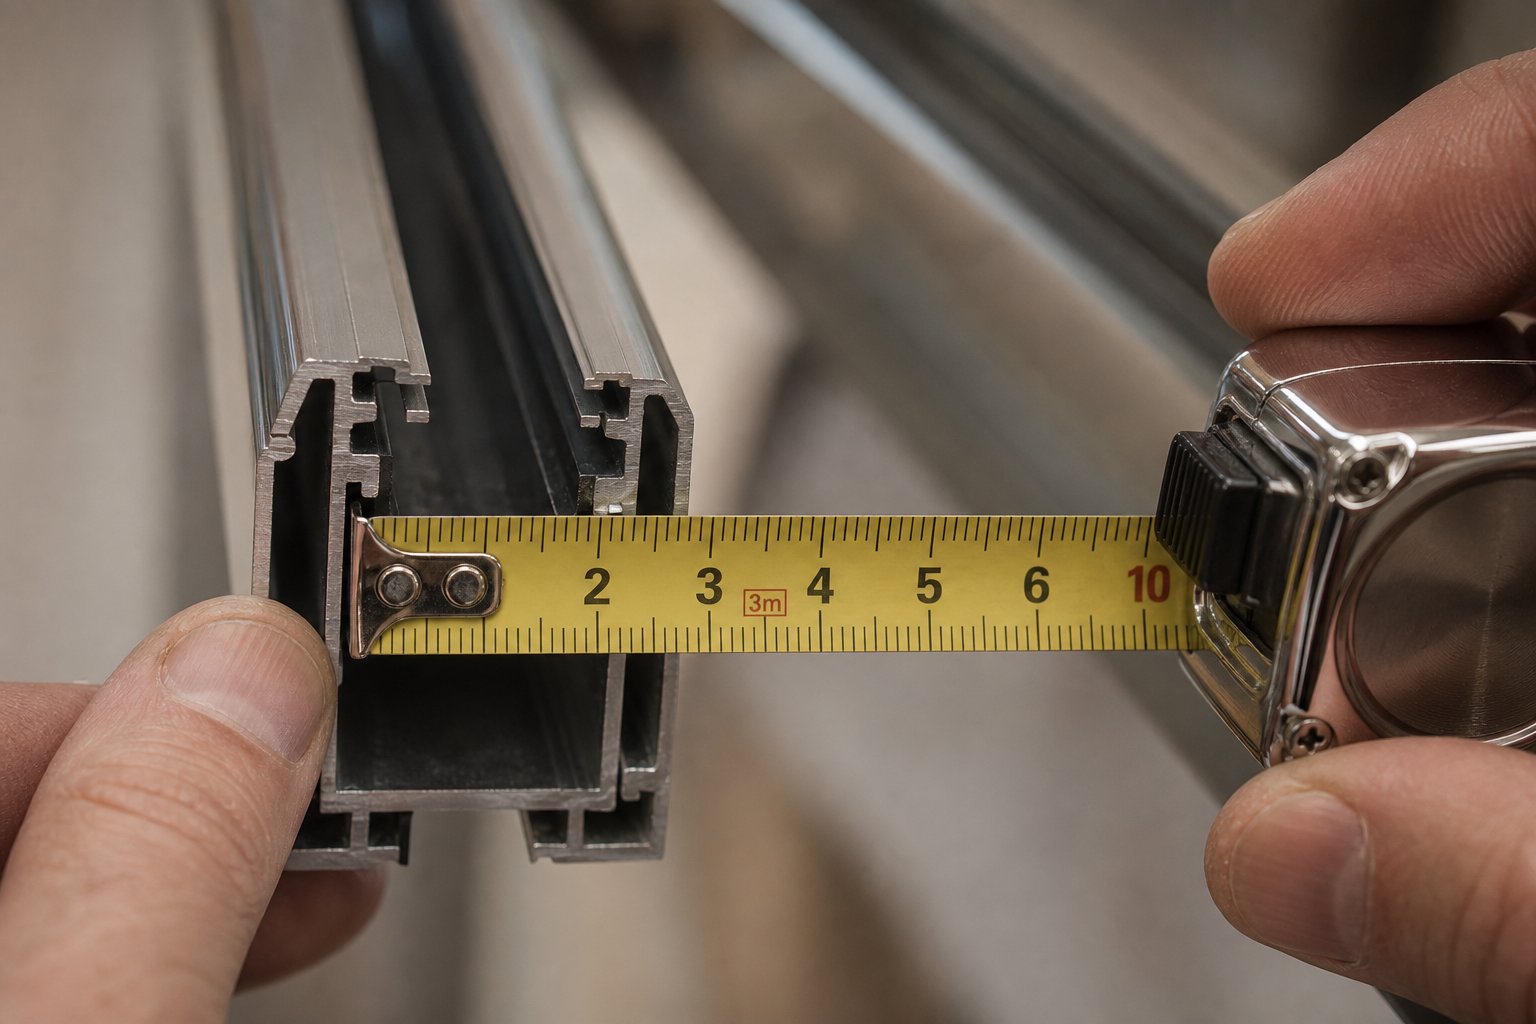
Measuring the Glass Rebate Correctly
The rebate is the recessed channel in the aluminium frame where the glass edge sits. It’s hidden behind the glazing bead or sealant, which means the visible glass surface is always smaller than the actual pane. If you measure only what you can see, your replacement glass will be undersized by the depth of the bead overlap on each side — typically 8 to 12 mm short in both width and height.
Here’s how to measure properly once you’ve removed the glazing bead or can access the full channel:
- Remove one glazing bead (or score back the sealant on wet-glazed systems) to expose the full rebate depth on at least two adjacent sides — one horizontal, one vertical.
- Place your tape measure inside the rebate channel, hooking it against the base of the channel on one side. Extend it across to the base of the opposite channel. This is your rebate-to-rebate measurement — the full opening the glass must fit within.
- Take three width measurements — at the top, middle, and bottom of the opening. Record all three.
- Take three height measurements — at the left edge, centre, and right edge. Record all three.
- Use the smallest value for both width and height. Aluminium frames can be slightly out of square, and the glass must fit the tightest point.
- Deduct 2 to 3 mm from each dimension to allow clearance for thermal expansion and installation tolerance. For metal frames, this clearance is essential — aluminium and glass expand at different rates, and a pane cut to the exact rebate size will bind or crack under heat stress.
- Measure the rebate depth (how far the channel extends from the face of the frame). This confirms whether your frame can accommodate the glass thickness you’re ordering, particularly relevant when upgrading from single to double-pane units.
All measurements should be in millimetres — never centimetres, never rounded up. A metal tape measure gives more reliable readings than a fabric one, and a torch helps illuminate shadowed rebate channels on darker frames.
When learning how to replace double pane window glass in an aluminium frame, you’ll need one additional measurement: the overall unit thickness. Record the combined depth of both glass panes plus the spacer bar between them. Common insulated glass unit (IGU) configurations in Australia run 20 mm to 24 mm total — for example, 4 mm glass / 12 mm spacer / 4 mm glass. Your rebate depth must accommodate this full thickness with room for the gasket or sealant behind it.
Specifying Glass Type and Thickness
Measurements alone aren’t enough for a correct order. You also need to specify exactly what type of glass goes into that space. Getting this wrong doesn’t just affect performance — it can create compliance issues under AS 1288 if safety glass is required at your window’s position.
Key specifications to confirm before ordering:
- Thickness — Standard single-pane residential glass in Australia is typically 4 mm, 5 mm, or 6 mm. Larger openings or wind-load requirements may demand thicker panes. For IGUs, specify each pane’s thickness and the spacer width separately.
- Glass type — Toughened (tempered), laminated, annealed (standard float), low-E coated, or tinted. Your earlier assessment of safety glass obligations determines whether toughened or laminated is mandatory.
- Edge finishing — For glass seated in a rebate with gaskets, a clean-cut or arrised (lightly sanded) edge is standard. Polished edges are unnecessary and add cost for no functional benefit in framed applications.
- Coatings and fills — If upgrading to double glazing, specify whether you want low-E coating (and which surface it sits on), argon gas fill, or a specific Solar Heat Gain Coefficient for your climate zone.
If you’re replacing an existing pane, check the old glass for markings. Toughened glass carries a permanent etch in one corner identifying the manufacturer, standard (AS/NZS 2208), and glass type. Photograph this before disposal — it tells your supplier exactly what to replicate.
Ordering Tips to Avoid Costly Mistakes
Glass suppliers cut to your dimensions. There’s no returning a custom-cut pane because you transposed two numbers. A few ordering habits protect you from expensive errors:
- Write measurements as width x height, and confirm with your supplier which convention they use. Some suppliers read the first number as the horizontal dimension regardless of orientation — clarify this upfront.
- Label each pane with a location code if ordering multiple pieces (e.g., BATH-W1, BED2-W2). This prevents mix-ups during installation, especially when panes are similar but not identical sizes.
- Photograph each opening alongside your written measurements. If a supplier queries a dimension, you have visual reference to cross-check.
- Ask about lead times before committing. Standard clear float in common thicknesses might be available same-day or next-day from local suppliers. Toughened glass, laminated panes, low-E coated units, and IGUs typically require 5 to 10 business days for fabrication. Factor this into your project timeline — you don’t want a window open to the weather for a fortnight.
- Order one pane first if you’re replacing multiple windows. Confirm the fit on a single opening before committing to the full batch. One test pane is cheaper than discovering a systematic measurement error across six windows.
With accurate measurements recorded and the correct glass specified, the physical replacement process becomes far more predictable. The approach from here diverges depending on whether you’re working with a sliding sash you can lift onto a workbench or a fixed pane that stays in the wall throughout.
Step-by-Step Replacement for Each Frame Type
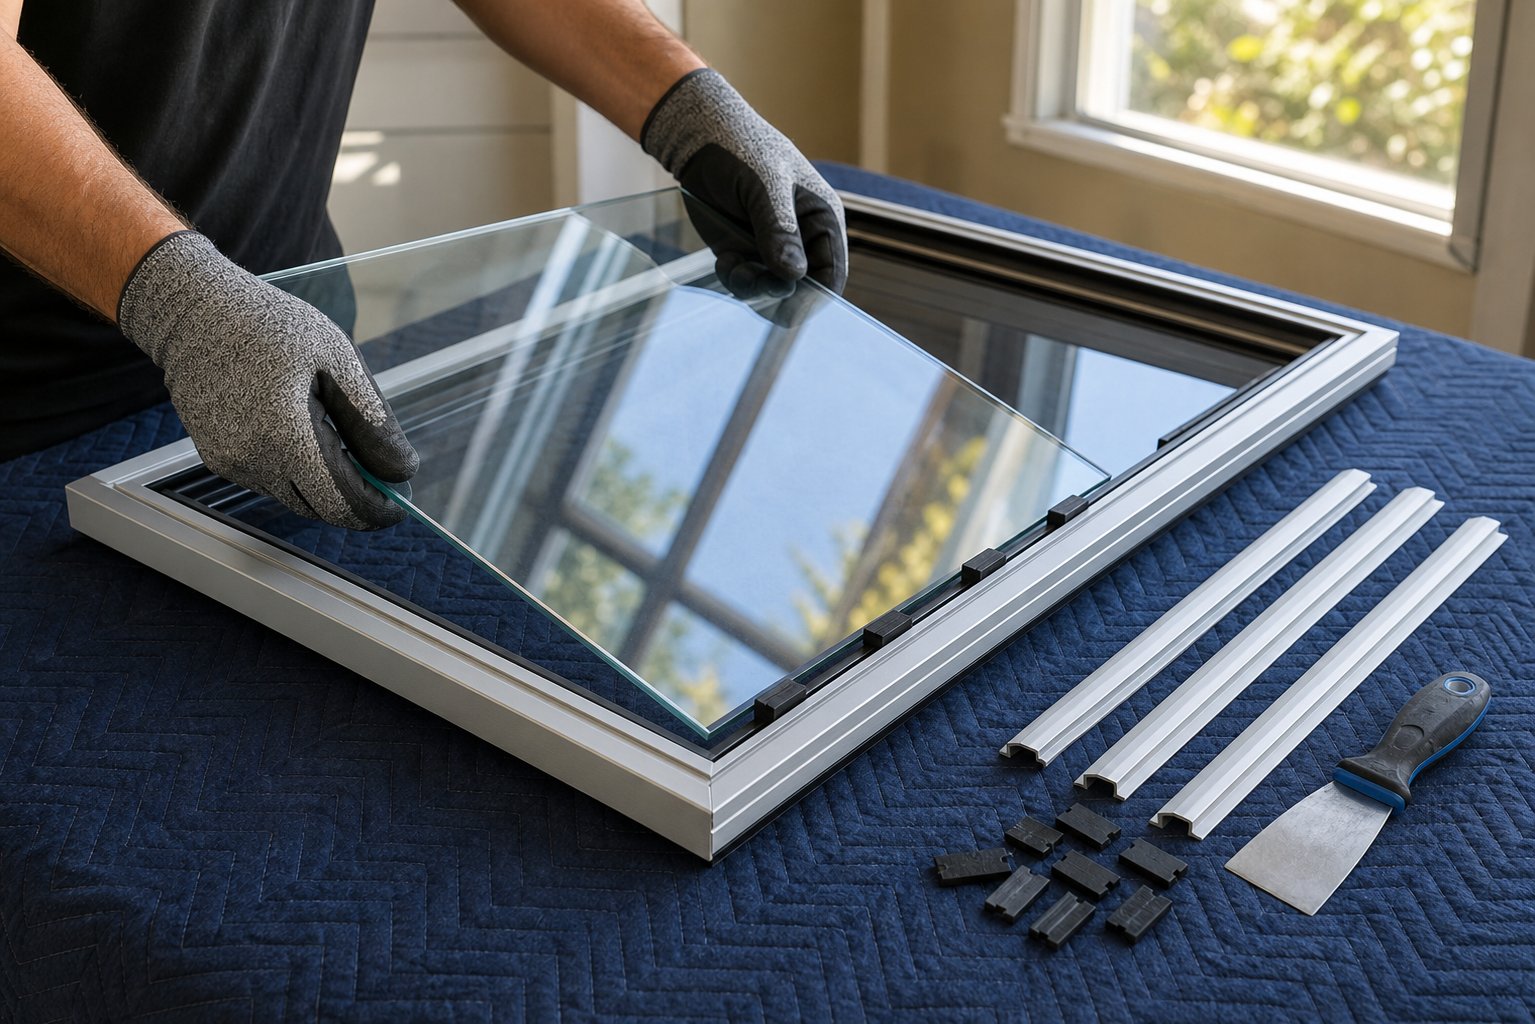
A single generic process doesn’t cut it here. How to replace window glass in a metal frame depends entirely on whether that frame slides, swings, cranks, or stays fixed in the wall. Each type presents different access points, different bead orientations, and different physical challenges. The core sequence — remove bead, extract glass, clean rebate, place setting blocks, insert new pane, reinstall bead — remains consistent, but the execution shifts at every stage.
Before starting any frame type, gear up with cut-proof gloves and safety glasses. Tape an X pattern across the damaged glass with duct tape to contain fragments if the pane breaks during removal. Have your replacement glass, setting blocks, and a stiff putty knife or dedicated bead pry tool within reach.
Replacing Glass in Sliding Aluminium Windows
Sliding windows are the most forgiving frame type for DIY replacement. The sash lifts out of its track, giving you the luxury of working on a flat surface at bench height rather than wrestling with a vertical pane overhead.
- Remove the sash from the track. Lift the sash upward into the head channel (there’s usually 10 to 15 mm of clearance built in), then swing the bottom edge inward and clear of the sill track. On some systems, you’ll need to slide the sash to a specific position where a removal notch aligns. Set the sash flat on a padded workbench or drop sheet on the floor.
- Identify the bead sequence. Glazing beads on sliding sashes are almost always snap-in type, accessible from the interior face. Look for the shortest bead — typically one of the vertical sides — and start there. Beads overlap at the corners, so removing them out of sequence can crack the adjoining piece.
- Lever out the first bead. Insert a stiff putty knife or flat pry bar into the seam between the bead and the frame, roughly at the midpoint of the bead’s length. Twist gently to pop the bead’s spine out of the frame channel. Once the centre releases, work toward each end by hand. Avoid prying at the corners — that’s where beads are most likely to snap.
- Remove remaining beads. With the first bead out, the adjacent beads release more easily. Remove the opposite side next, then top and bottom. Set beads aside in order so you know which goes where during reinstallation.
- Extract the old glass. Lift the pane straight up and out of the rebate. If it’s stuck to old glazing tape or residual silicone, score along the edge with a utility knife to break the bond. For cracked panes, keep the tape in place and remove in one piece if possible.
- Clean the rebate channel. Scrape out old glazing tape, silicone residue, dirt, and any glass fragments using a putty knife. Wipe the channel clean with a rag dampened with methylated spirits. The rebate surface needs to be smooth and debris-free for the new gasket or tape to seat properly.
- Position setting blocks. Place two rubber or neoprene setting blocks at the quarter points along the bottom rebate — roughly one-quarter of the frame width in from each corner. These support the glass weight and maintain even clearance around the perimeter. For a standard residential sliding window, 5 mm thick blocks work for most single-pane applications.
- Apply new glazing tape (if your system uses it) around the back rebate face — the surface the glass rests against. Press it firmly into the channel, keeping it continuous around corners without gaps.
- Insert the new glass. Tilt the pane into the rebate at a slight angle, seating the bottom edge onto the setting blocks first, then lowering the top into position. Confirm even clearance on all sides — the pane should float centrally without touching the frame at any point.
- Reinstall glazing beads. Start with the bottom bead, pressing it into the channel by hand until it clicks home along its full length. Follow with the top, then the two sides. Each bead should snap in with firm hand pressure — if you need a mallet, something is misaligned. Check that the gasket or tape compresses evenly against the glass face with no visible gaps.
- Refit the sash. Reverse the removal process — angle the top into the head channel, swing the bottom onto the sill track, and confirm the sash slides freely without binding.
The entire process on a standard sliding window typically takes 20 to 40 minutes once you have the replacement pane in hand.
Working with Casement and Awning Frames
Casement and awning windows share enough DNA to cover together, though each has a quirk that changes the workflow. Both use hinged sashes operated by friction stays or winder mechanisms — the difference is hinge position (side-hung for casements, top-hung for awnings) and how gravity acts on the sash during removal.
Casement windows:
- Disconnect the friction stays or winder arm. Open the window fully. Most friction stays have a release clip or a single screw that allows the stay to detach from the sash. On winder-operated casements, disconnect the arm from the sash bracket. Support the sash weight while doing this — once the stays release, the sash is free-swinging.
- Remove the sash from the hinges. With stays disconnected, lift the sash off its hinge pins or remove the hinge screws from the sash side. Have a second person support the sash, especially on larger openings. Lay it flat on a protected surface.
- Follow the same bead removal and reglazing sequence as sliding windows (steps 2 through 10 above). Casement sashes typically use snap-in beads on the interior face, identical in principle to sliding sash beads.
- Rehang the sash. Reattach hinge pins or screws, reconnect friction stays, and test the opening and closing action. Confirm the stays hold the sash at various open positions without creeping.
Awning windows:
The process mirrors casement work with one critical difference: when you disconnect the friction stays on a top-hung awning sash, gravity pulls the sash outward and downward. This makes it heavier to manage and riskier to handle solo.
- Support the sash from below before disconnecting stays. A second person holding the bottom rail from outside is the safest approach. Alternatively, prop the sash open with a timber offcut wedged between the sash and the sill.
- Disconnect stays and remove the sash by lifting it off the top hinge pins. The sash will be heavier than it looks — glass weight plus aluminium frame adds up quickly on wider awning windows.
- Proceed with bead removal, reglazing, and reinstallation as per the standard sequence. Pay attention to setting block placement: on awning sashes, blocks go along the bottom rail (the rail closest to the hinges when the sash is closed and vertical in the frame).
If removing the sash feels impractical — perhaps the window is at height or the friction stays are seized — you can replace the glass with the sash still in the frame. Open it fully, prop it securely, and work on the interior face. It’s slower and more awkward, but achievable for smaller panes.
Fixed Window Glass Replacement Technique
Fixed windows present the trickiest scenario for DIY replacement. There’s no sash to remove — the glass sits directly in the frame that’s fixed to the wall structure. Everything happens in situ, often at an uncomfortable working angle.
- Identify the bead location. On fixed aluminium windows, the glazing bead is almost always on the interior side. Some commercial or older residential fixed frames use wet-seal glazing with no removable bead at all — if that’s your situation, you’ll need to cut through the sealant on both faces to free the glass.
- Remove beads in sequence. Start with a side bead (shorter beads are easier to flex out without breaking). Work your putty knife into the seam at the midpoint and lever gently. Because you’re working vertically, gravity won’t help hold the glass once beads are removed — it can fall inward. Remove the two side beads and the top bead first, leaving the bottom bead in place to support the pane’s weight.
- Control the glass removal. With only the bottom bead holding the pane, tilt the top edge of the glass inward toward you. A suction cup handle attached to the glass face gives you far better control than gloved hands alone, especially on panes larger than 600 mm in any dimension. Lift the pane up and clear of the bottom bead.
- Clean the rebate thoroughly. You won’t get another easy chance to access these channels once the new glass is in, so take your time scraping out old tape, sealant, and debris from all four sides.
- Place setting blocks on the bottom rebate at the quarter points, same as other frame types.
- Insert the new pane. Rest the bottom edge on the setting blocks, then tilt the top edge into the frame until the pane sits flat in the rebate. Use suction cups for control. Confirm even perimeter clearance before proceeding.
- Reinstall beads starting with the bottom, then top, then sides. Press firmly until each bead clicks fully home along its entire length. Check for uniform gasket compression around the perimeter — any visible gaps indicate the bead hasn’t seated completely.
For larger fixed panes — anything over about 1.5 m² — this becomes a two-person job regardless of your experience level. The glass weight alone makes single-handed insertion risky, and a dropped pane in a fixed frame means potential damage to the rebate, the sill, and your floor.
Regardless of frame type, the physical installation is only successful if the glass sits squarely on its setting blocks with consistent clearance and the beads compress the gasket uniformly. Any binding, rattling, or uneven gaps signal a problem that needs correcting before you call the job done. And when things don’t go smoothly — corroded channels, stuck beads, broken clips — the fix isn’t always obvious.
Troubleshooting Problems During Aluminium Window Glass Replacement
The step-by-step process assumes everything cooperates. Real-world aluminium frames — especially those exposed to decades of Australian coastal air, UV, and temperature cycling — rarely cooperate fully. Corrosion builds up in hidden channels, rubber hardens into brittle plastic, and clips that should flex simply snap. Knowing how to handle these mid-job complications separates a successful replacement from a damaged frame and a call to the glazier you were trying to avoid.
Dealing with Corroded Frames and Stuck Beads
Aluminium doesn’t rust, but it does oxidise. That white powdery buildup inside rebate channels and along aluminium window glazing bead tracks creates friction that turns a simple snap-out into a wrestling match. Forcing a stuck bead with excessive leverage risks bending the bead profile beyond reuse or cracking the frame channel lip.
- White oxidation gripping the bead spine: Spray a penetrating lubricant (lanolin-based products like Inox MX3 work well without damaging rubber gaskets) into the channel seam. Let it wick in for 10 to 15 minutes. Then work a thin, stiff blade — a sharpened putty knife or a dedicated glazing bead removal tool — along the seam in short increments rather than trying to pop the full length at once.
- Bead fused to the frame by paint layers: Score along both edges of the bead with a sharp utility knife before attempting removal. Cut through every paint layer bridging the bead-to-frame joint. Without this step, you’ll peel paint off the surrounding frame face when the bead releases.
- Corroded screws in frame corners (screw-fixed beads): If the screw head strips or the shaft has bonded to the aluminium through galvanic corrosion, apply heat from a soldering iron to the screw head for 20 seconds to break the oxide bond. Follow immediately with a firm-fitting screwdriver. If the head is completely destroyed, drill it out with a bit slightly smaller than the screw shaft and extract the remaining stud with locking pliers once the bead is free.
Patience matters more than force here. A bead that takes five minutes of careful working to release is still a reusable bead. One that gets levered aggressively for 30 seconds often isn’t.
Fixing Misaligned Gaskets and Broken Clips
Rubber gaskets and retaining clips are the consumable components in a dry-glazed aluminium window. They deteriorate with age, and replacement glass won’t seal properly against compromised seals — no matter how accurately you measured or how cleanly the bead snaps home.
- Hardened or compressed rubber gaskets: If the gasket has lost its elasticity and no longer springs back when pressed, replace it entirely. Peel the old gasket from its channel, take a cross-section sample to a glazing supplier, and match the profile. Aluminium window glazing beads rely on gasket compression for their weather seal — a flattened gasket that doesn’t rebound leaves air gaps even with the bead fully seated.
- Gasket that won’t seat into its channel: Lubricate the gasket with a thin film of soapy water (dishwashing liquid and water) before pressing it into the groove. This lets it slide into position without bunching or twisting. Never use petroleum-based lubricants — they degrade EPDM rubber over time.
- Broken plastic retaining clips: Some aluminium frame systems use small plastic clips at intervals along the bead channel to hold the bead in place between the snap-in points. When these break, the bead may bow outward between its remaining attachment points. Source replacement clips from the window manufacturer or a specialist hardware supplier — generic clips rarely match the channel geometry precisely enough. As a temporary measure, a small dab of neutral-cure silicone at the clip location can hold the bead until proper clips arrive.
- Silicone residue preventing proper seal: Old silicone left in the rebate channel stops new glazing tape from adhering and prevents gaskets from compressing evenly against the glass. Scrape bulk residue with a plastic scraper (metal gouges aluminium), then remove the remaining film with a silicone remover solvent. Allow the solvent to fully evaporate before applying new tape or seating the glass — trapped solvent under glazing tape causes adhesion failure within weeks.
When Frame Damage Means Full Window Replacement
Glass-only replacement assumes the frame is structurally sound and dimensionally stable. Sometimes it isn’t — and persisting with a glass swap in a compromised frame wastes money on a result that won’t last.
Consider full unit replacement rather than glass-only if you encounter:
- Deep pitting or through-corrosion on the rebate face where the glass seats — this prevents a uniform seal regardless of gasket condition
- Frame corners that have separated or show visible gaps at the mitre joints, indicating failed corner crimps or broken screw fixings
- A frame that’s racked or twisted (diagonal measurements differ by more than 3 mm), making it impossible to achieve even perimeter clearance for the new pane
- Extensive corrosion on the exterior face that has undermined the frame’s structural section — particularly common on older windows in coastal or high-salt environments
- Obsolete bead profiles that are no longer manufactured, leaving you unable to source replacement aluminium glazing bead components if the originals break during removal
In these scenarios, the frame itself has reached end of life. Investing in new glass for a failing frame is like fitting new tyres to a car with a cracked chassis — technically possible, but the underlying problem remains and will resurface quickly.
If the frame passes inspection and the new glass is seated, a few quick verification checks confirm the job is genuinely complete:
- Visual seal check: Run your eye around the full perimeter of each aluminium window glazing bead. The gasket should show uniform compression against the glass face with no visible gaps, bulges, or sections where the bead has lifted from its channel.
- Draft test: On a windy day, hold a lit incense stick or thin strip of tissue paper close to the glass perimeter. Movement indicates air leakage — usually a bead that hasn’t fully clicked home or a gasket section that’s folded under rather than seating flat.
- Water test: Using a garden hose on a gentle spray setting, wet the exterior face of the glass and frame junction for two to three minutes. Check the interior for any moisture ingress around the bead edges. This is especially important for wet-sealed systems where the silicone needs to be continuous without voids.
- Operation test (operable windows): Open and close the sash several times. Confirm it moves freely without binding — new glass that’s fractionally thicker than the original can sometimes interfere with track clearances on sliding windows or catch on friction stays on casement and awning types.
Passing all four checks means the replacement is sound. Failing any of them points to a specific fix — reseat the bead, reposition the gasket, or reapply sealant at the leak point — rather than starting over from scratch.
Aluminium Window Glass Replacement Cost
Knowing how to do the work is one thing. Knowing whether you should do it yourself is another question entirely — and it usually comes down to dollars. The real aluminium window glass replacement cost depends on how many windows you’re tackling, what glass type you need, and whether the access situation turns a 30-minute job into a half-day ordeal.
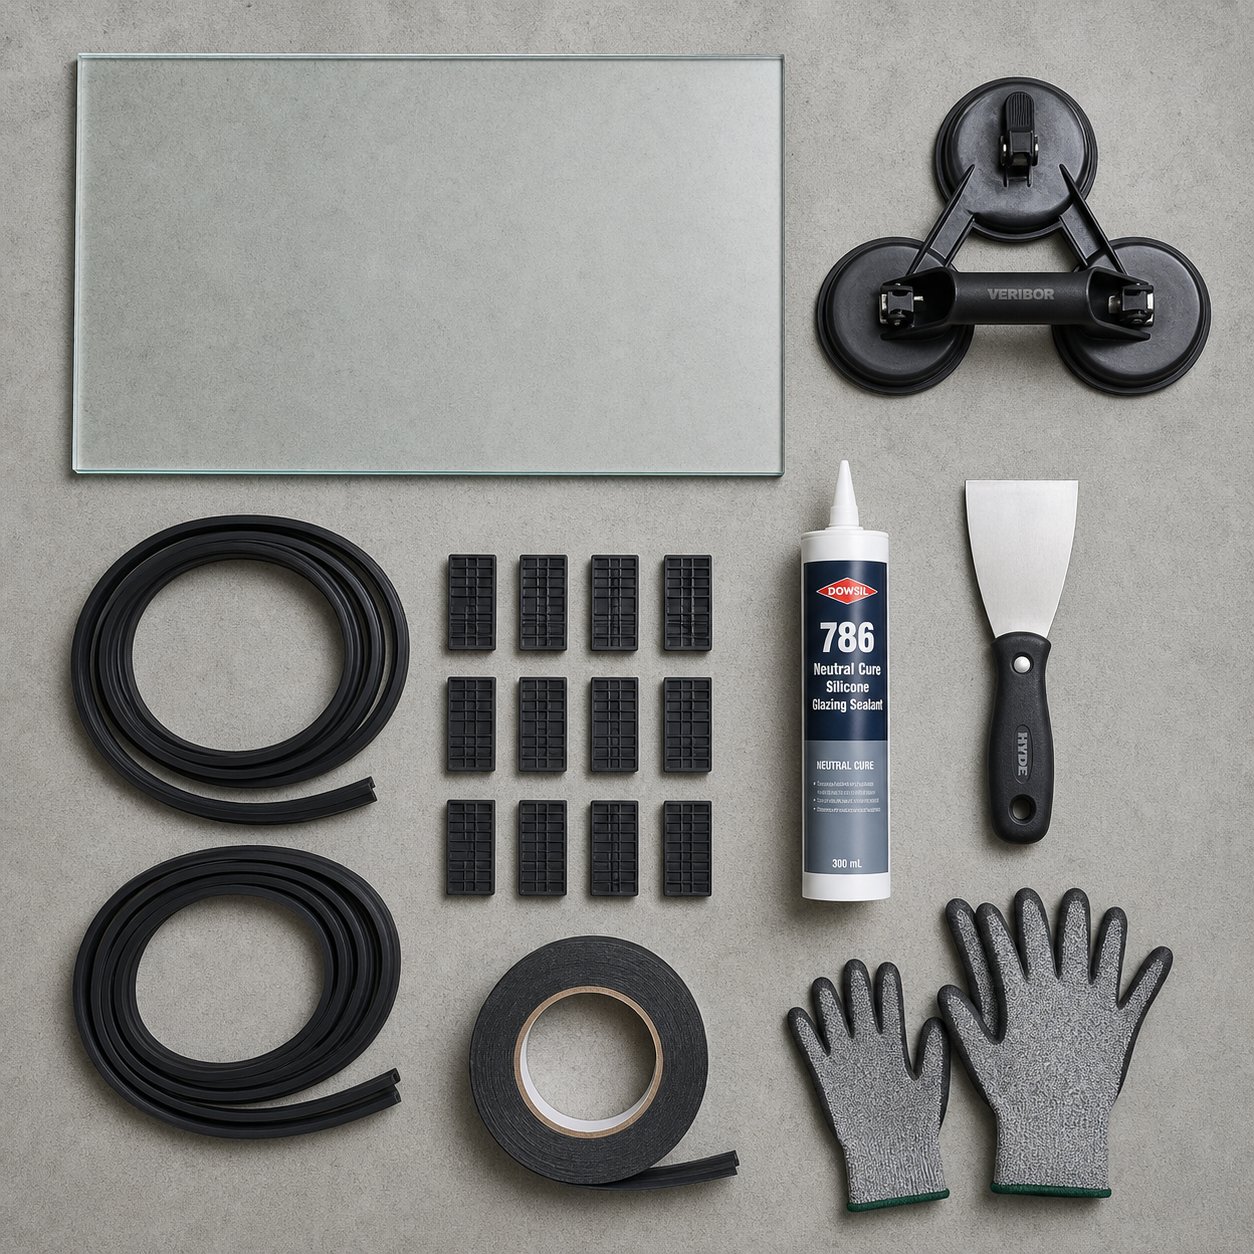
Material and Tool Costs for DIY
The DIY window glass replacement cost is lower than most people expect — provided you already own basic hand tools. The glass itself is the main expense, and everything else is relatively minor.
Typical material costs for a single standard-sized window (approximately 900 mm x 600 mm) in Australia:
- 4 mm clear float glass (single pane, supply only): $30 to $60
- Double-glazed IGU (standard clear, supply only): $120 to $250
- Glazing tape or rubber gasket (per metre): $3 to $8
- Setting blocks (pack): $10 to $20
- Neutral-cure silicone (for wet-sealed systems): $12 to $20 per cartridge
- Suction cup lifter (if not owned): $25 to $60
- Bead removal tool or stiff putty knife: $15 to $30
All up, a single-pane DIY replacement might cost $60 to $120 in materials. A double-glazed unit pushes that to $180 to $350. Tools are a one-off purchase that covers every subsequent window.
Glass Upgrades Worth the Investment
If you’re already pulling the glass out, it’s worth considering whether the replacement pane should do more than the original. Aluminium frames conduct heat readily — the glass specification is where you claw back thermal performance.
Low-emissivity (low-E) coatings reduce heat transfer through the glazing by 30% to 50% compared to uncoated glass, at roughly 10% to 15% more than standard panes. For Australian climates — particularly in zones where summer cooling loads dominate — a spectrally selective low-E coating filters solar heat gain while preserving natural daylight. That translates to measurable reductions in air conditioning costs, especially on west-facing windows copping afternoon sun.
Argon-filled double glazing takes performance further. The inert gas between panes insulates better than air alone, lowering the U-factor of the glazing unit. Combined with low-E coating on surface two or three of the IGU, this configuration delivers genuine year-round comfort improvements in both heating and cooling seasons.
Laminated glass adds acoustic and safety benefits rather than thermal ones — useful for street-facing windows or positions requiring Grade A safety compliance under AS 1288. It blocks 99% of UV transmission, protecting interior furnishings from fading.
| Factor | DIY Cost (per window) | Professional Cost (per window) | What Shifts the Decision |
|---|---|---|---|
| Single pane, standard float | $60 – $120 | $250 – $400 | Ground floor, easy access — DIY saves significantly |
| Double-glazed IGU | $180 – $350 | $400 – $750 | Heavier unit; second-storey or large panes favour professional |
| Toughened or laminated safety glass | $150 – $300 | $350 – $650 | Certification and compliance documentation easier through a glazier |
| Low-E coated IGU with argon fill | $250 – $450 | $500 – $900 | Correct surface orientation critical — pros reduce error risk |
| Multiple windows (5+) | Materials only, time multiplied | Often discounted per-unit rate | Volume pricing and speed favour professional for larger jobs |
Professional glaziers in Australia typically charge $80 to $120 per hour for labour, with most single-window replacements taking 30 to 60 minutes of on-site time. The total professional cost includes measurement, glass supply, installation, cleanup, and usually a workmanship warranty — none of which you get when handling glass and aluminium installation yourself.
When Professional Installation Saves Money
DIY makes financial sense for ground-floor sliding or casement windows with snap-in beads and standard glass. Outside that sweet spot, the economics shift quickly.
Hire a professional when:
- The window is above ground floor — scaffold hire alone can exceed the labour cost of a glazier who brings their own access equipment.
- The pane exceeds 1.5 m² or weighs over 20 kg — large glass requires suction cup rigs and two people minimum. A dropped pane costs more than the professional fee you were trying to avoid.
- Safety glass certification is required — glaziers supply glass with proper AS/NZS 2208 markings and can provide compliance documentation for council or insurance purposes. Sourcing certified glass yourself is possible but adds complexity.
- You’re replacing glazing across multiple openings — professionals work faster on volume jobs, and bulk glass ordering through their supplier accounts often undercuts retail pricing enough to narrow the cost gap.
- Warranty matters — if the window is in a rental property, body corporate building, or recently constructed home still under builder’s warranty, DIY work may void coverage. Professional installation with documented warranty protects your position.
The honest calculation isn’t just materials versus labour. Factor in your time, the risk of a measurement error requiring a reorder, potential frame damage from inexperience, and the value of a guaranteed result. For a single accessible window, DIY is a clear win. For a project involving multiple openings, varied glass types, or anything requiring you to replace glazing at height — the professional quote often represents better value than it first appears.
Planning Your Aluminium Window Replacement Project for Best Results
A single cracked pane is a weekend fix. Ten windows across a renovation, a unit block needing systematic upgrades, or a commercial fitout requiring consistent aluminium window glazing across dozens of openings — that’s a project, and projects demand planning that goes well beyond measuring rebates and ordering glass one pane at a time.
The difference between a smooth multi-window replacement and a drawn-out headache usually comes down to sequencing, sourcing strategy, and knowing when piecemeal DIY stops making sense. Whether you’re a homeowner tackling a full-house upgrade, a builder managing a renovation, or a property manager responsible for a multi-unit complex, the principles below keep larger jobs on track.
Planning Multi-Window Replacement Projects
Scaling from one window to many introduces variables that single-pane work doesn’t encounter. Batch ordering, phased installation, and consistent specifications across openings all require upfront coordination.
Start with a full audit of every window in scope. Document each opening’s frame type, glazing system, glass specification, condition of existing beads and gaskets, and any compliance requirements triggered by the window’s position. This audit becomes your master specification sheet — the document that prevents ordering errors when you’re dealing with 15 different sizes across four glass types.
Phasing matters for occupied buildings. Replacing every window simultaneously leaves rooms exposed to weather and security risk. A practical approach for residential projects:
- Group windows by exposure. Prioritise weather-facing elevations (typically west and south in southern Australia) where failed seals cause the most comfort and energy loss.
- Batch by glass type. Order all toughened panes together, all IGUs together, and all standard float together. This consolidates lead times and often unlocks volume pricing from suppliers.
- Schedule around weather. Avoid starting multi-day replacement projects during forecast rain periods. Even with temporary coverings, open rebates and uncured silicone don’t mix well with moisture.
- Allow a test window. As mentioned in the ordering section, fit one pane first to confirm measurements and process before committing to the full batch. This is doubly important on older buildings where frame dimensions may vary between supposedly identical openings.
For multi-unit residential or commercial properties, the logistics compound further. Coordinating access to individual units, managing tenant disruption, maintaining consistent aesthetics across the building facade, and ensuring every opening meets NCC compliance adds layers that pure technical skill doesn’t address. These projects benefit from a structured supply chain rather than ad hoc sourcing.
Working with a Specialist Aluminium Window Supplier
Single-pane replacements work fine with a trip to your local glass supplier. Larger projects — particularly those involving custom sizes, complete frame-and-glass units, or commercial specifications — demand a different relationship. An aluminium window supplier for replacement projects offers capabilities that retail glass shops simply don’t.
The distinction matters because bigger jobs often reveal that glass-only replacement isn’t sufficient for every opening. Some frames will be too corroded, too racked, or too outdated to accept new glazing effectively. At that point, you need complete aluminium window units manufactured to your exact dimensions — not off-the-shelf stock sizes that require site modification.
When evaluating a supplier for project-scale work, look for these capabilities:
- System recommendation: A capable supplier assesses your project requirements — climate zone, performance targets, aesthetic preferences, compliance obligations — and recommends the appropriate aluminium and glass system rather than simply filling an order for whatever you ask for.
- Engineering coordination: For commercial projects or structurally complex residential work, the supplier should review drawings, confirm wind-load ratings, and verify that specified frame sections handle the glass weight and span without deflection issues.
- Material calculation accuracy: Precise take-offs from architectural drawings prevent over-ordering (wasted budget) and under-ordering (project delays). This includes profiles, glass, hardware, gaskets, fixings, and flashings — everything needed for a complete installation.
- Quality-controlled manufacturing: Factory-assembled units with verified dimensions, correct glass configurations, and properly fitted hardware arrive ready to install. This eliminates the site assembly variables that cause fit problems.
- Logistics and delivery coordination: Staged deliveries matched to your installation sequence keep the site organised and reduce the risk of damage to units stored on-site for extended periods.
Builders, developers, and contractors working across multiple projects recognise the value of this end-to-end approach. Sourcing profiles from one supplier, glass from another, hardware from a third, and hoping everything aligns on site introduces risk at every interface point. A single supplier managing the full scope — from drawings through to delivery — eliminates those gaps. For projects that require this level of coordination, MEICHEN’s project-based supply service covers the complete chain from system recommendation and material calculation through manufacturing, quality control, and logistics, supporting builders and procurement teams who need a reliable aluminium window partner rather than a parts catalogue.
The right time to engage a specialist supplier is early — ideally during the planning phase rather than after you’ve discovered mid-project that three of your frames need full replacement and your glass order doesn’t match the revised specifications. Early engagement means accurate costing, realistic lead times, and a supply schedule that matches your installation program.
Whether your project is a single bathroom window that needs toughened glass or a 40-unit apartment block requiring consistent aluminum and glass across every elevation, the principles remain the same: assess thoroughly, measure precisely, specify correctly, and source from a supply chain that matches your project’s complexity. Get those foundations right, and the physical work — the part most guides focus on exclusively — becomes the straightforward part it should always have been.
Frequently Asked Questions About Aluminium Window Glass Replacement
1. Can you replace just the glass in an aluminium window frame?
Yes, in most cases you can replace the glass without replacing the aluminium frame itself. The frame needs to be structurally sound with no deep corrosion, separated corners, or significant racking. If the frame uses snap-in glazing beads, the process is non-destructive — beads pop out, old glass lifts free, and the new pane drops in. Wet-sealed frames require cutting through the old sealant and reapplying fresh silicone, but the frame remains in place. Full frame replacement only becomes necessary when corrosion has compromised the rebate surface, corner joints have failed, or the frame is twisted beyond 3 mm out of square.
2. How much does it cost to replace glass in an aluminium window in Australia?
For a standard-sized window (approximately 900 mm x 600 mm), DIY material costs range from $60 to $120 for a single pane of clear float glass, or $180 to $350 for a double-glazed insulated glass unit. Professional supply-and-install typically runs $250 to $400 for single pane and $400 to $750 for double glazing. Toughened safety glass and low-E coated IGUs with argon fill sit at the higher end. Professional pricing includes measurement, glass supply, installation, cleanup, and workmanship warranty. For projects involving five or more windows, professionals often offer discounted per-unit rates that narrow the gap with DIY costs.
3. How do I know if my aluminium window needs safety glass?
Under Australian Standard AS 1288, safety glass (toughened or laminated) is mandatory in several residential positions: glazing with a finished sill height below 800 mm above floor level, glass within 500 mm of a doorway, wet areas including bathrooms and laundries, glazing adjacent to stairways and landings, and any pane forming part of a balustrade. Bushfire-prone areas rated BAL-29 or above under AS 3959 may also require toughened glass. Replacement glass in these positions must carry a permanent AS/NZS 2208 safety mark. Installing standard annealed glass where safety glass is required creates compliance issues that can surface during property sales or insurance claims.
4. What is the difference between dry glazing and wet glazing in aluminium windows?
Dry glazing uses a snap-in aluminium or PVC bead that clips mechanically into a channel on the frame, holding the glass against a rubber gasket or glazing tape through compression alone — no liquid sealant involved. Wet glazing bonds the glass directly to the frame using silicone or putty that cures to form both the structural hold and weather seal. The practical difference for replacement is significant: dry-glazed windows allow non-destructive removal in 20 to 30 minutes with no curing time, while wet-sealed systems require cutting through old sealant, scraping residue, and allowing 24 hours for fresh silicone to cure before weather exposure.
5. Should I replace aluminium window glass myself or hire a professional glazier?
DIY makes strong financial sense for ground-floor sliding or casement windows with snap-in beads and standard glass — these are genuine weekend projects. Hire a professional when the window is above ground floor (scaffold hire alone can exceed labour costs), the pane exceeds 1.5 square metres or 20 kg, safety glass certification documentation is needed, you are replacing multiple windows where volume pricing narrows the cost gap, or warranty coverage matters for rental or body corporate properties. If your frame uses wet sealant, is in a hard-to-reach location, or you are unsure about building code requirements, professional installation typically delivers better value than a potentially costly DIY mistake.
More Window & Door Guides