What Standard Window Sizes Actually Mean
Planning a build, renovation, or window swap? The single fastest way to blow your budget is ordering the wrong size. Standard window sizes are the pre-set width and height dimensions that manufacturers produce in volume to fit the rough openings found in most residential construction. They exist so builders, contractors, and homeowners can source windows quickly, affordably, and with confidence that the unit will fit a common wall opening without custom fabrication.
In this guide, you’ll find every dimension organized two ways: by window type — from the double hung window and casement window to the largest window styles like fixed picture units — and by room, so you can match the right size to the right space in your home.
What Counts as a Standard Window Size
Standard window sizes generally range from about 24 to 48 inches wide and 36 to 72 inches tall for the most common operable styles. Fixed and sliding units can stretch well beyond those figures. The exact dimensions available depend on the manufacturer, the frame material, and the operating style — a casement window won’t share the same size chart as a double hung window, even though both are considered standard.
“Standard” does not mean universal. It means commonly manufactured and widely stocked. Two different brands may list slightly different dimensions for the same window type, so always verify sizes against the specific manufacturer’s spec sheet before you order.
Manufacturers also use a four-digit notation system to label each size — a shorthand you’ll see on retail tags and spec sheets. We break that code down in the next section so you can read any label at a glance.
Why Standard Dimensions Matter for Your Project
Choosing a standard size over a custom order delivers a handful of practical advantages that directly affect your timeline and wallet:
- Lower cost — stock windows are mass-produced, which keeps pricing competitive. Custom units can run roughly 50% more than their standard counterparts.
- Shorter lead times — standard units are typically in stock or available within days, while custom orders may take weeks.
- Easier replacement sourcing — if a window is damaged years later, finding a matching standard size is far simpler than reordering a one-off custom unit.
- Better resale compatibility — homes framed around standard openings give future owners more options when it’s time to upgrade.
- Simplified code compliance — building codes set minimum window dimensions for egress in bedrooms and basements. Standard sizes are designed with these requirements in mind, making it easier to meet safety minimums without guesswork.
Of course, knowing the right numbers only helps if you understand how those numbers are expressed. Manufacturers don’t just list inches — they use a compact coding system that trips up a lot of first-time buyers.
Decoding the Four-Digit Window Notation System
Walk into any home improvement store or open a manufacturer’s spec sheet, and you’ll see standard window sizes expressed as four-digit codes — 2030, 2846, 3040, 4060. Sounds cryptic? It’s actually a simple shorthand once you know the pattern, and it’s the same system referenced across the rest of this guide.
How to Read the Four-Digit Size Code
The first two digits represent the window’s width in feet and inches. The last two digits represent its height in feet and inches. So a window labeled 2846 translates to 2 feet 8 inches wide by 4 feet 6 inches tall — or 32 inches by 54 inches. The four-digit notation can sometimes refer to the rough opening rather than the unit itself, so always confirm with the manufacturer which measurement the code describes.
Here are four common codes broken down side by side:
| Size Code | Width (ft-in) | Height (ft-in) | Width (inches) | Height (inches) | Approx. Metric (mm) |
|---|---|---|---|---|---|
| 2030 | 2′ 0″ | 3′ 0″ | 24″ | 36″ | 610 x 914 |
| 2846 | 2′ 8″ | 4′ 6″ | 32″ | 54″ | 813 x 1372 |
| 3040 | 3′ 0″ | 4′ 0″ | 36″ | 48″ | 914 x 1219 |
| 4060 | 4′ 0″ | 6′ 0″ | 48″ | 72″ | 1219 x 1829 |
You’ll notice the pattern quickly. A 3040 code on a set of sliding windows at your local retailer? That’s 36 inches wide by 48 inches tall. A 2030 label on bathroom windows? That’s a compact 24-by-36-inch unit — a common choice for privacy and ventilation.
Converting Between Inches, Feet, and Millimetres
If you’re working with Australian standards or sourcing windows from international suppliers, you’ll need metric equivalents. The conversion is straightforward: one inch equals 25.4 millimetres. The table below covers the most frequently encountered measurements in standard window sizing.
| Imperial (inches) | Imperial (feet-inches) | Metric (mm) |
|---|---|---|
| 24″ | 2′ 0″ | 610 |
| 28″ | 2′ 4″ | 711 |
| 32″ | 2′ 8″ | 813 |
| 36″ | 3′ 0″ | 914 |
| 48″ | 4′ 0″ | 1219 |
| 54″ | 4′ 6″ | 1372 |
| 60″ | 5′ 0″ | 1524 |
| 72″ | 6′ 0″ | 1829 |
Keep this notation system in your back pocket. Every size table in the sections ahead uses these same codes, so you’ll be able to cross-reference any dimension — whether you’re comparing double hung options for a bedroom or picking out the right sliding windows for a living area — without second-guessing the numbers.
Standard Sizes for Every Window Type
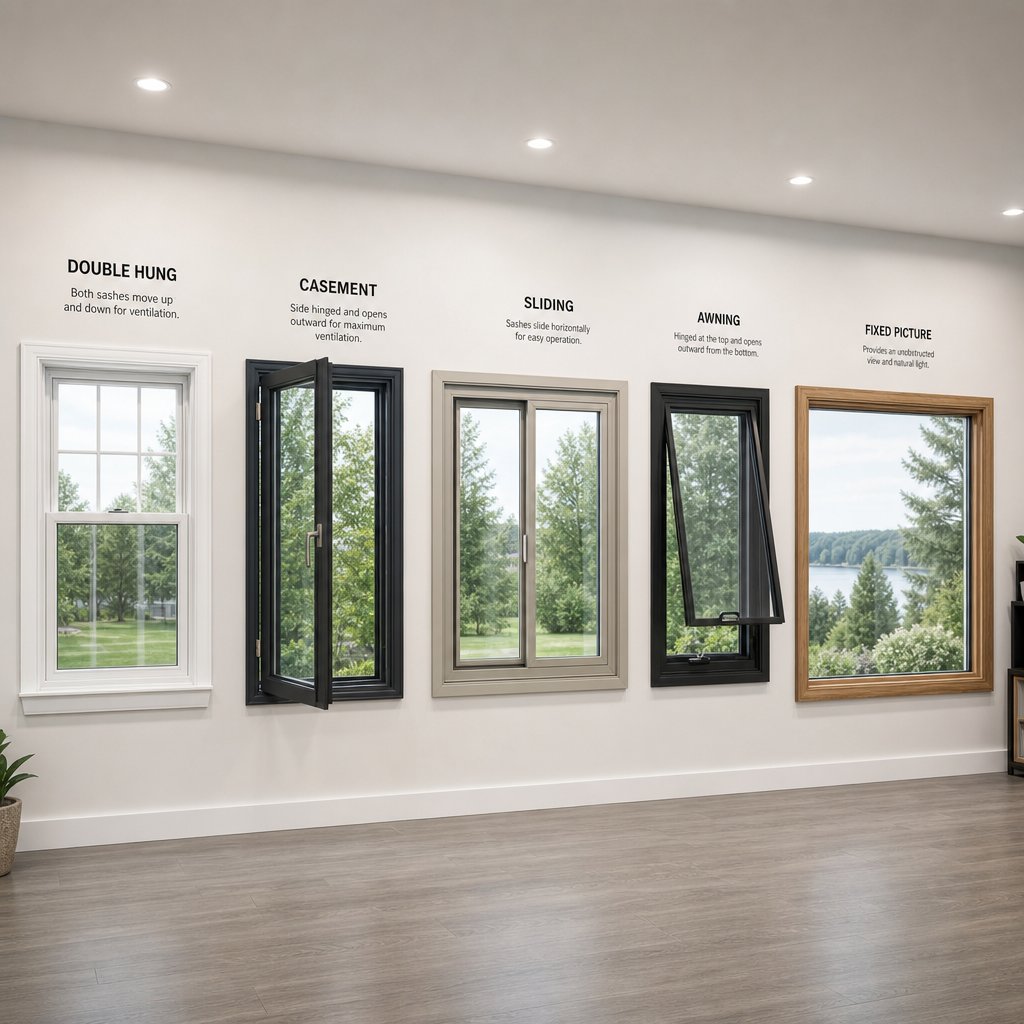
Each window style has its own set of standard window dimensions, shaped by how the sash operates, how much glass the frame can support, and where the unit typically gets installed. A double hung window and a fixed window may sit in the same wall, but their size ranges look very different on a spec sheet.
The table below gives you a quick-scan comparison across all major types. Use the four-digit notation codes from the previous section to cross-reference any size you find at a retailer or in a supplier catalog.
| Window Type | Common Widths (inches) | Common Heights (inches) | Popular Notation Codes |
|---|---|---|---|
| Double Hung | 24, 28, 32, 40, 44, 48 | 36, 44, 48, 52, 54, 60, 62, 72 | 2030, 2844, 3040, 4060 |
| Casement | 16, 20, 24, 28, 32, 36, 40, 44, 48 | 24, 36, 48, 54, 60, 72, 84 | 2030, 2446, 2860, 3060 |
| Sliding (Horizontal) | 36, 48, 60, 72, 84 | 24, 36, 48, 60 | 3020, 4836, 6048, 7260 |
| Awning | 16, 20, 24, 28, 32, 36, 40, 44, 48 | 24, 36, 48, 54, 60, 72, 84 | 2020, 2436, 3040, 3648 |
| Fixed / Picture | 34, 36, 48, 60, 72 | 36, 48, 60 | 3040, 4848, 6060, 7260 |
| Hopper | 32, 36, 48 | 14, 18, 24 | 3214, 3618, 4824 |
Double Hung and Casement Window Sizes
These two styles dominate residential construction, and for good reason — they cover the widest range of window sizes in standard production. Double hung windows typically span 24 to 48 inches wide and 36 to 72 inches tall, with the most common widths landing at 24, 28, 32, and 48 inches. Both sashes move vertically, making them a go-to for bedrooms, hallways, and living areas where easy cleaning and balanced ventilation matter.
Casement windows swing outward on a side hinge, so they tend to be narrower — standard widths run from about 16 to 48 inches, while heights stretch from 24 all the way up to 84 inches. That tall, slim profile makes casements a natural fit for spaces flanking a fixed window or lining a kitchen window above the sink where you want maximum airflow with a single crank.
Keep in mind that exact availability depends on the manufacturer and frame material. Vinyl frames, aluminium frames, and wood frames each carry slightly different size catalogs, even within the same brand.
Sliding, Awning, and Fixed Window Sizes
Sliding windows are the workhorses of living rooms, patios, and open-plan spaces. Standard widths start at 36 inches and climb to 84 inches, with heights ranging from 24 to 60 inches. Because the sash glides horizontally along a track, sliders handle wider openings more comfortably than most operable styles — imagine a 72-by-48-inch unit framing a backyard view.
Awning windows share the same standard window dimensions as casements (widths from 16 to 48 inches, heights from 24 to 84 inches) but hinge at the top and push outward at the bottom. That design lets you crack them open during rain without water entering the room, which is why you’ll see them above a kitchen window counter or in bathrooms where moisture control is a priority.
A fixed window — also called a picture window — offers the broadest size range of any type because there’s no operating hardware to limit the frame. Standard widths run from 34 to 72 inches, and heights from 36 to 60 inches. Without sashes, rails, or cranks, fixed units maximize the glass area and are often paired with operable casements or awnings on either side to combine views with ventilation. For Australian homeowners and builders looking for energy-efficient aluminium options across casement, sliding, awning, and fixed styles, MEICHEN’s aluminium windows collection covers all four types in Australian-standard-compliant sizes — a practical single source when your project calls for multiple window styles.
Hopper and Specialty Window Sizes
Hopper windows are the type most guides skip, yet they’re one of the most common choices for basements and utility rooms. They hinge at the bottom and tilt inward, fitting neatly into the narrow strip of wall space between a basement ceiling and ground level. Standard hopper sizes are compact: widths of 32, 36, or 48 inches paired with heights of just 14 to 24 inches. A 32-by-18-inch unit is a typical stock size at major retailers, while larger hopper windows — say 48 by 24 inches — may need to be special-ordered depending on the store.
Specialty shapes like arched tops, trapezoids, and octagons fall outside the standard size charts entirely. These are almost always custom or semi-custom orders with longer lead times, so factor in extra weeks if your design calls for them.
Knowing the standard dimensions for each type is only half the equation, though. The room where the window goes — and the building codes that govern it — play an equally important role in narrowing down the right size.
Standard Window Sizes Organized by Room
Most people don’t shop for windows by type — they shop by room. You’re not thinking “I need a 3050 window size.” You’re thinking “I need a window for the master bedroom” or “what fits above the kitchen sink?” Room function is what actually drives the decision: how much light you want, how much ventilation you need, whether privacy matters, and whether building codes impose a minimum size for emergency escape.
The window size chart below maps the most common standard dimensions to each room so you can zero in on the right fit without scrolling through every type and style.
| Room | Typical Width Range (inches) | Typical Height Range (inches) | Most Popular Standard Size (inches) |
|---|---|---|---|
| Bedroom | 24 – 48 | 36 – 60 | 36 x 48 |
| Living Room | 48 – 72 | 48 – 72 | 48 x 48 or 72 x 48 (picture) |
| Bathroom | 24 – 36 | 24 – 36 | 24 x 36 |
| Kitchen | 24 – 48 | 24 – 36 | 36 x 36 |
| Basement (non-egress) | 24 – 48 | 18 – 24 | 32 x 24 |
| Basement (egress) | 30 – 48 | 42 – 48 | 30 x 48 (casement) |
Bedroom and Living Room Window Sizes
Bedrooms are where building codes have the most say. Every bedroom window must meet egress minimums — a net clear opening large enough for an adult to escape during a fire. That requirement alone rules out anything too small, so the standard window size for bedrooms typically falls between 24 and 48 inches wide and 36 and 60 inches tall. The 36 x 48-inch double hung is the most popular choice: it comfortably clears egress thresholds while fitting the proportions of a typical bedroom wall.
Living rooms play by different rules. Here, the goal is natural light and visual connection to the outdoors, so sizes skew larger. Picture windows up to 72 inches wide are common, often flanked by operable casement or double hung units for airflow. A 48 x 48-inch or 72 x 48-inch configuration is a frequent starting point. If you want a wall of glass without going custom, combining two or three standard units in a mulled assembly gives you the scale of a single oversized window at stock pricing.
Bathroom and Kitchen Window Sizes
Privacy and moisture control shape bathroom window choices more than anything else. Standard sizes here are compact — commonly 24 to 36 inches wide and 36 to 72 inches tall, though many homeowners lean toward the smaller end of that range (24 x 36 or 24 x 24) paired with frosted or obscure glass. Awning windows are especially popular because they vent humid air while staying rain-resistant when cracked open.
Kitchen windows sit above countertops and sinks, so height is constrained by the backsplash and upper cabinets. A 36 x 36-inch or 36 x 24-inch unit is the sweet spot for most kitchen layouts. Casement windows work well here too — a single crank handle is easy to reach over a faucet, and the full-swing sash pulls cooking steam and odors out efficiently.
Basement Window Sizes
Basements present the tightest sizing constraints because the window sits in a narrow band of wall between the ceiling joists and the exterior grade. For non-egress applications — storage rooms, utility areas, laundry — standard sizes run small. Common non-egress dimensions include 24 x 24, 36 x 24, and 48 x 24 inches, typically in awning or hopper styles.
If the basement is a bedroom or habitable living space, egress codes kick in and the window must be significantly larger. Casement units sized around 30 x 48 inches are a popular egress-compliant choice because the full-swing sash maximizes the clear opening area. Sliding windows can also work, but keep in mind that only half the frame serves as usable opening — so you’ll need a wider unit (like a 48 x 36) to hit the same clear-opening threshold.
Picking the right standard window size for each room gets you most of the way there. The piece that trips people up next is the gap between the size printed on the label and the hole in the wall it needs to fit into.
Rough Opening vs Actual Window Unit Size
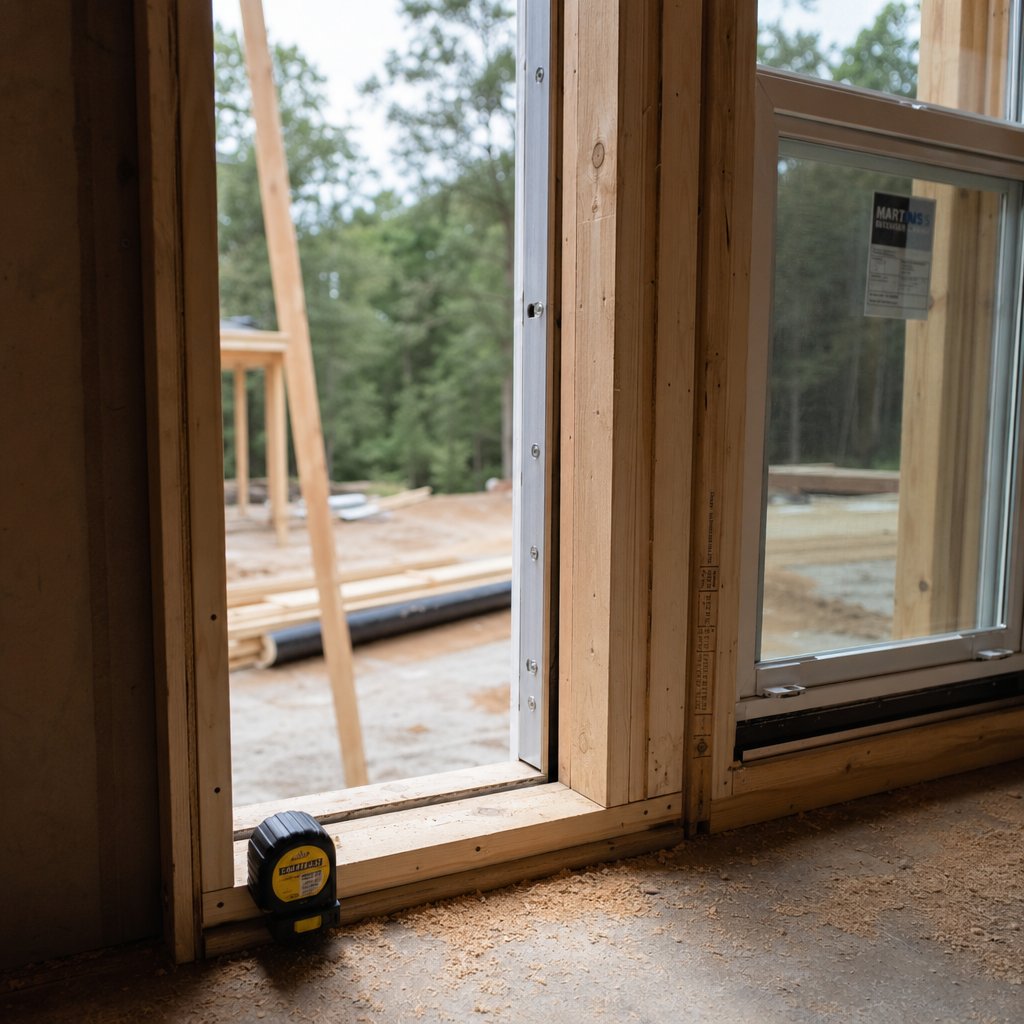
Every standard window width and height you see on a label describes the window unit itself — frame included. The hole in your wall where that unit sits? That’s a different number entirely, and confusing the two is one of the most expensive mistakes in any window project.
What Is a Rough Opening and Why It Matters
The rough opening is the framed space left by the studs, header, and sill plate before the window goes in. It’s intentionally larger than the window unit to leave room for shimming, insulation, and minor leveling adjustments. Industry standards typically call for the rough opening to be about 1/2 inch wider and 1/2 inch taller than the window’s frame dimensions.
So when a manufacturer lists a window at 36 x 48 inches, you’ll need a rough opening of approximately 36.5 x 48.5 inches. That half-inch gap on each side gets filled with low-expanding foam or fiberglass insulation and sealed with caulking — creating the weather-tight barrier that keeps drafts and moisture out. Without it, you can’t properly insulate, level, or seal the unit.
Here’s how the math works for five of the most common sizes, from compact basement units to the biggest window options in a living room:
| Window Unit Size (inches) | Notation Code | Rough Opening Needed (inches) |
|---|---|---|
| 24 x 36 | 2030 | 24.5 x 36.5 |
| 32 x 48 | 2840 | 32.5 x 48.5 |
| 36 x 48 | 3040 | 36.5 x 48.5 |
| 36 x 60 | 3050 | 36.5 x 60.5 |
| 48 x 72 | 4060 | 48.5 x 72.5 |
Keep in mind that these are general guidelines. Some manufacturers specify a slightly different clearance — occasionally 1/4 inch per side instead of 1/2 inch — so always check the installation instructions for the exact product you’re ordering.
Common Sizing Mistakes to Avoid
Even experienced renovators get tripped up here. The errors below account for the majority of costly returns and reorders, and every one of them is preventable:
- Measuring the sash instead of the frame — the sash is the movable panel that holds the glass. It’s smaller than the full unit. Always measure the outer frame edges to get the true window dimensions.
- Confusing rough opening with unit size — ordering a window that matches the rough opening exactly leaves zero room for shimming or insulation. The unit should always be slightly smaller than the opening.
- Measuring at only one point — walls and openings are rarely perfectly square, especially in older homes. Measure the width at the top, middle, and bottom, and the average window height at the left, center, and right. Use the smallest number for ordering.
- Assuming the old window size equals the rough opening — a previous unit may have been shimmed, trimmed, or even incorrectly sized. Remove interior trim and measure the actual framed opening before placing an order.
- Ignoring out-of-square conditions — if the two diagonal measurements of the opening differ by more than 1/4 inch, the frame isn’t square. Shimming can correct minor irregularities, but significant racking may require framing repairs before a new window will fit properly.
The bottom line: verifying the rough opening before you order is non-negotiable, whether you’re framing a brand-new wall or pulling out a 30-year-old unit. A tape measure and five minutes of careful checking can save hundreds of dollars in return shipping and project delays.
That half-inch gap also explains something else that catches people off guard — why the same rough opening can call for two different window sizes depending on whether the project is new construction or a replacement.
New Construction vs Replacement Window Sizes
Imagine two houses with identical rough openings — same standard window height, same width down to the fraction. You’d think they need the exact same window unit, right? Not quite. The type of project — new build or replacement — changes the unit size you should order, and overlooking this distinction is a fast track to a window that doesn’t fit.
New Construction Window Sizing
New construction windows are built with a nailing fin — a flat flange that extends around the perimeter of the frame. This fin gets fastened directly to the exposed wall studs before siding, brick, or any exterior cladding goes on. Weather flashing wraps over the fin, creating a tight seal between the window and the wall assembly.
Because the nailing fin sits flush against the framing, the window unit is sized to the rough opening itself. When manufacturers publish common window sizes in their catalogs, those dimensions almost always refer to new construction units. Builders and developers working from architectural plans spec windows this way — they frame the rough opening, then order the unit that matches it with the standard half-inch clearance on each side.
Hinged windows like casements and awnings, sliding units, double hungs — every operable style follows the same logic in new construction. The nailing fin is the constant.
Replacement Window Sizing and How It Differs
Replacement windows skip the nailing fin entirely. Instead of attaching to the studs, they’re designed to fit inside the existing window frame after the old sash and hardware have been removed. The existing frame stays in place, and the new unit slides into that frame pocket, gets shimmed plumb and level, then secured with screws through the jambs.
The practical result: a replacement unit for the same opening is smaller than its new construction counterpart. The existing frame eats into the available space, so the replacement window must be sized to the interior of that frame — not to the original rough opening. A homeowner replacing a standard 36 x 48-inch new construction window, for example, will typically need a replacement unit closer to 35.5 x 47.5 inches to fit the frame pocket properly.
Here’s how the numbers compare across four of the most frequently ordered sizes:
| Rough Opening (inches) | New Construction Unit (inches) | Replacement Unit (approx. inches) |
|---|---|---|
| 30.5 x 48.5 | 30 x 48 | 29.5 x 47.5 |
| 36.5 x 48.5 | 36 x 48 | 35.5 x 47.5 |
| 36.5 x 60.5 | 36 x 60 | 35.5 x 59.5 |
| 48.5 x 48.5 | 48 x 48 | 47.5 x 47.5 |
Those half-inch differences may look trivial on paper, but they’re the difference between a snug, weather-tight fit and a unit that’s too large to slide into the frame — or too small to seal properly. This is exactly why accurate measurement of the existing frame is essential before ordering replacement windows. You can’t just pull the old window’s size code and reorder the same number. Measure the frame pocket itself — jamb to jamb, sill to head — at three points each, and use the smallest reading.
Whether you’re working with plexiglass windows in a workshop, standard vinyl units in a bedroom, or aluminium frames in a modern build, the rule holds: new construction sizes and replacement sizes are not interchangeable for the same opening. Confirm your project type first, then measure accordingly.
Size and fit are only part of the equation, though. The window also has to satisfy local building codes — and in bedrooms and basements, those codes set hard minimums that not every standard size can meet.
Building Codes and Egress Requirements for Windows
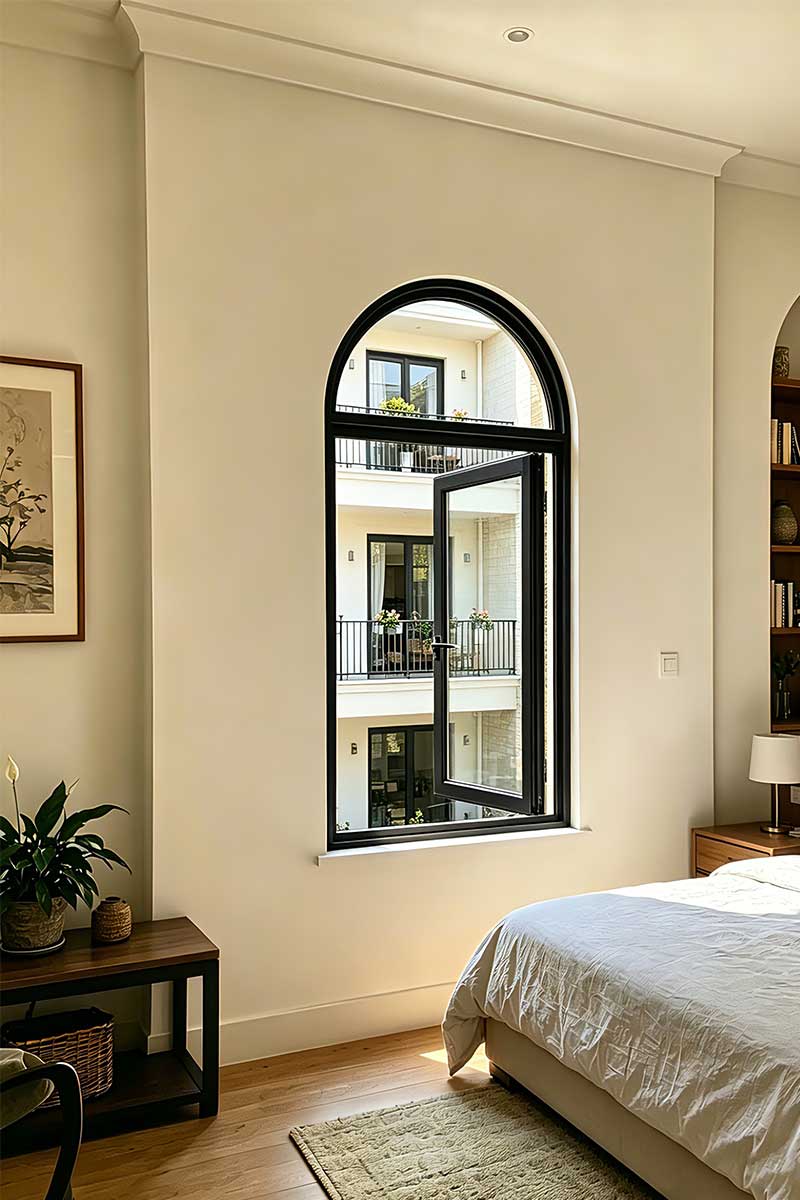
A window size that fits the wall perfectly can still fail your project if it doesn’t satisfy building code. In bedrooms, habitable basements, and attics, the International Residential Code (IRC) mandates that at least one window serve as an emergency escape and rescue opening — large enough for an adult to climb out and for a firefighter to climb in. These aren’t suggestions tucked into a guideline document. They’re life-safety requirements enforced through inspections, and failing to meet them can mean a failed permit, a forced retrofit, or serious liability.
IRC Egress Window Minimums Explained
The IRC sets four hard numbers that every egress window must hit simultaneously. A window that clears three out of four still doesn’t comply — all four dimensions must be met through the normal operation of the window, meaning you can’t break or alter the unit to reach the required opening.
| Requirement | Minimum Dimension | Notes |
|---|---|---|
| Net Clear Opening Area | 5.7 sq ft | Reduced to 5.0 sq ft for grade-floor openings |
| Net Clear Opening Height | 24 inches | Measured when the window is fully open |
| Net Clear Opening Width | 20 inches | Measured when the window is fully open |
| Maximum Sill Height | 44 inches from floor | Bottom of the clear opening to finished floor |
These minimums effectively set a floor on the smallest acceptable window size in any bedroom or habitable basement. You can go larger, but you can’t go smaller — no matter how neatly a compact unit fits the wall framing.
How Building Codes Affect Your Size Selection
Here’s where it gets tricky. A standard window size like 24 x 24 or 24 x 36 inches looks perfectly reasonable on a spec sheet, but neither one delivers 5.7 square feet of net clear opening. Why? Because the net clear opening is not the same as the overall window size. The frame, sash rails, and hardware all eat into the usable opening. A 24 x 36-inch double hung, for example, only opens one sash — roughly half the total pane of glass area — so the actual clear opening may land well below the 5.7-square-foot threshold.
To verify whether a specific window size meets egress code, you need the manufacturer’s published net clear opening dimensions, not just the unit’s overall width and height. Most manufacturers list these figures in their spec sheets. Multiply the net clear opening width by the net clear opening height (both in inches), divide by 144 to convert to square feet, and confirm the result is at least 5.7. If the average window size you’re considering falls short, step up to the next standard size — a 36 x 48-inch casement, for instance, typically clears egress requirements comfortably because the full sash swings open.
One more thing worth flagging: the IRC is a baseline. Local jurisdictions can — and often do — adopt amendments that tighten these minimums or add requirements the IRC doesn’t cover. Some municipalities mandate larger openings, lower sill heights, or specific window styles in certain zones. Always verify with your local building authority before finalizing your order, because a window that passes IRC minimums in one county may not pass inspection in the next.
Code compliance tells you the minimum size your window must be. The next challenge is making sure the opening you already have matches that size — and that starts with knowing exactly how to measure it.
How to Measure Your Windows Step by Step
Knowing the typical window sizes for your room and window type is only useful if the numbers you hand to the manufacturer are accurate. A measurement that’s off by even a quarter inch can mean a unit that won’t slide into the frame or one that leaves gaps no amount of caulking can fix. Whether you’re replacing a double hung in a bedroom or swapping out a window casement above the kitchen sink, the measuring process is the same — and it takes about five minutes per window.
Grab these tools before you start:
- Tape measure (a 25-foot model with a locking blade works well)
- Level (to check plumb and level of the frame)
- Carpenter’s square or speed square
- Pencil and notepad (or your phone’s notes app)
Measuring Width, Height, and Depth
The golden rule: measure in three places and use the smallest number. Walls shift, frames settle, and openings that looked square 20 years ago rarely are today. Taking each opening’s measure at several points accounts for those irregularities and ensures the new unit fits the tightest spot in the frame.
- Measure the width from jamb to jamb (the vertical sides of the frame) at three points: near the top, at the center, and near the bottom. Record all three numbers and circle the smallest.
- Measure the height from the sill to the head jamb at three points: left side, center, and right side. Again, record all three and circle the smallest.
- Measure the depth of the frame — from the inside edge of the interior trim to the outside edge of the exterior trim. This confirms the frame can accommodate the new window’s profile. For most insert replacement windows, you’ll need a minimum jamb depth of about 3 1/4 inches.
- Write down the standard window length and width you’ve recorded alongside the window’s location (e.g., “master bedroom, north wall”) so you don’t mix up numbers when ordering multiple units.
Why the smallest measurement? Imagine the width reads 36 1/4 inches at the top, 36 inches at the center, and 36 1/8 inches at the bottom. If you order based on the largest reading, the window will be too wide at the center. Ordering to the smallest reading guarantees the unit slides in everywhere, and the minor gaps get filled with shims and insulation during installation.
Checking for Square and Accounting for Irregularities
Even if your width and height numbers look consistent, the opening can still be racked — meaning the corners aren’t true 90-degree angles. To check, measure the two diagonals: top-left corner to bottom-right, then top-right corner to bottom-left. If those two numbers are within 1/4 inch of each other, the opening is square enough for a standard unit. A difference greater than 1/4 inch means the frame is out of square and may need shimming adjustments or minor framing repairs before installation.
Older homes — especially those built before the 1970s — are the usual suspects here. Decades of settling, moisture movement, and foundation shifts can pull a frame out of alignment. Crank windows like casements and awnings are particularly sensitive to out-of-square conditions because the sash must seal tightly against the frame on all four sides to operate properly.
If your measurements land between two standard sizes, you’re facing a practical decision: shim a slightly smaller standard unit into the opening, or order a custom window for a precise fit. That choice comes down to budget, timeline, and how far off the numbers are — a trade-off worth exploring before you place the order.
Choosing Between Standard and Custom Window Sizes
That shimming-versus-custom decision from the measuring stage isn’t just a one-window question — it’s a project-wide strategy call. Getting it right early saves money, shortens your timeline, and prevents the kind of mid-project scramble that turns a straightforward renovation into a headache. So how do you decide? It comes down to three things: the condition of your openings, the style of your home, and how much flexibility your budget allows.
When Standard Sizes Are the Right Call
For the majority of residential projects, standard sizes handle the job. If you’re wondering what is a standard window size for your situation, the answer usually lines up with the dimensions already framed into your walls — especially in homes built after the 1980s, when builders began consistently framing around manufacturer catalogs.
Standard windows make the most sense when your project checks these boxes:
- The home was built to modern framing standards with common rough openings.
- Your measurements fall within 1/4 inch of a cataloged size.
- Budget and timeline are priorities — stock units ship faster and cost less.
- You’re replacing like-for-like in a straightforward swap (same style, same opening).
- The standard bedroom window size or living room unit you need matches egress and code requirements without modification.
Most new builds can be completed entirely with stock dimensions if the architect designs around them from the start. Even many renovations land here — the average window dimensions in post-1980s homes tend to cluster around the same handful of sizes covered earlier in this guide.
When Custom Windows Become Necessary
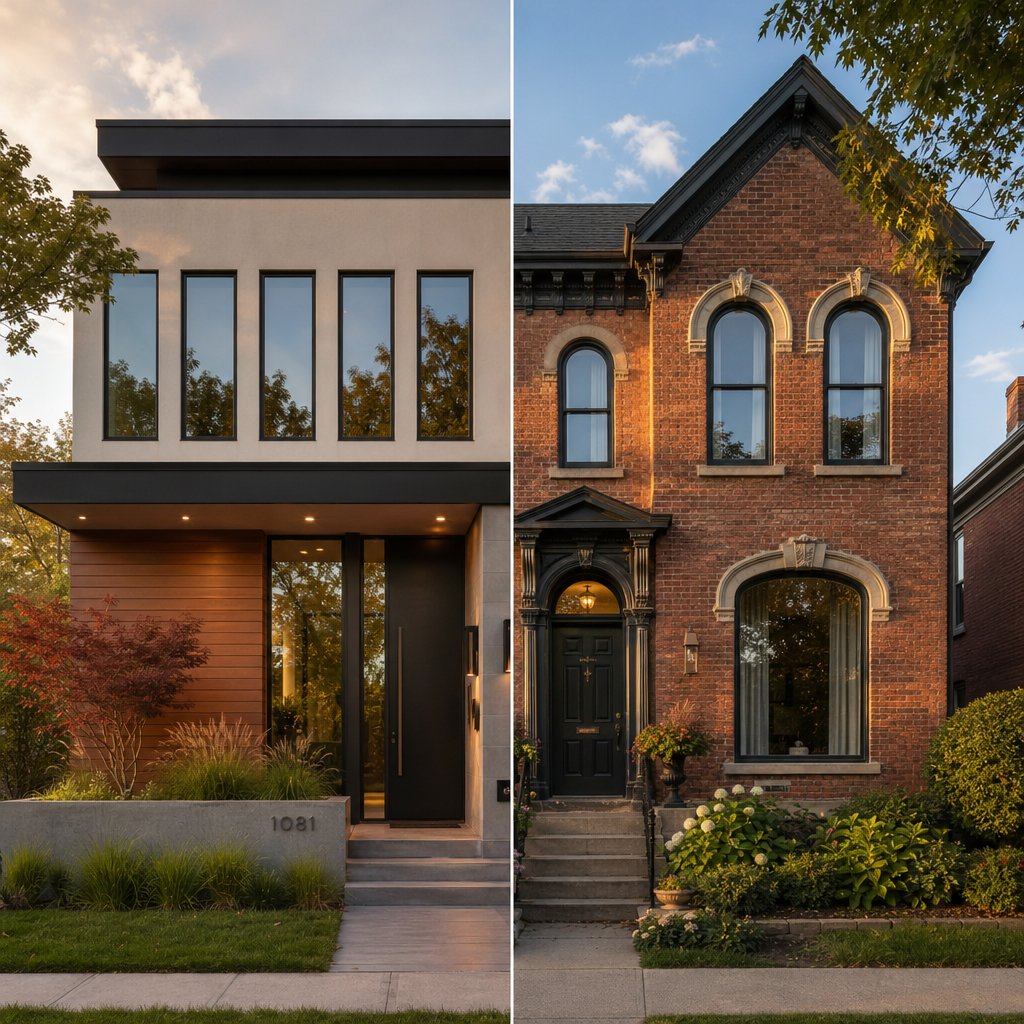
Some openings simply refuse to cooperate with a catalog. Historic and heritage homes are the most common example — window shapes and sizes that were popular decades ago often don’t match anything in today’s standard lineup. Forcing a stock unit into a non-standard opening can create air leaks, trim problems, and a look that clashes with the home’s character.
Custom sizing typically becomes necessary when:
- The home is pre-1970s with openings that have shifted due to settling.
- Architectural features demand unique shapes — arched tops, trapezoids, floor-to-ceiling glass.
- Rough openings are more than 1/2 inch off from any standard size after accounting for shimming.
- You’re matching existing non-standard units elsewhere in the home for visual consistency.
Worth noting: some manufacturers offer semi-custom options that split the difference. These units start from a standard platform but get adjusted in small increments — say, half-inch steps — to fit openings that are close to standard but not quite there. Lead times are shorter than fully custom, and pricing sits somewhere in between.
Balancing Cost, Lead Time, and Fit
The trade-offs are real. Custom windows carry a premium because you’re paying for one-off manufacturing, and lead times can stretch several weeks beyond what stock units require. If what is the width of a standard window in your opening matches a cataloged dimension, staying with stock is almost always the smarter financial move.
That said, a poor fit costs more in the long run than the upfront premium on custom. Air leaks drive up energy bills, moisture intrusion damages framing, and a window that doesn’t seal properly will need replacing again far sooner than it should.
For Australian homeowners and builders weighing this decision, sourcing aluminium windows built to Australian standards can simplify the equation. MEICHEN’s aluminium windows collection spans casement, sliding, awning, and fixed styles in standard sizes — giving projects that fit average window dimensions a compliant, energy-efficient option without the custom price tag or wait. When the brief calls for standard and compliance matters, a single supplier covering multiple styles keeps procurement simple and the project moving.
Whether you go stock or custom, the sizing principles from this guide stay the same: measure accurately, confirm the rough opening, verify code compliance, and double-check the manufacturer’s specs before you place the order. Get those steps right, and you’ll order the correct window the first time — no returns, no delays, no surprises on install day.
Frequently Asked Questions About Standard Window Sizes
1. What is the most common standard window size for a house?
The most frequently installed standard window size in residential homes is 36 x 48 inches, often seen as a double hung unit in bedrooms and living areas. This size comfortably meets egress code requirements for bedrooms while fitting the wall proportions found in most homes built after the 1980s. Living rooms tend to use larger configurations, such as 48 x 48 or 72 x 48 inches, especially when picture windows are combined with operable side units for ventilation.
2. How do I read the four-digit window size code?
The four-digit code splits into two pairs: the first two digits indicate the width in feet and inches, and the last two digits indicate the height. For example, a code of 3040 means 3 feet 0 inches wide by 4 feet 0 inches tall, which equals 36 x 48 inches. This notation appears on retail tags, spec sheets, and manufacturer catalogs. Always confirm with the specific manufacturer whether the code refers to the window unit dimensions or the rough opening, as conventions can vary between brands.
3. What is the difference between a rough opening and a window unit size?
The rough opening is the framed hole in the wall created by studs, a header, and a sill plate. The window unit, including its frame, is intentionally smaller than this opening to allow space for shimming, insulation, and leveling. Typically, the rough opening needs to be about half an inch wider and half an inch taller than the window unit on each side. Ordering a window that matches the rough opening exactly is a common and costly mistake, as it leaves no room for proper installation and weatherproofing.
4. Do all standard window sizes meet egress requirements for bedrooms?
No, not all standard sizes satisfy egress code. The International Residential Code requires bedroom egress windows to provide a minimum net clear opening of 5.7 square feet, with at least 24 inches of opening height and 20 inches of opening width. Smaller standard sizes like 24 x 24 or 24 x 36 inches typically fall short of this threshold because the frame, sash, and hardware reduce the usable opening area. Always check the manufacturer’s published net clear opening dimensions rather than relying on overall unit size to confirm compliance.
5. Should I choose standard or custom windows for a renovation?
For most renovations in homes built after the 1980s, standard sizes handle the job well because the rough openings were framed around manufacturer catalogs. Standard units cost less, ship faster, and are easier to source for future replacements. Custom windows become necessary when openings have shifted significantly due to settling, when the home features non-standard architectural shapes like arches or trapezoids, or when measurements fall more than half an inch away from any cataloged size. Australian homeowners seeking compliant aluminium options across multiple styles can explore suppliers like MEICHEN, whose aluminium windows collection covers casement, sliding, awning, and fixed types in standard sizes.
More Window & Door Guides