What Is a Push Out Casement Window
Imagine opening a window the same way you open a door: unlatch, push, done. That’s the core idea behind a push out casement window, and it’s a design that’s been around far longer than most people realize.
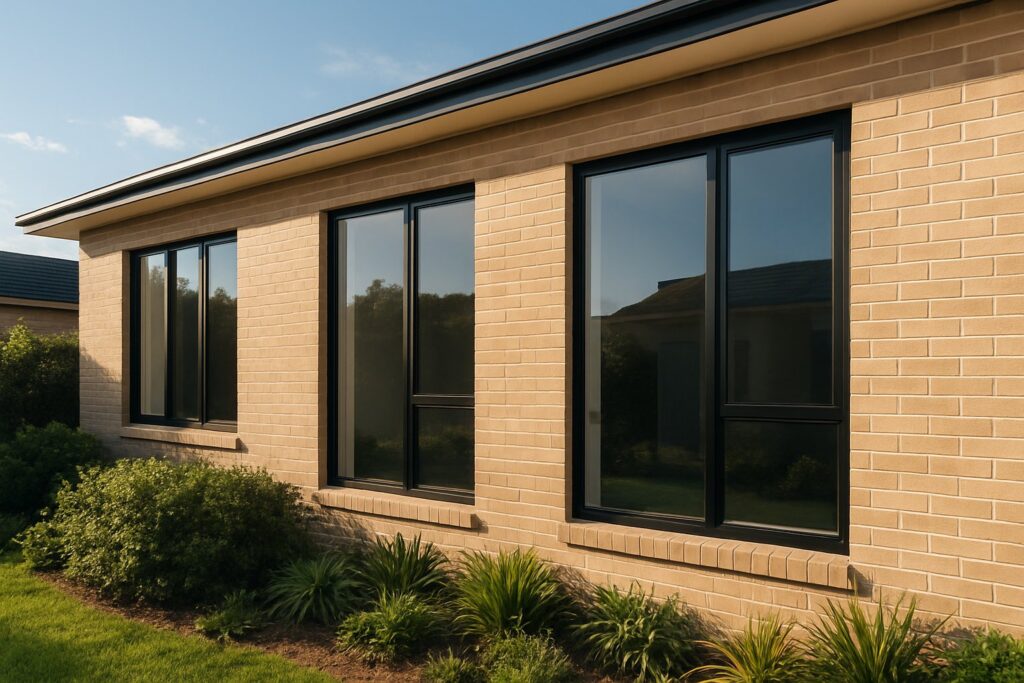
A push out casement window is a side-hinged window that swings outward when the user manually pushes the sash open by hand. It uses no crank mechanism. A handle releases the latch, the sash swings on its hinges, and friction stays or casement stay hardware hold it at the desired angle.
If you’ve seen crank-operated casements, you already know the alternative. Those models use a rotary handle connected to an internal gear system that mechanically drives the sash open. Push out casement windows skip all of that. There’s no gearbox, no folding arm, no rotating operator mounted at the base of the frame. You interact with the window directly, and the simplicity is the whole point.
How a Push Out Casement Window Works
The open-close sequence is refreshingly straightforward:
- Turn or lift the handle to disengage the latch and release the sash from the frame.
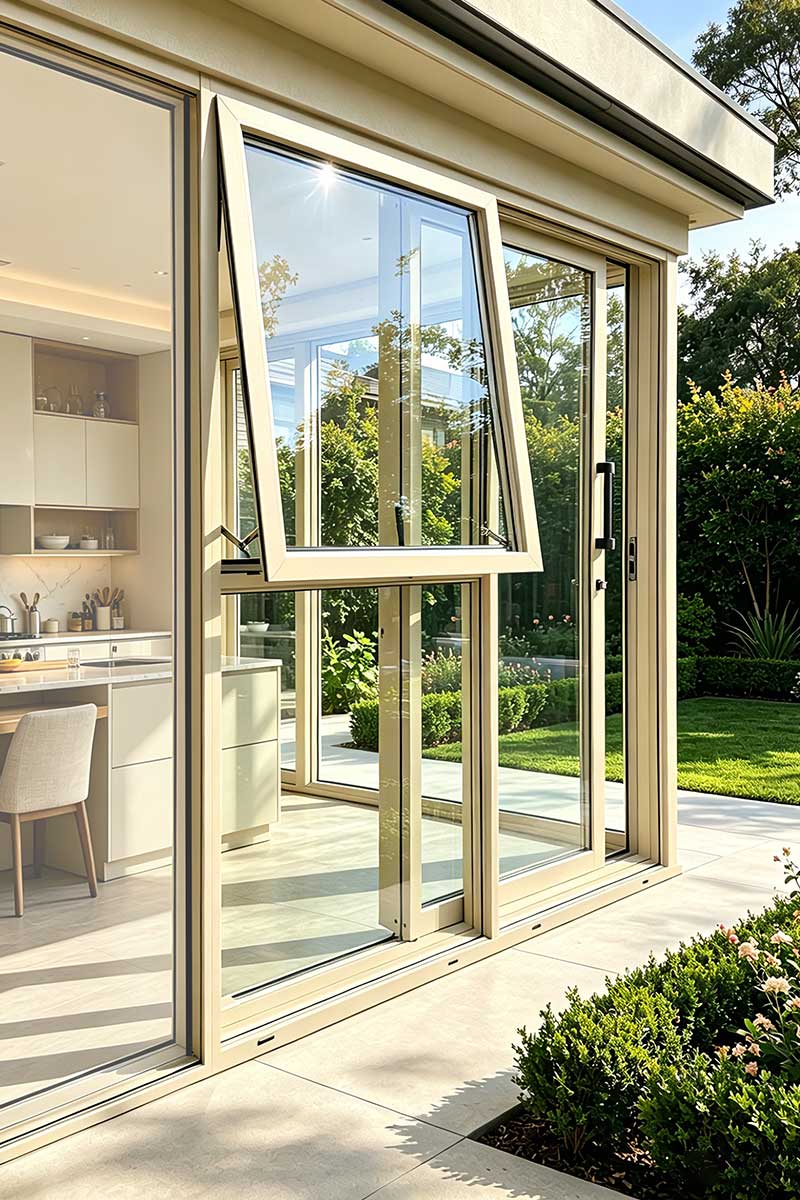
- Push the sash outward to your preferred opening angle.
- Friction hinges grip the sash and hold it in position, resisting wind pressure and gravity so the window stays exactly where you set it.
- To close, pull the sash back toward you until it sits flush against the frame.
- Re-engage the handle to lock the sash and compress it against the weatherstripping.
That’s it. No repetitive cranking, no mechanical leverage required. You’ll notice the entire interaction feels more like operating a door than a traditional window.
Why the Crank-Free Design Matters
Removing the crank operator does more than simplify the motion. It eliminates the most failure-prone component in a casement window system. Crank gears can strip, seize, or corrode over time, and replacing them isn’t cheap. Casement push out windows sidestep that risk entirely because there are fewer moving parts to wear out or bind.
There’s also a visual payoff. Without a bulky crank mechanism mounted at the sill, the interior profile of the sash stays clean and minimal. For homeowners drawn to french push out casement windows or any design where aesthetics matter, that uncluttered look is a real advantage.
Of course, simplicity comes with trade-offs. The question of when a push out design outperforms a crank, and when it doesn’t, depends on where the window sits, who’s using it, and what the space demands.
Push Out vs Crank Casement Windows
That trade-off between simplicity and mechanical control is exactly where the push out vs crank debate lives. Both are casement windows. Both swing outward on side hinges and create a compression seal when closed. The difference is how you interact with them daily, and that single distinction ripples into maintenance, aesthetics, cost, and which rooms they actually suit.
Here’s how they stack up across the dimensions that matter most:
| Feature | Push Out Casement | Crank-Out Casement |
|---|---|---|
| Operation Method | Manual push with friction hinges | Gear-driven rotary crank handle |
| Interior Hardware Profile | Minimal, concealed hardware | Visible crank operator at sill |
| Ease of Use for Large Openings | Direct and intuitive for accessible windows | Mechanical leverage handles heavy sashes easily |
| Mechanical Complexity | Low — fewer moving parts | Moderate — internal gears, folding arms, tracks |
| Maintenance Burden | Low — basic hinge tension checks | Moderate — annual gear lubrication and inspection |
| Aesthetic Impact | Clean, European-inspired, traditional feel | Functional, transitional look |
| Hard-to-Reach Locations | Requires direct physical reach to the sash | Crank handle allows one-handed operation from a distance |
| Typical Price Position | Premium / designer tier | Standard — roughly 20% lower |
Both styles deliver strong energy efficiency through tight compression seals, so thermal performance isn’t the deciding factor here. The real question is how the window fits your space and your daily routine.
When Push Out Wins Over Crank Out
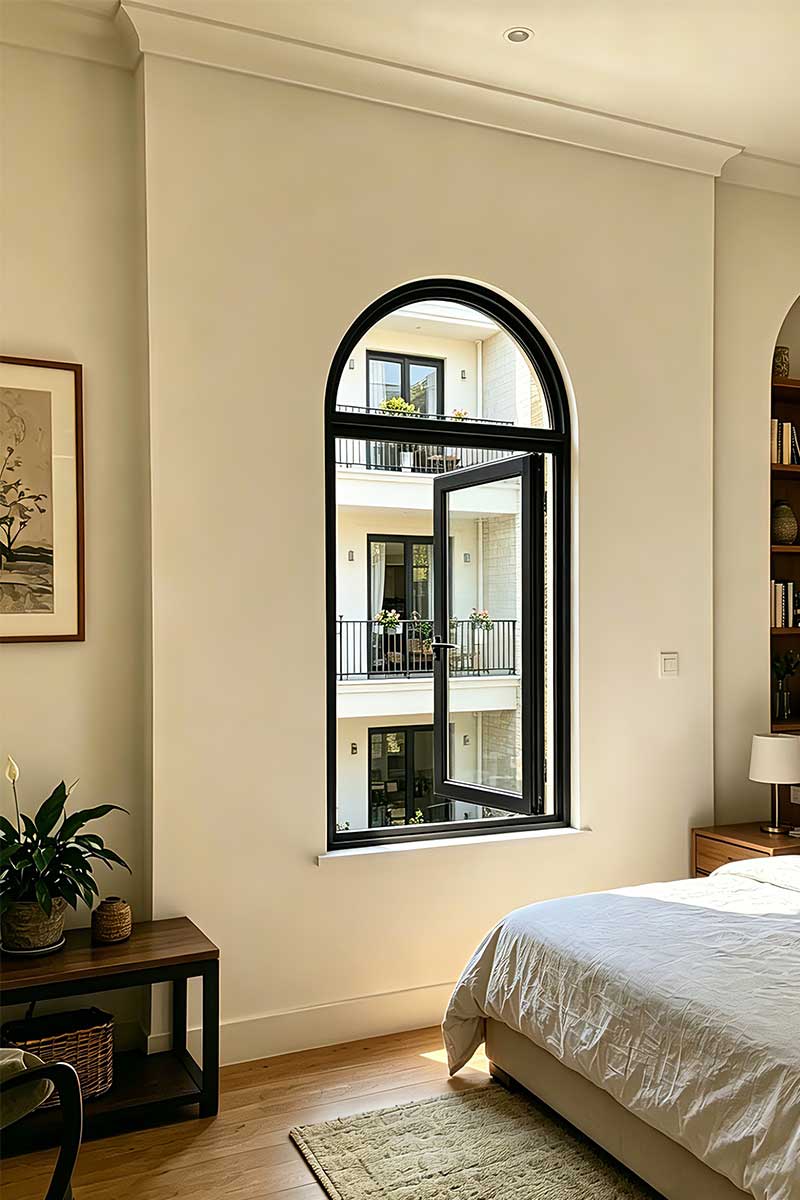
If you can comfortably reach the window, push out casements are hard to beat. The direct, door-like operation feels natural, and the absence of a crank mechanism means a cleaner interior frame with nothing protruding at the sill. That matters in living rooms, bedrooms, and hallways where you want the window to disappear into the wall rather than announce itself with visible hardware.
Push out french casement windows take this even further. Two sashes meet in the center with no mullion between them, creating a wide, unobstructed opening that suits traditional, colonial, and European-inspired architecture. Brands like Marvin and Andersen offer push out casement configurations in their premium lines for exactly this reason — the style pairs naturally with period homes and heritage renovations where a crank handle would look out of place.
Homeowners who simply prefer fewer things that can break also lean toward this design. Fewer gears, fewer tracks, fewer parts to lubricate or replace. The maintenance profile is genuinely lighter over the life of the window.
When a Crank Casement Makes More Sense
Crank-out casements earn their place in specific scenarios, and it’s worth being honest about that. If the window sits above a kitchen sink or behind a deep countertop, physically pushing a sash open means leaning across that obstacle. A crank handle solves this with mechanical leverage — you turn it from a comfortable standing position without stretching.
The same logic applies to high-mounted windows or any installation where direct reach is limited. The gear system requires minimal force and gives you precise, incremental control over the opening angle. That’s useful in bathrooms or utility rooms where you want just a sliver of ventilation rather than a full swing.
Accessibility is another consideration. Users with limited mobility or reduced upper-body strength may find the rotary motion of a crank easier than the sustained push-and-hold action that a manual casement demands.
Neither mechanism is universally better. The right choice maps directly to where the window goes, who uses it, and what you value — which means the hardware behind the sash deserves just as much attention as the operating style itself.
Push Out Casement Window Hardware, Hinges, and Locking Mechanisms Explained
The operating style gets all the attention, but the hardware is what actually determines how a push out casement window performs day after day. Hinges control how the sash moves and holds position. Locks determine how tightly it seals when closed. Handles dictate how the whole interaction feels in your hand. Understanding these components gives you a much sharper eye when comparing products from manufacturers like Pella, Marvin, or Sierra Pacific — because the differences often live in the hardware, not the glass.
Hinge Types and What They Do
Three hinge styles dominate push out casement window hardware, and each brings a distinct set of trade-offs:
- Butt hinges — The oldest and simplest option. Two metal plates joined by a pin, mounted to the sash edge and frame. They’re durable, inexpensive, and easy to replace. The downside? They don’t hold the sash at a set angle on their own. You’ll need a separate casement stay or restriction arm to keep the window from swinging freely, which adds another piece of hardware to maintain.
- Friction hinges — The go-to choice for modern push out casements. These stainless steel hinges let you open the sash to any angle and hold it there through controlled resistance. Wind can’t easily push the sash wider or slam it shut, which directly addresses the biggest practical concern with outward-swinging windows. Some friction hinge models also include an easy-clean position, allowing the sash to pivot inward so you can wash the exterior glass from inside — a feature that’s especially valuable on upper floors.
- Concealed hinges — Built from extruded aluminium alloy sections and hidden within the frame rebate, these hinges are invisible when the window is closed. They’re recommended for heavy-duty casement applications and typically offer a full 90-degree opening. The clean aesthetic makes them popular for french casement push out windows where uninterrupted sightlines matter. The trade-off is cost and complexity — they require precise installation and a restriction arm to control the opening angle.
If you’re weighing options, friction hinges offer the best balance of function and convenience for most residential projects. They reduce hardware clutter, resist wind catch, and simplify cleaning. Butt hinges suit heritage restorations where period-correct detailing matters. Concealed hinges are the premium play when you want the hardware to vanish entirely.
Multi-Point Locks and Handle Options
A single latch point at the handle isn’t enough to keep a casement sash sealed evenly against its frame. That’s where multi-point locking systems come in. When you turn the handle on a Pella push out casement window or a comparable product, the mechanism simultaneously engages locking points at the top, middle, and bottom of the sash. Each point pulls the sash inward against the weatherstripping, creating uniform compression around the entire perimeter.
This matters for two reasons. First, security — three or more engagement points make the sash dramatically harder to force open from outside compared to a single-point lock. Second, air sealing. Uneven compression leaves gaps where drafts and moisture can infiltrate. Multi-point locks eliminate those weak spots, which directly improves energy performance and reduces the chance of water intrusion during wind-driven rain.
Handle styles vary by manufacturer, but most push out casements use either a lever handle or a tilt-and-turn style mechanism. Lever handles rotate 90 or 180 degrees to engage or release the multi-point lock. Some Pella push out french casement window configurations and similar premium lines offer a wash-mode position — rotating the handle to an intermediate angle unlocks the sash from its normal swing path and allows it to tilt inward for cleaning. It’s a small detail that makes a real difference if your windows sit above the ground floor.
The quality of this hardware — the smoothness of the lock engagement, the precision of the compression, the corrosion resistance of the hinge material — varies significantly across price points. It’s worth handling the hardware in person before committing, because these are the parts you’ll touch every time you open or close the window. And they’re also the parts most directly tied to how well the window keeps air, water, and noise on the right side of the glass.
Frame Materials Compared for Push Out Casements
Hardware quality shapes how a push out casement window operates, but the frame material shapes how it endures. The frame accounts for roughly 20-30% of the total window area, and it directly influences thermal performance, structural integrity, weight, and long-term maintenance. Choosing the wrong material for your climate or project type can undermine even the best hinges and multi-point locks.
Here’s how the four primary frame materials compare when used in push out casement configurations:
| Material | Durability | Thermal Performance | Maintenance | Aesthetic Versatility | Weight | Typical Price Range |
|---|---|---|---|---|---|---|
| Aluminium (thermally broken) | Excellent — corrosion-resistant, won’t rot or warp | Very good with thermal break technology | Low — periodic hardware lubrication and finish checks | High — slim profiles, wide colour range via powder coating | Light | Mid-range to premium |
| Timber (clad or unclad) | Good — vulnerable to moisture if seals fail | Excellent — natural insulator | High — refinishing every 5-10 years | High — paintable, stainable, warm interior feel | Heavy | Premium |
| Vinyl (PVC) | Moderate — can become brittle in extreme cold, may warp in heat | Good — multi-chambered designs insulate well | Very low — no painting required | Limited — factory colours only, difficult to repaint | Moderate | Budget to mid-range |
| Fiberglass | Excellent — dimensionally stable across temperature extremes | Excellent — especially with foam-filled cavities | Low — paintable if desired | Good — smooth finish, paintable | Light to moderate | Mid-range to premium |
Aluminium Frames for Push Out Casements
Aluminium earns its spot at the top of that table for a reason. Its strength-to-weight ratio allows manufacturers to build narrower frame profiles, which means more glass area and less visual obstruction. For push out casement windows with screens mounted on the interior, slim aluminium sightlines keep the overall look clean and uncluttered even with the added screen layer.
The old knock against aluminium was thermal conductivity — the metal conducts heat roughly 205 W/m-K, which made early aluminium frames terrible insulators. Modern thermally broken aluminium systems solve this by inserting a polyamide (PA66 GF25) barrier between the interior and exterior profiles. This thermal break reduces frame U-values by 30-60%, closing the energy-efficiency gap with timber and making aluminium viable even in demanding climates.
Add in corrosion resistance, full recyclability, and powder-coated finishes that hold up for decades without peeling or fading, and you get a frame material that suits coastal homes, harsh weather zones, and contemporary designs equally well. For homeowners, renovators, and builders exploring Australian-standard-compliant aluminium options, MEICHEN’s aluminium windows collection offers a range of energy-efficient configurations designed for exactly these kinds of push out casement applications.
Timber, Vinyl, and Fiberglass Options
Timber remains the classic choice for heritage projects and homeowners who want natural warmth on the interior. It’s an excellent natural insulator, and it can be stained or painted to match any design scheme. The trade-off is maintenance. Timber frames need refinishing every 5-10 years, and they’re vulnerable to moisture damage if exterior cladding or seals are compromised. For push out casements specifically, the heavier sash weight also puts more demand on hinge hardware over time.
Vinyl is the budget-friendly entry point. PVC frames never need painting, resist moisture well, and offer decent insulation through multi-chambered internal designs. The limitations show up in extremes: vinyl can become brittle in severe cold and warp under intense heat, and its higher coefficient of thermal expansion means more dimensional movement through temperature cycles. Colour options are typically limited to factory finishes, and repainting isn’t recommended. If push out casement windows cost is your primary concern, vinyl delivers the lowest upfront price — just weigh that against the potential for shorter service life in harsh conditions.
Fiberglass sits in the sweet spot between aluminium and timber. Its coefficient of thermal expansion nearly matches glass itself, which means the seal between frame and glazing stays tight through thousands of freeze-thaw cycles. Fiberglass frames are dimensionally stable, paintable, and capable of 40-60+ year lifespans. The downside is availability and cost — fewer manufacturers offer fiberglass push out casements compared to aluminium or vinyl, and pricing tends to sit at the higher end of the mid-range bracket.
Each material handles the job differently, and the right pick depends on your climate, your budget horizon, and how much maintenance you’re willing to take on. What none of these materials can do on their own, though, is guarantee energy performance — that depends on how the entire window system seals, insulates, and meets the performance standards your building code demands.
Energy Efficiency and Building Performance Standards
Frame material determines how well the structure itself resists heat transfer, but the real energy story in any window is the seal — the invisible boundary where sash meets frame. This is where push out casement windows hold a measurable advantage over other common window types, and it’s a topic that rarely gets the attention it deserves.
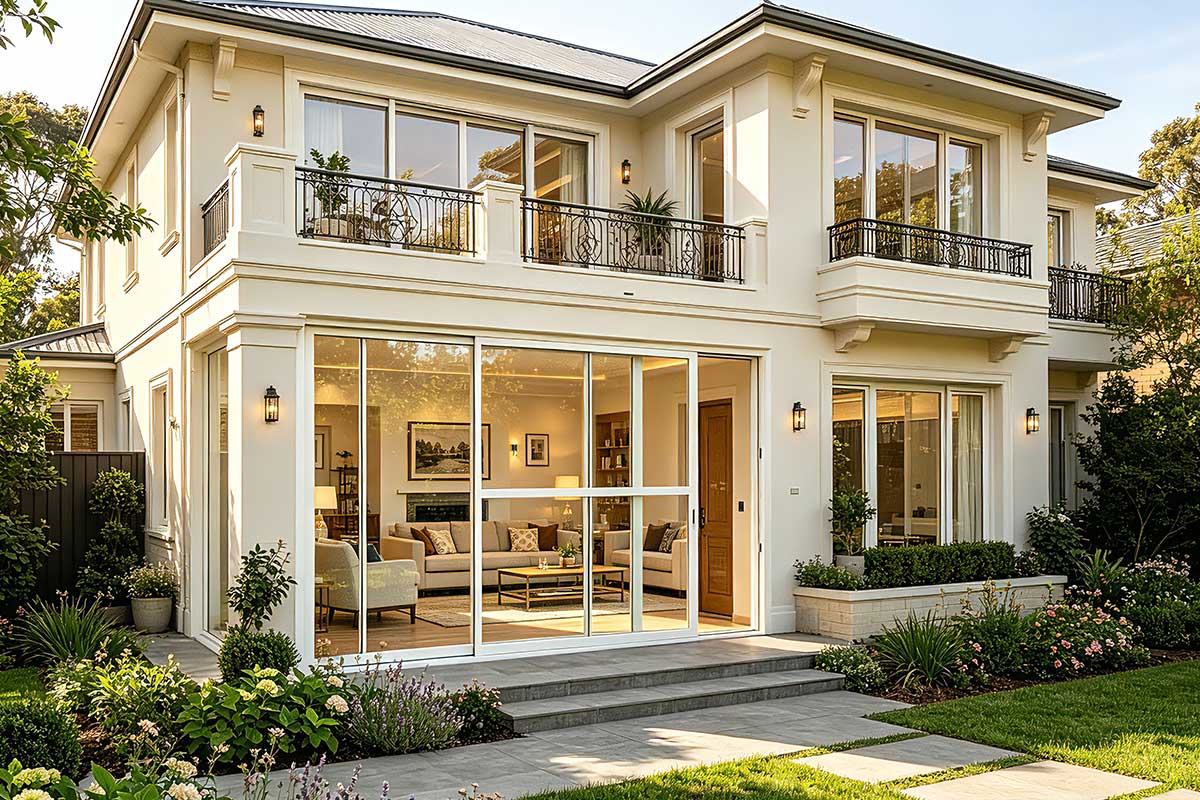
Why Casements Seal Better Than Sliding Windows
Think about how a double-hung or sliding window closes. The sash slides along a track, and the seal relies on fin-style weatherstripping that brushes against the moving surface. It’s a sliding contact — effective, but inherently limited by the friction tolerance needed to keep the sash operable. Too tight, and the window becomes difficult to open. Too loose, and air slips through.
Push out casement windows work on a fundamentally different principle. When you pull the sash closed and engage the handle, the sash presses directly into the frame like a door into a doorjamb. The weatherstripping compresses evenly around the entire perimeter, creating what’s known as a compression seal. Casement windows typically create a tight seal when closed, and this compression mechanism is the reason why.
Multi-point locking hardware amplifies this effect. As discussed in the hardware section, engaging three or more locking points simultaneously pulls the sash inward at the top, middle, and bottom. The result is uniform pressure against the weatherstripping with no weak spots — no corners where drafts sneak in, no edges where wind-driven rain finds a gap. It’s a simple physics advantage that sliding and hung windows can’t replicate without fundamentally changing how they operate.
Performance Metrics Worth Understanding
If you’re comparing products or trying to verify what is a push out casement window actually delivering in terms of efficiency, three numbers matter most:
- U-factor — Measures how much heat passes through the entire window assembly (frame, glass, and spacers combined). Lower is better. For most climate zones, look for U-factors between 0.20 and 0.30 W/m2K in high-performance casements. A well-built push out casement with thermally broken aluminium or fiberglass framing and double glazing will typically land in this range.
- Solar Heat Gain Coefficient (SHGC) — Measures how much solar radiation passes through the glass as heat. Values range from 0 to 1. In hot climates, a lower SHGC (around 0.25) reduces cooling loads. In cold climates, a higher SHGC (around 0.40 or above) lets beneficial solar warmth in. The right target depends entirely on your orientation and climate zone.
- Air leakage rating — Expressed in cubic meters of air per square meter of window area per hour (or CFM per square foot in U.S. testing). Lower numbers mean a tighter seal. Because push out casements compress against their weatherstripping rather than sliding past it, they consistently test among the lowest air leakage rates of any operable window type.
These metrics aren’t just academic. They directly affect your heating and cooling bills, indoor comfort, and whether the window meets the energy provisions in your local building code.
Building Codes and Performance Standards to Know
Energy ratings are one piece of the compliance picture. Several other performance standards apply to push out casement windows, and understanding them helps you avoid costly surprises during inspection or down the road:
- Egress requirements — If a casement window serves as an emergency exit in a bedroom or basement, building codes specify minimum clear opening dimensions (typically 5.7 square feet in the U.S., with minimum height and width thresholds). Not every casement size qualifies, so verify the clear opening area before specifying a window for an egress-required location.
- Wind load ratings — Coastal zones and high-wind regions require windows tested to withstand specific design pressures. These ratings, measured in pascals or pounds per square foot, confirm the frame and hardware can handle sustained wind forces and gusts without failure. For push out casements, the hinge and locking hardware must be rated to match the frame’s structural capacity.
- Water penetration resistance — Testing simulates wind-driven rain at specified pressures to verify the window doesn’t leak. The compression seal of a casement helps here, but proper installation flashing and drainage are equally critical — a topic covered in the installation section ahead.
- Australian Standard AS 2047 — In Australia, all windows must comply with AS 2047, which sets minimum thresholds for structural adequacy, water penetration resistance, air infiltration, and operating force. Quality push out casements should meet or exceed these benchmarks, and the standard provides a reliable baseline for comparing products regardless of brand.
International equivalents exist across most markets — AAMA/WDMA/CSA 101 in North America, BS 6375 in the UK, and EN 14351-1 in Europe all set similar performance floors. Whichever standard applies to your project, the core principle is the same: the window needs to prove it can handle the thermal, structural, and weather demands of its installed location.
Performance data and code compliance tell you what a window can withstand in controlled testing. What they don’t tell you is how the window fits the character of your home, which rooms benefit most from the push out design, and where architectural context should guide the decision just as much as engineering specs.
Best Home Styles and Rooms for Push Out Casement Windows
A window can hit every performance benchmark on paper and still feel wrong in the room. Architectural fit matters — the way a window operates, the profile of its hardware, and the proportions of its sash all contribute to whether it complements or clashes with the character of a home. Push out casement windows happen to suit a surprisingly wide range of styles, but some pairings are more natural than others.
Traditional, colonial, and craftsman homes are the most obvious match. These styles evolved alongside the push out design, so the proportions, the side-hinged swing, and the minimal interior hardware all feel historically correct. Cottage-style and European-inspired architecture benefit for the same reason — the window looks like it belongs because, historically, it does.
Contemporary and minimalist homes are a less obvious but equally strong fit. The clean sash profile, the absence of a visible crank mechanism, and the option for concealed hinges give designers a window that nearly disappears into the wall plane. A push out french casement window — two sashes meeting in the center with no mullion between them — takes this further by creating a wide, uninterrupted glass opening that reads as a single architectural element rather than two separate windows.
Best Rooms and Locations for Push Out Casements
Where you place these windows matters just as much as the home style they go into. The push out mechanism requires direct physical reach, so the best locations are ones where you can comfortably touch the sash without leaning or stretching:
- Living rooms and bedrooms — Easily accessible wall heights, generous ventilation when fully open, and the clean hardware profile keeps the focus on the view rather than the window itself. French configurations work especially well here, flooding the room with light through an unobstructed opening.
- Hallways and stairwells — Simple push-to-open operation means no fumbling with a crank in tight or transitional spaces. A single casement sash provides ventilation without demanding much wall area.
- Ground-floor installations — Any room at an accessible height is a natural candidate. The direct, door-like operation feels intuitive and requires no mechanical advantage.
One location worth flagging as less ideal: kitchens where the window sits above a deep countertop or behind a sink. Reaching across that obstacle to push a sash open gets awkward quickly. If push out casement windows prices are a factor in your project and you’re outfitting multiple rooms, it can make sense to mix window types — push out casements where reach is easy, crank-operated models where it isn’t.
The European Heritage and Architectural Appeal
The push out casement isn’t just a window style — it’s the original window style. Side-hinged casement windows first appeared in Medieval Europe, with examples dating to 15th-century England and France. Early versions used small diamond-shaped glass panes held together by lead cames, set into wrought iron frames crafted by local blacksmiths. The side-hinged, outward-swinging design was a practical necessity: it allowed maximum ventilation in smoky, fire-heated homes long before mechanical operators existed.
By the Tudor and Stuart periods of the 16th and 17th centuries, casement windows had become the standard across the British Isles and much of Continental Europe. Crank mechanisms didn’t enter the picture until much later, meaning every casement window for roughly 400 years was a push out casement. The crank is the newcomer, not the other way around.
That heritage is exactly why these windows feel at home in period renovations and heritage-listed properties. Specifying a push out casement for a colonial revival or a craftsman bungalow isn’t a stylistic choice — it’s a historically accurate one. Manufacturers like Jeld-Wen offer push out casement windows in their architectural lines for this reason, recognizing the demand from restoration projects and design-conscious new builds alike.
Even in modern contexts, the old-world DNA reads as intentional restraint rather than dated design. A contemporary home fitted with push out casements signals that the architect chose simplicity on purpose — fewer moving parts, cleaner lines, a direct connection between the occupant and the window. That philosophy translates across centuries and styles, which is rare for any building component.
Style and heritage tell you where push out casements look right. What they don’t address is how they hold up when the wind picks up, the rain drives sideways, and the open sash is exposed to the elements — a practical reality that deserves honest attention.
Wind, Weather, and Screens for Push Out Casements
Here’s the thing nobody puts on the product page: a push out casement sash, when open, projects outward from the face of your home like a flat panel hanging in the breeze. Wind hits that panel, and physics takes over. It’s a real concern, and pretending otherwise doesn’t help anyone make a good decision.
How Wind Affects an Open Push Out Sash
Picture an open sash swung out at a 30-degree angle. A gust strikes the exterior face and creates positive pressure on one side and low pressure on the other. The sash acts like a sail — wind force tries to push it wider open, stressing the hinge screws and the stay hardware anchored to the frame. A strong enough gust can slam the sash fully open against its stops, or worse, rip a poorly secured hinge right out of the timber or aluminium profile.
The risk scales with two variables: sash size and exposure. A compact 39 x 43 push out casement kitchen window on a sheltered wall faces minimal wind load. A pair of 39 x 43 push out double casement kitchen windows on an exposed upper storey is a different story entirely. Larger sashes catch more wind, and elevated or coastal positions amplify the force.
The good news? This isn’t an unsolved problem. It’s a solved one — you just need the right hardware.
- Friction hinges — The most effective first line of defense. These stainless steel mechanisms create controlled resistance that holds the sash firmly at any angle, resisting both gravity and wind pressure. You can adjust the tension by tightening or loosening a friction screw near the hinge pivot, tuning the resistance to match your local conditions.
- Wind chains and casement stays — These limit the maximum opening angle, typically to 90 degrees or less. Even if a gust overpowers the friction hinge momentarily, the chain or stay prevents the sash from swinging beyond a safe point. They’re inexpensive insurance for exposed locations.
- Appropriate sizing for exposed walls — In high-wind zones, specifying a slightly smaller sash or choosing a configuration with two narrower sashes instead of one wide panel reduces the wind-catch area per sash. Push-out french casement windows, for example, split the opening between two sashes — each one catches roughly half the wind load of a single large panel.
One of the key advantages of a push-out casement window is that the compression seal actually gets tighter under wind pressure when the window is closed, since wind pushes the sash harder into the frame. The vulnerability only exists while the sash is open. Close it, and the same physics that created the problem now works in your favor.
Screens, Weather Protection, and Climate Suitability
Screening a push out casement is trickier than screening a double-hung or slider, because the sash swings outward into the space where a conventional exterior screen would sit. The solution is interior-mounted screens, and you have two main options.
Fixed interior screens attach to the inside of the frame and stay in place year-round. They’re simple and affordable, but they sit between you and the window hardware — which means you’ll need to remove or open the screen every time you operate the latch. That gets old fast.
Retractable screens for casement windows are the more practical choice. These mount inside the frame and pull into position only when the window is open. When closed, the screen retracts into a slim housing at the side or top of the opening, leaving an unobstructed view and full access to the handle and latch. Pleated retractable designs use tensioning lines to keep the fabric taut in moderate wind, solving the common complaint of screen fabric blowing inward on breezy days.
Climate suitability rounds out the picture. Push out casements perform well across a broad range of conditions, though some environments play to their strengths more than others:
- Temperate and cold climates — This is where the design excels. The tight compression seal minimizes air infiltration, and the outward swing sheds rain away from the interior. Snow and ice on the exterior sash can be pushed clear when opening.
- High-wind coastal areas — Manageable with proper hardware selection. Friction hinges rated for the expected wind loads, combined with casement stays and appropriately sized sashes, keep the system safe. Aluminium frames resist salt-air corrosion far better than timber or steel in these environments.
- Hot and humid regions — The window itself handles humidity fine, but material choice matters more here. Timber frames in sustained high humidity can swell, warp, or develop mould if maintenance lapses. Aluminium and fiberglass frames sidestep these issues entirely, making them the safer long-term bet in tropical or subtropical zones.
Wind, screens, and climate aren’t reasons to avoid push out casements — they’re variables to plan for. Get the hardware and material pairing right, and the window handles weather as well as any other type on the market. The more practical question for most buyers is what happens after the window is installed: how it goes in, and what it needs from you over the years to keep performing.
Installation and Maintenance Essentials for a Casement Push Out Window
Getting the hardware, material, and climate pairing right is only half the equation. How the window goes into the wall — and what you do in the months and years after — determines whether that careful selection actually pays off. These two topics are chronically undercovered, so let’s fix that.
New Construction vs. Retrofit Installation
A new build gives you the cleanest path. The rough opening is framed to the exact dimensions the window requires, and the weather-resistant barrier on the exterior sheathing is still accessible. That means flashing tape can be integrated directly into the wall’s drainage plane before the window goes in, creating a continuous seal from frame to sheathing with no gaps for water to exploit. The nailing fin or mounting flange sits flat against the studs, and exterior cladding covers the transition afterward. Everything layers in the correct sequence.
Retrofit projects are more nuanced. The existing opening may not match the new window’s rough opening dimensions precisely, and the original flashing is buried behind siding that you’d rather not disturb. Retrofit windows install inside the existing frame without exterior siding work, which keeps costs lower and disruption minimal — but it also means the original frame’s condition becomes critical. Any rot, warping, or compromised flashing in that existing frame stays in the wall, and a new casement push out window installed over damaged structure won’t perform any better than what it replaced.
For push out casements specifically, the exterior exposure adds a layer of importance to the flashing detail. The sash swings outward, which means the junction between frame and wall faces direct rain, wind, and UV exposure every time the window opens. Improperly sealed perimeters invite water behind the cladding, and that moisture damage compounds silently over years. Whether you’re working with an Andersen E Series push out casement window, a Marvin product, or any other brand, the installation quality matters more than the name on the label.
Professional installation is strongly recommended for either scenario. A skilled installer will verify the opening is square and plumb, shim the frame correctly, apply continuous sealant around the full perimeter, and ensure the flashing integrates with the wall’s drainage system. Skipping any of those steps — or trusting them to a general handyman — is where most window failures originate.
Cleaning, Hinge Care, and Weatherstripping Maintenance
Once the window is in, the ongoing care is straightforward. Push out casements have fewer mechanical components than crank-operated models, which means less to maintain. But “less” doesn’t mean “none.” A few simple tasks, done seasonally, keep the window operating smoothly and sealing tightly for decades.
Here’s a practical seasonal routine:
- Clean the sash tracks and frame rebates. Dirt, dust, and debris accumulate in the channels where the sash meets the frame. A soft brush or vacuum with a brush attachment clears loose particles. Follow up with a damp cloth and mild detergent. This prevents grit from grinding into the weatherstripping and degrading the seal over time.
- Lubricate the hinges. Apply a silicone-based lubricant to all hinge pivot points. Silicone won’t attract dust the way petroleum-based oils do, so the hinges stay clean and move freely. For friction hinges, check the tension adjustment screw — if the sash drifts open or feels too stiff, a quarter-turn correction usually restores the right resistance.
- Inspect the weatherstripping. Run your fingers along the full perimeter of the sash seal. Feel for cracks, compression set (where the material has permanently flattened and no longer springs back), or sections that have pulled away from the frame. Damaged weatherstripping should be replaced promptly to maintain the compression seal that makes casements so energy efficient in the first place.
- Test the multi-point lock alignment. Close the window and engage the handle. The latch should click into each locking point smoothly, without forcing. If one point resists or fails to engage, the sash may have shifted slightly in the frame — a common issue as buildings settle. Most Andersen windows hardware casement push out windows and comparable products allow minor strike plate adjustments with a screwdriver to restore alignment.
- Clean both sides of the glass. The interior face is easy. The exterior face, especially on upper storeys, is where it gets interesting. If your hardware includes a wash-mode tilt feature — where rotating the handle to an intermediate position lets the sash pivot inward — use it. This gives you safe access to the outside glass without a ladder. If your windows don’t have this feature, a squeegee on an extension pole or professional window cleaning is the practical alternative.
- Inspect hinge screws and hardware fasteners. Open the sash fully and check that all screws in the hinges, stays, and lock mechanism are snug. Vibration from wind and daily operation can loosen fasteners gradually. A quick tightening pass twice a year prevents the kind of progressive loosening that leads to sagging sashes or misaligned locks.
That entire routine takes about 15 minutes per window, twice a year. It’s not glamorous work, but it’s the difference between a casement that still operates like new at year 20 and one that starts binding, leaking, or rattling at year 5.
With installation done right and maintenance kept consistent, the remaining question is the most practical one of all: what should you actually look for when you’re ready to buy?
Your Buying Checklist for Push Out Casement Windows
You’ve worked through the mechanics, the materials, the weather considerations, and the maintenance reality. The question now is how to turn all of that into a confident purchase. When you’re standing in a showroom or reviewing a quote, it helps to have a clear list of what actually matters — and what’s just marketing noise.
Before you commit to any casement window push out configuration, verify these items:
- Hinge type and quality — Friction hinges are the standard for modern casement windows push out. Confirm they’re stainless steel, adjustable for tension, and rated for your sash weight. If the manufacturer offers a wash-mode tilt position, that’s a meaningful bonus for upper-storey installations.
- Multi-point locking system — Look for a minimum of three engagement points (top, middle, bottom). The lock should compress the sash evenly against the frame with no dead spots. Test the handle action in person if possible — smooth, firm engagement signals quality hardware.
- Weatherstripping material — Compression-style seals (EPDM rubber or silicone) outperform fin-style alternatives. Ask about the expected lifespan and whether replacement strips are readily available for that specific window model.
- Frame material suited to your climate — Aluminium with a thermal break for coastal, hot, or humid zones. Timber for heritage projects where you’ll commit to maintenance. Fiberglass for extreme temperature swings. Vinyl for budget-driven projects in moderate climates.
- Glazing specification — Double glazing with Low-E coatings and argon gas fill is the baseline for energy-efficient performance. Triple-pane windows add superior insulation and noise reduction, making them worth the premium in extreme climates or noise-sensitive locations.
- Building code compliance — Confirm the window meets your local standards (AS 2047 in Australia, AAMA/WDMA/CSA 101 in North America, EN 14351-1 in Europe). Check egress dimensions if the window serves a bedroom or basement.
- Warranty terms — Read the fine print. A strong warranty covers the frame, glass seal, and hardware separately, with at least 10 years on hardware and 20+ years on the frame and IGU. Warranties that exclude hardware or limit coverage to the original purchaser are red flags.
- Professional installation included or available — A casement window with push out hardware is only as good as its installation. Suppliers who offer or coordinate professional fitting are signaling confidence in their product and accountability for the result.
Key Features to Prioritise
If you have to rank what matters most, put hardware and frame material at the top. A premium brand name on a window with mediocre friction hinges and a single-point lock won’t outperform a lesser-known manufacturer using high-grade stainless steel hardware and a robust multi-point system. The hardware is what you interact with daily, and the frame is what faces your climate for decades. Everything else — brand prestige, colour options, decorative grilles — is secondary to those two fundamentals.
Glass specification comes next. The difference between a standard double-glazed unit and one with Low-E coatings and gas fill is measurable in both energy bills and comfort. After that, warranty terms and code compliance round out the priority list. A window that doesn’t meet local performance standards isn’t just a bad investment — it’s a potential inspection failure.
Matching Your Window to Your Project Needs
Your project type shapes which combination of features makes sense:
For a new build, you have the most flexibility. Specify the exact rough opening size, integrate flashing into the wall system from the start, and choose the frame material and glazing package that matches your climate zone and design intent. This is the scenario where investing in premium casement window with push out hardware pays the highest return, because the installation conditions are ideal and the window will perform at its rated capacity from day one.
A renovation or remodel introduces constraints. Existing openings may need adapting, and the condition of surrounding framing dictates how much work the installation requires. Prioritise a supplier who offers site assessment before quoting — someone who will inspect the existing structure and flag issues before the window arrives. Aluminium frames work well here because their slim profiles and light weight make them easier to fit into adapted openings without overloading older framing.
For a single window replacement, focus on matching the new unit to the existing aesthetic while upgrading performance. If you’re replacing a crank casement with a push out model, confirm the rough opening dimensions are compatible and that the new hardware profile won’t conflict with existing interior trim.
Across all three scenarios, MEICHEN’s aluminium windows collection is a practical starting point if you’re exploring energy-efficient, Australian-standard-compliant options. Their product hub covers multiple aluminium window configurations suited to homeowners, renovators, builders, and developers — which makes it useful for comparing options across different project types rather than locking you into a single product.
The right casement window with push out operation isn’t the most expensive one or the one with the most recognizable name. It’s the one where the hardware, frame, glazing, and installation quality all align with your specific climate, your specific room, and your willingness to maintain it over time. Get those fundamentals right, and the window will do its job quietly for decades.
Frequently Asked Questions About Push Out Casement Windows
1. What is the difference between push out and crank out casement windows?
Push out casement windows open manually by pushing the sash outward by hand, relying on friction hinges to hold the sash in place. Crank out casements use a rotary gear mechanism at the sill to drive the sash open mechanically. The push out design has fewer moving parts, a cleaner interior profile, and lower long-term maintenance since there are no gears to strip or seize. Crank casements, on the other hand, offer easier one-handed operation and work better in hard-to-reach spots like above kitchen sinks or deep countertops. Your choice depends largely on window placement and how directly you can reach the sash.
2. Are push out casement windows energy efficient?
Yes, push out casement windows are among the most energy-efficient operable window types available. When the sash closes, it presses directly into the frame and compresses the weatherstripping around the full perimeter, creating a tight compression seal. Multi-point locking hardware enhances this by engaging at the top, middle, and bottom simultaneously, eliminating weak spots where air could infiltrate. This compression mechanism outperforms the sliding contact seals found in double-hung or sliding windows. For optimal performance, look for thermally broken aluminium or fiberglass frames paired with Low-E coated double or triple glazing and argon gas fill. Australian-standard-compliant options, such as those in MEICHEN’s aluminium windows collection (https://meichenwindows.com.au/aluminium-windows/), are engineered to meet AS 2047 benchmarks for air infiltration and thermal performance.
3. What type of screens work with push out casement windows?
Since the sash swings outward, conventional exterior screens won’t work. Interior-mounted screens are the standard solution, and retractable designs are the most practical option. Retractable screens pull into position when the window is open and retract into a slim housing when closed, giving you an unobstructed view and full access to the handle. Pleated retractable models use tensioning lines to keep the fabric taut in moderate wind, which prevents the screen from blowing inward on breezy days. Fixed interior screens are a simpler, more affordable alternative, but they sit between you and the window hardware, requiring removal each time you operate the latch.
4. How do you maintain push out casement windows?
Maintenance is straightforward and takes roughly 15 minutes per window twice a year. Key tasks include cleaning the frame rebates and sash tracks with a soft brush and damp cloth, lubricating hinge pivot points with silicone-based lubricant, inspecting weatherstripping for cracks or permanent compression, testing multi-point lock alignment to ensure smooth engagement, and checking all hinge screws and hardware fasteners for tightness. If your hardware includes a wash-mode tilt feature, use it to pivot the sash inward for safe exterior glass cleaning from inside. Consistent seasonal care prevents binding, air leaks, and premature hardware wear, keeping the window performing like new for decades.
5. What is the best frame material for push out casement windows?
The best frame material depends on your climate, budget, and maintenance tolerance. Thermally broken aluminium is a strong all-rounder, offering slim sightlines, corrosion resistance, low maintenance, and modern thermal performance that rivals timber. It suits coastal, humid, and harsh climates particularly well. Timber delivers natural warmth and excellent insulation but demands refinishing every 5 to 10 years. Fiberglass provides exceptional dimensional stability and long lifespans but comes at a higher price with fewer manufacturer options. Vinyl is the most budget-friendly but can warp in extreme heat or become brittle in severe cold. For Australian projects, MEICHEN’s aluminium windows range (https://meichenwindows.com.au/aluminium-windows/) offers AS 2047-compliant configurations designed for energy efficiency across multiple project types.
More Window & Door Guides