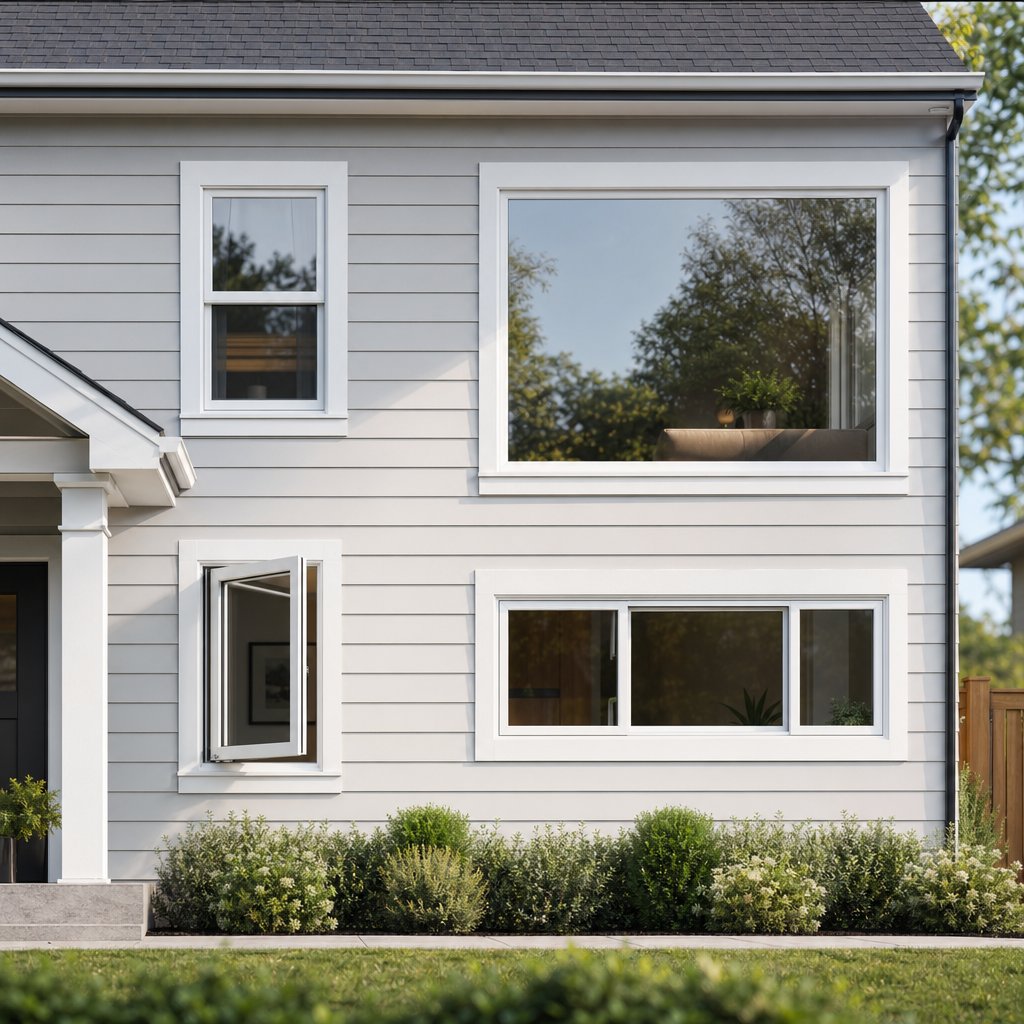
Retrofit vs Full-Frame Replacement and Why Your Measurements Change
When you start looking into how to measure for retrofit windows, you’ll quickly notice that most guides lump retrofit and full-frame replacement together. That’s a problem, because the two methods use completely different reference points. Confuse them, and you’ll end up ordering a window that either won’t fit or leaves gaps you never planned for.
So before the tape measure comes out, let’s get clear on what makes these two approaches distinct and why that distinction changes everything about where you measure.
What Makes a Retrofit Window Different
A retrofit window, sometimes called a pocket insert, is a new window unit designed to slide directly into your existing frame. The original jambs, sill, and head stay right where they are. Nothing gets torn out, no exterior cladding gets disturbed, and the surrounding wall structure remains untouched.
Full-frame replacement is the opposite. The entire old window, frame and all, comes out down to the rough opening. That exposed rough opening then becomes the reference for sizing the new unit.
This single difference, whether the old frame stays or goes, dictates where your tape measure lands. Measuring for a retrofit window means every dimension references the inside faces of the existing jambs, sill, and head. Measuring for full-frame replacement means referencing the rough opening behind them. Mix up those reference points and your numbers will be off from the start.
Retrofit vs Full-Frame Replacement Measuring at a Glance
Here’s a side-by-side look at how measuring for a retrofit window compares to measuring for a full-frame replacement:
| Factor | Retrofit (Pocket Insert) Measurement | Full-Frame Measurement |
|---|---|---|
| Where the tape goes for width | Inside face of left jamb to inside face of right jamb | Left rough opening edge to right rough opening edge |
| Where the tape goes for height | Top of the sill to underside of the head jamb | Rough sill to top of the rough opening |
| Primary reference points | Existing interior frame components (jambs, sill, head) | Structural rough opening behind the frame |
| Existing frame condition | Must be structurally sound, square, and rot-free | Can be damaged or deteriorated since it’s being removed |
| Best suited for | Frames in good condition where minimal disruption is preferred | Damaged frames, resizing, or full structural upgrades |
You’ll notice the tape literally goes to different places depending on the method. That’s why a generic “how to measure replacement windows” guide can steer you wrong if it doesn’t specify which type of replacement it’s talking about.
If your existing frame is structurally sound, retrofit is the faster, less invasive path, and accurate measurement is the single most important step to getting it right.
That said, “structurally sound” is doing a lot of heavy lifting in that sentence. A frame that looks fine on the surface can hide rot, warping, or settling that makes retrofit a risky bet. Knowing how to evaluate your frame’s condition is just as critical as knowing where to place the tape.
Step 1 – Assess Your Existing Frame Before You Measure
A retrofit window installation lives or dies by the condition of the frame it sits in. Since the existing jambs, sill, and head become the structural housing for your new unit, any hidden weakness in those components will compromise the fit, the seal, and the long-term performance of the window. Spending five minutes on a hands-on inspection now can save you from measuring for the wrong project entirely.
How to Inspect Your Existing Frame for Retrofit Viability
Start with a visual sweep from both inside and outside the house. Look for peeling or bubbling paint, discoloration, and any gaps where the frame meets the surrounding wall. These surface clues often point to moisture problems lurking underneath.
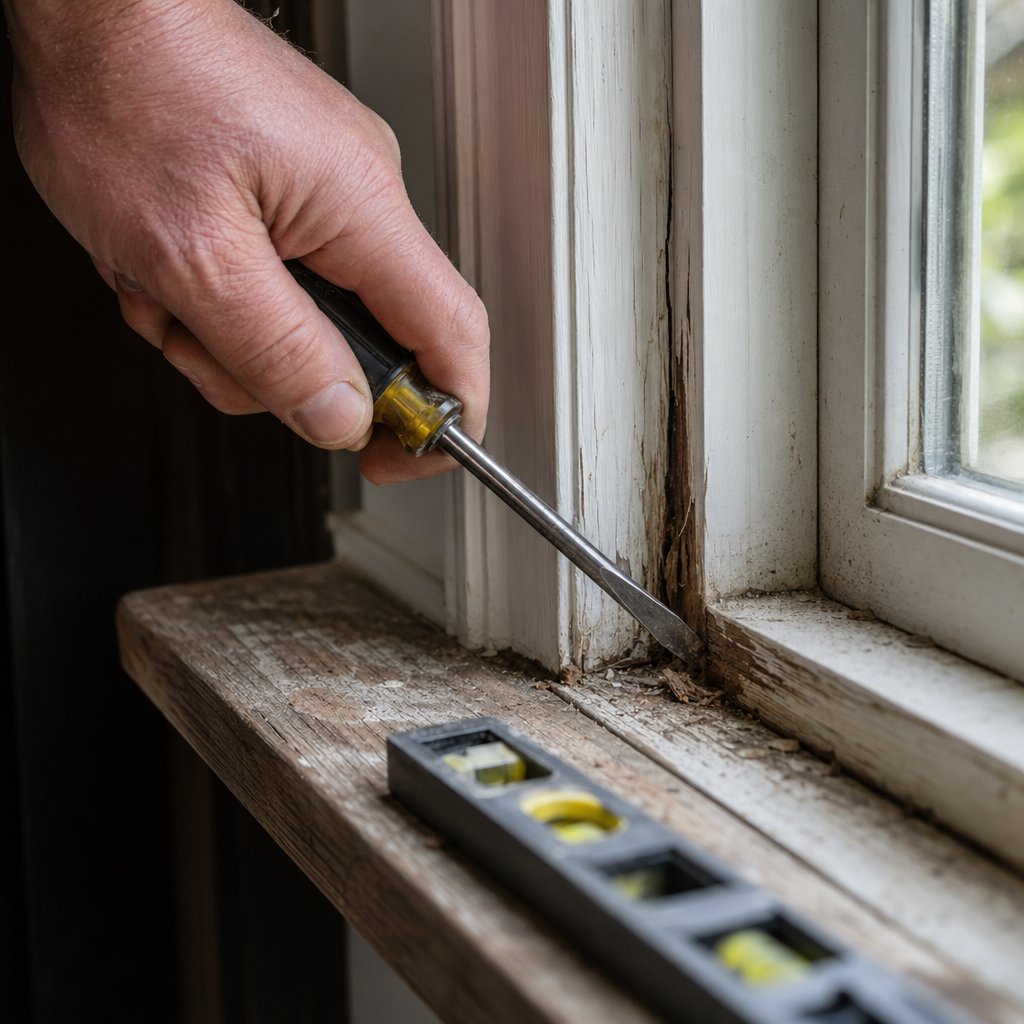
Then get tactile. Take a flathead screwdriver and press the tip firmly into the sill, both side jambs, and the head, especially at the corners and along the bottom edge where water tends to collect. Solid wood resists the probe. If the screwdriver sinks in, the wood feels spongy, or small pieces crumble away, rot has already set in and the frame can’t reliably support a retrofit insert.
Next, hold a straightedge or level against each jamb and across the sill. You’re checking for bowing, warping, or sagging that would prevent the new window from seating evenly. A frame that has twisted over time will create uneven contact points, making a weathertight seal nearly impossible without excessive shimming.
Finally, try operating the existing window. Sashes that stick, jam, or refuse to stay open can indicate swelling from moisture retention, another sign the frame’s integrity is compromised.
When Full-Frame Replacement Is the Smarter Choice
If your inspection turns up any of the following red flags, retrofit windows measuring becomes a moot point. Full-frame replacement is the safer path:
- Wood feels soft or spongy under the screwdriver probe
- Visible rot, mold, or fungal growth on any frame component
- Daylight visible between the frame and the surrounding wall
- Frame has separated or pulled away from the wall structure
- Jambs or sill are bowed more than the straightedge can bridge
- Evidence of water staining, insect damage, or structural sagging
- Window is completely inoperable due to frame swelling or distortion
Think of it as a simple decision tree: if the frame passes every check on that list, you’re clear to move forward with how to measure retrofit windows. If even one item fails, pause and evaluate whether a targeted repair can restore the frame or whether full-frame replacement is the more responsible investment.
With a confirmed-solid frame, the next step is making sure you have the right tools on hand and understand exactly which parts of that frame your tape measure needs to reference.
Step 2 – Gather Your Tools and Learn Frame Anatomy
A solid frame is only half the equation. If you don’t know exactly where to place the tape, or you’re working with a flimsy tool that flexes mid-span, even the best frame won’t save you from a bad measurement. Before you measure for vinyl retrofit windows, aluminium units, or any other frame material, take a few minutes to set yourself up properly.
Essential Tools for Accurate Retrofit Measurement
You don’t need a truck full of gear. A handful of reliable basics will cover every measurement in this guide:
- Rigid tape measure (25 ft / 8 m) — a stiff, wide blade prevents sag across openings wider than about 900 mm, which is where flexible tapes start to droop and introduce error.
- Pencil — mark your measurement points directly on the frame so you can verify tape placement if you need to re-measure.
- Spirit level (600 mm or longer) — confirms whether the sill and jambs are level and plumb, which affects shimming later.
- Combination square or speed square — useful for checking 90-degree corners at the sill-to-jamb junction.
- Notepad or phone — record every measurement immediately. Relying on memory across multiple windows is a recipe for mix-ups.
- Flathead screwdriver — you already used this for the rot probe, but keep it handy to gently pry back any paint-sealed stops that obscure the jamb face.
One detail worth noting: frame material influences how precisely the replacement window can be manufactured. Aluminium frames, for instance, allow tighter manufacturing tolerances than wood or vinyl, which means your measurements need to be equally precise. If you’re considering aluminium retrofit units, suppliers like MEICHEN offer retrofit-compatible aluminium window systems built to Australian standards, where that tighter tolerance translates to a cleaner fit with less reliance on shimming.
Know Your Window Frame Anatomy
Imagine you’re standing inside your house, looking at the window. Here’s what you’re actually seeing, layer by layer, and why each part matters when you measure retrofit vinyl windows or any other type:
The jambs are the vertical sides of the frame, left and right. These are your primary width reference. When measuring, your tape hooks against the inside face of one jamb and stretches to the inside face of the opposite jamb. The head jamb is the horizontal top piece of the frame, and it serves as your upper height reference.
The sill sits at the bottom of the frame. It’s the structural ledge the sash rests on when closed. Don’t confuse it with the stool, which is the flat, shelf-like trim piece extending into the room. Your height measurement starts at the top surface of the sill, not the stool.
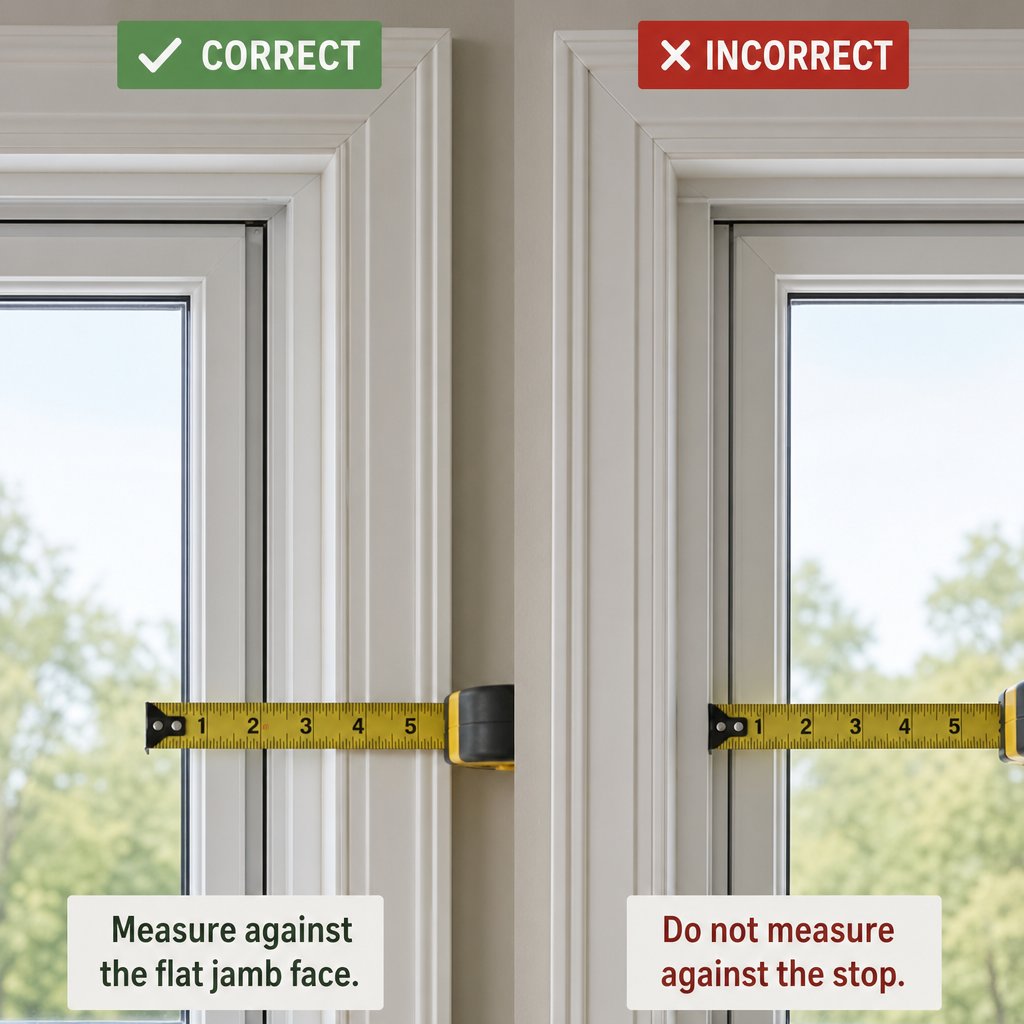
Layered in front of the jambs, you’ll find a series of narrow strips called stops. The blind stop (sometimes called the outer stop) sits closest to the exterior. The parting stop is the thin strip between the upper and lower sash tracks on a double-hung window. The interior stop (or sash stop) is the innermost strip, the one closest to you. These stops hold the sashes in alignment, but they are not your measurement reference. Placing the tape against a stop instead of the jamb face behind it will give you a narrower reading, and your new window will end up undersized.
Here’s the rule that ties it all together: for width, the tape goes jamb face to jamb face. For height, it goes sill surface to head jamb underside. Every stop, trim piece, and stool gets ignored. If you can internalize those two reference lines, the actual measuring steps that follow become straightforward, starting with width.
Step 3 – Measure the Width of Your Window Opening
Width is the first live number you’ll capture, and it’s the one most often botched. The mistake almost always comes down to where the tape lands. Get the placement right, and the rest of this retrofit window width measurement guide falls into place quickly.
Where Exactly to Place the Tape for Width
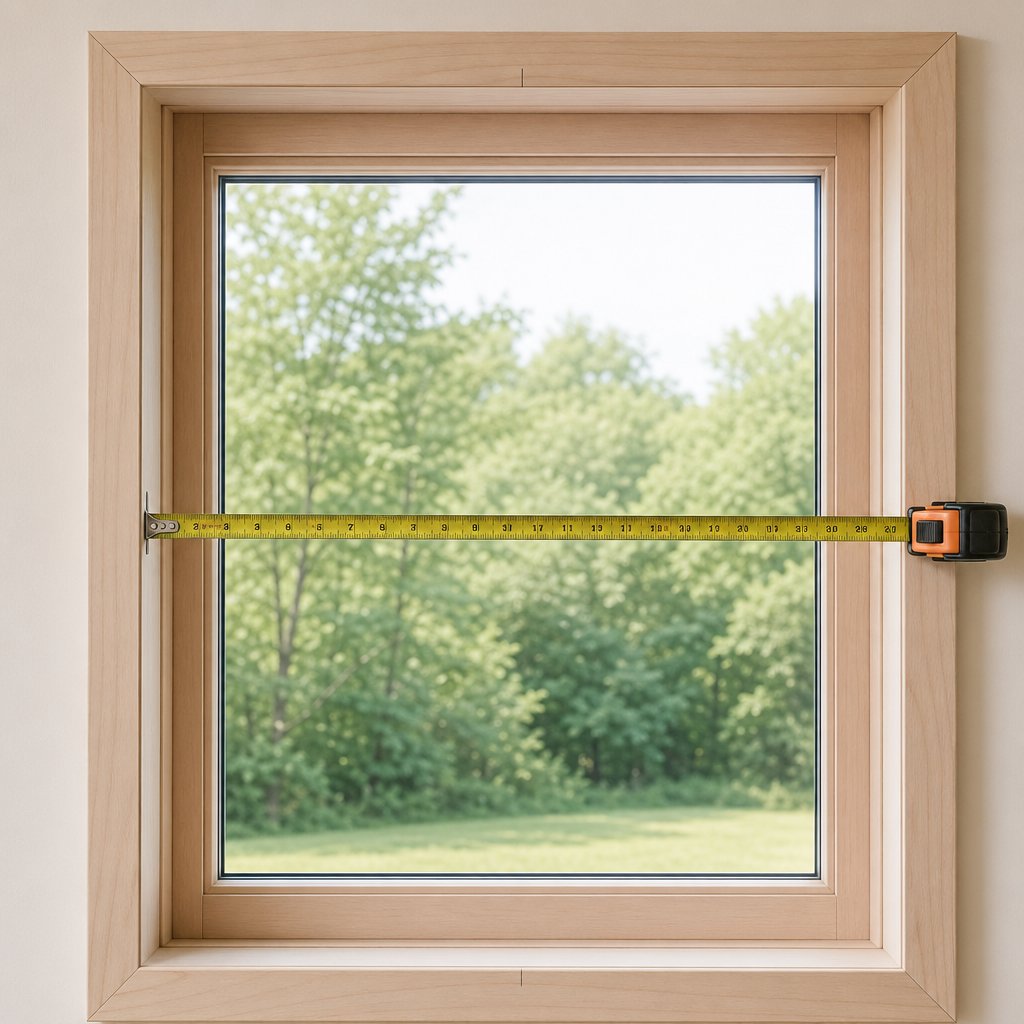
Hook or press the end of your tape against the inside face of the left jamb, the flat vertical surface of the frame itself. Stretch the blade straight across to the inside face of the right jamb. That jamb-to-jamb span is your width.
Here’s where people go wrong: they rest the tape against the interior stop or the parting stop instead of the jamb behind it. Those stops sit proud of the jamb face by several millimetres, so measuring stop-to-stop produces a reading that’s narrower than the actual opening. Order a window based on that number and you’ll end up with visible gaps on both sides, poor weathersealing, and a unit that relies entirely on oversized shims to stay centred.
If paint has fused the stops to the jamb and you can’t tell where one ends and the other begins, use your flathead screwdriver to gently pry the stop edge away just enough to identify the jamb surface behind it. That’s your true reference point when measuring window opening width for retrofit.
Why Three Width Measurements Matter
A single width reading assumes the opening is perfectly uniform from top to bottom. In reality, frames shift. Foundations settle. Lumber dries and warps over decades. Homes built before the 1970s commonly show width variations of 5 mm or more across the height of a single opening, sometimes considerably more in balloon-framed structures.
To account for this, take three separate measurements:
- One near the top of the opening, roughly 50 mm below the head jamb
- One at the midpoint of the opening
- One near the bottom, roughly 50 mm above the sill
Write all three down. Then circle the smallest one. That’s the number you’ll carry forward.
Always use the smallest of your three width measurements when ordering. A window sized to the widest point physically will not fit at the narrowest point, and forcing it risks damaging both the new unit and the existing frame.
What if the difference between your largest and smallest readings is significant? Minor variation, a few millimetres, is normal and easily handled with shims during installation. Larger discrepancies suggest the frame has racked or the wall has shifted, which starts to push the project toward the limits of what retrofit can accommodate. As a general rule, if the spread is large enough that shimming would need to be extreme on one side, it’s worth revisiting the frame assessment from Step 1 before committing to a retrofit approach.
Width captured, the same logic applies vertically. Height measurement follows the identical three-point method, but the tape placement shifts to a completely different pair of reference surfaces, and the most common error changes along with it.
Step 4 – Measure the Height from Sill to Head
Height trips people up more than width, and the reason is deceptively simple: the bottom reference point isn’t where most people think it is. When you measure retrofit window height, the tape needs to start at the top surface of the sill, not the stool, and not the sloped portion of the sill that sheds water toward the exterior. Confuse these surfaces and your height reading could be off by 10 mm or more, enough to create a real problem at installation.
Correct Tape Placement for Height
Picture the bottom of your window from the inside. The flat, shelf-like piece that extends into the room, the one you might set a plant on, is the stool. It’s trim, not structure. Behind and slightly above it sits the actual sill, the structural ledge where the bottom sash rests when the window is closed. On many older windows, the sill also has a slight outward slope designed to direct rainwater away from the frame. That sloped surface is not your starting point either.
Your tape goes on the highest point of the sill, the flat area where the sash makes contact. From there, extend the blade straight up to the underside of the head jamb. That’s your retrofit window sill to head measurement.
Why does this matter so much? If you measure from the stool instead of the sill, you’ll record a height that’s taller than the actual pocket the new window needs to fit into. The unit arrives, and it’s physically too tall to slide into the opening. If you measure from the low point of the sill slope, you get a similar overcount. Either mistake means a window that can’t be installed without modification.
Follow this three-point sequence to capture accurate height readings across the opening:
- Place the tape on the sill surface at the left side of the opening, roughly 50 mm in from the left jamb, and measure straight up to the underside of the head jamb. Record the number.
- Move to the centre of the opening and repeat the same sill-to-head measurement. Record it.
- Shift to the right side, roughly 50 mm in from the right jamb, and take the third measurement. Record it.
Compare all three numbers and circle the smallest. Just like with width, the smallest height measurement is the one you’ll use when ordering. A window sized to the tallest reading won’t clear the shortest point in the opening.
Measuring Height in Older or Settled Frames
If your home has a few decades behind it, don’t be surprised when those three height readings come back different. Foundation settlement is one of the most common causes. As soil beneath the house compresses or shifts unevenly over time, the structure above responds. The head jamb may drop slightly on one side, or the sill may tilt, producing measurable height differences across a single window opening.
You might also notice that doors in the same area stick or that floors slope gently toward one wall. These are related symptoms. Foundation settlement doesn’t always affect every opening equally, so each window needs to be measured individually, even if two openings sit side by side on the same wall.
Minor height variation, a few millimetres from left to right, is perfectly normal and manageable with shims during installation. The new retrofit unit gets levelled within the opening, and the small gaps get sealed. This is standard practice and nothing to worry about.
Larger discrepancies tell a different story. When the height difference across the opening becomes pronounced, shimming alone can’t compensate without creating uneven pressure on the new window frame. That uneven pressure leads to binding sashes, failed seals, and long-term performance issues. If your three height readings vary by a significant margin, and especially if you’re also seeing large width variation from Step 3, the frame may have racked beyond what a pocket insert can handle. In that scenario, full-frame replacement gives you the chance to re-square the opening from scratch.
With both width and height recorded, you have two of the three critical dimensions. The third, jamb depth, determines whether the new window will sit flush within the frame or protrude awkwardly past the interior trim. And a quick diagonal check will confirm whether the opening is square enough to accept a retrofit unit at all.
Step 5 – Measure Jamb Depth and Check for Square
Width and height tell you how big the opening is. Jamb depth tells you how deep it is, and that third dimension is the one most DIYers skip entirely. Without it, you won’t know whether the new retrofit window will sit flush within the frame or stick out past the interior trim like a shelf. Measuring jamb depth for retrofit windows takes about thirty seconds per opening, and it can change your entire installation approach.
How to Measure Jamb Depth Correctly
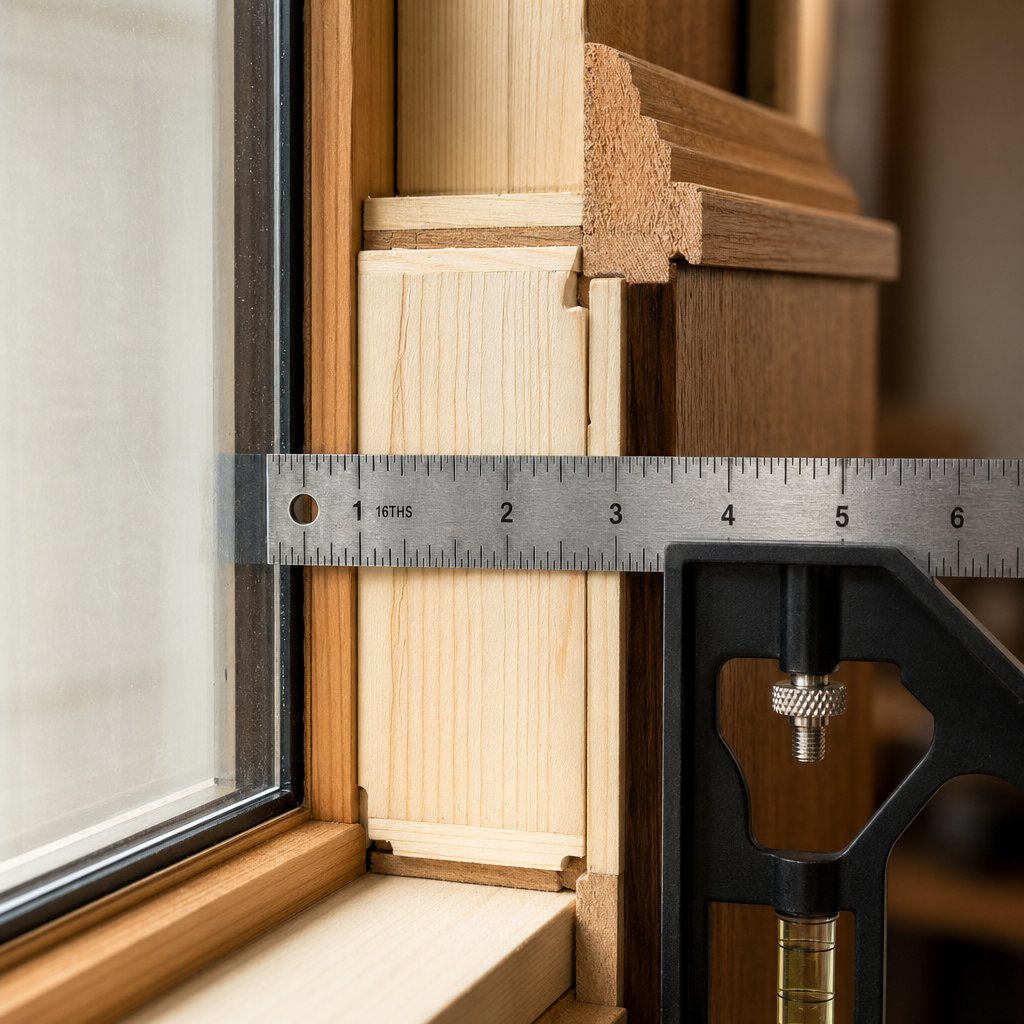
Open the window so you have clear access to the frame’s cross-section. You’re measuring the total thickness of the frame pocket, from the inside face of the interior stop (the strip closest to you inside the room) straight through to the outside face of the blind stop or exterior casing on the other side. A rigid tape measure or a small combination square works well here because the distance is short and you need precision, not reach.
Take this retrofit window jamb depth measurement at three or four points around the opening: both jambs, the sill, and the head. Older frames can vary in depth from one spot to another, especially if the sill has been planed down or the exterior casing has been built up with additional trim layers over the years.
Why does this number matter so much? Every retrofit window has a minimum frame depth it needs in order to seat properly within the pocket. Standard window jamb depths typically range from about 3-1/4 inches to 4-9/16 inches, though the exact requirement varies by manufacturer and product line. If your existing jamb depth falls short of the new window’s frame depth, the unit will protrude past the interior stop, interfering with trim and creating an unfinished look. The fix is jamb extensions, additional strips that build out the depth, but that adds cost, complexity, and time to the project.
Frame material plays a role here too. Vinyl frames tend to have slightly bulkier profiles than aluminium, which means they consume more of the available jamb depth. Wood frames vary widely depending on the era they were built. Record the depth alongside your width and height numbers so you can cross-reference it against the product specifications when you’re ready to order.
Checking for Square and What to Do If Your Frame Is Off
Imagine sliding a perfectly rectangular window into an opening shaped like a parallelogram. The corners won’t line up, gaps will appear in unpredictable places, and weathersealing becomes a guessing game. That’s what happens when you skip the square check.
To check window square for retrofit, you need two diagonal measurements. Stretch your tape from the top-left corner of the opening to the bottom-right corner and record the number. Then measure from the top-right corner to the bottom-left corner. If both diagonals are identical, the opening is perfectly square. In practice, they rarely match exactly, so the question becomes: how far off is too far off?
| Diagonal Difference | What It Means | Retrofit Feasibility |
|---|---|---|
| Less than 1/8 inch (3 mm) | Opening is essentially square | Fully suitable for retrofit. Standard shimming during installation will handle any minor variation. |
| 1/8 inch to 1/4 inch (3-6 mm) | Slightly out of square | Workable for retrofit, but expect heavier shimming on one side. Confirm with your window supplier that the unit can accommodate the offset. |
| Greater than 1/4 inch (6 mm) | Significantly racked | Retrofit becomes risky. Uneven gaps compromise the seal, and excessive shimming puts stress on the new frame. Full-frame replacement is the safer route. |
A difference within that middle range doesn’t automatically disqualify retrofit, but it does mean you’ll need to shim strategically during installation to bring the window plumb and level inside the opening. The shims absorb the irregularity, and the gaps between the window frame and the jamb get sealed with low-expansion foam. It’s manageable, just not as clean as working with a square opening.
If your diagonals land in the “significantly racked” zone, especially combined with large width or height variations from the earlier steps, the frame has likely shifted beyond what a pocket insert can reliably accommodate. Forcing a retrofit into a badly racked opening leads to binding hardware, failed weatherstripping, and callbacks you’d rather avoid.
With depth and squareness confirmed, you have a complete dimensional profile of your opening: width, height, depth, and geometry. The next consideration is whether the type of window you’re installing, double-hung, casement, sliding, or something else, introduces any additional measurement requirements beyond this standard trio.
Step 6 – Adjust Your Approach for Different Window Types
Your width, height, and depth numbers form the foundation, but they’re not always the whole story. Different window styles have moving parts that move in different directions, and each mechanism needs its own clearance. Measuring for double hung retrofit windows follows a slightly different checklist than measuring for a casement or an awning unit. Treat the standard trio as your baseline, then layer on the type-specific measurements below.
Measuring for Double-Hung and Sliding Retrofit Windows
Double-hung windows are the most straightforward retrofit candidates. Both sashes travel vertically within the frame, so the standard width, height, and depth measurements from the previous steps cover nearly everything. The one thing to verify is that your jamb depth can accommodate the dual sash tracks and the balance system (springs or cords) that keeps the sashes in position. If the existing frame already houses a double-hung unit, the depth is almost certainly sufficient.
Sliding windows add a wrinkle. Because the sashes glide horizontally along a track recessed into the sill and head, you need to confirm that the track depth, the channel the sash rides in, is adequate for the new unit’s roller assembly. This is a separate measurement from the overall jamb depth. Run your tape along the inside of the bottom track from its front lip to its back wall. If the existing track channel is shallower than what the replacement requires, the sash won’t seat properly and may bind or derail. Think of this as a retrofit sliding window measurement guide add-on: standard dimensions first, then track depth as a fourth check.
Retrofit Measurements for Casement, Awning, and Picture Windows
Operable windows that swing outward introduce clearance demands the vertical-travel types don’t have.
When you measure for retrofit casement windows, pay special attention to the hinge side. A casement sash pivots on hinges mounted to one jamb and swings outward. The hinge hardware needs room to fold and extend without contacting the frame or exterior trim. Measure the clearance between the inside face of the hinge-side jamb and any exterior obstruction, like a brick reveal or neighbouring window, to confirm the sash can open fully.
Awning windows are hinged at the top and swing outward from the bottom. That outward arc means you need sill-level clearance below the opening. If an exterior ledge, garden bed, or security screen sits close to the sill, the sash may not open to its intended angle. Measure the vertical clearance from the bottom of the opening to the nearest exterior obstruction.
Picture windows (also called fixed windows) have no operable hardware at all, which makes them the simplest to measure but the least forgiving. There are no hinges, tracks, or balances to absorb a slightly off dimension. The frame-to-opening fit has to be precise because any gap is purely visual, with no moving parts to mask it.
Here’s a quick reference of the extra measurement each type requires beyond the standard width-height-depth trio:
- Double-hung: verify existing balance-system depth within the jamb
- Sliding: measure bottom and top track-channel depth for roller clearance
- Casement: measure hinge-side clearance to exterior obstructions
- Awning: measure vertical clearance below the sill for outward swing arc
- Picture (fixed): no additional measurement, but tolerances are tightest, so re-confirm width and height to the millimetre
Each of these extra checks takes less than a minute per window, yet skipping them is one of the fastest ways to end up with a unit that technically fits the opening but can’t operate the way it’s supposed to. And operational problems aren’t the only risk. Measurement errors, whether type-specific or general, tend to compound in ways that aren’t obvious until installation day.
Step 7 – Avoid These Common Retrofit Window Measurement Mistakes
“Measure twice, cut once” is fine advice, but it doesn’t help much if you’re measuring twice from the wrong reference point. The most costly retrofit window measuring errors to avoid aren’t about carelessness. They’re about misunderstanding where the tape goes, which number to trust, or which dimension to skip. Here’s a breakdown of the three mistakes that cause the most problems on installation day, along with what actually goes wrong and how to prevent each one.
Measuring to the Stops Instead of the Jambs
This is the single most common retrofit window measurement mistake, and it’s easy to see why. The interior stop is the first surface your tape touches when you reach into the frame. It feels like the natural edge of the opening. But the stop sits proud of the jamb face behind it, sometimes by 5 mm or more. Measure stop-to-stop and your recorded width comes in narrower than the actual pocket.
The result? Your new window arrives undersized. It slides into the opening with noticeable gaps on both sides, gaps that shims and sealant can only partially disguise. Weathersealing suffers, air infiltration increases, and the window may shift within the frame over time because it was never a snug fit to begin with. As Cunningham Doors & Windows notes, inaccurate measurements are among the most frequent installation errors, leading to gaps between the window and frame that cause energy loss and air leaks.
Ignoring the Smallest Measurement Rule
You took three width readings and three height readings, just like the guide said. But when it came time to record the final number, you averaged them, or worse, used the largest. It seems logical: a bigger number gives the window more coverage, right?
Wrong. A retrofit window has to physically pass through the narrowest and shortest points of the opening to get into position. If you size the unit to the widest or tallest reading, it simply won’t fit where the opening pinches in. Forcing it risks cracking the new frame, damaging the existing jambs, or both. And if you catch the problem before forcing anything, you’re looking at a reorder, a delay, and a second delivery fee. The fix is simple but non-negotiable: always record the smallest of your three measurements for each dimension.
Skipping the Depth or Square Check
Width and height get all the attention. Jamb depth and squareness often get none, and that’s where wrong measurements for retrofit windows quietly derail a project.
Skip the depth check and you won’t discover the problem until the new window is in your hands. If the frame pocket is too shallow for the unit’s profile, the window protrudes past the interior stop. Trim won’t sit flush, the interior finish looks unfinished, and you’re left choosing between jamb extensions (added cost and labour) or returning the window entirely.
Skip the square check and the consequences show up at the sealing stage. An out-of-square opening means the gap between the window frame and the jamb varies from corner to corner. One side might be tight while the opposite side has a wedge-shaped void. Uneven gaps compromise insulation and weathersealing, creating paths for air and moisture that no amount of caulk can reliably close over time.
The table below pulls all three errors together into a quick reference you can check before finalising your numbers:
| Common Mistake | What Goes Wrong | How to Prevent It |
|---|---|---|
| Measuring to the stops instead of the jamb faces | Window is undersized; visible gaps on both sides; poor air sealing and energy loss | Pry back paint-sealed stops to expose the jamb face. Place the tape on the flat jamb surface, not the stop in front of it. |
| Using the largest measurement instead of the smallest | Window is too wide or too tall to fit at the narrowest/shortest point; forced installation damages frames | Take three readings for both width and height. Always record and order based on the smallest number. |
| Skipping the jamb depth measurement | Window protrudes past interior trim; requires unplanned jamb extensions or a reorder | Measure depth at multiple points around the frame. Cross-reference against the manufacturer’s minimum depth requirement before ordering. |
| Skipping the diagonal square check | Uneven gaps around the window; compromised weatherstripping; binding hardware on operable sashes | Measure both diagonals. If the difference exceeds 1/4 inch (6 mm), evaluate whether full-frame replacement is the better path. |
Every one of these mistakes is preventable with the steps already covered in this guide. The pattern is consistent: the errors that cause the biggest headaches aren’t dramatic miscalculations. They’re small oversights, a tape placed a few millimetres off, a single dimension left unchecked, that only reveal themselves when the new window shows up and doesn’t fit the way it should.
Catching these issues before you order is the goal. And once your measurements are clean and verified, the final step is translating those raw numbers into an order-ready specification, which means understanding the tolerances and deduction factors that sit between your tape-measure readings and the actual window size you request.
Step 8 – Apply Tolerances and Order Your Retrofit Windows
Your tape-measure numbers are clean, verified, and written down. So you just hand those figures to a supplier and wait for delivery, right? Not quite. Raw measurements and order-ready specifications are two different things. The gap between them is called a deduction factor, and understanding how it works is the difference between a window that installs smoothly and one that jams, rattles, or leaks.
Understanding Measurement Tolerances and Deduction Factors
Here’s the core idea: retrofit windows are always ordered slightly smaller than the measured opening. That intentional gap, typically deducted from both width and height, leaves room for shimming, low-expansion foam insulation, and fine adjustment during installation. Without it, the window would fit so tightly that there’d be no way to level it, plumb it, or seal it properly.
How much gets deducted? That depends on two things: the manufacturer’s specifications and the frame material. Vinyl frames expand and contract more with temperature swings, so they generally call for a slightly larger deduction to accommodate seasonal movement. Aluminium frames are dimensionally more stable, which often allows a smaller deduction and a tighter fit. Wood falls somewhere in between, depending on the species and finish.
Most suppliers publish their recommended deduction factors in their ordering guides or spec sheets. A common range you’ll see is roughly 1/4 inch to 1/2 inch deducted from each dimension, but treat that as a ballpark, not a rule. The exact number varies by product line, and guessing instead of confirming is how orders go wrong.
Always confirm the specific deduction factor with your chosen supplier before placing an order. Using a generic number from the internet instead of the manufacturer’s recommendation is one of the fastest ways to end up with a window that doesn’t fit.
When you contact the supplier, provide your smallest width, smallest height, and jamb depth measurements. Let them apply their own deduction rather than doing the math yourself and submitting a pre-deducted number. This avoids the risk of a double deduction, where both you and the manufacturer subtract tolerances, producing a window that’s noticeably undersized.
Choosing the Right Retrofit Window for Your Measurements
Accurate dimensions get you the right size. Choosing the right product gets you the right performance. Once your measurements are locked in, the selection process shifts to matching those numbers with a window that suits your climate, your building code requirements, and the long-term demands of your home.
Here’s what to evaluate when comparing retrofit window options:
- Energy efficiency ratings — look for U-factor and Solar Heat Gain Coefficient (SHGC) values that meet or exceed your local energy code. Lower U-factor means better insulation. The right SHGC depends on your climate zone and sun exposure.
- Frame material compatibility — the new frame material should work with your existing jamb depth and the deduction factor your opening allows. Aluminium offers dimensional stability and slim profiles. Vinyl provides good insulation but bulkier sections. Wood delivers a traditional look but requires more maintenance.
- Compliance with local building standards — codes vary by region, and a window that’s legal in one jurisdiction may not meet requirements in another. Verify that the product carries the relevant certifications for your area, whether that’s ENERGY STAR, NFRC ratings, or region-specific standards like Australia’s AS 2047.
- Window style availability — confirm the supplier offers the specific type you need (double-hung, casement, sliding, awning, or fixed) in the dimensions your opening requires. Custom sizing is common, but lead times and pricing vary.
- Weathersealing and hardware quality — gaskets, weatherstripping, and locking mechanisms directly affect long-term air and water resistance. These components matter as much as the glass and frame.
For homeowners and renovators working on retrofit projects, MEICHEN’s aluminium windows collection is worth exploring as a practical next step. Their range is built to Australian standards, covers multiple window styles that align with the measurement approaches in this guide, and uses energy-efficient aluminium frames suited to a variety of project types. The dimensional stability of aluminium pairs well with the tight tolerances a retrofit demands, and having multiple styles available from a single supplier simplifies the ordering process when you’re replacing several windows at once.
Whatever product you choose, the process ends where it started: with your measurements. Every step in this guide, from the frame inspection through the width, height, depth, and square checks, feeds directly into the order you’re about to place. Get those numbers right, confirm the deduction factor with your supplier, and match the product to your performance requirements. That’s how you measure once, order once, and install a retrofit window that fits the way it should.
Frequently Asked Questions About Measuring for Retrofit Windows
1. What is the difference between a retrofit window and a full-frame replacement window?
A retrofit window, also called a pocket insert, slides into your existing window frame without removing the jambs, sill, or head. The surrounding wall structure and exterior cladding stay untouched. Full-frame replacement removes the entire old window down to the rough opening, which then becomes the reference for the new unit. Because the existing frame stays in place during a retrofit, every measurement must reference the interior faces of the current jambs, sill, and head rather than the rough opening behind them. Retrofit is generally faster and less invasive, making it ideal when the existing frame is structurally sound and square.
2. How do I know if my window frame is suitable for retrofit installation?
Before measuring, inspect the frame for signs of rot, warping, moisture damage, and structural separation. Press a flathead screwdriver into the sill, jambs, and head, especially at corners and along the bottom edge. If the wood feels spongy or crumbles, rot has compromised the frame. Hold a straightedge against each jamb and across the sill to check for bowing. Also look for daylight gaps between the frame and the wall, mold or fungal growth, and insect damage. If any of these red flags appear, full-frame replacement is the safer choice because a weakened frame cannot reliably support a pocket insert long term.
3. Why do I need to take three measurements for width and height?
Window frames shift over time due to foundation settlement, lumber shrinkage, and structural movement. A single measurement assumes the opening is perfectly uniform, which is rarely the case, especially in older homes where width variations of 5 mm or more are common. Taking three readings at different points across the opening (top, middle, and bottom for width; left, centre, and right for height) captures any irregularity. You then use the smallest of the three readings when ordering. Sizing the window to the smallest dimension ensures it will physically fit at every point in the opening without forcing or leaving excessive gaps.
4. What is a deduction factor and why does it matter when ordering retrofit windows?
A deduction factor is the small amount subtracted from your measured opening dimensions so the new window is slightly smaller than the pocket it sits in. This intentional gap, typically ranging from roughly 1/4 inch to 1/2 inch per dimension, provides room for shimming, levelling, and sealing with low-expansion foam during installation. The exact deduction varies by manufacturer and frame material. Aluminium frames are dimensionally stable and often allow smaller deductions, while vinyl frames expand more with temperature changes and may require larger gaps. Always confirm the specific deduction with your supplier rather than applying a generic figure, and provide your raw smallest measurements so the manufacturer can apply their own calculation.
5. Do different window types require different measurements for retrofit?
Yes. While every retrofit window needs accurate width, height, and jamb depth readings, certain styles require additional checks. Sliding windows need a track-depth measurement to ensure the roller assembly seats properly. Casement windows require hinge-side clearance measurement to confirm the sash can swing open without hitting exterior obstructions. Awning windows need vertical clearance below the sill for the outward swing arc. Picture (fixed) windows have no extra measurements but demand the tightest tolerances since there is no operable hardware to mask minor fit issues. Aluminium window systems, such as those in MEICHEN’s collection at meichenwindows.com.au, often accommodate multiple styles from a single supplier, simplifying the ordering process across different window types.
More Window & Door Guides