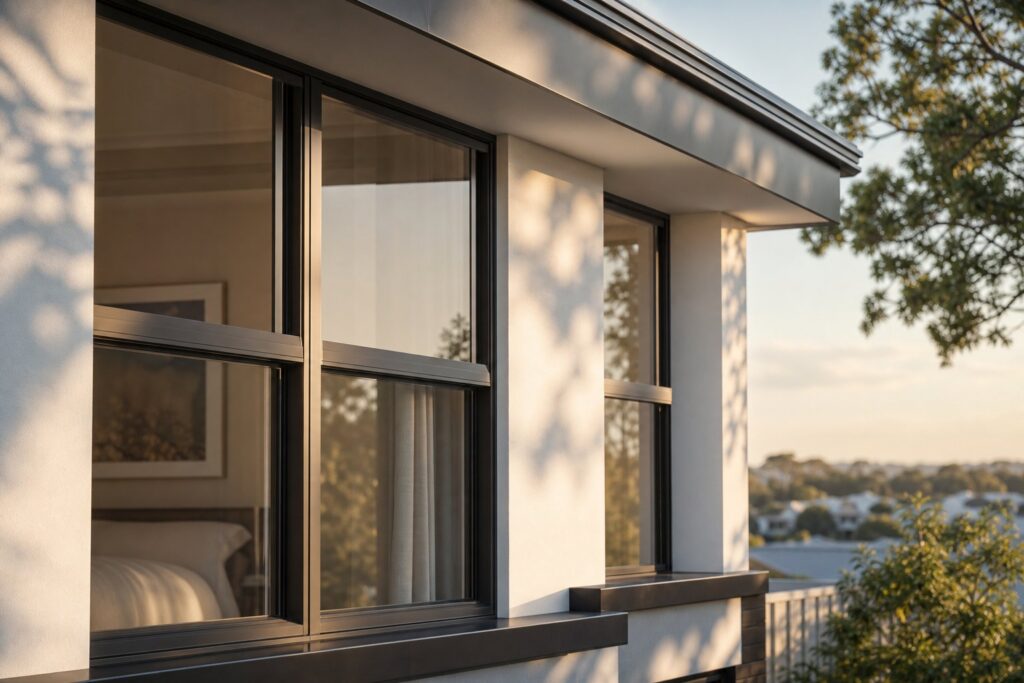
Understanding Aluminium Window Beading Before You Start
A loose or popping glazing bead is more than a cosmetic annoyance. It compromises the seal between glass and frame, inviting draughts, water ingress, and even security risks. Learning how to fit aluminium window beading properly means the difference between a fix that lasts decades and one that fails again next winter.
What Is Aluminium Window Beading
An aluminium window glazing bead is the trim profile that locks a glass pane into its frame. Manufactured from extruded aluminium alloy, these beads apply consistent compression against EPDM rubber gaskets, creating an airtight and watertight barrier around the glazing unit. They distribute the weight of the glass evenly, prevent rattling under wind load, and allow non-destructive removal when a pane eventually needs replacing.
Two configurations exist. Internal beading clips in from inside the room, which is standard on ground-floor and accessible windows because it prevents the glass from being removed externally. External beading fixes from the outside and is typically found on upper-storey casements or older commercial systems. This guide covers both, across snap-in and screw-fixed aluminium window systems rather than any single brand or series.
Who This Guide Is For
Whether you are a confident DIYer or a tradesperson picking up a new skill, this walkthrough applies whenever aluminium window glazing beads need attention. Common scenarios include:
- Replacing cracked or broken glass in an existing aluminium frame
- Upgrading single glazing to a double-glazed unit
- Resealing a window after water ingress or persistent draughts
- Fitting beading on a newly fabricated frame during a renovation
The workflow ahead moves through safe removal of old beads, accurate measuring and cutting, glass preparation, snap-in fitting technique, and final verification. Each step builds on the last, so the sequence matters. Getting the right tools together first saves time and protects both the beads and the frame finish from unnecessary damage.
Step 1 Gather the Right Tools and Materials
Reaching for whatever is handy in the toolbox is tempting, but aluminium glazing beads punish improvisation. A flathead screwdriver jammed into a snap-in channel will gouge the anodised finish, crack the bead lip, or both. Spending ten minutes assembling the correct kit protects your frame, your beads, and your knuckles.
Essential Tools for Beading Installation
The table below covers every tool and consumable you need for a clean glass and aluminium installation, from removal through to final verification. If you are only refitting existing beads without replacing glass, you can skip the suction cups and setting blocks.
| Tool / Material | Purpose | Notes |
|---|---|---|
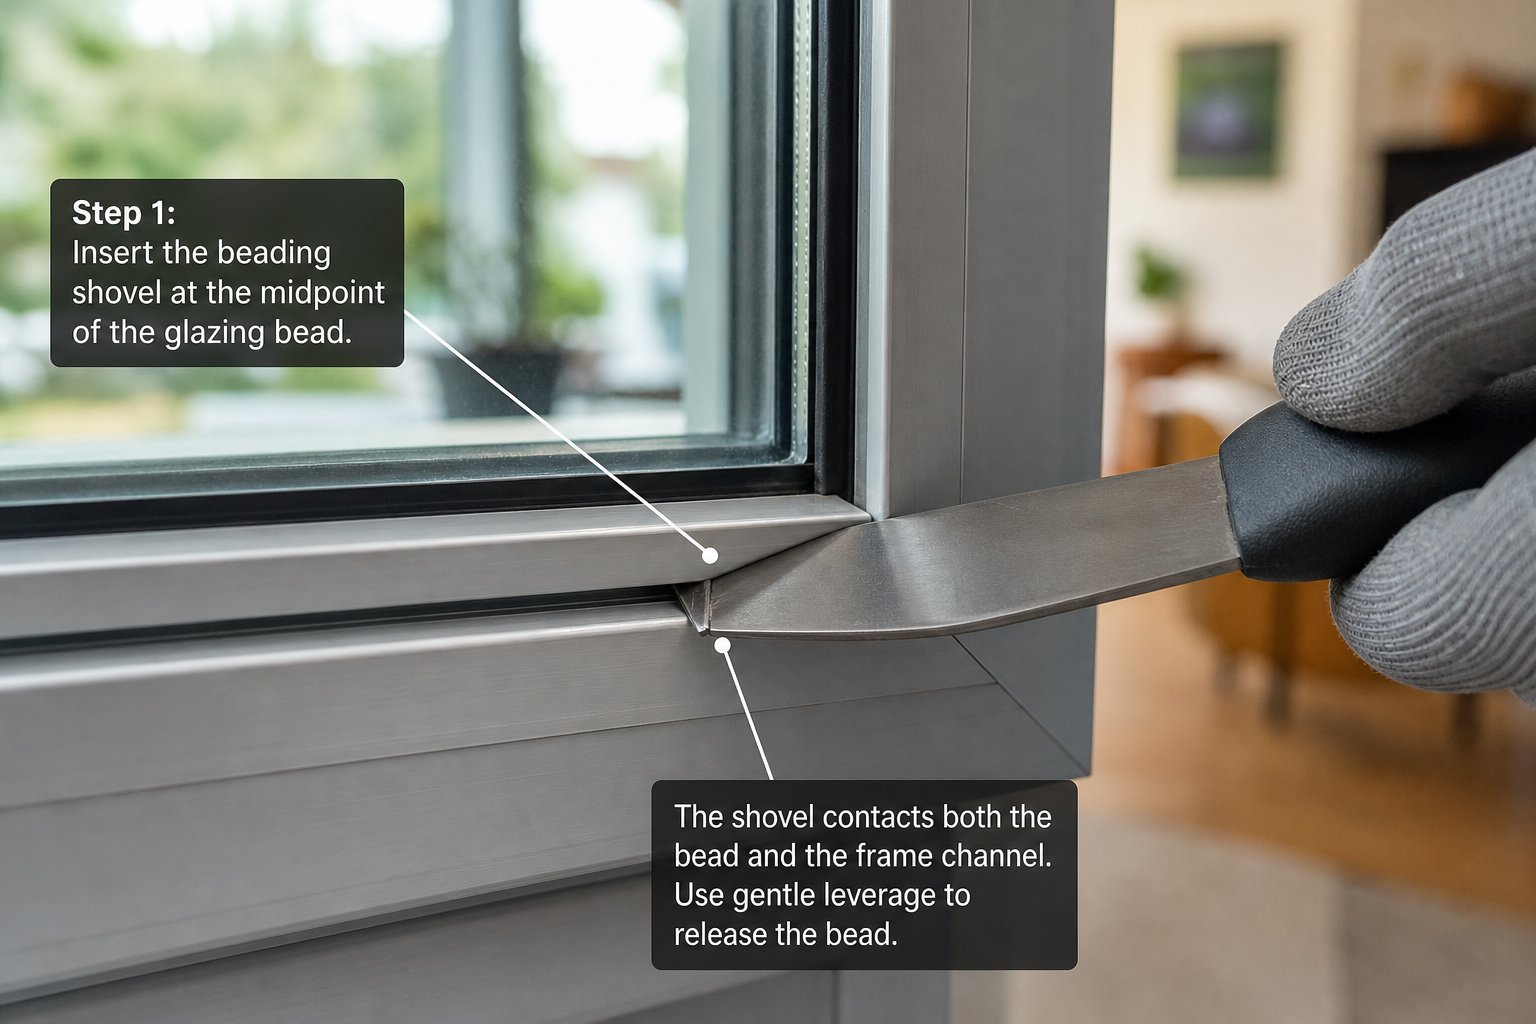
| Beading shovel (or wide flat chisel, 25 mm+) | Lever beads out of the frame channel without point-loading | A narrow screwdriver concentrates force and cracks the clip. Use a broad, flat blade only. |
| Rubber mallet | Tap beads into the snap-in channel with even force | Never use a metal hammer directly on aluminium — it dents the profile instantly. |
| Suction cups (pair, rated 30 kg+) | Lift and position glass safely | Essential for double-glazed units. Check suction before lifting. |
| Tape measure (metric) | Measure internal rebate lengths for each bead | Measure in millimetres for precision. Do not round up. |
| Mitre saw or fine-tooth hacksaw (32 TPI) | Cut aluminium beading to length with clean mitre joints | A mitre box keeps 45-degree angles consistent if using a hand saw. |
| Lint-free cloth | Clean rebate channels and glass edges before fitting | Microfibre works well. Avoid paper towels — they leave fibres in the gasket channel. |
| Silicone lubricant or soapy water | Reduce friction when seating rubber gaskets | A light mist is enough. Excess liquid can trap moisture behind the seal. |
| Replacement rubber gaskets or wedge seals | Provide compression between glass and bead | Match the existing profile — wedge gaskets and E-gaskets are not interchangeable. |
| Safety gloves (cut-resistant) | Protect hands from glass edges and sharp aluminium burrs | Level 5 cut-resistance recommended when handling raw glass edges. |
| Safety glasses | Shield eyes from aluminium swarf and gasket debris | Wrap-around style prevents particles entering from the side. |
Materials and Consumables You Will Need
Beyond the tools themselves, keep a few consumables on hand. Replacement aluminium glazing beads should match the existing profile exactly — take a sample piece to your supplier if you are unsure. Gaskets come in two main types: wedge gaskets that press into the gap between glass and frame, and E-gaskets with an arrow foot that locks into a channel recess. They serve a similar function but are not interchangeable, so identify which your window uses before ordering.
A small tube of clear silicone sealant is worth having nearby for older frames where the drainage slots need resealing, and a deburring tool or fine file tidies any rough edges left after cutting beads to length. Gather everything before you start — once the glass is exposed, you do not want to leave the opening unattended while hunting for a missing part.
With the right gear laid out, the next challenge is getting old beads off without damaging the frame or the glass behind them.
Step 2 Remove Existing Beading Without Causing Damage
Pulling beads off in a random order is the fastest way to crack one — or worse, stress the glass. Every snap in glazing bead for windows is fitted in a deliberate sequence, and removal needs to reverse that logic with a specific twist: you always take the longest piece out first.
Identifying the Correct Removal Sequence
Longer beads flex more at their midpoint, which makes them easier to release without excessive force. Shorter pieces, by contrast, are held rigid by the adjacent beads pressing into the corner mitres. Trying to pop a short vertical bead while the long horizontals are still locked in place puts enormous stress on the corner joints and can snap the clip tabs clean off.
Follow this order when you need to replace glazing or remove a pane:
- Remove the longest horizontal bead first — usually the top or bottom piece, depending on the system. Look for the one with the most visible flex when you press lightly at its centre.
- Remove the opposite horizontal bead second. With the first piece gone, this one now has room to bow outward slightly during release.
- Remove the two shorter vertical beads last. They will practically fall free once the horizontals are out.
If all four beads appear the same length (a square window, for instance), start with the top bead. Gravity works in your favour — the glass unit remains seated on its setting blocks below while you work.
Releasing Clips Without Cracking the Bead
Position your beading shovel at the midpoint of the bead, not at a corner. The centre of the profile has the greatest span between clip points, so it deflects with less resistance. Slide the flat blade between the bead and the frame channel, angling it slightly toward the frame rather than toward the glass. A gentle lever action — no more than 10 to 15 degrees of rotation — should release the first clip with an audible click.
From there, work outward toward one corner, releasing each clip in turn. Then return to the centre and repeat toward the opposite end. This progressive approach prevents the bead from bowing into a curve that permanently deforms the aluminium extrusion.
Three damage risks catch people out most often:
- Forcing corners. Corners are where mitre joints meet and clip tension is highest. Prying here bends the bead tip beyond recovery.
- Levering against the glass edge. Using the glazing unit as a fulcrum point risks chipping the glass or breaking the sealed-unit edge bond on double-glazed panes.
- Over-bending for reuse. If you plan to refit the same bead, keep deflection minimal. An aluminium bead bent past roughly 20 degrees will not spring back to its original profile and the snap in glazing for windows will lose its holding tension.
One important caveat: some older aluminium systems — particularly commercial frames from the 1980s and early 1990s — use screw-fixed beading rather than snap-in clips. You will spot these by the countersunk screw heads visible along the bead face or concealed beneath plastic caps. For screw-fixed profiles, remove all screws before attempting to lift the bead away. Trying to lever a screw-fixed bead as though it were a snap-in type will strip the screw threads and damage the frame’s tapped holes, making refitting far more difficult.
With all beads safely off and set aside in order, the frame rebate is exposed and ready for the next critical step: measuring and cutting new beads to precise lengths with clean mitre corners.
Step 3 Measure and Cut Beading with Accurate Mitre Corners
A bead that is even 2 mm too long will bow when you try to snap it in. One that is 2 mm too short leaves an ugly gap at the mitre joint and lets moisture creep behind the gasket. Precision here is non-negotiable, and it starts with understanding that your aluminium frame is almost certainly not a perfect rectangle.
Measuring the Rebate for Each Bead Length
Aluminium frames shift subtly over time. Thermal cycling, building settlement, and the weight of the glass in a metal frame all contribute to minor distortions. Industry guidance from Glass Helper confirms that if diagonal measurements differ by more than 3 mm, the frame is out of square — and even smaller deviations affect bead lengths at the corners.
The rule is simple: measure each side individually. Never assume the top matches the bottom or that the two verticals are identical. Here is the process:
- With the glass removed or still seated (depending on your workflow), place your tape measure inside the rebate channel — the groove where the bead lip locks in.
- Measure the full internal length from corner to corner along the channel, recording the figure in millimetres.
- Take the same measurement at three points if possible — near the glass face, at the midpoint of the channel depth, and at the outer edge. Record the smallest figure.
- Subtract 2 to 4 mm total from the recorded length. This accounts for 1 to 2 mm clearance at each end where the mitre meets its partner, preventing the beads from binding against each other and bowing outward.
- Mark the cutting length clearly on the bead using a fine permanent marker or a light scribe line.
Repeat for all four sides. Label each piece (top, bottom, left, right) so nothing gets mixed up during fitting. Even on a window that looks perfectly square, you will often find 1 to 3 mm variation between opposing sides — enough to cause problems if you batch-cut to a single dimension.
Cutting Clean Mitre Joints at Corners
Knowing how to cut aluminium window beading cleanly separates a professional-looking result from a rough one. Each corner requires a 45-degree aluminium window bead mitre cut so the two adjoining pieces meet flush without visible gaps or overlapping edges.
A mitre saw with a fine-tooth blade (60 teeth or more for a 250 mm blade) gives the cleanest result. If you are working with a hand saw, clamp the bead into a mitre box to hold the 45-degree angle steady. Use a blade with at least 32 teeth per inch — coarser blades tear the aluminium rather than shearing it, leaving a ragged edge that prevents a tight joint.
A few cutting principles keep things accurate:
- Orientation matters. The mitre must angle inward so the longer face of the bead sits against the glass and the shorter face meets its partner at the corner. Cutting the angle the wrong way produces a joint that opens rather than closes.
- Secure the bead firmly. Aluminium extrusions are hollow or semi-hollow. If the profile vibrates during cutting, the blade chatters and leaves a rough finish. Clamp close to the cut line.
- Deburr immediately. A fine flat file or deburring tool removes the small burr left on the cut edge. This burr, if left in place, prevents the mitre from sitting flush and can scratch the frame channel during installation.
For aluminum window glazing work on older frames, you may encounter bead profiles that are slightly different on each side of the window — a sign that previous repairs used non-matching stock. In that case, take a cross-section sample of each existing bead to your supplier to confirm the replacement profile before cutting anything to length.
Measure twice, cut once — and test-fit each piece dry before final installation. Slide the bead into its channel without forcing the clips home. Check that both mitre ends meet their partners with an even, hairline gap. If a piece is fractionally long, trim 0.5 mm at a time rather than removing a full millimetre in one pass.
Seasonal temperature also plays a role that many people overlook. Aluminium expands at roughly 0.024 mm per metre for every degree Celsius of temperature change. On a 1200 mm bead, a 30-degree swing between a cold winter morning and a hot summer afternoon translates to nearly 0.9 mm of movement. If you are fitting beads on a scorching day in Western Australia or northern Queensland, the aluminium is already expanded — cut to your measured length and the beads may end up slightly short once temperatures drop. Conversely, fitting in cold conditions means the bead will grow as it warms, so err toward the tighter end of your clearance allowance. A 1 mm gap per end suits moderate conditions; reduce to 0.5 mm in cold weather and increase to 1.5 mm during extreme heat.
With all four beads cut, deburred, and dry-fitted to confirm their lengths, the frame itself needs attention. Old sealant residue, compressed gaskets, and misplaced setting blocks can all prevent a clean seat — and that preparation step determines whether your freshly cut beads clip in smoothly or fight you the whole way.
Step 4 Prepare the Frame and Seat the Glass Unit
A perfectly cut bead will still refuse to clip home if the channel it sits in is clogged with old sealant, or if a perished gasket has swollen into the rebate space. Frame preparation is invisible once the job is done, yet it determines whether your beading snaps in cleanly or fights you at every clip point.
Cleaning and Inspecting the Frame Rebate
The rebate is the recessed channel machined into the aluminium frame where the glass and bead meet. Over years of service, it collects dried silicone, paint overspray, oxidation residue, and fragments of old rubber. All of it needs to go before you replace glass in an aluminium window or refit beading.
- Scrape the rebate channel with a plastic or nylon putty knife. Avoid metal scrapers — they gouge the aluminium and create burrs that snag the new gasket.
- Wipe the entire channel with a lint-free cloth dampened with methylated spirits. This dissolves adhesive residue and removes fine dust that a scraper misses.
- Inspect the drainage slots at the bottom of the frame. These small rectangular openings allow any moisture that enters the rebate to weep out externally. Clear them with a thin piece of wire or a compressed air blast. Eversure’s retrofit guide notes that faulty drainage can lead to premature failure of double-glazed units and water entering the house framing — so this step is not optional.
- Examine the rubber gasket or wedge seal that sits between the glass and the frame. Press it with your thumb. A healthy gasket springs back immediately. If it stays compressed, feels sticky, or shows cracking along its length, replace it entirely. A perished gasket cannot maintain compression, and no amount of careful beading will compensate for a seal that has lost its memory.
- Fit the new gasket into the rebate channel, pressing it firmly into the groove or arrow-foot slot. Run a thin film of soapy water along the rubber to help it slide into position without bunching or twisting.
Take a moment to run your fingertip along the full perimeter of the channel. Any lump, ridge, or sticky patch you feel now will translate into a bead that sits proud or a clip that refuses to engage later.
Positioning Glass with Setting Blocks and Gaskets
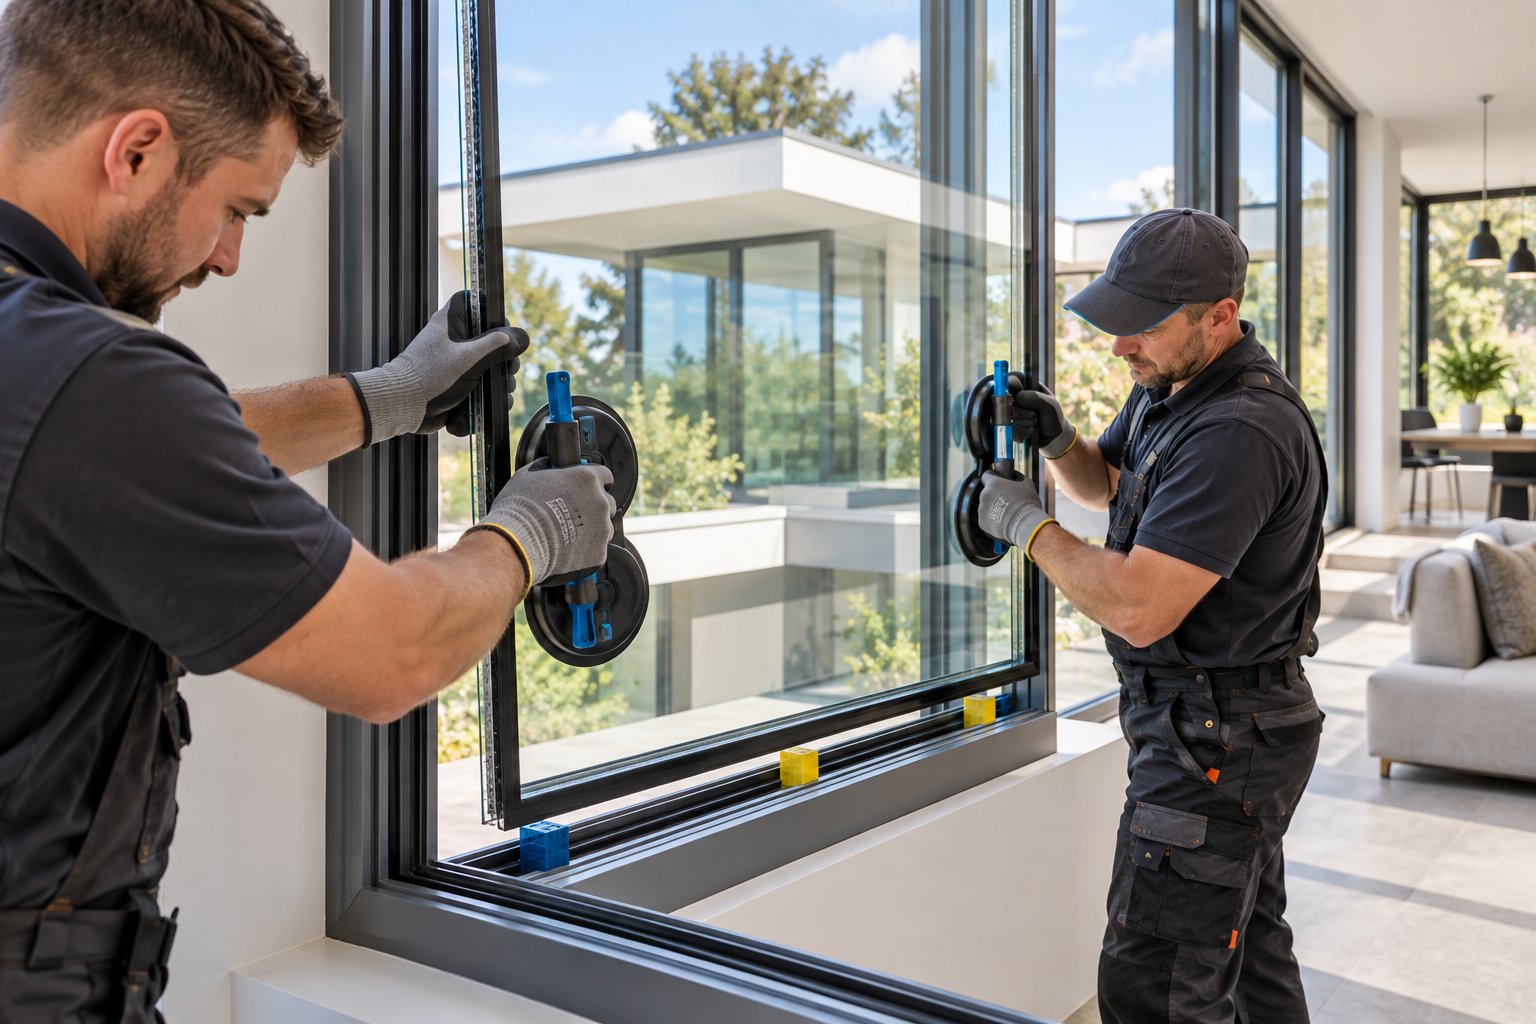
Glass should never rest directly on aluminium. Setting blocks — small pads of nylon or EPDM rubber, typically 5 mm thick and 50 mm long — carry the weight of the pane and prevent glass-to-metal contact that causes stress fractures over time. Their placement follows a specific pattern known as toe-and-heel packing, which Just Aluminium’s installation guide describes as critical for stability and proper weight distribution.
For a standard fixed window, position two setting blocks along the bottom rail at the quarter points — roughly one-quarter of the frame width in from each corner. This distributes the glass weight evenly across the sill rather than concentrating it at the centre or edges. On opening casements, the packing pattern shifts to a diagonal arrangement (bottom corner on the hinge side, top corner on the lock side) so the sash weight transfers correctly through the hinges.
When you need to replace double pane window glass in an aluminium frame, handle the sealed unit with particular care. Grip it only with rated suction cups — never by the edges — and lower it vertically into the frame rather than tilting it in at an angle. Tilting risks cracking the hermetic edge seal that keeps moisture out of the cavity between panes. Once the unit is resting on its setting blocks, check the clearance on all four sides. You want an even gap of 3 to 5 mm between the glass edge and the frame rebate, visible all the way around. Uneven gaps mean the glass is sitting off-centre, which will cause the beads to bind on one side and leave a loose fit on the other.
Confirm the unit is sitting squarely by measuring the diagonals from corner to corner of the visible glass face. If they match within 1 mm, the glass is true. Nudge the setting blocks slightly inward or outward to correct any discrepancy before moving on — once the beads are clipped in, repositioning becomes far more difficult.
With the glass seated level, centred, and resting securely on its packing blocks, the frame is ready for the step that brings everything together: snapping the new beads into place in the correct sequence.
Step 5 Snap In the New Glazing Beads
This is the step where everything comes together — and where the aluminium window bead fitting technique you use determines whether the result holds for years or pops out next storm season. The fitting sequence is the exact reverse of removal: shortest pieces go in first, longest pieces last.
The Correct Fitting Sequence for Snap-In Beads
During removal, you started with the longest bead because it flexes most easily. For installation, the logic flips. Fitting the shorter vertical beads first locks their mitre ends into position without resistance from adjacent pieces. When you then press the longer horizontal beads in last, they wedge against the already-seated verticals at each corner, creating mutual compression that holds every piece firmly in place.
Follow this order for a snap in window glazing bead installation that stays put:
- Fit the two shorter vertical beads first. Offer the bead up to the frame channel and align the clip lip into the groove at one end, seating the mitre corner precisely against its partner position.
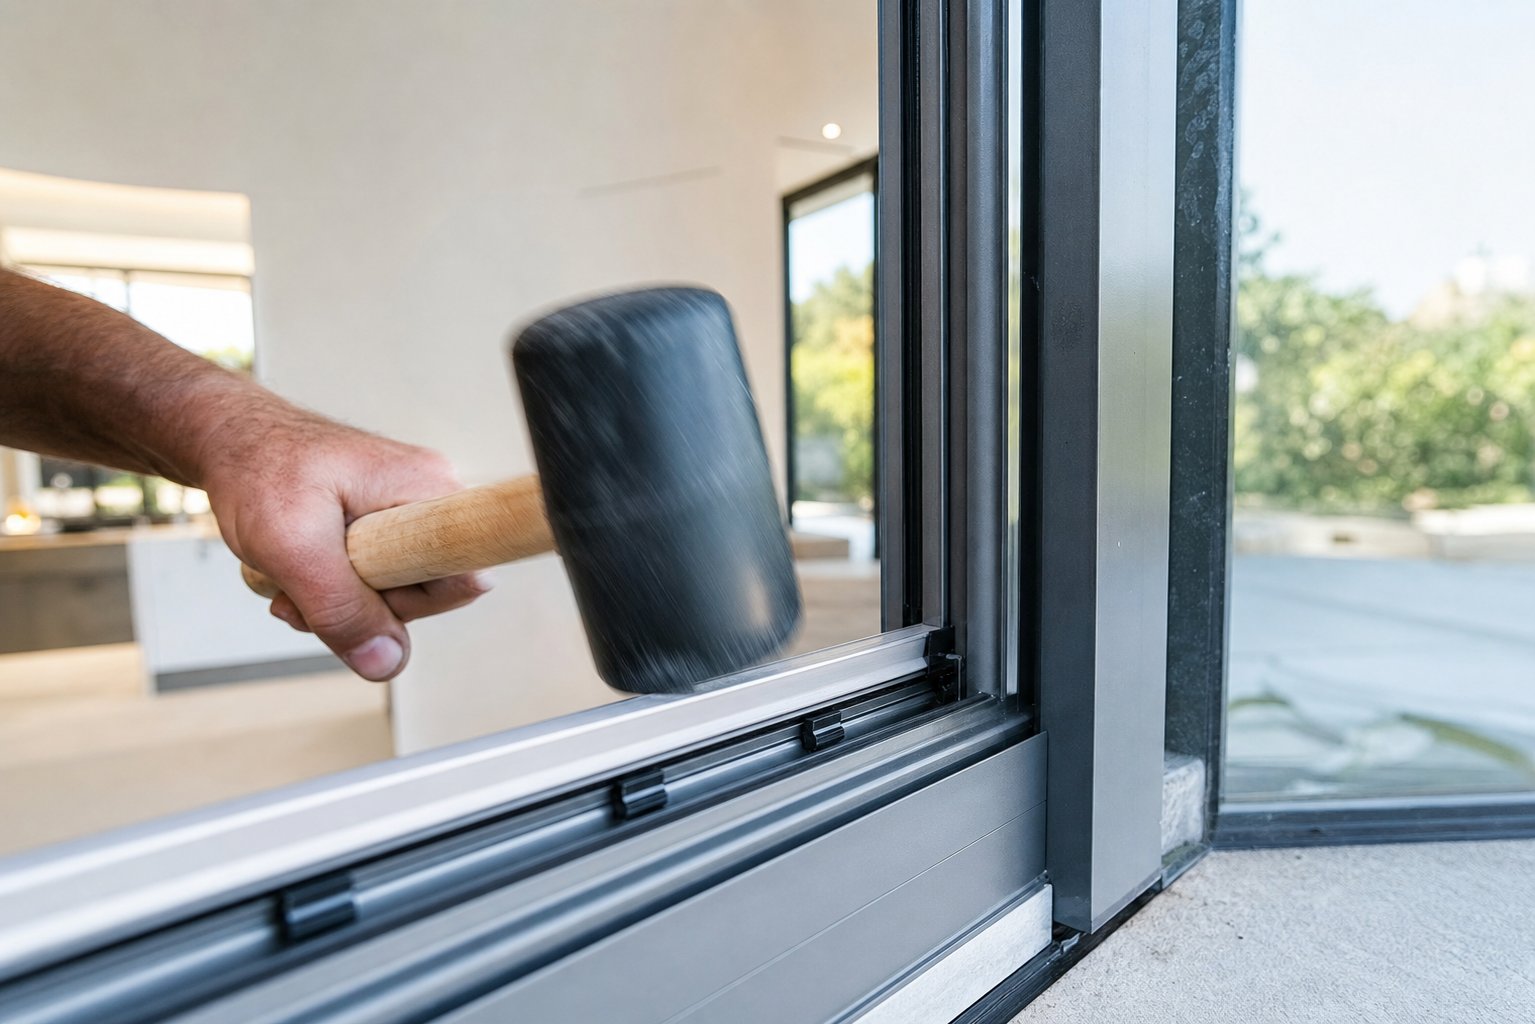
- With the lip engaged at one end, apply steady pressure along the length using the heel of your palm or a rubber mallet with light, even taps. Work progressively from the seated end toward the opposite corner.
- Listen for a consistent click at each clip point. A dull thud without a click means the clip has not fully engaged — back up slightly and re-angle your pressure.
- Fit the longer horizontal beads last, starting with the bottom piece and finishing with the top. The final bead should require slightly more force because it is compressing against all three already-fitted pieces at the corners.
Pro tip: before fitting each bead, apply a thin film of soapy water or silicone spray along the rubber gasket where it contacts the bead lip. This reduces friction dramatically, prevents the gasket from bunching or rolling out of its channel during installation, and lets the bead slide into its full seated position without excessive force.
If you need to know how to fit glazing bead in aluminium window frames with particularly tight tolerances, the lubrication step is not optional — it is the difference between a smooth seat and a gasket that bunches into a lump halfway along the bead, preventing the clips from reaching their channel.
Avoid hammering directly on the visible face of the bead. If you are using a rubber mallet, strike along the clip edge where the bead meets the frame, not on the decorative face. A block of softwood held against the bead distributes mallet force evenly and prevents localised denting.
Fixed Windows Versus Opening Casements
The fitting principle stays the same, but the beading location differs depending on window type. Fixed windows — panes that do not open — typically use internal beading only. The beads clip in from the room side, meaning the glass cannot be pushed out from the exterior. This arrangement suits ground-floor and accessible windows where security matters.
Opening casements introduce a different consideration. Because the sash swings outward (awning style) or to the side, the beading often sits on the external face of the sash frame. External beading on a casement is acceptable at upper storeys where access from outside is impractical, but at ground level, many Australian window systems use internally beaded casements with a reverse-rebate design to maintain both operability and security.
If you are working on a casement, confirm which side the beading sits on before you start. Fitting beads on the wrong face leaves the glass vulnerable to removal from outside — a security oversight that is easy to make and awkward to correct once the sealant has cured around the gaskets.
With all four beads clicked home and the gaskets seated cleanly, the installation looks complete. But looks can deceive — a bead that appears flush might still have one or two clips that have not fully engaged, and a mitre joint that seems tight from a distance might reveal a gap under closer inspection. Verification catches these issues before they become leaks.
Step 6 Verify the Installation and Troubleshoot Issues
A bead that looks seated is not necessarily a bead that is sealed. Partial clip engagement, hairline mitre gaps, and gaskets that have rolled out of position can all hide behind an apparently tidy finish. A two-minute verification routine catches these problems while they are still easy to fix — far better than discovering a leak during the next heavy downpour.
How to Verify a Secure and Weathertight Fit
Work your way around the full perimeter of the window using this sequence:
- Run a fingertip along each bead face. You are feeling for any section that sits proud of the frame surface. Even 0.5 mm of lift indicates a clip that has not fully engaged beneath.
- Press gently inward at 100 mm intervals along the bead length. A properly seated bead feels solid with no inward give. If a section springs in and clicks, that clip was not home — press until it locks, then recheck the adjacent clips either side.
- Inspect every mitre joint at close range. Crouch down so your eye is level with the corner. A well-cut joint shows a consistent hairline gap of no more than 0.5 mm. Anything wider, or a joint where one bead overhangs the other, needs attention.
- Move outside and check the glass-to-frame margins. The visible gap between the glass edge and the aluminium frame should be even on all four sides. Uneven margins suggest the glass has shifted on its setting blocks, which puts unequal pressure on the beads and gaskets.
- Spray the outside of the window lightly with a garden hose (low pressure, not a jet). Watch the internal rebate for any water tracking past the gasket. Pay particular attention to the bottom corners where drainage slots sit.
If you have completed an aluminium window glass replacement or needed to replace glass in an aluminium window frame, this verification step is especially important. New sealed units may differ in thickness by a fraction of a millimetre from the original pane, and that difference can affect how tightly the gasket compresses under the bead.
Fixing Common Beading Problems
Not every issue requires starting over. Most problems that surface during verification have a straightforward cause and a targeted fix. The table below covers the situations you are most likely to encounter when learning how to replace window glass in an aluminium frame or refitting existing beads.
| Problem | Likely Cause | Solution |
|---|---|---|
| Bead will not clip in fully along its length | Debris or old sealant residue in the frame channel; gasket too thick for the rebate depth | Remove the bead, clean the channel again with methylated spirits, and confirm the gasket profile matches the original. A gasket even 1 mm oversize prevents full clip engagement. |
| Bead cracks or splits during installation | Excessive force applied at a single point; cold temperatures making powder-coated aluminium more brittle at stress points | Replace the damaged bead. In cold weather (below 10°C), warm the bead gently indoors before fitting. Use a rubber mallet with distributed taps rather than concentrated strikes. |
| Visible gap at one or both mitre corners | Inaccurate measurement; frame slightly out of square; bead cut fractionally short | If the gap is under 1 mm, a colour-matched exterior-grade silicone can seal it cosmetically. Gaps over 1 mm require re-cutting the bead — trim a fresh piece 0.5 mm longer and test-fit before committing. |
| Water ingress after fitting (drips inside during rain) | Gasket not fully seated in its channel; drainage slots blocked by sealant or debris; gasket bunched during bead installation | Remove the bead on the affected side, inspect the gasket for bunching or displacement, reseat it with soapy water as lubricant, and confirm drainage slots at the sill are clear. Refit the bead and hose-test again. |
| Bead pops out after a few weeks | Clip tabs have lost spring tension from previous removal cycles; bead profile does not match the frame channel | Clips that have been bent open too many times will not grip. Replace the bead with new stock of the correct profile — profile matching guides stress that even slightly undersized beads will not seal properly. |
| Rattling or vibration noise in wind | Glass not centred on setting blocks; gasket compression uneven around the perimeter | Remove beads, reposition setting blocks to achieve even clearance on all sides, and refit. Ensure the gasket sits uniformly without flat spots or twists. |
A pattern worth noting: most failures trace back to preparation rather than the fitting step itself. Debris left in the channel, a gasket that was not replaced when it should have been, or a measurement taken carelessly — these upstream shortcuts surface as downstream problems every time.
If your verification passes cleanly and the hose test shows no water tracking, the beading is secure and weathertight. The remaining risk is not in the installation technique but in the habits and assumptions that lead people to repeat the same errors on future projects.
Step 7 Avoid These Common Beading Mistakes
Knowing the correct technique is half the battle. The other half is recognising the glazing bead installation mistakes that trip people up repeatedly — often without them realising until water starts tracking in or a bead pops loose months later. Many aluminium window beading problems stem not from a lack of skill but from assumptions that seem reasonable yet produce poor results.
Mistakes That Ruin Your Beading Installation
These errors span every skill level, from first-time DIYers to experienced tradespeople working quickly on a multi-window project. Some are obvious in hindsight; others only reveal themselves once the weather turns.
- Forcing beads in the wrong sequence. Fitting the longest horizontal bead first — before the shorter verticals are seated — leaves no room for the corner mitres to compress. The result is a bowed bead that sits proud of the frame and eventually pops free under thermal movement.
- Neglecting to replace perished gaskets. Old rubber that has lost its elasticity cannot maintain compression against the glass. Even perfectly fitted beads will allow draughts and water past a gasket that no longer springs back. This is the single most common reason people end up searching how to replace glass in aluminium window frame guides a second time.
- Cutting all beads to the same length. Assuming the frame is perfectly square is a gamble that rarely pays off. Opposing sides can differ by 2 to 3 mm — enough to leave visible gaps at one corner and binding at the other.
- Installing in very cold weather without preparation. Below roughly 10°C, powder-coated aluminium and glass clips become noticeably more rigid. Forcing a bead home in these conditions risks cracking the clip tabs or splitting the bead at stress points. Warming the beads indoors for 20 minutes before fitting makes a measurable difference.
- Reusing beads that have lost clip tension. Every removal cycle fatigues the snap-in tabs slightly. After two or three removals, the clips may no longer grip with enough force to resist wind pressure or thermal expansion. If a bead feels loose during dry-fitting, replace it.
- Forgetting to clear drainage channels after fitting. Sealant squeeze-out, gasket offcuts, and aluminium swarf from cutting can block the weep slots at the frame sill. Lumani Systems notes that blocked drainage paths are among the most common installation failures — water pools inside the rebate, degrades the sealed unit edge, and eventually enters the wall cavity.
Which Errors Are Recoverable
Not every mistake means starting from scratch. Understanding which problems you can fix in place — and which demand a do-over — saves time and materials.
- Recoverable: A single bead fitted slightly out of sequence can usually be levered off and refitted correctly without damage, provided you catch it before forcing the remaining pieces in. Blocked drainage slots are a five-minute fix with a piece of wire. A gasket that has bunched during installation can be reseated once the bead is removed from that side.
- Requires starting over: A cracked or split bead cannot be repaired — it must be replaced with new stock cut to the same length. Beads with fatigued clips that no longer hold tension are equally beyond saving. And if you have cut all four pieces to a single measurement on a frame that is out of square, you will likely need to re-measure and re-cut at least two of them.
For confident DIYers comfortable with precise measuring and light hand-tool work, every step in this guide is achievable on a standard residential window. Where things get trickier — large-format glass panels, upper-storey external beading requiring scaffold access, or older commercial systems with non-standard profiles — calling a trade installer is the pragmatic choice. The cost of a professional fitting is modest compared to replacing a cracked sealed unit or repairing water damage inside a wall cavity.
Mistakes aside, there is a broader question worth considering: if your aluminium frames are old enough that beading problems keep recurring, is repeated repair still the most sensible investment — or has the window reached the point where a full system replacement delivers better long-term value?

Step 8 Decide Whether to Re-Bead or Replace the Whole Window
Recurring beading failures are a symptom, not always the disease. A frame that keeps losing its beads, leaking at the gaskets, or refusing to hold new clips may be telling you something the repair approach cannot fix. At some point, the honest calculation shifts from “how do I fit this bead properly” to “is this frame still worth fitting beads into?”
When Re-Beading Is the Right Choice
Plenty of aluminium windows have decades of life left in them. Re-beading makes clear financial sense when the frame itself remains structurally sound and the issue is limited to worn gaskets, damaged bead clips, or a one-off glass replacement. Specifically, re-beading is the right path if:
- The frame shows no visible corrosion, pitting, or white oxidation powder beyond surface level
- Matching bead profiles are still available from suppliers — you can source exact replacements without resorting to generic or ill-fitting alternatives
- The sealed unit has failed (fogged between panes) but the frame and hardware operate correctly
- You are upgrading from single glazing to a double-glazed unit and the existing rebate depth accommodates the thicker glass build-up
- The window is less than 20 years old and was manufactured to a recognised system (most Australian aluminium window systems from the early 2000s onward still have parts availability)
In these situations, the aluminium window replacement vs repair equation tips firmly toward repair. Window Doctorz estimates that restoration and re-beading typically costs 30 to 50 percent of full replacement — a significant saving when the underlying frame is in good condition and the problem is genuinely limited to the glazing interface.
When a Full Window System Upgrade Makes More Sense
The economics reverse once you factor in repeated call-outs, sourcing obsolete profiles, and the thermal performance gap between older frames and current designs. If you find yourself searching how to replace window glass in an aluminium frame for the third time on the same window, the frame is likely the weak link rather than your technique.
Consider replacement when you notice several of these signs converging:
- Widespread corrosion or pitting — particularly in coastal areas of Queensland, NSW, or Western Australia where salt-air exposure accelerates aluminium degradation. Surface oxidation is cosmetic, but deep pitting weakens the rebate channel and prevents beads from gripping.
- Bead profiles no longer available — older systems from the 1980s and early 1990s used proprietary extrusions that manufacturers have since discontinued. Fitting a generic bead into a system-specific channel rarely seals properly.
- Seal failure across multiple windows — if several windows in the same home show fogged units, draughts, or water ingress simultaneously, the frames have likely reached end-of-life as a system rather than suffering isolated component failures.
- Poor thermal performance — older aluminium frames without thermal breaks conduct heat rapidly. In climate zones where NatHERS ratings matter for compliance or comfort, no amount of fresh beading compensates for a frame that acts as a thermal bridge between inside and outside air.
- Difficulty opening, closing, or locking — warped frames and worn hardware indicate structural fatigue beyond what re-beading addresses. If the sash no longer sits square in the frame, beads will never seat evenly.
- Visible condensation between panes on multiple units — a sign that edge seals have failed system-wide, often due to inadequate drainage or gasket deterioration that has allowed moisture to pool repeatedly over years.
The cost comparison is worth running honestly. A single re-bead job on one window might cost a few hundred dollars in materials and a tradesperson’s time. But if you are facing the same work across six or eight windows, plus new gaskets, plus sourcing hard-to-find profiles, the cumulative spend approaches — or exceeds — the cost of modern replacements that will not need the same attention for another 30 years.
Modern aluminium window systems eliminate most of the variables that cause beading failures in the first place. Precision-engineered frames arrive with factory-fitted gaskets, thermally broken profiles, and bead channels machined to exact tolerances — meaning the beading, hardware, glass build-ups, and frame finishes all function as a unified system rather than a collection of aftermarket parts assembled on site. The MEICHEN MC100 Awning Window (Fixed Window) is one example of this integrated approach: its beading and sealing components are matched to the frame at the manufacturing stage, with project customisation support for glass specifications, frame finishes, and opening configurations. For homeowners whose existing frames are beyond economical repair, a system like this represents a one-time investment that removes the cycle of re-beading, re-sealing, and re-sourcing obsolete parts entirely.
Whichever direction you choose, the decision rests on a clear-eyed assessment of the frame’s condition rather than sentiment or habit. A sound frame deserves fresh beads and gaskets. A frame that has served its time deserves retirement — and a replacement engineered to perform without the maintenance burden that brought you to this guide in the first place.
Frequently Asked Questions About Fitting Aluminium Window Beading
1. What order do you fit aluminium window beading?
Fit the two shorter vertical beads first, then the longer horizontal pieces last. This sequence is the reverse of removal. Seating the shorter pieces first allows their mitre ends to lock into position without resistance, and the final longer bead compresses against all three already-fitted pieces at the corners, creating mutual tension that holds everything secure against wind load and thermal movement.
2. Why does my aluminium window beading keep popping out?
Beading that repeatedly pops out usually indicates one of three issues: the snap-in clip tabs have lost their spring tension after multiple removal cycles, the bead profile does not correctly match the frame channel, or debris in the rebate is preventing full clip engagement. Perished gaskets that have swollen can also push beads outward over time. If clips are fatigued beyond recovery, the bead must be replaced with new stock of the correct profile rather than refitted.
3. Can I reuse old aluminium glazing beads?
You can reuse aluminium glazing beads provided the clip tabs still grip firmly during a dry-fit test and the bead has not been bent beyond its original profile. After two or three removal cycles, the clips fatigue and lose holding tension. Press the bead into the channel without forcing it home — if it feels loose or does not click positively at each clip point, replace it with new stock. Reusing a bead with weakened clips risks failure during high winds or temperature swings.
4. How do I know if my aluminium window needs new beading or a full replacement?
Re-beading suits windows where the frame is structurally sound, free of deep corrosion, and matching bead profiles remain available from suppliers. A full window system replacement becomes the better investment when you see widespread pitting or corrosion, bead profiles are discontinued, multiple sealed units have failed simultaneously, or the frame lacks a thermal break and no longer meets energy performance expectations. Repeated repairs across several windows can approach the cost of modern integrated systems that eliminate ongoing beading maintenance entirely.
5. Do I need to replace the rubber gasket when refitting aluminium window beading?
Not always, but you should inspect it every time. Press the gasket with your thumb — a healthy seal springs back immediately. If it stays compressed, feels sticky, or shows surface cracking, it has lost its elastic memory and must be replaced. A perished gasket cannot maintain weathertight compression regardless of how well the bead is fitted. Always match the replacement to the original profile type, as wedge gaskets and E-gaskets with arrow-foot channels are not interchangeable.
More Window & Door Guides