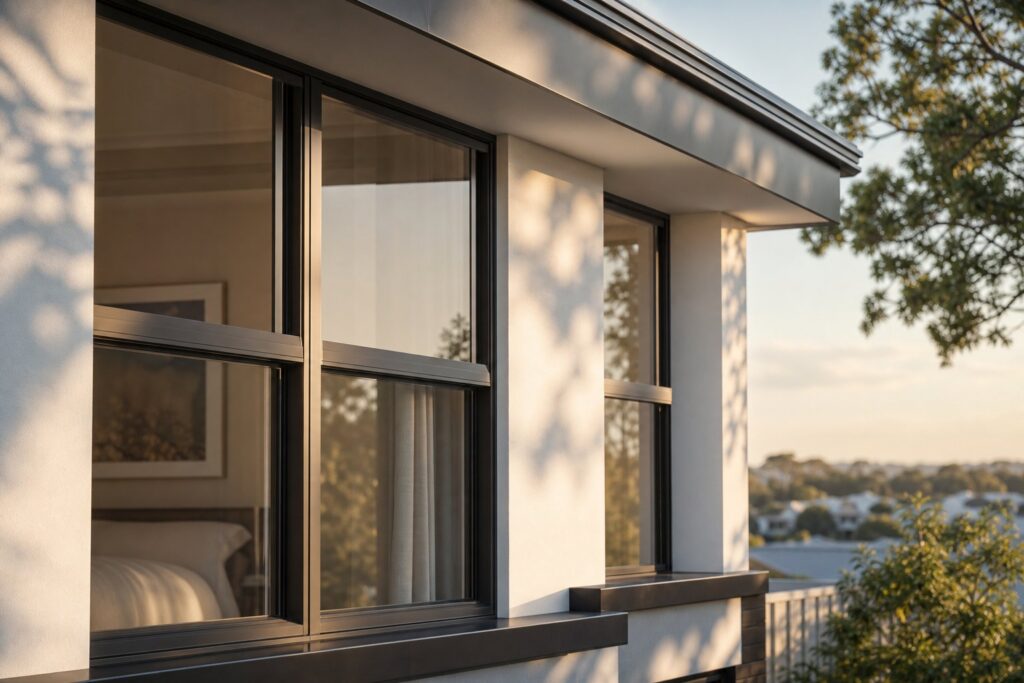
What a Glazing Gasket Does in Aluminium Window Systems
A glazing gasket for aluminium windows is a flexible elastomeric strip that sits between the glass pane and the metal frame, forming a continuous compression seal on both surfaces. It sounds simple. In practice, this unassuming rubber profile is the only thing standing between your interior and the weather outside.
A glazing gasket is the flexible interface between rigid glass and a rigid aluminium frame. It creates a weathertight seal while absorbing movement caused by thermal expansion, vibration, and wind load — protecting both the glass and the frame from damage.
So what does a glazing gasket do, exactly? Three things, simultaneously. It seals against water and air infiltration, preventing drafts and moisture from reaching your interior. It cushions the glass within the frame channel, distributing pressure evenly so the pane isn’t sitting metal-on-glass. And it compensates for the different rates at which aluminium and glass expand and contract as temperatures shift throughout the day.
Why Aluminium Windows Specifically Need Gaskets
Every window frame material moves with temperature changes. The difference with aluminium is how much it moves. Aluminium has a thermal expansion coefficient of 24 x 10⁻⁶/K — roughly double that of glass and significantly higher than timber or PVC. On a 40°C temperature swing (common across Australian summers and winters), a one-metre aluminium frame section can shift noticeably more than the glass it holds.
This mismatch creates real stress at the junction between pane and frame. Without a gasket that absorbs this differential movement, you get seal failure, rattling glass, or worse — cracked panes. The gasket’s elastic memory allows it to compress and recover thousands of times without losing its sealing ability.
Aluminium’s high thermal conductivity adds another layer of complexity. The frame transfers heat rapidly, meaning the gasket also functions as a micro thermal break at the glass-to-frame interface, reducing condensation risk along the glazing rebate. For these reasons, how glazing gaskets seal aluminium windows is more performance-critical than in timber or PVC systems, where lower expansion rates and natural insulation properties are more forgiving of imperfect seals.
The material, profile shape, and dimensions of the gasket you choose all influence how well it handles these demands — and getting any one of those variables wrong means paying for the job twice.
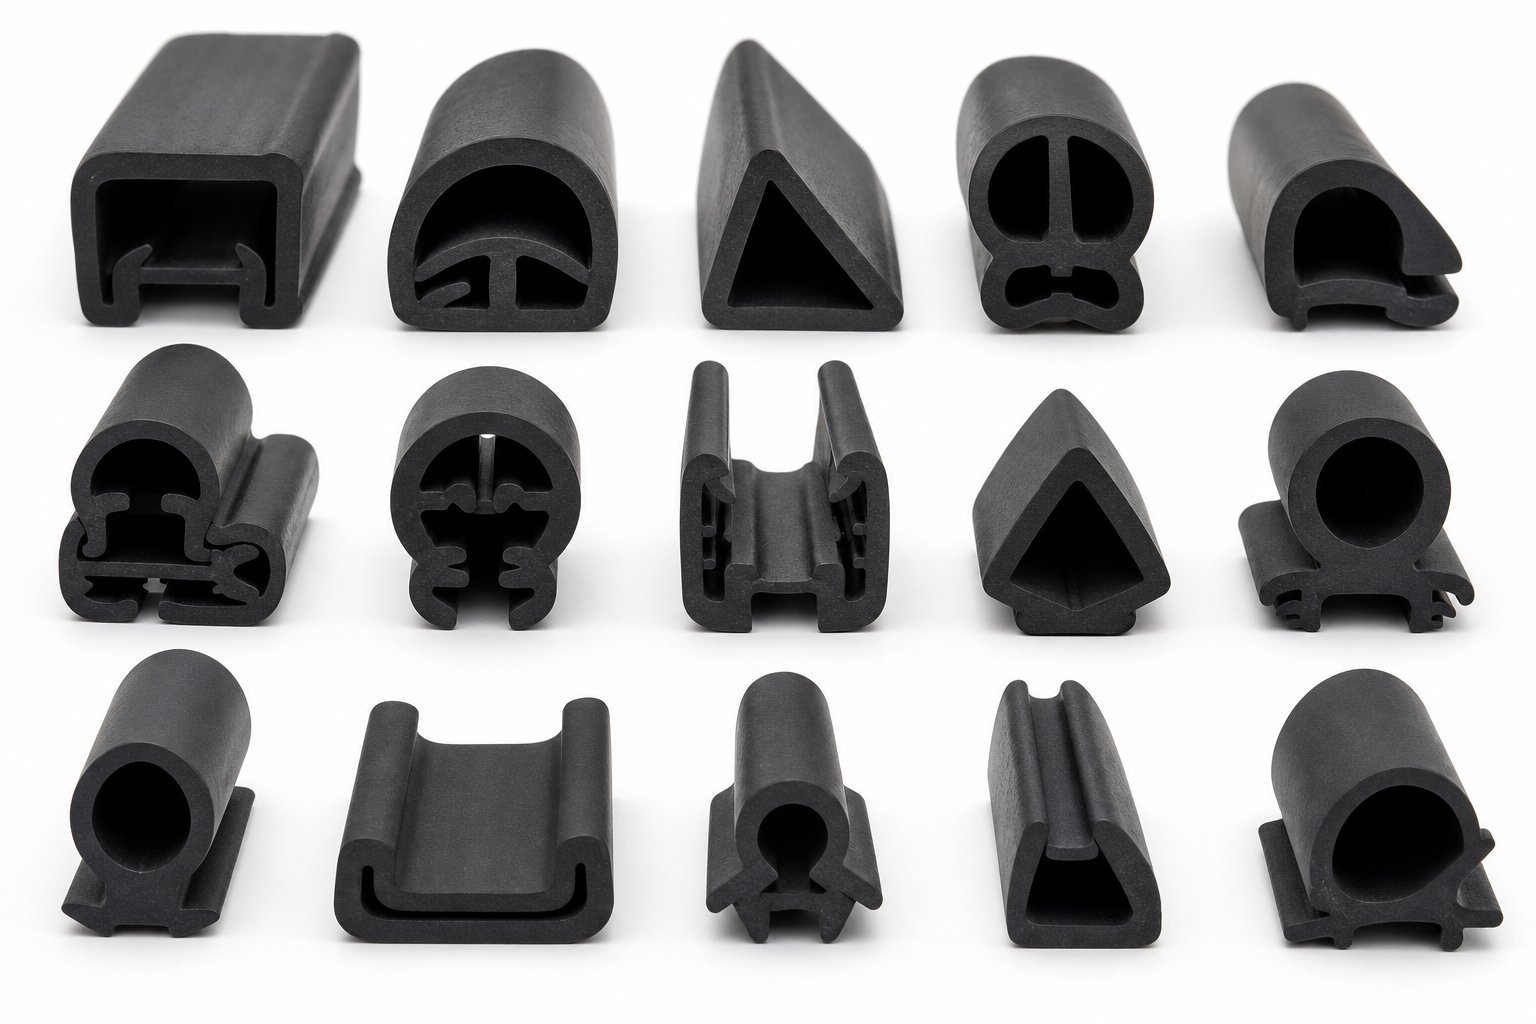
Glazing Gasket Profiles and When to Use Each Type
Profile shape determines how a gasket grips the glass, locks into the frame, and responds to pressure over time. Choosing the best gasket profile for an aluminium window depends on the application — residential casement, commercial storefront, curtain wall — and the installation method the frame system was designed around. Here’s how the main types of glazing gasket profiles for windows break down.
U-Channel and H-Channel Profiles
A U-channel gasket is exactly what the name suggests: a rubber strip with a U-shaped cross-section that wraps around the edge of the glass pane. The two legs of the U grip either side of the glass, holding it centrally within the frame rebate. These are the most common profiles in residential aluminium windows because they’re straightforward to fit — slide the gasket onto the glass edge before placing it in the frame, and you’re done.
H-channel profiles take this a step further. The cross-section resembles a letter H rotated 90 degrees, with one channel gripping the glass edge and the other engaging the frame channel itself. This dual-grip design creates a seal on both surfaces simultaneously, which improves weather resistance and reduces the chance of the gasket working loose under thermal cycling. H-channels suit applications where frame movement is more pronounced or where higher performance is specified.
Wedge and Push-In Gaskets
Wedge gaskets take a fundamentally different approach. Rather than wrapping the glass before it enters the frame, the glass is set into the channel first, and the wedge gasket is then pressed into a groove alongside it. The tapered profile locks tight under compression, securing the pane firmly in position.
This is the dominant method for commercial storefront glazing and shopfront systems. A push-in glazing gasket for storefront windows allows glaziers to install or replace individual panes without disassembling the frame — a practical advantage when dealing with large panels or high-traffic commercial buildings. The trade-off is that wedge gaskets require a purpose-designed groove in the aluminium extrusion, so they’re not interchangeable with U-channel systems.
Bulb Seal Profiles
A bulb seal gasket for aluminium frames features a rounded, bulbous head attached to a narrower stem or foot. The bulb compresses when the glass is set, filling irregular gaps between pane and frame. This makes bulb seals particularly useful where manufacturing tolerances are wider — think older frames, custom fabrications, or situations where slight dimensional inconsistencies exist between the glass unit and the channel.
The compression of the rounded head provides consistent contact pressure even when the gap width varies along the perimeter. Bulb seals often appear in combination with other profile types, acting as a secondary weather seal behind a primary wedge or U-channel gasket.
| Profile Type | Best Application | Installation Method | Typical Use Case |
|---|---|---|---|
| U-Channel | Standard residential windows | Slide onto glass edge before fitting into frame | Casement, awning, and fixed-lite aluminium windows |
| H-Channel | Higher-performance residential and light commercial | Glass and frame engage simultaneously during assembly | Thermally broken frames needing dual-surface sealing |
| Wedge (Push-In) | Commercial storefront and curtain wall | Pressed into frame groove after glass is set | Shopfronts, office glazing, large panel installations |
| Bulb Seal | Variable-tolerance applications | Compressed into gap by glass or beading pressure | Older frames, custom sizes, secondary weather seals |
When weighing u-channel vs wedge gasket options for aluminium frames, the deciding factor is usually the frame’s extrusion design. You can’t retrofit a wedge gasket into a system built for U-channel sealing, and vice versa. Matching the profile to the frame architecture — not just the glass — is what keeps the seal performing year after year. That said, profile shape alone only tells half the story. The material the gasket is made from determines how long that seal actually lasts under Australian sun, salt air, and temperature extremes.
EPDM, Silicone, and Rubber Material Options Compared
Material choice dictates how a glazing gasket handles UV bombardment, temperature cycling, and long-term compression — the three forces that ultimately kill seals in aluminium window systems. Picking the best material for window glazing gaskets means matching the rubber’s chemistry to your specific climate, building location, and performance expectations.
EPDM Rubber as the Industry Standard
EPDM (ethylene propylene diene monomer) dominates the aluminium window gasket market for good reason. This synthetic rubber delivers a combination of UV stability, ozone resistance, and wide temperature tolerance that other materials struggle to match at the same price point. An EPDM rubber gasket for aluminium windows handles service temperatures from approximately -40°C to 120°C without hardening or cracking — a range that comfortably covers every Australian climate zone, from frosty Tasmanian winters to North Queensland summers.
The Southern California Glass Management Association (SCGMA) notes that EPDM offers higher tensile strength and abrasion resistance than silicone at a lower cost, making it the default specification for both residential and commercial aluminium glazing systems. Its compression set resistance — the ability to spring back after being squeezed for years — keeps seals tight across decades of thermal cycling.
One consideration: EPDM gaskets cured with sulphur can discolour silicone sealants used elsewhere in the glazing system. For projects where structural silicone or wet-seal details sit adjacent to the gasket, peroxide-cured EPDM avoids this compatibility issue.
- UV and ozone resistance: Excellent — no degradation under prolonged direct sun exposure
- Temperature range: -40°C to 120°C continuous service
- Compression set resistance: High — maintains seal pressure over 20+ years
- Expected lifespan: 20 to 30 years in typical conditions
- Colour availability: Black (standard), white, grey, and almond/tan
- Cost: Low to moderate — the most economical high-performance option
Silicone, Neoprene, and TPE Alternatives
A silicone vs EPDM glazing gasket comparison reveals clear trade-offs rather than a simple winner. Silicone rubber is chemically inert and handles temperatures exceeding 200°C, making it the pick for extreme thermal environments — think aluminium curtain walls on north-facing commercial facades with intense radiant heat gain, or frames adjacent to cooking exhaust outlets. Silicone also bonds well with silicone sealants, creating chemical compatibility across the entire glazing pocket. The downside is lower tear strength and higher cost.
- UV and ozone resistance: Excellent — mineral-based chemistry resists all weathering
- Temperature range: -60°C to 230°C (some formulations beyond 300°C)
- Compression set resistance: Moderate — softer formulations may flatten over time
- Expected lifespan: 20 to 40 years depending on hardness and load
- Colour availability: Wide range including custom colour matching
- Cost: High — typically two to three times the price of EPDM
A neoprene gasket for aluminium window frames suits specific industrial scenarios. Neoprene resists oils, petroleum-based chemicals, and solvents that would degrade EPDM — relevant for windows in workshops, commercial kitchens near exhaust systems, or buildings adjacent to fuel storage. However, neoprene is considered older technology in glazing applications and requires additional enhancement for adequate UV and ozone stability. It’s no longer a first-choice material for standard residential or commercial projects.
- UV and ozone resistance: Moderate — requires additives for outdoor longevity
- Temperature range: -30°C to 100°C continuous service
- Compression set resistance: Moderate to good
- Expected lifespan: 10 to 20 years in protected applications
- Colour availability: Primarily black
- Cost: Moderate — between EPDM and silicone
Thermoplastic elastomers (TPE) represent the newer generation. Unlike EPDM, silicone, and neoprene — which are thermoset polymers that cannot be remelted once cured — TPE can be recycled and reprocessed. This matters increasingly on projects pursuing sustainability certifications or reduced embodied carbon targets. TPE gaskets perform adequately in moderate climates but generally offer shorter lifespans and less resistance to compression set than EPDM.
- UV and ozone resistance: Good but varies by formulation
- Temperature range: -30°C to 80°C (narrower than EPDM or silicone)
- Compression set resistance: Lower — may require earlier replacement
- Expected lifespan: 10 to 15 years
- Colour availability: Wide range — easily pigmented during manufacturing
- Cost: Low to moderate — comparable to EPDM
Colour selection is worth a brief mention. EPDM’s limited palette — black, white, grey, and almond — covers most residential aluminium frame finishes. Silicone and TPE offer broader colour matching for architectural projects where the gasket is visible. Functionally, colour doesn’t affect performance, but aesthetics matter when gasket edges are exposed on interior sight lines.
Material sets the performance ceiling. But even the right rubber compound fails if the gasket dimensions don’t match your glass thickness and frame channel — a sizing puzzle that trips up more installers than you’d expect.
Matching Gasket Dimensions to Glass Thickness and Frame Channels
Getting the material right and the profile shape right still leaves one critical variable: size. A gasket that’s 1 mm too narrow won’t seal. One that’s 1 mm too wide won’t let the bead snap shut. And yet, how to measure glazing gasket size is the question most often answered with vague advice like “bring a sample to the hardware store.” That’s not good enough when you’re dealing with a full house of aluminium windows or a commercial reglaze.
Three cross-sectional measurements define whether a gasket fits its intended channel. Understanding all three — and how they relate to your glass — is the difference between a seal that lasts decades and one that fails within a year.
Understanding Gasket Width, Height, and Bite Depth
Think of a gasket’s cross-section as a small rectangle (or shaped profile) that must slot into the space between glass and frame. Three dimensions govern the fit:
- Width — the gasket’s cross-sectional thickness measured perpendicular to the glass face. This determines how tightly the gasket compresses between the glass surface and the frame rebate wall. Too thin, and you get air gaps. Too thick, and the glazing bead won’t close or the frame puts excessive stress on the glass.
- Height — how far the gasket extends into the frame channel, measured parallel to the glass face. Height controls how deeply the gasket sits within the rebate and how much lateral support it provides against wind load.
- Bite depth — the amount of glass edge that the gasket covers, measured from the edge of the pane inward. Bite depth determines how securely the glass is held and how much of the pane perimeter is protected from direct contact with the aluminium frame.
The glazing gasket bite depth is often overlooked, but it’s functionally critical. Too little bite and the glass can shift under wind pressure or thermal movement. Too much bite and you reduce the visible glass area while potentially interfering with the sealed unit’s edge seal on double-glazed panels. For most residential aluminium frames, a bite depth between 10 mm and 15 mm is typical, while commercial systems often spec 15 mm to 20 mm to handle larger pane sizes and higher wind loads.
Incorrect sizing creates a cascade of problems. An undersized gasket leaves voids that admit water and air — you’ll notice this as drafts, condensation on the frame, or water stains on the sill after rain. An oversized gasket prevents the glazing bead from seating properly, which either leaves the bead proud of the frame (ugly and vulnerable) or forces installers to push harder than they should, risking glass breakage.
How Glass Thickness Determines Gasket Selection
The glass panel’s thickness is your starting point for matching gasket width to glass thickness. The logic is straightforward: the frame channel has a fixed width (set during extrusion), and the gasket must fill the remaining space between the glass surface and the channel wall on each side. Thicker glass leaves less room for the gasket; thinner glass leaves more.
A gasket needs to compress enough to form a continuous seal — typically in the 25% to 50% range of its original thickness — but not so much that it permanently deforms. Over-compressed gaskets lose their elastic memory faster, meaning they won’t spring back after thermal cycling and will eventually fail to maintain contact pressure against the glass.
For single-pane glass (common in older homes, louvres, and some internal applications), standard thicknesses of 4 mm, 5 mm, and 6 mm pair with relatively narrow channel widths. Double-glazed units (IGUs) are substantially thicker — anywhere from 16 mm for a basic unit up to 24 mm or more for high-performance configurations with wider air gaps or argon-filled cavities. These thicker units demand wider frame channels and correspondingly different gasket dimensions to achieve proper compression.
The table below maps common glass types to their gasket dimensions for double glazed units and single-pane applications in typical Australian aluminium window systems:
| Glass Type | Typical Thickness | Recommended Channel Width | Gasket Compression Range |
|---|---|---|---|
| Single pane (standard) | 4 mm | 6 mm – 8 mm | Gasket compresses 25% – 40% to fill gap each side |
| Single pane (heavy duty) | 5 mm – 6 mm | 8 mm – 10 mm | Gasket compresses 25% – 40% to fill gap each side |
| Double glazed unit (standard) | 16 mm – 20 mm | 22 mm – 26 mm | Gasket compresses 30% – 45% each side |
| Double glazed unit (high performance) | 20 mm – 24 mm | 26 mm – 30 mm | Gasket compresses 30% – 45% each side |
| Laminated safety glass | 6.38 mm – 10.38 mm | 10 mm – 14 mm | Gasket compresses 25% – 40% each side |
A few practical notes on reading this table. The “recommended channel width” refers to the total internal width of the frame rebate — the space that holds the glass plus both gaskets. Subtract your glass thickness from the channel width, divide by two, and you have the uncompressed gasket width needed for each side. If your frame has a 24 mm channel and your IGU is 20 mm thick, each gasket needs roughly 2 mm of uncompressed width — which, at 30% to 45% compression, means selecting a gasket with a free (uncompressed) cross-section of approximately 2.8 mm to 3.6 mm.
Always measure at multiple points along the frame. As industry guidelines note, aluminium extrusions can have slight manufacturing variations, and rubber tolerances differ from metal tolerances. A gasket that fits perfectly at the head of the frame may be fractionally too tight or loose at the sill. Measuring at the head, sill, and both jambs gives you a realistic picture of the channel dimensions you’re working with.
The numbers above cover standard residential and light commercial systems. But residential windows and commercial storefront glazing don’t just differ in gasket size — they differ in performance demands, installation complexity, and the standards they’re built to meet.
Residential vs Commercial Aluminium Window Gaskets
A casement window in a suburban brick veneer home and a floor-to-ceiling curtain wall panel on a Brisbane office tower both rely on gaskets to seal glass against aluminium. But the similarities end there. The gasket that quietly does its job in a bedroom window would fail within months in a commercial storefront — different loads, different glass sizes, different accountability. Understanding these residential vs commercial glazing gasket differences helps you specify correctly the first time, whether you’re a homeowner replacing weathered seals or a specifier writing a facade package.
Residential Aluminium Window Gaskets
Most Australian homes use aluminium windows in one of four configurations: awning, casement, sliding, or double-hung. Each style moves differently — hinged at the top, hinged at the side, sliding horizontally, or sliding vertically — but the gasket requirements share common ground. Residential panes are relatively small (typically under 1.5 m² per lite), wind loads are moderate compared to high-rise exposure, and the frame profiles are compact.
For an aluminium casement window gasket replacement, you’re almost always dealing with a U-channel or push-in profile in EPDM rubber. The gasket wraps the glass edge or presses into a simple groove, and installation rarely requires more than steady hands and a utility knife. These smaller profiles — often 3 mm to 5 mm in cross-sectional width — compress easily against single-pane or standard double-glazed units without requiring specialist tools.
Residential gaskets typically need to satisfy:
- Weather sealing — preventing rain and draughts at the glass-to-frame junction under normal wind conditions
- Thermal cycling tolerance — expanding and contracting with daily temperature swings without losing compression
- Quiet operation — cushioning the glass to eliminate rattling in operable sashes
- Longevity without maintenance — homeowners rarely inspect gaskets, so the material must perform unattended for 20+ years
The good news for DIY homeowners: residential gasket replacement is genuinely achievable without professional help. The profiles are forgiving, the glass sizes are manageable, and the frame channels are accessible once you remove the glazing bead. Where things go wrong is in choosing an incompatible profile shape or an undersized gasket — problems covered in earlier sections — rather than in the physical installation itself.
Commercial Storefront and Curtain Wall Gaskets
Step into commercial territory and the demands escalate sharply. A glazing gasket for storefront aluminium windows might look similar to its residential cousin at first glance, but the engineering behind it is built for a harder life. Commercial glass panels are larger (often exceeding 3 m² per lite), installed at greater heights where wind pressures multiply, and subject to stricter performance documentation from architects and certifiers.
Commercial systems predominantly use wedge and compression gasket profiles. These lock into purpose-machined grooves in the aluminium extrusion after the glass is set, creating higher retention forces that resist the positive and negative wind pressures acting on large panels. As curtain wall industry guidelines explain, commercial facades must transfer wind loads back to the building structure through their anchor points — and the gasket is the component maintaining seal integrity while the frame flexes under those loads.
The commercial window gasket wind load rating conversation goes beyond simple weatherproofing. A gasket in a curtain wall system or storefront assembly needs to maintain its seal under sustained pressures that residential windows never experience. In cyclone-prone regions of northern Queensland and the Northern Territory, design wind pressures on commercial facades can be extreme, requiring gaskets with higher durometer (hardness) ratings and more aggressive compression profiles to stay seated.
Beyond structural wind performance, commercial projects layer additional requirements:
- Acoustic attenuation — gaskets contribute to sound insulation ratings by eliminating flanking paths where glass meets frame, critical for buildings near roads, flight paths, or entertainment precincts
- Energy efficiency documentation — commercial buildings must demonstrate compliance with NCC Section J energy provisions, and the airtightness provided by gaskets directly affects the window system’s U-value and energy modelling inputs
- Water penetration resistance under pressure — tested to higher Pascal ratings than residential systems, often requiring multiple gasket lines (an outer weather seal plus an inner air seal) working in sequence
- Replaceability without full disassembly — commercial buildings can’t remove entire curtain wall panels to change a gasket, so wedge profiles that insert and extract from the exterior are standard
For architects, builders, and specifiers, the gasket itself is never specified in isolation. It exists as one component within a tested and documented window system. Australian Standard AS 2047 requires that aluminium windows demonstrate structural performance, water penetration resistance, and air infiltration control as complete assemblies — frame, gasket, glass, and hardware working together. A gasket can only achieve its rated performance within the system it was designed for.
This is where the gap between residential and commercial decision-making becomes most apparent. A homeowner picks a gasket that fits. A specifier selects a gasket as part of a verified system that meets documented compliance expectations for weather resistance, thermal performance, durability, and sound attenuation. For professionals working on commercial aluminium window and door systems that must align with Australian project requirements, resources like MEICHEN’s Compliance & Certifications page provide documented evidence of how complete systems address these performance benchmarks — supporting the kind of performance-led specification that commercial projects demand.
Whether you’re a homeowner tackling a weekend gasket swap or a glazier fitting out a new commercial build, the principle remains the same: the gasket must match the system, and the system must match the application. What differs is the consequence of getting it wrong. A failed residential gasket means a draught and an annoyed occupant. A failed commercial gasket means water damage, failed inspections, and remediation costs that make the original install look cheap.
Knowing which category your project falls into — and what your gasket actually needs to withstand — is only half the battle. The other half is getting the physical installation right, starting with accurate measurement of what you’re replacing.
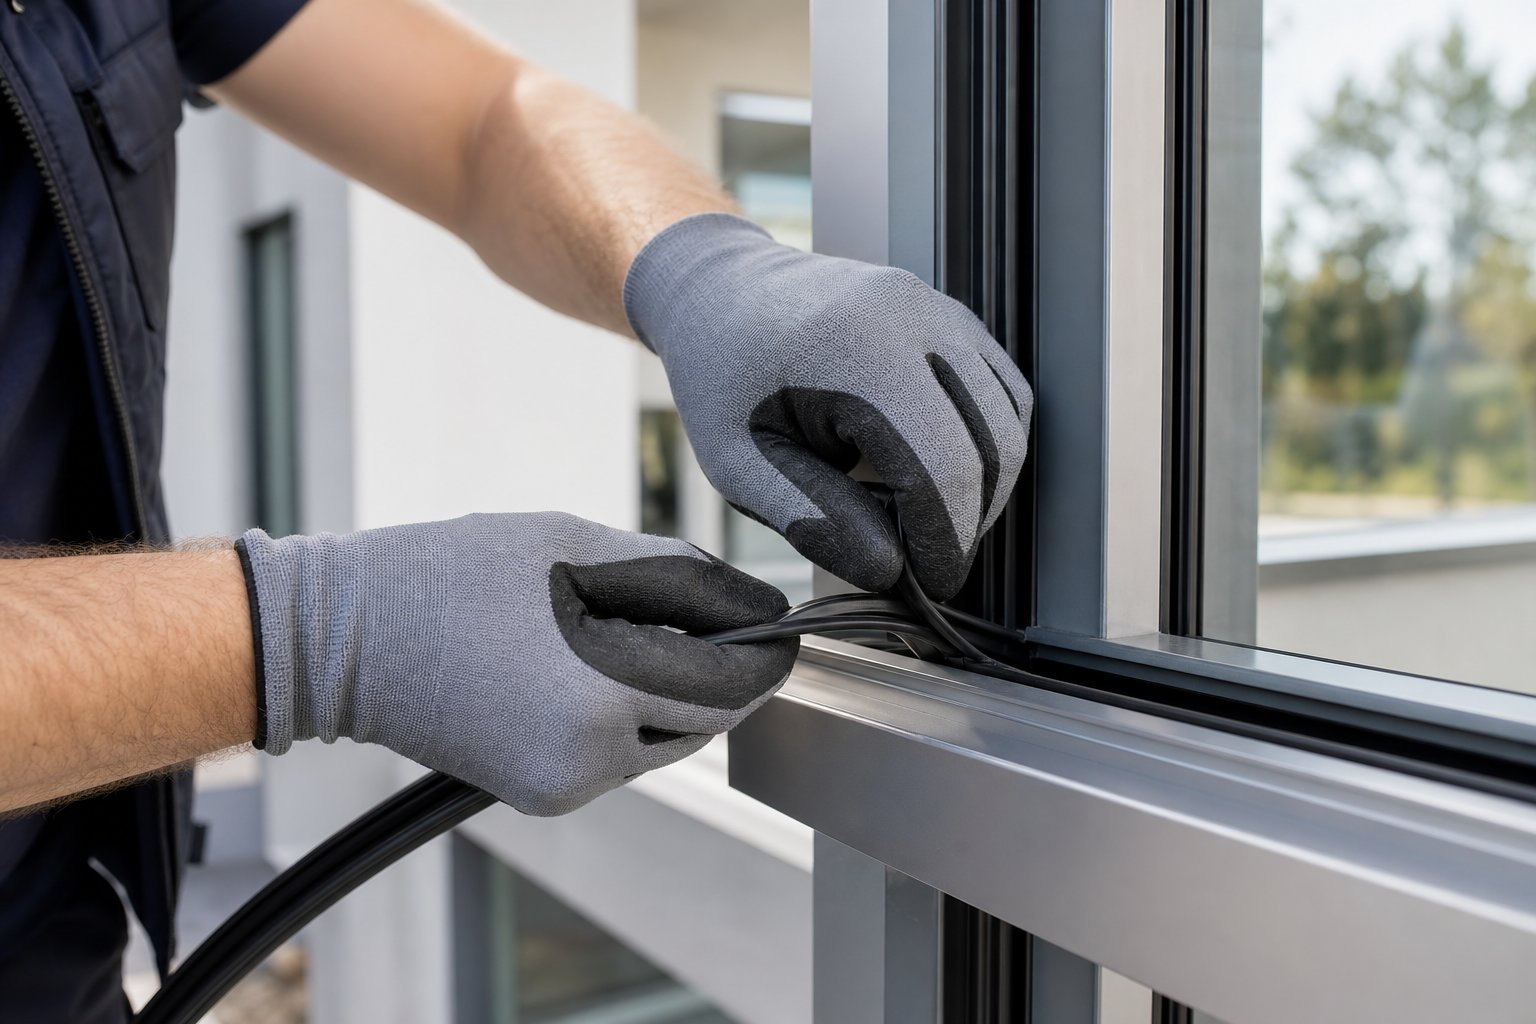
How to Measure and Install Glazing Gaskets Step by Step
Accurate measurement is the difference between a gasket that seals for decades and one that lets water in after the first heavy rain. The dimensions covered in the previous section — width, height, and bite depth — are only useful if you can reliably extract them from your existing frame. This step-by-step glazing gasket installation guide walks through the full process: measuring what you’ve got, removing old gasket from aluminium window frame safely, fitting the replacement, and avoiding the mistakes that send people back to the supplier for a second purchase.
How to Measure Your Existing Gasket and Frame Channel
Before ordering replacement material, you need three sets of measurements: the gasket’s own cross-section, the frame channel dimensions, and the glass thickness. Guessing any of these — even by a single millimetre — risks ordering the wrong size. As Seals Direct notes, the difference between wedge gasket sizes can be as small as 1 mm, and an inaccurate measurement means a product that’s either too large to fit into the channel or too small to apply enough compression against the glass.
Here’s how to measure window gasket for replacement correctly:
- Remove a small sample section. Peel back approximately 50 mm to 100 mm of the existing gasket from one side of the frame — ideally from the middle of a straight run rather than a corner. Removing only a short section from one side prevents the glass from shifting, which would distort your measurements.
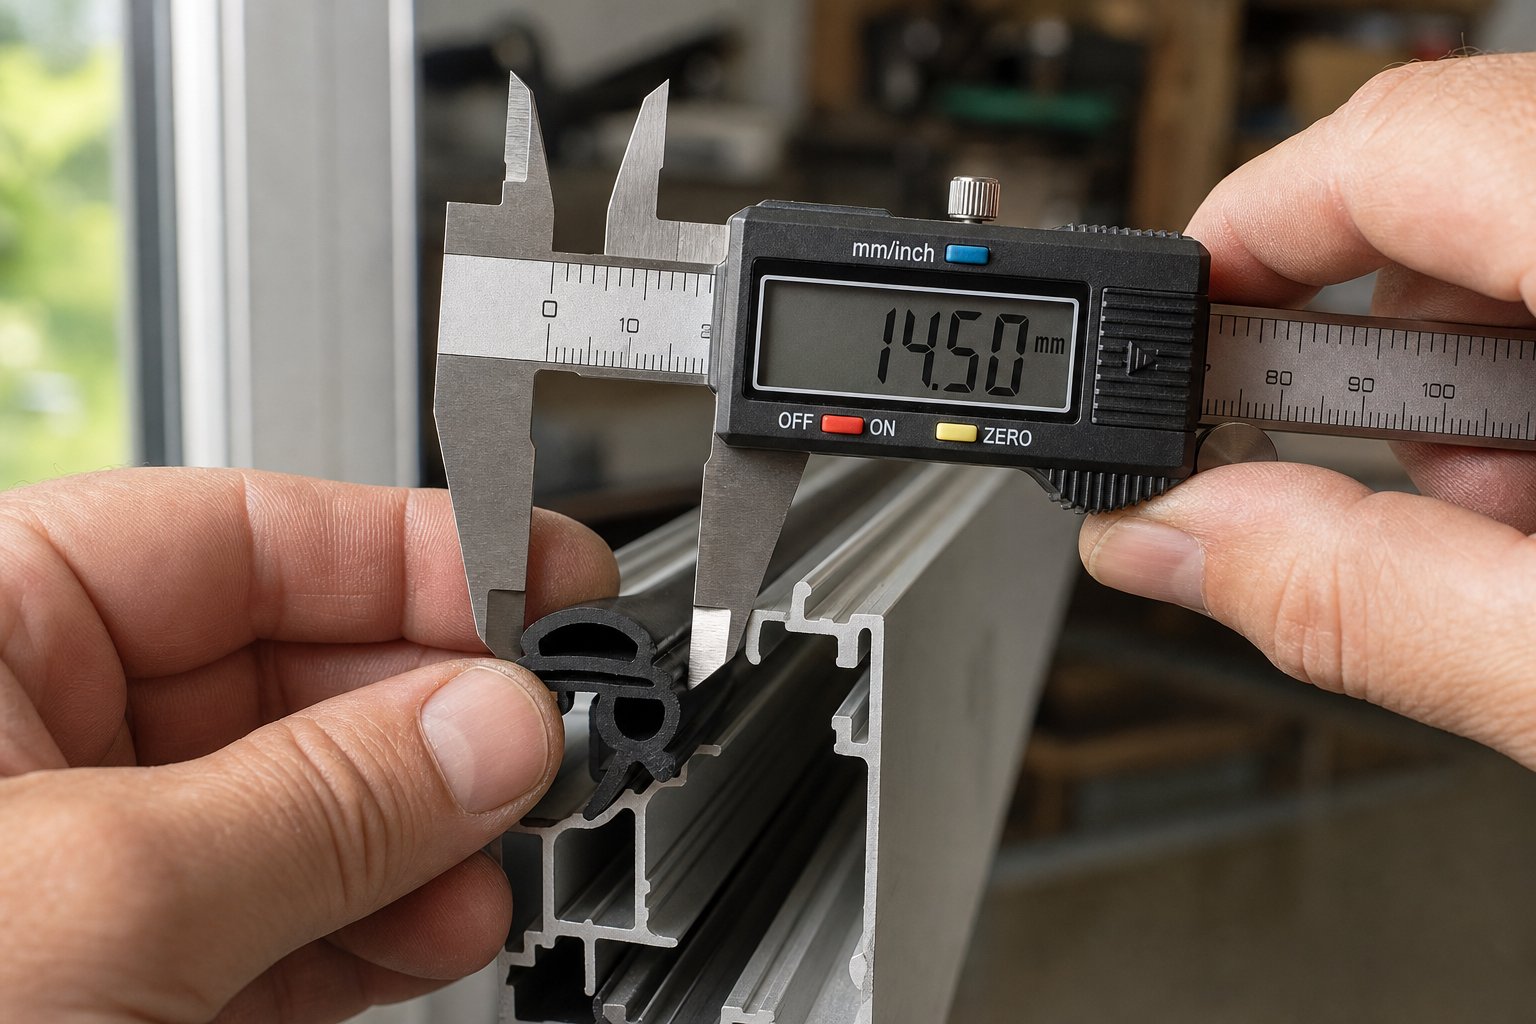
- Measure the gasket’s cross-section. Using digital callipers (not a tape measure — you need sub-millimetre accuracy), measure the gasket’s width and height. If the old gasket is compressed or deformed from years of service, note this and compare against the channel dimensions to estimate the original uncompressed size.
- Measure the frame channel width and depth. With the gasket sample removed, measure the internal width of the aluminium channel (the space between the glass face and the rebate wall) and the channel depth. These are your target dimensions for the replacement gasket’s width and height.
- Measure the glass thickness. Use callipers at the exposed glass edge, or if the edge isn’t accessible, measure at the channel opening. For double-glazed units, measure the total unit thickness including both panes and the spacer.
- Repeat at multiple points. Measure channel width at the head (top), sill (bottom), and both jambs (sides). Aluminium extrusions can have slight manufacturing variations — a channel that measures 5 mm at the head might read 4.8 mm at the sill. Use the tightest measurement as your limiting dimension.
- Calculate the gap. Subtract the glass thickness from the internal channel width, then divide by two. This gives you the gap on each side that the gasket must fill. For example, if your channel width is 10 mm and your glass is 4 mm, you have a 3 mm gap either side of the glass — and your replacement gasket needs to fill that gap under compression.
One common trap: measuring with a standard ruler that has a gap before the zero mark. This sounds trivial, but at the scale you’re working — differences of 0.5 mm to 1 mm matter — even that small offset throws your numbers off. Digital callipers eliminate this problem entirely and cost under $30 AUD from any hardware store.
Removing Old Gaskets Without Damaging the Frame
Aluminium window frames have anodised or powder-coated finishes that scratch easily. A single gouge from a flathead screwdriver becomes a corrosion initiation point — particularly in coastal areas where salt air attacks any breach in the protective coating. Removing an old gasket from an aluminium window frame requires patience and the right tools.
Start at a corner. Gaskets are typically continuous runs with joints at the corners, so this is where they’re easiest to lift. Use a plastic pry tool, a nylon spudger, or even a sturdy plastic putty knife to ease the gasket edge out of the channel. Never use metal scrapers, screwdrivers, or Stanley knife blades against the aluminium — the finish will lose every time.
Work slowly along the length once you’ve freed the corner. For U-channel gaskets, pull the gasket away from the glass edge at a low angle rather than yanking it perpendicular to the frame. For wedge gaskets, grip the exposed spine and pull straight out of the groove. If the gasket has bonded to the channel over time (common with older EPDM in hot climates), work in short sections rather than trying to peel the entire run at once.
Once the gasket is out, clean the channel thoroughly. Years of accumulated dust, oxidation residue, and degraded rubber fragments create an uneven surface that prevents the new gasket from seating properly. A stiff nylon brush removes loose debris, and a wipe with isopropyl alcohol dissolves any remaining film without attacking the aluminium finish. Avoid mineral turpentine, acetone, or other aggressive solvents — these can damage powder-coated surfaces and leave residues that degrade the new gasket’s rubber.
Installation Best Practices and Common Mistakes
With clean channels and correctly sized replacement gasket in hand, installation seems straightforward. And mechanically, it is — press the gasket into the channel or slide it onto the glass edge. But the common glazing gasket installation mistakes happen during this seemingly simple process, and they don’t reveal themselves until months later when the seal fails.
Don’t stretch the gasket during installation. This is the single most frequent error. Rubber is elastic, and it’s tempting to pull it taut as you work it around the frame perimeter. The problem: stretched EPDM slowly recovers toward its original length over weeks and months. A gasket installed under even mild tension will eventually shrink back, opening gaps at corners and along straight runs. Instead, lay the gasket into the channel with zero tension — even leave a fraction of slack. A gasket that’s 1 mm too long is far better than one that’s 1 mm too short.
Cut corners as mitres, not butt joints. Where gasket runs meet at 90-degree corners, cutting both ends at 45 degrees creates a mitre joint that closes tightly as the gasket compresses. A butt joint — where one piece simply meets the end of another at a right angle — leaves a triangular void at the corner that water will exploit. Use a straight razor blade or mitering scissors for the cleanest cut, and mark your angles with a template before cutting. A sharp blade is essential — a dull cut compresses the rubber and creates an uneven mating surface. For an even stronger joint, apply a rubber-compatible adhesive (cyanoacrylate types designed for rubber-to-rubber bonding work well) to bond the mitre faces together, creating a continuous seal around the entire perimeter.
Never use petroleum-based lubricants. Sliding a stiff gasket into a tight channel is easier with lubrication — but the wrong lubricant destroys the rubber. Petroleum-based products (WD-40, mineral oils, Vaseline) cause EPDM to swell, soften, and lose structural integrity over time. Use silicone spray or a light dusting of soapy water instead. Silicone lubricant is chemically inert to EPDM and evaporates cleanly, leaving no residue that interferes with compression.
Additional installation pointers:
- For U-channel gaskets, fit the gasket to the glass edge on a flat surface before setting the glazed unit into the frame. Trying to slide a U-channel around the glass edge while it’s already in the frame leads to uneven seating.
- When replacing gaskets on sliding aluminium window frames, rest the glass on a piece of expanded neoprene or setting block at the sill to prevent glass-to-metal contact at the base.
- Do a dry fit before committing. Push the gasket fully into position without adhesive first, check the compression is even along the entire perimeter, and confirm the glazing bead or pressure plate seats properly. Then remove, apply adhesive to mitre joints only, and install permanently.
- Keep spare material on hand. An extra 200 mm to 300 mm allows trial cuts for mitre angles and accounts for any measurement errors — a small insurance cost against getting it right first time.
Knowing how to replace a glazing gasket on an aluminium window is a practical skill that saves real money — especially on a house with ten or fifteen windows that all need attention at the same time. But installation technique only preserves performance in the short term. What keeps that seal working five, ten, and twenty years from now comes down to recognising early failure signs and applying basic maintenance before small problems become expensive ones.
Signs of Gasket Failure and Maintenance Tips
A well-installed gasket doesn’t announce its presence — it just works, quietly sealing out weather and cushioning glass for years on end. The flip side is that failure is equally quiet. Window gasket cracking and draft problems develop gradually, over months or even years, and most homeowners don’t notice until water stains appear on the sill or a cold draught makes the lounge room uncomfortable in winter. Catching deterioration early keeps a minor gasket swap from escalating into frame corrosion or glass damage.
Visual and Functional Signs of Gasket Failure
Gasket degradation follows a predictable pattern. UV exposure and thermal cycling slowly break down the polymer chains in the rubber, causing it to lose elasticity and harden. Once that process passes a threshold, the signs of glazing gasket failure in windows become visible — and functional problems follow close behind.
Run through this checklist if you suspect your seals are past their prime:
- Visible cracking or surface hardening — the rubber looks dry, feels rigid to the touch, and shows fine surface cracks (sometimes called crazing). Pressing a fingernail into healthy EPDM leaves a temporary indent; failed material resists indentation or crumbles.
- Gaps between gasket and glass or frame — the gasket has pulled away from its groove or shrunk back from corners, leaving visible daylight between the rubber and the surfaces it should be sealing.
- Condensation forming between panes — for double-glazed units, fogging trapped inside the IGU that won’t wipe away from either surface indicates the edge seal has been compromised. A failed exterior gasket can accelerate this by allowing moisture to pool against the unit’s perimeter seal.
- Draughts near window edges — cold air infiltrating around the glass-to-frame junction when the window is fully closed and locked. Hold a lit incense stick near the gasket line on a windy day — any deflection of the smoke confirms air leakage.
- Water stains on interior sills after rain — evidence that water is bypassing the gasket seal and tracking along the frame rebate. In aluminium systems, standing water in the channel also risks galvanic corrosion if dissimilar metals are present.
- Rattling glass in wind — the gasket has lost enough compression to no longer hold the pane firmly. The glass vibrates in its channel, producing audible rattling during gusts and accelerating wear on both the gasket and the glass edge.
- Increased external noise — a window that suddenly seems noisier may have lost acoustic insulation due to seal gaps acting as flanking paths for sound transmission.
The important thing to understand: these symptoms compound. A small crack allows moisture ingress, which accelerates rubber degradation, which widens the crack. A gasket that needed a simple replacement six months ago becomes a corrosion repair on the frame if left unattended. Early intervention is cheap. Late intervention rarely is.
Maintenance Practices That Extend Gasket Life
So how long do window gaskets last? In typical Australian conditions, a quality EPDM gasket in an aluminium frame delivers 20 to 25 years of reliable service — sometimes longer in sheltered positions, sometimes shorter on north and west-facing elevations copping full UV all day. Industry data suggests degradation becomes visible after roughly 5 to 10 years, with functional failure following in the 10 to 20 year range depending on exposure and material quality.
You can push gasket life toward the upper end of that range with basic maintenance that takes minutes per window. Here’s how to maintain EPDM window gaskets effectively:
- Clean with mild soap and water every few months. Dirt, dust, and biological growth (mould, mildew) trap moisture against the rubber surface and accelerate degradation. A soft cloth with warm water and neutral detergent is all you need. Wipe the gasket surfaces whenever you clean the glass — it adds thirty seconds per window.
- Never use solvents. Acetone, mineral turpentine, petrol, and even WD-40 attack rubber polymers. They strip plasticisers from the compound, leaving the gasket brittle and prone to cracking. If you need to remove a stubborn mark, isopropyl alcohol (70%) used sparingly is the strongest thing that’s safe on EPDM.
- Apply a silicone-based conditioner annually. A thin coat of silicone spray or dedicated rubber conditioner restores surface flexibility and provides a protective barrier against UV. Apply to a clean, dry gasket and spread evenly with a soft cloth. This single step — taking perhaps five minutes for an entire window — restores elasticity and prolongs seal life measurably.
- Keep drainage channels clear. Aluminium window frames have weep holes and drainage slots designed to evacuate water that penetrates past the outer seal. If these block with debris, water pools against the gasket base and the frame channel — a recipe for premature seal failure and aluminium corrosion. Check and clear them at least twice a year.
- Inspect after extreme weather events. Severe storms, hail, and cyclone-force winds can dislodge gaskets, drive debris into channels, or crack rubber that was already borderline. A quick visual check after any major weather event catches displacement before it becomes water ingress.
- Pay extra attention to north and west-facing windows. These cop the most UV and the greatest temperature swings. In harsh Australian sun, gaskets on these elevations may need conditioning twice a year and are likely to reach replacement age 5 to 8 years earlier than shaded south-facing seals.
Think of gasket maintenance the way you’d think about servicing a car — small, regular inputs prevent expensive breakdowns. A $15 can of silicone spray and ten minutes twice a year buys you years of additional seal life and defers the cost of full replacement.
Still, even the best-maintained gasket eventually reaches the end of its service life. And when that day comes, the replacement gasket’s performance ceiling is set not just by its own material and profile, but by the aluminium window system it sits within.

Choosing Window Systems Built for Long-Term Performance
A premium EPDM gasket in the correct profile and dimensions is only as good as the frame holding it. You could spec the perfect seal — right material, right compression, right mitre joints — and still end up with a window that leaks, conducts heat, or fails certification if the aluminium system itself wasn’t engineered to perform. How gasket quality affects window energy efficiency is really a question about system integrity: every component either supports or undermines the whole.
Why Gasket Quality Reflects Overall System Performance
A gasket creates a seal at the glass-to-frame interface. But that seal only matters if the frame manages thermal bridging, if the drainage channels evacuate water correctly, if the hardware maintains sash compression over thousands of open-close cycles, and if the glazing itself delivers the thermal and acoustic values the project requires. A single weak link — poorly designed drainage, an inadequate thermal break, substandard hardware — turns even a well-fitted gasket into a band-aid on a systemic problem.
This is why evaluating aluminium window compliance standards matters more than evaluating individual components. AS 2047 tests windows as complete assemblies — frame, gasket, glass, and hardware working together under simulated wind, rain, and structural load. A gasket doesn’t receive its own certification. It passes or fails as part of the system it belongs to.
Evaluating Complete Aluminium Window Systems
For architects, builders, developers, and specifiers choosing an aluminium window system for performance, the gasket is one input within a broader assessment. The complete window system thermal performance factors worth evaluating include:
- Thermal break design — the depth and material of the polyamide barrier separating interior and exterior aluminium profiles, which determines how much heat transfers through the frame itself
- Glazing configuration — single pane, double glazed, or triple glazed units with Low-E coatings and argon fills, each offering different U-values and solar heat gain characteristics
- Gasket material and profile — as covered throughout this article, the right compound and cross-section matched to the frame’s channel geometry and the project’s climate zone
- Hardware quality and compression — locking mechanisms that maintain consistent sash pressure against gasket seals over the window’s service life, preventing gradual air leakage as hardware wears
- Drainage and pressure equalisation — properly engineered weep systems that manage water without allowing wind-driven rain to bypass seals
- Documented compliance and testing — verified performance data for weather resistance, energy efficiency, condensation management, acoustic attenuation, and structural durability under Australian conditions
That last point deserves emphasis. Documented compliance isn’t a marketing exercise — it’s the evidence that a system performs as claimed when installed correctly. The National Construction Code references AS 2047 for structural and weatherproofing performance, WERS provides energy ratings that feed into NatHERS assessments, and projects in cyclone or bushfire zones carry additional requirements under AS 1170.2 and BAL ratings. A system without documented test data against these benchmarks is a system you’re trusting on faith alone.
For professionals specifying aluminium window and door systems that must align with Australian project requirements, MEICHEN’s Compliance & Certifications page provides documented evidence of how their systems address energy efficiency, weather resistance, condensation management, sound performance, and durability — supporting the kind of performance-led decision-making where gasket selection sits within a verified, standards-compliant whole.
The thread running through this entire article is simple: a glazing gasket for aluminium windows isn’t a commodity you grab off the shelf. It’s a precision component that must match the glass, the frame, the climate, and the performance standard the system was built to meet. Get the material wrong, the profile wrong, the dimensions wrong, or the system wrong — and you pay for the job twice. Get it right, and a few dollars of well-chosen rubber quietly protects your investment for decades.
Frequently Asked Questions About Glazing Gaskets for Aluminium Windows
1. What is the best material for a glazing gasket on aluminium windows?
EPDM rubber is the industry standard for aluminium window gaskets in Australia. It offers excellent UV and ozone resistance, handles temperatures from -40°C to 120°C, and maintains compression for 20 to 30 years. Silicone suits extreme heat applications such as north-facing curtain walls, while neoprene works near industrial chemicals. TPE is a recyclable alternative but has a shorter lifespan of 10 to 15 years. For most residential and commercial projects, EPDM provides the best balance of durability, weather resistance, and cost.
2. How do I know when my aluminium window gasket needs replacing?
Key signs include visible cracking or hardening of the rubber, gaps between the gasket and glass or frame, drafts near window edges when closed, water stains on interior sills after rain, condensation forming between double-glazed panes, and glass rattling in wind. You can test for air leaks by holding a lit incense stick near the gasket line on a windy day. Gasket degradation is gradual, so early replacement prevents more expensive problems like frame corrosion or glass damage.
3. How do I measure the correct gasket size for my aluminium window?
Remove a 50 mm to 100 mm sample from mid-frame, then use digital callipers to measure the gasket’s cross-sectional width and height. Measure the frame channel’s internal width and depth with the gasket removed, plus the glass thickness. Subtract glass thickness from channel width and divide by two to find the gap each gasket must fill. Measure at the head, sill, and both jambs since aluminium extrusions can vary slightly. The replacement gasket should compress 25% to 45% of its uncompressed thickness to create an effective seal.
4. Can I replace a glazing gasket on aluminium windows myself?
Residential gasket replacement is achievable as a DIY project. The profiles used in most Australian homes — U-channel and push-in types — are straightforward to install with basic tools. Key tips: use a plastic pry tool (never metal) to avoid scratching the frame finish, avoid stretching the gasket during installation, cut corners at 45-degree mitres rather than butt joints, and use silicone spray as lubricant instead of petroleum-based products. Commercial systems with wedge gaskets or large panels are better left to professional glaziers.
5. What is the difference between residential and commercial aluminium window gaskets?
Residential gaskets are typically smaller U-channel or push-in profiles in EPDM, designed for moderate wind loads and standard glass sizes under 1.5 m². Commercial gaskets use larger wedge and compression profiles rated for higher wind pressures, bigger panels exceeding 3 m², and stricter performance documentation. Commercial systems often require multiple gasket lines for weather and air sealing, plus compliance with AS 2047 as a complete tested assembly. For specifiers needing verified system performance data covering weather resistance, energy efficiency, and durability, resources like MEICHEN’s Compliance & Certifications page document how complete aluminium systems meet Australian standards.
More Window & Door Guides