How to Diagnose Your Aluminium Window Problem
A grinding noise every time you slide the window open. A persistent draft creeping through on cold nights. A sash that flat-out refuses to budge. These symptoms all point to different failures, and grabbing the wrong tool or ordering the wrong part wastes time and money. Aluminium windows fixing starts with accurate diagnosis, not guesswork.
Every aluminium window issue falls into one of four categories: track, roller, seal, or frame. Pinpointing which component has failed tells you exactly what repair to attempt and whether the job is a quick weekend task or something more involved.
Identify Whether It Is a Track, Roller, Seal, or Frame Problem
Your window gives clear signals about what has gone wrong. The trick is knowing how to read them.
A grinding or gritty noise when the sash moves usually points to roller wear. Rollers carry the full weight of the glass panel along the track, and once they develop flat spots or cracks, you get that unmistakable scraping resistance. If you have a sliding window stuck in place despite a clean track, worn rollers are the most likely culprit.
Drafts, whistling sounds, or cold spots near the window frame indicate seal failure. Weatherstripping degrades over time from UV exposure and repeated compression, eventually losing its ability to block airflow. You might also notice increased street noise — another telltale sign that seals have thinned out.
A window that won’t slide at all or jumps off its track typically has a track obstruction or misalignment issue. Dirt, debris, and oxidation buildup in the channel create friction that rollers cannot overcome. In Australian coastal areas, salt deposits accelerate this problem significantly.
Visible bowing, cracking, or discolouration on the aluminium frame itself signals structural degradation. Frame-level damage is the most serious category and often determines whether a repair or full replacement makes better financial sense.
Quick Symptom Checklist Before You Start
Run through this list to narrow down your specific issue before pulling out any tools:
- Window won’t open or close smoothly — likely a track or roller problem
- Visible gaps between the frame and sash — seal deterioration or frame distortion
- Rattling or vibration during windy conditions — loose rollers or insufficient sealing
- Condensation appearing between glass panes — sealed glass unit failure
- Lock or latch won’t engage properly — hardware misalignment or spring fatigue
- Increased outside noise — compromised weatherstripping
If you are ticking multiple boxes, you may be dealing with a broken sliding window system that has several worn components rather than a single isolated fault. That is still fixable in most cases, but it changes your approach and parts list.
When a Stuck Window Signals a Bigger Issue
Not every stuck sash is a simple fix. The resistance you feel when trying to move the panel tells a story about what is happening inside the frame assembly.
If the window moves with effort but feels rough, track debris is the most common explanation. A vacuum, stiff brush, and silicone lubricant typically restore smooth operation within minutes. This is the simplest scenario and the place most people learning how to fix a sliding window should start.
A sash that moves partway then stops, or feels heavier than it used to, points toward roller failure. This is a moderate repair requiring you to remove the sash panel, inspect the roller assemblies on the bottom rail, and fit replacements. Roller sizes vary between manufacturers, so matching the old unit is essential.
The more concerning scenario is a sash that binds unevenly or shows daylight gaps along one side. This suggests frame warping or distortion — the aluminium has shifted out of square due to thermal stress, foundation settling, or corrosion weakening the corners. At this point, you are weighing repair feasibility against the cost of a new window unit.
Knowing which category your problem falls into shapes every decision that follows: what tools to gather, which replacement parts to source, and whether the job stays within DIY territory. The underlying cause matters just as much as the visible symptom, and that is where things get interesting.
Root Causes of Aluminium Window Failures
Symptoms tell you what broke. Understanding why it broke tells you how to prevent it from happening again, and whether your repair will actually last. Aluminium window failures rarely happen overnight. They build gradually through environmental exposure, material stress, and mechanical wear that most homeowners never notice until something stops working.
Oxidation, Corrosion, and Coastal Exposure
Aluminium forms a natural oxide layer that protects it from the elements, but that defence has limits. In coastal areas — and Australia has no shortage of those — salt-laden air attacks protective coatings and initiates pitting corrosion beneath the surface. Chloride ions penetrate finishes, creating small craters that spread and eventually weaken the frame structure. Properties within a few kilometres of the shoreline experience this at an accelerated rate, particularly where prevailing winds carry saline aerosols directly onto window surfaces.
Galvanic corrosion presents another risk that catches people off guard. When dissimilar metals sit in direct contact with aluminium — steel screws in an aluminium frame are the classic example — an electrochemical reaction occurs in the presence of moisture. The aluminium corrodes preferentially around the contact point, creating localised degradation that weakens fastener connections over time. This is why repairing aluminium window frames in coastal homes sometimes reveals surprising damage around hardware mounting points that looked fine from the outside.
Thermal Expansion and Frame Stress
Aluminium expands and contracts with temperature changes more than timber or uPVC. On a hot summer day, an aluminium frame can expand noticeably across its length. When temperatures drop overnight, it contracts again. This daily cycling gradually loosens screws, compresses seals unevenly, and creates hairline gaps where frame components meet.
Over years of thermal movement, hardware fixings lose their grip, weatherstripping develops permanent compression in some spots while gapping in others, and corner joints can develop slight play. The result is a window that operated perfectly for a decade but now rattles, drafts, or binds. Australian climates with wide diurnal temperature swings — think inland areas that hit 40°C by day and drop below 15°C at night — accelerate this process considerably compared to milder coastal zones.
Wear Patterns from Daily Use
Beyond environmental factors, simple mechanical wear from opening and closing your windows thousands of times takes a toll. Rollers bear the full sash weight with every slide. Tracks endure repeated friction. Latches compress springs cycle after cycle. Most aluminium window repairs stem from components that have simply reached the end of their designed service life, typically somewhere between 10 and 20 years depending on usage frequency and maintenance habits.
Common wear indicators to watch for:
- Track groove scoring — visible scratches or channels worn into the aluminium track surface
- Roller flat spots — wheels that no longer roll smoothly due to worn bearings or deformed surfaces
- Latch spring fatigue — handles that no longer snap into position or require extra force to engage
- Weatherstrip compression set — seals that remain flattened even when the window is open, having lost their ability to spring back
Each of these wear patterns progresses at its own pace, which is why aluminium window frame repair often means addressing one failed component while the rest of the system still has years of life left. Knowing the cause behind each failure helps you target the right fix — and set realistic expectations for how long that fix will hold before the next component reaches its limit.
Essential Tools and Materials for Every Repair Type
Halfway through a window slider repair with the sash panel balanced on one knee is not the moment to discover you are missing a Phillips head screwdriver. Gathering everything before you start keeps the job efficient and prevents half-dismantled windows from sitting open overnight. The tools and materials you need depend entirely on which failure you diagnosed in the previous steps, so this section breaks them down by repair category.
Tools for Track and Roller Repairs
Track and roller work is the most common aluminium window repair, and the tool list stays relatively short. You will need a flathead screwdriver for prying out roller adjustment covers, a Phillips screwdriver for the roller mounting screws, and a stiff-bristled brush or vacuum with a crevice attachment for clearing track debris. A silicone-based lubricant is essential — avoid oil-based products that attract dirt and create sludge in the channel over time. Pick up replacement rollers sized to your specific window, and if possible, bring the old roller to the hardware store to match the wheel diameter and housing dimensions exactly.
Tools for Glass Replacement
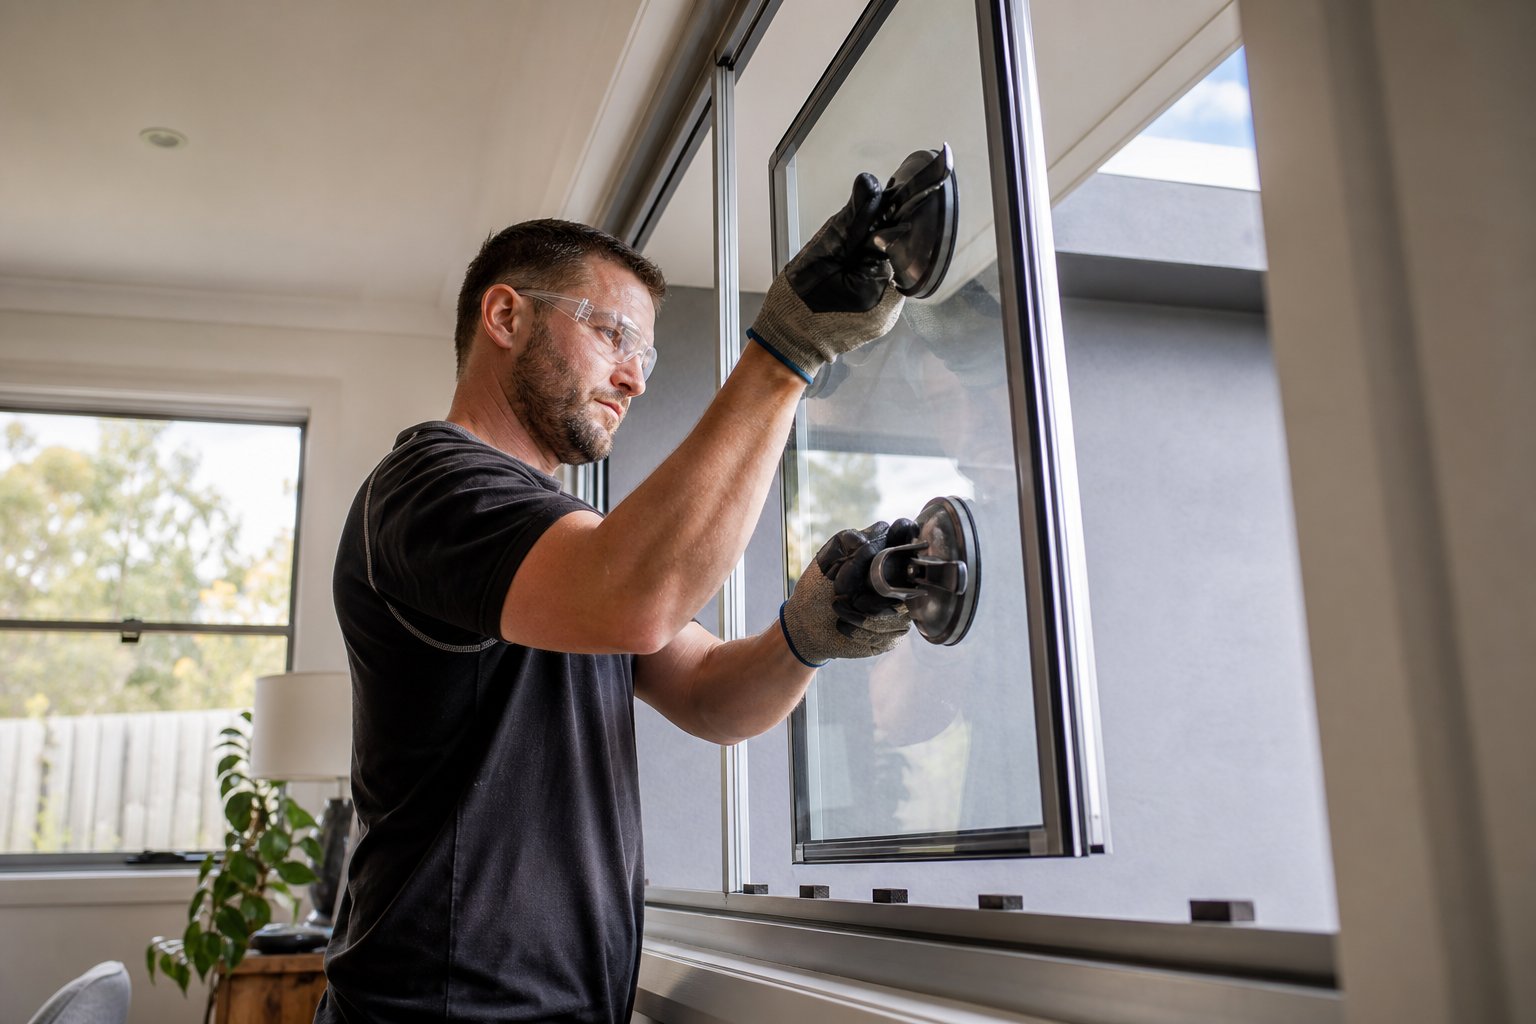
Glass work demands more safety gear. Thick work gloves and safety glasses are non-negotiable. A glazing putty knife helps you lever out old rubber spline without scratching the frame, while a rubber mallet lets you tap the frame apart gently where sections are tight. Suction cups rated for the pane weight give you a controlled grip during removal and installation. You will also need replacement rubber glazing spline matched to the channel width and a spline roller tool to press it firmly into place.
Tools for Seal and Hardware Fixes
Weatherstripping replacement requires a utility knife for trimming material to length, rubbing alcohol or isopropyl for cleaning adhesive residue from channels, and the correct replacement strip type. Common options include pile (mohair) strips for sliding tracks, adhesive-backed foam for compression gaps, and fin-type seals for casement windows — choosing the wrong type means a poor fit regardless of installation quality. For hardware repairs, source a replacement latch or lock mechanism that matches your existing mounting hole pattern.
| Repair Type | Essential Tools | Materials Needed | Approximate Time |
|---|---|---|---|
| Track and Roller | Flathead and Phillips screwdrivers, stiff brush or vacuum, adjustable wrench | Silicone spray lubricant, replacement rollers | 30–60 minutes per panel |
| Glass Replacement | Glazing putty knife, rubber mallet, suction cups, spline roller | Replacement glass (to spec), rubber glazing spline, setting blocks | 1–2 hours per pane |
| Seal and Weatherstrip | Utility knife, cleaning cloths, plastic pry tool | Replacement weatherstripping (pile, foam, or fin type), rubbing alcohol | 20–40 minutes per window |
| Lock and Hardware | Phillips screwdriver, drill with titanium bits, digital caliper | Replacement latch or lock mechanism, penetrating oil for seized screws | 15–30 minutes per fitting |
Print this table or save it on your phone before heading to the hardware store. Having the right gear on hand from the start means your aluminum window repair stays a single-session job rather than a drawn-out project spread across multiple weekends. With your tools sorted and materials matched to your specific failure type, the actual hands-on repair work can begin.
Fixing Sliding Window Tracks and Rollers Step by Step
Tracks and rollers handle the heavy lifting in every sliding aluminium window. They bear the full sash weight, guide it along a precise channel, and do this thousands of times over the window’s lifespan. When either component degrades, the result is immediately obvious — grinding resistance, uneven movement, or a panel that refuses to budge. The good news is that sliding window repair on tracks and rollers sits firmly in DIY territory for most homeowners. The process is methodical, the parts are affordable, and the difference in operation afterwards is dramatic.
Cleaning and Restoring Aluminium Window Tracks
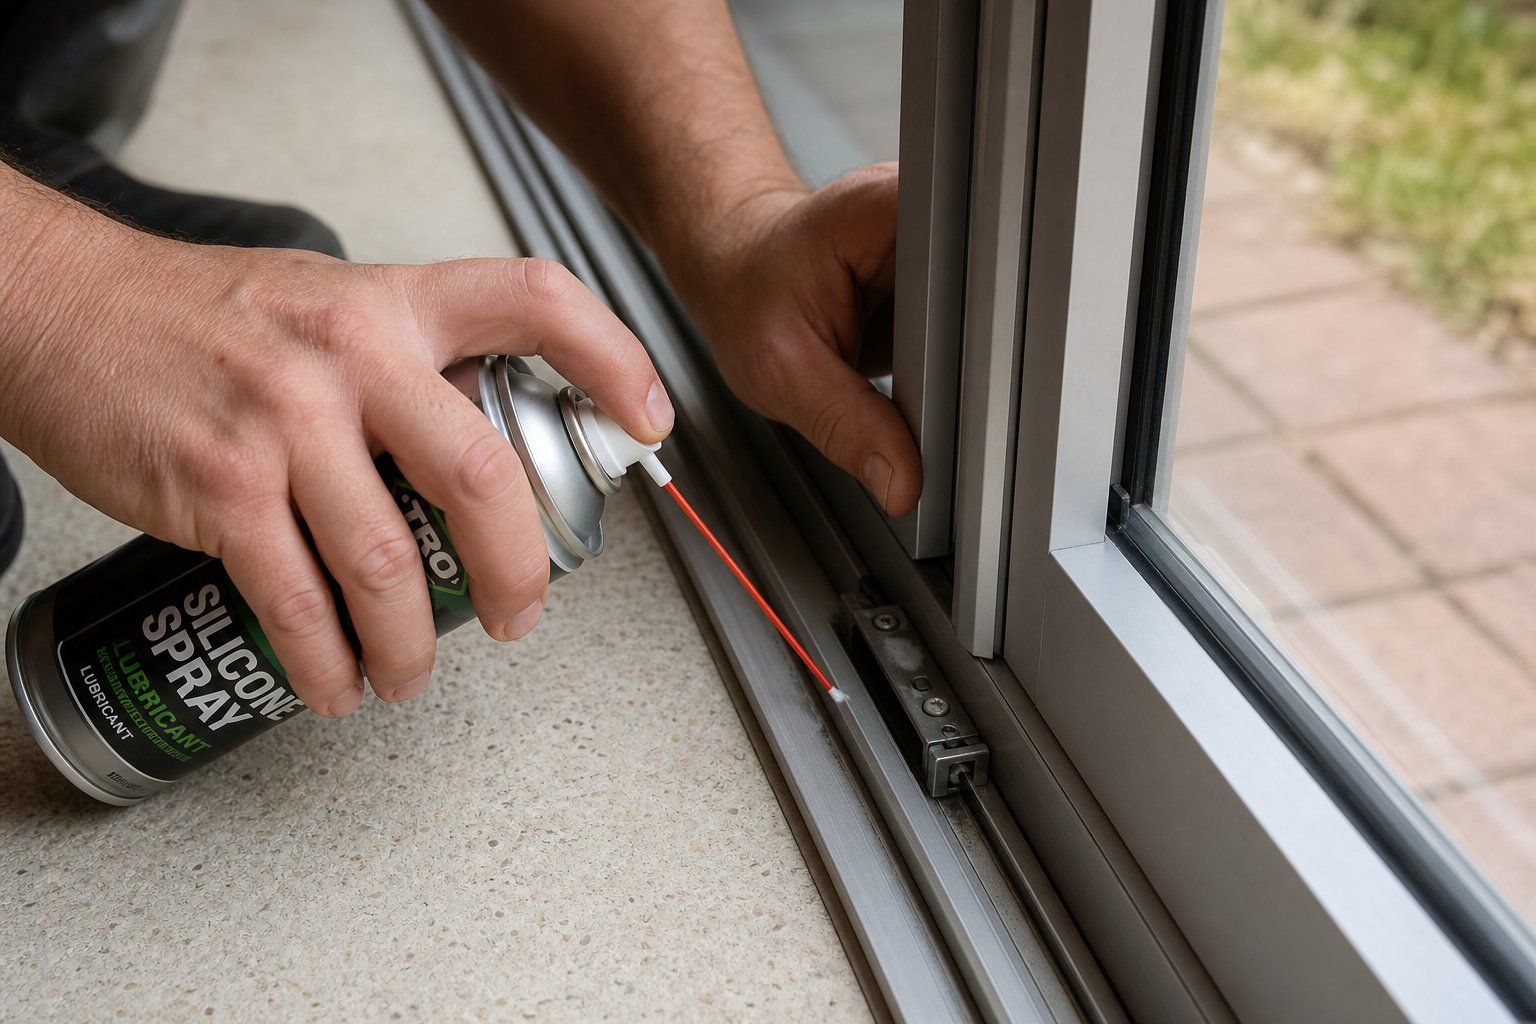
Dirty tracks cause more stuck windows than any other single factor. Dust, sand, pet hair, and oxidation debris accumulate in the channel over months, creating a layer of friction that rollers struggle to overcome. Window track repair starts here because a thorough clean often resolves the issue entirely without touching any other component.
Begin by vacuuming the full length of the track channel using a crevice attachment. This removes loose grit and larger particles that a cloth would simply push further into corners. Follow up with a stiff-bristled brush — an old toothbrush works in tight spaces — scrubbing the channel with warm soapy water. Pay attention to the corners where debris compacts into solid deposits.
Dry the track completely before applying any lubricant. Moisture trapped beneath lubricant accelerates aluminium oxidation, creating the exact problem you are trying to solve. Once dry, apply a thin coat of silicone-based spray lubricant along the full track length. Silicone does not attract dust the way petroleum-based oils do, so it keeps the track cleaner for longer between maintenance sessions. Australian housing maintenance data confirms that tracks cleaned and lubricated on a regular schedule last significantly longer than those left until problems appear.
For tracks with minor dents or bends — common after years of sash weight bearing down on one spot — use a flat metal file to smooth raised edges, or gently reshape the channel with a track repair tool. Work in small strokes, testing roller movement frequently. You are aiming for a smooth glide path, not a perfectly polished finish.
Removing and Replacing Window Rollers
When cleaning the track does not restore smooth operation, worn rollers are almost certainly the problem. Roller wheels develop flat spots, bearings seize, and housings crack after years of carrying heavy glass panels back and forth. Replacing them brings a window back to like-new operation and is one of the most satisfying sliding window repairs you can do.
Removing the sash panel follows a consistent process across most aluminium sliding window designs. Locate the head track — the upper channel the sash sits within. Grip the panel on both sides, lift it straight up into the head track (there is usually 10–15 mm of clearance built into the design for exactly this purpose), then swing the bottom edge inward toward you and lower the panel out of the frame. Large panels are heavy; have a second person steady the glass while you manoeuvre it free.
With the sash removed, flip it on its side or lay it flat on a padded surface. The rollers sit in housings at the bottom rail, typically secured by one or two Phillips head screws. Some models have an adjustment screw that raises or lowers the roller height — note its current position before removing anything. Unscrew the mounting hardware, slide or lever the old roller assembly out of its housing, and inspect the wheel and axle for damage.
Here is where a common mistake trips people up: roller sizes vary considerably between manufacturers. Wheel diameter, housing width, axle offset, and mounting hole spacing all differ. Measure the diameter and width of the old rollers before purchasing replacements, or better yet, bring the old unit to a hardware store or window parts specialist and match it directly. Installing an incorrect size causes misalignment, uneven sash height, or poor track engagement that creates new problems.
Seat the new roller into the housing, secure the mounting screws snugly without over-tightening (this can crack the housing or distort the frame), and apply a drop of silicone lubricant to the wheel. Reinstall the sash by reversing the removal process: angle the top into the head track first, then lower the bottom onto the rollers in the sill track. Test by sliding the panel back and forth several times. If it drags at any point, adjust the roller height screw incrementally until the sash glides level and smooth.
Fixing Vertical Sliding Window Mechanisms
Vertical sliding windows — double-hung and single-hung designs — rely on a different system entirely. Instead of rollers on a horizontal track, they use counterbalance mechanisms that offset the sash weight so the window stays open at any height. When these balances fail, the window slams shut, drifts down slowly, or requires both hands to lift. Vertical sliding window repair centres on identifying and restoring these balance systems.
Two main types exist in Australian homes. Spiral balances consist of a spring-loaded rod inside a tube, typically mounted in channels on each side of the frame. They are common in older and mid-range double-hung windows. Block-and-tackle balances use a pulley-and-spring system housed in a metal channel, offering smoother operation and found in newer or premium installations. Check for manufacturer stamps or markings on the balance hardware to confirm which system your window uses before ordering parts.
For spiral balances, tension adjustment is often all that is needed. If the sash drops when released, the spring has lost tension. If it shoots up, there is too much. Adjusting involves rotating the spiral rod clockwise to increase tension or counter-clockwise to decrease it — typically two to three turns is enough to restore proper hold.
When adjustment alone does not solve the problem, full replacement is the next step. Here is the process for removing and reinstalling a spiral balance:
- Open the window fully and support the sash securely with a wooden block or have a helper hold it — an unsupported sash can drop suddenly and cause injury or glass breakage.
- Locate the balance tube mounting bracket at the top of the side channel and unscrew it from the frame.
- Disconnect the balance shoe (the clip at the bottom that attaches to the sash) by disengaging the pivot bar from the shoe mechanism.
- Carefully extract the entire spiral balance unit from the channel, noting its length and any identifying markings for ordering a match.
- Slide the new balance unit into the channel with the spiral rod oriented correctly (hook end toward the sash connection point).
- Secure the top mounting bracket with screws, ensuring it sits flush and firm.
- Reconnect the balance shoe to the sash pivot bar, confirming it clicks or seats fully.
- Remove the support block, then test the window by raising it to several heights — it should hold position without drifting in either direction.
For block-and-tackle systems, the approach is similar: disconnect the sash, remove the old balance unit from its jamb-mounted channel, and install a replacement matched to the sash weight. These balances are rated by weight capacity, so weigh the sash (or check manufacturer specifications) before purchasing.
Safety note: Always support the sash weight before disconnecting any balance mechanism. A double-hung sash with glass can weigh 15 kg or more, and an uncontrolled drop risks serious hand injuries and shattered glass.
Whether you are dealing with horizontal sliders or vertical mechanisms, the underlying principle stays the same: identify the worn component, match the replacement precisely, and reinstall with care. Smooth, effortless window operation is the payoff — but the seals around that freshly gliding sash matter just as much for comfort and energy efficiency.
How to Replace Window Glass in Aluminium Frames
Cracked panes, shattered glass from a stray cricket ball, or foggy double-glazed units that have lost their seal — these are problems no amount of track cleaning or roller replacement will solve. When the glass itself has failed, you need a different skill set. Knowing how to replace window glass in an aluminium frame is one of the most practical home repair skills an Australian homeowner can develop, particularly given the cost difference between DIY and calling a glazier for a straightforward single-pane swap.
The process varies depending on whether your frame uses snap-in glazing beads (common in modern aluminium windows) or wet-sealed putty and silicone (typical of older installations). Both approaches follow the same fundamental sequence: safely remove the damaged pane, measure accurately for its replacement, and install the new glass with proper support and sealing.
Removing Broken Glass from an Aluminium Frame Safely
Glass removal is where injuries happen if you rush. Before touching anything, put on thick cut-resistant gloves and safety glasses — non-negotiable regardless of how minor the crack looks. If the pane is cracked but still intact, run strips of duct tape across the glass surface in an X pattern. This holds fragments together during removal and prevents shards scattering across your work area.
Work from the top down. On frames with snap-in glazing beads, use a stiff putty knife inserted at the midpoint of one bead to lever it out of its channel. Start with the shortest bead — typically a vertical side — since beads overlap at corners and removing them out of sequence risks cracking adjacent pieces. Once all four beads are free, the glass lifts straight out of the rebate.
For older wet-sealed frames, score along both edges of the silicone or putty with a sharp utility knife to break the bond between glass and aluminium. A heat gun on low setting softens stubborn putty compound without damaging the frame. Take your time here — gouging the aluminium rebate surface creates sealing problems when you install the replacement pane.
With the glass out, scrape all residual sealant, old glazing tape, and debris from the channel using a putty knife. Wipe the rebate clean with a rag dampened with methylated spirits. This prep work is critical: new gaskets and spline will not seat properly against a dirty or uneven surface.
Measuring and Ordering Replacement Glass
Incorrect measurements are the single biggest reason DIY glass replacements fail. The mistake almost everyone makes is measuring the visible glass area — what you see from inside the room — rather than the full rebate dimension where the pane actually sits. The visible surface is always smaller than the actual glass because the beads overlap the edges.
Measure inside the rebate channel itself once the beads are removed. Place your tape measure at the base of the channel on one side and extend it to the base of the opposite channel. Take three width measurements (top, middle, bottom) and three height measurements (left, centre, right), then use the smallest value for each dimension. Aluminium frames are not always perfectly square, and the glass must fit the tightest point.
Deduct 2 to 3 mm from both width and height to allow clearance for thermal expansion. Aluminium and glass expand at different rates under heat, and a pane cut to the exact rebate size will bind or crack on a hot day. All measurements should be in millimetres — never rounded up, never converted to centimetres.
When ordering, specify the glass type your situation requires. Standard residential panes in Australia are typically 4 mm, 5 mm, or 6 mm clear float. However, under AS 1288, certain window positions legally require safety glass — either toughened or laminated. These include:
- Glazing with a finished sill height below 800 mm above floor level
- Glass within 500 mm of a doorway
- Wet areas such as bathrooms and laundries
- Glazing adjacent to stairways and landings
- Any pane forming part of a balustrade or barrier
If your window falls into one of these categories, the replacement glass must carry a permanent AS/NZS 2208 safety mark. Installing standard annealed glass where safety glass is required creates compliance issues that surface during property sales or insurance claims. For homes in bushfire-prone areas rated BAL-29 or above, additional requirements under AS 3959 may also apply.
Double-glazed units need one extra measurement: the overall unit thickness, including both glass panes and the spacer bar between them. Common insulated glass unit (IGU) configurations run 20 mm to 24 mm total. Confirm your rebate depth can accommodate this before ordering.
Installing New Glass in the Aluminium Frame
With the correct pane in hand and a clean rebate ready, installation follows a precise sequence. Rushing this stage risks cracked glass, poor seals, or a pane that rattles in its frame.
- Position two rubber or neoprene setting blocks along the bottom rebate at the quarter points — roughly one-quarter of the frame width in from each corner. These support the glass weight and maintain even clearance around the perimeter.
- If your system uses glazing tape, press a continuous strip firmly into the back rebate face (the surface the glass rests against), keeping it tight around corners without gaps.
- Tilt the new pane into the rebate at a slight angle. Seat the bottom edge onto the setting blocks first, then lower the top into position. Use suction cup handles for control on panes larger than 600 mm.
- Confirm even clearance on all four sides — the glass should float centrally without touching the aluminium frame at any point.
- Reinstall the glazing beads starting with the bottom, pressing firmly by hand until it clicks home along its full length. Follow with the top bead, then the two sides.
- For wet-sealed systems, apply a continuous bead of neutral-cure silicone around the glass perimeter where it meets the frame. Smooth with a damp finger and allow 24 hours to cure before exposing to weather.
- Check for uniform gasket compression around the entire perimeter — visible gaps indicate a bead that has not seated completely.
Each bead should snap in with firm hand pressure alone. If you need a mallet, something is misaligned — recheck the glass position and setting block placement before forcing anything.
Reseating a loose pane: Sometimes glass comes loose from its spline without actually breaking. If the pane is intact and undamaged, you can often reseat it without full replacement. Remove the affected bead section, reposition the glass on its setting blocks, replace any compressed or damaged glazing tape, and snap the bead back into place. This takes ten minutes and costs almost nothing.
When to call a glazier instead of tackling it yourself: DIY glass replacement works well for ground-floor sliding or casement windows with standard single-pane glass and snap-in beads. Step back and call a professional when the pane exceeds 1.5 square metres or weighs over 20 kg, the window is above ground floor where scaffold or ladder work adds risk, you are dealing with a double-glazed IGU that requires factory-sealed construction, or safety glass certification documentation is needed for compliance purposes. The cost of a professional glazier — typically $250 to $400 for a standard single-pane replacement in Australia — is modest compared to the expense of a dropped pane, a damaged frame, or a failed compliance inspection.
A properly glazed pane seated on correct setting blocks with uniform bead compression will perform reliably for decades. But glass is only one part of the thermal envelope — the seals surrounding that pane determine whether your window keeps conditioned air where it belongs or lets it bleed away through invisible gaps.
Weatherstripping and Seal Replacement for Better Efficiency
Seals do not fail dramatically. There is no loud crack or sudden jam — just a gradual shift from comfortable to drafty that most people attribute to the season changing rather than a component wearing out. Yet degraded weatherstripping on a sliding aluminium window is responsible for more energy waste than most homeowners realise. Replacing these seals is inexpensive, requires no specialist tools, and delivers an immediate improvement in comfort and climate control.
Identifying Worn Weatherstripping and Failed Seals
The simplest diagnostic is the paper test. Close your window on a standard sheet of printer paper, then try to pull it free. A properly sealed sash grips the paper firmly — you should feel genuine resistance. If the sheet slides out with barely any friction, the weatherstripping at that point has lost its compression and is no longer blocking airflow. Repeat at multiple spots along the sash perimeter to determine whether the problem is localised or consistent across the entire seal.
Visual inspection catches the more obvious failures. Run your finger along the weatherstrip and feel for sections that remain permanently flattened, have cracked or split, or are missing entirely. Mohair pile strips that look squashed, frayed, or matted down have reached the end of their useful life and cannot recover their original loft.
For harder-to-spot leaks, hold a lit incense stick or candle slowly along the window frame perimeter on a still day. Watch the smoke trail or flame behaviour — any flickering, leaning, or sputtering indicates air being drawn through a gap in the seal. This method picks up subtle drafts that your hand might miss, particularly around corners and where horizontal tracks meet the frame jamb.
One more test worth running: darken the room during the day and check whether daylight is visible around the frame edges. If light passes through, so does air, moisture, and noise.
Replacing Pile, Foam, and Fin Weatherstripping
Aluminium windows use three main weatherstripping types, each suited to a specific application. Choosing the wrong one means a poor seal regardless of how carefully you install it.
Pile (mohair) strips are the most common seal on sliding aluminium windows in Australian homes. These consist of a soft, dense fibre pile attached to a rigid plastic or polypropylene backing fin that slides into a channel routed in the frame. They line the tracks where the sash panel meets the frame — top, bottom, and sides — allowing the panel to slide freely while blocking drafts, dust, and insects. Common base widths run 4.8 mm, 6.5 mm, and 7.5 mm, with pile heights typically between 5 mm and 10 mm. Measuring both dimensions accurately is critical — even 1 mm too narrow creates gaps, while 1 mm too wide creates excessive friction that makes the window hard to operate.
Adhesive-backed foam strips work as compression seals where two surfaces press together — around the perimeter of casement and awning windows when closed, or between a sash and frame on non-sliding edges. They compress under pressure to fill irregular gaps but lose resilience over time, especially in high-UV environments where the foam cell structure degrades.
Fin seals feature a flexible plastic or silicone blade that deflects against the opposing surface. These are common on casement and awning windows and handle wider gap tolerances than pile strips. They wipe across the frame during opening and closing, creating a continuous seal line.
Replacement follows the same basic sequence regardless of type:
- Remove the old weatherstrip by pulling it from its channel. Pile strips slide out lengthways; foam strips peel off. Use a plastic pry tool if sections are stuck with adhesive residue or paint.
- Clean the channel thoroughly — scrape out any old glue, dirt, or oxidation debris with a stiff brush, then wipe with rubbing alcohol to degrease the surface. The new strip needs a clean track to seat properly.
- Measure the channel length and cut your replacement strip slightly longer — roughly 10 mm extra — to ensure full coverage. A clean, straight cut with sharp scissors gives a neater fit than tearing or pinching.
- Feed the new pile strip into the channel slowly, ensuring the backing fin seats fully into the groove without bunching. For adhesive foam, peel the backing paper in sections as you press the strip firmly into position.
- Test the window operation immediately. The sash should move smoothly without excessive drag. If a sliding aluminium window suddenly feels stiff after new pile installation, the pile height may be oversized — check your measurements against the channel depth.
The entire job takes 20 to 40 minutes per window and requires no power tools. For anyone managing multiple sliding aluminium windows in an older home, replacing all the mohair in a single session is far more efficient than addressing them one at a time as problems appear.
Reducing Drafts and Condensation Problems
Properly sealed windows do more than block cold air. They maintain the pressure differential your heating and cooling system relies on to condition rooms efficiently. Every gap in the building envelope forces the system to work harder, cycling more frequently and driving up energy costs. In Australian climates where summer cooling represents a major portion of household electricity use, aluminium windows sliding shut onto fresh, resilient weatherstripping make a measurable difference to running costs.
A well-sealed aluminium window can reduce heating and cooling energy loss by a significant margin. Even modest improvements in seal integrity — replacing compressed pile strips that have lost half their original loft — can noticeably reduce the workload on split-system air conditioners and ducted heating units.
Condensation is the other symptom that proper sealing addresses, but only partially — because not all condensation means the same thing. Understanding the distinction saves you from replacing perfectly good seals or ignoring a genuine failure.
Condensation on the interior glass surface is a humidity problem, not a window problem. It occurs when warm, moist indoor air contacts the cooler glass surface and drops below its dew point. This is common on winter mornings in well-sealed homes with limited ventilation — bathrooms, kitchens, and bedrooms with closed doors are typical culprits. The fix involves reducing indoor humidity through exhaust fans, improved ventilation, or a dehumidifier. Your window seals may actually be working perfectly; the moisture simply has nowhere else to go.
Condensation or fogging between the glass panes of a double-glazed unit tells a different story entirely. This indicates the perimeter seal of the insulated glass unit (IGU) has failed, allowing moist air to infiltrate the cavity between the panes. No amount of weatherstripping replacement will fix this — the sealed unit itself needs professional reglazing or replacement. The insulating gas that originally filled the cavity has escaped, and the unit’s thermal performance has dropped substantially.
How to tell which situation you are dealing with: wipe the glass on the interior face. If the moisture disappears, it was surface condensation caused by indoor humidity. If the haze or droplets remain — because they are trapped between panes where you cannot physically reach — the IGU seal has failed and a glazier is your next call.
Fresh weatherstripping combined with correct condensation diagnosis keeps your windows performing as intended and your energy bills under control. But seals are only one piece of the hardware puzzle — the latches, locks, and handles that secure your windows also wear out, and a latch that will not engage is just as frustrating as a seal that will not hold.
Fixing Aluminium Window Locks, Latches, and Hardware
A window latch that refuses to click home is more than an annoyance — it is a security gap. Locks and latches endure thousands of engagement cycles over a window’s lifetime, and the internal springs, keeper plates, and pivot points gradually wear beyond their tolerances. Whether you need to fix a sliding window latch or replace a corroded winder on a casement, hardware repairs are among the quickest and most affordable jobs in the aluminium windows fixing toolkit.
Fixing or Replacing a Window Latch That Won’t Engage
A latch that will not seat into its keeper has three common causes, and each one demands a different response. Identifying the right one saves you from replacing parts that were never broken.
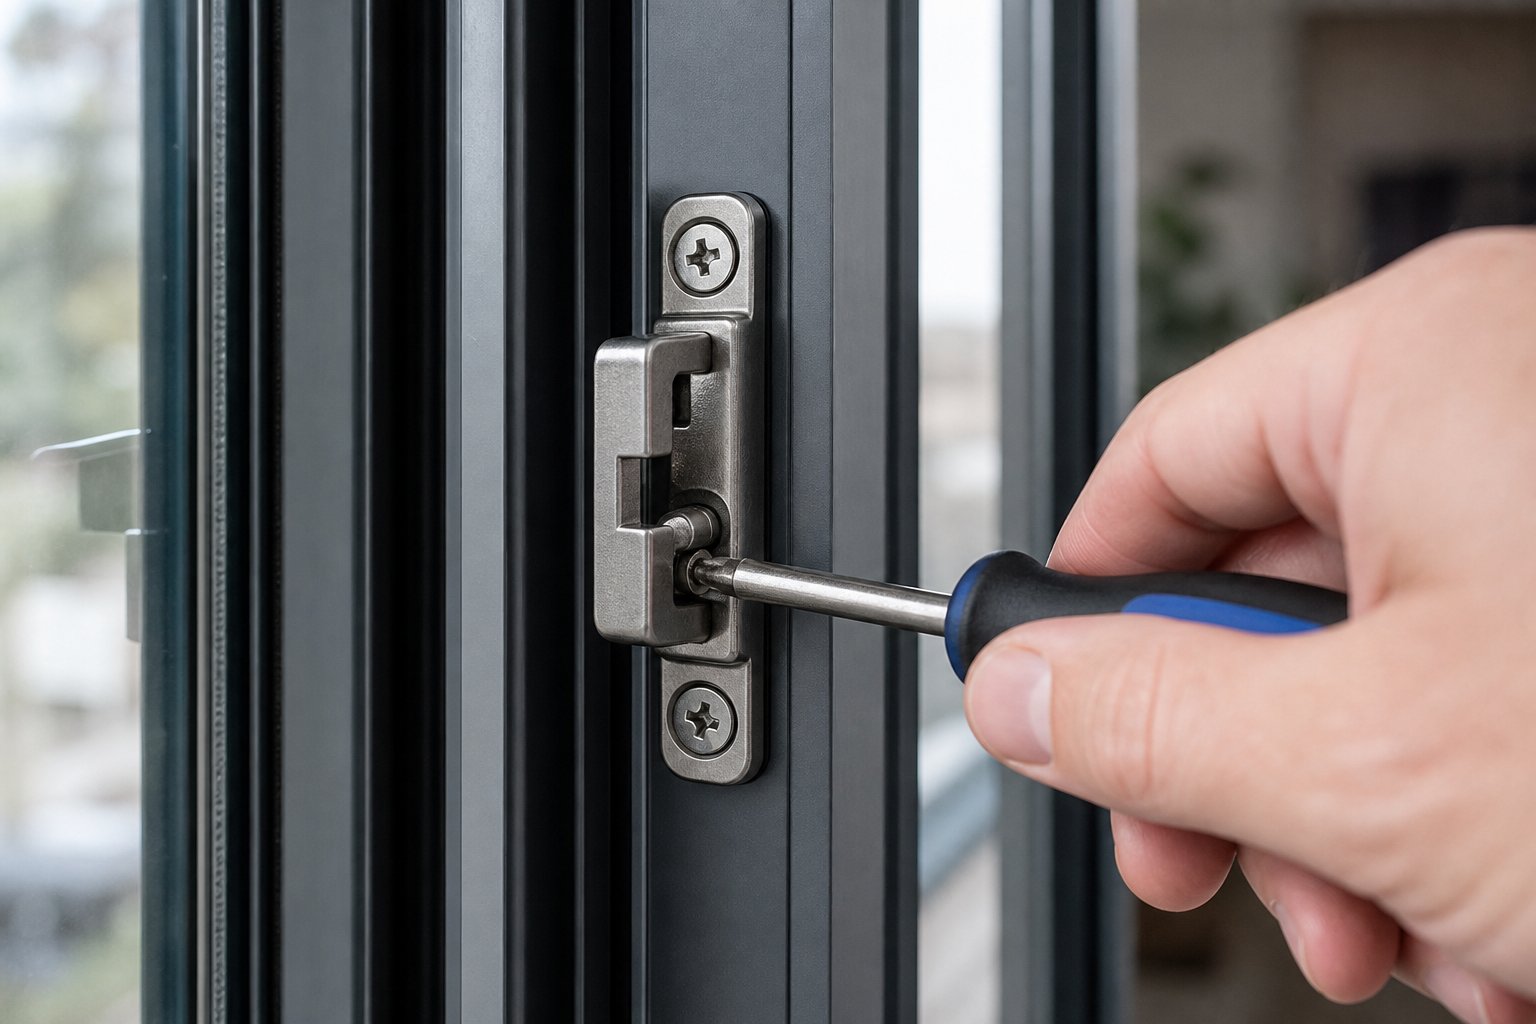
Misalignment is the most frequent culprit. The keeper (the metal strike plate the latch tongue slots into) drifts out of position over time as screws loosen or the frame shifts slightly through thermal cycling. Close the window and watch where the latch tongue contacts the keeper — if it hits above, below, or to one side of the slot opening, repositioning the keeper solves it. Loosen the keeper screws, shift the plate until the tongue slides cleanly into the slot, and retighten. Some keepers have slotted screw holes specifically to allow this adjustment without new drilling.
Spring fatigue shows up as a latch tongue that no longer snaps forward with authority, or a handle that feels limp. The internal spring has lost its tension and cannot project the tongue far enough to engage the keeper reliably. This requires replacing the latch mechanism itself. Remove the mounting screws holding the latch body to the sash rail, slide the old unit out, and fit a replacement matched to the same screw spacing and spindle size.
Frame distortion is the trickiest scenario. If the aluminium frame has bowed or shifted enough that neither the latch nor the keeper can be adjusted into alignment, shimming the keeper outward with a thin plastic or metal packing piece bridges the gap. This works for minor distortion of a millimetre or two — anything beyond that suggests structural frame issues that move into repair-versus-replace territory.
When replacing a latch assembly entirely, take the old unit to a hardware store or window parts specialist. Aluminium window latch designs vary widely between manufacturers, and matching spindle length, backset measurement, and mounting hole pattern is essential for a clean installation. Generic “universal” latches rarely fit without modification.
Repairing Window Handles and Winders
Casement and awning windows rely on winder mechanisms rather than sliding hardware to open and close the sash. Two systems dominate in Australian aluminium windows: chain winders and friction stays.
Chain winders use a handle-driven sprocket that feeds a stainless steel chain, pushing the sash open or pulling it closed. When a chain winder fails, common symptoms include a stiff handle that requires excessive force, a slipping chain that no longer holds the window position, or grinding noises during operation. Start with cleaning — wipe the chain and sprocket free of grit, then apply silicone-based lubricant to reduce friction. Avoid oil-based products that attract dust into the mechanism. If the sprocket teeth are worn or the chain links are stretched, the entire winder assembly needs replacement rather than repair.
To replace a chain winder, remove the screws securing the operator body to the window frame, disconnect the chain from the sash bracket, and extract the unit. Fit the new winder into the same mounting position, reattach the chain to the sash arm, and test operation through several full open-close cycles before tightening everything permanently.
Friction stays are the hinged arms that support casement and awning sashes, controlling how far the window opens and providing holding force at any angle. A stripped or broken winder handle on a friction-stay window usually means the internal gearing between handle and stay arm has failed. Replace the handle first — they are inexpensive and often solve the problem. If the handle spins freely without moving the sash, the operator gearbox behind it has stripped, and the full assembly requires swapping out.
One useful slider window repair tip for anyone who has lifted a panel off its track during roller work and is wondering how to put a sliding window back in frame from inside: angle the top of the sash up into the head track first, push it as high as it will go, then swing the bottom inward over the sill track and lower the panel until the rollers seat in the channel. The reverse sequence of removal, performed entirely from indoors.
Safety Guidance for Upper-Floor Window Work
Hardware repairs on ground-floor windows carry minimal risk. The same job on a first-floor bedroom or stairwell window introduces fall hazards that demand respect. Falls from ladders account for a significant proportion of serious household injuries, and window work often puts you in an awkward position — leaning outward, hands occupied with tools, body weight poorly balanced.
Before starting any upper-floor window repair, consider whether you can remove the sash entirely and bring it to ground level for the work. Most sliding panels lift out using the head-track clearance method described earlier. Casement sashes can often be unscrewed from their friction stays. Doing the actual hardware swap on a bench or sawhorse at ground level eliminates the height risk entirely.
When removal is not practical and you must work at height, follow these non-negotiable safety rules:
- Never lean your upper body out through an open window unsupported — your centre of gravity can shift past the sill before you realise
- Use a stable ladder on firm, level ground and always have a spotter holding the base
- Set extension ladders at the correct angle — one metre out from the wall for every four metres of height
- Keep both feet on the ladder and maintain three points of contact at all times
- Never work on a ladder in windy conditions or on wet surfaces
- If the window is above single-storey height or requires reaching beyond comfortable arm’s length, hire a professional with appropriate height-safety equipment
The cost of a qualified tradesperson for a 30-minute latch replacement is negligible compared to an emergency department visit. Know your limits, and factor working height into every repair decision before you pick up a screwdriver.
Hardware that latches securely and handles that wind smoothly keep your windows functional and your home safe. But there comes a point with any ageing window where individual component repairs start stacking up — new rollers last year, fresh seals this season, a latch replacement next month — and the question shifts from “what do I fix next” to “is this window still worth fixing at all.”
When to Repair vs When to Replace Aluminium Windows
Spending $80 on new rollers for a window that needs $200 in seals and another $150 in hardware starts to feel like pouring money into diminishing returns. At some threshold, the accumulated cost of individual repairs exceeds what a complete replacement would deliver in performance, efficiency, and longevity. The challenge is knowing exactly where that threshold sits for your specific situation.
This is not a binary choice. Some windows have decades of service left after a single targeted repair. Others have crossed a line where ongoing fixes only delay an inevitable replacement at greater total cost. A clear framework removes the guesswork.
Signs Your Aluminium Window Is Worth Repairing
Most aluminium windows are worth fixing when the failure is isolated to a single component and the frame itself remains structurally sound. If you can press firmly on the frame corners and feel no flex, see no corrosion pitting beyond surface level, and observe square, even gaps between sash and frame, the bones are good.
Repair makes strong financial sense when:
- Only one system has failed — rollers, seals, glass, or hardware — while other components still function well
- The window is less than 15 to 20 years old, meaning the frame’s protective coating and structural integrity are still within their design life
- Replacement parts are available and compatible with the existing frame (common brands stock spares for decades)
- The frame shows no visible bowing, twisting, or corner separation
- Overall operation returns to smooth function after the repair, without secondary issues emerging
A window that ticks these boxes can deliver another 10 to 15 years of reliable service from a repair costing a fraction of full replacement. Aluminium frames are inherently durable — the metal itself does not rot, warp from moisture, or attract insects — which means the frame often outlasts the moving parts and seals within it by a wide margin.
Signs Replacement Is the Better Investment
Replacement becomes the smarter path when problems compound. A single worn roller is a repair. Worn rollers plus failed seals plus a corroded track plus a latch that no longer engages is a window telling you its service life has ended.
Consider planning to replace an aluminium window when you observe:
- Multiple simultaneous failures — two or more components have degraded to the point of needing replacement at the same time
- Visible frame corrosion or warping — pitting that penetrates beyond the surface coating, white powder deposits along joints, or frame corners that have separated
- Single-glazed glass in a home you want to improve thermally — retrofitting double glazing into frames designed for single panes is rarely cost-effective and often structurally unsuitable
- Persistent water ingress after seal replacement — if new weatherstripping fails to stop leaks, the frame geometry has likely shifted beyond what seals alone can compensate
- Security concerns — older latch and lock designs may not meet current Australian standards for window security, particularly on ground-floor bedrooms where NCC compliance requires specific locking and egress configurations
Energy performance also factors heavily into the equation. Older non-thermally-broken aluminium frames conduct heat readily between indoors and outdoors. If your home struggles with temperature regulation and your energy bills reflect it, individual component repairs will not address the fundamental thermal weakness of the frame design. This is where replacement delivers value that repairs simply cannot match — a modern thermally broken frame changes the window’s insulation properties at a structural level.
Choosing Quality Replacement Aluminium Windows
When replacement is the right call, understanding how to replace sliding windows — or any window type — with a quality system prevents you from trading one set of problems for another. Not all replacement windows perform equally, and the cheapest option often costs more in the long run through poor sealing, faster hardware wear, and inadequate thermal performance.
For Australian conditions, prioritise these features when evaluating new aluminium window systems:
- Thermally broken frames — an insulating barrier separates the interior and exterior aluminium profiles, dramatically reducing heat transfer through the frame. This is particularly important in climate zones where the NCC mandates minimum energy performance
- Powder-coated finishes — factory-applied powder coating resists UV degradation, salt air corrosion, and general weathering far better than paint or anodising, especially in coastal and high-UV environments
- Compliance with AS 2047 — this Australian Standard covers design, testing, and installation requirements for windows. Any replacement system should carry certification confirming it meets structural, weather resistance, and operational performance criteria
- Custom sizing for existing openings — off-the-shelf windows rarely match existing apertures precisely. A system manufactured to your exact measurements avoids the compromise of packing gaps or trimming reveals that undermine both appearance and performance
- Quality hardware and glazing options — look for systems that accommodate double-glazed IGUs, offer multi-point locking as standard, and use commercial-grade rollers and tracks rather than builder-basic components
Homeowners and builders ready to fit aluminium windows as replacements can explore purpose-built systems designed specifically for Australian residential and commercial projects. MEICHEN’s aluminium window range offers thermally broken frames, custom sizing, and powder-coated finishes engineered for local conditions — a practical starting point for anyone who has moved past repair and into replacement planning.
| Problem Type | Typical Repair Cost Range (AUD) | When Replacement Makes Sense |
|---|---|---|
| Worn rollers | $50 – $150 per panel (parts and DIY labour) | Track is also scored or corroded beyond cleaning |
| Failed weatherstripping | $30 – $80 per window | Seals fail repeatedly due to frame distortion or gaps exceed strip capacity |
| Broken glass (single pane) | $150 – $400 depending on size and type | Frame cannot accept modern safety glass or double-glazed units |
| Latch or lock failure | $40 – $120 per fitting | Mounting points are corroded or frame has distorted beyond shimming range |
| Multiple component failures | $300 – $600+ combined | Total repair cost approaches 50% or more of a quality replacement window |
The 50 percent rule offers a practical threshold: if the combined cost of all necessary repairs exceeds half the price of a quality replacement window (including installation), replacement delivers better long-term value. You get a full manufacturer warranty, modern thermal performance, updated hardware, and a reset on the maintenance clock — none of which a patchwork of individual repairs provides.
Whether you repair or replace, the real savings come from preventing the same failures from recurring. A structured maintenance routine protects your investment — repaired or new — and extends the interval before you face this same decision again.

Seasonal Maintenance to Prevent Future Window Problems
Every repair in this guide fixes a problem that already exists. Maintenance prevents those problems from developing in the first place. A window that receives 20 minutes of attention each quarter will outperform and outlast an identical window that only gets touched when something breaks. The difference compounds over years — fewer emergency repairs, lower energy bills, and a much longer interval before you face that repair-versus-replace decision again.
Whether you have just finished a repair on sliding windows or installed brand-new units, the maintenance routine below keeps aluminium windows operating smoothly across Australian seasons.
Quarterly Maintenance Tasks That Prevent Common Failures
Consistency matters more than intensity here. A brief routine repeated every three months catches small issues before they escalate into the roller failures, seal degradation, and track damage covered earlier in this article.
- Vacuum tracks monthly — use a crevice attachment to clear dust, sand, insect debris, and leaf fragments from both sill and head tracks. This single habit prevents the majority of sliding resistance issues.
- Lubricate rollers and tracks every three months — apply a light coat of silicone spray along the full track length and directly onto roller wheels. Wipe excess with a dry cloth. Avoid petroleum-based lubricants that attract grit and form sludge over time.
- Inspect weatherstripping at each season change — run the paper test on a few windows each quarter, rotating through the house so every window gets checked at least twice a year. Replace any strip that fails to grip.
- Check latch engagement and tighten loose screws — thermal cycling gradually loosens hardware fixings. A quick turn of the screwdriver on keeper plates, hinge screws, and roller adjustment screws prevents misalignment from compounding.
- Clean frame surfaces to prevent oxidation buildup — wipe aluminium frames with warm soapy water and a soft cloth, then dry thoroughly. This removes salt deposits, atmospheric grime, and early-stage oxidation before they damage the powder-coat finish. Homes within a few kilometres of the coast benefit from monthly rather than quarterly cleaning.
This entire routine takes less than 20 minutes per window. Spread across a Saturday morning each quarter, you can service every window in an average three-bedroom home in a couple of hours — far less time and money than a single emergency repair sliding window call-out from a tradesperson.
Annual Inspection Checklist for Aluminium Windows
Once a year — ideally at the start of autumn before winter weather tests your seals — conduct a more thorough inspection. This deeper check catches the slower-developing issues that quarterly maintenance alone might miss.
- Test all locks and latches for firm, positive engagement — any latch that requires jiggling or extra force needs adjustment or replacement before it fails completely
- Inspect glazing seals for separation from the glass or frame — run a fingertip along the perimeter looking for gaps, lifting edges, or hardened sections
- Check drainage holes (weep holes) at the bottom of exterior frames are clear and flowing — blocked weeps trap water inside the frame cavity, accelerating hidden corrosion
- Look for frame discolouration, white powdery deposits, or pitting that indicates corrosion progressing beneath the surface coating
- Verify smooth operation of all opening panels — every sliding, casement, and awning sash should move freely with one-hand operation
- Examine corners and joints for any separation or movement that was not present previously
- Inspect flyscreens for tears, loose spline, and frame damage that allows insects inside
Document anything you find. A phone photo of early corrosion or a note about which window’s latch is getting stiff creates a maintenance history that helps you spot accelerating wear patterns. If the same window appears on your list year after year, that is a signal its remaining service life is shortening and budgeting for eventual replacement makes sense.
Building a Long-Term Window Care Plan
Consistent maintenance extends aluminium window lifespan well beyond the 20 to 30 year mark that neglected windows typically reach before requiring major intervention. The frames themselves can last 40 years or more when protected from unchecked corrosion, while rollers, seals, and hardware serviced on schedule often double their expected replacement intervals.
Think of it as compound interest working in your favour. Each quarterly clean removes the grit that would have scored your tracks. Each lubrication session prevents the friction that would have worn your rollers flat. Each seal check catches compression loss before drafts become energy waste. The individual effort is minimal — the cumulative benefit is substantial.
For homeowners planning renovations or new builds, modern aluminium window systems are engineered specifically to reduce the maintenance burden. Powder-coated frames resist corrosion and UV degradation without repainting. Upgraded roller systems use sealed bearings that tolerate longer service intervals. Thermally broken profiles reduce the expansion stress that loosens hardware over time. These design improvements do not eliminate maintenance — nothing does — but they push the routine further toward “quick check” territory and away from “repair project” territory.
If you are upgrading existing windows or specifying for a new build, MEICHEN’s range of aluminium window systems is worth exploring. Designed for Australian conditions — coastal salt air, intense UV, wide temperature swings — their thermally broken, powder-coated frames and commercial-grade hardware represent the kind of engineering that rewards a simple maintenance routine with decades of reliable performance.
Whether you have just completed a how-to-repair-sliding-window project from this guide or decided that replacement is your next step, the principle stays the same: aluminium windows give back what you put in. A small, regular investment of time keeps them operating smoothly, sealing tightly, and looking sharp for years longer than anyone who ignores them will ever experience.
Frequently Asked Questions About Aluminium Windows Fixing
1. Why is my aluminium sliding window so hard to open?
A stiff sliding window usually comes down to one of three causes. The most common is debris buildup in the track channel — dust, sand, and oxidation deposits create friction that rollers cannot overcome. Vacuuming the track and applying silicone lubricant often restores smooth operation within minutes. If the track is clean but the window still resists, the rollers themselves may have developed flat spots or seized bearings from years of carrying the sash weight. The third possibility is frame misalignment from thermal expansion or foundation settling, which causes the sash to bind unevenly against the track. Start with a track clean before moving to roller inspection, as the simpler fix resolves the majority of cases.
2. How much does it cost to repair an aluminium window in Australia?
Repair costs vary depending on the component that has failed. Replacing worn rollers on a sliding panel typically runs $50 to $150 AUD in parts for a DIY job. Weatherstripping replacement costs $30 to $80 per window. Single-pane glass replacement ranges from $150 to $400 depending on size and whether safety glass is required under AS 1288. Lock and latch replacements sit between $40 and $120 per fitting. When multiple components fail simultaneously, combined repair costs can reach $300 to $600 or more — at which point comparing against the price of a quality replacement window becomes worthwhile. A practical rule of thumb: if total repairs exceed 50 percent of a new window’s cost, replacement delivers better long-term value.
3. Can I replace the glass in an aluminium window frame myself?
Yes, for ground-floor windows with standard single-pane glass and snap-in glazing beads, DIY replacement is achievable with basic tools and careful measuring. The process involves safely removing the broken pane, measuring the rebate channel dimensions (not just the visible glass area), ordering correctly sized glass with 2-3 mm expansion clearance, and reinstalling with setting blocks and new glazing spline. However, you should call a professional glazier when the pane exceeds 1.5 square metres, the window is above ground floor, you need a factory-sealed double-glazed unit, or Australian Standards require certified safety glass documentation for compliance purposes.
4. How often should I maintain my aluminium windows?
A quarterly maintenance routine prevents the majority of common aluminium window failures. Each season, vacuum the tracks, apply silicone lubricant to rollers and channels, inspect weatherstripping compression, and tighten any loosened hardware screws. Coastal properties benefit from monthly frame cleaning to remove salt deposits before they damage powder-coat finishes. Once a year, conduct a deeper inspection: test all locks for positive engagement, check weep holes are clear, examine glazing seals for separation, and look for early corrosion signs like white powdery deposits or surface pitting. This combined routine takes roughly 20 minutes per window quarterly and can extend your windows’ service life well beyond 30 years.
5. When should I replace my aluminium windows instead of repairing them?
Replacement makes more financial sense when multiple components have failed simultaneously, the frame shows structural corrosion or warping, or single-glazed windows need upgrading for energy efficiency in climate zones requiring double glazing under the NCC. Persistent water leaks that continue after seal replacement indicate frame geometry has shifted beyond what repairs can address. If your total repair bill approaches 50 percent of a quality replacement window’s cost including installation, a new thermally broken aluminium window system delivers better long-term performance, a full warranty, and resets your maintenance timeline. Modern systems from manufacturers like MEICHEN offer powder-coated frames, commercial-grade hardware, and thermal break technology engineered specifically for Australian conditions.
More Window & Door Guides